Many of you know me as the foremost authority on the contemporary saddle mule, but what you may not know is how I earned such a title. Most of us who have become trainers began by riding and showing. Through our success, we gained recognition and subsequently clients who brought their animals to us for training. Our success with their animals posed a question for each of us at a critical stage in our careers and we had to make a decision whether we were going on the road to do clinics or something different. I opted for something different!
Instead of going on the road to do clinics, I thought long and hard and decided to do an equestrian correspondence training course instead. I opted for this after considering that when I went to clinics as a student, I was one of 20 people and only got limited attention during those clinics. When I put into practice at home what I had learned at the clinics, I realized that I had only received the highlights of training and it was full of holes! When I tried to contact the clinicians to ask a question, I was either answered by someone in the office, or not answered at all. The clinicians were most often too busy and out of touch. The one thing I didn’t realize by making this decision was the incredible learning opportunity I had opened up for myself that I could, in turn, pass on to my clients.
I did my resistance-free video training series in as much detail as I could possibly muster. Each video represents a year’s worth of training, but as we all come to know, you can never know everything. The more you learn, the more you learn what you don’t know. I did learn fairly quickly that the relationship between equine and owner is unique to those individuals. That is, I realized it made more sense that I teach people how to train their own animals. After all, you wouldn’t ask someone to go out and make a friend for you? The relationship is truly your own and I adopted the policy that as a trainer, my responsibility would be to guide people through the process of training their own animals for the best possible results. This has proven to be true far beyond any expectations that I might have had!
This decision afforded me more time at home where I could communicate with others and help them with their animals. It also afforded me more training time with my 30 head of mules, horses and donkeys. I have always done the training of my own animals myself. I had an assistant for awhile who kept the old school masters and other broke mules exercised from time to time. However, the actual training of the mules I did solely by myself because I wanted to keep learning new things that would enhance my training program and make it better. The new things I learned I documented in the form of books, videos and television shows. What began as a quest to train and show mules in every equestrian discipline expanded beyond my wildest dreams!
When they told me mules would not work well in a snaffle bit, I learned how to make that work. When they said they were not suitable for Dressage, I based my entire training program on those principles. When they told me not to give food rewards, I paid my mules for their efforts with a generous reward of crimped oats. When they told me not to talk to my equines, I spoke three languages to them: verbal language, body language and “touch” language. I can truthfully say that today I realize that it wasn’t the mules that were so stubborn, but rather…it was me! This positive kind of stubbornness did pay off, as I was to soon discover.
Beginning with the “A B C’s” (walk, trot, canter, whoa, back), my verbal language with them evolved over time into actual conversations. The tone of my voice indicated my pleasure or displeasure with their actions. Calling their names and then stating a command prompted their immediate attention. When working with multiple animals, phrases like “Get back on the rail!” and “Stop kicking your brother!” initiated a positive response and validated my expectations that they could indeed understand what I was saying beyond the normal commands. I watched their reactions to the tour guests we had at the ranch as they walked through the barn and met these animals. If a guest made a remark, the animals responded with an appropriate show of emotion. If it was a snide remark, they would lower their heads and splay their ears in a most dejected way. A positive remark would elicit a show of attention with ears perked toward the person who made the comment. This has shown me that they do understand English, even if they cannot speak it!
Body language is probably the most important of all the “languages.” These animals will mirror you and react to what your body is telling them. If you position yourself in front, you can turn them or stop them. If you walk up to them in an aggressive way, they will show fear. If you go to a gate or the stall door and wait with an inviting attitude, they will come to you. Of course, learning accurate body language is a responsibility that we must put upon ourselves to really be effective. I just watched the reactions of my animals to everything I did and said. If I received a negative response, I would change my approach until I got it right. When I got it right, so did they!
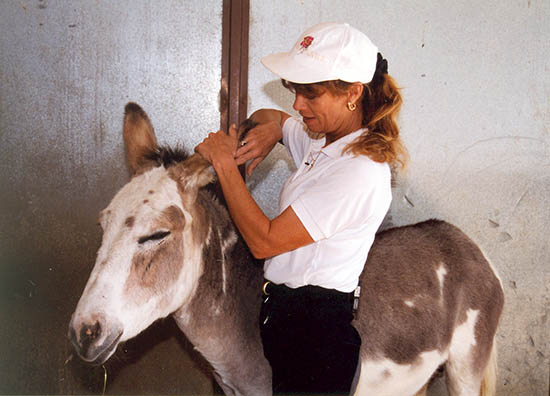
“Touch” language is simply how you touch your animal whether it is with your hand, a grooming tool or a whip. Touch needs to be empathetic but firm enough to do the job. Touch is a powerful tool. It can be soothing and relieve anxiety. It can be pleasurable or painful. Touch can indicate direction depending on how it is used. We begin with imprinting, or touching of the foal all over its body, but this is not the beginning and end of imprinting. Imprinting sets the stage for the kind of interaction you and your equine will have during your entire life together and can often bridge a gap of misunderstanding when the other two languages are not working. Never was this more apparent to me than just recently!
Little Jack Horner had gone through my entire training series right along with my mules and had learned everything that I taught them. He may not have made it to Fourth Level Dressage, but he made it to Second Level Dressage with gait lengthening and lateral work. He overcame his “donkey” behaviors and gave a phenomenal performance, jumping four feet in exhibition at Bishop Mule Days. His Reining was accurate though somewhat limited by his donkey conformation. Still, he could always elicit a supportive laugh and a wide grin! He competed successfully at dressage driving shows and won world championships in driving at Bishop Mule Days.
Little Jack Horner was to star yet again in the making of my biography, our latest Those Magnificent Mules documentary project. I doubt that I had driven Little Jack Horner in fifteen years. In fact, since he turned twenty, he had not done much but take part in more sedate roles in our TV shows and videos with an occasional bareback ride around the ranch. At 30 years old, I wasn’t really sure how he would react to being hitched to the Meadowbrook cart again after so many years, so I thought I had better do a dress rehearsal.
During the dress rehearsal, I discovered that Little Jack Horner didn’t know what to do once I put on the harness. He was tied in the tack barn and when I tried to ground drive him forward, he just backed up until he was out of the building, then he went forward to the hitching area. I was rather puzzled. Still, I went ahead and hitched him to the cart and we stood there for some photos before I backed him from the hitch rail. I verbally asked him to go forward…nothing. I did not have my driving whip with me, so I used the end of the reins on his fanny to move him forward which he then did, but kept going straight until he ran into the fence and stopped.
I thought this was very strange, so I asked my ranch manager to get my driving whip. With the whip in hand, I began to talk to him with the whip. A simple tap to the side and he turned from the fence. Another tap in the middle of his spine sent him smartly forward at an animated walk. Another tap to the other side turned him the other way and we were soon doing figure eights, stopping, backing and driving as if there was never a problem at all. During the film shoot, he did all these things and even offered several hundred feet of trot before he was too tired to continue.
It was during this experience that I realized that Little Jack Horner had become deaf and could not hear one word of what I was saying, even when I was yelling. I was sitting in the Meadowbrook cart, he had blinders on his harness bridle and could not see me, so verbal language and body language were of no help to him at all. Lucky for us, we still had the “touch” language that we had developed between us and we thoroughly enjoyed the experience of driving yet again.
It is evident to me that every detail that I had taken the time to learn in our 30-plus years together culminated in the results I see now with all of my equines. We have learned so much about each other! Now that we are all a lot older, a lot slower and a lot less coordinated, we are still afforded the luxury to continue to learn and grow together in a safe and enjoyable way. It doesn’t get any better than this!
Covered in TRAINING MULES & DONKEY: A LOGICAL APPROACH TO TRAINING, TRAINING WITHOUT RESISTANCE, EQUUS REVISITED and A GUIDE TO RAISING & SHOWING MULES at www.luckythreeranchstore.com.
In Part 1 of Rock and Roll: Diary of a Rescue, we learned about the discovery and rescue of Belgian draft mules, Rock and Roll, by Meredith Hodges and her team of experts. As the pair’s rehabilitation continues, the road to recovery gets tougher. But for every health setback, there is a personality breakthrough with these courageous and now-trusting gentle giants—and always a reason to hope.
By May of 2011, both mules were beginning to bond well with me and I was able to separate them during workouts. I knew I would have to develop a strong bond with Roll in case Rock didn’t make it, and we all knew the odds were not in Rock’s favor. Being alone with me in the round pen helped Roll to concentrate on the tasks at hand. His way of going was markedly improving with each new lesson.
Both mules could now square up properly and move in a much more balanced frame, although holding that balance was intermittent. The personality of each mule began to emerge and they became more willing to play games and to be touched and kissed about their heads. Rock was much more overt about his pleasure during the massages, and we could finally tell that they were beginning to trust us.
By mid-June, we were able to take the pads off Rock’s back feet and reset the shoes without the pads. He had grown three-eighths of an inch of sole on both hind feet and the rotation began to improve in one back foot. Both mules were feeling much better and were actually engaging in play during turnout. Next, we discovered that due to the concussion to his rear feet from improper use during driving in the past, Roll had side bones in his right hind foot. This caused him to twist that foot as it grew out between trims, so we put shoes on his back feet as well.
Rock loved our newly acquired mini donkeys and, during turnout, he would stand by their pen for the better part of the day. Here they all are on the Fourth of July, 2011.
By that time, Rock and Roll both looked magnificent! Considering the extent of Rock’s past neglect and injuries, he had gained incredible muscle tone and balance. His eyes were bright and alert, his coat was shiny and his feet were much improved (although they still exhibited a hint of chronic founder).
Roll’s fat and lumpy body had changed dramatically. Now his body was more symmetrical and balanced, and he also sported a shiny coat and balanced feet. His eyes were alert and his appearance of laziness had completely vanished.
However, by the end of July, Rock once again began to lose muscle tone over his right hip and his front feet became very sore. We thought he and Roll may have been playing too hard, which could have caused Rock to injure himself again, so we separated them into adjoining pastures during daily turnout. At night they remained in their respective stalls and runs, side by side. Custom-made boots were ordered for Rock’s front feet to help alleviate the pressure, but unfortunately we had to wait until the first of November for delivery of the boots. By the time they arrived, they were of use for only about two weeks before the weather changed. The wet snow and mud became packed in the boots, causing Rock too much pain on the dropped soles of his feet.
While Rock was on three weeks of rest during August, he developed swelling in his sheath. He was treated with an anti-inflammatory for two weeks, but the swelling didn’t go down. Since his front feet seemed better, I decided to resume his physical therapy. Although the structured movement helped the swelling go down, it migrated to the midline of his abdomen. After two weeks of hot packing the abdomen twice a day, the swelling finally disappeared. Because Rock was becoming stronger and getting up and down more often, he was beginning to develop sores on his knees, fetlocks and hocks, and “shoe boils” on his underbelly (pressure sores caused by his hooves when lying down), all of which needed to be frequently tended to.
In September, once again there was swelling on Rock’s underside midline, which also seemed to cause him to get weaker musculature in the hips. The swelling was hot-packed, and it disappeared fairly quickly this time. By mid-October, Rock was lying down for prolonged periods of time—unhealthy for an equine—so his support team of three veterinarians, two equine chiropractors, his equine masseuse and I got together to assess his condition. All 2000 plus pounds of his weight was being shifted off his three bad feet and onto his left hind leg, causing it to track behind the right front when he walked. We decided on a regimen of phenylbutazone (a non-steroidal anti-inflammatory drug), minimal exercise, plenty of rest and icing of his feet for 15-20 minutes twice daily. Things were not looking good.
No matter what was asked of him, Rock always gave it his all. We babied him through turnout, chiropractics, trims, and massage, but it finally got to the point where we could barely get his back feet off the ground to apply the hoof dressing. We decided to remove his shoes. That day, he was so weak in the hindquarters we could not replace them and couldn’t even trim the feet without running the risk of him falling down. We waited a couple of weeks before we trimmed his heels with the aid of a custom-made, six-inch equine jack stand. That seemed to help through November and part of December, but Rock still needed the Thrush Buster and Rainmaker for hoof health. He was able to tip his hind feet forward and let us have the bottoms of his feet for a few seconds at a time so the medication could be applied. Finally, he just couldn’t manage having his feet elevated at all—the pain was too great. Around this time, we noticed that the swelling had again cropped up in his midline abdomen, which led to another week of hot packing it twice a day.
After Christmas, I decided to resume a modified version of his physical therapy. Trooper that he was, he tried with all his might, but his hips were listing terribly to the left, and the first time he went over the three one-inch ground poles, he crashed into every one of them. His third time over, he grazed just one. When I put him back in his pen, he immediately laid down. I then noticed the bulging in the coronet band of his left hind foot. He was “sinking!” We immediately called the vet and he confirmed my fear. The lamina was pulling away from the hoof wall and allowing the bones to “sink” through the sole of Rock’s hoof. It wouldn’t be long before the other feet would quickly follow suit. It was clear that he was in agony and would have to be put down, so our vet came out the ranch, loaded Rock up with anti-inflammatory and pain medications and said he would be back the next afternoon.
Every day for a year, I prayed for a miracle for Rock and each time I prayed, he got better. I now wondered if God would give us yet another miracle and let him live—but it wasn’t meant to be. On December 27th, 2011, surrounded by his Lucky Three family, our beautiful Rock took his last steps. We all knew it was time for us to let him go. Rock was euthanized at home and died peacefully, with his head resting in my hands.
My vet Greg Farrand informed me that the president of Colorado State University had pulled together a team for Rock’s necropsy and the preservation of his skeleton as a teaching aid for the CSU Veterinary Sciences department.
When the necropsy came back, it showed not a single fracture of Rock’s pelvis, but rather multiple old fractures in the socket of the hip joint. The bottom of the socket was almost completely gone and there was a hole the size of a dime at the top of the socket. The head of the femur had no cartilage left and there was fibrosis and cysts full of fluid the entire length of the femur stem.
I have come to realize that our courageous and noble Rock gave us more than one miracle. He had been able to live one more year of life with a severely shattered hip joint and compromised femur. He proved that our balance and core muscle therapy can work wonders! And he lived long enough to give his half-brother, Roll, the chance to bond with people who will love and care for him for the rest of his life. Thank you and God bless you, Rock. We will miss you.
To learn more about Meredith Hodges and her comprehensive all-breed equine training program, visit LuckyThreeRanch.com or call 1-800-816-7566. Check out her children’s website at JasperTheMule.com. Also, find Meredith on Facebook, YouTube and Twitter.
No training series would be complete without examination of the principles and philosophy behind the training techniques. The philosophy of my training techniques is based on the principle that we are not, in fact, training our equines. In fact, we are cultivating relationships with them by assigning meaning to our own body language that they can understand.
Since our own level of understanding changes and grows over time, we must assume that so does that of our animals, and we must gauge our explanations accordingly. In the beginning, the emotional needs of the young equine are quite different from that of an older animal. They need to overcome a lot of instincts that would protect them in the wild, but are inappropriate in a domestic situation. In this case, our focus must be on developing friendship and confidence in the young animal, while establishing our own dominance in a non-threatening manner.
We do this through a lot of positive reinforcement in the beginning, with gentle touch, reassuring voice, and lots of rewards for good behavior. Our expressions of disapproval are kept at a minimum. As he grows with us, the equine will realize that we do not wish to harm him, and will next develop a rather pushy attitude in an attempt to assert his own dominance – once that he is confident that his behavior is acceptable. When this occurs, we must re-evaluate our reward system and save excessive praise for the new things as he learns them and allow the learned behavior to be treated as the norm, praised more passively, yet appreciated. This is the cultivation of a delicate concept of give and take in a relationship from the emotional standpoint. As in any good relationship, we must learn to be polite, considerate and respectful of our mules, donkeys, horses, ponies and hybrids. After all, as my grandmother used to say, “You can catch more flies with sugar that you can with vinegar!”
From the physical standpoint, there are also a lot of things to consider of both mule and trainer. In the beginning, unless you are a professional trainer with years of proper schooling, you are not likely to be the most balanced and coordinated of riders, lacking absolute control over your own body language. By the same token, the untrained equine will be lacking in the muscle coordination and strength to respond correctly to your cues that guide him to perform certain movements. For these reasons, we must modify our approach to fit each new situation and modify again to perfect it, keeping in mind that our main goal is to establish a good relationship with our equine and not just to train him! It is up to the trainer to decide the cause of any resistance, and to modify techniques to temper that resistance – be it mental or physical.
For instance, we had a 3-year-old mule learning to lunge without the benefit of the round pen. The problem was that she refused to go around you more than a couple of times without running off. Assess the situation first by brainstorming all the probable reasons she might keep doing such an annoying thing. Is she frightened? Is she bored? Is she mischievous? Has she been calm and accepting of most things until now? And most important, is my own body language causing this to occur?
Animals are all quite different, as are humans, and each individual will learn in his own way, as do humans. Once in a while, you meet an animal that is not able to learn things in a conventional manner. He perceives things just differently enough to make it extremely difficult. In the case of the mule that would not lunge independently on the line, we found that she needed additional learning aids. You can either put a round pen around the animal to “force” him to comply, or you can wait until he is broke to saddle before you try to lunge him again with just the line. If you only have an arena, you can lunge the equine in the corner and the two fenced sides will help him to stay on the circle. This certainly helped her!
I have worked with many mules that wouldn’t lunge first, but would ground-drive and accept a saddle and rider with no problem. After this they seem to lunge quite easily! Learn to be fair and flexible in your approach to problems as you would for anyone you were interested in getting to know. Be firm in your own convictions, but be sensitive to things that can change and be willing to make those changes as the occasion arises!
As mental changes occur, so do physical changes. As muscles develop and coordination gets better, the animal will gain confidence. As a trainer, you will need to do less and less to cause certain movements. For example, in the case of the leg yield, you may have to turn your mule’s head a little in the opposite direction to get him to step sideways and forward. As he becomes stronger, more coordinated, and understands your request, you can then begin to straighten his body more with less effort. Granted, we have begun by doing this the wrong way, yet we have put our mule “on the road” to the right way. We have assimilated an action in response to our leg that can now be perfected over time. In essence, you have simply said, “First you learn to move away from my leg, then you can learn to do it gracefully!”
The same concept works in the case of the trainer, or rider. Sometimes you must do things that are not quite right in the beginning to get your own body to assimilate correctness. As I have said, we all perceive things a little differently and it depends on how we are introduced to something whether or not we can understand or perform it. It is nearly impossible for the inexperienced horseman to perceive and control unused seat bones as a viable means of control of the equine. In the beginning, reins and legs are much easier to use to complete such a task.
In training horses and mules, there is really little difference in one’s techniques or approach, provided we maintain patience and understanding and a good rewards system. The major difference between these two equines is their ability to tolerate negative reinforcement, or punishment. The mule, being part donkey, does not tolerate punitive action very well unless he is fully aware that the fault was his own and the punishment is fair. For instance, you ask for a canter lead and your mule keeps trotting, one good smack with the whip, or one good gig with the spurs, is negative reinforcement that will bring about the desired response, but be careful of an over-reaction from an overdone cue. More than one good smack or gig could cause either a runaway or an extremely balky animal. This kind of resistance comes from the donkey and requires a much different approach when training donkeys. The horse part of the mule allows us an easier time of overcoming this type of resistance in mules, making them different and easier to train than donkeys.
It is the innate desire of all humans to control their own lives both emotional and environmental. When we cannot, we become panicked and confused about our situation. We doubt ourselves, our abilities, and our self-worth. If we do not maintain a sense of humor about those things that we cannot control and learn to accept that which we cannot change, we are doomed to a life of depression and failure. Horses can be controlled and even some mules can be controlled for the most part, but it is my experience that donkeys are only controlled when they so desire.
Donkeys are affectionate, amicable characters, and possess such a sensitive nature that one would think punishment a real deterrent from bad behavior – but when you punish a donkey, you will be met with a tough hide and unbelievable avoidance behaviors which often cause more resistance than it’s worth! As if this isn’t enough, if you do punish your donkey for something, the next time he even comes close to the same action, he may anticipate your punishment and go straight to the avoidance behavior before he actually makes the mistake. For this reason, it is better to try to ignore the mistakes, focus on the successes and reward the equine with lots of praise. If something in your training isn’t really necessary to your final objectives and you encounter this resistance, such as I did during lunging training, then just drop it and go on to something else that they can do easily. There is plenty of time to learn it at a later date.
To learn more about Meredith Hodges and her comprehensive all-breed equine training program, visit LuckyThreeRanch.com or call 1-800-816-7566. Check out her children’s website at JasperTheMule.com. Also, find Meredith on Facebook, YouTube and Twitter.
Long before the Founding Fathers drafted our constitution, the roots of America were as a religious nation under God. Today’s mule also has his roots in religion. The mule’s ancestor—the donkey—is mentioned in the Bible numerous times as an animal acknowledged by God and blessed by Jesus Christ. The donkey was even chosen to bring Mary and Joseph to Bethlehem and, later, as the mount Jesus himself used for his ride into the city of Jerusalem.
Throughout the development of our country—one nation under God—the American mule has been used to pull the mighty Conestoga Wagons of the pioneering settlers moving Westward, as a pack animal for settlers, miners and traders, and as an important part of our country’s defense in times of war.
As early-nineteenth-century America continued to develop and its population grew, the American people came to depend more and more on self-sustaining agriculture. Because of the mule’s extraordinary ability to work long hours in sometimes harsh and unrelenting climates, his sure footedness which allowed them to cross terrain not accessible by any other means, and his resistance to parasites and disease, he became the prized gem of agriculture and remained so for the next hundred and fifty years.
From the day the Erie Canal first opened on October 26, 1825, mules and donkeys were always used to pull the heavy barges. Inevitably, songs like Thomas A. Allen’s “Low Bridge, Everybody Down,” which praises a mule named “Ol’ Sal,” became part of America’s folk song tradition. In the early days of the Erie Canal, men and their mules lived side by side on the barges—the mules were even brought onboard when they were not towing, and safety ramps were placed at intervals up the banks of the canals, in case an unlucky mule accidentally slipped into the canal and could not negotiate its steep walls to climb back out.
In 1882, the Harmony Borax Works opened with one big problem—how to get their product 165 miles across the treacherous Mojave Desert from Death Valley to the nearest railroad spur. The answer? Mules! “The borax wagons were built in Mojave at a cost of $900 each…When the two wagons were loaded with ore and a 500-gallon water tank was added, the total weight of the mule train was 73,200 pounds or 36 and a half tons. When the mules were added to the wagons, the caravan stretched over 100 feet. The Twenty Mule Teams hauled more than 20 million pounds of borax out of Death Valley between 1883 and 1889.” 1
When American coal mining was booming, the mule was such a valuable member of the mining process, that a good mining mule was considered to actually be more valuable than a human miner. Mining has always been a dangerous business, and the mining mule’s innate sense of self-preservation was well known. “Mules are very smart…They know what they can do and would never do anything they couldn’t or would not want to do. Mules were known to pull at least three full mine cars full of coal. If you hooked up a fourth car they would balk at any commands and just stand there. No way would they pull the fourth car!” 2
Because of their traits of strength, intelligence and loyalty, mules were a crucial part of our country’s greatest conflicts, from the Civil War through the Spanish American War, and in both World War I and World War II. A well-known tale from the Civil War states that, “In a battle at Chattanooga, a Union general’s teamsters became scared and deserted their mule teams. The mules stampeded at the sound of battle and broke from their wagons. They started toward the enemy with trace-chains rattling and wiffletrees snapping over tree stumps as they bolted pell-mell toward the bewildered Confederates. The enemy believed it to be an impetuous cavalry charge; the line broke and fled.” 3 During World War I, mules and horses were still the primary way that artillery was carried into battle. Although the 75mm Howitzers proved too heavy for most horses, it was a common sight to see the big guns strapped to the back of a sturdy mule.
One of the world’s greatest natural wonders, the Grand Canyon, has been home to mules since the 1800s. First brought in by prospectors, it was soon realized that the tourists wanted a way down to the Canyon floor, and so began the Grand Canyon mule pack trips. Famous mule-riding visitors to the Grand Canyon have included Presidents Theodore Roosevelt and Howard Taft, famed naturalist John Muir and painter/sculptor Frederic Remington.
We Americans have worked alongside our mules and donkeys for centuries and have often taken their generous contributions for granted in the course of our country’s fast-paced growth, but the mule and donkey are likely to remain with us as long as they can find a way to make their contributions to society.
Those of us who attend Bishop Mule Days every year and many longears lovers across this country are very well-acquainted with the incredible assets of the mule, and look forward to singing his praises every year on October 26th, when Mule Appreciation Day rolls around. Let us never forget to thank our trusted companions for all they have contributed to building this great country of ours!
To learn more about Meredith Hodges and her comprehensive all-breed equine training program, visit LuckyThreeRanch.com or call 1-800-816-7566. Check out her children’s website at JasperTheMule.com. Also, find Meredith on Facebook, YouTube and Twitter.
I have done extensive work in training equines for many years and it seems you can never learn enough. If you learn how to ask the right questions, there is always something more to learn just around the corner. It is no secret that things can happen when you push limits and you can get what might seem to be the right results, but then you have to ask yourself…really? You may, for instance get your young Reining prospect to do a spin, but then you should ask yourself if he is executing it correctly so as not to injure the ligaments, tendons and cartilage in his body. If he is not adequately prepared for the spin with exercises that address his core muscle strength and good posture, then he is likely to do the movement incorrectly, putting his body at risk.
Horse trainers have kept us in awe of their unique and significant talents for centuries, and now that their techniques are more public, many equine professionals will pooh-pooh those who attempt a “kinder” approach to training. Scientists who study the equine in motion—its nutrition, biomechanics, care and maintenance—have their own perceptions to offer as to what we can learn about equines. Because many of these studies and tests are done in the laboratory, scientists rarely have the opportunity to follow their subjects throughout a lifetime of activity, as well as having the opportunity to experience what it really means for you as a rider, to be in balance with your equine when you work together, whether you are leading, lunging, riding or driving. If they did, their findings would probably yield quite different results. With all this progressive scientific thought, it seems to me that common sense can often get lost in the shuffle and respect for the living creature’s physical, mental and emotional needs may not be met.
It is true that bribery never really works with an equine, and many people who attempt the “kind” approach do get caught up with bribery because they are unskilled at identifying good behaviors and waiting to reward until the task is performed. However, reinforcement of positive behaviors with a food reward does work if you can figure out how to adhere to the program, and be clear and consistent in how you behave and what you expect. In order to do this, you need to really pay attention to the whole equine, have a definite exercise program that has been proven to work in developing the equine’s good posture and strength, and be willing to work on yourself as well as your equine. A good program for your equine will require that you actively participate in the exercises as well. That way, you will also benefit while you are training your equine.
People feel better when they pay attention to their diet and are aware of their posture while practicing physical activities—and, in the same respect, an equine will perform willingly and happily if he feels good. Horses have as many different postures as do people, and there are generalized postures that you can easily notice and predict in specific breeds of horses. For instance, the American Saddlebred has a higher body carriage than that of the Quarter Horse. However, each individual within any breed is not naturally born in good posture and might need some help to get in good posture in order to exercise correctly.
There are varying levels of abuse and most abuse happens out of ignorance. Many training techniques appear to get the equine to do what you want, but the question then becomes, “How is he doing this and will it result in a good strong body or is it in opposition to what would be his best posture and condition?” Any time you take the equine out of good posture to accomplish certain maneuvers, you are abusing his body, and this can result, over time, in degenerative breakdown. For instance, those who get in a hurry in Dressage and do not take a full year at each level in order to develop their equine’s body slowly and methodically may discover, several years later, that their animal has developed ringbone, side bones, arthritis or some other internal malady. These types of injuries and malformations are often not outwardly exhibited until it is too late to do anything about them.
In my experience with my draft mule rescues, Rock and Roll, this became blatantly apparent to me. When Rock had to be euthanized in December of 2011, a necropsy was performed after his death. When the necropsy report came back and we were able to ascertain the long-term results of his years of abuse, neglect and bad posture, we found it a wonder that he was able to get up and down at all, much less rear up and play with Roll and trot over ground rails in balance.
His acetabulum (or hip socket) had multiple fractures. The upper left photo shows Rock’s normal acetabulum and the upper right photo shows Rock’s fractured acetabulum. The photo at right shows the head of each of Rock’s femurs. Rock’s left femoral head was normal, while the right, injured femoral head was virtually detached from the hip socket and contained fluid-filled cysts. There was virtually no cartilage left on the right femoral head, nor on the right acetabulum. It was the very fact that my team and I made sure that Rock was in balance and took things slowly and in a natural sequence that he was able to accomplish what he did and gain himself an extra year of quality life.
Tragically, many equines are suffering from abuse every day, while they are trying to please their owners and do what is asked of them. Their owners and trainers take shortcuts that compromise the equine’s health. It could be that these owners and trainers are trying to make choices with limited knowledge and really don’t know whom to believe. But ignorance is not a valid defense and sadly, the animal is the one that ends up suffering.
When they don’t have enough time to ride, racing stables often use hot walkers in order to exercise their Thoroughbred horses. But when an equine is put on a hot walker, he is forced to walk in a circle with his head raised and his neck and back hollowed. Since we all build muscle while in motion, muscle is being built on the hot walker while the equine is out of good posture. Consequently, when the equine is ridden later, bad behaviors can arise simply because the animal is uncomfortable. It would be better to develop core muscle strength (the strength around the bones and vital organs) first in good posture before developing hard muscle strength over the rest of the body. Core muscle strength takes time, but once the animal begins to automatically move in good posture, it becomes his natural way of going.
The Lucky Three mules have always been worked in good posture, and spend only as much time on the hot walker as it takes for them to dry after a bath. They maintain their good posture while walking and rarely let the hot walker “pull” them into bad posture.
There has been a lot of scientific research done on equine biomechanics using treadmills, which is one of my pet peeves. It would seem to me that any data scientists have gathered is not viable for one reason. An equine on a treadmill will not move the same way as an equine that is moving over ground. Have you ever had the ground move backwards underneath you? What kind of an effect do you think this would have on your ability to walk, trot or run correctly and in good posture? The very motion of the treadmill throws the body balance forward while you try to keep your balance upright. It actually interferes with the ability to balance easily and therefore, does not build muscle symmetrically and correctly around the skeletal structure and vital organs.
Like many, I am of the belief that mechanical devices that force an equine into a rounded position do not necessarily put that equine in good posture. I would guess that many trainers think the “Elbow Pull” device that I use is guilty of developing this artificial posture. If that is their opinion, then they do not understand how it works. Rather than pulling the equine’s head down into a submissive position, when adjusted correctly, the “Elbow Pull” acts like a balance bar (like a ballet dancer would use) to help the equine to balance in good posture. It takes time to develop good posture. So, in the beginning, your equine can only sustain good posture for a certain number of measured steps, and then he must “lean” on the “Elbow Pull” in between these moments of sustaining his ideal balance on his own. The “Elbow Pull” simply prevents him from raising his head and neck so high that the neck becomes inverted and the back hollowed, but it does not actually pull his head down. The rope itself is very lightweight and puts virtually no weight on his head and neck at all. Note: Because horses react differently than mules and donkeys when hard-tied, a simple adjustment to allow the “Elbow Pull” to “slip” with a horse is necessary.
Like humans, when equines are encouraged and aided in developing good equine posture, core strength with adequate bulk muscle built over the top, they are healthier and better able to perform the tasks we ask of them. With this in mind and other good maintenance practices, you can enjoy the company of your equine companion for many years to come and most of all, he will enjoy being with you!
Covered in TRAINING MULES & DONKEY: A LOGICAL APPROACH TO TRAINING, TRAINING WITHOUT RESISTANCE, EQUUS REVISITED and A GUIDE TO RAISING & SHOWING MULES at www.luckythreeranchstore.com
It is important to know the differences among rewards, treats, coaxing and bribing in order to correctly employ the reward system of training called Behavior Modification.
Rule Number One: Treats and bribery should never be used during training. However, the appropriate dispensing of rewards and coaxing will produce the correct behaviors.
In order to reward your equine correctly for performing tasks, it is important to know the difference between a reward and a treat, and between coaxing and bribing. Let’s begin with some basic definitions of these terms:
Reward: something desirable given for a completed task
Treat: an unexpected gift given simply because it will be enjoyed
Coax: to gently persuade without dispensing the reward
Bribe: to persuade the animal by indiscriminately dispensing treats
Remember to give your equine a reward only after a specific task you’ve asked for has been performed—or even an assimilation of that task, which means the taking of baby steps toward completing the task. The reward should be given immediately upon completion of the task and then your equine should be allowed time to enjoy his reward before moving on to the next task. If your equine is given a food reward for only good behaviors, he will be more likely to continue to repeat only those behaviors for which he is rewarded and you can begin to “shape” his behavior in a positive way.
Treats, on the other hand, are a food that your equine especially likes, which are given randomly and without purpose. Giving random treats during training can result in crossed signals and confusion in your animal. Treats such as peppermints and even “horse treats” are generally an inappropriate food source for equines and when dispensed too freely, have actually been known to cause equine health problems, so forego treats of any kind during the training process.
Coaxing and bribing can seem like the same thing, but they are not. Bribery suggests the actual dispensing of a reward before the task has been completed. Bribery is the indiscriminate dispensing of treats and is not the way to clearly communicate to your equine which is truly a positive behavior and which is not. Rewards and coaxing are often confused with bribery, but rewards are dispensed for a task only when it has been completed, and coaxing using the promise of a reward can often be used to help your equine to stop balking and attempt to perform the task you have requested. Then the reward is given only when he has completed the task.
As an example of coaxing, you can extend a handful of crimped oats to lure your equine closer to an obstacle, but he should not receive the handful of oats until he completes the required task or travels enough distance toward the obstacle to deserve a reward. If your equine just won’t come all the way to an obstacle, even to get a reward, you can modify the task by asking your equine to just come closer to the obstacle and then halt (but without backing up). Then the reward can be dispensed for the partial approach and halt, because these actions still qualify as an assimilation of the bigger task that is to be completed. If he backs away at all, he should not be rewarded and you will have to go back to the beginning of the task and try again.
A kind word or a pat on the head may be enjoyable for your equine, but it doesn’t necessarily insure that the desired behavior will be repeated. However, a food reward insures that desirable behaviors will be repeated, because food is a solid, tangible reward. The food reward will back up the petting, (the petting is something that you probably do all the time anyway). When you visit your equine, you most likely pat him on the nose or head and say hello, but there are no real demands for any particular task being asked of your equine—you and your equine are simply interacting. You’re getting him used to touch, discovering how he likes to be touched and learning about his responses, which is actually part of imprinting.
The problem with carrots, apples and other foods people use for treats is that they’re not something for which the equine will continue to work and are not healthy choices for your animal in large quantities. After a limited amount of time, equines can easily become satiated on most treats. It’s like a kid with a bunch of candy bars. Once they become full they don’t want any more candy and they’ll stop working for the treat. Many foods used as treats, when given too freely, may also cause your animal to become tense or hyperactive. However, it’s been my experience that an equine will continue to work for crimped oats as long as you dole them out. Crimped oats are healthy for the body and they don’t cause an equine to become tense and difficult to handle.
When you’re using rewards, always start with lavish rewards for all new behaviors. This means that, every time you teach something new, you’re going to give lavish rewards for even the slightest assimilation toward the correct behavior. For instance, if your foal is tied to the fence and upon your approach, he quits pulling, it’s time to try to walk away from the fence with him and see if he will follow you. In this first leading lesson, you’ll untie him and ask him to take a step toward you. If he does, lavishly reward that step toward you, wait for him to finish chewing his oats and then ask him to take another step forward and toward you. If he complies and takes another step forward, lavishly reward that step too. During the first lesson, you will be rewarding every single step he takes toward you. Remember to keep the lesson short (about 15 minutes) and ask for only as many steps as he willingly gives you.
Between lessons, let your equine have a day off in order to rest. When you return for the second lesson, tie him to the fence and review with him your last lesson from the very beginning. He should remember the previous lessons and be willing to follow you right away in order to be rewarded. If he seems willing to follow your lead, untie him and ask him to take a step forward just as he did before, but this time, instead of dispensing the food reward when he takes the first step forward, simply say, “Good boy” and ask him for a second step forward before you reward him with the oats. You will now be progressing from one step forward before you reward to two steps forward before you reward.
If he won’t take the second step forward, then give the reward for the first step, wait for him to finish chewing and ask again for two steps before rewarding him again. If he complies, you can then reward him every two steps during that lesson and quit after fifteen minutes. Give him another day between lessons and then proceed in the same manner, beginning with a review of the previous lesson, then a reward for the first step, and then for every two steps. During this lesson, you can now ask for three steps, and you can continue asking for three or more steps during this lesson, provided that he takes these steps willingly and then stops obediently on his own to receive his reward. You no longer need to count the steps as long as he is offering more steps between rewards each time. If, because of his enthusiasm, he begins to charge ahead, stop him and immediately reward him for halting. This will insure that he keeps his attention on you and the task at hand. This methodical, deliberate process is setting the stage for a positive and healthy working relationship with your equine.
This is how you begin with leading training, and also how you should proceed with all the new things that you will be teaching your equine. In the beginning of leading training, he gets rewarded for even an assimilation of what you’re asking. For example, when you get to negotiating obstacles, your goal may be to cross over a bridge, but when your equine sees the bridge ahead, he may stop or start backing up. At this point, allow him to back until he stops. Go back and repeat the steps you did prior to approaching the obstacle. Then, asking for only one step at a time, proceed as you did during his flatwork leading training toward the bridge, rewarding each step he takes. Tell him verbally how brave he is and continue to reward any steps he takes toward the obstacle before proceeding forward. Remember to stop at any interval where he becomes tense, ask for one more step to be rewarded, and then allow him to settle and refocus before asking any more from him.
Once he goes to the bridge without a problem, you no longer have to reward him all the way up to the bridge. Just reward him when he actually gets to the bridge. Next, step up onto the bridge and ask him to take a step up onto the bridge with his two front feet, which is another new task. If he puts one foot on the bridge or even tries to lift up a foot and put it on the bridge, make sure you reward that behavior. Once he has a foot firmly placed on the bridge, keep tension on the lead rope and ask for his other front foot to come up onto the bridge. If he places his second foot on the bridge, you can then reward him for having both front feet on the bridge. Next, you’re going to continue forward and just walk over the bridge to the other side, pause and reward. Then quit this lesson. In his next lesson, if needed, repeat the approach the same way if he starts to balk. If not, ask him to step both front feet up onto the bridge, stop, make sure he is standing squarely, and reward that behavior.
Now you no longer need to reward for one foot on the bridge. This is called “fading or phasing out” the reward for a previous behavior (one step), while introducing the new behavior of walking to the bridge, halting and then putting two front feet up on the bridge. Wait for a moment for him to chew his reward and then ask him to continue onto the bridge, stop and square up with four feet on the bridge and reward. If he does not comply and won’t stop on the bridge, just go back to the beginning, approach the bridge as described and try again until he stops to be rewarded with all four feet placed squarely on the bridge
Then you ask him, to place his two front feet on the ground while leaving his two back feet on the bridge. Then have him stop and square up to be rewarded. This is a difficult position and if he cannot succeed by the third attempt, you may have to step in front and aid in his balance, then reward him when he settles in this position.
The last step over the bridge is to bring the hind feet off the bridge, stop and square up one more time before he gets rewarded. This does two things. It causes your equine to be attentive to the number of steps you are asking and it puts him in good posture at each stage so that his body will develop properly. In future lessons, the steps in the approach to the bridge no longer need to be rewarded and as he becomes more attentive, he will learn to stop any time you ask and wait for your cue to proceed. After several months of this meticulous attention to these detailed steps, he will not necessarily need to be rewarded with the food reward each time—a pat on the neck and kind words of support should be sufficient. Rewards can then be given for whole “blocks” of steps when he successfully completes them.
Here is a question a lot of people ask: “This is fine while my animal and I are still working from the ground, but what happens when I finally get on to ride? Do I keep rewarding every new behavior when I ride?” The answer to that question is, “No, you don’t.” If you do your ground work correctly, it will address all the things that you’ll be doing while you’re riding before you actually even get on. Your equine has been lavishly rewarded for stopping when you pull on the reins and the drive lines, and he’s been rewarded for turning and backing and everything else he needs to learn before you actually get on him, so the only thing left to get used to would be exposure to your legs on his sides. He will soon learn that your legs push him in the direction of the turn you are indicating with your reins. For this action, he does not need to be rewarded.
In the natural progression of correct training—including during mounting training—your equine should also be getting rewarded when you’re first getting him used to your being on-board. Give him the oats reward for standing still while you attempt to mount (i.e., walking toward him, holding the left rein and reaching for the saddle horn), and then when you hang from each side of his body with a foot in the stirrup (first on one side and then on the other side), and, finally, from each side of his body while you sit on his back. When you ask him to turn his head to take the oats from your hand, you can be sure his attention will be on you because this action will force him to look at you in order to receive his oats. Then reward him again for standing still as you dismount. Consequently, by the time you actually get to the point of riding in an open arena, he’s been rewarded for having you on his back and for behaving well through all the exercises demanded from him during round pen training.
You may first want to lunge your equine when you move into the open arena. Lunge him on the lunge line and reward him during that part of your arena workout. When you are ready to mount in the open arena, have a few oats in your pockets to offer him when you mount on each side the first few times. This will ensure that his attention stays focused on you. Once he is used to being ridden, you will no longer have to reward him in the middle of riding lessons. If he does not keep his attention on his work in the open arena, this signifies that not enough time has been spent on the ground work and you should back up your training regimen to the point that he is maintaining attentiveness and performing correctly, even if it means going back to the round pen or leading work. If, in the ground work stages, you give plenty of food rewards in the correct manner, by the time you groom and tack up, your equine should have been sufficiently rewarded and will not require another reward until after your workout when you return to the work station and un-tack him. This is called delayed gratification. When you un-tack him and do your last minute grooming before putting him away, again be generous with the crimped oats and praise your equine for a job well done. Rewards are dispensed very specifically and pave the road to a solid foundation of trust and friendship.
To learn more about Meredith Hodges and her comprehensive all-breed equine training program, visit LuckyThreeRanch.com or call 1-800-816-7566. Check out her children’s website at JasperTheMule.com. Also, find Meredith on Facebook, YouTube and Twitter.
My philosophy is based on the principle that I am not, in fact, “training” donkeys and mules. Rather, I am cultivating relationships and establishing a lifestyle with them by assigning meaning to my body language that they can understand, while I learn what they are trying to indicate to me with their body language.
In the same way that my own level of understanding changes and grows over time, I believe that my animals’ understanding grows, too. In the beginning, the emotional needs of a young mule or any equine are different from those of an older animal. The young animal needs to overcome many instincts that would protect him in the wild, but are inappropriate in a domestic situation. In a domestic situation, the focus must be on developing friendship and confidence in the young equine, while establishing my own dominance in a non-threatening manner. This is accomplished through the use of a great deal of positive reinforcement early on, including gentle touches, a reassuring voice and lots of rewards for good behavior. Expressions of disapproval should be kept to a minimum and the negative reinforcement for bad behavior should be clear, concise and limited.
As your young equine grows and matures, he will realize that you do not wish to harm him. Next, he will develop a rather pushy attitude in an attempt to assert his own dominance (much like teenagers do with their parents), because he is now confident that this behavior is acceptable. When this occurs, reevaluate your reward system and save excessive praise for the new exercises as he learns them. Note, however, that a gentle push with his nose might only be a “request” for an additional reward and a polite “request” is quite acceptable in building a good relationship and good communication with your equine. Allow the learned behavior to be treated as the norm, and praise it more passively, yet still in an appreciative manner. This is the concept, from an emotional standpoint, of the delicate balance of give and take in a relationship. As in any good relationship, you must remain polite and considerate of your horse, mule or donkey. After all, “You can catch more flies with sugar than you can with vinegar.”
Many details of both animal and trainer must also be considered from a physical standpoint. In the beginning, unless you are a professional trainer with years of proper schooling, you are not likely to be the most balanced and coordinated of riders, and you may lack absolute control over your body language. By the same token, the untrained equine will be lacking in the muscular coordination and strength it takes to respond to your request to perform certain movements. For these reasons, you must modify your approaches to fit each new situation, and then modify again to perfect it, keeping in mind that your main goal is to establish a good relationship with your animal and not just to train him. It is up to you, the trainer, to decide the cause of any resistance from your equine, and to modify techniques that will temper that resistance, whether it is mental or physical.
Here is an example: I had a three-year-old mule that was learning to lunge without the benefit of the round pen. The problem was that he refused to go around me more than a couple of times without running off. I first needed to assess the situation by brainstorming all the probable reasons why he might keep doing such an annoying thing. Is he frightened? Is he bored? Is he mischievous? Has he been calm and accepting of most things until now? And, most important, is my own body language causing this to occur? Once I was willing to spend more time with regard to balance on the lead rope exercises and proceeded to the round pen to learn to balance on the circle, I soon discovered that developing good balance and posture was critical to a mule’s training. The reason my mule was pulling on the lunge line so hard was because he just could not balance his own body on a circle. Once I reviewed the leading exercises with him—keeping balance, posture and coordination in mind—and then went to the round pen to learn to balance on the circle, I noticed there was a lot less resistance to everything he was doing. I introduced the lunge line in the round pen and taught him how to circle with slack in the line. And, I realized that it was also important to time my pulls on the lunge line as his outside front leg was in suspension and coming forward. It didn’t make much difference in the round pen, but it was critical to his balance in the open arena so the front leg could be pulled onto the arc of the circle without throwing his whole body off balance. After learning that simple concept, lunging in the open arena on the lunge line was much easier and he did maintain the slack in the line while circling me.
Like humans, all animals are unique, and like humans, each learns in his own way. Learn to be fair and flexible in your approach to problems. It is best to have a definite program that evolves in a logical and sequential manner that addresses your equine’s needs physically, mentally and emotionally. Be firm in your own convictions, but be sensitive to situations that can change, and be willing to make those changes as the occasion arises. This is what learning is all about for both you and your equine.
Just as mental changes occur, so do physical changes. As your equine’s muscles develop and coordination improves, you will need to do less and less to cause certain movements. For example, in the case of the leg-yield, you may have to turn your animal’s head a little too far in the opposite direction to get him to step sideways and forward. You will need to guide him more strongly with the reins and kick harder. As he becomes stronger and more coordinated, and begins to understand your aids, you can then start to straighten his body more toward the correct bend and stay quieter with your aids. Granted, you began by doing things the “wrong” way by over-bending your equine and by over-using your aids, yet you put him “on the road” to the right way. You assimilated an action in response to your leg that can now be perfected over time. In essence, you have simply told your equine, “First you must learn to move away from my leg, and then you can learn to do it gracefully.”
The same concept works in the case of the trainer or the rider. Sometimes you must do things that are not quite right in the beginning to get your own body to assimilate correctness. In the beginning, a rider cannot “feel” the hind legs coming under his seat, so he needs to learn by watching the front legs moving forward along with his hands. With practice, the rider will develop the “feel” and will no longer need to watch the front legs moving forward. Remember, we all perceive things a little differently, and our perception depends on how we are introduced to something and on whether or not we can understand or perform a task.
It is nearly impossible for the inexperienced horseman to perceive and control unused seat bones as a viable means of controlling the animal. Reins and legs are much more prevalent. In order to help such a rider perceive their seat bones more clearly, it sometimes helps to start by involving the whole lower body. Earlier in this book, I suggested that, to begin facilitating this action, you pedal forward in conjunction with the front legs. Connecting this action with the front legs of the equine allows you to “see” something concrete with which you can coordinate, plus the pedaling encourages necessary independent movement in the seat bones from side to side and forward. When you begin to “feel” this sensation, you can begin to understand that when the foreleg comes back, the corresponding hind leg is coming forward under your seat bone. When you understand this, both mentally and physically, you can begin to pedal backward, which will cause you to be in even closer synchronization with your equine’s body. As your leg muscles become more stable, actual movement in your own body becomes less, more emphasis is directed toward your center of gravity and more responsibility is placed on your seat bones. Using this approach, your muscles are put into active use and coordinated with your animal’s body through gymnastic exercises, which will eventually lead to correct positioning and effective cueing.
Achieving balance and harmony with your equine requires more than just balancing and conditioning his body. As you begin to finish-train your equine, you should shift your awareness more toward your own body. Your equine should already be moving forward fairly steadily and in a longer frame, and basically be obedient to your aids. The objective of finish-training is to build the muscles in your own body, which will cause your aids to become more effective and clearly defined. This involves shedding old habits and building new ones, which takes a lot of time and should be approached with infinite patience. There are no shortcuts. In order to stabilize your hands and upper body, you need to establish a firm base in your seat and legs. Ideally, you should be able to drop a plumb line from your ear to your shoulder, down through your hips, through your heels and to the ground. To maintain this plumb line, work to make your joints and muscles in your body more supple and flexible by using them correctly. Don’t forget to always look where you are going to keep your head in line with the rest of your body.
As you ride your equine through the walking exercise, try to stay soft, relaxed and flexible in your inner thighs and seat bones. Get the sensation that your legs are cut off at the knees, and let your seat bones walk along with your animal, lightly and in rhythm with his body. If he slows down, just bend your knees and bump him alternately with your legs below the knees, while you keep your seat and upper legs stable and moving forward. To collect the walk on the short side, just bend both knees at the same time, bumping your equine simultaneously on both sides, while you squeeze the reins at the same time. Your legs should always have contact with your animal’s body in a light “hugging” fashion and real pressure should only come during the cues.
In order to help you stay over the middle of your equine’s back on the large circle, keep your eyes up and looking straight ahead. Shift your weight slightly to the outside stirrup, and feel it pull your inside leg snugly against your animal. Be sure that your outside leg stays in close to his barrel as you do this. On straight lines, keep your legs even, but on the arc, and look a little to the outside of the circle. This will bring your inside seat bone slightly forward, allowing your legs to be in the correct position for the circle. This technique is particularly helpful during canter transitions.
Most people feel that they do not balance on the reins as much as they actually do. If you balance on the reins at all, your equine will be unable to achieve proper hindquarter engagement and ultimate balance. To help shift the weight from the hands and upper body to the seat and legs, first put your equine on the rail at an active working walk. On the long side, drop your reins on his neck and feel your lower body connect with his body as you move along. You will need to tip your pelvis forward and stretch your abdominal muscles with each step in order to maintain your shoulder to hip plumb line. If your lower leg remains in the correct position, your thigh muscles will be stretched over the front of your leg from your hip to your knee. There is also a slight side-to-side motion as your animal moves forward that will cause your seat bones to move independently and alternately forward. There is no doubt that you can probably do this fairly easily right from the start, but to maintain this rhythm and body position without thinking about it takes time and repetition.
When you are fairly comfortable at the walk, you can add some variation at the trot. Begin at the posting trot on the rail. When your equine is going around in a fairly steady fashion, drop your reins on his neck and continue to post. As you post down the long side, keep your upper body erect and your pelvis rocking forward from your knee. Your knee should be bent so that your legs are positioned on the barrel of your animal. Raise your arms out in front of you, parallel to your shoulders. If your equine drifts away from the rail, you need to post with a little more weight in your outside stirrup. As you go around corners, be sure to turn your eyes a little to the outside of the circle to help maintain your position. As you approach the short side of the arena, bring your arms back, straight out from your shoulders, and keep your upper body erect. As you go through the corners, just rotate your arms and upper body slightly toward the outside of your circle. When you come to the next long side, once again bring your arms in front of and parallel to your shoulders, and repeat the exercise.
Notice the different pressure on your seat bones as you change your arm position. When your arms are forward it will somewhat lighten your seat, while having your arms to the side will tend to exert a little more pressure. Consequently, you can send your equine more forward with your seat as you go down the long sides. On the short sides, you can shorten that stride with a little added pressure from the seat bones. When you wish to halt, put your arms behind you at the small of your back to support an erect upper body. Let your weight drop down through your seat bones and legs to total relaxation and an entire halting of movement. Remember to use your verbal commands—especially in the beginning—to clarify your aids to your animal. If your equine doesn’t stop, just reach down and give a gentle tug on the reins until he stops. Before long, he will begin to make the connection between your seat and your command to “Whoa,” and your seat will take precedence over your reins.
When you and your equine have become adept at the walk and the trot, add the canter. At the canter, however, keep your arms out to the side and rotate them in small backward circles in rhythm with the canter. Be sure to sit back and allow only your pelvis, your seat and your thighs to stretch forward with the canter stride. Keep your upper body erect and your lower leg stable from the knee down. Once your equine has learned to differentiate seat and leg aids in each gait and through the transitions on the large circle, you can begin to work on directional changes through the cones.
As you practice these exercises, you will soon discover how even the slightest shift of balance can affect your animal’s performance. By riding without your reins and making the necessary adjustments in your body, you will begin to condition your own muscles to work in harmony with those of your equine. As your muscles get stronger and more responsive, you will cultivate more harmony and balance with him. As you learn to ride more “by the seat of your pants,” you will encounter less resistance in your equine, because most resistance is initiated by “bad hands” due to an unstable seat. As you learn to vary the pressure in your seat accordingly, you will also encounter less resistance in your animal through his back. Having a secure seat will help to stabilize your hands and make rein cues much more clear to your equine. The stability in your lower leg will also give him a clearer path to follow between your aids. Riding a balanced seat is essential to exceptional performance.
To learn more about Meredith Hodges and her comprehensive all-breed equine training program, visit LuckyThreeRanch.com or call 1-800-816-7566. Check out her children’s website at JasperTheMule.com. Also, find Meredith on Facebook, YouTube and Twitter.
Imprinting is defined as “rapid learning that occurs during a brief receptive period, typically soon after birth or hatching, and establishes a long-lasting behavioral response to a person or object as attachment to a parent or offspring.” 1 When we speak of “imprinting” in the scientific sense, it is a reference to the way the brain accepts input. The brain compartmentalizes impressions and images, and the animal reacts to the stimulus that the image produces. A collection of “imprints and images” produces memories. Imprinting training with a foal of any breed will give him a jump-start on his life with human beings.
Imprinting is more than getting your foal used to people. He’s going to spend the rest of his life with human beings, so he should get used to your touch, your voice, your smell and, especially, your handling of him. Handling your foal the minute he is born is a wonderful way to bond with him, and you will learn how he likes to be touched in order to produce a positive response. This early imprinting lays a foundation of trust for the training to follow.
Although it is commonly accepted that initial imprinting on the foal’s brain occurs only during a brief receptive period when initial contact is made during the first few days of life, it does provide a foundation on which to expand exposure to a human being through your foal’s five senses of touch, taste, smell, hearing and sight that leave impressions on the equine brain and will affect the way he interacts with a handler beyond what his dam may teach him. If the initial contact with humans leaves a positive impression, a foal will be more likely to be curious about humans than afraid of them. Because of this early contact, continuing imprinting then becomes an ongoing process that builds on the initial imprinting that is introduced at birth.
A calm, well-mannered mother helps produce a well-mannered foal, so if your mare or jennet is not easy to handle, she needs imprint training before the foal is born. Mares, and particularly jennets, can become very aggressive in defense of their offspring, so it is advisable to imprint even a mature mare or jennet so she will be safe to be around when she finally foals.
When imprinting your foal, think about the kind of adult you want him to be. A foal is very similar to a human baby regarding emotional needs—both need attention, love, guidance and praise to become loving, cooperative adults. Start your relationship with a positive attitude and approach your foal with love, patience, kindness and respect. Be sure to set reasonable boundaries for his behavior through the way you touch him and speak to him, the facial expressions you use, and even how you smell when you are around him so he can learn to trust and respect you and be happy at the sight of you.
It doesn’t matter if your equine is a young foal or an older animal—he needs imprint training. It will set the stage for the way he relates to humans for the rest of his life. Imprinting stimulates all of his five senses: touch, hearing, taste, smell and sight. This leaves an indelible impression on your equine’s brain as to how you expect him to behave, which—over time and with repetition—becomes his new natural way of responding.
The most important sensation to which you can expose your equine is touch. If your touch is gentle and considerate, it will feel good to him and he will be interested in your attention. When you run your fingers over his body, being careful not to press too hard on sensitive areas, he will experience pleasure and begin to look forward to your visits. Learning how your equine likes to be touched will also help things go more smoothly when you begin grooming him and tacking him up and during his training lessons, when he must learn to take his cues from your hands, legs and other aids. Even how you mount and sit down in the saddle—for instance, how your seat is placed on his back—denotes your consideration of him through touch. The wrong kind of touch, no matter how slight, can be a trigger for adverse behaviors. However, the right kind of touch—done correctly—produces pleasure in your equine and instills a willingness to perform in a positive way each time you interact with him.
To begin imprinting training, run your hands all over your equine’s body and down his legs, and put your hands in his mouth and in his ears. His reactions will help you learn how he likes to be touched. Getting your equine used to touch in this way eventually evolves into exposing him to grooming and working with tack and equipment. You are continuing to build on the initial imprinting work, but now, when you are grooming, the grooming tools will become extensions of your hands, and when you introduce various tack and equipment like clippers, they will also become an extension of your hands. Allow your equine to use his sense of touch (usually with his nose) when introducing any new object. Work toward getting your equine’s response to your touch as highly sensitive as possible, so that he can use his own body language to communicate with you. NOTE: Many owners pat their equine on the top of the head with the flat of their hand as a sign of affection, without realizing that, as a rule, most equines don’t take kindly to people patting their foreheads or faces. A pat on the forehead works if you want to distract your equine, but save it for that purpose only. It is much better to show affection by stroking your equine (always in the direction in which his hair lies), in a soothing and reassuring manner.
The tone of your voice is another important element of imprinting. If your general tone is soothing and encouraging, he is more likely to comply. Then, when he needs to be disciplined, the change in your tone of voice will convey your disapproval before you even have to touch him to make a correction—giving him the opportunity to straighten up before you actually need to apply the physical backup of negative reinforcement. If, no matter what the situation, you always speak in low tones, he will not be able to differentiate between what’s acceptable and what is not, but if you modulate your voice to clearly express what you want to convey, your equine will be much better able to understand and react appropriately.
Equines have an excellent sense of smell—for instance, they can smell danger from miles away. They can also smell people, and they are much more likely to warm up to a person who smells “good” to them. Smelling good to an equine has nothing to do with soaps or perfumes or deodorants. Oats and hay are smells that all equines immediately recognize and love, so if you dole out oats rewards correctly and you actively participate in the feeding and care of your equine, you will mostly smell like crimped oats throughout lessons, making you VERY attractive to your equine!
The next sense to which you should appeal is your equine’s sense of taste (a no-brainer). When you dispense the oats reward for all of his new positive behaviors, he associates that wonderful taste with you and will follow you to the ends of the earth to get more oats.
When the equine’s five senses are truly pleased, the very sight of you will prompt the memories and impressions on his brain that you have instilled in him during imprinting. The impression you have left with him is positive, encouraging, kind, considerate and respectful, and his reactions to you will also be positive and willing.
As you begin your equine’s imprinting, make sure you include an equal measure of fun. As with children, if you make learning fun, it comes more easily. By encouraging your young foal or older equine’s enthusiasm for learning, you’ll cultivate and enhance your equine’s desire to please and to serve.
Imprinting training is truly an ongoing learning experience. When touching a newborn foal, keep in mind that the foal is coming out of the protected environment of the womb, where he’s had pressure from the amniotic fluid over his entire body. Suddenly, he’s born into an entirely foreign environment and, soon after, a human appears out of nowhere and begins touching him. Initially, this is like being tickled all over, so at this point, imprinting serves as a desensitization technique to human touch. Desensitization doesn’t mean you want your equine to become totally desensitized to you—just that you don’t want him to jump out of his skin every time you touch him. Always strive for a positive interaction between you and your equine.
Pay attention to the way your equine’s hair lays and stroke his coat in that direction only. There is more fatty tissue down the neck and over the back, so you can press a little harder when touching these areas. Going with the hair and using the flat of your hand, learn to gauge how much pressure you can apply to the fatty areas. Then, as you work your way down to where the fatty tissue becomes thinner, be sure to ease up on the pressure over the bony areas.
Always keep an eye on your equine and watch his face—he’ll let you know if he is experiencing pleasure or displeasure. If you observe wrinkling around his mouth, if his ears are laid back flat or if he stomps a foot, he is showing displeasure. A soft eye, a relaxed, contentedly chewing mouth and an absence of tension in his body denotes pleasure. So when you are engaged in training, pay special attention to your equine’s body language and adjust your own touch accordingly.
Work on evolving your own body language as a natural and truly wonderful way to “talk” with your equine. You can also use verbal language, but body language should be your primary form of communication.
Making use of your equine’s five senses to expand the meaning and benefit of imprinting can really work in your favor and will leave an indelible impression on your equine’s brain that will engage his attention and expedite the learning process. The result will be a deep and meaningful relationship with your equine not just now, but for the rest of his life.
To learn more about Meredith Hodges and her comprehensive all-breed equine training program, visit LuckyThreeRanch.com or call 1-800-816-7566. Check out her children’s website at JasperTheMule.com. Also, find Meredith on Facebook, YouTube and Twitter.
The old saying, “No foot, no mule” is literally true, as it is in any nomadic animal. If the hooves are not trimmed and balanced properly, it will offset the balance of the equine’s entire body and can compromise longevity in the animal because his entire internal structure will be compromised. Most equines will need to be trimmed or shod every 6-8 weeks whether horse, mule or donkey.
Horse’s hooves in general are proportionately larger, rounder and more angled than that of the donkey or mule. The sole of the foot is flat on the ground promoting good circulation in the foot through the frog.
Regardless of the size of the animal, the hooves of the mule will be smaller and more upright than that of a horse of equal size, and should be well sprung and supported, not contracted. They should have a smooth appearance and look sleek and oily. No ribbing should be apparent and the frog should be well extended, healthy and make adequate contact with the ground for good circulation to the hooves. The shape of the mule or donkey foot is more oval and the bottom of the foot is slightly “cupped” which accounts for the surefootedness in the mule and donkey. When being trimmed, the mule should be left with more heel than the horse to maintain the often more upright position that complements the shoulders and hips. If the mule or donkey has a better slope to the shoulders, he might have an angle that is similar to the horse, but he will still grow more heel than the horse. The shape and condition of the hooves of the jack and the mare are both equally important when considering foot development in the mule.
Because donkey and mule hooves are different from a horse’s hoof in that they are more oblong, cupped in the sole, they need more heel left during a trim than the round, flat sole and low heels on a horse. There are, however, a few exceptions to the rule as there are in most generalizations. Most donkeys are relatively inactive and live on moderate ground, so they do grow out in that time period. Some donkeys, like my own Little Jack Horner, are much more active and will wear their feet down naturally.
Miniature Horse
Miniature Mule
Miniature Donkey
Saddle Horse
Saddle Mule
Saddle Donkey
Draft Horse
Draft Mule
Mammoth Donkey
Of course, those that do not have the benefit of good training and conditioning would still wear unevenly and would still need to be trimmed, however, with the correct training and conditioning, they may wear evenly and may not need to be trimmed more than once a year! The same goes for those who would live in rough terrain. They may wear their feet down, but they would still need to be trimmed for balance. Those who are moving correctly may wear down evenly and would not require trims as often.
Failure to have your mule’s hooves regularly trimmed in order to maintain their balance and shape can result in an imbalance in your mule’s feet, which will then cause an imbalance throughout his entire body, inhibiting his performance. However, if trimming is done consistently, the risk of imbalance, accident or injury will be greatly reduced.
There are a lot of things to consider when trimming and shoeing all equines. If the animal is to have shoes, for instance, then they would need to maintain the flat surface of the sole for the shoes to fit properly. It is important that the equine have relief from shoes when they are not being ridden as much. We usually take any shoes off during the winter which keeps the heels from becoming contracted from wearing shoes and promotes good circulation to the foot as the frog can then make contact with the ground more consistently than it can with shoes. A good understanding of the anatomical differences among horses, mules and donkeys is essential for healthy hoof care.
When your farrier is trimming your equine, he should take into account the angles of the shoulder, the forearm, the knees, the cannon bone, fetlock, pastern and the general angle to the entire body when at rest, not just trimming off the excess. This is an anatomical call and only people who are schooled and skilled in this profession should even attempt it or you could run the risk of injuring your animal.
It is commonly known that, when it comes to horses and mules, light-colored hooves are softer and more likely to break down under stress than are the darker, black hooves. Even though the black hoof is naturally harder than the light-colored hoof, if it does not contain sufficient moisture, it can become brittle and can chip away as destructively as can the lighter hoof. Whichever breed of equine you own and whatever the color of their feet, remember that good hoof care is essential for all domesticated equines.
For better or worse, an equine inherits his hooves through his genes. If your equine has inherited good feet—black, oily-looking, and with good shape—then you are fortunate and hoof care and maintenance should be relatively simple. If he has inherited a softer or misshapen foot, you will need to discuss more specialized care with your farrier. Beware of generalizations as they can often be misleading! Each animal should ultimately be assessed individually.
To learn more about Meredith Hodges and her comprehensive all-breed equine training program, visit LuckyThreeRanch.com or call 1-800-816-7566. Check out her children’s website at JasperTheMule.com. Also, find Meredith on Facebook, YouTube and Twitter.
Disaster is not always predictable, or even expected. We all know the weathermen are not always right, yet they are usually somewhere in the ballpark concerning what is about to happen. This summer has been unusually HOT and on this particular evening I was glad to be able to settle down in my pajamas and watch a movie. Although we have stalls for everyone in our two barns, we often opt to leave the eight mules from the South Barn in the dirt pen overnight when the weather is good. This makes for a lot less stall-and-run cleaning in the morning. I no sooner settled on the sofa when I heard a very peculiar noise coming from all around and on top of the house. HAIL, I thought, and got up to look. There was a lot more than just hail headed this way! Dark, ominous clouds slowly made their way across the sky, sheeted in lightning with loud roaring thunder. The hail, mixed with sheets of rain, began coming down faster and harder. I looked out the sliding glass door of the back deck and noticed my mules were running and dodging all over the dirt pen. They ran for the shed, but the wind was pushing the hail into the shed, and they bolted right back out again. They would need to be brought in to the barn! This wasn’t going to let up any time soon.
I waited until the hail had subsided a bit and made my way to the Grain Room where I filled a bucket with oats to put in the South Barn feeders. I always reward my mules for coming in when they are called! I couldn’t get all the way to the main South Barn doors because the guys had been doing some serious trenching to replace the existing water lines that had gone bad and sprung leaks everywhere. The black poly pipe was put in 20 years ago with non-galvanized clamps that were now rusting. We would be replacing the poly with Pex, but for now the trench was wide open with huge piles of dirt along the edge, most of the way down the road and in front of the South Barn doors. I did manage to get to the north end of the South Barn runs, went through the gate and into the closest pen, just as the thunder rolled and the lightning began again overhead. Instantly, down came a torrent of rain and hail!
When I got inside the barn, I went directly to the light switches…no lights…DANG! The only light in the barn was coming from the outside doorways when the lightning flashed. Thankfully, it was sheet lightning and not lightning bolts! As my eyes adjusted to the dark alleyway in the barn, I could make out the feeder doors, so I began dumping oats into the feeders and left the feeder doors open. They provided a bit more light into the alleyway…not much light, but it was better than pitch black! I no sooner finished dumping the oats into the feeders than the sky really opened up and let go with full force rain and hail! I just stood in the middle of the rough cement alleyway, lightning flashes all around me! I waited, afraid to touch the metal building, until I realized the building was grounded and shouldn’t necessarily pose a problem. So, I opened the stall door at the middle of the barn, entered the stall, and stood in the doorway to the run to watch the spectacle…pretty amazing show! I prayed for an opening to make my way across the pen, through the gate and alleyway between the barns to the next pen off the North Barn where mini donkey, Spuds, was housed. Things toned down a bit and I took advantage of the lull in the storm. I ran to the gate at the end of the pen, but I forgot, it was Lindy’s pen and she digs deep holes in front of her gate!
I tripped as I went into the hole, but luckily saved myself by grabbing the gate! Quickly as I could, I unlocked the chain (you have to have chains if you have Longears!), then made my way to Spuds’ pen across the lane. I unchained his gate and closed it behind me. I didn’t want an escapee! Spuds was waiting just inside the doorway to his stall, so I went to his inside stall door, grabbed his halter that was hanging just outside the door (good place for it in case of emergency!), put it on him and led him into one of the empty stalls on the north side of the North Barn. We keep those stalls empty when we can, so we can block the heavy winds by closing all the doors on the north side. It keeps the inside of the North Barn calm on the south side, and even blocks the winds from going all the way through to the South Barn.
By the time I got inside the North Barn to turn on the lights (Luckily they worked!), the rain, lightning and thunder had revved up again! I would need to pause before taking my side trip to the house to get my flashlight, before retrieving the mules from the dirt pen across the north road. My only thought was that it would be difficult to tell them apart in the darkness of the South Barn alleyway with no lights. I never doubted for a minute that they would behave. We have a very predictable routine that makes handling them very easy and stress-free no matter what the conditions might be. However, if I couldn’t tell them apart in the dark, I might put them in the wrong stalls and they would not like that. Even that would be hard to do because they each know which stall is theirs, but any mistake on my part could cause resistance and bad behaviors on their part. So, I would need my flashlight!
The downpour finally let up, so I ran as fast as I could back to the house for my flashlight. I got it and was back to the North Barn just in time for another downpour that lasted about three minutes. The lightning was getting more extensive and lit up the whole sky above. Hmmm! I didn’t relish the thought of running into the open area on the north side of the barn…the last leg of my journey to the dirt pen. There were four gates to latch back to open the MULE CROSSING from the dirt pen to the barns. I opened the stall door at the far, east end of the north barn. As soon as it looked safe to proceed, I made my way to the first gate where I could see all eight mules waiting patiently for me at the second gate across the road. I quickly opened the gate in front of me and sighed with relief to see that two ends of the double gates ahead on either side were already in place. I just had to swing the other sides to meet them, and get them chained together. Finally…the last gate was ready to be opened and as I opened it, the mules came sedately through the gate and walked to the stall door I had opened at the far, east end of the North Barn. I signaled Lance to take them all in while I brought up the rear and closed the gates behind me. I didn’t want anyone turning back. Merlin and Vinnie decided we were going through the wrong stall door into the North Barn and stood at the far west stall door. That is the one they usually use when we let them back and forth to turnout.
I made a feeble attempt to “herd” them toward the east door, but they were having no part of being “herded,” so I just gave up and told them to follow me…or NOT! Before I even made it to the doorway, I could hear the storm surging again. I politely stood to the side when I heard Merlin and Vinnie come running to the door. They slowed as they passed by me and went through the doorway and into the North Barn…at a walk. Inside the North Barn, all eight mules were bunched up in the alleyway. Spuds loudly brayed his dissatisfaction at being put in a strange stall. It’s amazing that the smallest donkey on the place has the LOUDEST voice! Then I remembered…I had not opened the gate at the end of Spuds’ run after I had put him in the other stall. That is why everyone was still bunched up in the North Barn alleyway between the stalls. I called Lance to come with me (He’s the leader) and went to open the gate. He was followed by Lindy (his girlfriend), April (Her sister) and Sassy (Lance’s sister)…while Merlin lagged behind. We proceeded through Spuds’ pen, across the lane between the barns, through Lindy’s pen (after traversing the big hole!) through her stall, then into the dark alleyway of the South Barn. I led Lance to his stall by his fly mask, opened the door and let him go in. April was next, but she had a hard time seeing her door with her fly mask on, so I just pointed the flashlight at it, and she went in. Sassy took that opportunity to dash into the barn and trot to her stall door where she waited for me to come and open it. I didn’t even need the flashlight for her!
When I went back to Lindy’s stall, she was threatening Merlin who was standing right outside her back door under the overhang. I took her out of her stall and put her in an empty one across the alley, so I could retrieve Merlin and the last three mules from the North Barn. The storm was building up again. Merlin was happy to be in the safety of his own space. I could see the last three mules eating hay and oats from the floor in the North Barn two runs away. I would need to wait again before crossing. I tried calling, but they could not hear my voice due to the incredible decibels of the roaring thunder. It took another four, or five, minutes before it subsided this time. When it finally did, I ran across the runs and into the North Barn. The mules just looked at me inquisitively as if to say, “What?!” I just told them, “Quit eating and get your butts to the South Barn!” They immediately complied and walked through the two runs into the South Barn, and into the dark!
I came behind them with the flashlight and pointed it at each of their stalls. Guy went first, looking for his Lady Love, Sassy. He was happy to be back next to her. Angel looked stoic and lost at the west end of the barn. She wasn’t too far from her stall, but could not make out the door in the dark. I walked up to her, slid the door open and pointed the flashlight to show her the inside of her stall. Then she abruptly woke up and quickly entered her stall, relieved to be in her own familiar surroundings. She peeked out the doorway in time to see another sheet of lightning flash though the clouds and across the sky! That was when I noticed that Vinnie was really disoriented at the east end of the barn. He didn’t even notice the feed cart stacked with hay with my oats bucket perched on top! Ordinarily, he would be the first to make a beeline for any bucket! I hurried to his stall, opened the door and pointed the flashlight inside, but he just stood there…frozen. I gave a short tug on his fly mask and he then stepped into his stall…also relieved to be HOME! Lance peered out the back door of his stall and watched as the rain persisted. There was so much lightning outside that it looked like daylight at times. I went to the empty stall retrieve Lindy and put her back into her own stall. She was happy to go back to her feeder to finish the oats.
I used to take off their fly masks each night, but I began to notice there were benefits to leaving them on. Merlin poked his eye on a tree when he was a yearling and almost blinded himself. For twenty-seven years, he has had to wear his fly mask to protect that eye from dirt, debris and flies that were attracted to the medication we were using on him. The fly mask never posed a problem as long as we kept it clean. When the weather got hot in the springtime, we used the fly masks on those mules that had sensitive skin around the eyes and who were prone to sunburn. They never had a problem seeing anything because looking through the fly mask was like looking through a screen door. During the storms like this one, the mask protected their faces from the pelting rain and hail. The rain actually washed the fly masks clean. When we have no rain, we just wash the masks as needed. Putting them back on when they are still damp, keeps the mules’ foreheads cooler in hot weather. At night, when they lie down in the deeply bedded stalls, the fly masks keep the shavings from irritating their eyes. With hygienic practices in the environment and regular stall cleaning and grooming, parasites and flies have ceased to be a problem. I have never had to put fly masks, or leg protection of any kind, on my donkeys or horses. In the case of this disaster, the fly masks came in pretty handy to safely lead them to their stalls…in the dark!
I walked through the barn one last time and checked to make sure everyone was okay. They were all drenched, but not stressed, as they munched their oats. I still wasn’t able to go out the front doors, so I made my way through Lindy’s stall. I had to wait another three minutes for the storm to subside again before traversing Lindy’s pen to the gate…side-stepping her huge hole…and then latched and chained her gate behind me. I could hear Spuds calling from the stall in the North Barn, “Hey, don’t forget ME!” I latched and chained the gate on his pen and went to the barn to fetch him. He was also a VERY happy Mini Donkey to be snugly tucked into his own “bed” for the night. I made the rounds in the North Barn to make sure everyone got their measure of oats before I left for the night. I took one last look and turned off the lights. I waited through yet another downpour before I closed the main doors of the barn behind me and headed for the house. It was 10:30 p.m. when I walked into the house. Whew! What a night!
I am so grateful that I have always been consistent and routine about the way I handle my equines. Handling them through this incredible storm was a piece of cake! Being consistent and routine about my actions wasn’t an easy task to learn, but through self-discipline and persistence, in the end, I was able to be consistent and win their trust! Now, my equines all know exactly what to expect from me and never get anxious about anything I ask of them. In the middle of a disaster such as this, they know undeniably that I will be there to rescue them and make them comfortable again. They don’t have to hurry; they don’t have to rush, just behave and do what I ask…and everything will be okay. When things are done haphazardly, equines get anxious. They never know what to expect and can become difficult during stressful situations. When you discipline yourself to be kind, respectful and reliable, they know they can TRUST you! And, TRUST goes a long way toward cooperation and safety for all of you!
To learn more about Meredith Hodges and her comprehensive all-breed equine training program, visit LuckyThreeRanch.com or call 1-800-816-7566. Check out her children’s website at JasperTheMule.com. Also, find Meredith on Facebook, YouTube and Twitter.
Proper conditioning of the young equine through a carefully sequenced program of gymnastic exercises is essential to the proper development of his mind and body. Spending time cultivating a smooth, fluid forward motion with rhythm and cadence will help him to develop properly and enable him to perform difficult movements more easily. Work with ground rails and cavalletti helps to build muscle, particularly in the hindquarters, which will help him carry your weight more easily through lateral movements, stops and lengthenings. Proper preparation minimizes resistance and frustration which will be apparent by the way your animal carries his tail. You may have noticed after the introduction of a few simple lateral movements, that your equine’s forward motion has become a little shaky again. It is now time to clarify to your animal the connection between forward motion and lateral motion. With his increased understanding of your seat and legs and by using a few simple exercises, this should be a fairly simple process.
Ask your equine to walk a 20-meter (approximately 60 foot) circle, maintaining rhythm, cadence, proper flexion and bend. Then, in rhythm, change your aids to a slight counter bend and ask for a turn-on-the-forehand, sending his haunches in toward the center of the circle until he is reversed. At the precise instant he is in position to start following the circle in the opposite direction, release your pressure on the reins and send him forward again with your legs onto the new circle in the opposite direction.
You will find that you must hold him back a little with the reins through the turn-on-the-forehand to keep his weight on his hindquarters through the turn, but to maintain the forward motion, it is critical that the release comes at the instant he has completed the 180 degree turn. While executing the turn-on-the-forehand, do not hold back on the reins with steady pressure.
Instead, complete the turn with a series of half-halts with your seat and a squeeze/release action with the reins. If you do this, your final release will come as a natural sequence to the turn and it will be in rhythm and harmony with your equine. You can do this exercise at the walk, trot and canter, slowing to the walk each time for the turn-on-the-forehand.
Next, you will begin to cultivate the turn-on-the-haunches. (Your equine’s lateral work on the Side Pass T-poles will have given him a little understanding of what this is all about.) Again, walk him on a 20-meter circle. Then, when you are ready to make the turn, nudge your equine rhythmically and hard with your outside leg, keeping your weight centered over his body with a passive inside leg.
Maintain contact with your outside rein so that his head remains straight, and lead him into the new direction with a squeeze/release action on your inside rein and back it up with a rhythmic squeeze-release from you leg on the opposite side from the leading rein. Be careful not to inhibit his forward motion. It is better that he do small circles to complete the turn than to fall back over his haunches into a reinback. As in the turn-on-the-forehand, nudge and give, squeeze and release—a Longears (mule or donkey) will lean hard against continuous pressure. Keep practicing this exercise, maintaining his body between your aids.
When he does well at the walk, you can move on to the trot and canter, slowing to the walk for the turn. And even if your equine makes a mistake, remember to praise him for his effort and go on. If you do this, you will find him to be a much more cooperative partner and eventually you will succeed at what you have set out to accomplish.
Once your equine gets his footwork figured out through these turns, and has had the chance to build up his body physically, you can think about increasing the demand for speed and finesse in the turn-on-the-haunches , but that will come much later. To attempt any more than this right now will most likely destroy his forward motion, cadence and rhythm, and will cause much frustration and fatigue. Working a mule along the fence will help him to keep his pivot foot planted throughout the turn. It is an excellent exercise for improving the quality of the turn-on-the-haunches for Reining and cow work, but because of the sensitive nature of the animal and his slow physical maturation, it usually causes too much stress and frustration on younger animals if attempted too early. The equine may even perform well for a couple of years after quicker training, but before long he will sour on the movements. He will anticipate and possibly even
begin to run off with you to avoid doing them. It’s better to take it slow and easy and maintain your rapport and understanding with him. After all, equines that are brought along slowly will generally live a lot longer, so why get impatient and try to do too much too soon? Wouldn’t you rather have a long-lasting and pleasant relationship with a animal that is happy with his work?
Your equine will not require the crimped oats reward while he is under saddle, but be sure to give him plenty of oats BEFORE the ride and then again afterwards to make sure he understands that he has done well. This will assure that his good behaviors will be repeated. When you praise your equine lavishly for successes, and stroke him gently and calmly if he makes a mistake, you will solidify the relationship between you!
To learn more about Meredith Hodges and her comprehensive all-breed equine training program, visit LuckyThreeRanch.com or call 1-800-816-7566. Check out her children’s website at JasperTheMule.com. Also, find Meredith on Facebook, YouTube and Twitter.
“Leverage” equipment refers to any restraining device or substance that is used to get an equine’s attention and obtain compliance, but many leverage practices often have the reverse effect and have the potential to cause distress and pain. This includes harsh bits, chain leads, twitches, hobbles, stocks and even medications. There are times when our equines can really be a handful, so having a little leverage when needed can be a good thing. However, deciding which equipment to use and learning how to use leverage without it becoming abusive can be a bit daunting. There are so many different types of tack, equipment and restraints that it becomes difficult to determine which would be best to use on your equine to correct a particular problem, or if you really need to use anything at all. It may only be a case of needing to be clearer in your approach, in which case, leverage equipment may not be needed. It is important to make an informed decision when using any leverage equipment to be sure that what you are using is helpful and not abusive.
One very common behavioral problem that seems to identify the need for more leverage is the mule that bolts and runs when on the lead rope. This seems like an obvious disobedience to the handler, and the first thing that comes to mind is to use a lead shank with a chain to gain control of the mule. Normal use for a lead shank is during a Showmanship class at a show and it should rarely be used in training unless the equine will be shown at halter and/or showmanship. And then, training with the lead shank should be done only after the animal is following well through all required movements while in his halter and on a lead rope.
Chains are severe and when not used properly, can damage the fragile bones in the underside of the jaw, and the cartilage and bone over the nose of the equine. If the chain is pulled while simply run under the jaw and attached to the ring on the opposite side, a quick jerk can bear down hard into the delicate mandible (jawbone). If the chain is run over the nose, when abrupt pressure is applied it can injure the nasal cartilage or the incisive bones. Because they occur internally, these injuries are often imperceptible to the human eye. The only thing you might see is broken skin, scabs or bumps that arise from repeated use. When properly fitted, the chain on a lead shank goes through the ring of the halter on the left side, threads under the chin and through the ring on the right side of the noseband, and is attached at the throatlatch ring on the right side. This keeps the halter balanced and the action of the chain less severe. When using the lead shank for leverage during training, it can work on some animals but others may decide to fight which can result in injuries such as fractures, causing more severe trauma to these areas. So it is best to avoid use of the lead shank until after completing leading training with the halter and lead rope. Even then, you should learn to use the lead shank properly with the least amount of pressure possible. Avoid using halters that are made with chains. Those types of halters should only be used when showing cattle and can do serious damage to equines.
If, after you’ve employed a kind, considerate and respectful approach along with a food reward, your equine is still being uncooperative, it may be appropriate to use equipment with more leverage such as the “Quick Twist,” but not necessarily chains. Chains do need to be used in some cases, such as with work harness (and most curb bits are now fitted with chains), but when not used correctly, these chains can be abusive. The chains on the pleasure driving harness should clear the legs and heels of the driving equine, and the chin chain on a curb bit should be adjusted so that it is twisted properly and lies flat against the animal’s jaw with an allowance of two fingers between the chain and the jaw, thereby minimizing any chance of injury. If you have a generally compliant equine, it is better to use a leather chin strap on your curb bit rather than a chain.
If, after you’ve employed a kind, considerate and respectful approach along with a food reward, your equine is still being uncooperative, it may be appropriate to use equipment with more leverage such as the “Quick Twist,” but not necessarily chains. Chains do need to be used in some cases, such as with work harness (and most curb bits are now fitted with chains), but when not used correctly, these chains can be abusive. The chains on the pleasure driving harness should clear the legs and heels of the driving equine, and the chin chain on a curb bit should be adjusted so that it is twisted properly and lies flat against the animal’s jaw with an allowance of two fingers between the chain and the jaw, thereby minimizing any chance of injury. If you have a generally compliant equine, it is better to use a leather chin strap on your curb bit rather than a chain.
If you train for leading with a step-by-step program that incorporates a reward system during training, the mule is much less likely to bolt and pull the lead rope from your hands, and horses will not need any more leverage at all. This kind of training invites the equine to remain with you and he is rewarded lavishly when he does. If a horse spooks, you can usually stand still in balance, hang onto the lead rope and quickly regain his attention by staying calm and deliberate yourself.
Normally, mules learn to comply with the reward training. However, if a mule has been spooked, he may not care much about the reward in your fanny pack and you might have the need to use something with more leverage. In this case and in cases where a mule doesn’t always comply willingly, I use a new positioning of the lead rope called a “Quick Twist.”
To employ the “Quick Twist” restraint, just take your lead rope and create a loop and feed it through the noseband of your nylon halter (rope halters are too loose and do not work) from back to front and then over the mule’s nose. When you pull on the rope, it will tighten around the end of the his nose below the incisive bones and over the cartilage, making breathing just a little difficult. Don’t keep pulling—just stand quietly and hold the tension snug. Let the equine come forward to you and slacken the rope himself by coming forward and allowing a free flow of air through his nostrils. Then, if the mule does not follow, just walk a step or two, creating tension on the rope, and then stand still again. When he does come forward, stop long enough to reward him with the oats reward before you proceed forward again. Keep the lead rope short and stand still in a balanced way so he cannot get ahead of you and jerk you off your feet. If you are standing still in a balanced position, it will be difficult for him to jerk the lead rope from your hand and leave.
Old-time twitches were made with a chain that could be twisted around the upper lip and used to distract the equine from shots, tube worming and the like, but the main focal point for the equine then becomes the equipment and not the task and, in the wrong hands, this piece of equipment can do a lot of damage to the equine’s sensitive upper lip. Most often, the equine can be more easily distracted by a simple rap on his forehead using your knuckles. Using a twitch at all can become a source of confrontation for many equines. If a twitch must be used, choose a more humane one that is made from aluminum and has a smooth surface. This will clamp down tight enough to hold, but not so tightly on the upper lip that it causes pain or even injury.
Restraints should not be used as a means to control your animal except for a short period of time with the purpose of showing them a correct behavior. Restraints should be used as a support and not a controlling device. Restraints should be “phased out” as soon as possible.
I call this next restraint method the “Face Tie.” For the sake of safety, tie your mule to a good stout hitch rail. Then use our Face Tie technique (TMD DVD #2), running the lead rope around the hitch rail (or fence) and back through the noseband of the halter (nylon halters work best for this). Then come around a second time and loop it through the throatlatch part of the halter and around the hitch rail once more and tie it off. Take up the slack slowly as he gives and be ready to reward him with oats when he complies, then keep taking up the slack until his face is against the fence or hitch rail.
Do not try to bully him into it or he will just pull back. This should be done while he is standing parallel to the hitch rail so that when you pull the rope tight, it pulls his head tightly sideways to the hitch rail. This will keep him from being able to swing his rear end around to block you. Reward him with oats and let him quiet down in this restraint before approaching with your shot. If he manages to keep you off the clear side, you can always go to the other side of the hitch rail and give him the shot from that side without fear of injury. You can do this along a stout fence provided the rails are sturdy. If you do this correctly, it will simply restrain him in a safe manner and keep you out of the line of fire. Each new time that you give shots, try to do it with the rope a little looser each time to fade out the restraint. They will usually just come to expect and go for their position along the hitch rail or fence and will lean into it like they do when you first gave the shots like this. He will soon learn to quiet down immediately when his face is being tied and at best will seem to be saying, “Dang, do we have to do this again?!” But, he will learn to comply.
This is a humane restraint for mules and donkeys, but do not try this with a horse! This is a good restraint to use (and fade out) for any Longears that is difficult to worm, give shots, take blood, clip bridle paths and to use for those that are difficult to bridle. When using the Face Tie for bridling training (or clipping the bridle path), you will only need to go through the noseband and hitch rail (and not through the throatlatch unless you need to prevent them from turning into you). Just make sure when you put on the bridle that you “protect” their sensitive ears with your hands as it goes on and they will learn to trust you. Put the bridle on over the halter for the lessons until they don’t mind the bridling process.
If they lean away from you, you can just pull on the halter to bring the head back to you to finish bridling. Each time you use the “Face Tie” method,” see if you can leave it looser each time until they just stand for putting on the bridle while it is at its loosest. Then you will no longer have to use it.
Keep your lessons short, only 20-40 minutes (depending on how compliant they are) every other day and never two days in a row. They need a day off to ponder what they have learned and when they are allowed this break between lessons, they will come back the next time and do the tasks more easily. They usually leave because they perceive the lesson to be either too long or too difficult (and they would rather play!).
It is always better to not use the Scotch Hobble if you do not need to do it. If your donkey will pick up his feet for you, just give him the opportunity to “meet” your farrier by having him give him a handful of oats. Then see if he will yield his feet. If not, then you go ahead and pick up his foot with the farrier standing beside you, give him the reward for picking up his foot and then hand it off to the farrier while you back up and continue to feed him small handfuls of oats for compliance. Eventually, you should be able to step away and just have a bucket of oats in front of him to eat while the farrier is working on him (and take it away if he won’t comply). If he has a friend, it is always best to do donkeys in groups. They stay calmer that way. Try this FIRST!
Your Longears will only need the kicking training covered in DVD #2 (Simple touch training with a driving whip) if he is resistant to having his hind legs worked with and even then, you should try picking them up with the scotch hobble rigging first. If he kicks with that, just hold the rope taut until he quits. Then, hold the foot off the ground for a couple of seconds and release it where the foot will touch the ground again. He just needs to know that when you pick up the hind foot, you will return it to him if he is good. During all of this, be sure to reward when he is standing still. If he complies easily about picking up his feet easily after trying to pick them up with the rope, you may not need to use the Scotch Hobble in it’s ultimate constraining position.
To employ the Scotch Hobble in its entirety, tie a Bowline knot loosely around the neck. Depending upon the size of the animal, the rope should be 16’-22’ long. Take the excess rope down to the pastern of the hind foot, loop it around the pastern, then back up through the loop around the neck, then back round the pastern a second time. Last, loop the rope around the ropes going from the pastern to the neck to capture them and tie off with a safety knot at the neck loop.
Only tie the Scotch hobble as tightly as is needed, and it is best to leave the toe touching the floor for balance. In some cases, you may have to tie the hind legs higher to prevent kicking on the off side, but be prepared to loosen the rope when the animal stops struggling with his balance. Remember that they can tire and not be able to continue to stand for long periods of time.
When taking the first wrap on the pastern of the hind leg, take the end of the rope well behind him and encourage him to step over it, keeping yourself out of kicking range. Then bring the rope along his side to the front and slip it through the loop around his neck. If he won’t let you go through the loop around his neck, you can just hold the rope taut around his pastern without putting it through the loop first and just allow him to settle before putting it through the loop. Just be very patient. When you get to this point, many animals will begin to kick. Just stand to the side, out of biting and kicking range, and keep the rope taut. Just hang onto it with both hands and stand quietly until he stops struggling. Allow your hands to follow a pull and release with the motion of his leg. If you allow your hands to move forward and back with the pulling of the rope and keep it taut, it won’t come off the pastern. Don’t try to hold his foot stationary at this point. You can easily step out of his way from this distance and position.
When he stops struggling, keep the rope the same tautness, walk to his head and give him a reward for standing still. Pet him and then proceed to go behind him again and take the second loop. Again, stand to the side if he begins to kick and wait for him to stop, allowing your hands to move back and forth with his kicking leg, maintaining the tautness in the rope. This is a give and release action that should not make him as mad as trying to hold the rope tight. Again, when he stops struggling, he is entitled to a reward.
If you do it this way, slowly and in small steps, you will not aggravate him as much and he will be more likely to comply. If you have been patient and meticulous while doing this procedure, tying the last knot around the neck rope should not be a problem, and you will not run the risk of him escaping from it.
Use a soft cotton twisted rope of the correct length measured to your animal for ease and to avoid chafing for the best results. It need not be traumatic if you proceed this way. Use the Scotch Hobble as needed, but each time, tie it as loosely as you are able and still have him stand still. For example, if you have had to raise the toe, don’t raise the toe and let it touch the floor. Next time, have the toe touch the floor with the ropes loosely tied. Next, take only one loop around the pastern, keep the rope fairly loose and tie to the rope around the neck. Lastly, just take the rope to the hind foot, around the pastern and let it lay on the floor. Next time, you won’t have to use it at all. Your goal is to phase out the restraint entirely.
A lot of activity when trailer loading can cause the equine to become anxious and noncompliant and he becomes overstimulated. When having difficulty loading your equine, things will usually go better if you simply give him time to survey the situation.
Do not allow him to back away from the trailer. One step at a time while offering a food reward (and a food reward waiting inside the trailer), with frequent pauses and encouragement to move forward from behind with a tap of the whip, will usually accomplish the task without confrontation. Most equines will willingly follow you right into the trailer if prior obstacle training has been done properly and successfully. Leverage equipment such as butt ropes only refocus the equine’s attention on the equipment and will result in a confrontation.
Hobbles are another form of leverage equipment and there are many different kinds of hobbles for different purposes. The hobbles that have chains on them should be avoided, as the equine can become entangled and the chains can do damage to their legs. Thin leather hobbles or coarse rope can chafe the hair right off the skin around the pastern and can cause severe abrasions that may never heal. Thick leather hobbles are best, as they will break when under extreme stress, releasing before damage to the equine is done. If so inclined, all mules and some horses can gallop in hobbles, so hobbles really aren’t all that effective for leverage. Tying onto a hyline (a rope suspended high between two trees that acts as a hitching line for overnighting equines in the mountains) is a better choice, and if the horses are tied, then the mules should not have to be tied or hobbled because they will generally stay with the horses. Personally, I only use hobbles in a controlled situation at the work station when body clipping my equine’s legs for show.
Sedation and tranquilizers are another form of leverage that is used all too often and, in some cases, can be very dangerous. Mules and donkeys may receive the correct dose, but they can be unaffected when they get over-stimulated, excited and confrontational. They can actually “pop out” of sedation if they get excited enough to release adrenaline in their bodies. In these cases, administering another dose of drugs can easily become an overdose and could result in death. Sedating an equine that is to be trimmed or shod can be dangerous for both the farrier and the equine because the animal is not able to stabilize his balance and his reactions are, for the most part, uncontrolled. The farrier may not have time to get out of the way and the animal could stumble into trouble.
Power tools can be of help to a veterinarian or an equine dentist when doing teeth. Old-fashioned rasps are safer than power tools, but they are clearly more of an aggravation to the equine. However, if power tools are to be used at all, they must be carefully monitored. When floating teeth, the equine dentist must be skilled in the use of his grinding tool and should do only what is necessary to remove sharp points on the equine’s teeth. Power tools can be a good thing when you are dealing with an equine’s mouth and jaw, as having their mouths held open for long periods of time is very tiring for them, so speed is essential, but accuracy and skill are also essential.
I do not approve of using power tools on the equine’s hooves at all. In order for the equine’s body to be properly balanced in good posture, the hooves must first be properly balanced. Power tools cannot possibly shape the hoof with proper curvature in the sole, alignment of angles and equal balance over the hoof walls with appropriate pressure to the heels and frog.
This demands hands-on custom sculpting, as each foot on each equine will be different and all four feet need to be aligned with each individual’s legs and body in mind. The hooves are the basic foundation for the entire body, so they must be done correctly or everything else will be off. This is especially true with the tiny hooves of mini donkeys and mules. Minis can often be kept calm for trims simply by keeping things at their eye level and rewarding their good behavior with crimped oats.
There are things that may seem to allow for shortcuts through certain tasks, but when you are dealing with living creatures there really are no shortcuts. It is always better to take the necessary time to implement training techniques that allow your equine to learn and grow in a logical, step-by-step process that will not overwhelm him or bombard him with too much stimulus at any stage, so that he can become a comfortable and cooperative individual. If you use the correct methods right from the beginning, the need for excessive retraints (that can cause pain and even more resistance) will be greatly diminished and the long-term results will be undeniably better.
Covered in TRAINING MULES & DONKEY: A LOGICAL APPROACH TO TRAINING, TRAINING WITHOUT RESISTANCE, TRAINING DVD #2 and EQUUS REVISITED at www.luckythreeranchstore.com
People have often asked me how on earth can only three people—my daughter, my husband and myself—manage to prepare and show as many as 18 head of mules and donkeys for one show?! They say that we must be crazy, and maybe we are a little crazy, but a few simple rules of organization have made this possible.
The first consideration is the grooming of the animals themselves. Anyone who has had to body clip an animal knows how tedious and time-consuming this can be. Mule and donkey hair does not appear to grow back as quickly, nor as radically, as does horse hair, so you can clip your mule, or donkey, as far as 2-3 weeks in advance of your show and do touch up work just before the show. If you have no shows until summer, you may want to body clip in mid-April anyway. It is at this time that the winter hair begins to shed and the summer hair starts to come in. If you clip off the winter hair and blanket him for the remainder of the spring, the hair that grows in will be much more manageable than the heavy winter hair and will greatly reduce grooming time before the show.
Once the heavier coat is eliminated, a weekly grooming will keep his coat nicely maintained. Daily grooming before a show, or every other day, is even better. Each time you groom him before riding, check and clip as needed the muzzle hairs, around the eyes and ears, and around the coronet bands. Leave the hairs inside the ears to prevent irritation from bugs and flies, but trim the outside edges and backs of the ears. An ounce of corn oil in his feed daily will assure a healthy sheen in his coat on show day without the use of artificial highlighters. Trimming, or shoeing, your mule on a regular six-eight week schedule will assure that his feet will not need attending at the last minute. A routine vaccination, deworming, Coggins testing and a permanent brand inspection will make sure he is ready for transport to any show anywhere at any time. Then, all that remains to be done right before the show is minor clipping, bathing, and polishing hooves.
Each individual mule, or donkey, should have his own personal show halter and bridle for convenience. Driving animals should each have their own set of harness. This will help to reduce the time between tack changes while at the show.
Dress rehearsals before the show at home are quite beneficial. Prepare as if you are about to enter each class, one at a time. First, pick the clothing you will need to wear and store it in a designated place in your house. You do not have to actually wear them for the rehearsal. As you pick out the items, take note of the things that need to be cleaned or polished, and set them to the side of the rest of your other clothes.
Then, tack up your animal, checking each piece of equipment to make sure that it is in working order. Go ahead and practice the class. Then, as you unpack your mule, set the tack aside from the rest in your tack room for cleaning later. Do this for each animal in each class. Your animals will do better at the show if they get plenty of rest before the show, so it is wise to spend the day before the show cleaning your tack, clothes, and equipment. Before you begin to clean, load all the items into your trailer that are all ready to go without cleaning. Then, as you clean the remaining items, load them directly into the trailer as you finish them.
When the basic gear for you and your animal is loaded, make a checklist for feed, buckets, hoses, brushes, forks, brooms, and shovels, etc., that you will need for general care, load them, and check them off. When you have finished, lay out all the items that you will need for transport (i.e. sheets, blankets, shipping boots, etc.), so they are easily available. If you proceed in this manner, the risk of forgetting any important items is minimized. It is best to make sure that your trailer is fully loaded (except the animals) the night before you leave as this gives you overnight to think of anything you might have missed. Items such as your ice chest can be left until morning, or last minute, provided that you put them in a highly visible spot with a list of what is to be put in attached. Do not try to rely on your memory, as it will be clouded by the excitement and anticipation of the show.
If you are taking a number of mules and donkeys to the show, it is wise to bathe with soap at home the day before; then, cover the animal with a sheet or blanket and leg wraps. The day of the show, you would then only need to rinse, or vacuum, any excess dirt. This will minimize grooming time at the show.
Post the show schedule where you will be tacking up for each class and organize your clothing and equipment such that it is ready to go and easily accessible. Once the show actually begins, you will not have time to go hunting for misplaced items. Take note of your clothing changes and wear things that are easily changed. For instance, if your Western classes are before your English classes, you can wear your breeches underneath your Western slacks and chaps. Changing from English attire to Driving and Side Saddle attire is easily done by wearing your English clothing, then, simply change your headgear and add a lap rug for driving, or an apron for Side Saddle. Changes of your boots are pretty much optional, as English boots are easily hidden beneath properly fitting Western chaps and are appropriate footwear for English, Driving and Side Saddle.
If classes are spaced fairly close together and you are using more than one animal, it is wise to tack up the other animals ahead of time so they are ready to go. If you are using only one saddle for more than one animal, the other animals can still be bridled with the halter slipped over it, so they can be tied and waiting. Be sure to tie up the reins so they will not be chewed or stepped on. If you are using the same mule throughout the show, tacking and stripping should not be too time-consuming if your equipment is well organized.
Shows should be fun and exciting, but it can easily turn into a nightmare when things are out of place and chaotic. Make your motel and stabling reservations early and leave for the show well ahead of schedule to allow for breakdowns or other unforeseen emergencies. By all means, bring friends to help you, but give them a briefing and a list of jobs they can do. They won’t be much help if they have to keep asking what to do the day of the show! If you are going any distance at all, have your truck and trailer checked over thoroughly before you leave. There is nothing more frustrating than a major breakdown on the roadside with a trailer full of animals!
In summary, with routine grooming, farrier care, vet care, regular Coggins testing during the show season and permanent brand inspections, you can greatly reduce your show preparation time. Dress rehearsals, individual tack for each animal and organized loading will assure that all your tack and equipment will be readily available. Advanced motel and stabling reservations will afford you and your animals much needed rest when you arrive. Having your truck and trailer checked before you leave will make sure that you arrive in plenty of time. And, organization of tack and equipment when you do arrive will heighten the chances for an enjoyable and relaxing show!
Covered in TRAINING MULES & DONKEY: A LOGICAL APPROACH TO TRAINING, TRAINING WITHOUT RESISTANCE, EQUUS REVISITED and A GUIDE TO RAISING & SHOWING MULES at www.luckythreeranchstore.com
Many common horse training techniques used today work well on either horses or mules. However, being creative and using less technique with a more logical approach to training works better with donkeys. In the case of the “rein back,” the problems are universal. Some equines seem to “rein back” more easily than others. Similarities exist within the equine species regarding personality types, but there are also differences in environmental behavior during training. Horses that are resistant to backing either shake their heads violently from side to side or rear up and try to throw themselves over backwards. Resistant mules try to walk sideways or forward, and resistant donkeys are either stone statues or terrific “leaners.” All of these tendencies are an expression of discomfort in the equine and can pose serious problems for the trainer.
In order to get the best results, before teaching an equine to “rein back” you must understand the animal’s body mechanics and his mental attitude. The “rein back” is a reverse, two-beat, diagonal gait. When executing a straight “rein back,” the equine is unable to see what is directly behind him, but he can see peripherally on both sides. Because of the way the eyes are set in their head, mules can actually see all four feet when facing straight forward where a horse cannot. The depth perception of an equine is questionable at best, but when an equine must “rein back,” his vision is even more impaired because he can’t see directly behind him. This causes him to become tense because the equine must trust the trainer not to back his precious little rear into anything that might hurt him! If the trainer has been even a little abusive in the past, the equine will not be able to trust and will become resistant. On the other hand, if the animal has been brought along well and is being asked to “rein back” on the long lines, he may simply not want to “back over” the trainer. This could be perceived as disobedience when it is only consideration for the trainer.
In order to execute a straight and smooth “rein back,” the equine must be able to lower his head, round his back and step back and underneath himself easily with the power initiated from his hindquarters. If the rider has not prepared his equine for the “rein back” by allowing the animal to take one step forward first and round under his seat, the animal will be resistant. This is why one step forward before executing a “rein back” is essential. Otherwise, the equine may raise his head and hollow his back, making it very difficult, at best, to perform the “rein back.” If you have trouble visualizing this, get on your hands and knees and try it yourself to see how it feels, first with a hollowed back and then with an arched back.
Before you begin to “rein back,” take that extra couple of seconds to relax and prepare your animal. First, let him take one step forward. Then, alternately, squeeze your reins and ask him to lower his head a little (not too much at first). Keep your legs snugly hugging his barrel, and lift your seat ever so slightly by leaning forward just a little. Check over your shoulder to be sure that he won’t back into anything. Then, with corresponding rein and leg cues, squeeze and release alternately from side to side: first, right rein, right leg; then, left rein, left leg. By pulling first on one side and then the other, you actually allow him to see more directly behind, thus eliminating much of the apprehension that he feels when he cannot see. Pretend that you are pushing him backward with your legs, directly after giving a gentle tug on the corresponding rein. In the beginning, be satisfied with one or two steps, and don’t forget to praise him.
Do this exercise in a two-beat fashion, with the squeeze/release action on the rein coming only a split second sooner than the corresponding leg. This prevents the hindquarters from resisting, and it is here where most resistance in backing originates. If you pull both reins at the same time, the hindquarters are not affected and this may cause considerable resistance. Animals that learn to “rein back” correctly will eventually learn to “rein back” on a mere tug of the reins and a shift of your body weight, but that is not the way to begin. Speed comes much later.
Horses and mules learn to “rein back” more easily than donkeys. As far as donkeys are concerned, why go backward when you can turn around to go forward? Because donkeys have a natural agility, this is not such a far-out way for them to think. However, if a donkey tried to turn around on a narrow trail with a rider aboard, his balance could be severely affected. Chances are, the donkey would make it, but the rider might not. The donkey needs to learn to “rein back” on command, because safety is of the utmost importance.
The simplest way to encourage your donkey to “rein back” is to ride or drive him into a three-sided tie stall, or anywhere that he has no way to escape but backward. Ask him to “rein back” with the cues outlined, and praise him for each step backward. If you are ground driving, just alternate long line pressure while you step backwards in unison with his back legs. Keep your squeeze/release action on the long lines minimal—pulling on your donkey’s mouth too much will only defeat your purpose. If your donkey is hitched to a vehicle, make sure that the weight of the cart or carriage that he has to push is not too heavy for him to manage. Adjust the breeching tightly enough so that your donkey can lean into it with his rear, and be sure that it is not so low that it will inhibit the motion of his upper hind legs.
If you have checked all of these factors and your donkey still will not back out of the stall, ask someone to act as your assistant, and have them wave a fearful object (such as a brightly colored scarf or plastic bag) low and in front of your donkey. He should dip his head to focus on the object (arching his back) and begin to “rein back,” apply the proper squeeze/release cues and after a few steps, reward him. You have set up a situation in which you can predict that his reaction will be the correct one. Once he has done this a few times, he should begin to make the connection between your cues and his action. Always keep your cues gentle, but clear. Be prepared to immediately praise those first one or two steps, and don’t ask for too many steps too soon. Just as an animal is conditioned to perform any other maneuver, his body must also be conditioned to “rein back.” Doing a “rein back” without conditioning the muscles that will be used can cause injury. Taking it slowly and cautiously diminishes the chance for resistance. Work up your speed in the “rein back” only after your equine is backing straight and easily. When he has had time off, be sure to take the time to recondition those muscles before again asking for speed.
I can’t count the hours that I have spent sitting on-board my donkey, waiting for a foot to move, giving the cue to just one side over and over again. Patience is the key to success with any animal, but with donkeys, it’s a necessity. Be patient and deliberate with your training. Don’t get upset, and don’t try to be forceful. Remember, he has to move sometime. Even donkeys get bored standing in one place for too long!
To learn more about Meredith Hodges and her comprehensive all-breed equine training program, visit LuckyThreeRanch.com or call 1-800-816-7566. Check out her children’s website at JasperTheMule.com. Also, find Meredith on Facebook, YouTube and Twitter.
Learning to go through a gate with respect and consideration for the handler is an important lesson for your equine to learn. Your considerate and consistent approach to retrieving him from his stall, pen or pasture can make all the difference in safety and pleasure for you both. This begins from the time you take him from his stall. Do not go into his area, but rather, ask him to come to you. If you have been consistent rewarding your equine from your fanny pack with the same oats he gets fed every evening, this should not pose a problem. The reason for feeding the oats in the evenings is so he is given the motivation to come back in during the spring months when pasture time must be limited. Feeding only grass hay in the morning gives him incentive to come to you to be haltered for lessons, as he knows his efforts will be rewarded with extra oats. Use verbal commands to “come on!” prefaced by his name. This reinforces his response to verbal commands and familiarity with his name. This will come in handy when you need to fetch him from a pen of multiple animals.
Going through a gate seems simple enough, but you can really get into trouble if it is not done correctly. Ask your mule to follow your shoulder to the gate and halt squarely, and then reward him (crimped oats) for standing quietly while you unlatch the gate. When going through the gate, if possible, the gate should always open away from you and your mule. When the gate is hinged on the left, transfer your lead line from your left hand (showmanship position) to your right hand, and open the gate with your left hand. Switch positions if the gate is hinged on the right, but always be sure to keep your body, rather than your mule’s body, closest to the gate. Ask your mule to walk through at your shoulder, to turn and face you on the other side of the gate, and to follow you as you close it. Then reward him again and latch the gate.
After latching the gate, turn back to your mule and reward him yet again for being patient and standing still while you latched the gate. This repetitive behavior through gates will teach him to stay with you and wait patiently instead of charging through, or pulling away from you. This is especially helpful when you are leading several animals at once. This way, you can get through a gate safely with as many animals as you choose to lead through together. Even if the gate is only two mules wide, you could lead as many as four through by simply lengthening the lead lines of the back pair, asking the first pair to come through first then encouraging the second pair to come through directly behind them before you turn back to the gate. When trained this way, your mules will all line up like little soldiers on the other side of the gate to receive their rewards. They will stand quietly while you latch the gate and will only proceed from the gate when you ask.
When you return your mule to a pen with other animals, wave the others away from the gate and return the mule to the pen the same way he was taken out. Lead your mule or mules through the gate, reward them, and then reward the others for staying back.
If you have any problems with kicking, carry a whip with you to keep the problem children at bay while you reward the others first. Do not vary this routine.
The repetition will build good habits. Once the others have learned that they cannot approach when you wave them away, and each mule knows the routine of going through the gate properly, and you want to take one animal from the herd, you can call his name, wave the others away with your hand, open the gate and allow him to come through and turn (receiving his reward, of course) to put on the halter. You never have to get in the middle of their sometimes-dangerous playfulness again, and your animals will all be easy to catch.
To learn more about Meredith Hodges and her comprehensive all-breed equine training program, visit LuckyThreeRanch.com or call 1-800-816-7566. Check out her children’s website at JasperTheMule.com. Also, find Meredith on Facebook, YouTube and Twitter.
We have all heard the numerous negative myths about mules that abound, but have you ever thought of a mule as a hero, as an extraordinary member of our society? The mule’s history can be traced back to Biblical times, and in those days, he was known as the preferred mount of royalty. Given his ancestry, this should not be surprising. After all, is he not the offspring of the chosen mount that Jesus Christ rode into Jerusalem? As Jesus was the Son of God, so is the mule the son of the chosen donkey. And he has much to teach us about ourselves and our world—if we could only learn to observe and listen carefully to what he is telling us. The mule can be a catalyst for health, happiness and prosperity, but we must learn to do our part in appreciation of him.
Although he is often confused with his sire, the donkey, the mule is the symbol of neither the Republicans nor the Democrats. During past political campaigns, certain Republicans actually declined to have their picture taken with a mule, because they were either ignorant of the difference between a mule and a donkey, or they were afraid that the mule would be mistaken for the Democratic Party’s symbol—the donkey.
As author Melvin Bradley notes, “Democrats in mule states have always been friendly to mule-loving voters. With a farm population of 25 percent of the total, votes from mule people could make a difference.”1As presidential candidate Harry S. Truman discovered, this was politically beneficial information and he used it wisely. Finally, on May 31, 1995, Governor Mel Carnahan signed a bill designating the Missouri mule as the official state animal.
When people are open and fortunate enough to be able to engage in intimate communication with the mule, they soon discover the redeeming and heroic characteristics of the donkey (that are naturally present in the mule). The donkey is the embodiment of various moral truths, which is why he is used as an appropriate hero in numerous fables. He possesses the ability to serve without judgment of his master. He is affectionate, thoughtful and humorous and carries his burdens without complaint. We are often dismayed by the true reflection of ourselves that we are destined to see while in his presence. The donkey is a creature of wonder and augury, and glimpses of these same characteristics can be seen in the mule. Although the donkey is the symbol of the Democratic Party, his effect on people is subjective and universal, and is not restricted to just one group.
I’d like to share one of my favorite stories, illustrating the mule’s legendary endurance and great heart. According to author Walter Rickell, “When General George Custer made his campaign into the Black Hills in early 1870, Buffalo Bill led him the first day as his guide. Custer and his staff were on their finest horses brought from the east, and they were prancing and ready to go. Suddenly, Buffalo Bill appeared on his little grulla Comanche mule, Mouse. Cody paid no attention to the way the officers ridiculed him and the mule—Cody had ridden Mouse before and found he could run a good lick, but his strongest point was his endless endurance. Custer, noting it was Cody’s intention to ride the mule, called a halt and informed him it was no time for pranks, that they had to travel fast, and Mouse could never stay out of their way. Cody said nothing, touched Mouse with his spurs, and led off, the column following. By the early afternoon, in terrific heat, the horses were lathered, and Cody had to stop several times for the column to catch up. The general was surprised that, at camping time that night, Mouse was still in the lead. Custer tried to trade his fine horse for the mule. Cody rode Mouse back that night over the same trail.”2
Mule stories from the past are numerous in this great country of ours. The number of mules (and horses) in the U.S. peaked in 1919, at 26.5 million. The United States of America was quite literally built on the backs of its mules—they pulled supply wagons in the cities, forged west with the early settlers across the vast prairies, packed hunters’ gear in the mountains, plodded underground with the coal miners and plowed the Southern cotton fields. They have participated in war alongside our brave soldiers, and have found their place in the field of entertainment. They even helped with the excavation of the Pasadena Rose Bowl.
After the onset of the Industrial Revolution, the number of mules in the U.S. declined, and in 1967, there were less than ten thousand. But happily, in recent years, renewed interest and public awareness have sparked a steady increase in the mule population.
Those who work with mules know that interacting with them can keep a person healthy and happy. The typical mule person gets up early in the morning to feed and water his mules, and then goes back to his house for his own breakfast. Then it’s back to the barn to harness or saddle up and make way for the day’s activities with the mules. There is much to learn from a mule in every interaction, and if he isn’t doing what we want, then we probably haven’t asked the right way. When we do, he complies and, in the process, teaches us about real patience, love, respect and good manners. There is no more loyal friend and companion than a mule. As the old mule skinners will tell you, you either love ‘em or you hate ‘em. You either get along with them or you don’t—there’s no in between with a mule.
Obviously, I have one of the worst cases of “Mule Fever” ever suffered! But then, here I am—older, wiser and without any broken bones due to my association with mules. In fact, I can say my life was saved by one of my own mules. I was on my mule, Mae Bea C.T., leading a group of four trail riders on horses up a switchback in the Rocky Mountains, when the trail began to get very narrow. It was 100 feet straight up on the right and 100 feet straight down on the left! I could not see very far ahead because the two-foot trail wrapped around a huge boulder and blocked my forward vision. As I rounded the boulder, with the horses right on my rear, I was faced with a trail that disappeared into a wide landslide of small rocks. I couldn’t go forward and, with the horses directly behind on the wider part of the trail, I couldn’t back up. The horses could turn around where they were, but I couldn’t. I waited for the horses to get turned around, and then indicated to Mae Bea C.T. that I wanted a tight turn on the haunches. She sat her rear back on her haunches and swung her front legs over the 100-foot drop in a smooth and effortless 180-degree turn, facing next in exactly the opposite direction. She then stopped and waited for my next cue to lead the horses safely back down the trail. I shudder to think what could have happened had she been a nervous horse.
“Mule Fever” happens when you find yourself hopelessly involved with a mule…or many mules! Suddenly, there is no other equine that will do. Many people liken a mule to a dog, but dogs are unconditionally faithful and submissive, whereas the mule challenges your soul. He innocently challenges you to be the best (or worst) person you can be—more like very young children would do. You might as well be tangling with an elephant if you don’t learn how to correctly ask the mule to do what you want. Most folks end up just dangling at the end of a lead rope or hanging on for dear life during a runaway—if they are lucky enough not to get dumped on the ground and possibly stomped on or kicked! If a person finally learns what a mule has to teach, there cannot be a more reliable, intelligent and loyal friend. At the end of a day spent with mules, one is tired, but it’s a good tired. The activity has increased circulation throughout the body, making the body tired and the mind alert. This makes for a good night’s sleep, and the next day, the cycle begins again—with joy!
Although the therapeutic value of the mule goes back as far as his own history, the idea of intentionally using mules for actual therapy did not come until much later. One of the most successful therapeutic stories involving mules is that of the Vision Quest Wagon Train. Vision Quest founder, Bob Burton, had a dream to use mules and the discipline and hard work of a real wagon train to help troubled kids. So, in 1976, the first Vision Quest Wagon Train was launched. In this life-changing program, 36 at-risk teens were required to spend one year traveling with six mule-powered wagon teams that went south in the winter and north in the summer. During the journey, the kids learned positive social skills and responsibility in caring for themselves and for their animals, with a solid success rate of 60 percent. (Mules really do make the best teachers!) Today, plans are being made on Facebook for a Vision Quest Wagon Train Reunion in 2012. Clips of the Vision Quest Wagon Train journeys can be seen on YouTube.
In 1985, an attempt was made by the Lynchburg Mule Trader’s Association, supported by the leadership of the Jack Daniels Distillery and U.S. Representative Jim Cooper, to designate October 26th as Mule Appreciation Day, in commemoration of George Washington’s receipt of Royal Gift, America’s first mammoth jack, from the King of Spain. Jack Daniels itself sponsored the first Mule Appreciation Day to gain publicity and support for the petition, which was passed by the House of Representatives by a substantial margin, but failed to pass in the Senate. The bill was later sent to a referral committee, where it languishes today. (Leave it to Congress to get our half-ass half-passed!) However, the spirit of mule lovers is undaunted—Mule Appreciation Day rose from the dead and has been celebrated ever since, even without the blessing of Congress. We red-blooded Americans love and appreciate our mules. Gratitude and appreciation are never outdated!
Covered in TRAINING MULES & DONKEY: A LOGICAL APPROACH TO TRAINING, TRAINING WITHOUT RESISTANCE, EQUUS REVISITED and A GUIDE TO RAISING & SHOWING MULES at www.luckythreeranchstore.com.
The purpose of tack and equipment has always been to give man leverage against the equine’s resistance during training, but I believe that the equine is “talking” with his resistance and this is a cue to find another alternative to achieve harmony when something isn’t working. There is an ongoing discussion about the use of cruppers and breeching when riding mules and donkeys, and even some horses. The purpose of both is to keep the saddle from sliding forward when the equine is in motion, whether he is tracking on flat ground or going up and down hills. Inappropriate use of both devices could give the equine problems. Whether or not to use a crupper or breeching is not an either/or decision. My equines taught me that in order to make an educated decision about which to use, one needs to take into account the anatomy of the equine and the effect that each has on his body in motion during different activities.
Good conformation is important in allowing the equine to perform to the best of his ability, but the tack we use has an effect on the equine’s movement in spite of his shape. In order to obtain freedom of movement, the elements of the equine’s anatomy must be allowed to move freely through every joint of his body. Energy and blood circulation finds open tracks throughout the body and when unobstructed, will run freely from the core of the body to the extremities in a healthy equine. Core and bulk muscles that are developed symmetrically support the skeletal frame, the cartilage and ligaments that surround the joints, and the tendons that tie the skeletal frame together. All work to support the proper internal organ functions and when the equine in good posture with symmetrical strength, they are unobstructed.
Many people have approached me with questions about cruppers. Their primary concern is that the crupper can break the tail when under pressure. If there is enough pressure put on the crupper to break a tail, then the crupper should break first! When the skeletal system is adequately supported with symmetrical muscle strength and especially over the top line, the animal is better equipped to use his body efficiently, tucking his tail and using leg muscles to support his own weight while his spine remains flexed upward along the top line to support the weight of the rider. The extremities have full range of motion so he can pick each step with confidence and no obstructions. An animal with insufficient conditioning will hollow his back and neck and try to compensate for his inefficiencies in muscle conditioning and movement. When pressure is put on the crupper of an animal with inadequate muscling, there is weakness over the top line and tail that will not support heavy weight of going downhill and could possibly do damage to the spine at the dock of the tail. Just for the record, I have done lots of trail riding and three years of cross country (3 miles, up and down hills, over twenty jumps) and have always ridden with a crupper on all of my mules with nary an incident.
Breeching originates with pack and driving animals and has a distinctive purpose to keeps loads from shifting on pack animals and to provide “brakes” for those in harness. Breeching generally has a “crupper” built in with straps on both sides to attach to the saddle and help to stabilize the load. But in each case, the breeching is being used with an inanimate object that will not resist against any adjustments or corrections that the animal might make in his own body. An unbalanced rider is more difficult for the animal to balance than an inanimate load. The equine can adjust his load with his own body movements, but he cannot easily adjust a live load that works against his balance like an unbalanced rider would inadvertently do. If using a crupper, the animal has full range of motion in his body and legs with the maximum strength to back up any movement that would help to correct the rider’s position and keep him over the equine’s center of balance.
The problem with breeching on a saddle equine is in the configuration and the way it sits anatomically. When going downhill, the breeching must be snug to do its job properly and it will keep the saddle from sliding forward. However, it also compresses the biceps femoris, a large muscle in the hindquarters that functions to extend the hip and hock joints, and also causes a flexion of the stifle, and a rotation of the leg inward. When pressure is applied to this area, it restricts circulation and extension of the hind leg backwards and causes compromises in the muscles groups resulting in asymmetrical conditioning. This doesn’t pose a real pressure problem going downhill. The stifle joint is configured so it can lock when needed through a stay mechanism between the stifle and hock, but it should still have the freedom of full range of motion if it is to function properly and not get unduly locked up. When the actions in the animal’s body remain symmetrical and orderly all of the joints, including the stifle, are able to function properly. The stifle will usually get locked up only when there are chaotic and unsupported directional actions coming through the joint.
When going uphill, however, the breeching must still be snug to do its job, but the animal is not allowed full extension of the hind legs, so more pressure is put between backward motion of the femur and the breeching. This results in compromised circulation, restricted movement in the hind legs and an inability to control hind quarter foot placement. In a crupper, the animal going uphill has full extension in his hind quarters, an ability to maintain good posture and balance and this results in exact foot placement to maintain that balance comfortably and safely.
The weight and ability of the rider will determine how much pressure is put against the animal and how much resistance it will cause. Even though mules can carry proportionately more weight than a horse of the same size, this doesn’t mean you can indiscriminately weight them down until their knees are shaking. Be fair and responsible and do your part in the relationship. Do not expect the animal to carry an obviously overweight body that doesn’t know how to control itself! Participate in training activities that prepare you both, first with groundwork and later under saddle. As you learn to ride correctly and in balance, you also learn how to ride supportively and take the stress out of going uphill and downhill. You will then find the crupper much safer and more efficient when riding in all kinds of terrain…even if you are a little heavier than you should be. You and your animal will be conditioned properly and he will be able to pick his way efficiently, safely and unobstructed!
To learn more about Meredith Hodges and her comprehensive all-breed equine training program, visit LuckyThreeRanch.com or call 1-800-816-7566. Check out her children’s website at JasperTheMule.com. Also, find Meredith on Facebook, YouTube and Twitter.
Until a decade ago, mules were used predominantly to perform work, primarily packing and plowing. How they performed this work was really of minimal concern provided that the jobs were accomplished. Today there is an expressed interest for well-mannered saddle mules like never before. The smooth travel and natural comfort of a mule ride coupled with their surefootedness and resistance to disease has inspired horsemen to change their mounts to mules or at the very least, add one to their herd. As more people express the need for well-mannered saddle mules, the need for better training practices becomes apparent. Granted, there are those who will always be content to just get on once a week and go for a ride. If the mule tolerates this, he is automatically accepted in the equestrian world and is considered trained. However, equines that possess this accepting nature are rare. Most mules and even horses will only respond when the correct approach is used. Most people are exposed to limited knowledge about equine management and training and will need the guidance of a trainer or instructor for safety’s sake. My friends Alan and Sally McClean of Golden, Colorado, decided to find out if benefits could be reaped from professional training.
In the spring of 1985, Alan and Sally came to consult with me about training their two fine saddle mules, “Bucky” and “Walter.” Sally had her leg in a cast. When I inquired about her accident, she told me that Bucky had fallen with her astride, pinning her leg underneath him. She told me that he had always been rather clumsy and tripped often, but she wasn’t sure if this could be corrected. Bucky had also been shown in Western Pleasure at the National Western Stock Show, where he refused to take his left lead. Walter’s problems were also seemingly minimal. He tended to be nervous about things in general after being on the racetrack for three years and refused to take his right lead. Neither mule was what you might call ill-mannered. It was apparent that they both needed help. The mules were clearly out of balance with little or no core strength to maintain any kind of real balance. The rider on board simply exacerbated the problem. These problems were making Alan and Sally a little apprehensive about using them very often and thus, decreased the amount of pleasure they could derive from their mules.
As problems such as these arise, we find that training is indeed much more than simply being able to ride your mule or any equine. The right kind of training enhances communication between equine and owner in addition to correcting questionable manners and behavior. The routine practice in training allows the animal to know what to expect of their owners, and what their owners can expect from them. Their manners and behaviors will be shaped accordingly, and stress and confusion will be kept to a minimum. The mule that is calm and easy to handle is truly a joy and a pleasure to his owner.
There are many mules that are calm and easy to handle. Each animal has his own particular set of idiosyncrasies that are unique to his situation. Some are more spoiled than others, but nevertheless generally cooperative. But what of those times of difficulty? What about taking only one lead, or tripping or falling? These are things a professional can help to correct. These are also things that should be corrected both for your sake and for the sake of your equine. His general health and your total enjoyment and safety are at stake!
Not unlike humans, mules must be taught how to carry themselves to make maximum use of their bodies. Overall muscle and skeletal conditioning is necessary for maximum performance that results in a sound body and a sound mind. The equine that has difficulty in picking his leads correctly is generally an animal that is not conditioned properly in good equine posture and balance. The muscles in his body are stronger on one side than they are on the other side which makes it painful and difficult for him to perform on his weak side. This only adds frustration to the whole situation when he cannot do what you ask. If you, as the owner, do not realize his physical limitations, it could jeopardize the whole relationship with your mule, thus limiting pleasure.
A professional trainer can be a qualified coach for you and your equine. His or her training program should include proper conditioning of muscles through a specific and scheduled series of exercises. The more difficult moves, such as sliding stops and spins, will come in natural succession as his body is strengthened. Frustrations are then minimized as the animal is able to perform. Most of us are contented with general knowledge about training. However, professional trainers, like athletic coaches, need to be able to evaluate each individual animal and decide upon a training program to suit his individual needs. Sure, professionals cost money, but they can also save you money by ensuring your equine’s good health and good manners. The “vet” bills you save could be your own!
In the case of Bucky and Walter, not only did they have difficulty with their leads, but their gaits were rough and one-sided. Correct body strengthening, balancing and conditioning was not the only problem. To add to their problems was incorrect shoeing. In Walter’s case, the shoeing had resulted in contracted heels on one side of his body, undoubtedly causing a lot of stress and strain when coupled with weak core muscles. More than incorrect shoeing, Bucky’s problem of tripping and falling was due to improper posture and body carriage. Today, both mules are strengthened, balanced and able to perform to the best of their ability. They are not put under undue stress when ridden and are noticeably calm and contented while being handled, and the ride they provide is much smoother. Alan and Sally were particularly pleased since their 15-hand mules will now stretch, lowering their backs about four inches which makes mounting much easier. What a pleasure they have become!
The benefits you will reap from professional training can be numerous. You will have a smoother ride because the animal is correctly balanced and strengthened in good equine posture. The animal will have more stamina, agility and endurance. He will have a higher resistance to disease due to increased circulation in good equine posture which greatly reduces vet bills and maintenance costs. There should be no worry about his behavior in public, but most of all, he will be an enormous pleasure to his owner and a credit to his breed.
To learn more about Meredith Hodges and her comprehensive all-breed equine training program, visit LuckyThreeRanch.com or call 1-800-816-7566. Check out her children’s website at JasperTheMule.com. Also, find Meredith on Facebook, YouTube and Twitter.
Do mules need to be shod? Those who are familiar with mules might be tempted to say, “No,” but the answer is a little more complicated than you might think. Although the mule generally has a tougher and more durable foot than the horse, all mules do not have the same feet, nor do all mules apply the same kind of stress to those feet. Therefore, each individual animal has to be considered when answering the question, “To shoe or not to shoe?”
It is commonly known that, when it comes to horses and mules, light-colored hooves are softer and more likely to break down under stress than are the darker, black hooves. Even though the black hoof is naturally harder than the light-colored hoof, if it does not contain sufficient moisture, it can become brittle and can chip away as destructively as can the lighter hoof. Whichever breed of equine you own and whatever the color of their feet, remember that good hoof care is essential for all domesticated equines.
For better or worse, an equine inherits his hooves through his genes. If your mule has inherited good feet—black, oily-looking, and with good shape—then you are fortunate and hoof care and maintenance should be relatively simple. If he has inherited a softer or misshapen foot, you will need to discuss more specialized care with your farrier.
Climate and weather greatly affect the condition of your mule’s feet. Damp weather and muddy footing will tend to soften the walls of any hoof, and perpetual exposure to mud and dampness can cause deterioration of his feet. With the light-colored hoof, which tends to soften more easily, this could spell disaster. It is wise, therefore, during damp weather or if you live in a damp climate, to provide a clean, dry place for your mule to stand. Conversely, extremely hot and dry weather can cause your mule’s feet to become dry and brittle, and they may start to crack due to contraction and expansion of the hoof. For this type of dry weather or climate, you may want to overflow your water tanks regularly so your mule has a place to “cool his feet.” If it is excessively dry, you may even need to manually lubricate your mule’s hooves as needed with one of the commercial products available. But before you use an artificial hoof lubricant, first check with your farrier to make sure that it is actually needed. Many people use hoof products too frequently, which can cause hooves to become too soft. When this begins to happen, you will see horizontal rings appear around the hoof wall, and sometimes, vertical lines. Try not to let the hoof get to this point by using lubricants sparingly, but if you see that these rings are beginning to appear, immediately discontinue use of the lubricant and allow the hoof to harden. Then check with your vet to make sure it is not a founder condition. It does not take much to adequately soften the hooves of an animal with rock-hard feet. During the really dry seasons, lubricant application once a week is usually sufficient.
Assuming that your mule has a normal set of dark, healthy hooves, he will probably not need to be shod, as long as he is used strictly for pleasure or only sporadically. However, if you are going to use your mule on excessively rocky or hard ground, you might want to look into getting shoes for him. Mules that repetitively participate in more stressful and demanding activities (such as parades, showing and endurance events) should be shod to protect their feet and to keep them healthy. Prevention of bruising or cracking and maintenance of good foot and leg posture is critical to the equine athlete.
The pack and pleasure mule that is not used much or is used on softer terrain and in places where he does not require shoes must still be trimmed for balance regularly to assure that his feet are evenly worn and that he is not putting undue stress on any joints, muscles or tendons. Failure to have your mule’s hooves regularly trimmed in order to maintain their balance and shape can result in an imbalance in your mule’s feet, which will then cause an imbalance throughout his entire body, inhibiting his performance. However, if trimming is done consistently, the risk of imbalance, accident or injury will be greatly reduced.
I believe that horses and mules, doing what they would naturally do alone—on terrain that is neither hard nor rocky—do not need to be shod. But mules that are asked to repetitively perform with a human on-board in varying surface situations should be fitted with the proper kind of shoes to help protect them from the additional weight and other demands that will be put upon their bodies. For example, my trail mules wear regular shoes on all four feet when they are being regularly used for trail riding and a variety of other activities, lessening the potential for injury. Then, when there is an occasional misstep on hard ground or rocks or when we trail-ride in the more challenging mountains, the shoes help to absorb some of the shock that would otherwise be absorbed by the hoof itself. It is my experience that young mules (and horses from two to four years of age) bear most of their weight on their front legs until their bodies are carefully and properly conditioned, and this is when you will see the most wear and tear on their feet. Because of this, my young mules that are just beginning saddle training wear regular shoes on the fronts only until their bodies are balanced and their activities clearly defined. Our broodstock, youngsters (under three years of age) and equines that are not used under demanding conditions can go barefooted year-round, but they all still get regular trims every six to eight weeks.
All my other stock is shod for the specific purpose for which they are used: The Reining mules wear slider plates during the competition season, and the jumpers are fitted with either regular shoes, a tap and die shoe with studs or a borium shoe for non-skid, depending upon the terrain they will be negotiating. If I were to ask one of my mules to race, I would fit him with the lighter-weight racing plates. Each equine athlete is given a set of shoes particularly designed for the best performance in his event, just as is the case with the human athlete. In the winter, if my mules have the need to wear shoes, I add rim pads to their shoes to help prevent “snowballing.”
Granted, there are a lot of mules that may not need to be shod, but there are also many that do need shoes, so each individual mule’s feet must be evaluated on a case-by-case basis. Because of this fact, the generalizations that “mules don’t need to be shod” and “all equines should go barefoot” are not always correct. You must take into consideration how your particular mule’s genetics affect his hooves, what he will be used for and how harsh the demands put on him will be on his feet. These important factors will determine whether or not he needs shoes, and if he does need shoes, what kind of shoes will best suit him. And don’t forget to check your mule’s shoes on a regular basis to make sure that all is well and that his shoes are staying on tight, but most of all, that he is comfortable and happy.
Covered in TRAINING MULES & DONKEY: A LOGICAL APPROACH TO TRAINING, TRAINING WITHOUT RESISTANCE, EQUUS REVISITED and A GUIDE TO RAISING & SHOWING MULES at www.luckythreeranchstore.com
“Imprinting” is a natural process by which an animal (most typically, when young) comes to recognize another animal or a person as a parent or other object of habitual trust. Imprinting is also the way any equine is touched when he is a foal and handled throughout his entire life. It is never too late to use imprinting with your equine, and the way you do it will determine whether or not he develops a lifelong confidence and trust in you. NOTE: Imprinting should not be utilized only when your equine is a newborn, and then never utilized again. Imprinting should continue throughout his entire life.
Equine foals must be allowed to play—running, kicking and rolling. This is how they exercise so they can grow up to be healthy adults. Like any baby or toddler, a foal cannot be expected to have perfect manners, so keep lessons short (10-20 minutes every other day at the most) and use good judgment when you are with him to avoid being kicked or bitten. If he does kick or bite while you are doing things with him, use the flat of your hand and give him a quick thump on the rump for kicking or on the side of his mouth for biting, accompanied by a loud “No!” He will probably run off, but should be able to be coaxed back verbally and fairly easily with soothing language and an offer of crimped oats. When he finally does come back to you, reward him with a nice pat on the neck, and then leave him to play. By doing this, you are letting him know that it is okay to play, but not to kick or bite. He has learned that bad behavior will elicit an unpleasant touch while his good behavior will illicit kind touch and soothing words. You can resume more serious corrective lessons later.
The most important thing to learn when training your equine is to dispense the crimped oats reward promptly and generously in the beginning of training, and only when your equine is complying (do not use anything but crimped oats for rewards). This will solidify the connection between the two of you and begin to establish a strong and mutually satisfying relationship. If, when haltered, your equine tries to pull away from you, just let go of the rope, reach in your fanny pack and offer the crimped oats to coax him to return to you. Remember not to try to progress through lessons too quickly, as this is usually what causes disobedience. Never chase your equine! Whenever at all possible, allow him to come to you of his own free will.
Before you begin your equine’s leading lessons—and during “tying” lessons—your equine should be rewarded frequently and whenever he is not pulling against the rope. This will help him to understand that he will be rewarded when the rope is loose so he is more likely to follow you when you do untie him and try to lead him. This concept is the same for each new task in each new lesson. Each time he easily complies, he should be rewarded. At this point you can move on to new lessons, but, in order to set him up for success, be sure to break down each process into small steps. Remember to always be generous with the rewards. An equine that learns to take the oats reward politely from your hand is less likely to bite you than one who has not had enough practice getting rewarded with the oats from your hand. When the correction for biting is done properly, your equine will learn not to be aggressive toward the reward and will learn to take them more delicately and gently from your hand.
If, as an adult, your equine gets too close or pushy, slap him on the side of the mouth with an open hand and a very loud “No!” Then put your hand up like a stop sign in front of his face. He should then step back or fling his head back, at which point you immediately step toward him and say, “Good Boy (or Girl),” and give him a reward for giving you your space. The next time he gets too close or pushy, simply put your hand up like a stop sign with a loud and abrupt “No!” This should be sufficient. Your equine should then be willing to back up and wait for the reward. You still need to be very consistent about when the rewards are given and when the correction is truly needed. “No” is the only negative verbal command you should ever give and should be the only word that ever denotes your displeasure so there is never any confusion (do not use any other negative verbal words or noises).
NOTE: Never leave a halter on an unsupervised equine. This is very dangerous! The halter can easily become snagged on something and can result in severe injury, a broken neck, or even death.
When thinking about the way horses, and particularly mules and donkeys learn, consider the way human children learn: They cannot accomplish many different tasks all at the same time. When tasks are not taught one by one and in a natural and logical order, confusion and failure are almost certainly guaranteed. If you want to have good results, you need to be working in a natural and logical order, with small enough steps that make sense to your equine. When training your mule or donkey, use a fanny pack filled with crimped oats, but do not offer a bucket of oats.
You should not even try to put on a halter and lead until your equine lets you touch him all over. Then you can approach with the halter. For instance, before you even halter your equine, ask him to come to you and then reward him with crimped oats when he does come. When he is consistently coming to you, the next step is to carry the halter with you without put it on him. Reward his approach toward you and his acceptance of the halter being present. Let him sniff and investigate the halter as much as he wants. Once he shows no sign of being at all bothered by the presence of the halter, you can then put the halter on him. When doing so, remember to always be polite and gentle. Reward your equine for the acceptance of the halter, and then try to loop your arm over his neck while feeding the crown strap of the halter from your left hand (from under his neck) to your right hand that is looped over his neck. This way, even if he starts to slowly move away, you can pull him back towards you with the loop around his neck and finish the process by putting his nose through the noseband of the halter. However, if he quickly jerks away, just let go of the rope. Then show him the oats and encourage him to return and try again, but do not give him any oats until he comes all the way back to your hand. Anytime he moves away, just ask him to return, but never chase him. Always make sure he comes all the way to you for his reward.
If you find that you are having difficulty during leading training, your own body may be out of good posture, causing you to take too many steps before stopping to square up. First, make sure you are in good posture. Then give the verbal command to “walk on.” Walk a straight line, pointing to where you are going with your right hand and keeping the left hand securely on your left hip. Make sure your steps mirror his front legs. Then stop, face your equine, reward him for stopping, make him stand squarely, make sure you are still in good posture and reward him for squaring up. Now just stand still for a few minutes, giving your equine time to settle and process what has just happened. Then reward him for standing quietly for a few minutes.
Next, turn and face the next direction in which you will be going, point with your right hand, give the command to “walk on,” and repeat the exercise. If done correctly, there will be many chances to hesitate a bit or stop between actions. All of these hesitations and stops will force your equine to pay attention and be ready for your next move. If you are performing each task in these smaller increments, he will be less likely to forge ahead. It will also give you the opportunity to do things slowly enough to get it exactly “right” and through repetition, your equine will be able to transform learned behaviors into automatic behaviors. If you try to hold a move too long or, on the other hand, do things too fast, your animal may not have time to properly comply, causing him to get confused, lose interest and engage in avoidance behavior.
You should not need to tug, pull or push. Just stand still in good posture when you stop and immediately stick your hand into the fanny pack and offer the reward. If you are doing all of this correctly, your equine might turn his head into your hand and swing his hindquarters around so that he faces you instead of stopping in his tracks. Not staying straight in his tracks is a temporary problem that you can fix by simply squaring him up after he has stopped and been rewarded. If he is forging ahead, one or more things are going on; either you are not doing things in small enough steps, not rewarding promptly enough to make him turn into you, or you are not using the fanny pack. These problems can be fixed by being more attentive to your own good posture and your movements, and to the times when he does cooperate. Keep lessons in small enough steps so he can be rewarded. This is called “setting up for success.”
You need to lead your equine with your left hand and shorten the lead rope, so he carries his head next to your right shoulder and cannot slip his head behind your back. He may try to walk ahead of you, at which point you can use your right hand to push his nose back into position. This will be very awkward at first and it will take time for you both to learn to do it properly. If he knows you are carrying a fanny pack of oats, he will be more apt to go in front of you than to follow you from behind or pass you, because he will be looking for the fanny pack. Again, use your free right hand to push him back into the correct position.
Without the reward, there is no incentive for him to do a task correctly, so always remember to dispense the reward promptly and appropriately, accompanied by a verbal “Good Boy!” whenever he correctly does what you ask. Do not spend more than 15 to 20 minutes every other day on lessons, as your animal can get bored and frustrated if you drill. At first, just practice “walk” and “halt.” When he has learned to stay at your shoulder, you can progress to the next step of halting and setting him up to stand squarely. Once he does this correctly, you can move on to trotting and turns. Remember—breaking the lessons into small steps, maintaining good posture and quickly rewarding will help your equine to achieve small victories because you are setting him up for success!
Covered in TRAINING MULES & DONKEY: A LOGICAL APPROACH TO TRAINING, TRAINING WITHOUT RESISTANCE and A GUIDE TO RAISING & SHOWING MULES at www.luckythreeranchstore.com.


 Instead of going on the road to do clinics, I thought long and hard and decided to do an equestrian correspondence training course instead. I opted for this after considering that when I went to clinics as a student, I was one of 20 people and only got limited attention during those clinics. When I put into practice at home what I had learned at the clinics, I realized that I had only received the highlights of training and it was full of holes! When I tried to contact the clinicians to ask a question, I was either answered by someone in the office, or not answered at all. The clinicians were most often too busy and out of touch. The one thing I didn’t realize by making this decision was the incredible learning opportunity I had opened up for myself that I could, in turn, pass on to my clients.
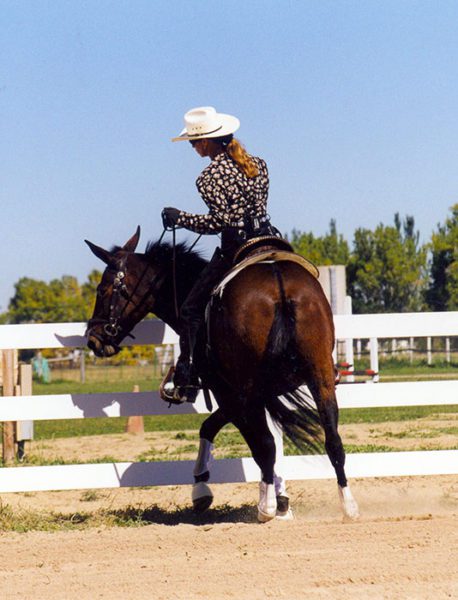 When they told me mules would not work well in a snaffle bit, I learned how to make that work. When they said they were not suitable for Dressage, I based my entire training program on those principles. When they told me not to give food rewards, I paid my mules for their efforts with a generous reward of crimped oats. When they told me not to talk to my equines, I spoke three languages to them: verbal language, body language and “touch” language. I can truthfully say that today I realize that it wasn’t the mules that were so stubborn, but rather…it was me! This positive kind of stubbornness did pay off, as I was to soon discover.
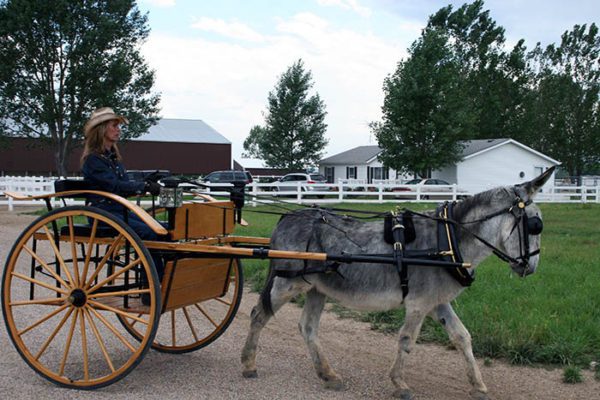 Little Jack Horner had gone through my entire training series right along with my mules and had learned everything that I taught them. He may not have made it to Fourth Level Dressage, but he made it to Second Level Dressage with gait lengthening and lateral work. He overcame his “donkey” behaviors and gave a phenomenal performance, jumping four feet in exhibition at Bishop Mule Days. His Reining was accurate though somewhat limited by his donkey conformation. Still, he could always elicit a supportive laugh and a wide grin! He competed successfully at dressage driving shows and won world championships in driving at Bishop Mule Days.
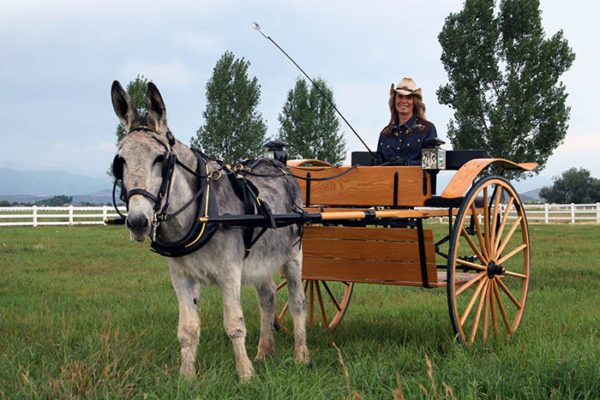 It was during this experience that I realized that Little Jack Horner had become deaf and could not hear one word of what I was saying, even when I was yelling. I was sitting in the Meadowbrook cart, he had blinders on his harness bridle and could not see me, so verbal language and body language were of no help to him at all. Lucky for us, we still had the “touch” language that we had developed between us and we thoroughly enjoyed the experience of driving yet again.

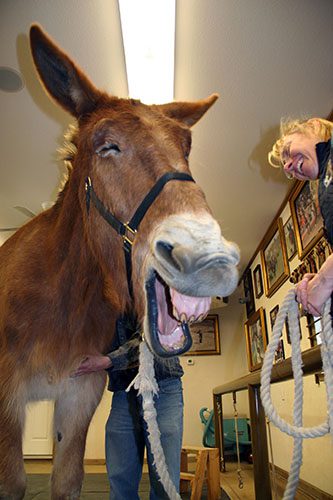

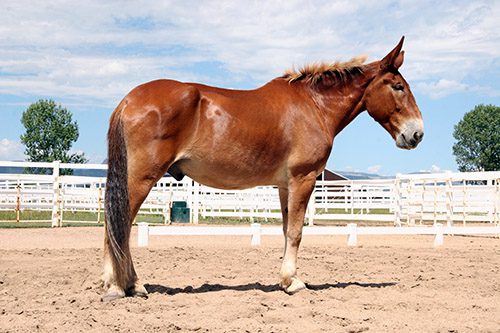

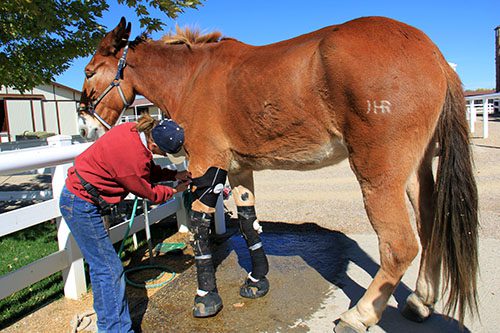

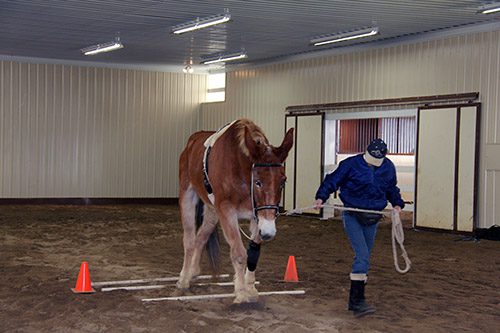


 No training series would be complete without examination of the principles and philosophy behind the training techniques. The philosophy of my training techniques is based on the principle that we are not, in fact, training our equines. In fact, we are cultivating relationships with them by assigning meaning to our own body language that they can understand.
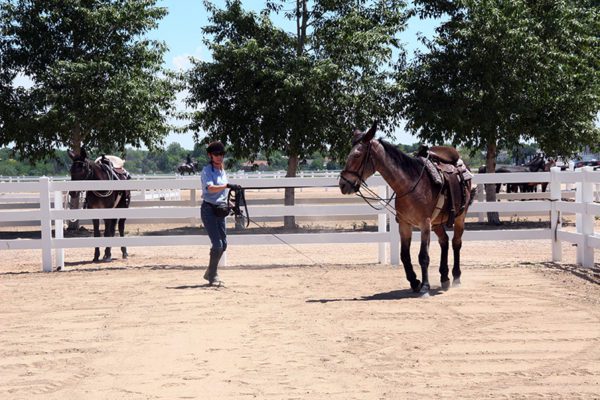 For instance, we had a 3-year-old mule learning to lunge without the benefit of the round pen. The problem was that she refused to go around you more than a couple of times without running off. Assess the situation first by brainstorming all the probable reasons she might keep doing such an annoying thing. Is she frightened? Is she bored? Is she mischievous? Has she been calm and accepting of most things until now? And most important, is my own body language causing this to occur?
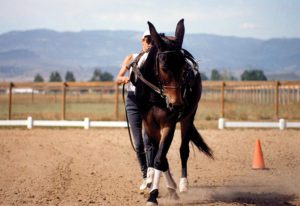 As mental changes occur, so do physical changes. As muscles develop and coordination gets better, the animal will gain confidence. As a trainer, you will need to do less and less to cause certain movements. For example, in the case of the leg yield, you may have to turn your mule’s head a little in the opposite direction to get him to step sideways and forward. As he becomes stronger, more coordinated, and understands your request, you can then begin to straighten his body more with less effort. Granted, we have begun by doing this the wrong way, yet we have put our mule “on the road” to the right way. We have assimilated an action in response to our leg that can now be perfected over time. In essence, you have simply said, “First you learn to move away from my leg, then you can learn to do it gracefully!”
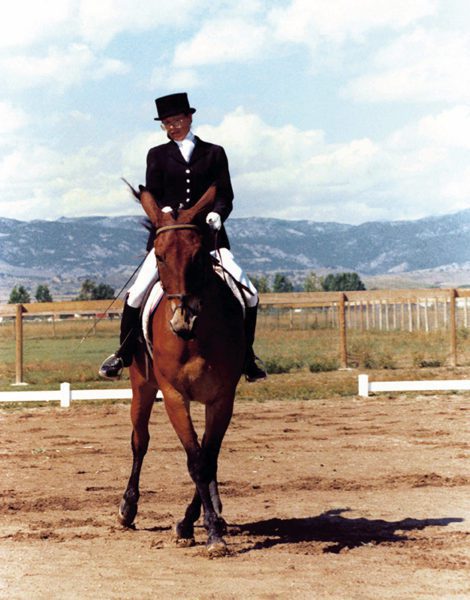 In training horses and mules, there is really little difference in one’s techniques or approach, provided we maintain patience and understanding and a good rewards system. The major difference between these two equines is their ability to tolerate negative reinforcement, or punishment. The mule, being part donkey, does not tolerate punitive action very well unless he is fully aware that the fault was his own and the punishment is fair. For instance, you ask for a canter lead and your mule keeps trotting, one good smack with the whip, or one good gig with the spurs, is negative reinforcement that will bring about the desired response, but be careful of an over-reaction from an overdone cue. More than one good smack or gig could cause either a runaway or an extremely balky animal. This kind of resistance comes from the donkey and requires a much different approach when training donkeys. The horse part of the mule allows us an easier time of overcoming this type of resistance in mules, making them different and easier to train than donkeys.
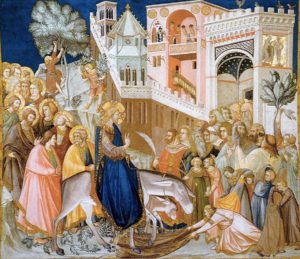 Long before the Founding Fathers drafted our constitution, the roots of America were as a religious nation under God. Today’s mule also has his roots in religion. The mule’s ancestor—the donkey—is mentioned in the Bible numerous times as an animal acknowledged by God and blessed by Jesus Christ. The donkey was even chosen to bring Mary and Joseph to Bethlehem and, later, as the mount Jesus himself used for his ride into the city of Jerusalem.
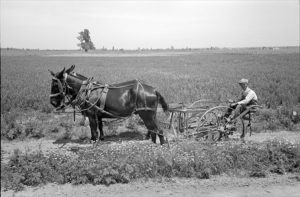 As early-nineteenth-century America continued to develop and its population grew, the American people came to depend more and more on self-sustaining agriculture. Because of the mule’s extraordinary ability to work long hours in sometimes harsh and unrelenting climates, his sure footedness which allowed them to cross terrain not accessible by any other means, and his resistance to parasites and disease, he became the prized gem of agriculture and remained so for the next hundred and fifty years.
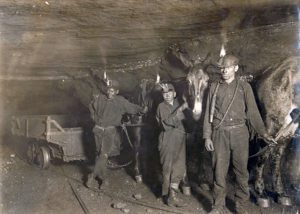 When American coal mining was booming, the mule was such a valuable member of the mining process, that a good mining mule was considered to actually be more valuable than a human miner. Mining has always been a dangerous business, and the mining mule’s innate sense of self-preservation was well known. “Mules are very smart…They know what they can do and would never do anything they couldn’t or would not want to do. Mules were known to pull at least three full mine cars full of coal. If you hooked up a fourth car they would balk at any commands and just stand there. No way would they pull the fourth car!” 2
 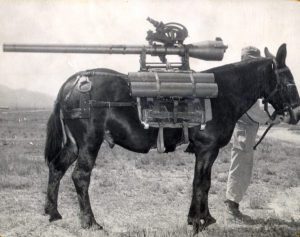 Because of their traits of strength, intelligence and loyalty, mules were a crucial part of our country’s greatest conflicts, from the Civil War through the Spanish American War, and in both World War I and World War II. A well-known tale from the Civil War states that, “In a battle at Chattanooga, a Union general’s teamsters became scared and deserted their mule teams. The mules stampeded at the sound of battle and broke from their wagons. They started toward the enemy with trace-chains rattling and wiffletrees snapping over tree stumps as they bolted pell-mell toward the bewildered Confederates. The enemy believed it to be an impetuous cavalry charge; the line broke and fled.” 3 During World War I, mules and horses were still the primary way that artillery was carried into battle. Although the 75mm Howitzers proved too heavy for most horses, it was a common sight to see the big guns strapped to the back of a sturdy mule.
 One of the world’s greatest natural wonders, the Grand Canyon, has been home to mules since the 1800s. First brought in by prospectors, it was soon realized that the tourists wanted a way down to the Canyon floor, and so began the Grand Canyon mule pack trips. Famous mule-riding visitors to the Grand Canyon have included Presidents Theodore Roosevelt and Howard Taft, famed naturalist John Muir and painter/sculptor Frederic Remington.
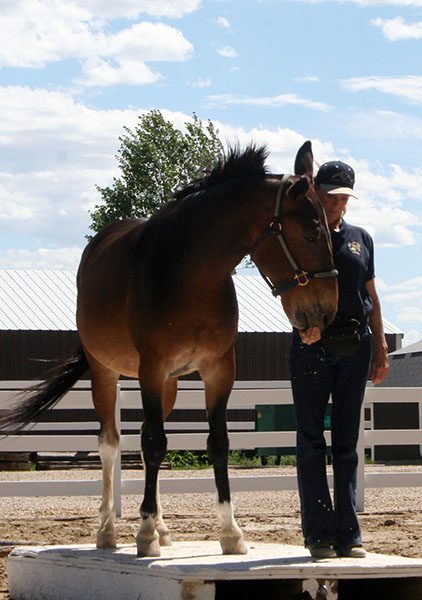 Horse trainers have kept us in awe of their unique and significant talents for centuries, and now that their techniques are more public, many equine professionals will pooh-pooh those who attempt a “kinder” approach to training. Scientists who study the equine in motion—its nutrition, biomechanics, care and maintenance—have their own perceptions to offer as to what we can learn about equines. Because many of these studies and tests are done in the laboratory, scientists rarely have the opportunity to follow their subjects throughout a lifetime of activity, as well as having the opportunity to experience what it really means for you as a rider, to be in balance with your equine when you work together, whether you are leading, lunging, riding or driving. If they did, their findings would probably yield quite different results. With all this progressive scientific thought, it seems to me that common sense can often get lost in the shuffle and respect for the living creature’s physical, mental and emotional needs may not be met.
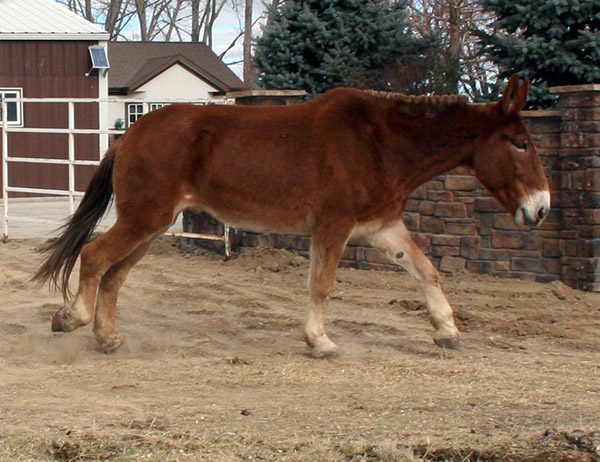 degenerative breakdown. For instance, those who get in a hurry in Dressage and do not take a full year at each level in order to develop their equine’s body slowly and methodically may discover, several years later, that their animal has developed ringbone, side bones, arthritis or some other internal malady. These types of injuries and malformations are often not outwardly exhibited until it is too late to do anything about them.
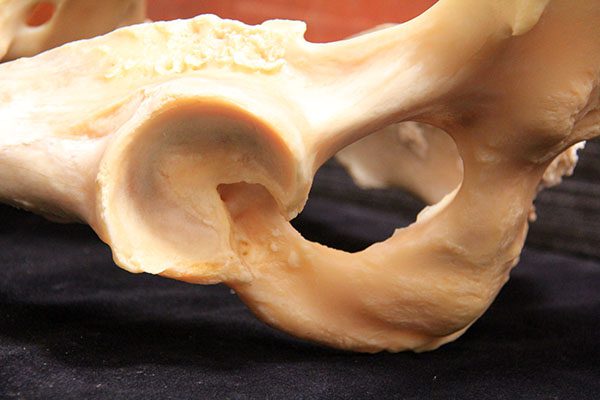
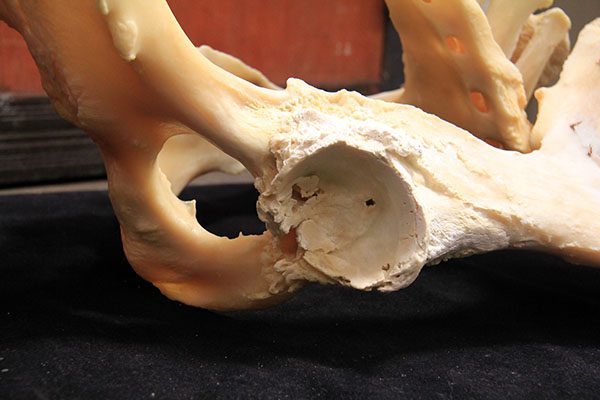
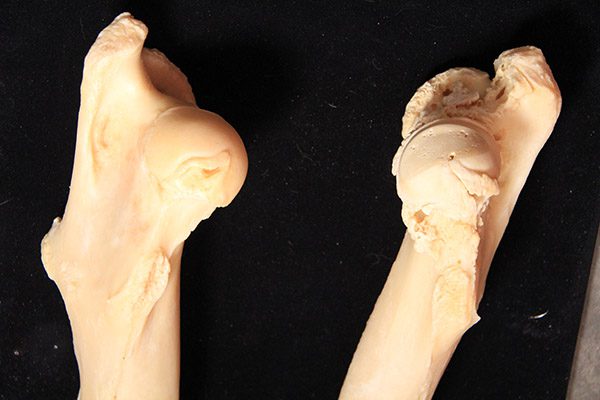 Tragically, many equines are suffering from abuse every day, while they are trying to please their owners and do what is asked of them. Their owners and trainers take shortcuts that compromise the equine’s health. It could be that these owners and trainers are trying to make choices with limited knowledge and really don’t know whom to believe. But ignorance is not a valid defense and sadly, the animal is the one that ends up suffering.
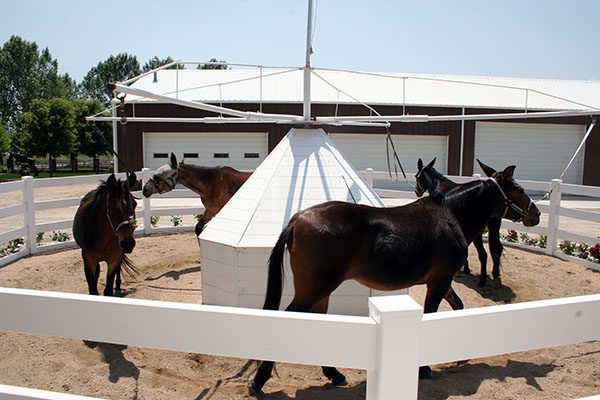 The Lucky Three mules have always been worked in good posture, and spend only as much time on the hot walker as it takes for them to dry after a bath. They maintain their good posture while walking and rarely let the hot walker “pull” them into bad posture.
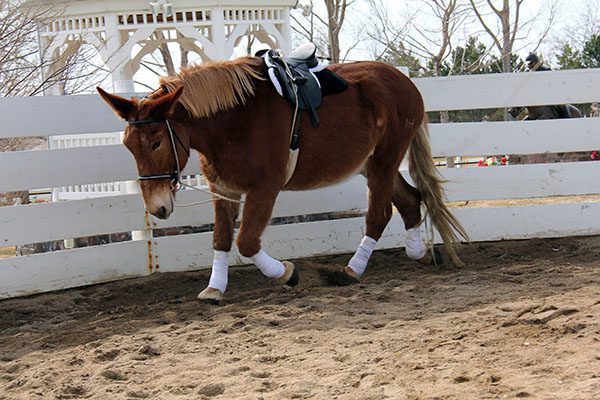 Like many, I am of the belief that mechanical devices that force an equine into a rounded position do not necessarily put that equine in good posture. I would guess that many trainers think the “Elbow Pull” device that I use is guilty of developing this artificial posture. If that is their opinion, then they do not understand how it works. Rather than pulling the equine’s head down into a submissive position, when adjusted correctly, the “Elbow Pull” acts like a balance bar (like a ballet dancer would use) to help the equine to balance in good posture. It takes time to develop good posture. So, in the beginning, your equine can only sustain good posture for a certain number of measured steps, and then he must “lean” on the “Elbow Pull” in between these moments of sustaining his ideal balance on his own. The “Elbow Pull” simply prevents him from raising his head and neck so high that the neck becomes inverted and the back hollowed, but it does not actually pull his head down. The rope itself is very lightweight and puts virtually no weight on his head and neck at all. Note: Because horses react differently than mules and donkeys when hard-tied, a simple adjustment to allow the “Elbow Pull” to “slip” with a horse is necessary.
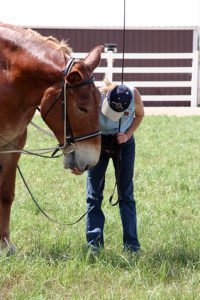 It is important to know the differences among rewards, treats, coaxing and bribing in order to correctly employ the reward system of training called Behavior Modification.
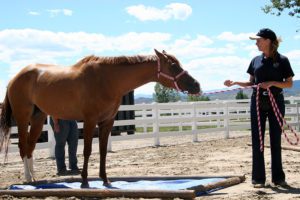 Remember to give your equine a reward only after a specific task you’ve asked for has been performed—or even an assimilation of that task, which means the taking of baby steps toward completing the task. The reward should be given immediately upon completion of the task and then your equine should be allowed time to enjoy his reward before moving on to the next task. If your equine is given a food reward for only good behaviors, he will be more likely to continue to repeat only those behaviors for which he is rewarded and you can begin to “shape” his behavior in a positive way.
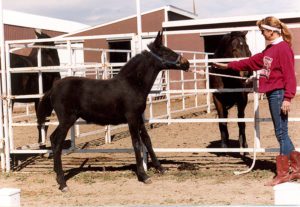 As an example of coaxing, you can extend a handful of crimped oats to lure your equine closer to an obstacle, but he should not receive the handful of oats until he completes the required task or travels enough distance toward the obstacle to deserve a reward. If your equine just won’t come all the way to an obstacle, even to get a reward, you can modify the task by asking your equine to just come closer to the obstacle and then halt (but without backing up). Then the reward can be dispensed for the partial approach and halt, because these actions still qualify as an assimilation of the bigger task that is to be completed. If he backs away at all, he should not be rewarded and you will have to go back to the beginning of the task and try again.
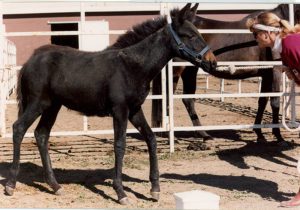 Between lessons, let your equine have a day off in order to rest. When you return for the second lesson, tie him to the fence and review with him your last lesson from the very beginning. He should remember the previous lessons and be willing to follow you right away in order to be rewarded. If he seems willing to follow your lead, untie him and ask him to take a step forward just as he did before, but this time, instead of dispensing the food reward when he takes the first step forward, simply say, “Good boy” and ask him for a second step forward before you reward him with the oats. You will now be progressing from one step forward before you reward to two steps forward before you reward.
 This is how you begin with leading training, and also how you should proceed with all the new things that you will be teaching your equine. In the beginning of leading training, he gets rewarded for even an assimilation of what you’re asking. For example, when you get to negotiating obstacles, your goal may be to cross over a bridge, but when your equine sees the bridge ahead, he may stop or start backing up. At this point, allow him to back until he stops. Go back and repeat the steps you did prior to approaching the obstacle. Then, asking for only one step at a time, proceed as you did during his flatwork leading training toward the bridge, rewarding each step he takes. Tell him verbally how brave he is and continue to reward any steps he takes toward the obstacle before proceeding forward. Remember to stop at any interval where he becomes tense, ask for one more step to be rewarded, and then allow him to settle and refocus before asking any more from him.
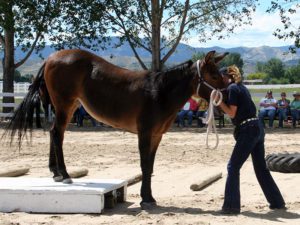 Now you no longer need to reward for one foot on the bridge. This is called “fading or phasing out” the reward for a previous behavior (one step), while introducing the new behavior of walking to the bridge, halting and then putting two front feet up on the bridge. Wait for a moment for him to chew his reward and then ask him to continue onto the bridge, stop and square up with four feet on the bridge and reward. If he does not comply and won’t stop on the bridge, just go back to the beginning, approach the bridge as described and try again until he stops to be rewarded with all four feet placed squarely on the bridge
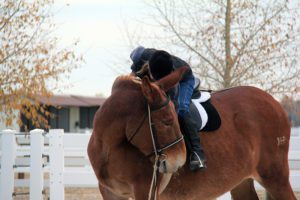 The last step over the bridge is to bring the hind feet off the bridge, stop and square up one more time before he gets rewarded. This does two things. It causes your equine to be attentive to the number of steps you are asking and it puts him in good posture at each stage so that his body will develop properly. In future lessons, the steps in the approach to the bridge no longer need to be rewarded and as he becomes more attentive, he will learn to stop any time you ask and wait for your cue to proceed. After several months of this meticulous attention to these detailed steps, he will not necessarily need to be rewarded with the food reward each time—a pat on the neck and kind words of support should be sufficient. Rewards can then be given for whole “blocks” of steps when he successfully completes them.
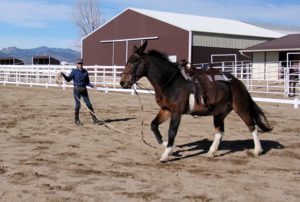 In the natural progression of correct training—including during mounting training—your equine should also be getting rewarded when you’re first getting him used to your being on-board. Give him the oats reward for standing still while you attempt to mount (i.e., walking toward him, holding the left rein and reaching for the saddle horn), and then when you hang from each side of his body with a foot in the stirrup (first on one side and then on the other side), and, finally, from each side of his body while you sit on his back. When you ask him to turn his head to take the oats from your hand, you can be sure his attention will be on you because this action will force him to look at you in order to receive his oats. Then reward him again for standing still as you dismount. Consequently, by the time you actually get to the point of riding in an open arena, he’s been rewarded for having you on his back and for behaving well through all the exercises demanded from him during round pen training.
 As your young equine grows and matures, he will realize that you do not wish to harm him. Next, he will develop a rather pushy attitude in an attempt to assert his own dominance (much like teenagers do with their parents), because he is now confident that this behavior is acceptable. When this occurs, reevaluate your reward system and save excessive praise for the new exercises as he learns them. Note, however, that a gentle push with his nose might only be a “request” for an additional reward and a polite “request” is quite acceptable in building a good relationship and good communication with your equine. Allow the learned behavior to be treated as the norm, and praise it more passively, yet still in an appreciative manner. This is the concept, from an emotional standpoint, of the delicate balance of give and take in a relationship. As in any good relationship, you must remain polite and considerate of your horse, mule or donkey. After all, “You can catch more flies with sugar than you can with vinegar.”
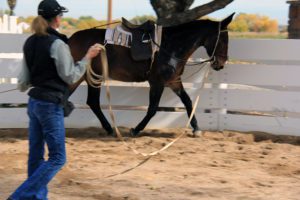 Here is an example: I had a three-year-old mule that was learning to lunge without the benefit of the round pen. The problem was that he refused to go around me more than a couple of times without running off. I first needed to assess the situation by brainstorming all the probable reasons why he might keep doing such an annoying thing. Is he frightened? Is he bored? Is he mischievous? Has he been calm and accepting of most things until now? And, most important, is my own body language causing this to occur? Once I was willing to spend more time with regard to balance on the lead rope exercises and proceeded to the round pen to learn to balance on the circle, I soon discovered that developing good balance and posture was critical to a mule’s training. The reason my mule was pulling on the lunge line so hard was because he just could not balance his own body on a circle. Once I reviewed the leading exercises with him—keeping balance, posture and coordination in mind—and then went to the round pen to learn to balance on the circle, I noticed there was a lot less resistance to everything he was doing. I introduced the lunge line in the round pen and taught him how to circle with slack in the line. And, I realized that it was also important to time my pulls on the lunge line as his outside front leg was in suspension and coming forward. It didn’t make much difference in the round pen, but it was critical to his balance in the open arena so the front leg could be pulled onto the arc of the circle without throwing his whole body off balance. After learning that simple concept, lunging in the open arena on the lunge line was much easier and he did maintain the slack in the line while circling me.
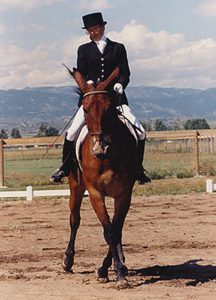 Like humans, all animals are unique, and like humans, each learns in his own way. Learn to be fair and flexible in your approach to problems. It is best to have a definite program that evolves in a logical and sequential manner that addresses your equine’s needs physically, mentally and emotionally. Be firm in your own convictions, but be sensitive to situations that can change, and be willing to make those changes as the occasion arises. This is what learning is all about for both you and your equine.
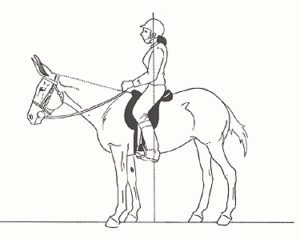 Achieving balance and harmony with your equine requires more than just balancing and conditioning his body. As you begin to finish-train your equine, you should shift your awareness more toward your own body. Your equine should already be moving forward fairly steadily and in a longer frame, and basically be obedient to your aids. The objective of finish-training is to build the muscles in your own body, which will cause your aids to become more effective and clearly defined. This involves shedding old habits and building new ones, which takes a lot of time and should be approached with infinite patience. There are no shortcuts. In order to stabilize your hands and upper body, you need to establish a firm base in your seat and legs. Ideally, you should be able to drop a plumb line from your ear to your shoulder, down through your hips, through your heels and to the ground. To maintain this plumb line, work to make your joints and muscles in your body more supple and flexible by using them correctly. Don’t forget to always look where you are going to keep your head in line with the rest of your body.
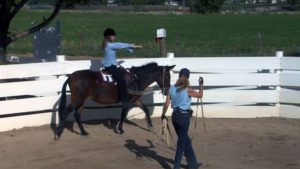 When you are fairly comfortable at the walk, you can add some variation at the trot. Begin at the posting trot on the rail. When your equine is going around in a fairly steady fashion, drop your reins on his neck and continue to post. As you post down the long side, keep your upper body erect and your pelvis rocking forward from your knee. Your knee should be bent so that your legs are positioned on the barrel of your animal. Raise your arms out in front of you, parallel to your shoulders. If your equine drifts away from the rail, you need to post with a little more weight in your outside stirrup. As you go around corners, be sure to turn your eyes a little to the outside of the circle to help maintain your position. As you approach the short side of the arena, bring your arms back, straight out from your shoulders, and keep your upper body erect. As you go through the corners, just rotate your arms and upper body slightly toward the outside of your circle. When you come to the next long side, once again bring your arms in front of and parallel to your shoulders, and repeat the exercise.
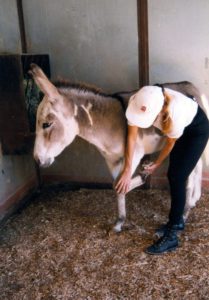 Imprinting is defined as “rapid learning that occurs during a brief receptive period, typically soon after birth or hatching, and establishes a long-lasting behavioral response to a person or object as attachment to a parent or offspring.” 1 When we speak of “imprinting” in the scientific sense, it is a reference to the way the brain accepts input. The brain compartmentalizes impressions and images, and the animal reacts to the stimulus that the image produces. A collection of “imprints and images” produces memories. Imprinting training with a foal of any breed will give him a jump-start on his life with human beings.
 When imprinting your foal, think about the kind of adult you want him to be. A foal is very similar to a human baby regarding emotional needs—both need attention, love, guidance and praise to become loving, cooperative adults. Start your relationship with a positive attitude and approach your foal with love, patience, kindness and respect. Be sure to set reasonable boundaries for his behavior through the way you touch him and speak to him, the facial expressions you use, and even how you smell when you are around him so he can learn to trust and respect you and be happy at the sight of you.
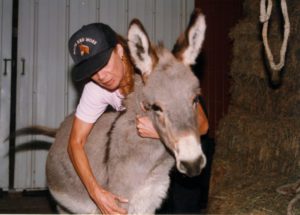 The most important sensation to which you can expose your equine is touch. If your touch is gentle and considerate, it will feel good to him and he will be interested in your attention. When you run your fingers over his body, being careful not to press too hard on sensitive areas, he will experience pleasure and begin to look forward to your visits. Learning how your equine likes to be touched will also help things go more smoothly when you begin grooming him and tacking him up and during his training lessons, when he must learn to take his cues from your hands, legs and other aids. Even how you mount and sit down in the saddle—for instance, how your seat is placed on his back—denotes your consideration of him through touch. The wrong kind of touch, no matter how slight, can be a trigger for adverse behaviors. However, the right kind of touch—done correctly—produces pleasure in your equine and instills a willingness to perform in a positive way each time you interact with him.
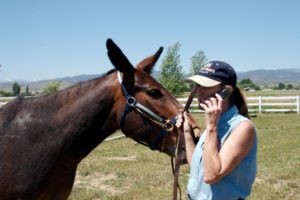 To begin imprinting training, run your hands all over your equine’s body and down his legs, and put your hands in his mouth and in his ears. His reactions will help you learn how he likes to be touched. Getting your equine used to touch in this way eventually evolves into exposing him to grooming and working with tack and equipment. You are continuing to build on the initial imprinting work, but now, when you are grooming, the grooming tools will become extensions of your hands, and when you introduce various tack and equipment like clippers, they will also become an extension of your hands. Allow your equine to use his sense of touch (usually with his nose) when introducing any new object. Work toward getting your equine’s response to your touch as highly sensitive as possible, so that he can use his own body language to communicate with you. NOTE: Many owners pat their equine on the top of the head with the flat of their hand as a sign of affection, without realizing that, as a rule, most equines don’t take kindly to people patting their foreheads or faces. A pat on the forehead works if you want to distract your equine, but save it for that purpose only. It is much better to show affection by stroking your equine (always in the direction in which his hair lies), in a soothing and reassuring manner.
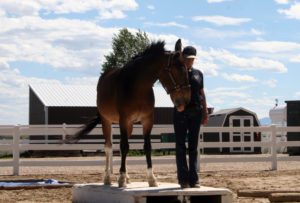 The tone of your voice is another important element of imprinting. If your general tone is soothing and encouraging, he is more likely to comply. Then, when he needs to be disciplined, the change in your tone of voice will convey your disapproval before you even have to touch him to make a correction—giving him the opportunity to straighten up before you actually need to apply the physical backup of negative reinforcement. If, no matter what the situation, you always speak in low tones, he will not be able to differentiate between what’s acceptable and what is not, but if you modulate your voice to clearly express what you want to convey, your equine will be much better able to understand and react appropriately.
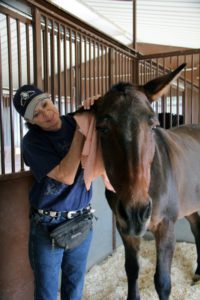 The next sense to which you should appeal is your equine’s sense of taste (a no-brainer). When you dispense the oats reward for all of his new positive behaviors, he associates that wonderful taste with you and will follow you to the ends of the earth to get more oats.
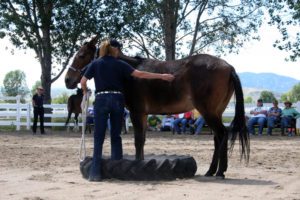 Work on evolving your own body language as a natural and truly wonderful way to “talk” with your equine. You can also use verbal language, but body language should be your primary form of communication.
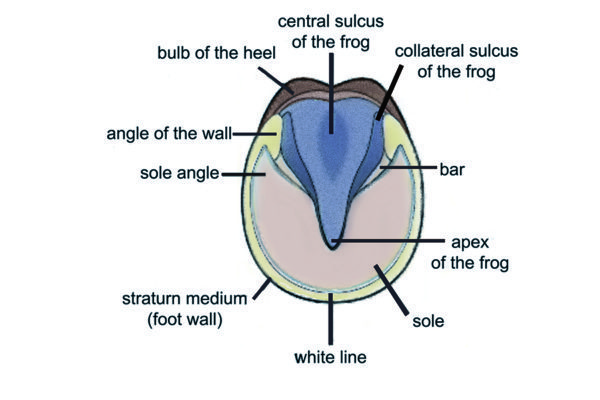 The old saying, “No foot, no mule” is literally true, as it is in any nomadic animal. If the hooves are not trimmed and balanced properly, it will offset the balance of the equine’s entire body and can compromise longevity in the animal because his entire internal structure will be compromised. Most equines will need to be trimmed or shod every 6-8 weeks whether horse, mule or donkey.


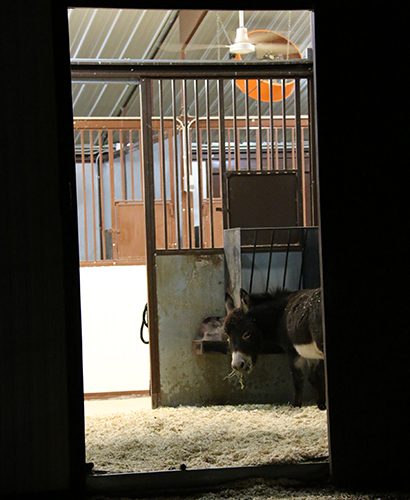

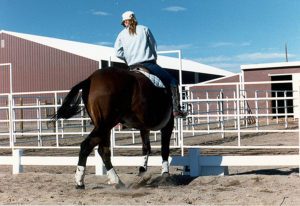 By Meredith Hodges
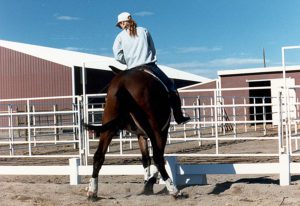 Ask your equine to walk a 20-meter (approximately 60 foot) circle, maintaining rhythm, cadence, proper flexion and bend. Then, in rhythm, change your aids to a slight counter bend and ask for a turn-on-the-forehand, sending his haunches in toward the center of the circle until he is reversed. At the precise instant he is in position to start following the circle in the opposite direction, release your pressure on the reins and send him forward again with your legs onto the new circle in the opposite direction.
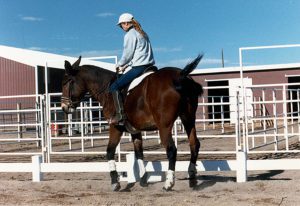 Instead, complete the turn with a series of half-halts with your seat and a squeeze/release action with the reins. If you do this, your final release will come as a natural sequence to the turn and it will be in rhythm and harmony with your equine. You can do this exercise at the walk, trot and canter, slowing to the walk each time for the turn-on-the-forehand.
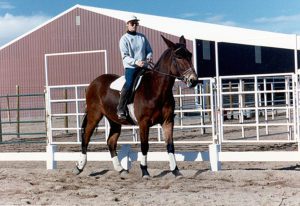 Maintain contact with your outside rein so that his head remains straight, and lead him into the new direction with a squeeze/release action on your inside rein and back it up with a rhythmic squeeze-release from you leg on the opposite side from the leading rein. Be careful not to inhibit his forward motion. It is better that he do small circles to complete the turn than to fall back over his haunches into a reinback. As in the turn-on-the-forehand, nudge and give, squeeze and release—a Longears (mule or donkey) will lean hard against continuous pressure. Keep practicing this exercise, maintaining his body between your aids.
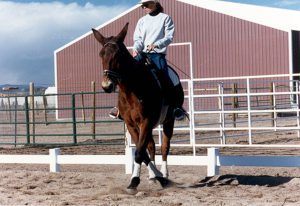 When he does well at the walk, you can move on to the trot and canter, slowing to the walk for the turn. And even if your equine makes a mistake, remember to praise him for his effort and go on. If you do this, you will find him to be a much more cooperative partner and eventually you will succeed at what you have set out to accomplish.
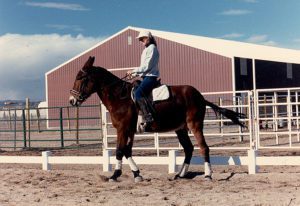 with him. After all, equines that are brought along slowly will generally live a lot longer, so why get impatient and try to do too much too soon? Wouldn’t you rather have a long-lasting and pleasant relationship with a animal that is happy with his work?
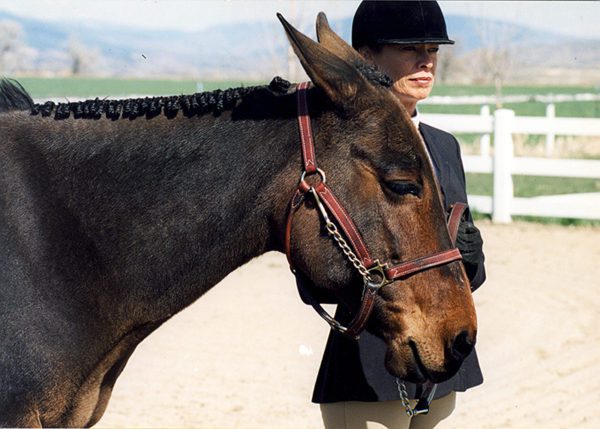 distress and pain. This includes harsh bits, chain leads, twitches, hobbles, stocks and even medications. There are times when our equines can really be a handful, so having a little leverage when needed can be a good thing. However, deciding which equipment to use and learning how to use leverage without it becoming abusive can be a bit daunting. There are so many different types of tack, equipment and restraints that it becomes difficult to determine which would be best to use on your equine to correct a particular problem, or if you really need to use anything at all. It may only be a case of needing to be clearer in your approach, in which case, leverage equipment may not be needed. It is important to make an informed decision when using any leverage equipment to be sure that what you are using is helpful and not abusive.
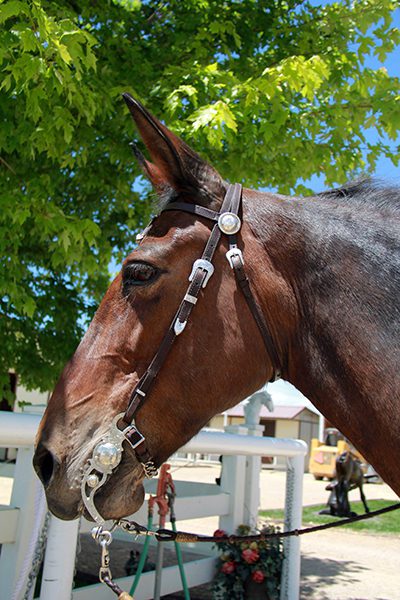 One very common behavioral problem that seems to identify the need for more leverage is the mule that bolts and runs when on the lead rope. This seems like an obvious disobedience to the handler, and the first thing that comes to mind is to use a lead shank with a chain to gain control of the mule. Normal use for a lead shank is during a Showmanship class at a show and it should rarely be used in training unless the equine will be shown at halter and/or showmanship. And then, training with the lead shank should be done only after the animal is following well through all required movements while in his halter and on a lead rope.
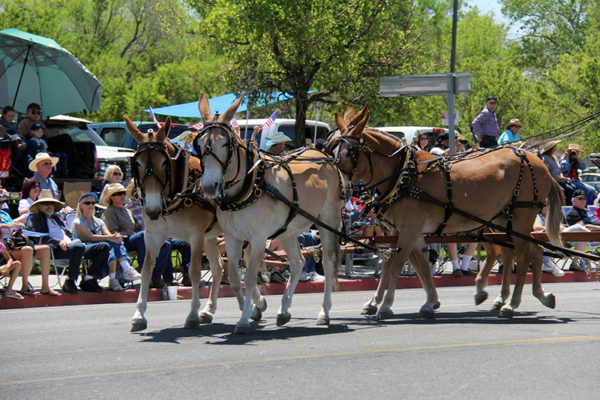 If, after you’ve employed a kind, considerate and respectful approach along with a food reward, your equine is still being uncooperative, it may be appropriate to use equipment with more leverage such as the “Quick Twist,” but not necessarily chains. Chains do need to be used in some cases, such as with work harness (and most curb bits are now fitted with chains), but when not used correctly, these chains can be abusive. The chains on the pleasure driving harness should clear the legs and heels of the driving equine, and the chin chain on a curb bit should be adjusted so that it is twisted properly and lies flat against the animal’s jaw with an allowance of two fingers between the chain and the jaw, thereby minimizing any chance of injury. If you have a generally compliant equine, it is better to use a leather chin strap on your curb bit rather than a chain.
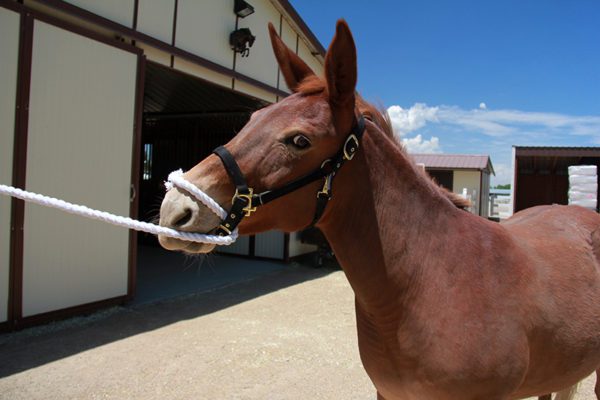 To employ the “Quick Twist” restraint, just take your lead rope and create a loop and feed it through the noseband of your nylon halter (rope halters are too loose and do not work) from back to front and then over the mule’s nose. When you pull on the rope, it will tighten around the end of the his nose below the incisive bones and over the cartilage, making breathing just a little difficult. Don’t keep pulling—just stand quietly and hold the tension snug. Let the equine come forward to you and slacken the rope himself by coming forward and allowing a free flow of air through his nostrils. Then, if the mule does not follow, just walk a step or two, creating tension on the rope, and then stand still again. When he does come forward, stop long enough to reward him with the oats reward before you proceed forward again. Keep the lead rope short and stand still in a balanced way so he cannot get ahead of you and jerk you off your feet. If you are standing still in a balanced position, it will be difficult for him to jerk the lead rope from your hand and leave.
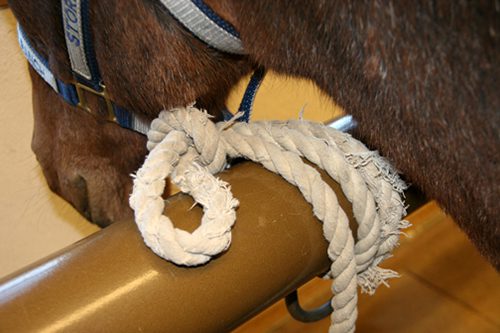 Restraints should not be used as a means to control your animal except for a short period of time with the purpose of showing them a correct behavior. Restraints should be used as a support and not a controlling device. Restraints should be “phased out” as soon as possible.
 Do not try to bully him into it or he will just pull back. This should be done while he is standing parallel to the hitch rail so that when you pull the rope tight, it pulls his head tightly sideways to the hitch rail. This will keep him from being able to swing his rear end around to block you. Reward him with oats and let him quiet down in this restraint before approaching with your shot. If he manages to keep you off the clear side, you can always go to the other side of the hitch rail and give him the shot from that side without fear of injury. You can do this along a stout fence provided the rails are sturdy. If you do this correctly, it will simply restrain him in a safe manner and keep you out of the line of fire. Each new time that you give shots, try to do it with the rope a little looser each time to fade out the restraint. They will usually just come to expect and go for their position along the hitch rail or fence and will lean into it like they do when you first gave the shots like this. He will soon learn to quiet down immediately when his face is being tied and at best will seem to be saying, “Dang, do we have to do this again?!” But, he will learn to comply.
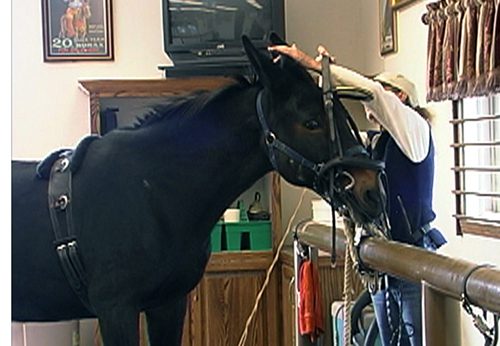 This is a humane restraint for mules and donkeys, but do not try this with a horse! This is a good restraint to use (and fade out) for any Longears that is difficult to worm, give shots, take blood, clip bridle paths and to use for those that are difficult to bridle. When using the Face Tie for bridling training (or clipping the bridle path), you will only need to go through the noseband and hitch rail (and not through the throatlatch unless you need to prevent them from turning into you). Just make sure when you put on the bridle that you “protect” their sensitive ears with your hands as it goes on and they will learn to trust you. Put the bridle on over the halter for the lessons until they don’t mind the bridling process.
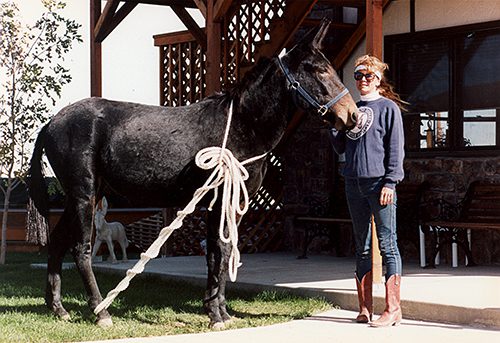 Your Longears will only need the kicking training covered in
 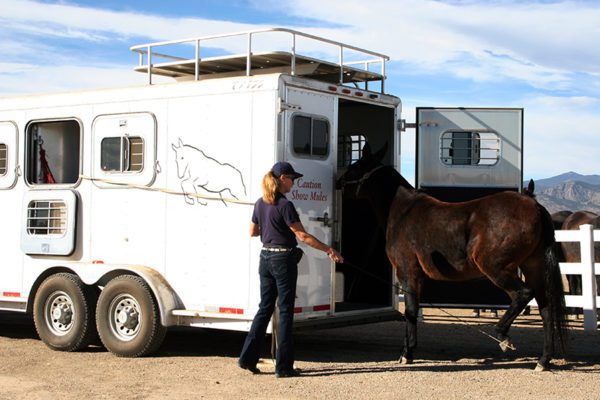 the hind foot, around the pastern and let it lay on the floor. Next time, you won’t have to use it at all. Your goal is to phase out the restraint entirely.
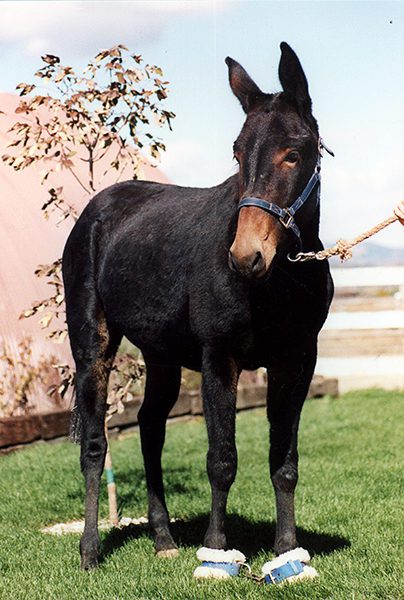 Hobbles are another form of leverage equipment and there are many different kinds of hobbles for different purposes. The hobbles that have chains on them should be avoided, as the equine can become entangled and the chains can do damage to their legs. Thin leather hobbles or coarse rope can chafe the hair right off the skin around the pastern and can cause severe abrasions that may never heal. Thick leather hobbles are best, as they will break when under extreme stress, releasing before damage to the equine is done. If so inclined, all mules and some horses can gallop in hobbles, so hobbles really aren’t all that effective for leverage. Tying onto a hyline (a rope suspended high between two trees that acts as a hitching line for overnighting equines in the mountains) is a better choice, and if the horses are tied, then the mules should not have to be tied or hobbled because they will generally stay with the horses. Personally, I only use hobbles in a controlled situation at the work station when body clipping my equine’s legs for show.
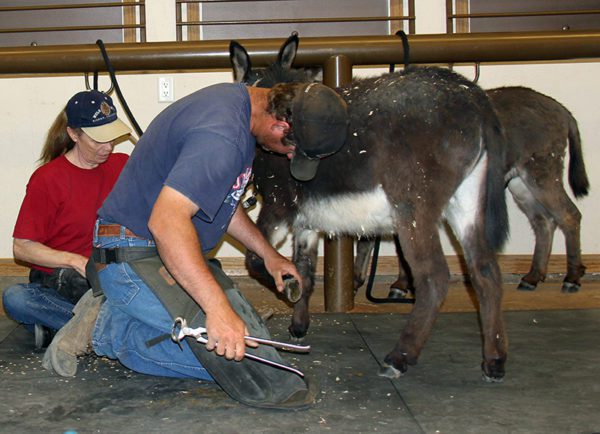 I do not approve of using power tools on the equine’s hooves at all. In order for the equine’s body to be properly balanced in good posture, the hooves must first be properly balanced. Power tools cannot possibly shape the hoof with proper curvature in the sole, alignment of angles and equal balance over the hoof walls with appropriate pressure to the heels and frog.
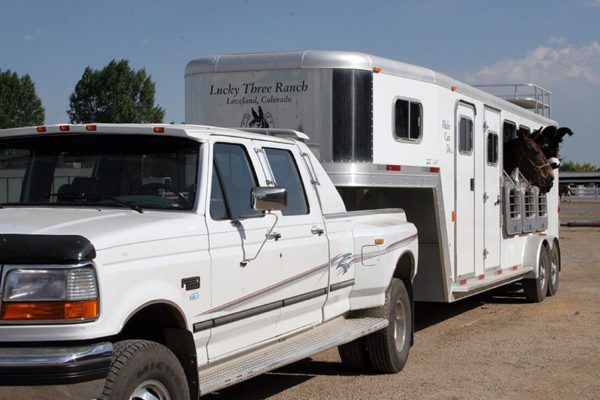 By Meredith Hodges
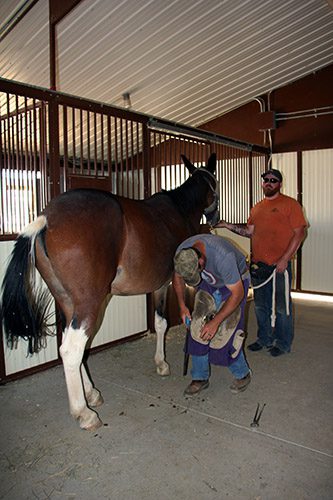 Once the heavier coat is eliminated, a weekly grooming will keep his coat nicely maintained. Daily grooming before a show, or every other day, is even better. Each time you groom him before riding, check and clip as needed the muzzle hairs, around the eyes and ears, and around the coronet bands. Leave the hairs inside the ears to prevent irritation from bugs and flies, but trim the outside edges and backs of the ears. An ounce of corn oil in his feed daily will assure a healthy sheen in his coat on show day without the use of artificial highlighters. Trimming, or shoeing, your mule on a regular six-eight week schedule will assure that his feet will not need attending at the last minute. A routine vaccination, deworming, Coggins testing and a permanent brand inspection will make sure he is ready for transport to any show anywhere at any time. Then, all that remains to be done right before the show is minor clipping, bathing, and polishing hooves.
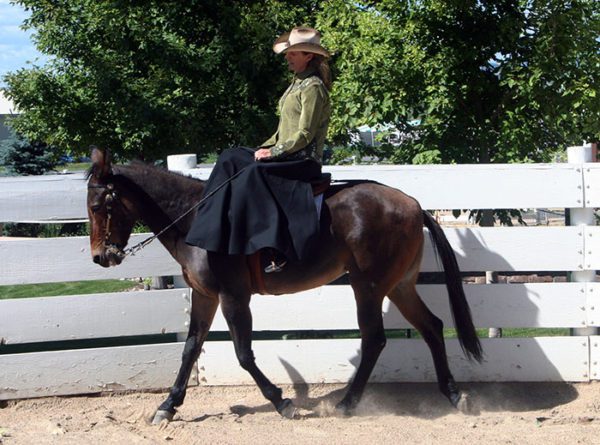 Then, tack up your animal, checking each piece of equipment to make sure that it is in working order. Go ahead and practice the class. Then, as you unpack your mule, set the tack aside from the rest in your tack room for cleaning later. Do this for each animal in each class. Your animals will do better at the show if they get plenty of rest before the show, so it is wise to spend the day before the show cleaning your tack, clothes, and equipment. Before you begin to clean, load all the items into your trailer that are all ready to go without cleaning. Then, as you clean the remaining items, load them directly into the trailer as you finish them.
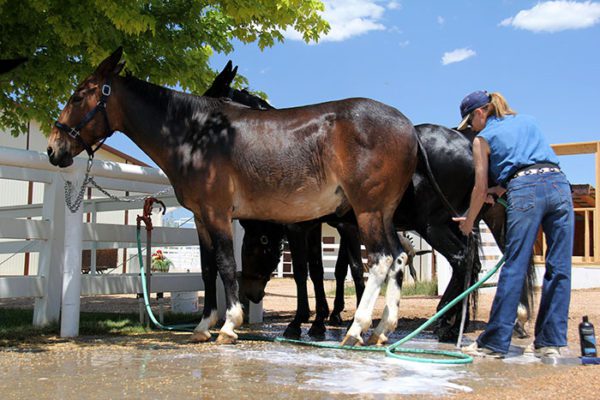 can be left until morning, or last minute, provided that you put them in a highly visible spot with a list of what is to be put in attached. Do not try to rely on your memory, as it will be clouded by the excitement and anticipation of the show.
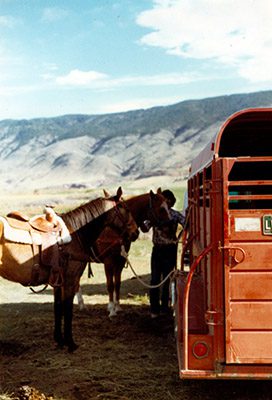 If classes are spaced fairly close together and you are using more than one animal, it is wise to tack up the other animals ahead of time so they are ready to go. If you are using only one saddle for more than one animal, the other animals can still be bridled with the halter slipped over it, so they can be tied and waiting. Be sure to tie up the reins so they will not be chewed or stepped on. If you are using the same mule throughout the show, tacking and stripping should not be too time-consuming if your equipment is well organized.
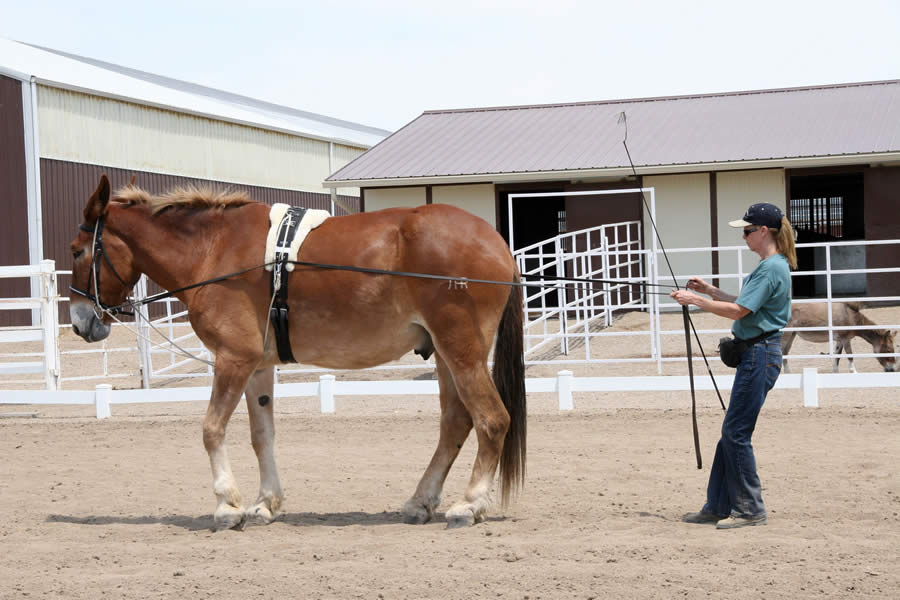
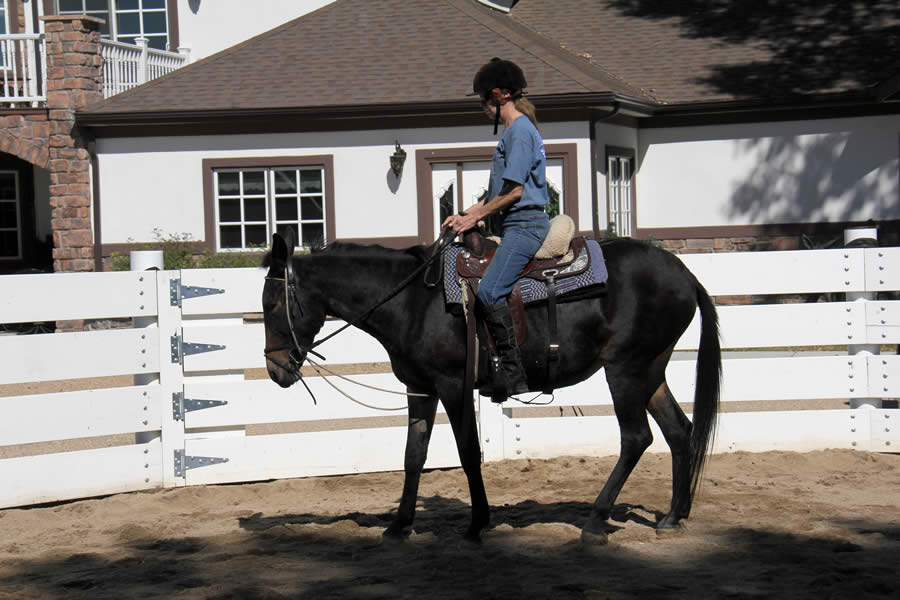
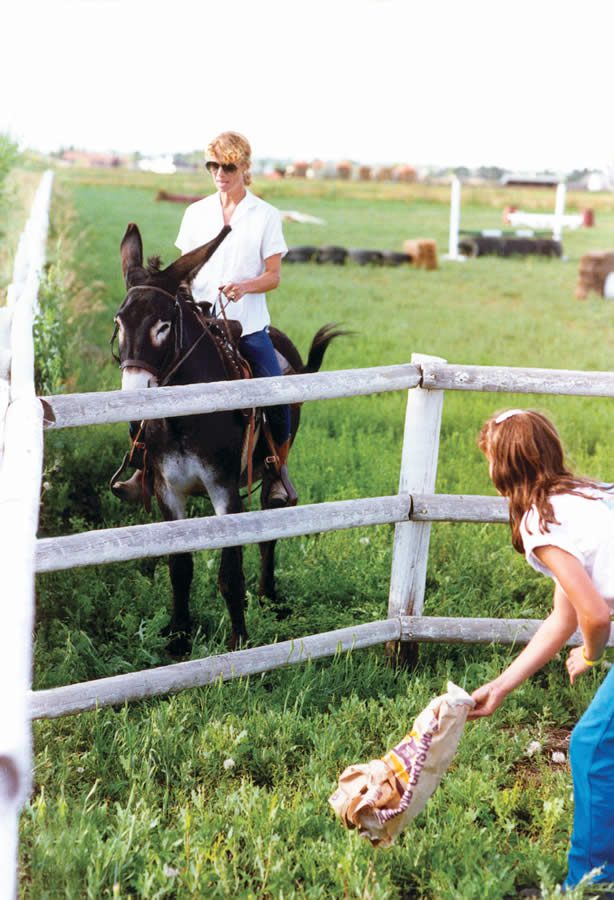

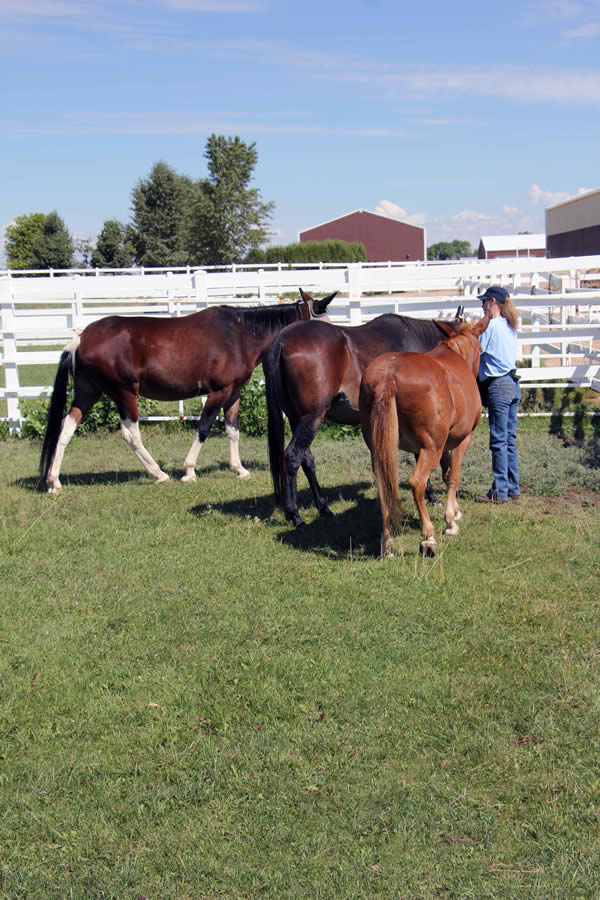
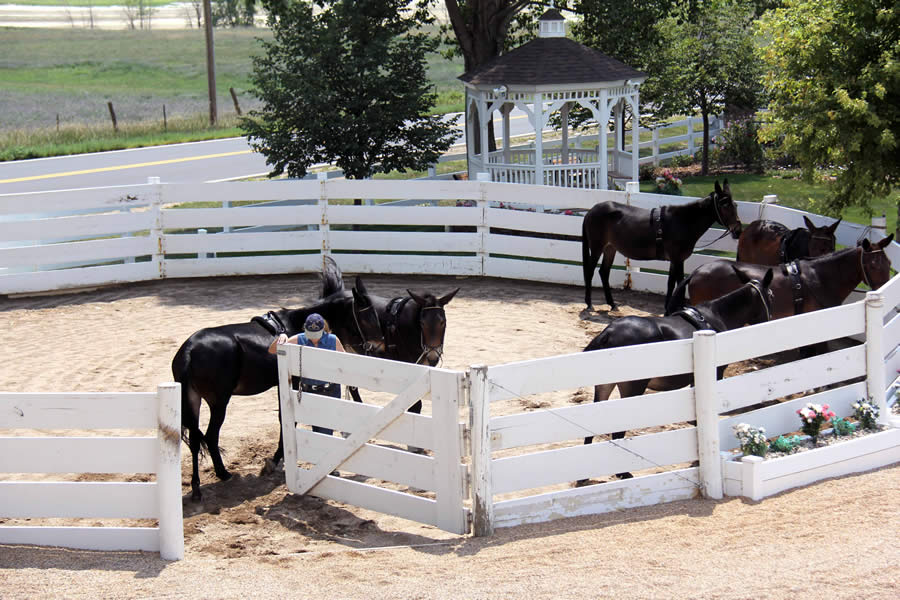
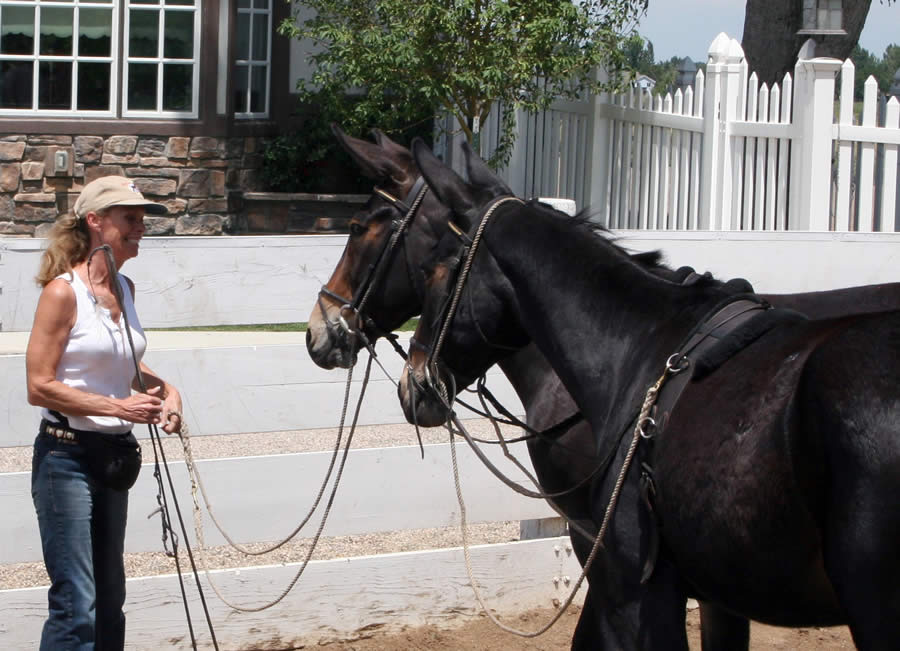
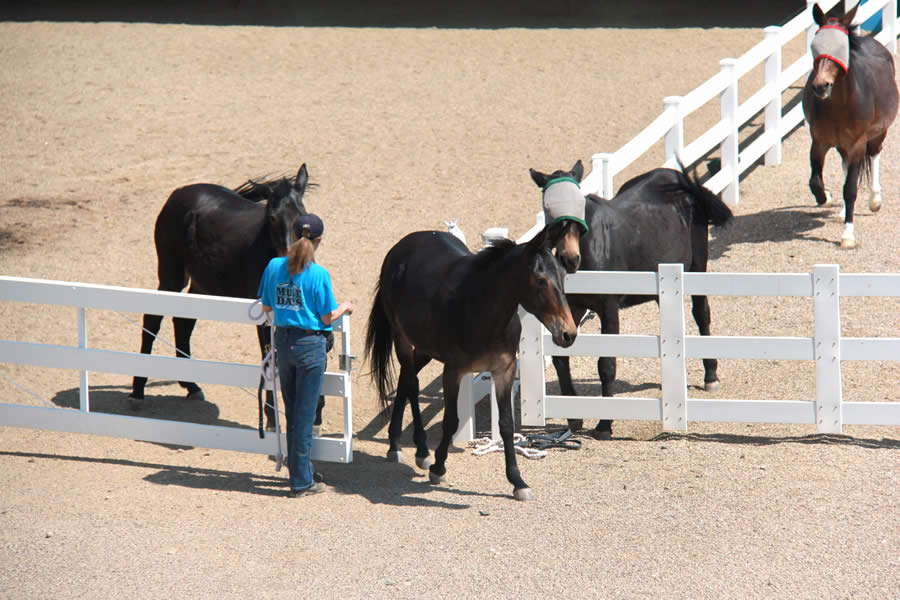
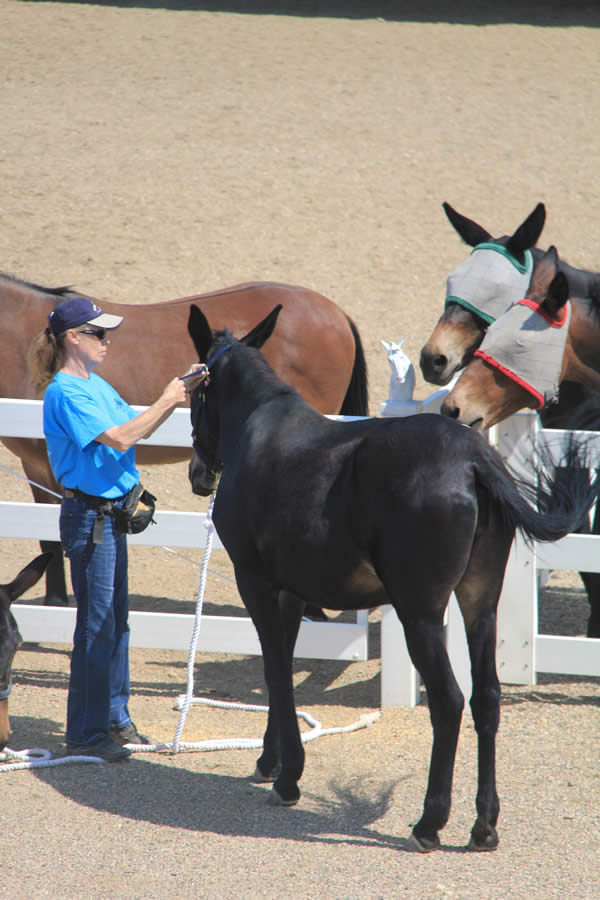

 Although he is often confused with his sire, the donkey, the mule is the symbol of neither the Republicans nor the Democrats. During past political campaigns, certain Republicans actually declined to have their picture taken with a mule, because they were either ignorant of the difference between a mule and a donkey, or they were afraid that the mule would be mistaken for the Democratic Party’s symbol—the donkey.
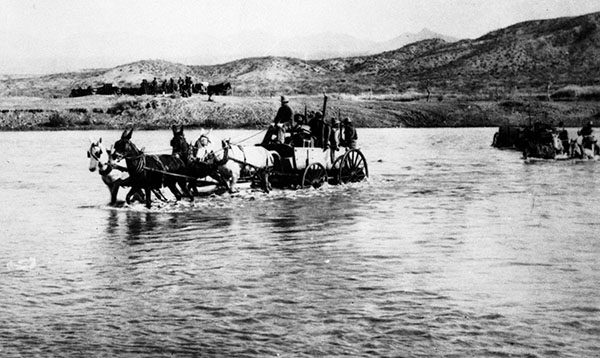 Mule stories from the past are numerous in this great country of ours. The number of mules (and horses) in the U.S. peaked in 1919, at 26.5 million. The United States of America was quite literally built on the backs of its mules—they pulled supply wagons in the cities, forged west with the early settlers across the vast prairies, packed hunters’ gear in the mountains, plodded underground with the coal miners and plowed the Southern cotton fields. They have participated in war alongside our brave soldiers, and have found their place in the field of entertainment. They even helped with the excavation of the Pasadena Rose Bowl.
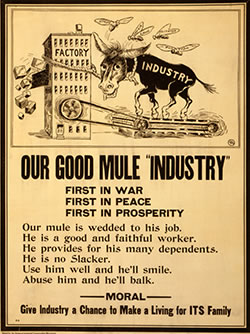 After the onset of the Industrial Revolution, the number of mules in the U.S. declined, and in 1967, there were less than ten thousand. But happily, in recent years, renewed interest and public awareness have sparked a steady increase in the mule population.
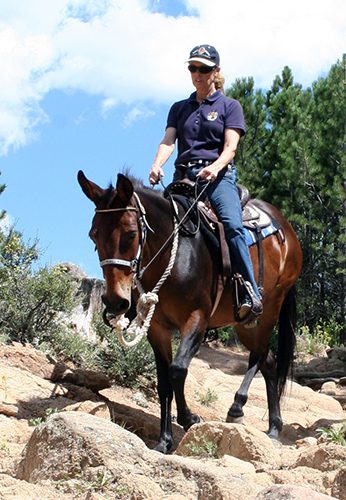 Obviously, I have one of the worst cases of “Mule Fever” ever suffered! But then, here I am—older, wiser and without any broken bones due to my association with mules. In fact, I can say my life was saved by one of my own mules. I was on my mule, Mae Bea C.T., leading a group of four trail riders on horses up a switchback in the Rocky Mountains, when the trail began to get very narrow. It was 100 feet straight up on the right and 100 feet straight down on the left! I could not see very far ahead because the two-foot trail wrapped around a huge boulder and blocked my forward vision. As I rounded the boulder, with the horses right on my rear, I was faced with a trail that disappeared into a wide landslide of small rocks. I couldn’t go forward and, with the horses directly behind on the wider part of the trail, I couldn’t back up. The horses could turn around where they were, but I couldn’t. I waited for the horses to get turned around, and then indicated to Mae Bea C.T. that I wanted a tight turn on the haunches. She sat her rear back on her haunches and swung her front legs over the 100-foot drop in a smooth and effortless 180-degree turn, facing next in exactly the opposite direction. She then stopped and waited for my next cue to lead the horses safely back down the trail. I shudder to think what could have happened had she been a nervous horse.
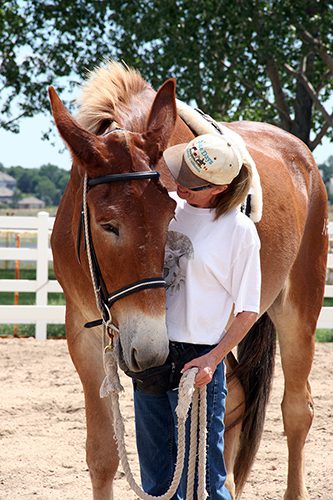 Although the therapeutic value of the mule goes back as far as his own history, the idea of intentionally using mules for actual therapy did not come until much later. One of the most successful therapeutic stories involving mules is that of the Vision Quest Wagon Train. Vision Quest founder, Bob Burton, had a dream to use mules and the discipline and hard work of a real wagon train to help troubled kids. So, in 1976, the first Vision Quest Wagon Train was launched. In this life-changing program, 36 at-risk teens were required to spend one year traveling with six mule-powered wagon teams that went south in the winter and north in the summer. During the journey, the kids learned positive social skills and responsibility in caring for themselves and for their animals, with a solid success rate of 60 percent. (Mules really do make the best teachers!) Today, plans are being made on Facebook for a Vision Quest Wagon Train Reunion in 2012. Clips of the Vision Quest Wagon Train journeys can be seen on YouTube.
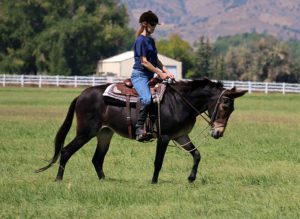 Good conformation is important in allowing the equine to perform to the best of his ability, but the tack we use has an effect on the equine’s movement in spite of his shape. In order to obtain freedom of movement, the elements of the equine’s anatomy must be allowed to move freely through every joint of his body. Energy and blood circulation finds open tracks throughout the body and when unobstructed, will run freely from the core of the body to the extremities in a healthy equine. Core and bulk muscles that are developed symmetrically support the skeletal frame, the cartilage and ligaments that surround the joints, and the tendons that tie the skeletal frame together. All work to support the proper internal organ functions and when the equine in good posture with symmetrical strength, they are unobstructed.
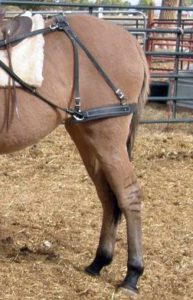 When the skeletal system is adequately supported with symmetrical muscle strength and especially over the top line, the animal is better equipped to use his body efficiently, tucking his tail and using leg muscles to support his own weight while his spine remains flexed upward along the top line to support the weight of the rider. The extremities have full range of motion so he can pick each step with confidence and no obstructions. An animal with insufficient conditioning will hollow his back and neck and try to compensate for his inefficiencies in muscle conditioning and movement. When pressure is put on the crupper of an animal with inadequate muscling, there is weakness over the top line and tail that will not support heavy weight of going downhill and could possibly do damage to the spine at the dock of the tail. Just for the record, I have done lots of trail riding and three years of cross country (3 miles, up and down hills, over twenty jumps) and have always ridden with a crupper on all of my mules with nary an incident.
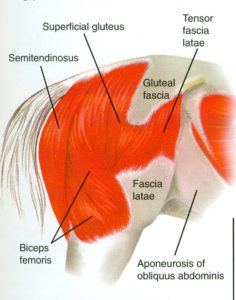
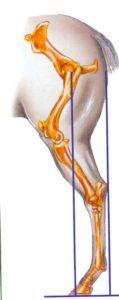
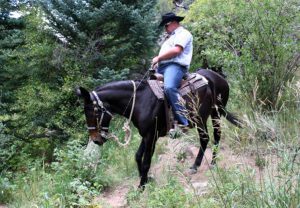 The problem with breeching on a saddle equine is in the configuration and the way it sits anatomically. When going downhill, the breeching must be snug to do its job properly and it will keep the saddle from sliding forward. However, it also compresses the biceps femoris, a large muscle in the hindquarters that functions to extend the hip and hock joints, and also causes a flexion of the stifle, and a rotation of the leg inward. When pressure is applied to this area, it restricts circulation and extension of the hind leg backwards and causes compromises in the muscles groups resulting in asymmetrical conditioning. This doesn’t pose a real pressure problem going downhill. The stifle joint is configured so it can lock when needed through a stay mechanism between the stifle and hock, but it should still have the freedom of full range of motion if it is to function properly and not get unduly locked up. When the actions in the animal’s body remain symmetrical and orderly all of the joints, including the stifle, are able to function properly. The stifle will usually get locked up only when there are chaotic and unsupported directional actions coming through the joint.
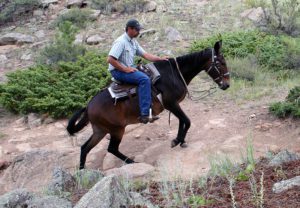 When going uphill, however, the breeching must still be snug to do its job, but the animal is not allowed full extension of the hind legs, so more pressure is put between backward motion of the femur and the breeching. This results in compromised circulation, restricted movement in the hind legs and an inability to control hind quarter foot placement. In a crupper, the animal going uphill has full extension in his hind quarters, an ability to maintain good posture and balance and this results in exact foot placement to maintain that balance comfortably and safely.
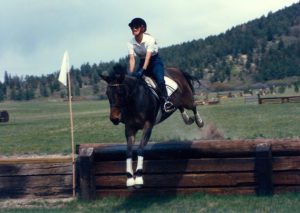 The weight and ability of the rider will determine how much pressure is put against the animal and how much resistance it will cause. Even though mules can carry proportionately more weight than a horse of the same size, this doesn’t mean you can indiscriminately weight them down until their knees are shaking. Be fair and responsible and do your part in the relationship. Do not expect the animal to carry an obviously overweight body that doesn’t know how to control itself! Participate in training activities that prepare you both, first with groundwork and later under saddle. As you learn to ride correctly and in balance, you also learn how to ride supportively and take the stress out of going uphill and downhill. You will then find the crupper much safer and more efficient when riding in all kinds of terrain…even if you are a little heavier than you should be. You and your animal will be conditioned properly and he will be able to pick his way efficiently, safely and unobstructed!
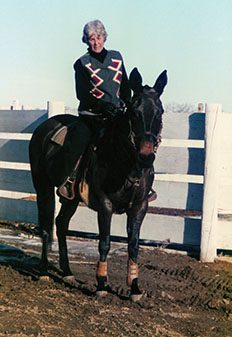
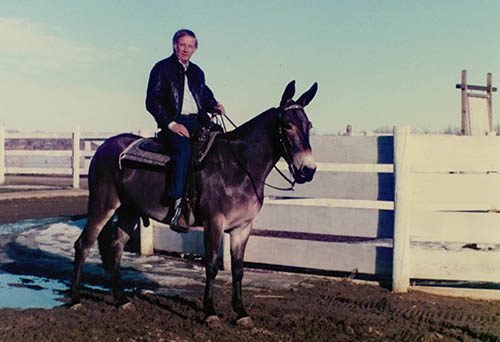
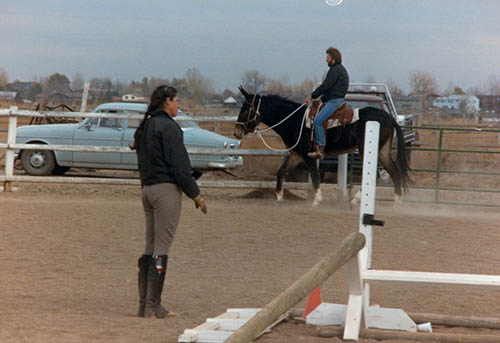
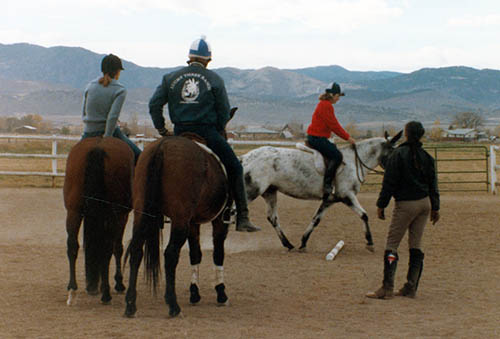
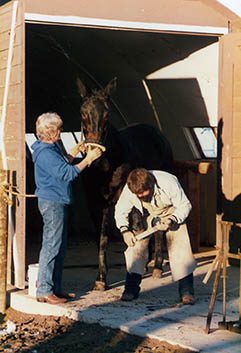

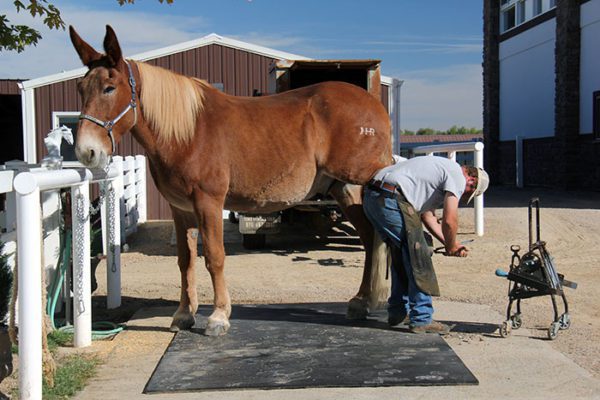
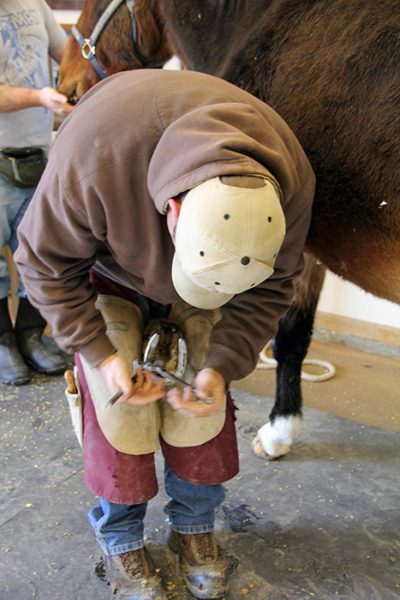 For better or worse, an equine inherits his hooves through his genes. If your mule has inherited good feet—black, oily-looking, and with good shape—then you are fortunate and hoof care and maintenance should be relatively simple. If he has inherited a softer or misshapen foot, you will need to discuss more specialized care with your farrier.
 lubricate your mule’s hooves as needed with one of the commercial products available. But before you use an artificial hoof lubricant, first check with your farrier to make sure that it is actually needed. Many people use hoof products too frequently, which can cause hooves to become too soft. When this begins to happen, you will see horizontal rings appear around the hoof wall, and sometimes, vertical lines. Try not to let the hoof get to this point by using lubricants sparingly, but if you see that these rings are beginning to appear, immediately discontinue use of the lubricant and allow the hoof to harden. Then check with your vet to make sure it is not a founder condition. It does not take much to adequately soften the hooves of an animal with rock-hard feet. During the really dry seasons, lubricant application once a week is usually sufficient.
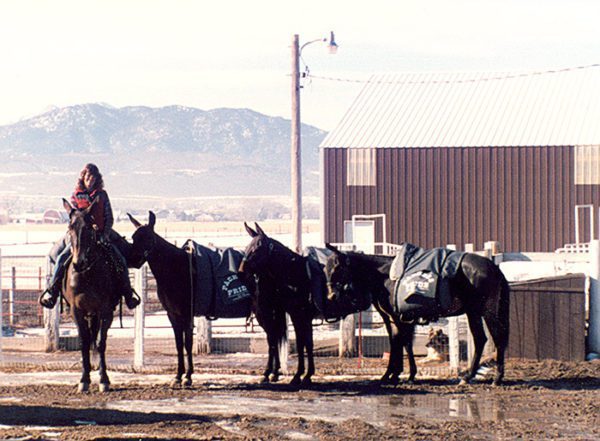 Assuming that your mule has a normal set of dark, healthy hooves, he will probably not need to be shod, as long as he is used strictly for pleasure or only sporadically. However, if you are going to use your mule on excessively rocky or hard ground, you might want to look into getting shoes for him. Mules that repetitively participate in more stressful and demanding activities (such as parades, showing and endurance events) should be shod to protect their feet and to keep them healthy. Prevention of bruising or cracking and maintenance of good foot and leg posture is critical to the equine athlete.
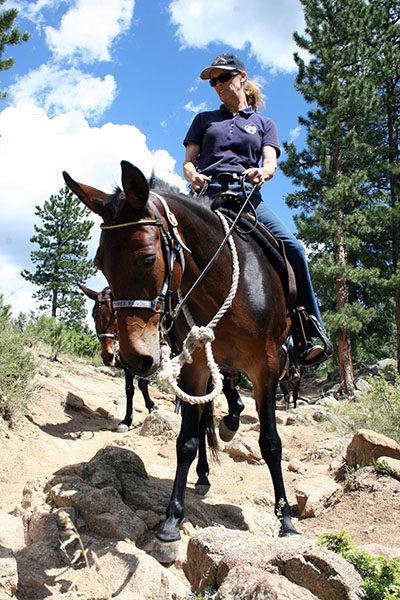 I believe that horses and mules, doing what they would naturally do alone—on terrain that is neither hard nor rocky—do not need to be shod. But mules that are asked to repetitively perform with a human on-board in varying surface situations should be fitted with the proper kind of shoes to help protect them from the additional weight and other demands that will be put upon their bodies. For example, my trail mules wear regular shoes on all four feet when they are being regularly used for trail riding and a variety of other activities, lessening the potential for injury. Then, when there is an occasional misstep on hard ground or rocks or when we trail-ride in the more challenging mountains, the shoes help to absorb some of the shock that would otherwise be absorbed by the hoof itself. It is my experience that young mules (and horses from two to four years of age) bear most of their weight on their front legs until their bodies are carefully and properly conditioned, and this is when you will see the most wear and tear on their feet. Because of this, my young mules that are just beginning saddle training wear regular shoes on the fronts only until their bodies are balanced and their activities clearly defined. Our broodstock, youngsters (under three
 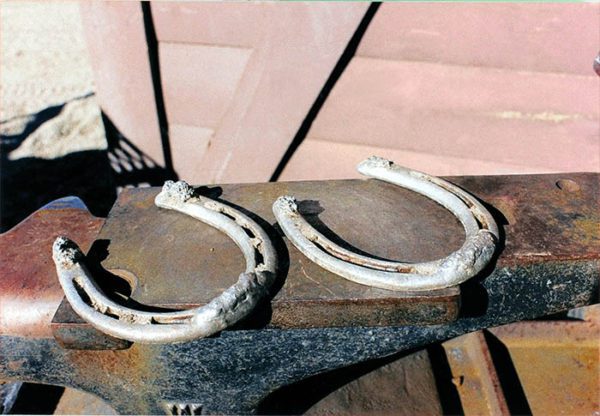 years of age) and equines that are not used under demanding conditions can go barefooted year-round, but they all still get regular trims every six to eight weeks.
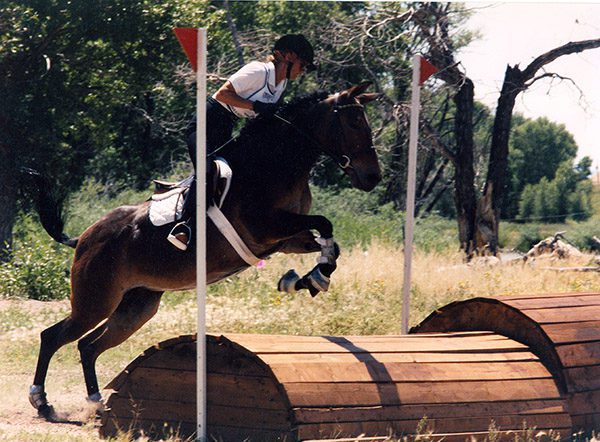 Granted, there are a lot of mules that may not need to be shod, but there are also many that do need shoes, so each individual mule’s feet must be evaluated on a case-by-case basis. Because of this fact, the generalizations that “mules don’t need to be shod” and “all equines should go barefoot” are not always correct. You must take into consideration how your particular mule’s genetics affect his hooves, what he will be used for and how harsh the demands put on him will be on his feet. These important factors will determine whether or not he needs shoes, and if he does need shoes, what kind of shoes will best suit him. And don’t forget to check your mule’s shoes on a regular basis to make sure that all is well and that his shoes are staying on tight, but most of all, that he is comfortable and happy.