

MULE CROSSING: Rewards, Treats, Coaxing and Bribing
By Meredith Hodges
 It is important to know the differences among rewards, treats, coaxing and bribing in order to correctly employ the reward system of training called Behavior Modification.
Rule Number One: Treats and bribery should never be used during training. However, the appropriate dispensing of rewards and coaxing will produce the correct behaviors.
In order to reward your equine correctly for performing tasks, it is important to know the difference between a reward and a treat, and between coaxing and bribing. Let’s begin with some basic definitions of these terms:
Reward: something desirable given for a completed task
Treat: an unexpected gift given simply because it will be enjoyed
Coax: to gently persuade without dispensing the reward
Bribe: to persuade the animal by indiscriminately dispensing treats
 Remember to give your equine a reward only after a specific task you’ve asked for has been performed—or even an assimilation of that task, which means the taking of baby steps toward completing the task. The reward should be given immediately upon completion of the task and then your equine should be allowed time to enjoy his reward before moving on to the next task. If your equine is given a food reward for only good behaviors, he will be more likely to continue to repeat only those behaviors for which he is rewarded and you can begin to “shape” his behavior in a positive way.
Treats, on the other hand, are a food that your equine especially likes, which are given randomly and without purpose. Giving random treats during training can result in crossed signals and confusion in your animal. Treats such as peppermints and even “horse treats” are generally an inappropriate food source for equines and when dispensed too freely, have actually been known to cause equine health problems, so forego treats of any kind during the training process.
Coaxing and bribing can seem like the same thing, but they are not. Bribery suggests the actual dispensing of a reward before the task has been completed. Bribery is the indiscriminate dispensing of treats and is not the way to clearly communicate to your equine which is truly a positive behavior and which is not. Rewards and coaxing are often confused with bribery, but rewards are dispensed for a task only when it has been completed, and coaxing using the promise of a reward can often be used to help your equine to stop balking and attempt to perform the task you have requested. Then the reward is given only when he has completed the task.
 As an example of coaxing, you can extend a handful of crimped oats to lure your equine closer to an obstacle, but he should not receive the handful of oats until he completes the required task or travels enough distance toward the obstacle to deserve a reward. If your equine just won’t come all the way to an obstacle, even to get a reward, you can modify the task by asking your equine to just come closer to the obstacle and then halt (but without backing up). Then the reward can be dispensed for the partial approach and halt, because these actions still qualify as an assimilation of the bigger task that is to be completed. If he backs away at all, he should not be rewarded and you will have to go back to the beginning of the task and try again.
A kind word or a pat on the head may be enjoyable for your equine, but it doesn’t necessarily insure that the desired behavior will be repeated. However, a food reward insures that desirable behaviors will be repeated, because food is a solid, tangible reward. The food reward will back up the petting, (the petting is something that you probably do all the time anyway). When you visit your equine, you most likely pat him on the nose or head and say hello, but there are no real demands for any particular task being asked of your equine—you and your equine are simply interacting. You’re getting him used to touch, discovering how he likes to be touched and learning about his responses, which is actually part of imprinting.
The problem with carrots, apples and other foods people use for treats is that they’re not something for which the equine will continue to work and are not healthy choices for your animal in large quantities. After a limited amount of time, equines can easily become satiated on most treats. It’s like a kid with a bunch of candy bars. Once they become full they don’t want any more candy and they’ll stop working for the treat. Many foods used as treats, when given too freely, may also cause your animal to become tense or hyperactive. However, it’s been my experience that an equine will continue to work for crimped oats as long as you dole them out. Crimped oats are healthy for the body and they don’t cause an equine to become tense and difficult to handle.
When you’re using rewards, always start with lavish rewards for all new behaviors. This means that, every time you teach something new, you’re going to give lavish rewards for even the slightest assimilation toward the correct behavior. For instance, if your foal is tied to the fence and upon your approach, he quits pulling, it’s time to try to walk away from the fence with him and see if he will follow you. In this first leading lesson, you’ll untie him and ask him to take a step toward you. If he does, lavishly reward that step toward you, wait for him to finish chewing his oats and then ask him to take another step forward and toward you. If he complies and takes another step forward, lavishly reward that step too. During the first lesson, you will be rewarding every single step he takes toward you. Remember to keep the lesson short (about 15 minutes) and ask for only as many steps as he willingly gives you.
 Between lessons, let your equine have a day off in order to rest. When you return for the second lesson, tie him to the fence and review with him your last lesson from the very beginning. He should remember the previous lessons and be willing to follow you right away in order to be rewarded. If he seems willing to follow your lead, untie him and ask him to take a step forward just as he did before, but this time, instead of dispensing the food reward when he takes the first step forward, simply say, “Good boy” and ask him for a second step forward before you reward him with the oats. You will now be progressing from one step forward before you reward to two steps forward before you reward.
If he won’t take the second step forward, then give the reward for the first step, wait for him to finish chewing and ask again for two steps before rewarding him again. If he complies, you can then reward him every two steps during that lesson and quit after fifteen minutes. Give him another day between lessons and then proceed in the same manner, beginning with a review of the previous lesson, then a reward for the first step, and then for every two steps. During this lesson, you can now ask for three steps, and you can continue asking for three or more steps during this lesson, provided that he takes these steps willingly and then stops obediently on his own to receive his reward. You no longer need to count the steps as long as he is offering more steps between rewards each time. If, because of his enthusiasm, he begins to charge ahead, stop him and immediately reward him for halting. This will insure that he keeps his attention on you and the task at hand. This methodical, deliberate process is setting the stage for a positive and healthy working relationship with your equine.
 This is how you begin with leading training, and also how you should proceed with all the new things that you will be teaching your equine. In the beginning of leading training, he gets rewarded for even an assimilation of what you’re asking. For example, when you get to negotiating obstacles, your goal may be to cross over a bridge, but when your equine sees the bridge ahead, he may stop or start backing up. At this point, allow him to back until he stops. Go back and repeat the steps you did prior to approaching the obstacle. Then, asking for only one step at a time, proceed as you did during his flatwork leading training toward the bridge, rewarding each step he takes. Tell him verbally how brave he is and continue to reward any steps he takes toward the obstacle before proceeding forward. Remember to stop at any interval where he becomes tense, ask for one more step to be rewarded, and then allow him to settle and refocus before asking any more from him.
Once he goes to the bridge without a problem, you no longer have to reward him all the way up to the bridge. Just reward him when he actually gets to the bridge. Next, step up onto the bridge and ask him to take a step up onto the bridge with his two front feet, which is another new task. If he puts one foot on the bridge or even tries to lift up a foot and put it on the bridge, make sure you reward that behavior. Once he has a foot firmly placed on the bridge, keep tension on the lead rope and ask for his other front foot to come up onto the bridge. If he places his second foot on the bridge, you can then reward him for having both front feet on the bridge. Next, you’re going to continue forward and just walk over the bridge to the other side, pause and reward. Then quit this lesson. In his next lesson, if needed, repeat the approach the same way if he starts to balk. If not, ask him to step both front feet up onto the bridge, stop, make sure he is standing squarely, and reward that behavior.
 Now you no longer need to reward for one foot on the bridge. This is called “fading or phasing out” the reward for a previous behavior (one step), while introducing the new behavior of walking to the bridge, halting and then putting two front feet up on the bridge. Wait for a moment for him to chew his reward and then ask him to continue onto the bridge, stop and square up with four feet on the bridge and reward. If he does not comply and won’t stop on the bridge, just go back to the beginning, approach the bridge as described and try again until he stops to be rewarded with all four feet placed squarely on the bridge
Then you ask him, to place his two front feet on the ground while leaving his two back feet on the bridge. Then have him stop and square up to be rewarded. This is a difficult position and if he cannot succeed by the third attempt, you may have to step in front and aid in his balance, then reward him when he settles in this position.
 The last step over the bridge is to bring the hind feet off the bridge, stop and square up one more time before he gets rewarded. This does two things. It causes your equine to be attentive to the number of steps you are asking and it puts him in good posture at each stage so that his body will develop properly. In future lessons, the steps in the approach to the bridge no longer need to be rewarded and as he becomes more attentive, he will learn to stop any time you ask and wait for your cue to proceed. After several months of this meticulous attention to these detailed steps, he will not necessarily need to be rewarded with the food reward each time—a pat on the neck and kind words of support should be sufficient. Rewards can then be given for whole “blocks” of steps when he successfully completes them.
Here is a question a lot of people ask: “This is fine while my animal and I are still working from the ground, but what happens when I finally get on to ride? Do I keep rewarding every new behavior when I ride?” The answer to that question is, “No, you don’t.” If you do your ground work correctly, it will address all the things that you’ll be doing while you’re riding before you actually even get on. Your equine has been lavishly rewarded for stopping when you pull on the reins and the drive lines, and he’s been rewarded for turning and backing and everything else he needs to learn before you actually get on him, so the only thing left to get used to would be exposure to your legs on his sides. He will soon learn that your legs push him in the direction of the turn you are indicating with your reins. For this action, he does not need to be rewarded.
 In the natural progression of correct training—including during mounting training—your equine should also be getting rewarded when you’re first getting him used to your being on-board. Give him the oats reward for standing still while you attempt to mount (i.e., walking toward him, holding the left rein and reaching for the saddle horn), and then when you hang from each side of his body with a foot in the stirrup (first on one side and then on the other side), and, finally, from each side of his body while you sit on his back. When you ask him to turn his head to take the oats from your hand, you can be sure his attention will be on you because this action will force him to look at you in order to receive his oats. Then reward him again for standing still as you dismount. Consequently, by the time you actually get to the point of riding in an open arena, he’s been rewarded for having you on his back and for behaving well through all the exercises demanded from him during round pen training.
You may first want to lunge your equine when you move into the open arena. Lunge him on the lunge line and reward him during that part of your arena workout. When you are ready to mount in the open arena, have a few oats in your pockets to offer him when you mount on each side the first few times. This will ensure that his attention stays focused on you. Once he is used to being ridden, you will no longer have to reward him in the middle of riding lessons. If he does not keep his attention on his work in the open arena, this signifies that not enough time has been spent on the ground work and you should back up your training regimen to the point that he is maintaining attentiveness and performing correctly, even if it means going back to the round pen or leading work. If, in the ground work stages, you give plenty of food rewards in the correct manner, by the time you groom and tack up, your equine should have been sufficiently rewarded and will not require another reward until after your workout when you return to the work station and un-tack him. This is called delayed gratification. When you un-tack him and do your last minute grooming before putting him away, again be generous with the crimped oats and praise your equine for a job well done. Rewards are dispensed very specifically and pave the road to a solid foundation of trust and friendship.
To learn more about Meredith Hodges and her comprehensive all-breed equine training program, visit LuckyThreeRanch.com, MEREDITH HODGES PUBLIC FIGURE Facebook page, or call 1-800-816-7566. Check out her children’s website at JasperTheMule.com. Also, find Meredith on Pinterest, Instagram, MeWe, YouTube and Twitter.
© 2013, 2016, 2018, 2021, 2022 Lucky Three Ranch, Inc. All Rights Reserved.


 distress and pain. This includes harsh bits, chain leads, twitches, hobbles, stocks and even medications. There are times when our equines can really be a handful, so having a little leverage when needed can be a good thing. However, deciding which equipment to use and learning how to use leverage without it becoming abusive can be a bit daunting. There are so many different types of tack, equipment and restraints that it becomes difficult to determine which would be best to use on your equine to correct a particular problem, or if you really need to use anything at all. It may only be a case of needing to be clearer in your approach, in which case, leverage equipment may not be needed. It is important to make an informed decision when using any leverage equipment to be sure that what you are using is helpful and not abusive.
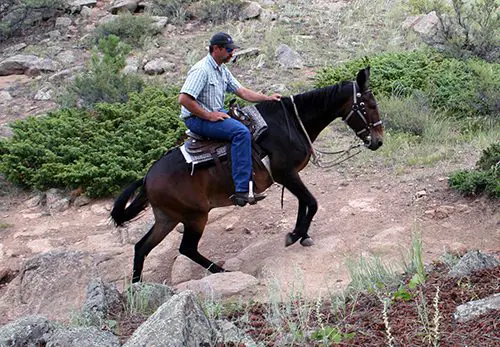
 One very common behavioral problem that seems to identify the need for more leverage is the mule that bolts and runs when on the lead rope. This seems like an obvious disobedience to the handler, and the first thing that comes to mind is to use a lead shank with a chain to gain control of the mule. Normal use for a lead shank is during a Showmanship class at a show and it should rarely be used in training unless the equine will be shown at halter and/or showmanship. And then, training with the lead shank should be done only after the animal is following well through all required movements while in his halter and on a lead rope.
 If, after you’ve employed a kind, considerate and respectful approach along with a food reward, your equine is still being uncooperative, it may be appropriate to use equipment with more leverage such as the “Quick Twist,” but not necessarily chains. Chains do need to be used in some cases, such as with work harness (and most curb bits are now fitted with chains), but when not used correctly, these chains can be abusive. The chains on the pleasure driving harness should clear the legs and heels of the driving equine, and the chin chain on a curb bit should be adjusted so that it is twisted properly and lies flat against the animal’s jaw with an allowance of two fingers between the chain and the jaw, thereby minimizing any chance of injury. If you have a generally compliant equine, it is better to use a leather chin strap on your curb bit rather than a chain.
 To employ the “Quick Twist” restraint, just take your lead rope and create a loop and feed it through the noseband of your nylon halter (rope halters are too loose and do not work) from back to front and then over the mule’s nose. When you pull on the rope, it will tighten around the end of the his nose below the incisive bones and over the cartilage, making breathing just a little difficult. Don’t keep pulling—just stand quietly and hold the tension snug. Let the equine come forward to you and slacken the rope himself by coming forward and allowing a free flow of air through his nostrils. Then, if the mule does not follow, just walk a step or two, creating tension on the rope, and then stand still again. When he does come forward, stop long enough to reward him with the oats reward before you proceed forward again. Keep the lead rope short and stand still in a balanced way so he cannot get ahead of you and jerk you off your feet. If you are standing still in a balanced position, it will be difficult for him to jerk the lead rope from your hand and leave.
 Restraints should not be used as a means to control your animal except for a short period of time with the purpose of showing them a correct behavior. Restraints should be used as a support and not a controlling device. Restraints should be “phased out” as soon as possible.
 Do not try to bully him into it or he will just pull back. This should be done while he is standing parallel to the hitch rail so that when you pull the rope tight, it pulls his head tightly sideways to the hitch rail. This will keep him from being able to swing his rear end around to block you. Reward him with oats and let him quiet down in this restraint before approaching with your shot. If he manages to keep you off the clear side, you can always go to the other side of the hitch rail and give him the shot from that side without fear of injury. You can do this along a stout fence provided the rails are sturdy. If you do this correctly, it will simply restrain him in a safe manner and keep you out of the line of fire. Each new time that you give shots, try to do it with the rope a little looser each time to fade out the restraint. They will usually just come to expect and go for their position along the hitch rail or fence and will lean into it like they do when you first gave the shots like this. He will soon learn to quiet down immediately when his face is being tied and at best will seem to be saying, “Dang, do we have to do this again?!” But, he will learn to comply.
 This is a humane restraint for mules and donkeys, but do not try this with a horse! This is a good restraint to use (and fade out) for any Longears that is difficult to worm, give shots, take blood, clip bridle paths and to use for those that are difficult to bridle. When using the Face Tie for bridling training (or clipping the bridle path), you will only need to go through the noseband and hitch rail (and not through the throatlatch unless you need to prevent them from turning into you). Just make sure when you put on the bridle that you “protect” their sensitive ears with your hands as it goes on and they will learn to trust you. Put the bridle on over the halter for the lessons until they don’t mind the bridling process.
 Your Longears will only need the kicking training covered in
  the hind foot, around the pastern and let it lay on the floor. Next time, you won’t have to use it at all. Your goal is to phase out the restraint entirely.
 Hobbles are another form of leverage equipment and there are many different kinds of hobbles for different purposes. The hobbles that have chains on them should be avoided, as the equine can become entangled and the chains can do damage to their legs. Thin leather hobbles or coarse rope can chafe the hair right off the skin around the pastern and can cause severe abrasions that may never heal. Thick leather hobbles are best, as they will break when under extreme stress, releasing before damage to the equine is done. If so inclined, all mules and some horses can gallop in hobbles, so hobbles really aren’t all that effective for leverage. Tying onto a hyline (a rope suspended high between two trees that acts as a hitching line for overnighting equines in the mountains) is a better choice, and if the horses are tied, then the mules should not have to be tied or hobbled because they will generally stay with the horses. Personally, I only use hobbles in a controlled situation at the work station when body clipping my equine’s legs for show.
 I do not approve of using power tools on the equine’s hooves at all. In order for the equine’s body to be properly balanced in good posture, the hooves must first be properly balanced. Power tools cannot possibly shape the hoof with proper curvature in the sole, alignment of angles and equal balance over the hoof walls with appropriate pressure to the heels and frog.
 First, you should be sure that the trailer in which they are to ride affords safety and comfort and that the plates on both the truck and trailer are up-to-date. Before you leave, you should check over your trailer thoroughly. Make sure the hitch is secure and in good repair, and that there are no weakened welds anywhere. Check your trailer’s tires, bearings, axels and brakes for maximum performance, and make sure all the lights are in working order. Take the trailer mats out and check the floor boards for rot and other weaknesses, and replace all floor boards that are even questionable. It is always good practice to get all new tires for the trip and a new spare.
 Mules and donkeys, like horses, should be “dressed” for their trip. For their overall comfort during long trips, halters should be fleeced, at least over the noseband, to protect from excessive rubbing that can result from being tied. Shipping wraps for their legs are also advisable to prevent injuries from a loss of balance, misstep or kick from another animal in the trailer. Depending on the weather and the kind of trailer you have (either a stock trailer or enclosed trailer) you can use sheets or blankets to protect the rest of your animal’s body.
 When loading your mules and donkeys, pay special attention to each individual’s needs. Animals that lean one way or the other generally do better in a slant load trailer rather than in an in-line trailer, but if you must use an in-line trailer, make sure that the animal that leans has a solid wall or partition on the side to which he leans. You always want to put animals next to each other that get along well, so if you must load a leaner on the wrong side, be sure to put him next to an animal that is able to tolerate his leaning without retaliating if there are no partitions. If you have an open stock trailer, another alternative is to load your animals into the trailer and tie them facing backwards. Many equines actually prefer to ride facing backwards because they find it easier to balance. Note: This alternative is not advisable in a partitioned in-line or slant-load trailer.
 Long before you actually go anywhere, get your animals used to being handled inside the trailer. When unloading, always make them stand and wait. I usually remove my animals’ shipping wraps before I let them come out of the trailer, but if they are packed in pretty tightly, I just remove the leg wraps I can reach. The removal of leg wraps before unloading will add purpose to your Longears’ waiting time (which they quickly come to understand). Frequently offering water at stops gets your animals used to you moving about the trailer while they are loaded. Most equines realize that all of this is for their benefit and you should find them mostly cooperative and appreciative. Having water from home in plastic jugs makes this easy.

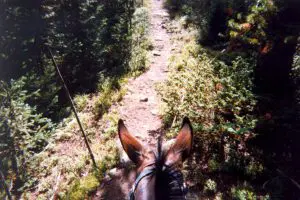

 We are fortunate to be able to share our time with such intelligent, tough and durable equines as our beloved mules. But you should also remember to do your part in the relationship. Be patient and willing to take the time to allow your relationship to grow and for training to become solid before you indulge in the challenges that trail riding can present. Plan ahead and scout the locations where you desire to ride. With the growth of urban populations, open areas that welcomed riders in the past are not as numerous as they once were. Many areas now welcome hikers and even bicycles, but not equines. Find the designated trails and camp grounds that will accept equines when planning your treks.
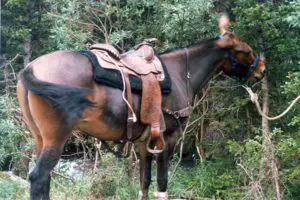
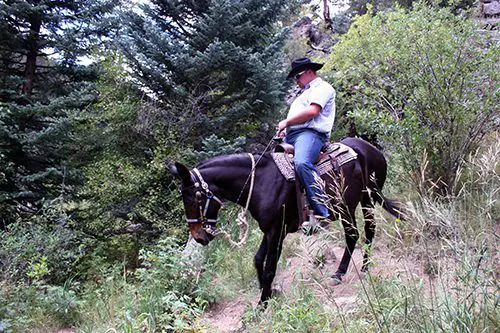 Even a ride that is planned to be short can turn into challenge if the weather changes suddenly, so be sure to plan for the worst case scenario. Tack up your equine in comfortable tack and equipment that fits like a glove. I like to ride with a crupper because it will hold the saddle in the correct placement when adjusted correctly and will allow for full range of movement, particularly behind when climbing uphill. If you use a breast collar, make sure it is loosely fitted so it does not pull your saddle forward and into the shoulder blades. Be sure to pack your saddle bags with the barest necessities for any ride far from home: Compass, water, rain gear, a Swiss Army knife, buck knife, hoof pick, lighter, fence pliers, Granola Bars or Trail Mix, a sleeping bag, a warm coat, Bear Spray and a First Aid Kit (at the very least Gauze, Vet Wrap and Neosporin).
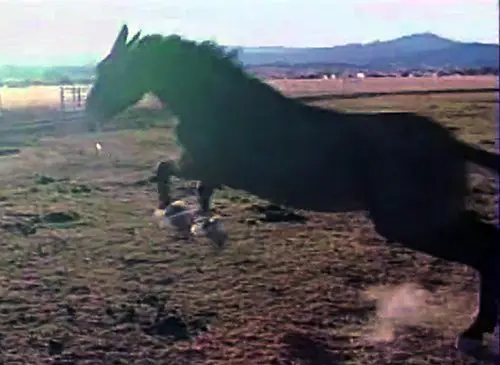 If planning an overnight trip, you will probably need a pack mule, or horse, to carry the extra food and additional necessities you will need like tents, blankets, sleeping bags, more food, extra clothes, High Lines and extra halters, and food for your equines. Lots of places will not allow your equines to graze in the parks, but some do. I do not like using picket lines where the equine is tied low with a halter, or with a rope around a foot. I do not like to use hobbles either (Mules can run off in hobbles with no trouble at all!). It is too easy for equines to get tangled up or injure themselves when they are restricted this way. They can get sprained tendons and ligaments, or severe rope burns that will leave them scarred for life. I prefer to bring their favorite horse “friend” along and tie the horse, and mules that tend to wander, to a High Line. Most of the mules can be allowed to run free and won’t leave your camp with the horse there, but do not leave halters on them. Again, they could become tangled up and injure themselves. If you have spent adequate time during training to build a solid relationship with your mules, they are much less likely to wander off and get lost. They will choose to stay near you.
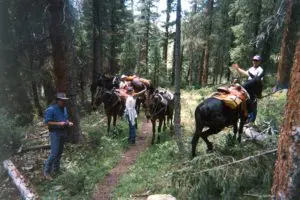
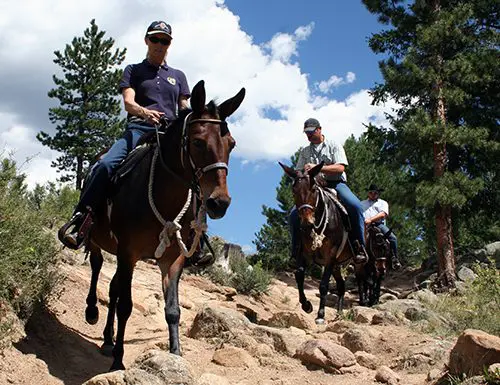 If you can, choose a place where you can establish a base and park your truck and trailer. You can then tie them on a High Line during the evening and put them back into the trailer for the night. This might be better if you are an area where there are a lot of large predators. Just don’t leave the truck and trailer windows open so a predator can get in. Stock trailers are the best for this purpose since they also have more room in them and are fully enclosed. Any food that could be attractive to predators should be mounted high in a tree, at least 50-100 yards away from your camp and your equines.
 By Meredith Hodges

 chest is composed of one wide muscle mass that resembles a turkey’s breast, which greatly enhances the mobility of the front quarters. Another example is found in the mule’s hindquarters, where the long, wide and smooth muscles enable the mule to kick forward, backwards and sideways—he can even scratch the top of his head with a hind foot if he wants to! Mules are also quite capable of climbing under, over and through most kinds of fencing. Restraints that are used with horses often do not work with mules because of their astounding ability to free themselves from annoying circumstances with their strong, quick and agile movements. Because the hindquarters of the horse possess bulkier muscle masses, the horse does not have this incredible range of motion. The difference in muscular structure is similar to that of a ballet dancer versus that of a weight lifter—the ballet dancer’s longer, smoother muscles are more conducive to elasticity and agility.
 In addition to this physical structure, which allows him more diverse range of movement, the mule also inherits from his sire (the donkey jack) the strength to tolerate prolonged and strenuous use of his muscles. One need only try to budge an unwilling donkey to realize his incredible strength! Donkeys traditionally possess an unbelievable vigor, and this vigor is passed on to the mule, adding to his superiority over the horse in strength and endurance. The donkey jack also contributes to the superior, tough hooves of the mule and a unique resistance to parasites and disease. Throughout their long history, the donkey’s natural ability to survive and thrive in habitats both desolate and unyielding guarantees that donkeys and their mule offspring are more sure-footed than other equines and masters of self-preservation.
 As a rule, donkeys are equipped with the innate intelligence to sense that humans are not always concerned with what is really best for them, yet they are still willing to gives us the opportunity to convince them otherwise. Donkeys also have a natural social attraction to humans and, when treated with patience, kindness and understanding, they learn to trust and obey. On the other hand, if they are treated with pain and abuse, they are not likely to comply and can become very dangerous to handle. Mules and donkeys have an honest way of responding to our demands, so if your mule or donkey is not complying with your request, you need to review the clarity of how you are communicating your desire and adjust your approach accordingly. The intelligence of the donkey is no accident.
 There are so many equine-related products on the market today that it is often difficult to decide which ones you really need and which ones you don’t. For instance, the subject of Splint Boots and Leg Wraps can be very confusing. How do you know when to use them? What types of Leg Wraps or Splint Boots are best? Do they really help? In what ways do they help? What kind of material should they be made from? And the list of questions goes on.
 are also used for support during training. These types of wraps are commonly used during Dressage training and typically only cover the Cannon Bones and not the fetlocks and pasterns. If you use Polo Wraps, or quilted cotton pads and wraps, learn to wrap them correctly to avoid pressure points that could cause circulation problems. Begin the wrap by placing the quilted pad or cotton pad in place around the Cannon Bone. Start the wrap at the center of the Cannon Bone, measure the tension on the wrap to make sure it does not interfere with circulation, that it is just snug and wrap down to the Fetlock joint. Then wrap upwards to just below the knee and Velcro the wrap in place. To keep the wrap from sliding down, use Duct tape just below the knee with one rotation of a tighter wrap to keep it in place. Consult with a professional to learn the proper wrapping technique. It is usually a hands-on lesson with a lot of practice! When they have lost their elasticity, it is time to throw them out.
 After his basic training, when your equine is participating in more stressful activities such as Jumping, Endurance, Reining and Racing (or in the case of an injury), it may become necessary to use a more supportive boot to lightly support already conditioned muscles and tendons. Support boots are designed to provide even support over the entire area that they cover. Be careful that they are neither too tight, nor too loose. You don’t want the boots so tight that they cut off the blood supply to the covered area, or not flexible enough to allow the joints to move freely. However, you don’t want them so loose that they ride down the legs.
 lameness if damaged, even by a small, seemingly insignificant cut or bump. If a hoof is unusually dry, severe cracks can occur. It is advisable to routinely use a hoof dressing in addition to the “Bell Boots’ to prevent traumatic cracking during repeated concussion.
 You might be asking yourself, “How can I tell a minimal support boot from a fully-functional medical support boot?” This can be quite confusing considering all the different kinds of leg wraps and splint boots that are out there. Some even look identical, but are not. Off-brand Splint Boots look a lot like Pro Choice Splint Boots, but they are made from inferior-quality materials that do not afford the degree of support and flexibility needed for successful therapy. Although these off-brands are designed for support and do cover the joints, they should be considered as more of a protective boot than a Therapeutic Boot. Splint Boots are strictly for the protection of the Cannon Bones because they do not cover the joints and offer very little support.
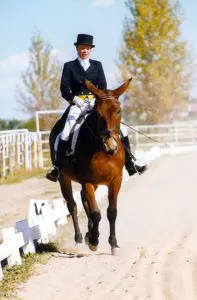 In order to perform the shoulder-in properly, it is important to understand its purpose. The shoulder-in causes the equine to engage his hindquarters so that they carry the bulk of his weight, giving him more freedom and suppleness in his shoulders and front quarters. A strong base must be established to carry this weight forward while the shoulders remain light and free to proceed forward while tracking laterally.
 Begin by walking your equine around the perimeter of the arena. When you reach the corner before the long side, make a ten-meter (30-foot) circle. As you close your circle at the start of the long side of the arena, maintain the bend that you had for the circle, using steady pressure on your inside rein. At the same time, nudge your equine with alternate leg pressure in synchronization with his hind legs as they each go forward. Squeeze your outside rein at the same time that you squeeze with your outside leg, and then release the outside rein. Ride the hindquarters straight forward from your seat and legs, as you offset the shoulders with your hands. Be careful that your inside rein is not so tight that your animal bends only his neck to the inside. As you squeeze with the outside aids, feel your equine rock his balance back to the hindquarters, giving you the sensation of pedaling backward on a bicycle. Simultaneously, you should feel the front quarters begin to lighten and become supple.
 Take your time and don’t try too hard. Be content at first with two or three steps of shoulder-in and then straighten him down the long side of the arena. After a few accurate steps of shoulder-in, as he straightens his body, you will feel him surge forward with more energy. Collect and slow your equine’s gait through the short side of the arena and then repeat the exercise on the next long side. As your equine begins to understand the concept of rocking his balance to the hindquarters, the surge of energy that you feel when he straightens will become more and more powerful.
 down the long sides. To add variation, ask him to lengthen across the diagonals (from corner to corner) as well. Your equine’s first impulse will probably be to shift his weight to the forehand and just speed up. For this reason, do not push him too hard too soon. At first, just ask for a little more energy—be aware that your rhythm and cadence will not be lost as his stride increases. He will just be spending more time in suspension. Keep the forehand light and free while you ride the hindquarters. Let your hand open slightly with the foreleg going forward on the same side, and close as the leg comes back. This will help you to determine how far you can let that stride go before the balance begins to shift forward. It will also allow you to check the balance with your hands before it begins to shift. If he has too much difficulty, you should go back and practice lengthening over ground rails again to gain more strength and coordination.
 As your equine gains strength in the hindquarters and is better able to carry your weight, his lengthened gaits will continue to improve until, perhaps a year or so later, he will be able to fully extend his stride at the walk, trot and canter. I caution you, however, that if your animal begins to rush, ask for less.
 The ideal mule should have a head that is slightly longer than that of a horse, but proportionate to the size of the mule’s body. The features should be prominent and give an overall pleasant appearance. The ears should have length and be nicely shaped, and the eyes should be large, soft and kind, reflecting the mule’s health and intelligence. The forehead should be broad, tapering to a small and delicate muzzle, with a shallow mouth and well-aligned teeth, and the nostrils should be wide to allow for adequate respiration while working. Both the mare and the jack are responsible for the shaping of these characteristics, but the jack has primary responsibility where the length of the ear and the mass of bone are concerned. A jack with a longer ear will, more often than not, throw a longer ear to the mule, while the shape of the ear is determined primarily by the mare. The attractive or unattractive head of the jack can emerge in the resulting mule, so be sure to carefully consider the head on the jack to be used for breeding to produce an attractive head on your mule offspring. Standard-sized jacks and Large Standard jacks most often have a more refined head, while the head of a Mammoth jack may be less refined and possess
  thicker bone, particularly around the eyes and jaw line. In the case of saddle mule production, massive bone on an otherwise attractive head can be very unattractive, so using the smaller jacks would be better for a more refined look in your saddle mule (which is also true for the rest of the mule’s body).

 The shoulders of the mule should be at a nearly 45-degree angle, with a broad collar surface. Most mares will have this angle, but donkeys have a tendency toward short, steep shoulders, so, to insure that the mule has good shoulders and hips, consider a jack with good length and a lower angle through the shoulders and hips.
 The chest of the mule should be deep and prominent, broad and well developed (it should resemble a turkey’s breast), with little or no line of separation (as is seen in a horse’s chest). Since jacks are generally narrower through the chest than are mares, the mare chosen for breeding should exhibit much width and depth through the chest to compensate for the lack of it in the jack.
 If a stockier mule is desired (as in the case of breeding for pack or draft mules), a stockier mare bred to a Mammoth jack will produce the desired thickness of bone in the legs of the mule. If a more refined Thoroughbred appearance is desired, the mare should be bred to a Standard or Large Standard jack in order to reduce the mass of the bone in the legs of the mule and retain refinement throughout the body. This does not affect the height of the mule, as the mare is primarily responsible for the mule’s height, while the jack is primarily responsible for the mule’s bone thickness. The forearm and stifle in the mule should be well developed and thickly covered with smooth muscle that tapers to the knee and hock in regular, well-defined lines. Again, these muscles should be thick and smooth, but not bulging, as in horses. The mare will compensate for the limited bulk muscling in the donkey jack, and the jack will contribute and maintain the smoothness of that additional bulk muscle in the mule.
 The coat and hair of the mule should be soft and shiny, covering pliable skin. The coat should be soft to the touch, denoting good skin health. Length and thickness of the coat are contributed by both jack and mare. Since donkeys have a typically thick coat of hair, a mare with a thinner coat will balance this thick hair coat in the mule, making him look sleeker and more horse-like than his donkey sire.


 Mules and donkeys are wonderful animals. They’re strong, intelligent and what a sense of humor! But training a mule or donkey is different from training a horse. They require love patience, understanding and a good reward system. Negative reinforcement should be used sparingly and only to define behavioral limits. The result is an animal that is relaxed, submissive, obedient, dependable and happy with his work.
 long ago when there was virtually nothing published on this subject. Those of us who were training needed to use educational resources published on horse training and modify those techniques to better suit our Longears. This still left a lot of room for trial and error…and frustration for both the trainer and the animal.
 increased interest has come an increase in the numbers of animals that need to be trained each year. The few trainers who are competent with Longears could not possibly train even most of the animals that need it, even if it were geographically possible
 home and become a problem within as little as three months. It is important to take an active part in the training of your Longears. The more you can be a part of the training, the better for both you and your animal. Even if your mule or donkey is with a competent trainer, you need to plan on spending at least two days a week with your animal and the trainer so that your animal learns to trust you as well as the trainer. Being present and interactive with your animal at feeding time will solidify the trust he gains.
 series proves that this was a great way to reach people and help them to reach new levels of communication with their animals. People who never before had the courage nor confidence to even attempt such a thing are discovering the self satisfaction and elation of training their own mules and donkeys. Most people tell me it is the best part of their day when they can work with their animals. They are quite surprised at how easy it is to establish a routine that fits with their other weekly activities…thanks to the intelligence and forgiveness of these wonderful animals.
 At first, you might think there just isn’t enough time to spend with your animal to accomplish all this, but somehow we all manage to make time for these things when we have children. We learn to experience and grow with our children, as we can also do with our animals by being realistic with our expectations at each stage of growth and training. We give ourselves the time to do this without the pressure of being hurried. There are few times in this world when we are really able to “stop and smell the roses.” Longears can afford us this very special time if you only let them. Look upon the time with your donkey or mule as you would look upon the time you spend with your child. Some days will be for learning and some for just plain fun. When there are learning days, try to make them fun and stress-free. Someday you’ll find yourself saying: “I can’t believe he has turned out to be so good. I never really felt like I was ‘training’ him!”
 Imprinting is defined as “rapid learning that occurs during a brief receptive period, typically soon after birth or hatching, and establishes a long-lasting behavioral response to a person or object as attachment to a parent or offspring.” 1 When we speak of “imprinting” in the scientific sense, it is a reference to the way the brain accepts input. The brain compartmentalizes impressions and images, and the animal reacts to the stimulus that the image produces. A collection of “imprints and images” produces memories. Imprinting training with a foal of any breed will give him a jump-start on his life with human beings.
 When imprinting your foal, think about the kind of adult you want him to be. A foal is very similar to a human baby regarding emotional needs—both need attention, love, guidance and praise to become loving, cooperative adults. Start your relationship with a positive attitude and approach your foal with love, patience, kindness and respect. Be sure to set reasonable boundaries for his behavior through the way you touch him and speak to him, the facial expressions you use, and even how you smell when you are around him so he can learn to trust and respect you and be happy at the sight of you.
 The most important sensation to which you can expose your equine is touch. If your touch is gentle and considerate, it will feel good to him and he will be interested in your attention. When you run your fingers over his body, being careful not to press too hard on sensitive areas, he will experience pleasure and begin to look forward to your visits. Learning how your equine likes to be touched will also help things go more smoothly when you begin grooming him and tacking him up and during his training lessons, when he must learn to take his cues from your hands, legs and other aids. Even how you mount and sit down in the saddle—for instance, how your seat is placed on his back—denotes your consideration of him through touch. The wrong kind of touch, no matter how slight, can be a trigger for adverse behaviors. However, the right kind of touch—done correctly—produces pleasure in your equine and instills a willingness to perform in a positive way each time you interact with him.
 To begin imprinting training, run your hands all over your equine’s body and down his legs, and put your hands in his mouth and in his ears. His reactions will help you learn how he likes to be touched. Getting your equine used to touch in this way eventually evolves into exposing him to grooming and working with tack and equipment. You are continuing to build on the initial imprinting work, but now, when you are grooming, the grooming tools will become extensions of your hands, and when you introduce various tack and equipment like clippers, they will also become an extension of your hands. Allow your equine to use his sense of touch (usually with his nose) when introducing any new object. Work toward getting your equine’s response to your touch as highly sensitive as possible, so that he can use his own body language to communicate with you. NOTE: Many owners pat their equine on the top of the head with the flat of their hand as a sign of affection, without realizing that, as a rule, most equines don’t take kindly to people patting their foreheads or faces. A pat on the forehead works if you want to distract your equine, but save it for that purpose only. It is much better to show affection by stroking your equine (always in the direction in which his hair lies), in a soothing and reassuring manner.
 The tone of your voice is another important element of imprinting. If your general tone is soothing and encouraging, he is more likely to comply. Then, when he needs to be disciplined, the change in your tone of voice will convey your disapproval before you even have to touch him to make a correction—giving him the opportunity to straighten up before you actually need to apply the physical backup of negative reinforcement. If, no matter what the situation, you always speak in low tones, he will not be able to differentiate between what’s acceptable and what is not, but if you modulate your voice to clearly express what you want to convey, your equine will be much better able to understand and react appropriately.
 The next sense to which you should appeal is your equine’s sense of taste (a no-brainer). When you dispense the oats reward for all of his new positive behaviors, he associates that wonderful taste with you and will follow you to the ends of the earth to get more oats.
 Work on evolving your own body language as a natural and truly wonderful way to “talk” with your equine. You can also use verbal language, but body language should be your primary form of communication.
 The old saying, “No foot, no mule” is literally true, as it is in any nomadic animal. If the hooves are not trimmed and balanced properly, it will offset the balance of the equine’s entire body and can compromise longevity in the animal because his entire internal structure will be compromised. Most equines will need to be trimmed or shod every 6-8 weeks whether horse, mule or donkey.


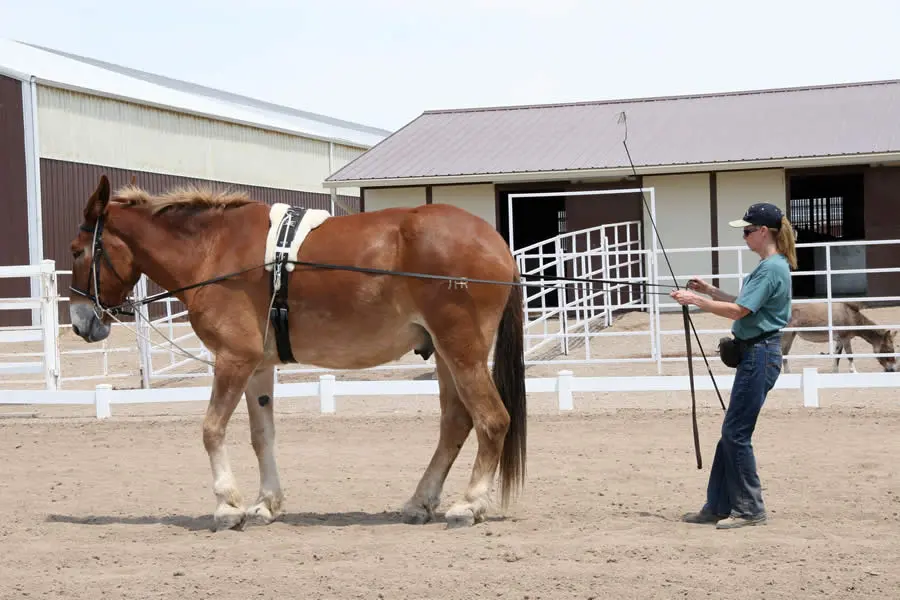


 Being asked to judge a show is both an honor and a tremendous responsibility. Just being asked to judge indicates that you have a reputation for being a knowledgeable and respected person in your field of expertise. Accepting the invitation to judge means that you are willing to share this knowledge and expertise with people who may, or may not, accept IT or you! Exhibitors can say that each show reflects only one “man’s” (judge’s) opinion, so not to worry if you don’t do well. As an exhibitor and a judge, this bothers me a little.
 he exhibitors and not by the personal opinions of the judge. The judge should be a catalyst toward better learning and performance. He or she should try to make their knowledge readily available to inquiring exhibitors and be diplomatic enough about its delivery to inspire and encourage exhibitors to improve their skills. In turn, the exhibitors will be better equipped to exhibit their animals in a favorable light to the public at large and to grow into knowledgeable experts themselves with time and experience.
 objective in his decisions and be able to back them up with reasonable and knowledgeable explanations that will inspire exhibitors to work harder and learn more. He should have a congenial attitude that invites exhibitors to question and learn freely without intimidation.
 credence to his final decisions. In my opinion, judges should assist in helping exhibitors realize their full potential by helping them to improve their skills through fair, just, and educated decisions. A good judge needs to serve the idea of better learning for the sake of health, wealth, happiness, and above all, safety! A judge can be the catalyst toward learning and self-satisfaction, or he can be the catalyst toward defeat and discouragement. I prefer to be the former, encouraging exhibitors to come to me with their questions and also encouraging them to learn from each other. In our Longears industry, the ideal scenario would be to have exhibitors work at home and with each other perfecting their Mulemanship skills, bring those exhibitions of skills to a show to be judged, then return home with a feeling of accomplishment and more things to work on until the next show and the next judge. To perpetuate the learning process and to continue to learn and improve himself should be a judge’s main objective.
 the mules and donkeys reflected this exceptional conditioning, care and handling. The show itself was obviously handled carefully and with attention to detail, leaving little margin for error or dispute. It is not really too surprising that a group such as this was able to elicit tremendous support from sponsors in their area. Their hard work and hospitality is to be appreciated and congratulated. It said a lot for the kind of people that we have in our industry – that we can all have a good time learning and showing together with our marvelous Longears, amateurs and professionals, exhibitors and judges alike! The whole idea is that each and every one of us has something to offer and something we can learn. To attend a show and to learn something new is to return home renewed and fulfilled, even though you haven’t won. To win without this mutual admiration, goodwill and learning is just another hollow victory!
 Everyone learned something at the Oregon Mr. Longears Mule Skinner Classic, including the judge! Dick and Debbie Cress and Alan and Elaine Case are to be heartily congratulated for their exceptional efforts in putting on a successful show and for taking wonderful care of this judge! Thank you to all of you who gave your time and efforts to work on the show and make it run as smoothly as it did! Thank you Larry and Fran Howe for coming with me from Colorado to help judge the packing classes and for helping to Ring Steward and to Gary Hodges for his fine photography! My deepest congratulations go to all the exhibitors for a superb effort. Keep up the good work! Thanks to our announcer Roger Harrison. And a very special congratulations to all of our Mule Skinner Classic Champions!


