By Meredith Hodges
 Your equine depends upon you for his safety and well-being. The best feed in the world won’t keep him in good health if you neglect other important areas such as vaccinations and worming. It’s up to you to create a program to prevent disease and control parasites. Here are some suggestions for a general health program:
1) Cleanliness is very important. Make sure feed boxes are clean and manure is removed from stalls and paddocks. Do not feed hay or grain on the floor or anywhere it may become contaminated with manure. Similarly, small, heavily used pastures tend to build up a heavy parasite load. Pastures should be rotated and harrowed as frequently as possible to break the life cycle of the parasites.
2) Internal parasites are the most common danger to the health and well-being of your mule, and you must be prepared to wage a constant battle to control these worms. Follow your vet’s advice to set up a parasite-prevention and control program through regular worming. The drugs that are available today are very effective in removing parasites and breaking the cycle of re-infection. At Lucky Three Ranch, we worm every eight weeks in January, March, May, July and September with Ivermectin and then break the cycle and worm with Strongid in November. Don’t forget to watch out for bot eggs and remove them immediately.
3) Avoid letting your equine drink from public watering facilities. Use your own clean water buckets. Keep an eye out for anything that might injure your equine, and remove or repair it.
Proper treatment of diseases and injuries depends on two very important factors: correct diagnosis and knowledge of the proper treatment. Your job is to become familiar with equine diseases and their symptoms. In case of sickness or injury, know what to do for your animal before help arrives. Understand what simple treatments and remedies are safe to follow. Above all, know when to call a veterinarian.
4) There are many resources available to help you learn how to be better prepared including books, clinics and, especially, advice from an expert such as your own veterinarian or farrier.
Assemble your own equine first aid kit and, with the help of your veterinarian, learn the proper use of each item in the kit. Be prepared to handle the situation before the vet arrives.
When signs of infectious disease appear, isolate infected animals promptly and call your veterinarian right away.
5) Seek your vet’s recommendations for shots and immunizations, and faithfully follow an annual vaccination program. Make sure you keep good records of vaccinations and worming, and be sure to keep track of when they’re next due.
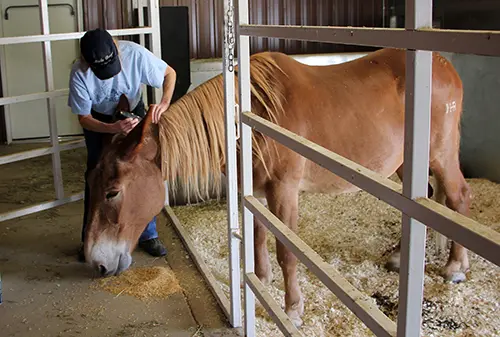
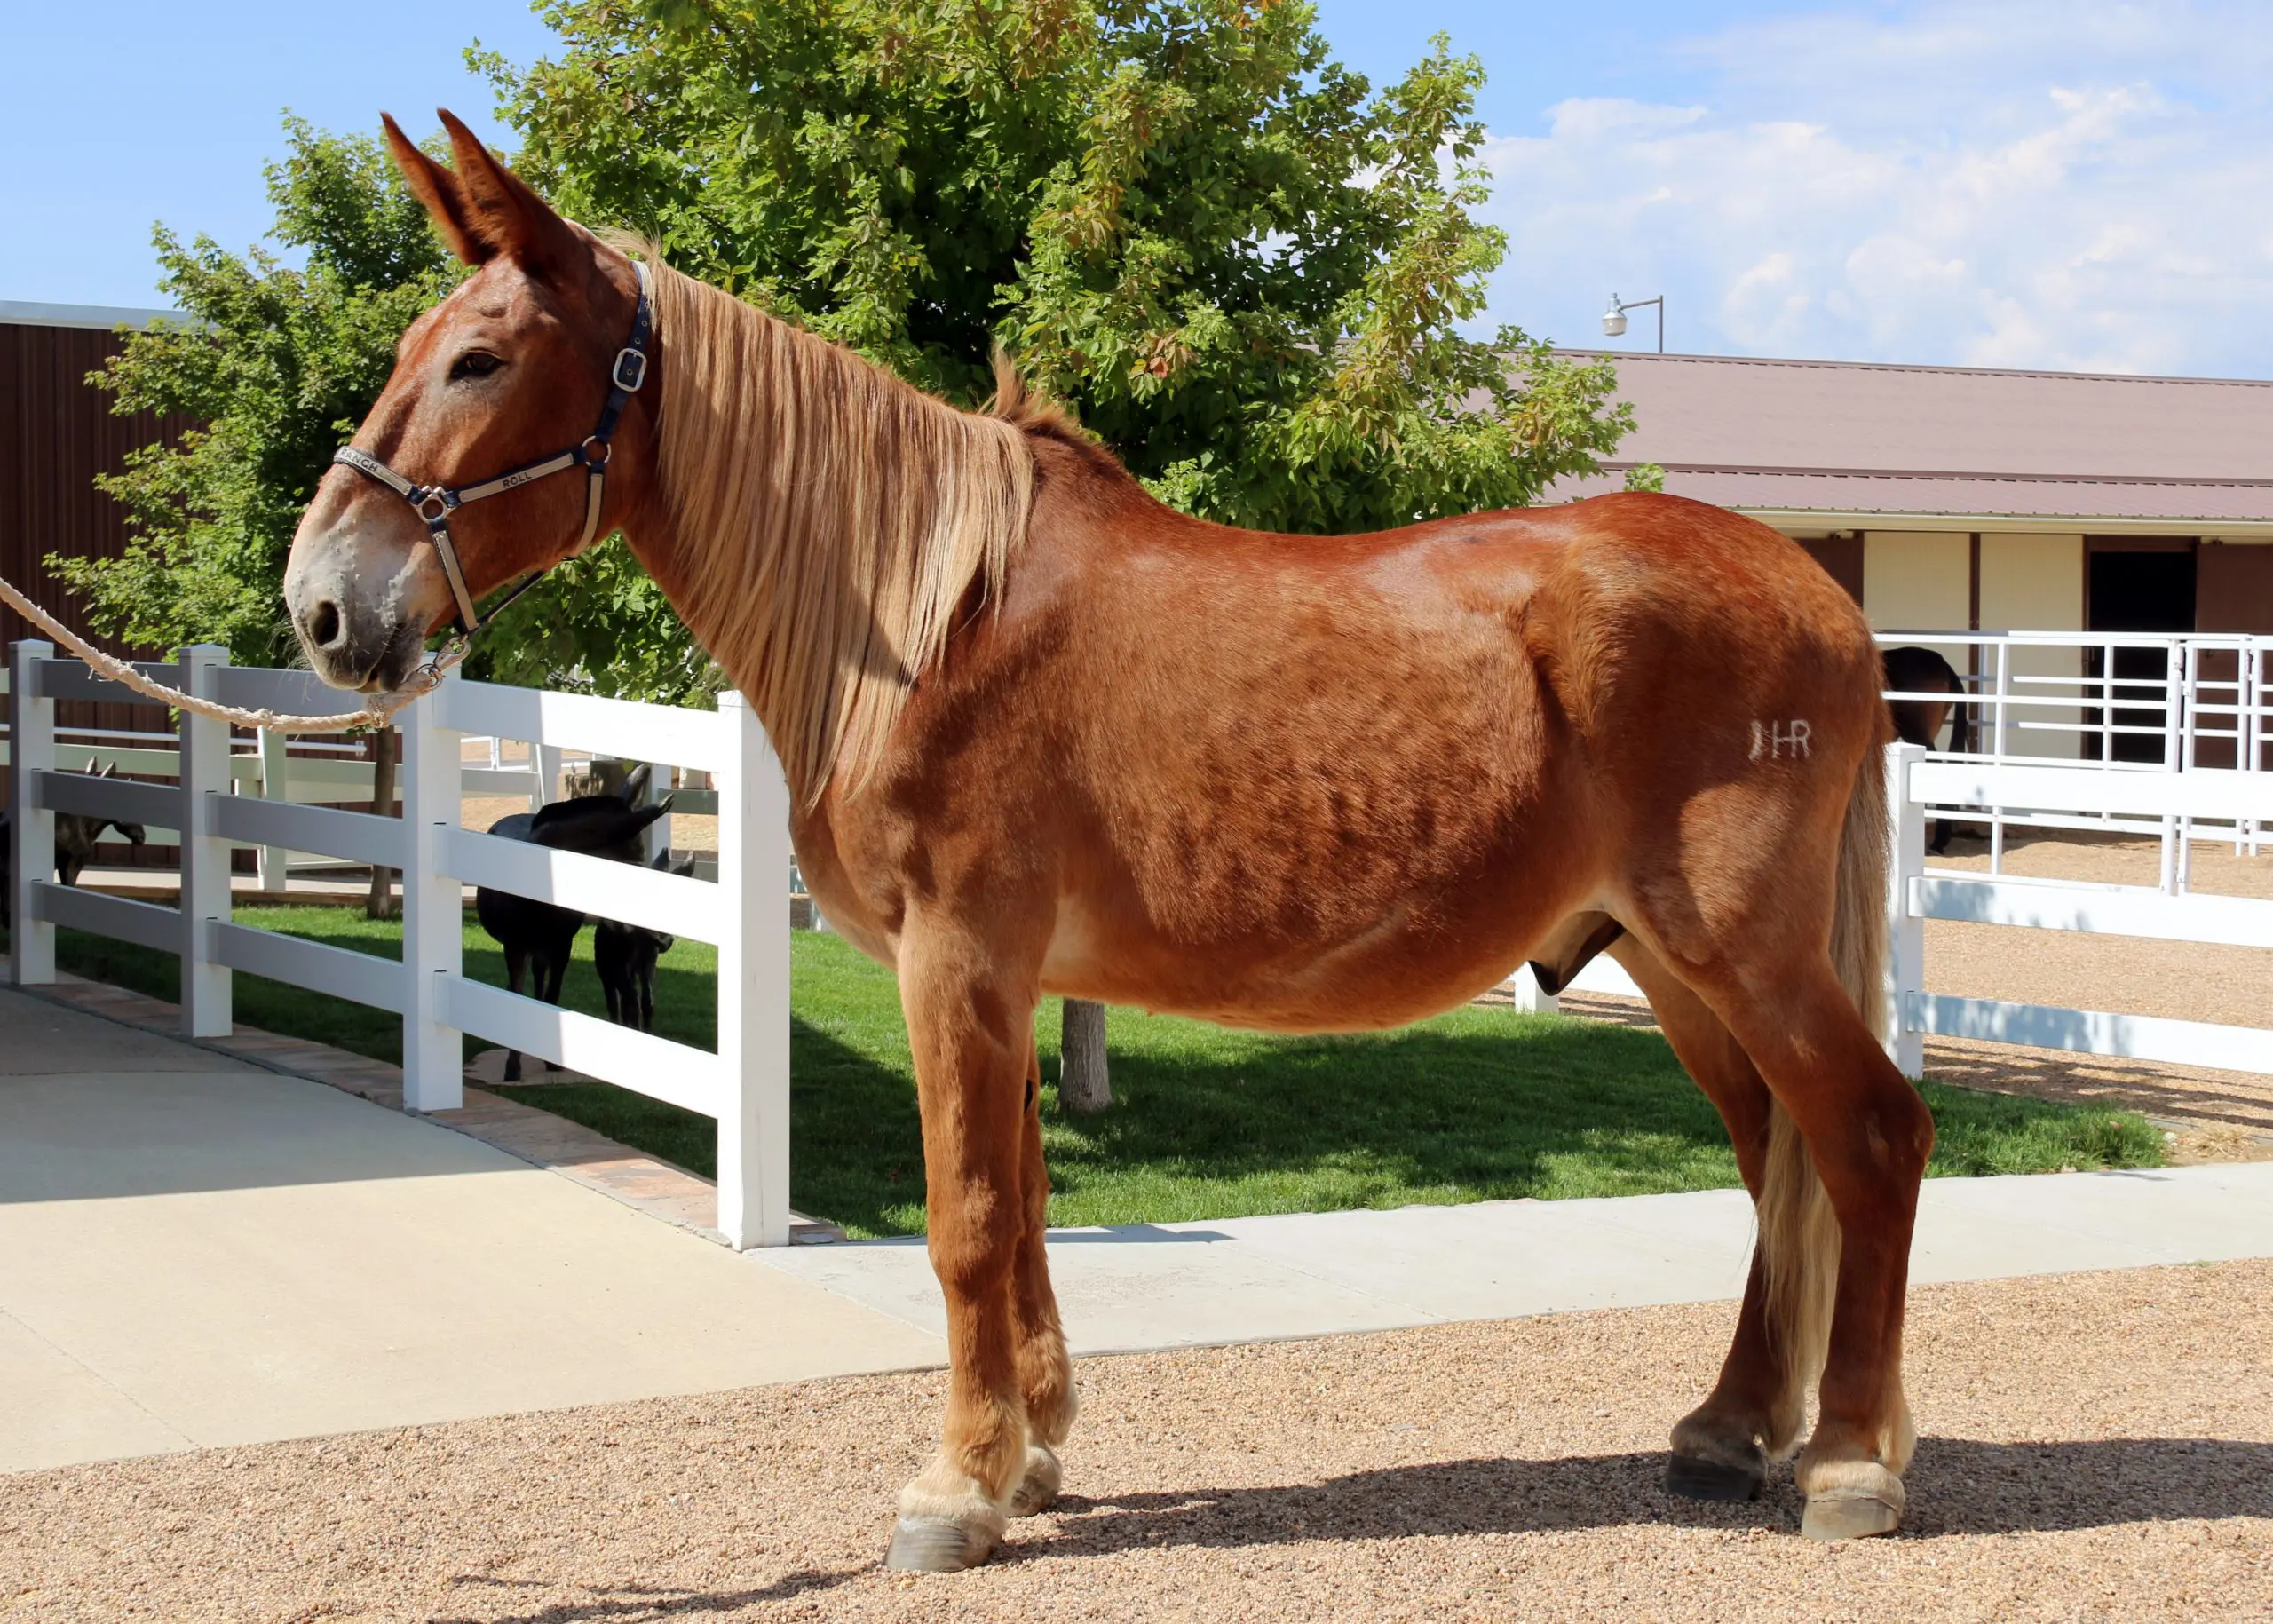
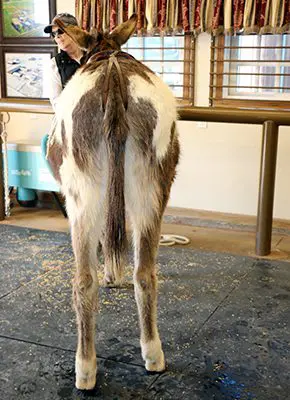
6) One of the best ways to monitor your equine’s health is by establishing a daily grooming routine. Not only will he be rewarded with a shiny coat, but you can watch for cuts and bruises and check the condition of the feet.
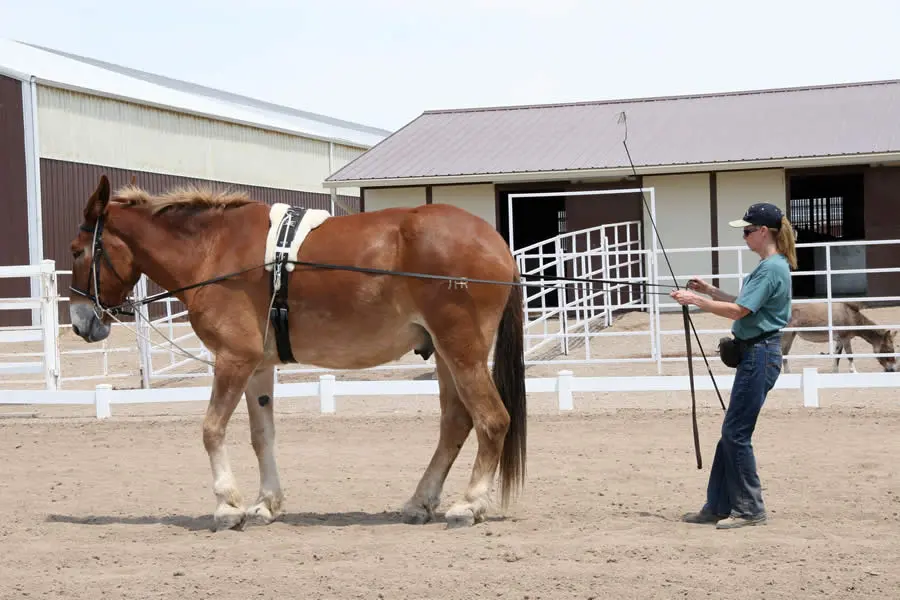
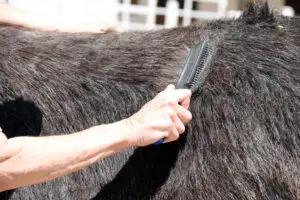
Basic grooming tools include a rubber currycomb to rough up the hair and bring dirt to the surface, a dandy brush to lift out the dirt, a body brush to smooth and shine, a hoof pick to clean the feet and a mane and tail comb and brush. A sweat scraper is handy to remove excess water during and after a bath, or sweat after a workout. A grooming cloth can be used to polish the coat and bring out the shine. In the springtime, a plastic multi-bristled hairbrush and shedding blade are also nice tools to have on-hand to remove dead hair, and a sponge can be used to clean muddy legs.
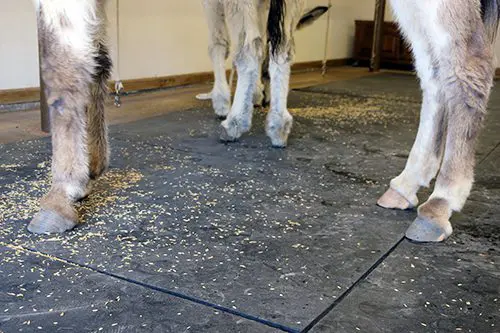
Begin your routine by using a hoof pick to clean the feet. Start with the near front foot, move to the near hind, then the off fore and off hind. If your young mule is skittish, work in whatever order he is comfortable. As he becomes accustomed to having his feet cleaned, you can do them in a consistent order. Clean from heel to toe and watch for infections like thrush and injuries from rocks or nails. This is also a good time to check his shoes. Mules should be shod (if working regularly on very hard surfaces), or trimmed, approximately every six to eight weeks according to use.
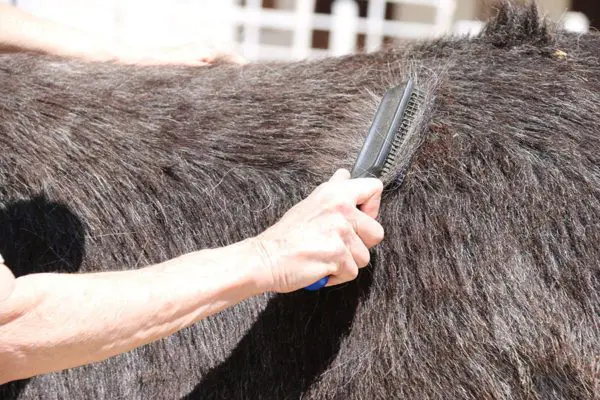
Next, begin to groom the body, starting on the left side at the head. Hold the currycomb in one hand, keeping the other hand on your animal to steady him. Gently curry in small circular strokes, working your way down and back, ending with the hind leg. Next brush vigorously, first with the hairbrush and then with the body brush. During springtime shedding, use your plastic bristle brush on the body to reach the dead hair in the undercoat before you use the shedding blade. Make sure that you apply only as much pressure as feels good to your equine (lighter pressure over bony areas). This should be an enjoyable experience for him.
After grooming the left side, move to the right side. Brush the head with a Dandy brush and use a multi-bristled human hairbrush on the mane and tail. By adding a little Johnson’s Baby oil to the mane and tail during grooming, you can train a mane to fall to one side and keep other equines from chewing on manes and tails. Finish with a soft body brush. Finally, use the grooming cloth to wipe around the ears, face, eyes, nose, lips, sheath (if it’s a male) and the dock of the tail.
While paying this much attention to your mule’s body, you will be sure to see anything abnormal such as an abscess, a cut, mites or insects, or a sore. Early discovery and treatment keep problems small.
Besides routine grooming, your equine’s longer hairs can be trimmed as often as needed. Clip the long hairs from the head, the outsides of the ears, on the jaw and around the fetlocks for a neat and clean appearance.
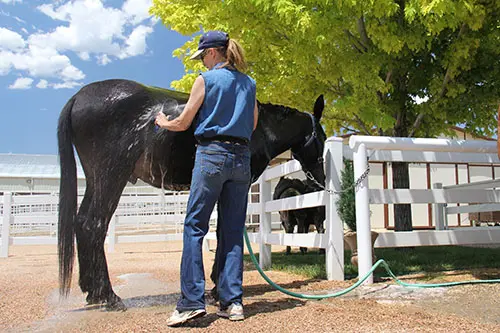
Mules and donkeys like to be dusty, but they also like to be clean. Bathing every so often will make your Longears look and feel better. All equines enjoy having all that itchy sweat rinsed off after a good workout. I don’t recommend bathing too often with soap because an equine’s skin is sensitive. Soap can irritate it as well as strip away the essential oils. Most of the time, a good rinse, while scraping the excess water off with a shedding blade, will maintain a clean, healthy coat. Of course it’s essential to have a spotless animal if you’re off to a show or parade.
Once your mule has been bathed and is spotlessly clean before the show, all you need to do to prepare him for your class is a quick once-over with a vacuum. Vacuum training is like anything else—take your time, be polite in your approach and make sure your mule understands that this strange, noisy monster is not going to hurt him. Soon he will learn to enjoy being groomed by the vacuum. The vacuum will also promote better circulation to the muscle tissue.
BODY CLIPPING
If you plan to show your mule, you might consider body clipping. If you clip in mid-April or May, you will expedite shedding and the hair that grows in will be more manageable than the heavy winter hair. Equines that are not going to be shown should be left with their natural hair coat, as it insulates them from both cold and heat, and protects them from invasive insects. Mules and donkeys shed more slowly than horses and are not usually fully shed out until late summer.
There’s a bonus to clipping a show mule or donkey—their hair won’t grow back as quickly as that of a horse. Just remember that clipped animals should be stabled and blanketed during cold weather. If you do blanket your mule, you must be ready to add or remove blankets and hoods as the weather changes each day. To keep the coat from growing back too quickly, it helps to have them under 16 hours of light (summertime light duration).
To body clip your mule, begin with a quick bath. Your clippers will last longer if your mule is clean. When he’s dry, use your rubber currycomb to bring any dirt and dead hair to the surface. Follow with a good brushing. If it’s too cold for a bath, use a vacuum to get him clean.
Begin clipping the legs and head, because these are usually the hardest areas to do. If he’s a little difficult, don’t hesitate to use the restraints you learned about in DVD #2. Use a twisted lead rope hobble to restrain the front legs, a scotch hobble for the rear legs, or a face tie for the head, but be sure to use them as described and don’t be punitive in your approach. Start with small clippers on the coronet band and fetlock, working your way up each leg.
Do the body last with large animal clippers. Clip against the lay of the hair. Start at the rear and work your way forward, clipping first one side and then the other. Pay special attention to the flanks, the mane and the fuzzy areas under the belly and around the forearms and buttocks.
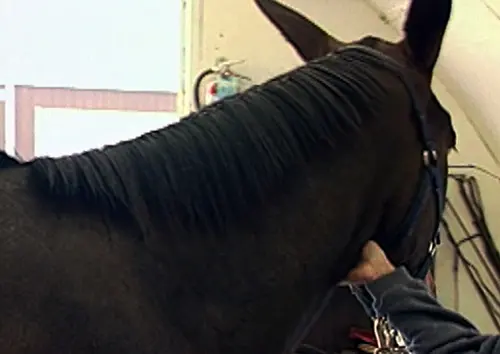
If your mule has a nice mane, leave it and clip a bridle path. The length of the mane and the bridle path will depend on trends in the event you are participating in. For example, in English riding, manes are kept shorter to make braiding easier, but if your event is reining, keep the mane as long as possible. I like to grow the manes as long as possible (they help to keep flies and insects at bay), give crew cuts through the bridle path to the males and leave a foretop and bridle path on the females.
If you’re packing, you might want to shave or trim the mane short for the sake of simplicity. Many people shave the foretop and bridle path with a #10 blade, and then trim the rest of the mane to half an inch. You may trim the outside edges and backs of the ears, but leave the inside hair to prevent irritation from flies and bugs.
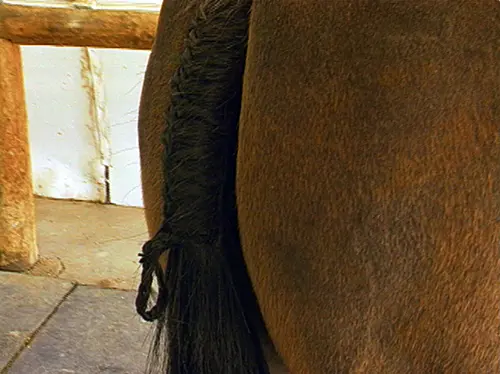
The tail is another area where there are many variations. I recommend applying Johnson’s Baby oil to the base during each grooming and letting the tail hair grow. This is a good idea if you compete in open events with horses. A second method is to shave the first two inches of the tail for a clean, well-groomed look (however, it does grow back even fuzzier!). A third variation is to “bell” the tail in three tiers. This looks best with a thick tail and is generally used for identification purposes by packers and the military, but is not recommended for normal grooming, as it is difficult to maintain.
Now you’re ready to trim the head. This will include trimming the bridle path, muzzle hairs, hair under the jaw, long hairs around the eyebrows and the backs and edges of the ears.
Lastly, remove chestnuts and ergots by soaking them with baby oil for about 30 minutes and peeling them off. If the ergots don’t peel off, you may cut them off with scissors or nippers.
Now you’ve got an equine that looks great! It will be easy to keep him looking good with a weekly trim that should include bridle path, ears, around the face and coronet bands.
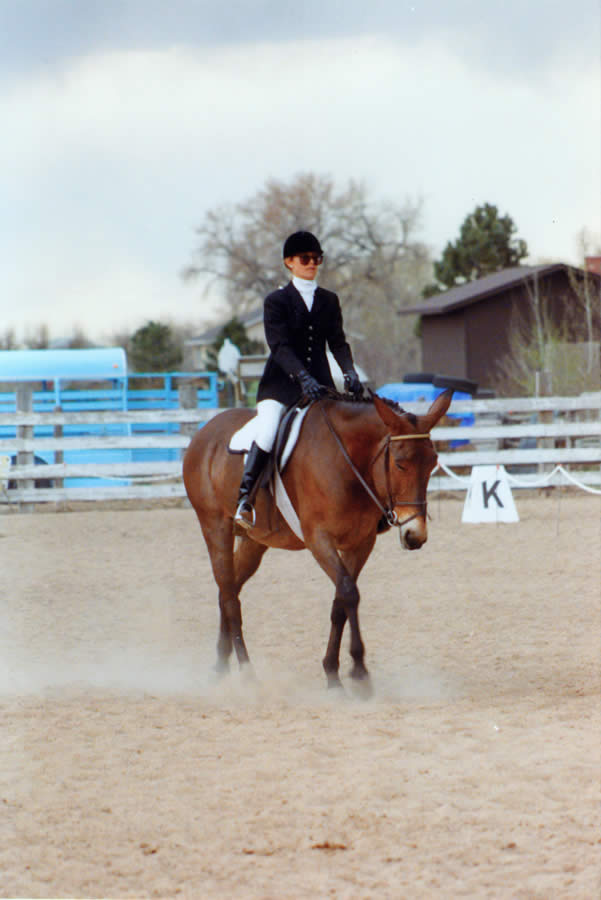
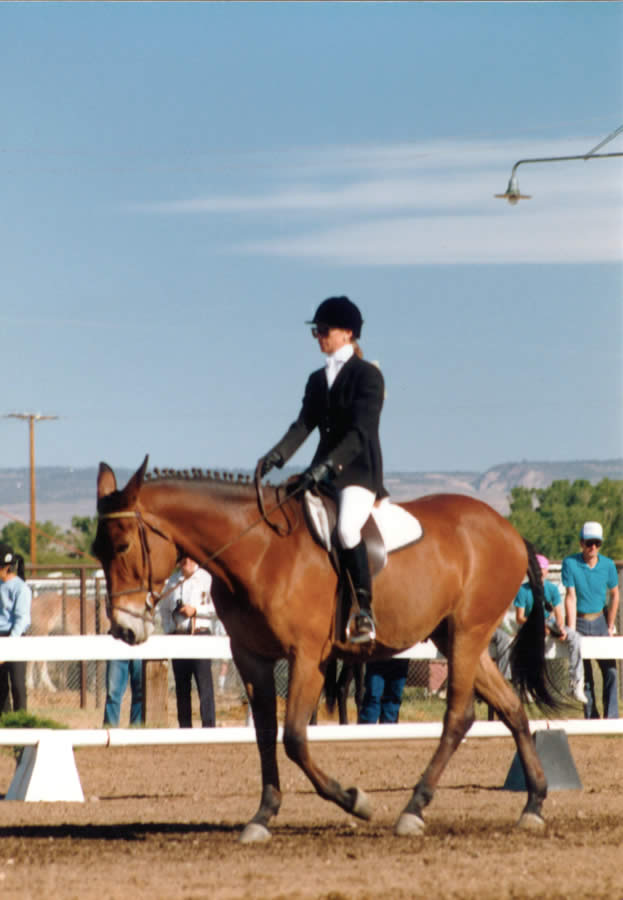
BRAIDING FOR SHOW
Depending on the event you plan to show in, treatment of the mane varies considerably. For Western pleasure, you may want to simply band the mane so it lies flat. The tiny rubber bands can be purchased in tack shops in colors to match your mule’s hair. Tradition dictates the braiding of the mane for hunters and English classes for a neat, clean appearance. A thick, heavy mane cannot be properly braided and must be thinned until all the hairs are about four to six inches long and lay flat on the neck. This is done by using a mane comb to pull out the long hairs from the underside of the mane. This can be a big job and it’s annoying to your equine, so limit mane pulling to a few minutes a day. Make sure the hair is the same length from poll to withers. Don’t even think about cutting it with scissors—it will just end up short but way too thick to braid.
You can spritz a little water and hair spray to make the hair easier to handle. The quickest way to secure the braids is by using tiny rubber bands. It’s also very easy to do and it’s great for one-day shows or quick changes between classes.
Sewing with thread or weaving yarn looks very professional and is more permanent, but it’s also more time consuming.
Once the braid is finished it should be folded once and fastened with either rubber bands or a piece of yarn or thread. It can also be rolled and tacked into place. How you finish your braid will depend upon the time you have and the look you want to achieve, as well as what looks good on your equine!
Braiding the tail begins with a clean, well-groomed tail. Even short hair can be braided if you use a lot of hair spray to make it sticky. Moisten all the hairs along the dock with a damp sponge and bring them forward. Take a section of hair from each side of the tail, as close to the top as possible, pulling the sections out from as far under as you can.
On a horse, you can pick up a third section from the middle of the tail, but on a mule’s thin tail, take the hair from the side. Cross it over one of the outer strands. Begin braiding with three strands down the center of the tail. With each twist of the braid, pick up a little more hair from either side or from the middle. Continue braiding until you reach the root of the tail, then don’t add any more hair, but braid until you reach the end.
Fasten the end of the braid with a tiny rubber band or a piece of yarn. Now fold the braid once and pull the end up into the braided root, tying it at the base with yarn or thread.
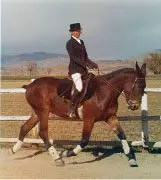
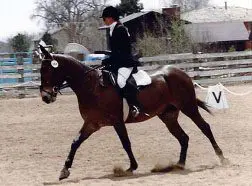
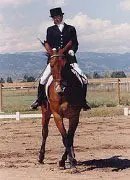
In showmanship and halter classes, it goes without saying that your equine must be groomed to perfection. This means that, for months prior to the show, you’ve given your equine a good brushing or vacuuming at least once a week. Brushing stimulates the skin and brings out the natural oils that make the coat shine. No amount of “shine in a can” will replace the natural luster of an equine that’s been brushed regularly.
To learn more about Meredith Hodges and her comprehensive all-breed equine training program, visit LuckyThreeRanch.com, MEREDITH HODGES PUBLIC FIGURE Facebook page, or call 1-800-816-7566. Check out her children’s website at JasperTheMule.com. Also, find Meredith on Pinterest, Instagram, MeWe, YouTube and Twitter.
Covered in TRAINING MULES & DONKEY: A LOGICAL APPROACH TO TRAINING, TRAINING
WITHOUT RESISTANCE, EQUUS REVISITED and A GUIDE TO RAISING & SHOWING MULES at www.luckythreeranchstore.com.
© 2013, 2016, 2024 Lucky Three Ranch, Inc. All Rights Reserved.


 So that prompted me to get really meticulous about what I did. That’s why I launched into what I did establishing the Loveland Longears Museum and Sculpture Park at Lucky Three Ranch as a 501 (c) 3. We had to develop a “mission statement” to make it legitimate. We did that to teach people, at risk-kids and younger children about the care, maintenance, handling and training of equines in general and not just mules…but, with the primary focus on mules. The focus being like that would ensure that my animals would be part of the 501 3 (c) 3 and would be guaranteed a place in the whole foundation. They would be taken care of!
 I hear from people every day that tell me they can’t find good grass hay for their animals. Mules and donkeys, being desert animals have to have a very specific diet or they can easily become obese and then you have all sorts of problems and vert bills up the ying-yang, if they don’t just die. It is really easy to mess up that program. The people that have been with me have been here for more than 20 years. We all operate as a team and not by how many hours are put in. Rather, each day is gauged by the tasks needed to be performed and we do not call it a day until the list is completed each day. We all pitch in to help each other when one person has more to do than the others. Each person has their own specific job description, but we all pitch in together when it is time to do the hay during the hay season.
 The two of us girls welcome the opportunity to get out of the office during hay season. The weather is always lovely and working together is a lot of just plain fun. Doing house and office work can get rather tedious when it is so repetitive each day throughout the year. We try to keep up morale by changing up the schedule every so often. There are a lot of things to do like answering the phone, answering peoples’ questions, taking orders, booking tours, distributing orders, keeping the book-keeping straight each day, making Social Media posts regularly, checking the websites connections, both the LTR website and the Jasper website, keeping up the inventory cards in the warehouse and updating all the records for the attorneys and accountants. We also celebrate birthdays
  with our fellow workers, including our remote graphics artist, videographers and with our JASPER MASCOT, Social Media and behind the scenes website help. It is important to keep a happy and enthusiastic crew!
 One cannot make any assumptions about what should happen upon your death after you are gone. If you don’t do the things as meticulously as I have done, anything can happen and your animals will suffer. It is better to have it all clearly laid out and in such a way that your designated recipients will be fully aware of what they are signing up for. You will need a clearly stated document about the way YOU care for your equine, so the recipient will know exactly what to do with your animal when they inherit it (How to feed (hay and oats mixes, worming, minerals, exercise, maintenance in a dry lot with limited turnout, social time, training expectations, etc.). This is critical for health of your mules and donkeys. Otherwise, you animals may not be cared for as you desire. Your assets will be at the mercy of other people’s opinions and desires. People can be very selfish in this way. People often believe that you can just turnout in a pasture and that is good enough…NOT! Mules and donkeys are very susceptible to obesity that will usually follow with founder and other things like ringbone and side bones. Poor management is generally due to owner laziness and misinformation that is freely passed around. Beware of advertising and markets techniques. They are not necessarily based in the overall welfare for your equine. Beware of dehydrated cubes and pellets, different oils, minerals, amounts and types of grains, treats, etc. I did my “field” research with 32 equines over a period of 40 years.

 After grooming the left side, move to the right side. Brush the head with a Dandy brush and use a multi-bristled human hairbrush on the mane and tail. By adding a little Johnson’s Baby oil to the mane and tail during grooming, you can train a mane to fall to one side and keep other equines from chewing on manes and tails. Finish with a soft body brush. Finally, use the grooming cloth to wipe around the ears, face, eyes, nose, lips, sheath (if it’s a male) and the dock of the tail.

 You can spritz a little water and hair spray to make the hair easier to handle. The quickest way to secure the braids is by using tiny rubber bands. It’s also very easy to do and it’s great for one-day shows or quick changes between classes.

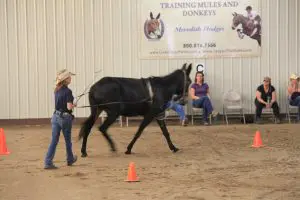
 In the past, when equines ran free, they were unencumbered by human interaction and could build and condition their muscles naturally. Today, with increased population but reduced open lands, their activity is often restricted. It then becomes our responsibility to not only train them, but to prepare them physically to perform and keep them happy in their environment. This responsibility becomes even more important when we ask them to exert more energy than normal, in activities like long trail rides, endurance events, showing and equine-related work. Proper preparation for this modern-day lifestyle will help to minimize your equine’s stress, both physically and mentally.
 Understanding the prey-predator responses can help to guide us in the training of our equines, but because of the change in the environment, it shouldn’t completely define our training methods. The prey animal that is uncomfortable with making direct eye contact with the human “predator,” for instance, is virtually trapped in a confined environment in which he has no control and can therefore become anxious and difficult to handle. We are taught not to make eye contact with him until he is willing to face us. We are taught to “chase” him in a round pen until he does.
 instance, the equine that is “trapped” on a lunge line and asked to reverse toward the handler will inadvertently be improperly set up to take the new trotting diagonal, or the new lead at canter, from a position that actually “tangles” his hind legs and causes him to fumble into the new diagonal or lead. This mistake can become painful and even detrimental to the stifles as he jumps out of the entanglement and can cause resistant behaviors which are often punished on top of the physical pain he is already experiencing.
 his body symmetrically in good equine posture. Once he has established good equine posture and balance over a long period of time doing appropriate exercises, he will then be better able to efficiently reverse towards you on the lunge line by changing direction from a position of balance rather than an awkward imbalance.
 Be a true leader and learn to set boundaries for your equine with appropriate corrections for bad behaviors (which can be found on our website and in our products). Make these corrections quickly and then immediately return to a clear definition of what you expect and make sure that it is easily doable for your equine at each step. Every animal on the planet will correct another’s misbehaving with a very clear and undeniable gesture that will stop the abuser promptly in their tracks. Take note. This is not abusive, but rather a very clear communication of what’s right and what’s clearly wrong. In fact, in the case of the mule attacking the puma that has circulated the internet for the past few years, it was clearly a case of the mule engaging in the hunt with his human “friend.” So, who is really prey and who is predator in this particular scenario? Sometimes we just need to change our perception or understanding of things and deny all-encompassing generalizations and stereotypes.
 being. In the practice of true Behavior Modification, all five senses should be employed: sight, hearing (voice), smell, touch and taste. These are all innate ways to communicate effectively. Any distractions should be eliminated when communicating with your equine—put away the electronic devices, clickers and loud whips, and avoid abrupt noises.
 In Part 1 of this article, you learned how to begin your relationship with your miniature equine in a positive and natural way, and how “getting down” to their eye level so they can make eye contact with you discourages striking, jumping on you and other bad behaviors that are common when working with miniature equines. Be sure you have successfully completed the lessons in Part 1 before moving on to the lessons in Part 2 or training may not yield the desired positive results. Also, if possible, it is best to work minis in groups if they are used to being with other equines, as they perform better when they are with their “friends” and it doesn’t hurt to train their friends in the same way.
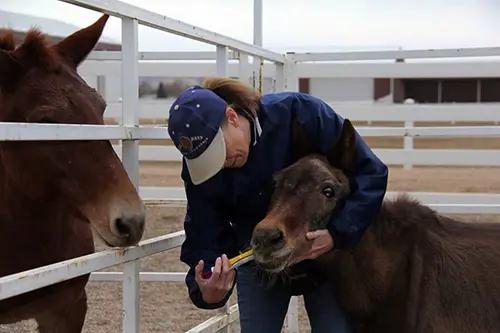
 in Part 1), but this time you will be in the work station and you will have a guest…the farrier. Before the farrier attempts to pick up the first foot, ask him to sit down beside your mini in front of the shoulder on the left side and offer a handful of oats as a way of introducing himself. Next, while you sit at your mini’s head and offer the oats reward for good behavior, have the farrier begin with the near side (left) front foot and work his way around from front to back, and then from back to front on the other side (right). While the farrier is working, talk calmly and encouragingly to your mini, and as long as he is doing what is asked of him, offer rewards generously. He should yield his feet easily, but if he does not don’t offer the reward until he complies.
 Don’t shove your mini when you want him to move over. Rather, give him some oats and use your index finger to tap or poke him on the side of his ribcage. If he doesn’t move over, use your whole hand to give him a slight push, always using a “push and release” movement, which is non-confrontational. You don’t want to keep steadily pushing up against him, because as soon as you give him anything to push against, he will and you could find yourself in a pushing match or, worse, a confrontation with him. As soon as he complies and moves, give him the oats reward and slide your body in next to him to help hold him in position for the farrier as he works with each foot. Don’t be afraid and always stay on the same side as the farrier. If the mini decides to make an abrupt move, he will try to slide around you because equines really don’t like stepping on, or running over, soft, squishy things like our bodies, so if your mini can get out of your way, he will. Even if he was to jump up in the air, he would more than likely jump over or around you, taking the path of least resistance. Trust your mini, stay calm and avoid becoming tense or exhibiting fear and things should go smoothly.
 This approach becomes particularly important when negotiating something like a dock or a bridge where you are not only dealing with an obstacle, but an obstacle that makes you substantially taller than you already appear to your mini. This is another instance when you can “get down” on your mini’s eye level the way you did in the pen and at the work station. Remember to do things in small steps. When you walk onto the surface of the dock or bridge or any other large, flat surface, leave enough room for your mini to come up. When you get to the end of the lead rope, take up the slack and then sit down and offer the reward. Then, once your mini has negotiated the obstacle, give him the oats reward and just have another picnic. If a companion equine is accompanying you, be sure to tie the companion animal in front of the obstacle so your mini can always see him. If you tie him behind, your mini will worry and want to go back instead of forward.
 When you are ready to step down off the dock or bridge, it would be unsafe to be lower than your mini, so at this point you should stand up, go to the end of the obstacle and ask him to come forward off the raised obstacle, making sure he has plenty of room to come off the obstacle without you having to move. Stand quietly and keep the lead rope taut as you verbally encourage him and invite him to come down off the bridge. As soon as he jumps down, ask for a halt and reward him for jumping down and stopping right in front of you. (He will learn to negotiate the obstacle more slowly with practice.) Once he has finished negotiating the obstacle and halted and is chewing on his reward, you can then proceed to the next obstacle. Having definite, purposeful and timely pauses will help alleviate anxiety and resistance in your mini.
 longer he must go without making eye contact with you, the greater the chance of resistance, but eye contact on his level will give him confidence in your judgment and will help to facilitate a real bond between you. If negotiating an obstacle such as a tractor tire or six tires, just extend the lead rope over the tire or tires, sit on that side, keep the rope taut and proceed as you did with the bridge obstacle.
 I call this technique “OATS.” (Observe, Approach, Touch and Sigh). It allows your mini time to observe each situation, then approach and touch the obstacle, finally giving a sigh as a signal that he is relaxed and not afraid. Always reward him for his efforts so he can begin to gain confidence and trust in you. By following the OATS technique you are turning your mini’s fear into curiosity, which will serve to keep him calm in future situations.


 Mules played an important role in our country during the Reconstruction Period: they patiently worked the fields, packed necessary artillery for the army, and served as a durable riding and driving animal in the westward movement. With the coming of the industrial age, their uses were minimized and they were faced with the possibility of extinction in the march of progress. Today, through the persistent determination of mule enthusiasts, mules are once again emerging as a conceivable asset to our economy and a unique form of athletic achievement and entertainment.
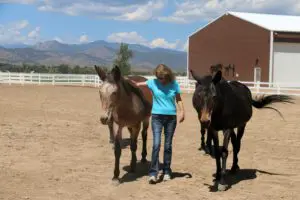 They will generally follow you around until you leave the field, begging for attention or simply observing you closely from a safe distance. Mules have a genuine desire to make friends with those other than their own species. Also, they are a very sensitive animal and can read your intentions through the tone of your voice and your body language.
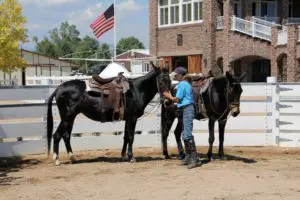 Still, the most important thing to remember is to praise the mule with caressing and scratching when he does what you desire and back it up with the food reward. Mules love this kind of attention and will do their best to get it. If they are rewarded immediately when they are behaving as desired, the desired behavior will eventually become the norm. If bad behavior is ignored or gently reprimanded, it will fade to a minimum. The result is a pleasant, affectionate, and dependable animal.