By Meredith Hodges
Most equines can be taught to carry a rider in a relatively short time. However, just because they are compliant doesn’t mean their body is adequately prepared for what they will be asked to do and that they are truly mentally engaged in your partnership. We can affect our equine’s manners and teach them to do certain movements and in most cases, we will get the response that we want…at least for the moment. Most of us grow up thinking that getting the animal to accept a rider is a reasonable goal and we are thrilled when they quickly comply. When I was first training equines, I even thought that to spare them the weight of the rider when they were younger and that it would be more beneficial to drive them first as this seemed less stressful for them. Of course, I was then unaware of the multitude of tiny details that were escaping my attention due to my limited education. I had a lot to learn.
 Because my equines reacted so well during training, I had no reason to believe that there was anything wrong with my approach until I began showing them. I started to experience resistant behaviors in my animals that I promptly attributed to simple disobedience. I had no reason to believe that I wasn’t being kind and patient until I met my dressage instructor, Melinda Weatherford. I soon learned that complaining about Sundowner’s negative response to his dressage lessons and blaming HIM was not going to yield any shortcuts to our success. The day she showed up with a big button on her lapel that said, “No Whining” was the end of my complaining and impatience, and the beginning of my becoming truly focused on the tasks at hand. I learned that riding through (and often repeating) mistakes did not pose any real solutions to our problems. I attended numerous clinics from all sorts of notable professionals and we improved slowly, but a lot of the problems were still present. Sundowner would still bolt and run when things got a bit awkward, but he eventually stopped bolting once I changed my attitude and approach, and when he was secure in his core strength in good equine posture.
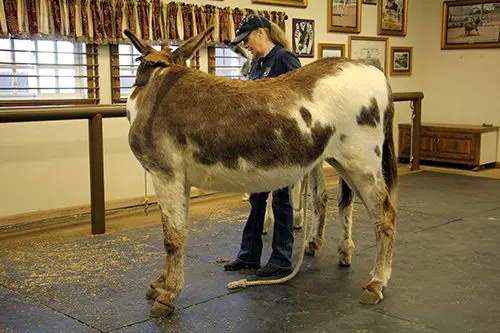
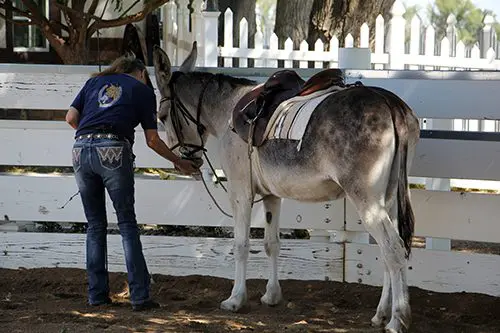
I thought about what my grandmother had told me years ago about being polite and considerate with everything I did. Good manners were everything to her and I thought I was using good manners. I soon found that good manners were not the only important element of communication. Empathy was another important consideration…to put oneself in the other “person’s” shoes, and that could be attributed to animals as well. So, I began to ask myself how it would feel to me if I was approached and treated the way I was treating my equines. My first epiphany was during grooming. It occurred to me that grooming tools, like a shedding blade, might not feel very  good unless I was careful about the way I used it. Body clipping was much more tolerable for them if I did the hard-to-get places first and saved the general body for last. Standing for long periods of time certainly did not yield a calm, compliant attitude when the more tedious places were left until last. After standing for an hour or more, the animal got antsy when I was trying to do more detailed work around the legs, head, flanks and ears after the body; so I changed the order. Generally speaking, I slowed my pace and eliminated any abrupt movements on my part to give the equine adequate time to assess what I would do next and approached each task very CAREFULLY. The results were amazing! I could now groom, clip bridle paths and fly spray everyone with no halters, even in their turnout areas as a herd. They were all beginning to really trust me.
There was still one more thing my grandmother had said that echoed in my brain, “You are going to be a sorry old woman if you do not learn to stand up straight and move in good posture!” Good posture is not something that we are born with. It is something that must be learned and practiced repetitiously so that it becomes habitual for it to really contribute to your overall health. Good posture begins at the core, “the innermost, essential part of anything.” In a human being, it lies behind the belly button amongst the vital organs and surrounded by the skeletal frame. In a biped, upon signals from the brain, energy impulses run from the core and up from the waist, and simultaneously down through the lower body and legs. The core of an equine is at the center of balance in the torso. Similar to bipeds, they need the energy to run freely along the hindquarters and down through the hind legs to create a solid foundation from which to allow the energy in front to rise into suspension to get the most efficient movement. When their weight is shifted too much onto the front end, their ability to carry a rider efficiently and correctly is compromised. To achieve correct energy flow and efficient movement, the animal’s internal supportive structures need to be conditioned in a symmetrical way around the skeletal frame. People can do this by learning to walk with a book on their head and with Pilates exercises, but how can we affect this same kind of conditioning in a quadruped?
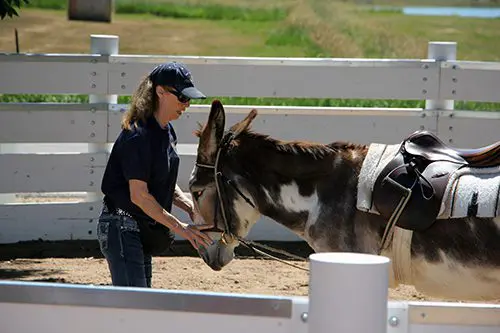
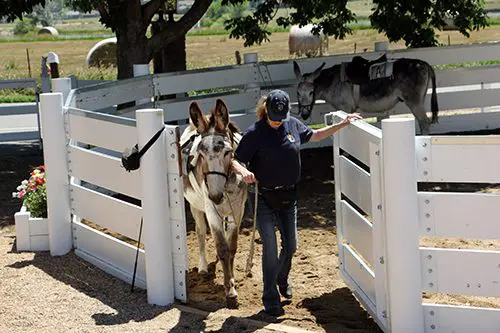
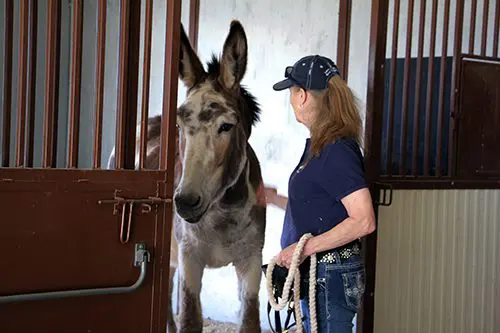
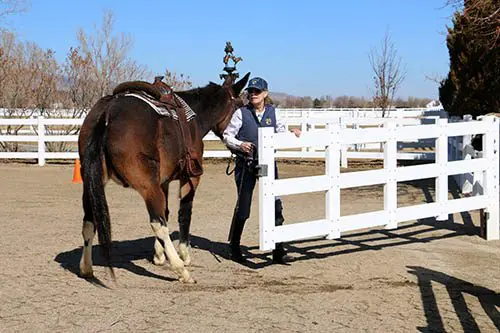
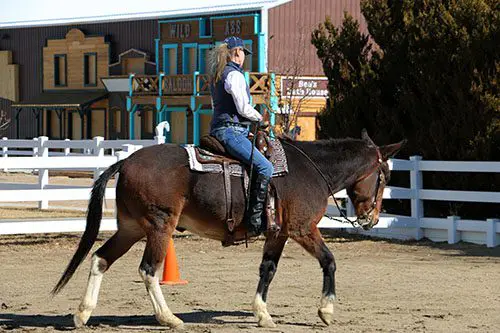
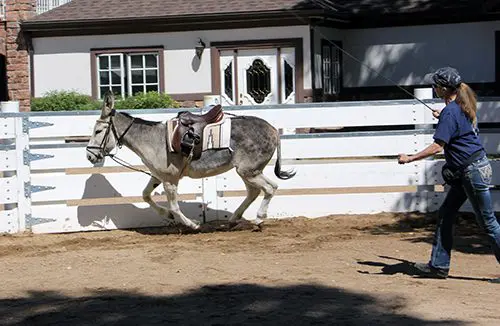
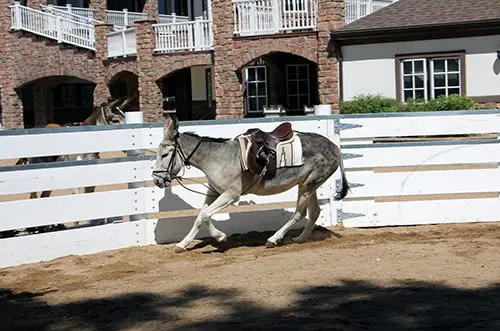
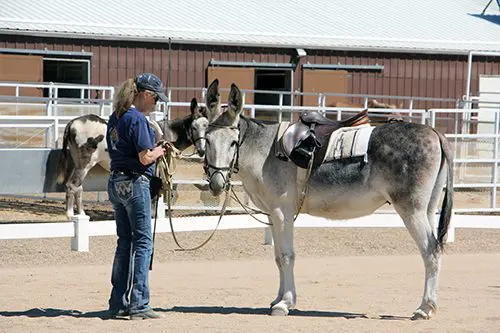
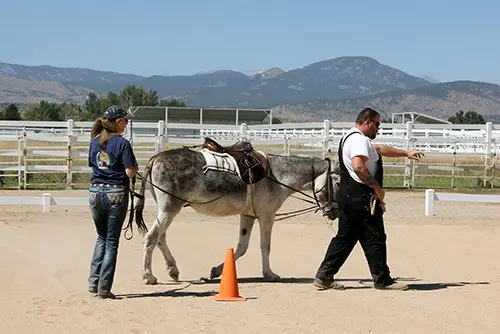
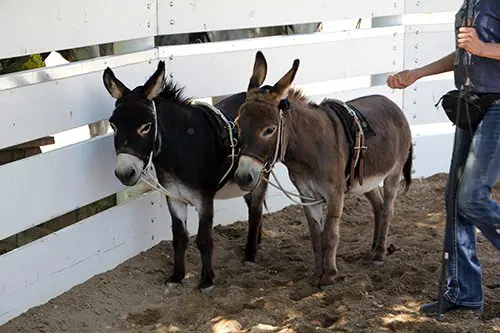
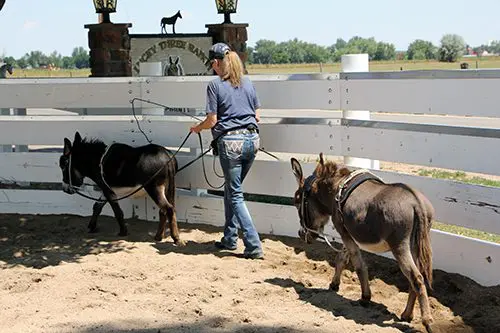
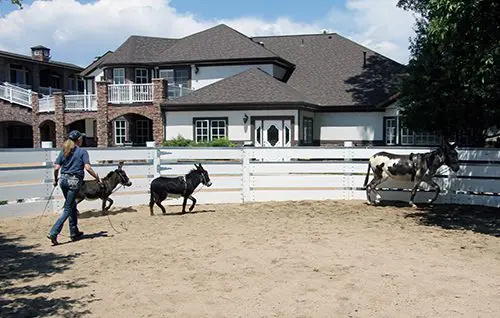
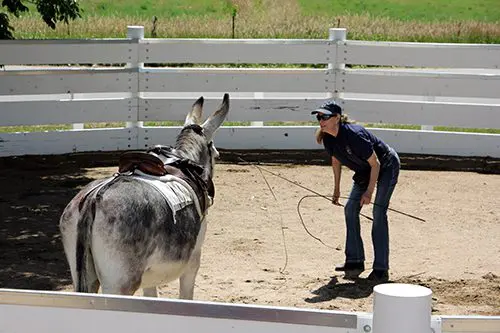
The first issue I noticed was with leading our animals. When we lead our animals with the lead rope in the right hand, we drop our shoulder and are no longer in good posture. When we walk, our hand moves ever so slightly from left to right as we walk; we inadvertently move the equine’s head back and forth. They balance with their head and neck. Thus, we are forcing them off balance with every step that we take. Since movement builds muscle, they are being asymmetrically conditioned internally and externally with every step we take together. In order to correct this, we must allow the animal to be totally in control of his own body as we walk together. We are cultivating proprioception or “body awareness.”
During the time you do the core strength leading exercises, you should NOT ride the animal as this will inhibit the success of these preliminary exercises. It will not result in the same symmetrical muscle conditioning, habitual behavior and new way of moving. For the best results, lessons need to be routine and done in good posture from the time you take your equine from the pen until the time you put him away. Hold the lead rope in your LEFT hand, keeping slack in the lead rope. Keep his head at your shoulder, match your steps with his front legs, point in the direction of travel with your right hand and look where you are going. Carry his reward of oats in a fanny pack around your waist; he’s not likely to bolt if he knows his reward is right there in the fanny pack.
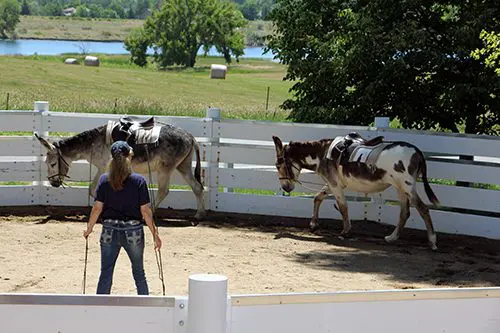
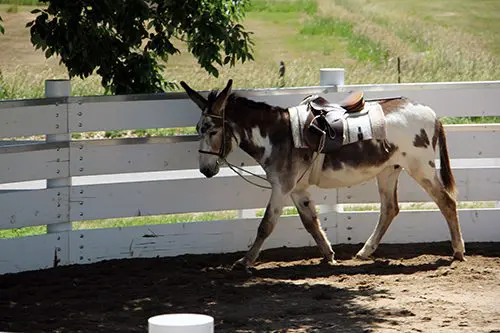
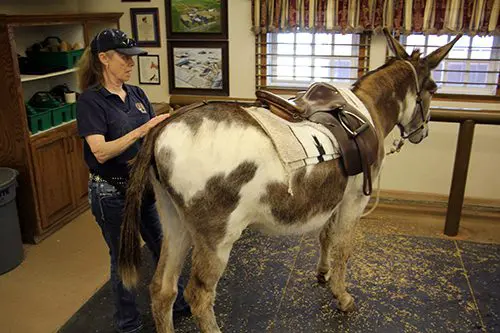
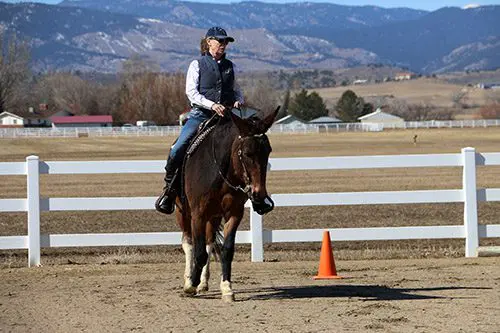
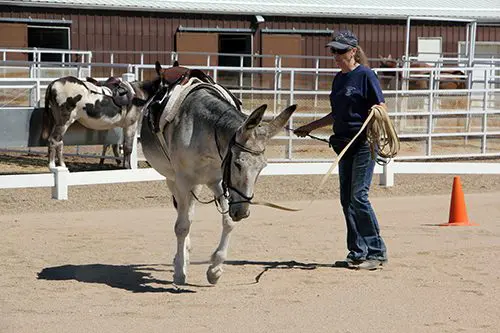
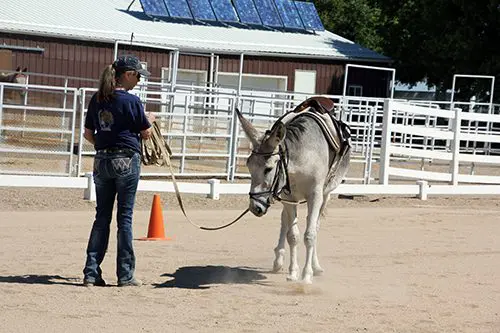
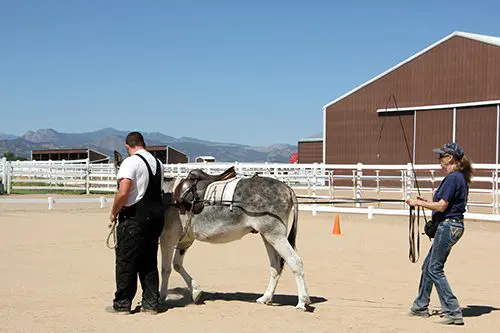
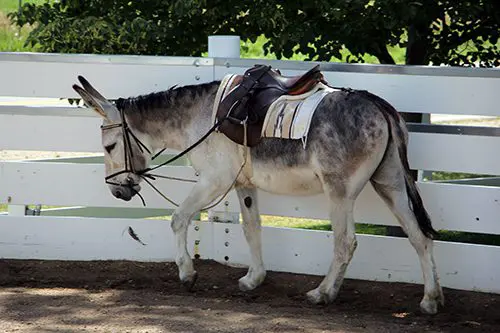
Plan to move in straight lines and do gradual turns that encourage him to stay erect and bend through his rib cage, keeping an even distribution of weight through all four feet. Square him up with equal weight over all four feet EVERY TIME you stop and reward him with oats from your fanny pack. Then wait patiently for him to finish chewing. We are building NEW habits in the equine’s way of moving and the only way that can change is through routine, consistency in the routine and correctness in the execution of the exercises. Since this requires that you be in good posture as well, you will also reap the benefits from this regimen. Along with feeding correctly (explained on my website at www.luckythreeranch.com), these exercises will help equines to drop fat rolls and begin to develop the top line and abdominal strength in good posture. The spine will then be adequately supported to easily accept a rider. He will be better able to stand still as you pull on the saddle horn to mount.
When the body is in good posture, all internal organs can function properly and the skeletal frame will be supported correctly throughout his entire body. This will greatly minimize joint problems, arthritis and other anomalies that come from asymmetrical development and compromises in the body. Just as our children need routine, ongoing learning and the right kind of exercise while they are growing up, so do equines. They need boundaries for their behavior clearly outlined to minimize anxious behaviors and inappropriate behavior. The exercises that you do together need to build strength and coordination in good equine posture. The time spent together during leading training and going forward, slowly builds a good solid relationship with your equine and fosters his confidence and trust in you. He will know it is you who actually helps him to feel physically much better than he ever has.
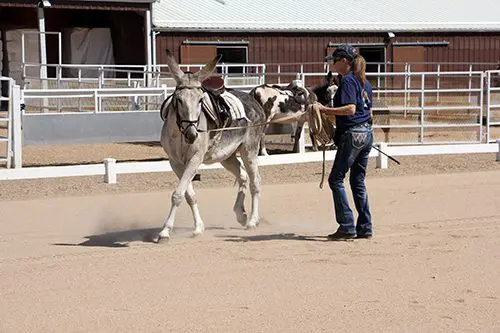
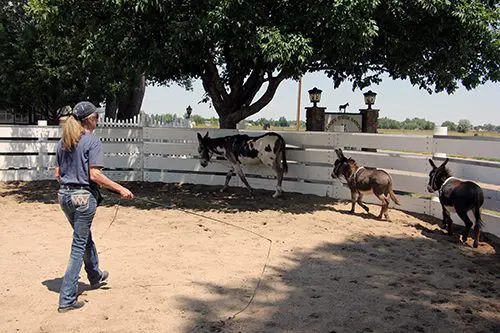
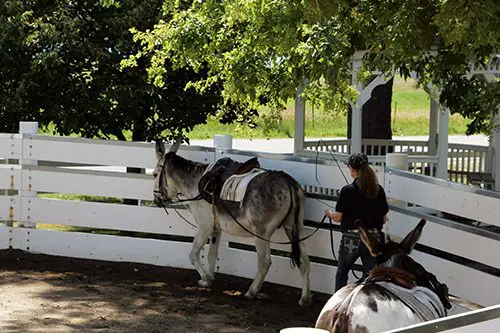
Core muscle strength and balance must be done through correct leading exercises on flat ground. Coordination can be added to his overall carriage with the addition of negotiating obstacles on the lead rope done the same way. Once familiar with the obstacles, you will need to break them down into very small segments where the equine is asked to randomly halt squarely every couple of steps through the obstacle. You can tell when you have successfully achieved core strength in good balance, when your equine will perform accurately with the lead rope slung over his neck. He will stay at your shoulder, respond to hand signals and body language only and does what is expected perfectly. A carefully planned routine coupled with an appropriate feeding program is critical to your equine’s healthy development.
The task at the leading stage is not only to teach them to follow, but to have your equine follow with his head at your shoulder as you define straight lines and gradual arcs that will condition his body symmetrically on all sides of the skeletal frame. This planned course of action also begins to develop a secure bond between you. Mirror the steps of his front legs as you go through the all movements keeping your own body erect and in good posture. Always look in the direction of travel and ask him to square up with equal weight over all four feet every time he stops and reward him. This kind of leading training develops strength and balance in the equine body at the deepest level so strengthened muscles will hold the bones, tendons, ligaments and even cartilage in correct alignment. Equines that are not in correct equine posture will have issues involving organs, joints, hooves and soft tissue trauma. This is why it is so important to spend plenty of time perfecting your techniques every time you lead your equine.
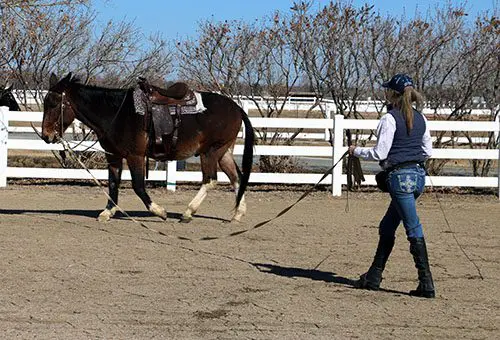
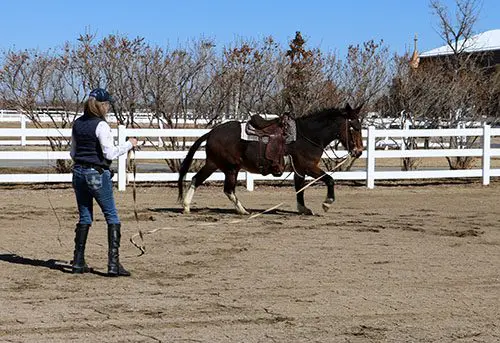
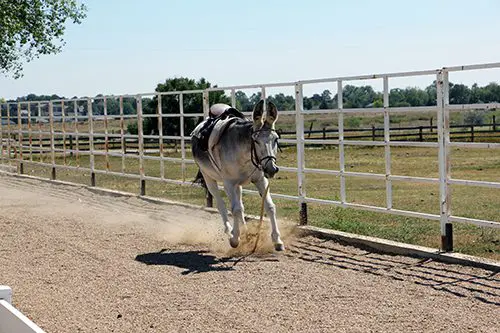
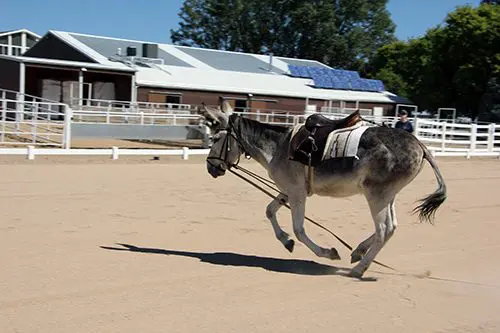
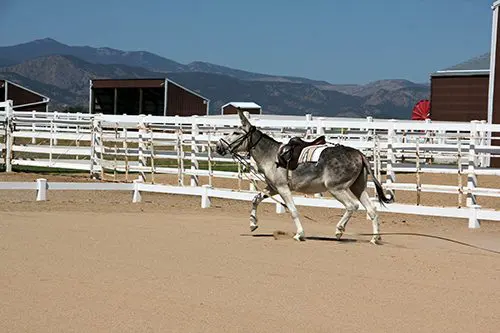
The equine then needs to build muscle so he can sustain his balance on the circle without the rider before he will be able to balance with a rider. An equine that has not had time in the round pen to establish strength, coordination and balance on the circle, with the help of our postural restraint called the “Elbow Pull,” will have difficulty as he will be pulled off balance with even the slightest pressure. He will most likely raise his head, hollow his back and lean like a motorcycle into the turns. When first introduced to the “Elbow Pull,” his first lesson in the round pen should only be done at the walk to teach him to give to its pressure, arch his back and stretch his spine while tightening his abs. If you ask for trot and he resists against the “Elbow Pull,” just go back to the walk until he can consistently sustain this good posture while the “Elbow Pull” stays loose. He can gain speed and difficulty as his proficiency increases.
Loss of balance will cause stress, and even panic that can result in him pulling the lead rope, lunge line or reins under saddle right out of your hands and running off. This is not disobedience, just fear from a loss of balance and it should not be punished, just ignored and then calmly go back to work. The animal that has had core strength built through leading exercises, lunging on the circle and ground driving in the “Elbow Pull” before riding, will not exhibit these seemingly disobedient behaviors. Lunging will begin to develop hard muscle over the core muscles and internal supportive structures you have spent so many months strengthening during leading training exercises. It will further enhance your equine’s ability to perform and stay balanced in action, and play patterns in turnout will begin to change dramatically as this becomes his habitual way of going. Be sure to be consistent with verbal commands during all these beginning stages as they set the stage for better communication and exceptional performance later. Although you need to spend more time in his beginning training than you might want to, this will also add to your equine’s longevity and use-life by as much as 5-10 years. The equine athlete that has a foundation of core strength in good equine posture, whether used for pleasure or show, will be a much more capable and safe performer than one that has not, and he will always be grateful to YOU for his comfort.
To learn more about Meredith Hodges and her comprehensive all-breed equine training program, visit LuckyThreeRanch.com, MEREDITH HODGES PUBLIC FIGURE Facebook page, or call 1-800-816-7566. Check out her children’s website at JasperTheMule.com. Also, find Meredith on Pinterest, Instagram, MeWe, YouTube and Twitter.
Covered in TRAINING MULES & DONKEY: A LOGICAL APPROACH TO TRAINING, TRAINING WITHOUT RESISTANCE and EQUUS REVISITED at www.luckythreeranchstore.com
© 2018, 2024 Lucky Three Ranch, Inc. All Rights Reserved.


 good unless I was careful about the way I used it. Body clipping was much more tolerable for them if I did the hard-to-get places first and saved the general body for last. Standing for long periods of time certainly did not yield a calm, compliant attitude when the more tedious places were left until last. After standing for an hour or more, the animal got antsy when I was trying to do more detailed work around the legs, head, flanks and ears after the body; so I changed the order. Generally speaking, I slowed my pace and eliminated any abrupt movements on my part to give the equine adequate time to assess what I would do next and approached each task very CAREFULLY. The results were amazing! I could now groom, clip bridle paths and fly spray everyone with no halters, even in their turnout areas as a herd. They were all beginning to really trust me.
 legs. The core of an equine is at the center of balance in the torso. Similar to bipeds, they need the energy to run freely along the hindquarters and down through the hind legs to create a solid foundation from which to allow the energy in front to rise into suspension to get the most efficient movement. When their weight is shifted too much onto the front end, their ability to carry a rider efficiently and correctly is compromised. To achieve correct energy flow and efficient movement, the animal’s internal supportive structures need to be conditioned in a symmetrical way around the skeletal frame. People can do this by learning to walk with a book on their head and with Pilates exercises, but how can we affect this same kind of conditioning in a quadruped?
 the routine and correctness in the execution of the exercises. Since this requires that you be in good posture as well, you will also reap the benefits from this regimen. Along with feeding correctly (explained on my website at www.luckythreeranch.com), these exercises will help equines to drop fat rolls and begin to develop the top line and abdominal strength in good posture. The spine will then be adequately supported to easily accept a rider. He will be better able to stand still as you pull on the saddle horn to mount.
 The task at the leading stage is not only to teach them to follow, but to have your equine follow with his head at your shoulder as you define straight lines and gradual arcs that will condition his body symmetrically on all sides of the skeletal frame. This planned course of action also begins to develop a secure bond between you. Mirror the steps of his front legs as you go through the all movements keeping your own body erect and in good posture. Always look in the direction of travel and ask him to square up with equal weight over all four feet every time he stops and reward him. This kind of leading training develops strength and balance in the equine body at the deepest level so strengthened muscles will hold the bones, tendons, ligaments and even cartilage in correct alignment. Equines that are not in correct equine posture will have issues involving organs, joints, hooves and soft tissue trauma. This is why it is so important to spend plenty of time perfecting your techniques every time you lead your equine.
 Loss of balance will cause stress, and even panic that can result in him pulling the lead rope, lunge line or reins under saddle right out of your hands and running off. This is not disobedience, just fear from a loss of balance and it should not be punished, just ignored and then calmly go back to work. The animal that has had core strength built through leading exercises, lunging on the circle and ground driving in the “Elbow Pull” before riding, will not exhibit these seemingly disobedient behaviors. Lunging will begin to develop hard muscle over the core muscles and internal supportive structures you have spent so many months strengthening during leading training exercises. It will further enhance your equine’s ability to perform and stay balanced in action, and play patterns in turnout will begin to change dramatically as this becomes his habitual way of going. Be sure to be consistent with verbal commands during all these beginning stages as they set the stage for better communication and exceptional performance later. Although you need to spend more time in his beginning training than you might want to, this will also add to your equine’s longevity and use-life by as much as 5-10 years. The equine athlete that has a foundation of core strength in good equine posture, whether used for pleasure or show, will be a much more capable and safe performer than one that has not, and he will always be grateful to YOU for his comfort.


 Horse trainers have kept us in awe of their unique and significant talents for centuries, and now that their techniques are more public, many equine professionals will pooh-pooh those who attempt a “kinder” approach to training. Scientists who study the equine in motion—its nutrition, biomechanics, care and maintenance—have their own perceptions to offer as to what we can learn about equines. Because many of these studies and tests are done in the laboratory, scientists rarely have the opportunity to follow their subjects throughout a lifetime of activity, as well as having the opportunity to experience what it really means for you as a rider, to be in balance with your equine when you work together, whether you are leading, lunging, riding or driving. If they did, their findings would probably yield quite different results. With all this progressive scientific thought, it seems to me that common sense can often get lost in the shuffle and respect for the living creature’s physical, mental and emotional needs may not be met.
 degenerative breakdown. For instance, those who get in a hurry in Dressage and do not take a full year at each level in order to develop their equine’s body slowly and methodically may discover, several years later, that their animal has developed ringbone, side bones, arthritis or some other internal malady. These types of injuries and malformations are often not outwardly exhibited until it is too late to do anything about them.

 Tragically, many equines are suffering from abuse every day, while they are trying to please their owners and do what is asked of them. Their owners and trainers take shortcuts that compromise the equine’s health. It could be that these owners and trainers are trying to make choices with limited knowledge and really don’t know whom to believe. But ignorance is not a valid defense and sadly, the animal is the one that ends up suffering.
 The Lucky Three mules have always been worked in good posture, and spend only as much time on the hot walker as it takes for them to dry after a bath. They maintain their good posture while walking and rarely let the hot walker “pull” them into bad posture.
 Like many, I am of the belief that mechanical devices that force an equine into a rounded position do not necessarily put that equine in good posture. I would guess that many trainers think the “Elbow Pull” device that I use is guilty of developing this artificial posture. If that is their opinion, then they do not understand how it works. Rather than pulling the equine’s head down into a submissive position, when adjusted correctly, the “Elbow Pull” acts like a balance bar (like a ballet dancer would use) to help the equine to balance in good posture. It takes time to develop good posture. So, in the beginning, your equine can only sustain good posture for a certain number of measured steps, and then he must “lean” on the “Elbow Pull” in between these moments of sustaining his ideal balance on his own. The “Elbow Pull” simply prevents him from raising his head and neck so high that the neck becomes inverted and the back hollowed, but it does not actually pull his head down. The rope itself is very lightweight and puts virtually no weight on his head and neck at all. Note: Because horses react differently than mules and donkeys when hard-tied, a simple adjustment to allow the “Elbow Pull” to “slip” with a horse is necessary.
 In Part 1, you learned how to begin the relationship with your miniature equine in a positive and natural way that fosters good behavior and a good relationship between you. You also learned the importance of getting down to your mini’s eye level so that he can make eye contact with you, which discourages striking, jumping on you and other bad behaviors that are common when working with miniature equines. In Part 2, I discussed how important it is to successfully complete the tasks in Part 1 before moving on to Part 2, and I explained why it is advisable to work minis in groups, as they perform better when they are with their friends. You also learned how to train minis to go over and around various obstacles. Remember that all of this is to be done with no expectations that may overwhelm your mini—it is better if you maintain an attitude of fun and games. In Part 3, we got down to some serious groundwork training so that your mini can be used for driving and showing in hand. He learned to lunge and to be ground driven in the round pen and in the open arena through the hourglass pattern and, if part of a team, how to do these things as a pair.
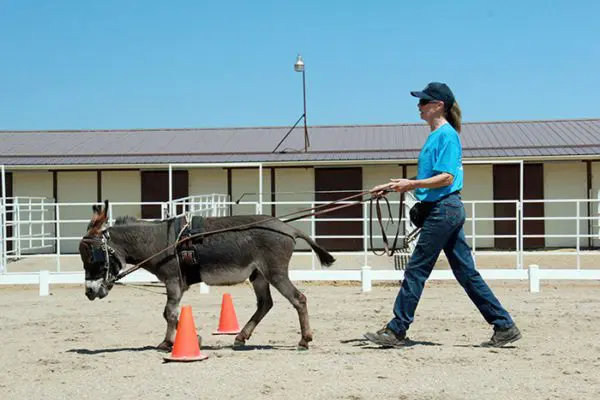 The “Elbow Pull” supports good equine postural balance and acts much like the balance bar that is used by a ballet dancer until she or he is strong enough to hold any postural position in the middle of the room without support. This becomes very important when your mini is in draught (pulling an obstacle or vehicle) in order to make sure he will pull correctly, and symmetrically condition his body’s muscles to avoid future injury to the internal structures within his body.
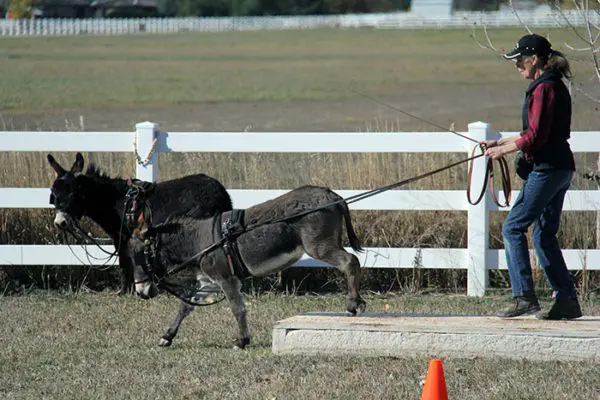 By now your mini has already learned to ground-drive the hourglass pattern and has negotiated the obstacle course on the lead line. There are still more obstacle exercises you can do to strengthen your mini and improve his strength and coordination to prepare him for driving before he is ever hitched to a cart or carriage. Now he is ready to learn to ground-drive the obstacle course. The obstacle course exercises will increase his confidence in being in the lead and help him to go bravely ahead of you upon command.
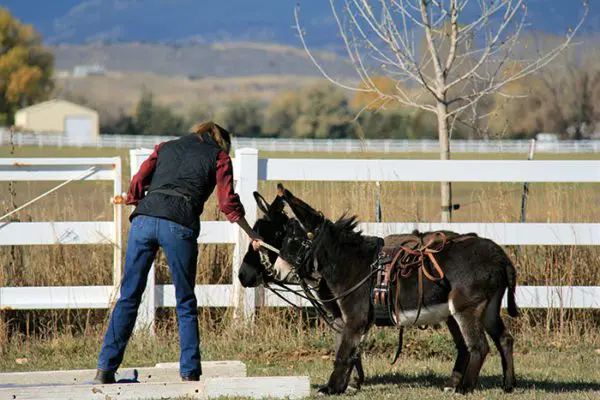 Approach each obstacle on the drive lines and if he balks and refuses to go forward, just stop, gently lay the lines over his back and then lead him through. Then go back and try again on the drive lines. In order to alleviate any fear or confusion your mini may feel, remember to “get down” to his eye level whenever possible. NOTE: Don’t forget to always reward him with his favorite crimped oats for compliance.
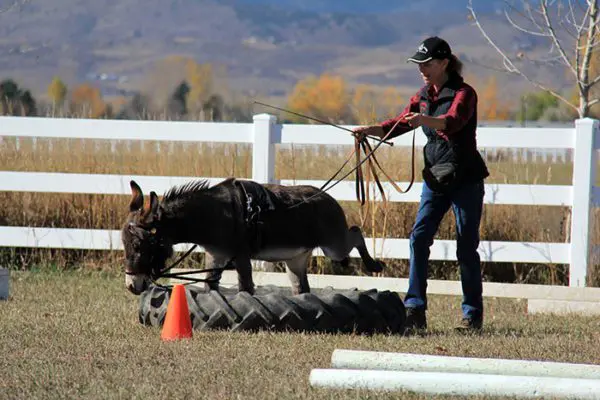 Once your mini is willing to go straight through the obstacle with a calm attitude and no balking, you can then begin to break each obstacle down into smaller, easier steps, rewarding and praising him for each success. If he is apprehensive about any obstacle, you should lead him through these smaller steps with frequent halts before attempting to ground-drive him through. He may need these detailed “explanations” before he is willing to “take the lead.”
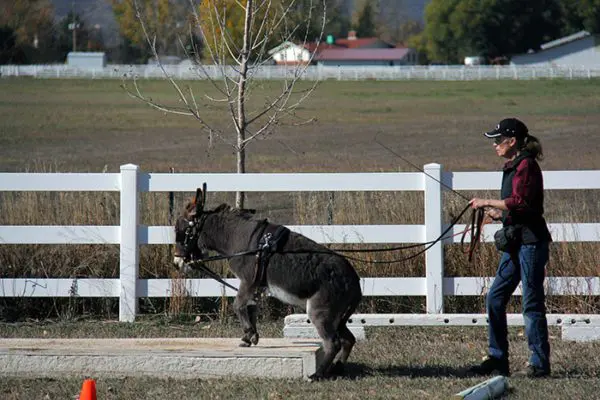 If you are training him on the bridge obstacle, go to the landing, stop, square up, put the lines up and reward, then resume your position and drive him up onto the bridge, but with only his front feet on the bridge, and then stop again. Put up the lines, walk forward and reward. Then drive him completely onto the bridge, stop, square up, put up the lines and reward. If he is having problems squaring up on the lines, then just square him up when you get to his head before you reward him.
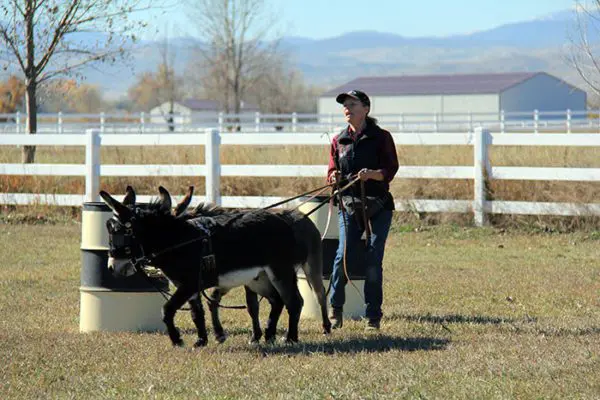 You can ask him to take full responsibility for perfect balance and negotiation of the obstacle later. For now, your primary task is to help him get through the obstacles successfully and with as little help as possible. Breaking obstacles down into smaller steps will increase his balance, coordination, agility and self-confidence. Even after he has become competent while hitched to the vehicle, you can use ground-driving obstacle exercises in the “Elbow Pull” to finesse his movements during future lessons. It will add variety to your mini’s lessons and continue to promote health, coordination and good equine posture.


