MULE CROSSING: Benefits of Postural Core Strength Training
By Meredith Hodges
Most equines can be taught to carry a rider in a relatively short time. However, just because they are compliant doesn’t mean their body is adequately prepared for what they will be asked to do and that they are truly mentally engaged in your partnership. We can affect our equine’s manners and teach them to do certain movements and in most cases, we will get the response that we want…at least for the moment. Most of us grow up thinking that getting the animal to accept a rider is a reasonable goal and we are thrilled when they quickly comply. When I was first training equines, I even thought that to spare them the weight of the rider when they were younger and that it would be more beneficial to drive them first as this seemed less stressful for them. Of course, I was then unaware of the multitude of tiny details that were escaping my attention due to my limited education. I had a lot to learn.
 Because my equines reacted so well during training, I had no reason to believe that there was anything wrong with my approach until I began showing them. I started to experience resistant behaviors in my animals that I promptly attributed to simple disobedience. I had no reason to believe that I wasn’t being kind and patient until I met my dressage instructor, Melinda Weatherford. I soon learned that complaining about Sundowner’s negative response to his dressage lessons and blaming HIM was not going to yield any shortcuts to our success. The day she showed up with a big button on her lapel that said, “No Whining” was the end of my complaining and impatience, and the beginning of my becoming truly focused on the tasks at hand. I learned that riding through (and often repeating) mistakes did not pose any real solutions to our problems. I attended numerous clinics from all sorts of notable professionals and we improved slowly, but a lot of the problems were still present. Sundowner would still bolt and run when things got a bit awkward, but he eventually stopped bolting once I changed my attitude and approach, and when he was secure in his core strength in good equine posture.
I thought about what my grandmother had told me years ago about being polite and considerate with everything I did. Good manners were everything to her and I thought I was using good manners. I soon found that good manners were not the only important element of communication. Empathy was another important consideration…to put oneself in the other “person’s” shoes, and that could be attributed to animals as well. So, I began to ask myself how it would feel to me if I was approached and treated the way I was treating my equines. My first epiphany was during grooming. It occurred to me that grooming tools, like a shedding blade, might not feel very  good unless I was careful about the way I used it. Body clipping was much more tolerable for them if I did the hard-to-get places first and saved the general body for last. Standing for long periods of time certainly did not yield a calm, compliant attitude when the more tedious places were left until last. After standing for an hour or more, the animal got antsy when I was trying to do more detailed work around the legs, head, flanks and ears after the body; so I changed the order. Generally speaking, I slowed my pace and eliminated any abrupt movements on my part to give the equine adequate time to assess what I would do next and approached each task very CAREFULLY. The results were amazing! I could now groom, clip bridle paths and fly spray everyone with no halters, even in their turnout areas as a herd. They were all beginning to really trust me.
There was still one more thing my grandmother had said that echoed in my brain, “You are going to be a sorry old woman if you do not learn to stand up straight and move in good posture!” Good posture is not something that we are born with. It is something that must be learned and practiced repetitiously so that it becomes habitual for it to really contribute to your overall health. Good posture begins at the core, “the innermost, essential part of anything.” In a human being, it lies behind the belly button amongst the vital organs and surrounded by the skeletal frame. In a biped, upon signals from the brain, energy impulses run from the core and up from the waist, and simultaneously down through the lower body and  legs. The core of an equine is at the center of balance in the torso. Similar to bipeds, they need the energy to run freely along the hindquarters and down through the hind legs to create a solid foundation from which to allow the energy in front to rise into suspension to get the most efficient movement. When their weight is shifted too much onto the front end, their ability to carry a rider efficiently and correctly is compromised. To achieve correct energy flow and efficient movement, the animal’s internal supportive structures need to be conditioned in a symmetrical way around the skeletal frame. People can do this by learning to walk with a book on their head and with Pilates exercises, but how can we affect this same kind of conditioning in a quadruped?
The first issue I noticed was with leading our animals. When we lead our animals with the lead rope in the right hand, we drop our shoulder and are no longer in good posture. When we walk, our hand moves ever so slightly from left to right as we walk; we inadvertently move the equine’s head back and forth. They balance with their head and neck. Thus, we are forcing them off balance with every step that we take. Since movement builds muscle, they are being asymmetrically conditioned internally and externally with every step we take together. In order to correct this, we must allow the animal to be totally in control of his own body as we walk together. We are cultivating proprioception or “body awareness.”
During the time you do the core strength leading exercises, you should NOT ride the animal as this will inhibit the success of these preliminary exercises. It will not result in the same symmetrical muscle conditioning, habitual behavior and new way of moving. For the best results, lessons need to be routine and done in good posture from the time you take your equine from the pen until the time you put him away. Hold the lead rope in your LEFT hand, keeping slack in the lead rope. Keep his head at your shoulder, match your steps with his front legs, point in the direction of travel with your right hand and look where you are going. Carry his reward of oats in a fanny pack around your waist; he’s not likely to bolt if he knows his reward is right there in the fanny pack.
Plan to move in straight lines and do gradual turns that encourage him to stay erect and bend through his rib cage, keeping an even distribution of weight through all four feet. Square him up with equal weight over all four feet EVERY TIME you stop and reward him with oats from your fanny pack. Then wait patiently for him to finish chewing. We are building NEW habits in the equine’s way of moving and the only way that can change is through routine, consistency in  the routine and correctness in the execution of the exercises. Since this requires that you be in good posture as well, you will also reap the benefits from this regimen. Along with feeding correctly (explained on my website at www.luckythreeranch.com), these exercises will help equines to drop fat rolls and begin to develop the top line and abdominal strength in good posture. The spine will then be adequately supported to easily accept a rider. He will be better able to stand still as you pull on the saddle horn to mount.
When the body is in good posture, all internal organs can function properly and the skeletal frame will be supported correctly throughout his entire body. This will greatly minimize joint problems, arthritis and other anomalies that come from asymmetrical development and compromises in the body. Just as our children need routine, ongoing learning and the right kind of exercise while they are growing up, so do equines. They need boundaries for their behavior clearly outlined to minimize anxious behaviors and inappropriate behavior. The exercises that you do together need to build strength and coordination in good equine posture. The time spent together during leading training and going forward, slowly builds a good solid relationship with your equine and fosters his confidence and trust in you. He will know it is you who actually helps him to feel physically much better than he ever has.
Core muscle strength and balance must be done through correct leading exercises on flat ground. Coordination can be added to his overall carriage with the addition of negotiating obstacles on the lead rope done the same way. Once familiar with the obstacles, you will need to break them down into very small segments where the equine is asked to randomly halt squarely every couple of steps through the obstacle. You can tell when you have successfully achieved core strength in good balance, when your equine will perform accurately with the lead rope slung over his neck. He will stay at your shoulder, respond to hand signals and body language only and does what is expected perfectly. A carefully planned routine coupled with an appropriate feeding program is critical to your equine’s healthy development.
 The task at the leading stage is not only to teach them to follow, but to have your equine follow with his head at your shoulder as you define straight lines and gradual arcs that will condition his body symmetrically on all sides of the skeletal frame. This planned course of action also begins to develop a secure bond between you. Mirror the steps of his front legs as you go through the all movements keeping your own body erect and in good posture. Always look in the direction of travel and ask him to square up with equal weight over all four feet every time he stops and reward him. This kind of leading training develops strength and balance in the equine body at the deepest level so strengthened muscles will hold the bones, tendons, ligaments and even cartilage in correct alignment. Equines that are not in correct equine posture will have issues involving organs, joints, hooves and soft tissue trauma. This is why it is so important to spend plenty of time perfecting your techniques every time you lead your equine.
The equine then needs to build muscle so he can sustain his balance on the circle without the rider before he will be able to balance with a rider. An equine that has not had time in the round pen to establish strength, coordination and balance on the circle, with the help of our postural restraint called the “Elbow Pull,” will have difficulty as he will be pulled off balance with even the slightest pressure. He will most likely raise his head, hollow his back and lean like a motorcycle into the turns. When first introduced to the “Elbow Pull,” his first lesson in the round pen should only be done at the walk to teach him to give to its pressure, arch his back and stretch his spine while tightening his abs. If you ask for trot and he resists against the “Elbow Pull,” just go back to the walk until he can consistently sustain this good posture while the “Elbow Pull” stays loose. He can gain speed and difficulty as his proficiency increases.
 Loss of balance will cause stress, and even panic that can result in him pulling the lead rope, lunge line or reins under saddle right out of your hands and running off. This is not disobedience, just fear from a loss of balance and it should not be punished, just ignored and then calmly go back to work. The animal that has had core strength built through leading exercises, lunging on the circle and ground driving in the “Elbow Pull” before riding, will not exhibit these seemingly disobedient behaviors. Lunging will begin to develop hard muscle over the core muscles and internal supportive structures you have spent so many months strengthening during leading training exercises. It will further enhance your equine’s ability to perform and stay balanced in action, and play patterns in turnout will begin to change dramatically as this becomes his habitual way of going. Be sure to be consistent with verbal commands during all these beginning stages as they set the stage for better communication and exceptional performance later. Although you need to spend more time in his beginning training than you might want to, this will also add to your equine’s longevity and use-life by as much as 5-10 years. The equine athlete that has a foundation of core strength in good equine posture, whether used for pleasure or show, will be a much more capable and safe performer than one that has not, and he will always be grateful to YOU for his comfort.
To learn more about Meredith Hodges and her comprehensive all-breed equine training program, visit LuckyThreeRanch.com, MEREDITH HODGES PUBLIC FIGURE Facebook page, or call 1-800-816-7566. Check out her children’s website at JasperTheMule.com. Also, find Meredith on Pinterest, Instagram, MeWe, YouTube and Twitter.
Covered in TRAINING MULES & DONKEY: A LOGICAL APPROACH TO TRAINING, TRAINING WITHOUT RESISTANCE and EQUUS REVISITED at www.luckythreeranchstore.com
© 2018, 2024 Lucky Three Ranch, Inc. All Rights Reserved.


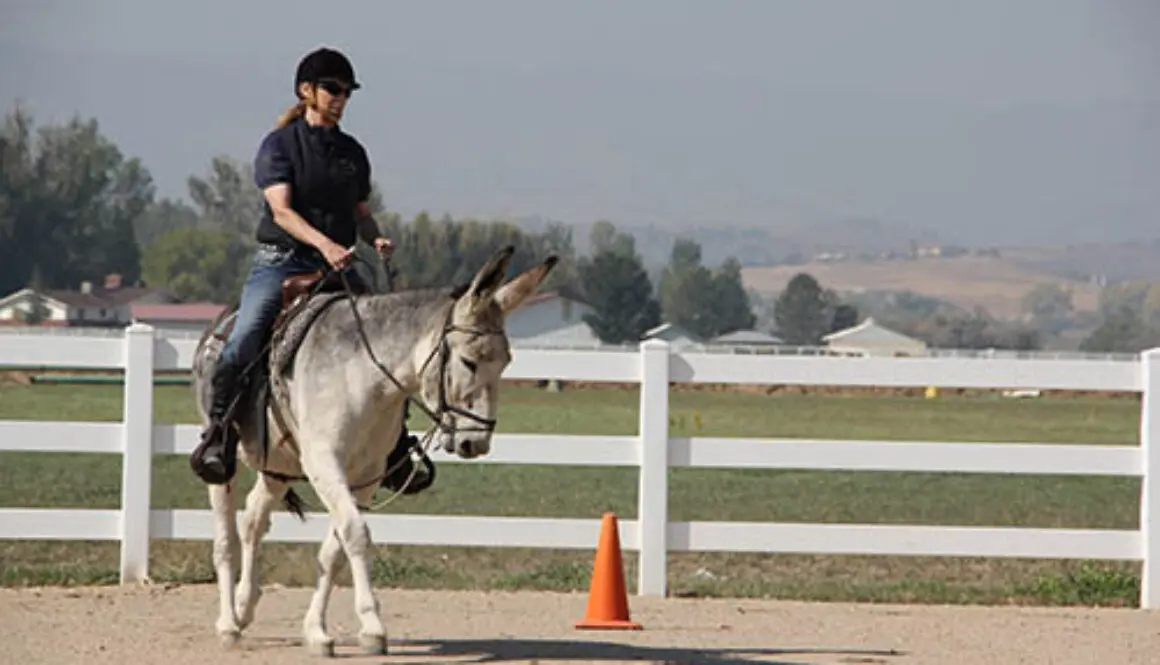
 In my TRAINING MULES & DONKEYS DVD #2, in the TRAINING WITHOUT RESISTANCE manual (2003) and in the SPECIAL FEATURES of my EQUUS REVISITED DVD (2009), I talk about using a postural aid called the “Elbow Pull.” In the EQUUS REVISITED DVD, we teach you how to measure it for your individual equine and how to make it. If you have our video series, in DVD #2, in the TRAINING WITHOUT RESISTANCE manual (2003) and in the EQUUS REVISITED DVD (2009), we talk about using the “Elbow Pull.” We teach you how to measure it for your individual equine and how to make it. The “Elbow Pull” puts your animal into your equine’s ideal posture. He will have full range of motion in every direction when it is adjusted correctly. He will just not be able to raise his head so high that he hollows his neck and back.
 underneath his body. The elevation (or suspension) in the shoulders allows him to increase the “reach” in his front legs. I use the “Elbow Pull” for Leading Training, Ground Driving and when he is ready, Lunging in the Round Pen. The Leading Training on flat ground through our HOURGLASS PATTERN positively affects his overall postural balance, and Leading through Obstacles adds coordination. You know that he is ready to go on to each stage of Leading Training on flat ground (and then through obstacles) when you can throw the lead rope over his neck and do the exercises with verbal commands, hand signals and body language alone. This is building a new habitual way of traveling is all in preparation for Lunging correctly…keeping his body erect and in a symmetrical balance while he bends to the arc of the circle through his torso without leaning like a motorcycle. It will prevent muscle compromises throughout his body that could cause soreness and compromise organ function.
 None of us were born in good posture. It is something that must be taught. If we are allowed to “slouch” in our posture, it WILL create soreness and physical problems over time, especially when we get much older. After Lunging in good posture for several months, the equine’s habitual way of going will be changed. He will begin to travel in good posture automatically.
 their legs and not their backs. These kinds of exercises make sure that the animal travels symmetrically, allowing the joints to work as they were designed to do (according to the laws of physics) with no compromises, and promotes optimum function of their internal organs.
 Lunge the equine in the Round Pen for several months until the animal habitually exhibits an erect posture with equal weight over all four feet and balanced self-body carriage. When you finally begin riding, you should use the “Elbow Pull” while you are riding our Hourglass Pattern under saddle as he adjusts to the added weight and new balance. When the “Elbow Pull” is adjusted correctly and the equine is in good posture, it will not put any pressure on the animal at all. When he is out of good posture, it puts pressure on the poll, the bit rings, behind the forearms and over the back. He will go back to his good posture as soon as he is able in order to release the pressure points.
 Place the “Elbow Pull” over the poll, through the snaffle bit rings, between the animal’s front legs and over the back, then snap the two ends to a surcingle D-ring or D-rings, on the saddle you are using. It should be adjusted so he can only raise his head approximately 3-4 inches above the level of the withers (just before he hollows his neck and back). The “Elbow Pull” needs to be adjusted loosely enough so that he can relieve the pressure at the poll, bit rings, elbows and back without having to drop his head below the withers.
 In the Round Pen, the “Elbow Pull” helps the animal learn to travel in good equine posture without the added weight of a rider first. In doing so, it increases his core strength and the ability for him to carry a more balanced posture of his own volition. The added weight of the rider under saddle will challenge the animal again to maintain this good posture. This will take further strengthening of the muscles. The “Elbow Pull” will keep the animal in the correct posture while carrying the rider, so he doesn’t ever build muscle out of balance and out of good equine posture. When you do this, you are changing old habitual movement into good equine posture and a balanced way of moving. This eventually (after two years) will become his habitual way of moving and playing, even during turnout.
 If you are consistent during his lessons, being in good equine posture will become his normal way of going and will not disappear when you finally ride without it.
 and to prevent the rider from injuring their spine (according to the laws of Physics). The “Elbow Pull” provides support much like a balance bar does for a beginning ballet dancer, and the principles of good posture are the same as with humans.
 you will need to cross the rope across their back, pull it taut into the correct tension and then secure the snaps, keeping plenty of slack in the rope. You want the rope semi-knot to slip if they brace against it, but you do not want loose snaps on the ends of the rope to swing free to hit the horse anywhere on his body. With horses, you would just twist the rope over the back as shown in the photo, so the snaps are a moot point until the horse learns to give to the Elbow Pull and can be hard tied.
 Although the “Elbow Pull” is a very simple and straight forward aid to help keep your equine in good posture, it is also a device that needs to be custom made to fit each individual equine. Equines that approximate the same size in the front quarters will probably be able to use the same one. First, you need to obtain a package of 3/8″ X 50′ nylon and polyester twisted rope. This is the way it is sold. Do not substitute any other kind of rope, or leather reins, etc. as this will have a different weight and slippage around the bridle and will not have the same effect.
 You will also need two snaps that are narrow, yet fairly strong that can fit easily through the D-rings on your surcingle, or Western saddle. English saddle D-rings are generally too small and in this situation, we do not attach to them, but rather attach the “Elbow Pull” to itself over the top of the spine. If the rope tends to twist and the snaps slide off to the side, you can often just snap one snap to the D-ring and the other snap snapped to the first snap, or if the “Elbow Pull” is a bit shorter, you can just snap it to the small D-ring on each side. The reason for twisted rope is so you can actually go through the D-rings and snap it into the twisted rope itself for a more exact setting. You would just untwist the rope at the setting point and snap into the middle of the rope so it won’t slide.
 Have the equine stand at the hitch rail with the snaffle bridle on. To get a measurement for how long a piece of rope you will need for his “Elbow Pull,” take a length of rope from the coil. Feed the end of the rope from the inside to the outside of the snaffle bit ring, drape it over the poll of your equine and feed it from the outside of the snaffle bit ring to the inside on the opposite side of your equine. Then pull enough slack to go down through the front legs, behind the forearm, up and over the back such that it hangs one foot, or more (but not less) on the other side of the spine. Then, go back to the side on which you started and do the same on that side with the remainder of the 50″ foot length of rope and cut the rope at the 1-foot mark on the other side of the spine.
 Once you have the proper length of rope for your equine, you will need to unravel 3” – 4″ of one end of the rope and loop it through the ring on your first snap. Then you will braid the rope back into itself. First, pick the loose strand that is on top as you lay the rope across your hand, bend it around the end of the snap and feed it under a twist of the rope such that it creates a loop around the end of your snap and pull it snug. Then take the next loose strand (which would be the middle of the three strands) and feed it under the next twist down from the one you just did. Then do the same with the third loose strand under the third twist in the rope. Take all three strands in your hand, hold the rope so it doesn’t twist and pull all three strands snug. They should all line up.
 Next, turn the rope over so you can see where the angled lines of the twisted rope begins again and feed the first strand under the first twist, the second under the second twist and the third under the third twist. Pull all three strands snug at the same time, turn the rope over, locate the first twist in the line and repeat until you have all 3” – 4″ braided into the twisted rope.
 You will have some loose ends sticking out and nylon rope can slip back out of the braid, so you now need to take a lighter and burn all these ends until they are melted together into the rope, so they will not slip. Be sure that you burn them so they are smooth and without bumps, or it will be difficult to feed the ends through the D-rings. Do the same with your second snap on the other end of the rope. Now you have your own custom made “Elbow Pull!”
 underneath to attach to the lead rope) and our “Elbow Pull” self-correcting postural restraint. The bridle with the drop nose band will encourage your equine to take proper contact with the bit and not get in the habit of “waving” his tongue over the bit. Adjust it so it is taut enough to keep his head from going so high that he inverts his neck and back, and not so tight that it pulls his head too low. Stand in front of him once you have secured the “Elbow Pull” on the near side and rock his head from the poll to make sure the tension is correct.
 Begin the “Hourglass Pattern” without doing circles at the cones. Lead your animal with the lead rope in your left hand from the left side with your equine’s head at your shoulder when tracking left, and lead your animal with the lead rope in your right hand with your equine’s head at your shoulder when tracking right. Point your left hand (or right hand) in the direction of travel and look where you are going. Say the animal’s name and give the command to “Walk on.” Then look down to see what leg he is leading with and match your steps with his.
 You can set up your Hourglass Pattern as pictured above so you can do Leading Training, Obstacle Training, Lunging off and on the Lunge Line, Ground Driving Training and Riding Training without having to move things around. Putting ground rails between the two center cones will encourage your equine to use his hind quarters by stepping well underneath his center of gravity below his torso. This will elevate his front end and produce more action in his joints.
 First he will get proficient on the lead rope in the Hourglass Pattern, and then obstacles will be added at the end of each lesson to facilitate coordination and further increase his postural core strength. During lunging training in good posture, he will be able to sustain equal weight over all four feet and won’t lean from one side to the other. His hind feet will fall into the footprints of the front feet. He will be able to stay in good balance with a consistent rhythm and cadence to all his gaits.
 Remember, when engaging in the Hourglass Pattern exercises, do not DRILL. You will only need to work your equine first one direction through the pattern with the designated halts between the cones, cross the diagonal and work in the other direction. Once around the pattern each way is enough to do the job. Work your equine a minimum of once a week and a maximum of once every other day. Be sure to leave a day of rest in between for the best results. Your equine will look forward to his time with you, so make the MOST of it!!
 To learn more about Meredith Hodges and her comprehensive all-breed equine training program, visit LuckyThreeRanch.com or call 1-800-816-7566. Check out her children’s website at JasperTheMule.com. Also, find Meredith on Facebook, YouTube, Pinterest, Instagram, MeWe and Twitter.
 Horse trainers have kept us in awe of their unique and significant talents for centuries, and now that their techniques are more public, many equine professionals will pooh-pooh those who attempt a “kinder” approach to training. Scientists who study the equine in motion—its nutrition, biomechanics, care and maintenance—have their own perceptions to offer as to what we can learn about equines. Because many of these studies and tests are done in the laboratory, scientists rarely have the opportunity to follow their subjects throughout a lifetime of activity, as well as having the opportunity to experience what it really means for you as a rider, to be in balance with your equine when you work together, whether you are leading, lunging, riding or driving. If they did, their findings would probably yield quite different results. With all this progressive scientific thought, it seems to me that common sense can often get lost in the shuffle and respect for the living creature’s physical, mental and emotional needs may not be met.
 degenerative breakdown. For instance, those who get in a hurry in Dressage and do not take a full year at each level in order to develop their equine’s body slowly and methodically may discover, several years later, that their animal has developed ringbone, side bones, arthritis or some other internal malady. These types of injuries and malformations are often not outwardly exhibited until it is too late to do anything about them.

 Tragically, many equines are suffering from abuse every day, while they are trying to please their owners and do what is asked of them. Their owners and trainers take shortcuts that compromise the equine’s health. It could be that these owners and trainers are trying to make choices with limited knowledge and really don’t know whom to believe. But ignorance is not a valid defense and sadly, the animal is the one that ends up suffering.
 The Lucky Three mules have always been worked in good posture, and spend only as much time on the hot walker as it takes for them to dry after a bath. They maintain their good posture while walking and rarely let the hot walker “pull” them into bad posture.
 Like many, I am of the belief that mechanical devices that force an equine into a rounded position do not necessarily put that equine in good posture. I would guess that many trainers think the “Elbow Pull” device that I use is guilty of developing this artificial posture. If that is their opinion, then they do not understand how it works. Rather than pulling the equine’s head down into a submissive position, when adjusted correctly, the “Elbow Pull” acts like a balance bar (like a ballet dancer would use) to help the equine to balance in good posture. It takes time to develop good posture. So, in the beginning, your equine can only sustain good posture for a certain number of measured steps, and then he must “lean” on the “Elbow Pull” in between these moments of sustaining his ideal balance on his own. The “Elbow Pull” simply prevents him from raising his head and neck so high that the neck becomes inverted and the back hollowed, but it does not actually pull his head down. The rope itself is very lightweight and puts virtually no weight on his head and neck at all. Note: Because horses react differently than mules and donkeys when hard-tied, a simple adjustment to allow the “Elbow Pull” to “slip” with a horse is necessary.
 distress and pain. This includes harsh bits, chain leads, twitches, hobbles, stocks and even medications. There are times when our equines can really be a handful, so having a little leverage when needed can be a good thing. However, deciding which equipment to use and learning how to use leverage without it becoming abusive can be a bit daunting. There are so many different types of tack, equipment and restraints that it becomes difficult to determine which would be best to use on your equine to correct a particular problem, or if you really need to use anything at all. It may only be a case of needing to be clearer in your approach, in which case, leverage equipment may not be needed. It is important to make an informed decision when using any leverage equipment to be sure that what you are using is helpful and not abusive.
 One very common behavioral problem that seems to identify the need for more leverage is the mule that bolts and runs when on the lead rope. This seems like an obvious disobedience to the handler, and the first thing that comes to mind is to use a lead shank with a chain to gain control of the mule. Normal use for a lead shank is during a Showmanship class at a show and it should rarely be used in training unless the equine will be shown at halter and/or showmanship. And then, training with the lead shank should be done only after the animal is following well through all required movements while in his halter and on a lead rope.
 If, after you’ve employed a kind, considerate and respectful approach along with a food reward, your equine is still being uncooperative, it may be appropriate to use equipment with more leverage such as the “Quick Twist,” but not necessarily chains. Chains do need to be used in some cases, such as with work harness (and most curb bits are now fitted with chains), but when not used correctly, these chains can be abusive. The chains on the pleasure driving harness should clear the legs and heels of the driving equine, and the chin chain on a curb bit should be adjusted so that it is twisted properly and lies flat against the animal’s jaw with an allowance of two fingers between the chain and the jaw, thereby minimizing any chance of injury. If you have a generally compliant equine, it is better to use a leather chin strap on your curb bit rather than a chain.
 To employ the “Quick Twist” restraint, just take your lead rope and create a loop and feed it through the noseband of your nylon halter (rope halters are too loose and do not work) from back to front and then over the mule’s nose. When you pull on the rope, it will tighten around the end of the his nose below the incisive bones and over the cartilage, making breathing just a little difficult. Don’t keep pulling—just stand quietly and hold the tension snug. Let the equine come forward to you and slacken the rope himself by coming forward and allowing a free flow of air through his nostrils. Then, if the mule does not follow, just walk a step or two, creating tension on the rope, and then stand still again. When he does come forward, stop long enough to reward him with the oats reward before you proceed forward again. Keep the lead rope short and stand still in a balanced way so he cannot get ahead of you and jerk you off your feet. If you are standing still in a balanced position, it will be difficult for him to jerk the lead rope from your hand and leave.
 Restraints should not be used as a means to control your animal except for a short period of time with the purpose of showing them a correct behavior. Restraints should be used as a support and not a controlling device. Restraints should be “phased out” as soon as possible.
 Do not try to bully him into it or he will just pull back. This should be done while he is standing parallel to the hitch rail so that when you pull the rope tight, it pulls his head tightly sideways to the hitch rail. This will keep him from being able to swing his rear end around to block you. Reward him with oats and let him quiet down in this restraint before approaching with your shot. If he manages to keep you off the clear side, you can always go to the other side of the hitch rail and give him the shot from that side without fear of injury. You can do this along a stout fence provided the rails are sturdy. If you do this correctly, it will simply restrain him in a safe manner and keep you out of the line of fire. Each new time that you give shots, try to do it with the rope a little looser each time to fade out the restraint. They will usually just come to expect and go for their position along the hitch rail or fence and will lean into it like they do when you first gave the shots like this. He will soon learn to quiet down immediately when his face is being tied and at best will seem to be saying, “Dang, do we have to do this again?!” But, he will learn to comply.
 This is a humane restraint for mules and donkeys, but do not try this with a horse! This is a good restraint to use (and fade out) for any Longears that is difficult to worm, give shots, take blood, clip bridle paths and to use for those that are difficult to bridle. When using the Face Tie for bridling training (or clipping the bridle path), you will only need to go through the noseband and hitch rail (and not through the throatlatch unless you need to prevent them from turning into you). Just make sure when you put on the bridle that you “protect” their sensitive ears with your hands as it goes on and they will learn to trust you. Put the bridle on over the halter for the lessons until they don’t mind the bridling process.
 Your Longears will only need the kicking training covered in
  the hind foot, around the pastern and let it lay on the floor. Next time, you won’t have to use it at all. Your goal is to phase out the restraint entirely.
 Hobbles are another form of leverage equipment and there are many different kinds of hobbles for different purposes. The hobbles that have chains on them should be avoided, as the equine can become entangled and the chains can do damage to their legs. Thin leather hobbles or coarse rope can chafe the hair right off the skin around the pastern and can cause severe abrasions that may never heal. Thick leather hobbles are best, as they will break when under extreme stress, releasing before damage to the equine is done. If so inclined, all mules and some horses can gallop in hobbles, so hobbles really aren’t all that effective for leverage. Tying onto a hyline (a rope suspended high between two trees that acts as a hitching line for overnighting equines in the mountains) is a better choice, and if the horses are tied, then the mules should not have to be tied or hobbled because they will generally stay with the horses. Personally, I only use hobbles in a controlled situation at the work station when body clipping my equine’s legs for show.
 I do not approve of using power tools on the equine’s hooves at all. In order for the equine’s body to be properly balanced in good posture, the hooves must first be properly balanced. Power tools cannot possibly shape the hoof with proper curvature in the sole, alignment of angles and equal balance over the hoof walls with appropriate pressure to the heels and frog.
 First, you should be sure that the trailer in which they are to ride affords safety and comfort and that the plates on both the truck and trailer are up-to-date. Before you leave, you should check over your trailer thoroughly. Make sure the hitch is secure and in good repair, and that there are no weakened welds anywhere. Check your trailer’s tires, bearings, axels and brakes for maximum performance, and make sure all the lights are in working order. Take the trailer mats out and check the floor boards for rot and other weaknesses, and replace all floor boards that are even questionable. It is always good practice to get all new tires for the trip and a new spare.
 Mules and donkeys, like horses, should be “dressed” for their trip. For their overall comfort during long trips, halters should be fleeced, at least over the noseband, to protect from excessive rubbing that can result from being tied. Shipping wraps for their legs are also advisable to prevent injuries from a loss of balance, misstep or kick from another animal in the trailer. Depending on the weather and the kind of trailer you have (either a stock trailer or enclosed trailer) you can use sheets or blankets to protect the rest of your animal’s body.
 When loading your mules and donkeys, pay special attention to each individual’s needs. Animals that lean one way or the other generally do better in a slant load trailer rather than in an in-line trailer, but if you must use an in-line trailer, make sure that the animal that leans has a solid wall or partition on the side to which he leans. You always want to put animals next to each other that get along well, so if you must load a leaner on the wrong side, be sure to put him next to an animal that is able to tolerate his leaning without retaliating if there are no partitions. If you have an open stock trailer, another alternative is to load your animals into the trailer and tie them facing backwards. Many equines actually prefer to ride facing backwards because they find it easier to balance. Note: This alternative is not advisable in a partitioned in-line or slant-load trailer.
 Long before you actually go anywhere, get your animals used to being handled inside the trailer. When unloading, always make them stand and wait. I usually remove my animals’ shipping wraps before I let them come out of the trailer, but if they are packed in pretty tightly, I just remove the leg wraps I can reach. The removal of leg wraps before unloading will add purpose to your Longears’ waiting time (which they quickly come to understand). Frequently offering water at stops gets your animals used to you moving about the trailer while they are loaded. Most equines realize that all of this is for their benefit and you should find them mostly cooperative and appreciative. Having water from home in plastic jugs makes this easy.


 (NOTE: I don’t recommend riding along paved roads at all these days. Although you and your equine may be in control, motorists don’t always pay attention while they are driving—which can lead to disaster.)
 Good habits are built through repetition and reward with regard to consideration for your equine. Eventually, the good habits that are being taught will become the normal way that your animal will move and react to you and to his environment. The details outlined in this article can help contribute to the behavior shaping of your animal, which will determine, as he ages, how willing and obedient he will be in all situations.

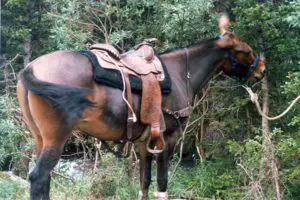
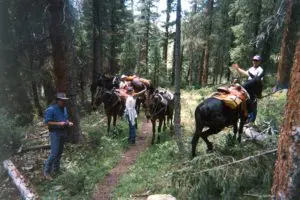

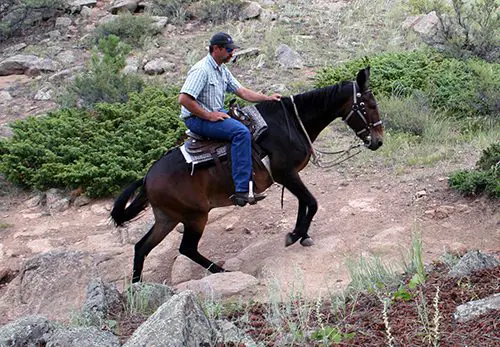 We are fortunate to be able to share our time with such intelligent, tough and durable equines as our beloved mules. But you should also remember to do your part in the relationship. Be patient and willing to take the time to allow your relationship to grow and for training to become solid before you indulge in the challenges that trail riding can present. Plan ahead and scout the locations where you desire to ride. With the growth of urban populations, open areas that welcomed riders in the past are not as numerous as they once were. Many areas now welcome hikers and even bicycles, but not equines. Find the designated trails and camp grounds that will accept equines when planning your treks.
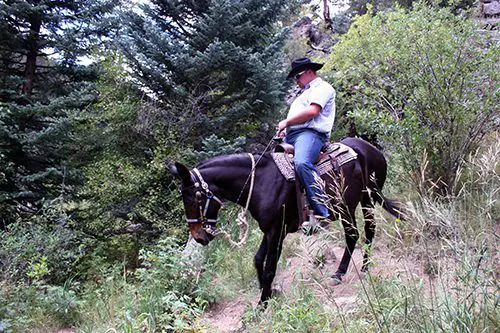 Even a ride that is planned to be short can turn into challenge if the weather changes suddenly, so be sure to plan for the worst case scenario. Tack up your equine in comfortable tack and equipment that fits like a glove. I like to ride with a crupper because it will hold the saddle in the correct placement when adjusted correctly and will allow for full range of movement, particularly behind when climbing uphill. If you use a breast collar, make sure it is loosely fitted so it does not pull your saddle forward and into the shoulder blades. Be sure to pack your saddle bags with the barest necessities for any ride far from home: Compass, water, rain gear, a Swiss Army knife, buck knife, hoof pick, lighter, fence pliers, Granola Bars or Trail Mix, a sleeping bag, a warm coat, Bear Spray and a First Aid Kit (at the very least Gauze, Vet Wrap and Neosporin).
 If planning an overnight trip, you will probably need a pack mule, or horse, to carry the extra food and additional necessities you will need like tents, blankets, sleeping bags, more food, extra clothes, High Lines and extra halters, and food for your equines. Lots of places will not allow your equines to graze in the parks, but some do. I do not like using picket lines where the equine is tied low with a halter, or with a rope around a foot. I do not like to use hobbles either (Mules can run off in hobbles with no trouble at all!). It is too easy for equines to get tangled up or injure themselves when they are restricted this way. They can get sprained tendons and ligaments, or severe rope burns that will leave them scarred for life. I prefer to bring their favorite horse “friend” along and tie the horse, and mules that tend to wander, to a High Line. Most of the mules can be allowed to run free and won’t leave your camp with the horse there, but do not leave halters on them. Again, they could become tangled up and injure themselves. If you have spent adequate time during training to build a solid relationship with your mules, they are much less likely to wander off and get lost. They will choose to stay near you.
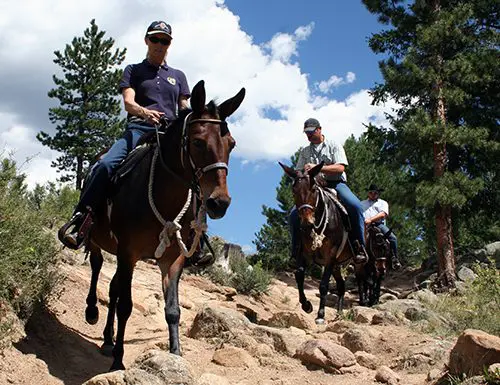 If you can, choose a place where you can establish a base and park your truck and trailer. You can then tie them on a High Line during the evening and put them back into the trailer for the night. This might be better if you are an area where there are a lot of large predators. Just don’t leave the truck and trailer windows open so a predator can get in. Stock trailers are the best for this purpose since they also have more room in them and are fully enclosed. Any food that could be attractive to predators should be mounted high in a tree, at least 50-100 yards away from your camp and your equines.
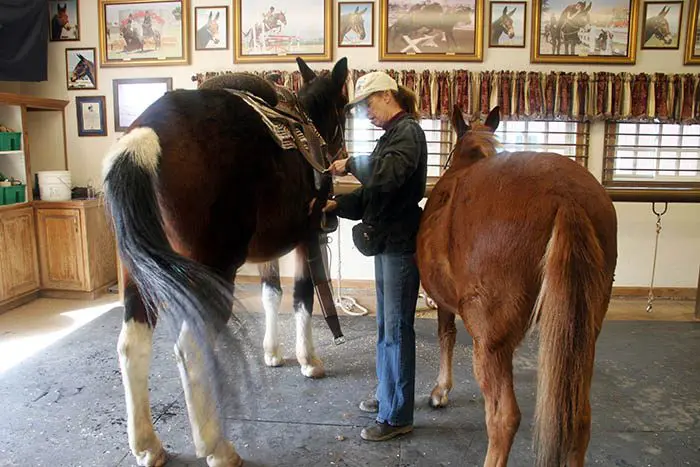 Once your equine has mastered tying and leading in the small pen, he can then move on to a designated work station where he will not only be groomed, but will also learn to accept tack in preparation for the round pen. This should be a place that has a good stout hitch rail and easy access to your tack and grooming equipment.
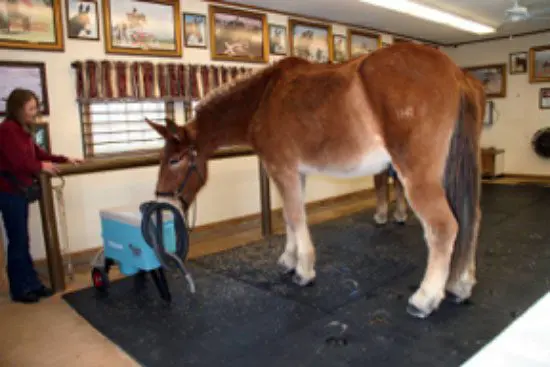 Keep an eye on the pressure you apply whenever using these various grooming tools. Different animals will have different sensitivity to these tools and will tolerate them better if they know you are not going to cause undue pressure or pain. Learn to brush the mane and tail starting at the bottom and working upward, and use a conditioner such as baby oil to keep from pulling or breaking the hair. (Baby oil will also keep other equines from chewing on the tail.) A shedding blade can be an uncomfortable grooming tool when used improperly. When using a shedding blade to remove mud around the head and ears and even on your animal’s body, be careful to minimize his discomfort by monitoring the pressure you apply to each area and working VERY slowly. When bathing him, be extra careful not to get water in his eyes or ears. These types of consideration for your equine’s comfort will help build his trust and confidence in you, and it will help make training easier and more enjoyable for both of you.
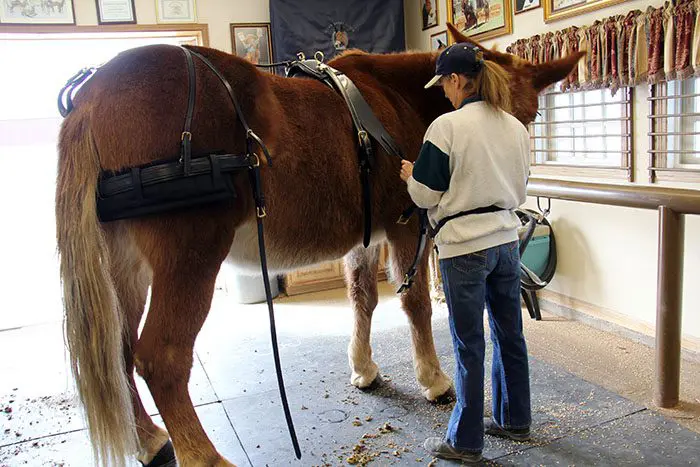 In order to elicit the correct response from your equine, always make sure you are using the correct tack for whatever you are doing. If you are not sure about what tack to use when, go to the Lucky Three Ranch website for more detailed information, or ask the experts in your area. Make sure all tack and equipment fits your animal properly. If it doesn’t, it can cause adverse behaviors during training.
 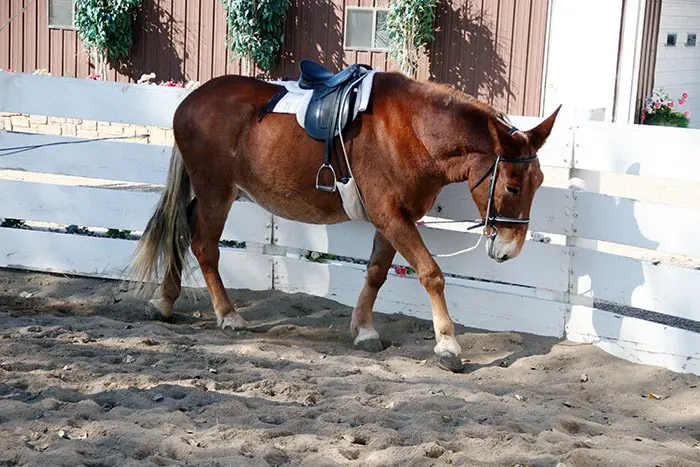 While working in the round pen, be aware of how your own body language and verbal commands elicit certain behaviors in your animal. If something isn’t working right, look to yourself and ask yourself what you might be doing to cause the adverse behavior you are seeing. Equines are very honest about their responses, and if they are not doing what you expect, it has to be in the way you are asking. Also, don’t hurry your equine. When asking for the walk, make sure that the walk is even in cadence, balanced and regular—not hurried. Only after your animal is correct in his execution of one gait, should you move on to the next gait. When first introduced to the round pen, it is not uncommon for an equine to begin work at the trot and then, as he becomes more comfortable with the new area, at the walk.
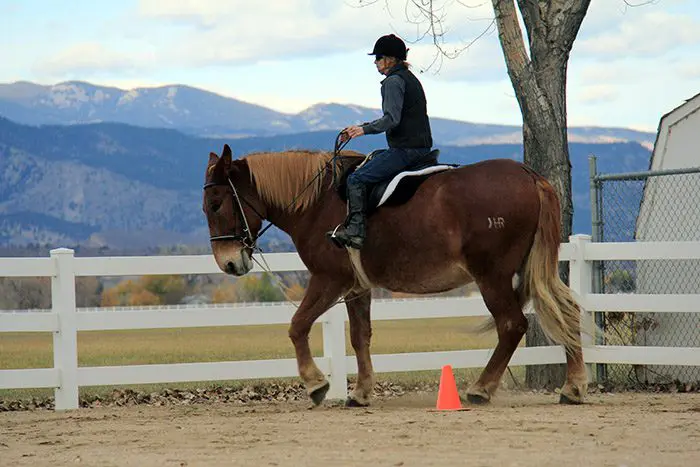 The arena is the place to really start focusing on forward motion and lateral exercises to further strengthen your equine, and it is the place to begin fine-tuning his balance while he is carrying a rider. The arena is also a good place for you to fine-tune your own riding skills, so that you learn to help your equine maintain good balance and cadence, on straight lines and while bending through the corners. In order for your equine to correctly go through the corners, you will be asking him to bend the muscles through his ribcage so he can remain upright and balanced. Equines are not motorcycles and should not lean around the corners. The power should always come from the hindquarters to keep the front end light, supple and responsive to cues. If his front end is heavy and sluggish, your equine is not adequately stepping underneath with his hind legs and will thus, lose forward impulsion and power and will not properly condition his muscles.
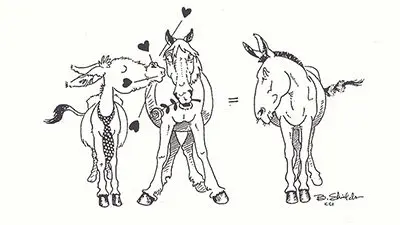 Many times I have been asked, “Is training a mule any different than training horses?”
 Showmanship training is not just for the showmanship class at a show. Perfecting your showmanship technique every time you have your equine on a lead line will command his attention to detail, build his confidence in you and insure that he is strengthening his muscles properly throughout his body at the most basic level.
 When you ask for a halt, stop with your feet balanced, your weight distributed equally over both legs and still facing forward. Give your equine a second or two to settle and then turn to face his shoulder. If his legs are already square, you can then give the crimped oats reward for stopping. If they are not square, take a moment to square up his legs and then give the reward. Praise him for standing quietly for a few seconds and allow him to settle. You can then face forward again, point in the direction of travel, give the command to “Walk on” and walk a few more steps before halting again. Add more steps each time before halting. Whenever you practice turning, always turn the equine away from you—never into you. To insure optimum balance, practice leading him through these exercises from BOTH sides.
 When executing a turn to the right, assume your leading position and then point in the direction of travel, asking your equine to take one step forward with the right front foot then cross the left front foot over the right to make the turn. Your own legs should execute the turn in sync with your equine’s front legs, giving him a good example to follow. Although you will rarely have an occasion to actually lead from the right side, be sure to practice from both sides to insure symmetrical muscle development. Dispense rewards, but only after he has completed what you have requested.
 Once he has learned to follow and to do the “moves,” you then need to help him fine-tune these moves, making them as steady, balanced and coordinated as possible. He should learn to walk, trot and back up in straight lines, to stop squarely and to execute smooth, properly arched turns. Remember that your equine will follow your lead, so always pay close attention to your good own posture and “way of going.” Equines and humans have corresponding body parts, so if you are stiff or off-balance in any part of your body, your animal will exhibit the same problem in his body.
 Maintain your own balance and rhythm, and ease into transitions from walk to trot and trot to walk smoothly and in rhythm and cadence—and so will your equine. Ask him to stand squarely each and every time he stops. Set up his back feet first by pushing on the lead rope with your hand directly under his chin in a diagonal motion toward the back foot that is forward. Push and release (in a diagonal motion only) the lead rope toward the forward foot as much as it takes to move it into line with the other back foot. Once the back feet are in line, set his front feet by pulling and releasing gently forward (again, in a diagonal motion only) to align the front legs.
 As your equine gains strength, you will notice that he now carries his body differently. He is more balanced, solid and steady, and is able to stop squarely at every “whoa,” regardless of the gait. As he frolics in the field, notice the dramatic change in his play patterns. He will be much less awkward.

 designed for a particular use. When doing light work in the arena, or for rail riding, you might want to use a “front and back” set that are designed for minimal support, while still providing the legs with greater protection from injury. In beginning training, you might use splint boots only on the front legs, since your animal will not likely be using his hind quarters efficiently enough to cause problems. But once you have begun activities such as balanced stops and lateral work in Dressage, or Reining, rear boots become important.
 After his basic training, when your equine is participating in more stressful activities such as jumping, endurance and racing (or in the case of an injury), it may become necessary to use a more supportive boot to lightly support already conditioned muscles and tendons. Support boots are designed to provide even support over the entire area that they cover. Be careful that they are neither too tight, nor too loose. You don’t want the boots so tight that they cut off the blood supply to the covered area, or not flexible enough to allow the joints to move freely. However, you don’t want them so loose that they ride down the legs.
 different kinds of leg wraps and splint boots that are out there. Some even look identical, but are not. Off-brand splint boots look a lot like Pro Choice splint boots, but they are made from inferior-quality materials that do not afford the degree of flexibility needed for successful therapy. Although these off-brands are designed for support and do cover the joints, they should be considered as more of a protective boot than a therapeutic boot. Splint boots are strictly for the protection of the cannon bones because they do not cover the joints and offer very little support.
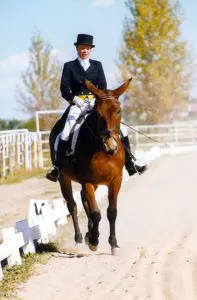 In order to perform the shoulder-in properly, it is important to understand its purpose. The shoulder-in causes the equine to engage his hindquarters so that they carry the bulk of his weight, giving him more freedom and suppleness in his shoulders and front quarters. A strong base must be established to carry this weight forward while the shoulders remain light and free to proceed forward while tracking laterally.
 Begin by walking your equine around the perimeter of the arena. When you reach the corner before the long side, make a ten-meter (30-foot) circle. As you close your circle at the start of the long side of the arena, maintain the bend that you had for the circle, using steady pressure on your inside rein. At the same time, nudge your equine with alternate leg pressure in synchronization with his hind legs as they each go forward. Squeeze your outside rein at the same time that you squeeze with your outside leg, and then release the outside rein. Ride the hindquarters straight forward from your seat and legs, as you offset the shoulders with your hands. Be careful that your inside rein is not so tight that your animal bends only his neck to the inside. As you squeeze with the outside aids, feel your equine rock his balance back to the hindquarters, giving you the sensation of pedaling backward on a bicycle. Simultaneously, you should feel the front quarters begin to lighten and become supple.
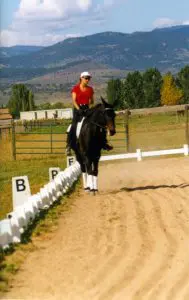 Take your time and don’t try too hard. Be content at first with two or three steps of shoulder-in and then straighten him down the long side of the arena. After a few accurate steps of shoulder-in, as he straightens his body, you will feel him surge forward with more energy. Collect and slow your equine’s gait through the short side of the arena and then repeat the exercise on the next long side. As your equine begins to understand the concept of rocking his balance to the hindquarters, the surge of energy that you feel when he straightens will become more and more powerful.
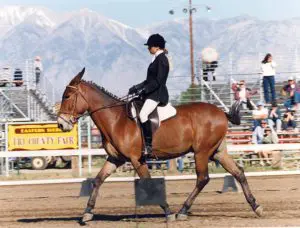 down the long sides. To add variation, ask him to lengthen across the diagonals (from corner to corner) as well. Your equine’s first impulse will probably be to shift his weight to the forehand and just speed up. For this reason, do not push him too hard too soon. At first, just ask for a little more energy—be aware that your rhythm and cadence will not be lost as his stride increases. He will just be spending more time in suspension. Keep the forehand light and free while you ride the hindquarters. Let your hand open slightly with the foreleg going forward on the same side, and close as the leg comes back. This will help you to determine how far you can let that stride go before the balance begins to shift forward. It will also allow you to check the balance with your hands before it begins to shift. If he has too much difficulty, you should go back and practice lengthening over ground rails again to gain more strength and coordination.
 As your equine gains strength in the hindquarters and is better able to carry your weight, his lengthened gaits will continue to improve until, perhaps a year or so later, he will be able to fully extend his stride at the walk, trot and canter. I caution you, however, that if your animal begins to rush, ask for less.
 Desensitization should be humane and considerate—never abusive. When we say we want to desensitize an animal, it simply means that we want him to become accustomed to touch and handling all over his body, particularly in areas such as his head, legs and rear quarters, where he is apt to be the most sensitive. An animal that has not been politely desensitized will tend to react more violently to touch. When properly teaching your mule to become desensitized, your touch should be presented in a pleasurable way, so that your mule not only learns to tolerate it, but to actually enjoy it and look forward to it. An old-time method such as “sacking out” is a somewhat crude technique that is used to desensitize an animal by tying the mule in a corner where he cannot flee, and then flinging a tarp or large canvas all over his body, including the head. Often times, it creates more problems than it can solve because it is rarely done politely. A mule that has been “sacked” about the head can actually become more sensitive because this inconsiderate approach teaches him that humans cannot be trusted. He perceives that they will fling things over his head, blinding him and causing him anxiety for no apparent reason. The mule will stand still only because he cannot move, but if he is given the opportunity to flee or fight back, he will more than likely do so. Thus, the old “obstinate mule” myths are actually most often the result of some fault of the trainer, and not the mule. Sacking out more politely will eliminate these kinds of potential bad habits.
 When his nose is finally up to the rail, run your lead around the post and come through the noseband on his halter and around the post again. Then tie him off snugly, so that his nose is tied as closely as possible to the hitch rail, making sure there is no slack. Now begin softly stroking your mule’s nose, using gentle yet firm strokes. Next, work your way up his forehead, and finally toward his ears. NOTE: Remember to use soft, gentle yet firm strokes, going with the grain of the hair and never against it. Do not “pat” your mule—it’s too threatening.
 When he will tolerate this, you can then cradle the ear in your fingers and with your thumb, begin to gently rub upward on the inside of the edge of his ear. Do not go too deep into the ear at first. After he is calm with this, you can begin rubbing downward into the ear with your fingers, while cradling the ear in your opposite hand, being very careful not to go too deep. Watch his eyes and allow him to “tell” you how deep to go. If it feels good, his eyebrows will raise and flicker. If he doesn’t like it, he will simply jerk his head away and that is your cue to lighten up. Most mules love to have the insides of their ears rubbed, so find the areas inside your mule’s ear that actually give him pleasure. Each individual mule will be different.
 In the next step, you will be in the same position, but you will close your hand around your mule’s ear and hold it with just enough pressure that he cannot jerk your hand loose. Do not hold too tight, grab or pull the ear—just maintain a quiet, gentle hold on the ear and go with his movement. If he pulls away, just slightly tighten your grip on the ear until he stops pulling and then lighten your grip again. Tighten only when he pulls away, and then immediately release when he stops resisting—tighten and loosen your grip as needed, and be sure to follow his movement. He will soon learn that if he doesn’t fight it, there is no discomfort. Never tightly grip his ear and do not tighten your grip any more than you need to in order to hold onto the ear—you never want to induce pain. Once your mule is tolerant of you holding his ear in this fashion, you can introduce the clippers, should you desire, using the same guidelines of tightening gently yet firmly when he pulls and releasing when he submits. However, introduce the clippers only after he has completely accepted you holding his ears.
 When you return with the difficult mule, tie him as before, stand directly in front of him (with the hitch rail between you) and gently remove the bridle with both hands lifting and sliding the crown piece over both of his ears simultaneously, so there is little pressure on his ears as it slides over them. If he still holds the bit in his mouth, hesitate for a minute when the bridle is off his ears and allow HIM to drop the bit. Removing the bridle this way will help to avoid chafing the ears and will avoid the bit hitting his teeth before you remove the bridle the rest of the way. Always removing the bridle in this fashion will encourage him to drop his head and will prevent bad habits such as pulling away or flinging his head.
 When your mule gets used to having his ears handled and being bridled while snubbed and haltered, you can then begin dropping the halter and loosely tying him while he is being bridled. Sometimes it takes a couple of weeks before you can drop the halter—this will vary depending on the individual mule, so just be patient. Your quiet, gentle perseverance will eventually win out and your mule’s ears will be desensitized and quite manageable. After you have mastered his outer ear and inner ear, you may find that your mule actually enjoys having his inner ear stroked or scratched, and bridling becomes easy. Integrating washing his face and cleaning his nostrils and ears during the grooming process should further help him to accept having his ears handled. Handling your mule’s ears can actually become a truly pleasurable experience for your Longears.
 As you ride your equine through walking exercises, try to stay soft, relaxed and following forward in your inner thighs and seat bones. Get the sensation that your legs are cut off at the knees and let your seat bones walk along with your animal—lightly, and in rhythm with him. If he slows down, just bend your knees and nudge him alternately with your legs below your knees, while keeping your seat and upper legs stable and moving forward. While your legs are still, they should rest gently on his sides in a “hug.” Do not push forward in your seat, but allow him to carry you forward. When collecting the walk on the short side, just bend both knees at the same time, nudging your equine simultaneously on both sides, while you squeeze the reins at the same time.
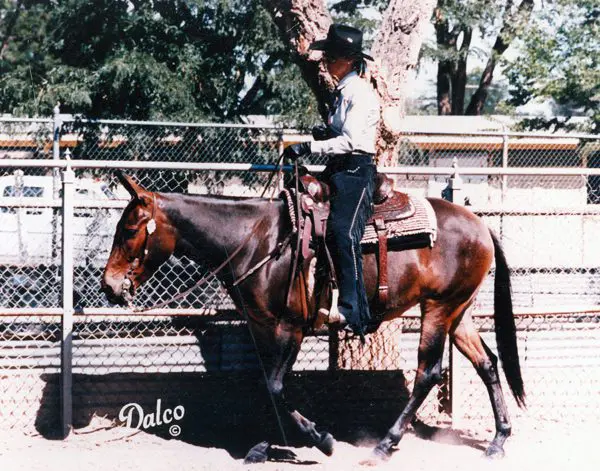 Most of us feel that we do not balance on our reins as much as we actually do. If there is any balancing on the reins at all by the rider, your equine will be unable to achieve proper hindquarter engagement and ultimate self-carriage. Here is a simple exercise you can do to help shift the weight from your hands and upper body to your seat and legs. Begin by putting your equine on the rail at an active working walk. On the long side, drop your reins on his neck and feel your lower-body connection with him as you move along. In order to maintain your shoulder-to-hip plumb line, you will find that you need to tip your pelvis forward and stretch your abdominal muscles with each step. If your lower leg remains in the correct position, this will also stretch the thigh muscles on the front of your leg from hip to knee. There is also a slight side-to-side motion as your animal moves forward that will cause your seat bones to move independently and alternately forward. There is no doubt that you can probably do this fairly easily right from the start, but to maintain this rhythm and body position without thinking about it takes time and repetition.
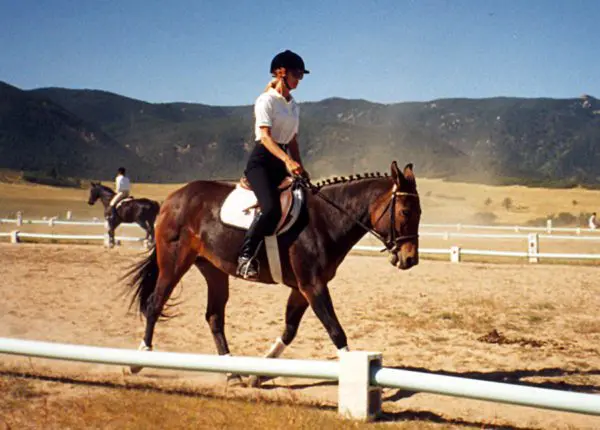 If your animal drifts away from the rail, you will need to post with a little more weight in your outside stirrup. As you go around the corners, be sure to turn your eyes a little to the outside of the circle to help your positioning. As you approach the short side of the arena, bring your arms backwards and straight out from your shoulders in a “T” formation, while keeping your upper body erect. As you go through the corners, just rotate your arms and upper body slightly toward the outside of your circle. When you come to the next long sides, bring your arms, once again, in front and parallel to your shoulders and repeat the exercise.
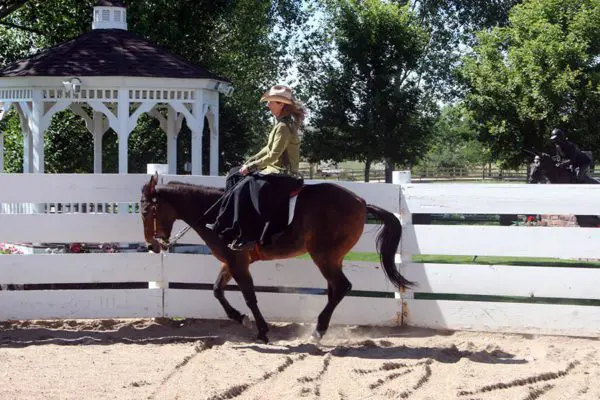 Notice the different pressure on your seat bones as you change your arm position. The forward arms will somewhat lighten your seat, while your arms to the side tend to exert a little more pressure. Consequently, you can send your animal more forward by using your seat as you go down the long sides, shortening that stride with a little added pressure from the seat bones on the short sides. When you wish to halt, put your arms behind you at the small of your back to support an erect upper body, and let your weight drop down through your seat bones and legs. Also, remember to use your verbal commands often in the beginning to clarify your aids (effect of the seat, legs and hands) to your equine. If your equine doesn’t stop, just reach down and give a gentle squeeze/release on the reins until he stops, but be sure to remain relaxed and continue to drop your weight into your seat and legs. Keep your inner thighs relaxed and flexible. Do NOT squeeze! Think DOWN through your legs on both sides. Before long, he will begin to make the connection between the weight of your seat and your command to “Whoa,” and your seat will take precedence over your reins.
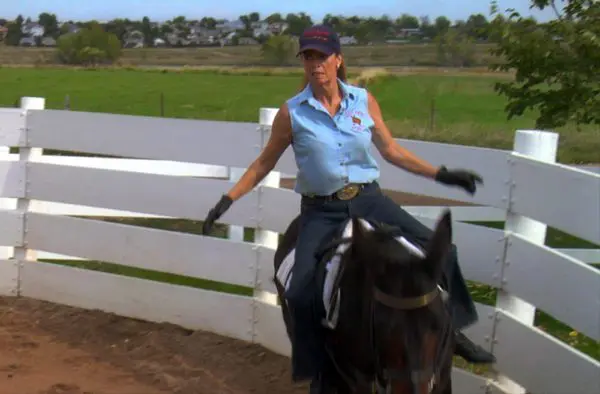

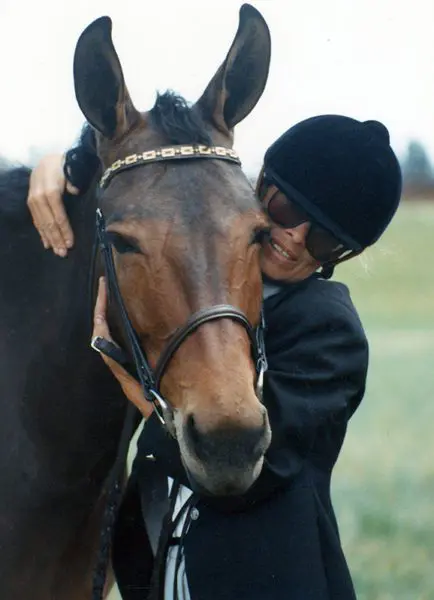 No training series would be complete without examination of the principles and philosophy behind the training techniques. The philosophy of my training techniques is based on the principle that we are not, in fact, training our equines. In fact, we are cultivating relationships with them by assigning meaning to our own body language that they can understand.
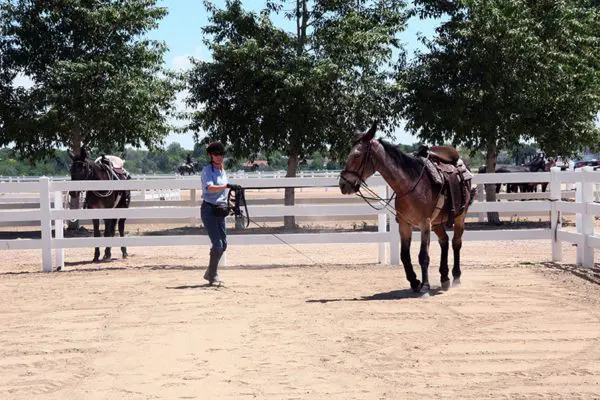 For instance, we had a 3-year-old mule learning to lunge without the benefit of the round pen. The problem was that she refused to go around you more than a couple of times without running off. Assess the situation first by brainstorming all the probable reasons she might keep doing such an annoying thing. Is she frightened? Is she bored? Is she mischievous? Has she been calm and accepting of most things until now? And most important, is my own body language causing this to occur?
 As mental changes occur, so do physical changes. As muscles develop and coordination gets better, the animal will gain confidence. As a trainer, you will need to do less and less to cause certain movements. For example, in the case of the leg yield, you may have to turn your mule’s head a little in the opposite direction to get him to step sideways and forward. As he becomes stronger, more coordinated, and understands your request, you can then begin to straighten his body more with less effort. Granted, we have begun by doing this the wrong way, yet we have put our mule “on the road” to the right way. We have assimilated an action in response to our leg that can now be perfected over time. In essence, you have simply said, “First you learn to move away from my leg, then you can learn to do it gracefully!”
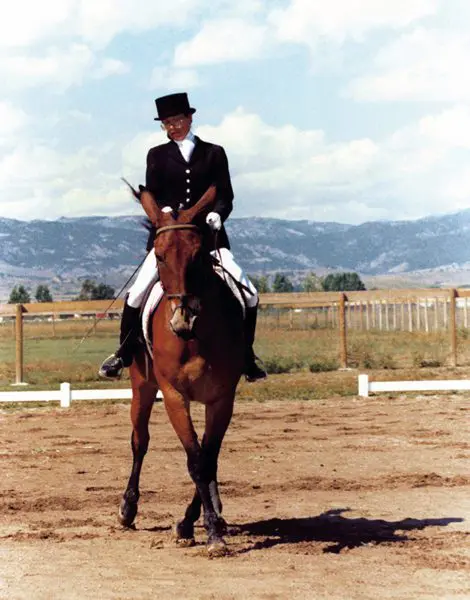 In training horses and mules, there is really little difference in one’s techniques or approach, provided we maintain patience and understanding and a good rewards system. The major difference between these two equines is their ability to tolerate negative reinforcement, or punishment. The mule, being part donkey, does not tolerate punitive action very well unless he is fully aware that the fault was his own and the punishment is fair. For instance, you ask for a canter lead and your mule keeps trotting, one good smack with the whip, or one good gig with the spurs, is negative reinforcement that will bring about the desired response, but be careful of an over-reaction from an overdone cue. More than one good smack or gig could cause either a runaway or an extremely balky animal. This kind of resistance comes from the donkey and requires a much different approach when training donkeys. The horse part of the mule allows us an easier time of overcoming this type of resistance in mules, making them different and easier to train than donkeys.
 It is important to know the differences among rewards, treats, coaxing and bribing in order to correctly employ the reward system of training called Behavior Modification.
 Remember to give your equine a reward only after a specific task you’ve asked for has been performed—or even an assimilation of that task, which means the taking of baby steps toward completing the task. The reward should be given immediately upon completion of the task and then your equine should be allowed time to enjoy his reward before moving on to the next task. If your equine is given a food reward for only good behaviors, he will be more likely to continue to repeat only those behaviors for which he is rewarded and you can begin to “shape” his behavior in a positive way.
 As an example of coaxing, you can extend a handful of crimped oats to lure your equine closer to an obstacle, but he should not receive the handful of oats until he completes the required task or travels enough distance toward the obstacle to deserve a reward. If your equine just won’t come all the way to an obstacle, even to get a reward, you can modify the task by asking your equine to just come closer to the obstacle and then halt (but without backing up). Then the reward can be dispensed for the partial approach and halt, because these actions still qualify as an assimilation of the bigger task that is to be completed. If he backs away at all, he should not be rewarded and you will have to go back to the beginning of the task and try again.
 Between lessons, let your equine have a day off in order to rest. When you return for the second lesson, tie him to the fence and review with him your last lesson from the very beginning. He should remember the previous lessons and be willing to follow you right away in order to be rewarded. If he seems willing to follow your lead, untie him and ask him to take a step forward just as he did before, but this time, instead of dispensing the food reward when he takes the first step forward, simply say, “Good boy” and ask him for a second step forward before you reward him with the oats. You will now be progressing from one step forward before you reward to two steps forward before you reward.
 This is how you begin with leading training, and also how you should proceed with all the new things that you will be teaching your equine. In the beginning of leading training, he gets rewarded for even an assimilation of what you’re asking. For example, when you get to negotiating obstacles, your goal may be to cross over a bridge, but when your equine sees the bridge ahead, he may stop or start backing up. At this point, allow him to back until he stops. Go back and repeat the steps you did prior to approaching the obstacle. Then, asking for only one step at a time, proceed as you did during his flatwork leading training toward the bridge, rewarding each step he takes. Tell him verbally how brave he is and continue to reward any steps he takes toward the obstacle before proceeding forward. Remember to stop at any interval where he becomes tense, ask for one more step to be rewarded, and then allow him to settle and refocus before asking any more from him.
 Now you no longer need to reward for one foot on the bridge. This is called “fading or phasing out” the reward for a previous behavior (one step), while introducing the new behavior of walking to the bridge, halting and then putting two front feet up on the bridge. Wait for a moment for him to chew his reward and then ask him to continue onto the bridge, stop and square up with four feet on the bridge and reward. If he does not comply and won’t stop on the bridge, just go back to the beginning, approach the bridge as described and try again until he stops to be rewarded with all four feet placed squarely on the bridge
 The last step over the bridge is to bring the hind feet off the bridge, stop and square up one more time before he gets rewarded. This does two things. It causes your equine to be attentive to the number of steps you are asking and it puts him in good posture at each stage so that his body will develop properly. In future lessons, the steps in the approach to the bridge no longer need to be rewarded and as he becomes more attentive, he will learn to stop any time you ask and wait for your cue to proceed. After several months of this meticulous attention to these detailed steps, he will not necessarily need to be rewarded with the food reward each time—a pat on the neck and kind words of support should be sufficient. Rewards can then be given for whole “blocks” of steps when he successfully completes them.
 In the natural progression of correct training—including during mounting training—your equine should also be getting rewarded when you’re first getting him used to your being on-board. Give him the oats reward for standing still while you attempt to mount (i.e., walking toward him, holding the left rein and reaching for the saddle horn), and then when you hang from each side of his body with a foot in the stirrup (first on one side and then on the other side), and, finally, from each side of his body while you sit on his back. When you ask him to turn his head to take the oats from your hand, you can be sure his attention will be on you because this action will force him to look at you in order to receive his oats. Then reward him again for standing still as you dismount. Consequently, by the time you actually get to the point of riding in an open arena, he’s been rewarded for having you on his back and for behaving well through all the exercises demanded from him during round pen training.
 Imprinting is defined as “rapid learning that occurs during a brief receptive period, typically soon after birth or hatching, and establishes a long-lasting behavioral response to a person or object as attachment to a parent or offspring.” 1 When we speak of “imprinting” in the scientific sense, it is a reference to the way the brain accepts input. The brain compartmentalizes impressions and images, and the animal reacts to the stimulus that the image produces. A collection of “imprints and images” produces memories. Imprinting training with a foal of any breed will give him a jump-start on his life with human beings.
 When imprinting your foal, think about the kind of adult you want him to be. A foal is very similar to a human baby regarding emotional needs—both need attention, love, guidance and praise to become loving, cooperative adults. Start your relationship with a positive attitude and approach your foal with love, patience, kindness and respect. Be sure to set reasonable boundaries for his behavior through the way you touch him and speak to him, the facial expressions you use, and even how you smell when you are around him so he can learn to trust and respect you and be happy at the sight of you.
 The most important sensation to which you can expose your equine is touch. If your touch is gentle and considerate, it will feel good to him and he will be interested in your attention. When you run your fingers over his body, being careful not to press too hard on sensitive areas, he will experience pleasure and begin to look forward to your visits. Learning how your equine likes to be touched will also help things go more smoothly when you begin grooming him and tacking him up and during his training lessons, when he must learn to take his cues from your hands, legs and other aids. Even how you mount and sit down in the saddle—for instance, how your seat is placed on his back—denotes your consideration of him through touch. The wrong kind of touch, no matter how slight, can be a trigger for adverse behaviors. However, the right kind of touch—done correctly—produces pleasure in your equine and instills a willingness to perform in a positive way each time you interact with him.
 To begin imprinting training, run your hands all over your equine’s body and down his legs, and put your hands in his mouth and in his ears. His reactions will help you learn how he likes to be touched. Getting your equine used to touch in this way eventually evolves into exposing him to grooming and working with tack and equipment. You are continuing to build on the initial imprinting work, but now, when you are grooming, the grooming tools will become extensions of your hands, and when you introduce various tack and equipment like clippers, they will also become an extension of your hands. Allow your equine to use his sense of touch (usually with his nose) when introducing any new object. Work toward getting your equine’s response to your touch as highly sensitive as possible, so that he can use his own body language to communicate with you. NOTE: Many owners pat their equine on the top of the head with the flat of their hand as a sign of affection, without realizing that, as a rule, most equines don’t take kindly to people patting their foreheads or faces. A pat on the forehead works if you want to distract your equine, but save it for that purpose only. It is much better to show affection by stroking your equine (always in the direction in which his hair lies), in a soothing and reassuring manner.
 The tone of your voice is another important element of imprinting. If your general tone is soothing and encouraging, he is more likely to comply. Then, when he needs to be disciplined, the change in your tone of voice will convey your disapproval before you even have to touch him to make a correction—giving him the opportunity to straighten up before you actually need to apply the physical backup of negative reinforcement. If, no matter what the situation, you always speak in low tones, he will not be able to differentiate between what’s acceptable and what is not, but if you modulate your voice to clearly express what you want to convey, your equine will be much better able to understand and react appropriately.
 The next sense to which you should appeal is your equine’s sense of taste (a no-brainer). When you dispense the oats reward for all of his new positive behaviors, he associates that wonderful taste with you and will follow you to the ends of the earth to get more oats.
 Work on evolving your own body language as a natural and truly wonderful way to “talk” with your equine. You can also use verbal language, but body language should be your primary form of communication.
 Work with ground rails and cavalletti helps to build muscle, particularly in the hind quarters. This will help him to carry your weight more easily through lateral movements, stops and lengthening of the gaits. Proper preparation minimizes resistance and frustration. This will be apparent in how your animal carries his tail. Is it hanging in a relaxed fashion, or is he switching his tail periodically, or regularly? You might notice that after the initial introduction of lateral moves, your equine’s forward motion has become a little “shaky” again. It is now time to clarify the connection between forward motion and lateral motion with his increased understanding of your seat and legs (Not so much the reins as your connection to the bit needs to remain quiet!). By employing a few simple exercises, this can be a very simple process.
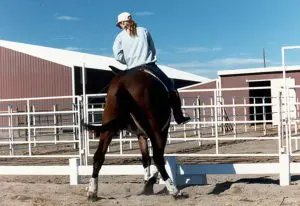 regular rhythm and cadence, proper flexion and bending through his rib cage. In rhythm, change your aids to a slight counter-bend and ask for a turn-on-the-forehand at the fence rail. Send his haunches around with pressure from your leg, well back on his barrel, until he is 180-degrees reversed. At the precise moment he is in the new position to go forward, in the opposite direction, release the pressure on your reins! Then send him forward again from your legs onto the new circle.
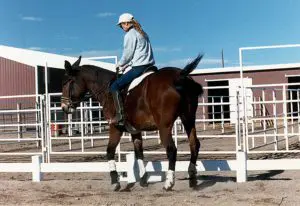 Complete the turn with a series of half-halts from your seat and a squeeze-release action with the reins. If you do this, your final release will come as a natural sequence to the turn and it will be executed in the rhythm and harmony of your equine’s movement. You can do this exercise at the walk, trot and canter, but be sure to slow down to a walk from the faster gaits in their natural sequence…canter, trot, walk and turn…trot, walk and turn. Do not be abrupt and skip the interim gaits.
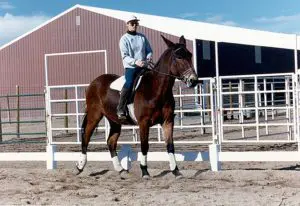 Be careful not to inhibit his forward motion. It is better that he does small circles to complete the turn at first than to fall back over his haunches and pivot on one hind foot. As in the turn-on-the-forehand, nudge his barrel on the opposite side, pushing his haunches into the turn with the squeeze-release action. Longears will tend to lean into a continuous pressure from your legs! Keep practicing this exercise, maintaining his body between your aids.
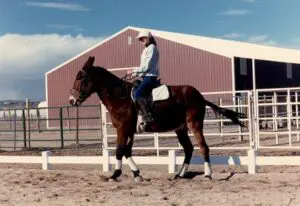 Once your equine gets his footwork figured out through these complicated movements, and has the opportunity to develop his body properly, you can begin to as for more speed and finesse on the turns, but this comes MUCH later! To attempt any more right now will most likely destroy his forward motion, cadence and rhythm. This will cause frustration and fatigue.
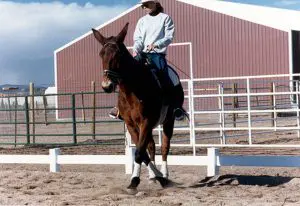 soon? Wouldn’t you rather have a long-lasting and pleasant relationship with a companion that is happy with his work?

