

MULE CROSSING: Handling Your Mule’s Ears
By Meredith Hodges
Just how sensitive is a mule about having his ears touched? If a mule is handled often and properly, he should be no more sensitive about his ears than he is about any other part of his body. However, if he is rarely handled, mishandled or handled roughly, he can become quite sensitive about any part of his body and in particular, his ears. Bearing this in mind, take the time to desensitize your mule to touch and handling by paying attention to how he likes to be touched in any given area, and then by being polite about handling those more sensitive areas. This is an important part of any training program, both for general management and for safety purposes. This is the heart of imprinting.
The mule that has an aversion to having his ears handled poses a problem with management convenience, but more than that, he can be a safety hazard in many situations. Here are some examples of lack of desensitization causing inconvenience and possibly, a dangerous situation. Inconvenient: Your mule does not want his ears touched, so you have to disassemble his bridle each time you put it on him. Dangerous: Should you accidentally touch his ears while putting the bridle on him, he could possibly thrash his head around and knock you silly! Inconvenient: If you get into a difficult spot on a trail where you have to dismount and move quickly, you may be unable to take the reins over your mule’s head in order to safely lead him. Dangerous: While you try to get the reins over his head without touching his ears, your mule could inadvertently knock you down or lose his balance and fall down while trying to avoid you. The moral is this: If your mule is to be a completely safe riding animal, he must be appropriately desensitized all over his head and body—including his ears—and trust that you will not harm him.
 Desensitization should be humane and considerate—never abusive. When we say we want to desensitize an animal, it simply means that we want him to become accustomed to touch and handling all over his body, particularly in areas such as his head, legs and rear quarters, where he is apt to be the most sensitive. An animal that has not been politely desensitized will tend to react more violently to touch. When properly teaching your mule to become desensitized, your touch should be presented in a pleasurable way, so that your mule not only learns to tolerate it, but to actually enjoy it and look forward to it. An old-time method such as “sacking out” is a somewhat crude technique that is used to desensitize an animal by tying the mule in a corner where he cannot flee, and then flinging a tarp or large canvas all over his body, including the head. Often times, it creates more problems than it can solve because it is rarely done politely. A mule that has been “sacked” about the head can actually become more sensitive because this inconsiderate approach teaches him that humans cannot be trusted. He perceives that they will fling things over his head, blinding him and causing him anxiety for no apparent reason. The mule will stand still only because he cannot move, but if he is given the opportunity to flee or fight back, he will more than likely do so. Thus, the old “obstinate mule” myths are actually most often the result of some fault of the trainer, and not the mule. Sacking out more politely will eliminate these kinds of potential bad habits.
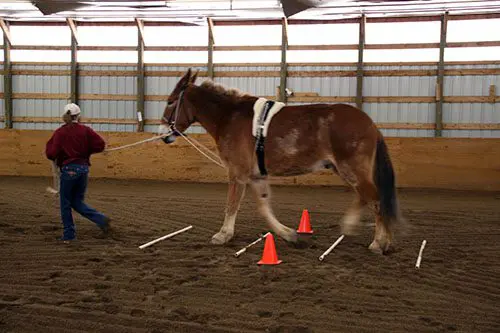
Desensitizing a mule that is sensitive about his ears is a long-term process. First, you must maintain a firm, quiet and tolerant attitude. Nothing your mule does should make you angry enough to lose your temper or your patience. Make sure your mule is tacked with a stout, non-breakable halter and rope. While stroking his nose in a polite and soothing manner, ask your mule to come forward, one step at a time, to a stout hitch rail. If he won’t come easily, just snub your lead on the hitch rail so he cannot go backwards, and keep coaxing him forward until he comes. Take up the slack with each step and then hold until he takes another step forward toward the hitch rail. Wait as long as it takes for him to gain confidence enough to come forward. Do not get into a pulling or pushing match with him—you will only create resistance in him and perpetuate avoidance behaviors—and he will win because he is stronger and he weighs more!
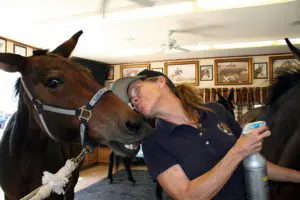
 When his nose is finally up to the rail, run your lead around the post and come through the noseband on his halter and around the post again. Then tie him off snugly, so that his nose is tied as closely as possible to the hitch rail, making sure there is no slack. Now begin softly stroking your mule’s nose, using gentle yet firm strokes. Next, work your way up his forehead, and finally toward his ears. NOTE: Remember to use soft, gentle yet firm strokes, going with the grain of the hair and never against it. Do not “pat” your mule—it’s too threatening.
Let the tips of your fingers find the base of your mule’s ear (away from the open side) and stroke upward, toward the tip. At this point, he will probably thrash his head back and forth to avoid your touch—just remain slow, deliberate, reassuring and gentle about your approach. When he has allowed you to stroke the ear, even if for only a couple of seconds, leave your hand resting on the ear and use your free hand to feed him an oats reward. Don’t take your hand away from the ear until he is chewing calmly and no longer worried about your hand on his ear. Do this with each ear no more than one or two times each session and then go to his shoulder and work your hand in a massaging fashion over his neck, toward his ears. While your thumb cradles an ear, let your fingers move over his poll. With your thumb, gently stroke upward on the back of his ear, while leaving the rest of your hand over his poll. If he jerks away, just keep going back to the same position of thumb cradling the ear and fingers moving over the poll.
 When he will tolerate this, you can then cradle the ear in your fingers and with your thumb, begin to gently rub upward on the inside of the edge of his ear. Do not go too deep into the ear at first. After he is calm with this, you can begin rubbing downward into the ear with your fingers, while cradling the ear in your opposite hand, being very careful not to go too deep. Watch his eyes and allow him to “tell” you how deep to go. If it feels good, his eyebrows will raise and flicker. If he doesn’t like it, he will simply jerk his head away and that is your cue to lighten up. Most mules love to have the insides of their ears rubbed, so find the areas inside your mule’s ear that actually give him pleasure. Each individual mule will be different.
 In the next step, you will be in the same position, but you will close your hand around your mule’s ear and hold it with just enough pressure that he cannot jerk your hand loose. Do not hold too tight, grab or pull the ear—just maintain a quiet, gentle hold on the ear and go with his movement. If he pulls away, just slightly tighten your grip on the ear until he stops pulling and then lighten your grip again. Tighten only when he pulls away, and then immediately release when he stops resisting—tighten and loosen your grip as needed, and be sure to follow his movement. He will soon learn that if he doesn’t fight it, there is no discomfort. Never tightly grip his ear and do not tighten your grip any more than you need to in order to hold onto the ear—you never want to induce pain. Once your mule is tolerant of you holding his ear in this fashion, you can introduce the clippers, should you desire, using the same guidelines of tightening gently yet firmly when he pulls and releasing when he submits. However, introduce the clippers only after he has completely accepted you holding his ears.

Introduce the bridle by holding your right hand flat on the poll between your mule’s ears, and by using your left hand to raise the crown piece over his nose and up to his forehead. Slide your right hand down his forehead a little to meet your left hand. When your hands meet, transfer the crown piece into your right hand, insert the bit with your left hand, and then raise the crown piece up to the base of his ears. Slowly transfer the crown strap back to your left hand. Gently cup the fingers of your right hand around the base of his right ear. Now bend the ear forward and under the crown piece and slide it over your hand (and the ear) into its position behind the ear. While keeping your palm firmly on your mule’s poll, slowly move to the left ear and repeat the same movements.
The bridle should now be in place and you can reward your mule. Do not put on and remove the bridle any more than once per session. Your mule needs to clearly know that this is not just some annoying past time you have discovered, but an act of necessity. He will soon learn that if he cooperates, it won’t take too long. Once the bridle is on, get right to the business at hand and forget the ears for a while.
 When you return with the difficult mule, tie him as before, stand directly in front of him (with the hitch rail between you) and gently remove the bridle with both hands lifting and sliding the crown piece over both of his ears simultaneously, so there is little pressure on his ears as it slides over them. If he still holds the bit in his mouth, hesitate for a minute when the bridle is off his ears and allow HIM to drop the bit. Removing the bridle this way will help to avoid chafing the ears and will avoid the bit hitting his teeth before you remove the bridle the rest of the way. Always removing the bridle in this fashion will encourage him to drop his head and will prevent bad habits such as pulling away or flinging his head.
 When your mule gets used to having his ears handled and being bridled while snubbed and haltered, you can then begin dropping the halter and loosely tying him while he is being bridled. Sometimes it takes a couple of weeks before you can drop the halter—this will vary depending on the individual mule, so just be patient. Your quiet, gentle perseverance will eventually win out and your mule’s ears will be desensitized and quite manageable. After you have mastered his outer ear and inner ear, you may find that your mule actually enjoys having his inner ear stroked or scratched, and bridling becomes easy. Integrating washing his face and cleaning his nostrils and ears during the grooming process should further help him to accept having his ears handled. Handling your mule’s ears can actually become a truly pleasurable experience for your Longears.
To learn more about Meredith Hodges and her comprehensive all-breed equine training program, visit LuckyThreeRanch.com, MEREDITH HODGES PUBLIC FIGURE Facebook page, or call 1-800-816-7566. Check out her children’s website at JasperTheMule.com. Also, find Meredith on Pinterest, Instagram, MeWe, YouTube and Twitter.
Covered in TRAINING MULES & DONKEY: A LOGICAL APPROACH TO TRAINING, TRAINING WITHOUT RESISTANCE, EQUUS REVISITED and A GUIDE TO RAISING & SHOWING MULES at www.luckythreeranchstore.com.
© 1992, 2003, 2012, 2016, 2024 Lucky Three Ranch, Inc. All Rights Reserved.

 Mules played an important role in our country during the Reconstruction Period: they patiently worked the fields, packed necessary artillery for the army, and served as a durable riding and driving animal in the westward movement. With the coming of the industrial age, their uses were minimized and they were faced with the possibility of extinction in the march of progress. Today, through the persistent determination of mule enthusiasts, mules are once again emerging as a conceivable asset to our economy and a unique form of athletic achievement and entertainment.
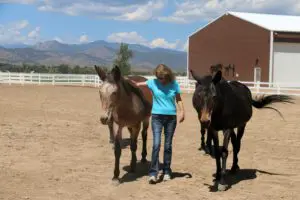 They will generally follow you around until you leave the field, begging for attention or simply observing you closely from a safe distance. Mules have a genuine desire to make friends with those other than their own species. Also, they are a very sensitive animal and can read your intentions through the tone of your voice and your body language.
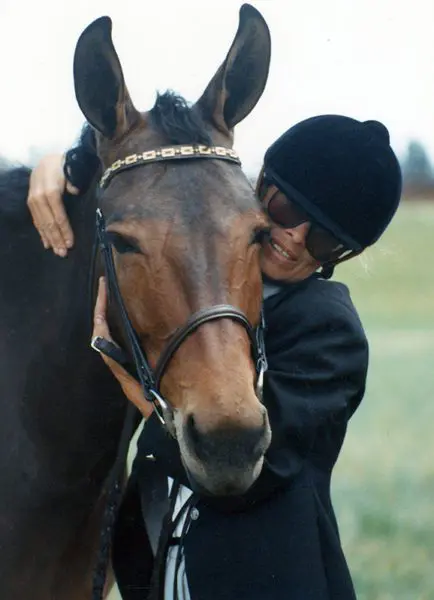
 Still, the most important thing to remember is to praise the mule with caressing and scratching when he does what you desire and back it up with the food reward. Mules love this kind of attention and will do their best to get it. If they are rewarded immediately when they are behaving as desired, the desired behavior will eventually become the norm. If bad behavior is ignored or gently reprimanded, it will fade to a minimum. The result is a pleasant, affectionate, and dependable animal.
 Mules and donkeys are wonderful animals. They’re strong, intelligent and what a sense of humor! But training a mule or donkey is different from training a horse. They require love patience, understanding and a good reward system. Negative reinforcement should be used sparingly and only to define behavioral limits. The result is an animal that is relaxed, submissive, obedient, dependable and happy with his work.
 long ago when there was virtually nothing published on this subject. Those of us who were training needed to use educational resources published on horse training and modify those techniques to better suit our Longears. This still left a lot of room for trial and error…and frustration for both the trainer and the animal.
 increased interest has come an increase in the numbers of animals that need to be trained each year. The few trainers who are competent with Longears could not possibly train even most of the animals that need it, even if it were geographically possible
 home and become a problem within as little as three months. It is important to take an active part in the training of your Longears. The more you can be a part of the training, the better for both you and your animal. Even if your mule or donkey is with a competent trainer, you need to plan on spending at least two days a week with your animal and the trainer so that your animal learns to trust you as well as the trainer. Being present and interactive with your animal at feeding time will solidify the trust he gains.
 series proves that this was a great way to reach people and help them to reach new levels of communication with their animals. People who never before had the courage nor confidence to even attempt such a thing are discovering the self satisfaction and elation of training their own mules and donkeys. Most people tell me it is the best part of their day when they can work with their animals. They are quite surprised at how easy it is to establish a routine that fits with their other weekly activities…thanks to the intelligence and forgiveness of these wonderful animals.
 At first, you might think there just isn’t enough time to spend with your animal to accomplish all this, but somehow we all manage to make time for these things when we have children. We learn to experience and grow with our children, as we can also do with our animals by being realistic with our expectations at each stage of growth and training. We give ourselves the time to do this without the pressure of being hurried. There are few times in this world when we are really able to “stop and smell the roses.” Longears can afford us this very special time if you only let them. Look upon the time with your donkey or mule as you would look upon the time you spend with your child. Some days will be for learning and some for just plain fun. When there are learning days, try to make them fun and stress-free. Someday you’ll find yourself saying: “I can’t believe he has turned out to be so good. I never really felt like I was ‘training’ him!”
 By Meredith Hodges
 Mule foals are not too much different than human infants in their emotional needs. They require lots of attention, love, guidance and praise if they are to evolve into loving, cooperative and confident adults. In your efforts to get your young foal trained, bear in mind that he is still a child. If he is expected to fulfill too many adult responsibilities too quickly, he can become overwhelmed, frustrated and resistant. This is why it is important to allow your foal to have a childhood. You can turn this time into a learning experience by playing games with your foal that will help him to prepare for adulthood without imposing adult expectations on him when he is too young.
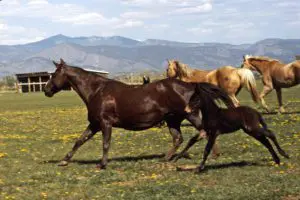 The first component of developing a well-adjusted adult mule is to establish a routine that will give your mule foal a sense of security and trust in you. Having a definite feeding schedule can help a lot. If you take a few minutes each morning and evening to scratch and pet your foal while your foal’s dam is eating and after he has finished nursing, he will associate you with a very pleasurable experience. If his dam is busy eating, she will be less likely to think about running off with him. If your animals are on pasture, a short visit once or twice a day with a ration of oats and plenty of petting while paying special attention to the intensity of your touch on his body will accomplish the same thing.
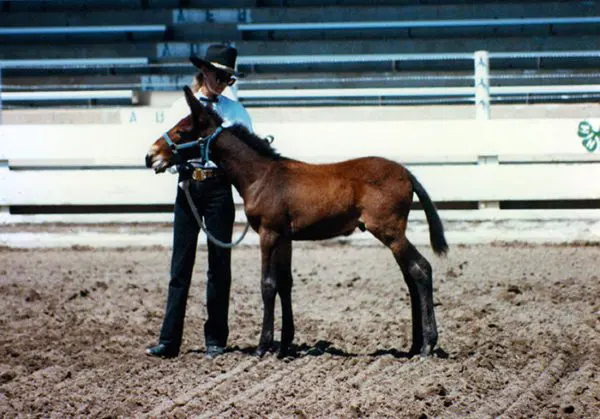 When your mule gets a little older and is ready to be halter broken, you can use your pleasurable status with him to your advantage. First, halter him and tie him to a fence with a safety knot (see DVD #1 n my Training Mules and Donkeys series). Leave him like this each day after breakfast for about half an hour, making sure to return to him every ten minutes. Each time you return, if he doesn’t become tense and struggle, untie him and ask him to follow you. If he refuses, just tie him up again and come back again ten minutes later and try again. If he comes with you, even if it is only one step the first time, take his halter off and play with him for a little while and then end the lesson. This will maintain your pleasurable status with your foal while he learns the things he will need to know as a young adult. In the next lesson you can ask for more steps before playing and ending the lesson
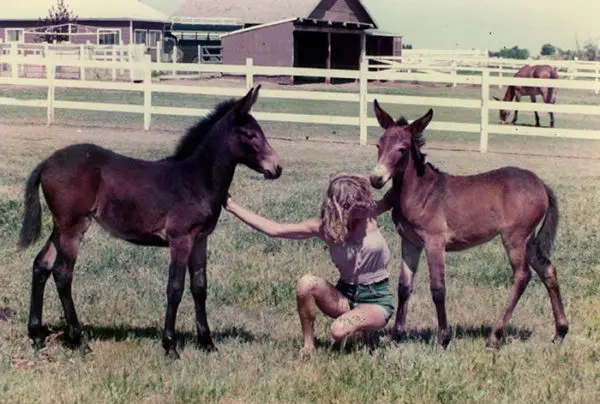 When handling your mule foal, always be sure to give him time to relax and accept a situation…and he probably will. Never get in a hurry and do not try to force anything—or your foal will be happy to oblige you with more resistance than you ever imagined possible! And remember, you can catch more flies with sugar than you can with vinegar, so go out there and have a good time with your little longeared pal. He’ll be glad to be your best friend if you learn how to be his best friend.
 As you ride your equine through walking exercises, try to stay soft, relaxed and following forward in your inner thighs and seat bones. Get the sensation that your legs are cut off at the knees and let your seat bones walk along with your animal—lightly, and in rhythm with him. If he slows down, just bend your knees and nudge him alternately with your legs below your knees, while keeping your seat and upper legs stable and moving forward. While your legs are still, they should rest gently on his sides in a “hug.” Do not push forward in your seat, but allow him to carry you forward. When collecting the walk on the short side, just bend both knees at the same time, nudging your equine simultaneously on both sides, while you squeeze the reins at the same time.
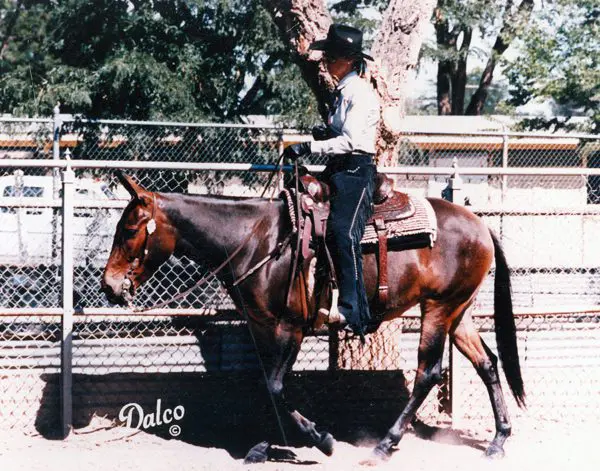 Most of us feel that we do not balance on our reins as much as we actually do. If there is any balancing on the reins at all by the rider, your equine will be unable to achieve proper hindquarter engagement and ultimate self-carriage. Here is a simple exercise you can do to help shift the weight from your hands and upper body to your seat and legs. Begin by putting your equine on the rail at an active working walk. On the long side, drop your reins on his neck and feel your lower-body connection with him as you move along. In order to maintain your shoulder-to-hip plumb line, you will find that you need to tip your pelvis forward and stretch your abdominal muscles with each step. If your lower leg remains in the correct position, this will also stretch the thigh muscles on the front of your leg from hip to knee. There is also a slight side-to-side motion as your animal moves forward that will cause your seat bones to move independently and alternately forward. There is no doubt that you can probably do this fairly easily right from the start, but to maintain this rhythm and body position without thinking about it takes time and repetition.
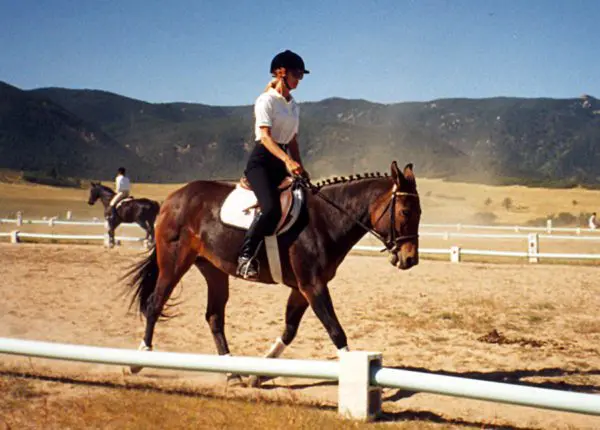 If your animal drifts away from the rail, you will need to post with a little more weight in your outside stirrup. As you go around the corners, be sure to turn your eyes a little to the outside of the circle to help your positioning. As you approach the short side of the arena, bring your arms backwards and straight out from your shoulders in a “T” formation, while keeping your upper body erect. As you go through the corners, just rotate your arms and upper body slightly toward the outside of your circle. When you come to the next long sides, bring your arms, once again, in front and parallel to your shoulders and repeat the exercise.
 Notice the different pressure on your seat bones as you change your arm position. The forward arms will somewhat lighten your seat, while your arms to the side tend to exert a little more pressure. Consequently, you can send your animal more forward by using your seat as you go down the long sides, shortening that stride with a little added pressure from the seat bones on the short sides. When you wish to halt, put your arms behind you at the small of your back to support an erect upper body, and let your weight drop down through your seat bones and legs. Also, remember to use your verbal commands often in the beginning to clarify your aids (effect of the seat, legs and hands) to your equine. If your equine doesn’t stop, just reach down and give a gentle squeeze/release on the reins until he stops, but be sure to remain relaxed and continue to drop your weight into your seat and legs. Keep your inner thighs relaxed and flexible. Do NOT squeeze! Think DOWN through your legs on both sides. Before long, he will begin to make the connection between the weight of your seat and your command to “Whoa,” and your seat will take precedence over your reins.
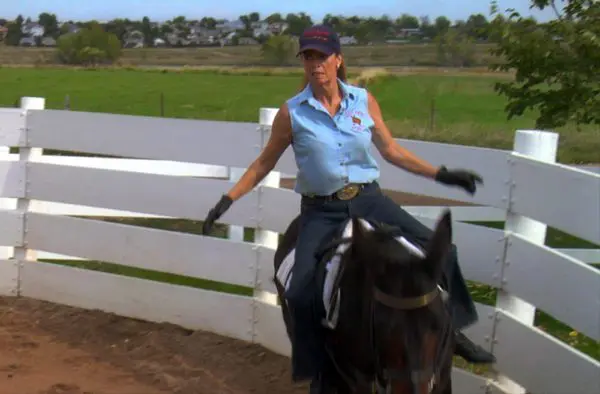

 By Meredith Hodges
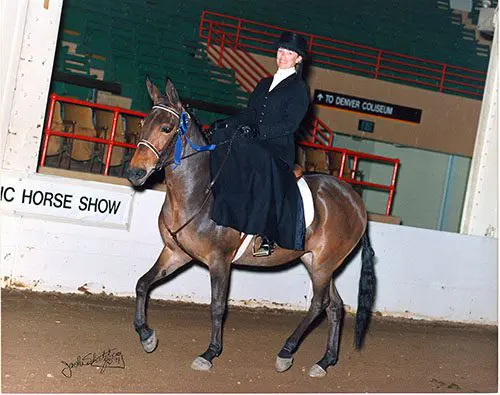
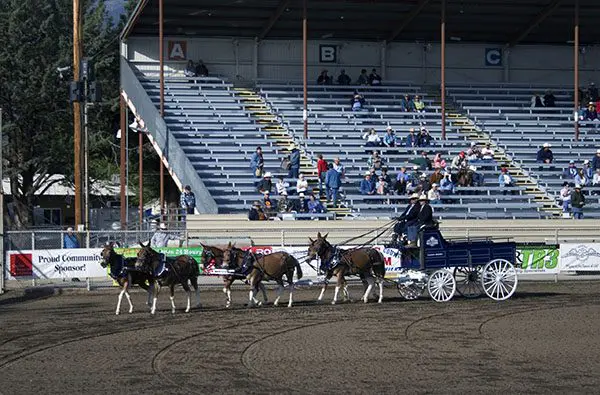 They are limited only by the imagination of The gift we have found with Longears is one that needs to be shared with others so that they might also experience the joy and pleasure these animals have to offer. In this hustle-and-bustle world, it is easy to take for granted the importance of love, sharing and simple pleasures derived from personal growth. Mule and donkey shows are a vehicle we can use to bring these things to light and revitalize the appreciation of Longears. The show ring is a place where mules and donkeys can exhibit the results of experiments with their owners and trainers, in exceptional horsemanship and performance, where challenges are met with both humor and enthusiasm. They can be pets, performers, pleasure mounts, or just plain hard workers.
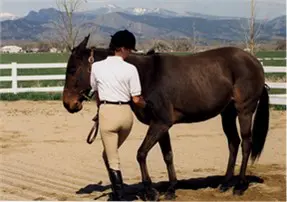 Because showing mules and donkeys is relatively new, there is much to be gained by participation. Those who feel that their animal is not of show quality can still attend shows and learn a lot about Showmanship, grooming and training skills. This development of new skills can make the difference between show quality or not, particularly in performance events. Newcomers to showing also give the audience something extra-special. The enthusiasm of the newcomer is often very contagious and the audience always finds Longears shows incredibly entertaining. They feel that this is something that they too could manage to do and enjoy. Those who feel they just cannot put in enough training time can still participate in a lot of the plain old fun classes that the show rosters include. There are enough mule and donkey clubs today that sponsor all kinds of shows and all one needs to do is contact any one of them to acquire the information that you need.
 Geographical locations and transportation can also restrict showing opportunities. With a little help and a lot of ingenuity, these issues can be resolved. One just needs to decide which shows would benefit them the most and then plan accordingly. If the show is some distance away, families, or groups, can pool their efforts and cut expenses dramatically. The growth of the mule and donkey industry has increased the number of shows throughout the country. They are now more numerous in remote areas and easy to reach. If you live in a really remote area, you might want to start a Longears Group and host your own schooling shows, or you can always request permission to ride in the Open Classes at Horse Shows in your area. Either way, you are doing important work in the promotion of Longears!
 will not give you an accurate feeling for any specific task—you must plan your course of action. If, for instance, you set up your mule to bend through and impulse out of the corner, you can close your eyes for a few seconds down the long side and feel the balance that comes out of that corner when the movement is executed correctly. In this particular situation, once you’ve closed your eyes, you may notice that your animal is starting to leans lightly to the inside. A squeeze/release from your inside leg, sending your mule forward and into the outside rein, corrects the balance and keeps him going straight down the long side.
 If he “ducks out” with you and begins to run, keep your connection on the rein that he has pulled as best as you can, and try to stop him by pulling on both reins together with a light squeeze/release action. Try to verbally calm him, and when he finally stops, praise him for stopping. Then, turn him with the rein that he has just pulled out of your hand, and return him to the task. Do not try to pull him around with the other rein, because this will cause him to lose his balance and will frighten him even more. If he is praised for stopping, he will not be afraid to stop. If he’s punished for running, he may never want to stop.
 I ride my equines diagonally through the aids to get the best lateral and vertical response. I want to maintain a good forward movement, which means that the impulsion must come from the hindquarters and from the push forward. Think of your hands and legs as four corners of a box that contains your mule. If you push forward on one side at a time from, say, left leg to your left hand, it leaves the other whole side of the animal unchecked, and he will proceed forward with a tendency to drift into the “open” side. This is why you have to ride alternately and diagonally from the left leg to the right hand and from the right leg to the left hand. It is why you ride from back to front, leg to hand, in a diagonal fashion—it pushes your mule from the outside leg forward into a straight and balanced inside rein, and from the supportive inside leg to the outside rein—he remains upright on the arcs and sufficiently bent. The wider the space between your legs and between your hands, the more lateral “play” you will feel in your mule. If you keep your hands close together and your legs snugly around his barrel, there is a lot less lateral “play” and a great deal more accuracy when doing your patterns. Think of your legs and hands creating a “train track” with rails between which your mule must move. The wider the space between your hands and legs, the more “snakier” his movements will become.


 No training series would be complete without examination of the principles and philosophy behind the training techniques. The philosophy of my training techniques is based on the principle that we are not, in fact, training our equines. In fact, we are cultivating relationships with them by assigning meaning to our own body language that they can understand.
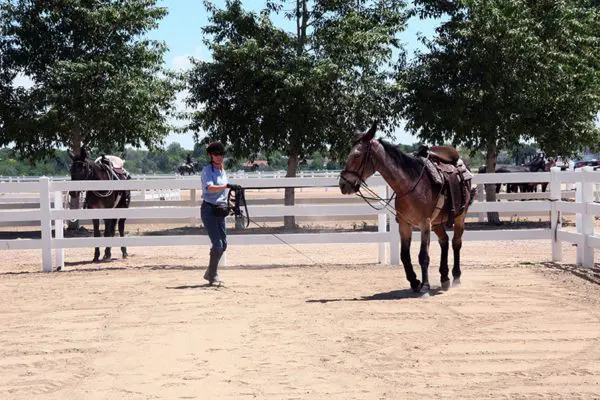 For instance, we had a 3-year-old mule learning to lunge without the benefit of the round pen. The problem was that she refused to go around you more than a couple of times without running off. Assess the situation first by brainstorming all the probable reasons she might keep doing such an annoying thing. Is she frightened? Is she bored? Is she mischievous? Has she been calm and accepting of most things until now? And most important, is my own body language causing this to occur?
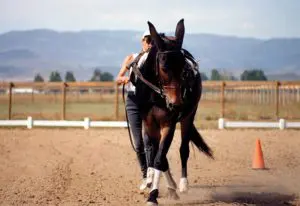 As mental changes occur, so do physical changes. As muscles develop and coordination gets better, the animal will gain confidence. As a trainer, you will need to do less and less to cause certain movements. For example, in the case of the leg yield, you may have to turn your mule’s head a little in the opposite direction to get him to step sideways and forward. As he becomes stronger, more coordinated, and understands your request, you can then begin to straighten his body more with less effort. Granted, we have begun by doing this the wrong way, yet we have put our mule “on the road” to the right way. We have assimilated an action in response to our leg that can now be perfected over time. In essence, you have simply said, “First you learn to move away from my leg, then you can learn to do it gracefully!”
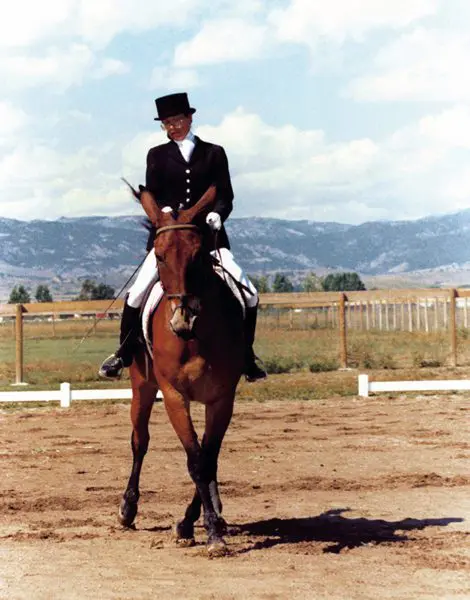 In training horses and mules, there is really little difference in one’s techniques or approach, provided we maintain patience and understanding and a good rewards system. The major difference between these two equines is their ability to tolerate negative reinforcement, or punishment. The mule, being part donkey, does not tolerate punitive action very well unless he is fully aware that the fault was his own and the punishment is fair. For instance, you ask for a canter lead and your mule keeps trotting, one good smack with the whip, or one good gig with the spurs, is negative reinforcement that will bring about the desired response, but be careful of an over-reaction from an overdone cue. More than one good smack or gig could cause either a runaway or an extremely balky animal. This kind of resistance comes from the donkey and requires a much different approach when training donkeys. The horse part of the mule allows us an easier time of overcoming this type of resistance in mules, making them different and easier to train than donkeys.
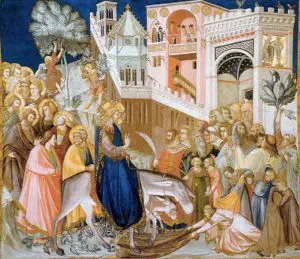 Long before the Founding Fathers drafted our constitution, the roots of America were as a religious nation under God. Today’s mule also has his roots in religion. The mule’s ancestor—the donkey—is mentioned in the Bible numerous times as an animal acknowledged by God and blessed by Jesus Christ. The donkey was even chosen to bring Mary and Joseph to Bethlehem and, later, as the mount Jesus himself used for his ride into the city of Jerusalem.
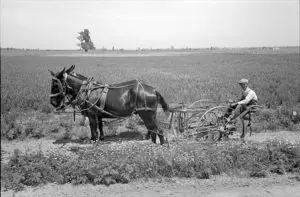 As early-nineteenth-century America continued to develop and its population grew, the American people came to depend more and more on self-sustaining agriculture. Because of the mule’s extraordinary ability to work long hours in sometimes harsh and unrelenting climates, his sure footedness which allowed them to cross terrain not accessible by any other means, and his resistance to parasites and disease, he became the prized gem of agriculture and remained so for the next hundred and fifty years.
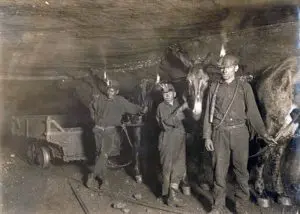 In 1882, the Harmony Borax Works opened with one big problem—how to get their product 165 miles across the treacherous Mojave Desert from Death Valley to the nearest railroad spur. The answer? Mules! “The borax wagons were built in Mojave at a cost of $900 each…When the two wagons were loaded with ore and a 500-gallon water tank was added, the total weight of the mule train was 73,200 pounds or 36 and a half tons. When the mules were added to the wagons, the caravan stretched over 100 feet. The Twenty Mule Teams hauled more than 20 million pounds of borax out of Death Valley between 1883 and 1889.” 1
 Because of their traits of strength, intelligence and loyalty, mules were a crucial part of our country’s greatest conflicts, from the Civil War through the Spanish American War, and in both World War I and World War II. A well-known tale from the Civil War states that, “In a battle at Chattanooga, a Union general’s teamsters became scared and deserted their mule teams. The mules stampeded at the sound of battle and broke from their wagons. They started toward the enemy with trace-chains rattling and wiffletrees snapping over tree stumps as they bolted pell-mell toward the bewildered Confederates. The enemy believed it to be an impetuous cavalry charge; the line broke and fled.” 3 During World War I, mules and horses were still the primary way that artillery was carried into battle. Although the 75mm Howitzers proved too heavy for most horses, it was a common sight to see the big guns strapped to the back of a sturdy mule.
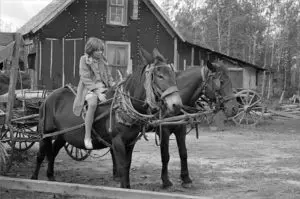 One of the world’s greatest natural wonders, the Grand Canyon, has been home to mules since the 1800s. First brought in by prospectors, it was soon realized that the tourists wanted a way down to the Canyon floor, and so began the Grand Canyon mule pack trips. Famous mule-riding visitors to the Grand Canyon have included Presidents Theodore Roosevelt and Howard Taft, famed naturalist John Muir and painter/sculptor Frederic Remington.
 As your young equine grows and matures, he will realize that you do not wish to harm him. Next, he will develop a rather pushy attitude in an attempt to assert his own dominance (much like teenagers do with their parents), because he is now confident that this behavior is acceptable. When this occurs, reevaluate your reward system and save excessive praise for the new exercises as he learns them. Note, however, that a gentle push with his nose might only be a “request” for an additional reward and a polite “request” is quite acceptable in building a good relationship and good communication with your equine. Allow the learned behavior to be treated as the norm, and praise it more passively, yet still in an appreciative manner. This is the concept, from an emotional standpoint, of the delicate balance of give and take in a relationship. As in any good relationship, you must remain polite and considerate of your horse, mule or donkey. After all, “You can catch more flies with sugar than you can with vinegar.”
 Here is an example: I had a three-year-old mule that was learning to lunge without the benefit of the round pen. The problem was that he refused to go around me more than a couple of times without running off. I first needed to assess the situation by brainstorming all the probable reasons why he might keep doing such an annoying thing. Is he frightened? Is he bored? Is he mischievous? Has he been calm and accepting of most things until now? And, most important, is my own body language causing this to occur? Once I was willing to spend more time with regard to balance on the lead rope exercises and proceeded to the round pen to learn to balance on the circle, I soon discovered that developing good balance and posture was critical to a mule’s training. The reason my mule was pulling on the lunge line so hard was because he just could not balance his own body on a circle. Once I reviewed the leading exercises with him—keeping balance, posture and coordination in mind—and then went to the round pen to learn to balance on the circle, I noticed there was a lot less resistance to everything he was doing. I introduced the lunge line in the round pen and taught him how to circle with slack in the line. And, I realized that it was also important to time my pulls on the lunge line as his outside front leg was in suspension and coming forward. It didn’t make much difference in the round pen, but it was critical to his balance in the open arena so the front leg could be pulled onto the arc of the circle without throwing his whole body off balance. After learning that simple concept, lunging in the open arena on the lunge line was much easier and he did maintain the slack in the line while circling me.
 Like humans, all animals are unique, and like humans, each learns in his own way. Learn to be fair and flexible in your approach to problems. It is best to have a definite program that evolves in a logical and sequential manner that addresses your equine’s needs physically, mentally and emotionally. Be firm in your own convictions, but be sensitive to situations that can change, and be willing to make those changes as the occasion arises. This is what learning is all about for both you and your equine.
 Achieving balance and harmony with your equine requires more than just balancing and conditioning his body. As you begin to finish-train your equine, you should shift your awareness more toward your own body. Your equine should already be moving forward fairly steadily and in a longer frame, and basically be obedient to your aids. The objective of finish-training is to build the muscles in your own body, which will cause your aids to become more effective and clearly defined. This involves shedding old habits and building new ones, which takes a lot of time and should be approached with infinite patience. There are no shortcuts. In order to stabilize your hands and upper body, you need to establish a firm base in your seat and legs. Ideally, you should be able to drop a plumb line from your ear to your shoulder, down through your hips, through your heels and to the ground. To maintain this plumb line, work to make your joints and muscles in your body more supple and flexible by using them correctly. Don’t forget to always look where you are going to keep your head in line with the rest of your body.
 When you are fairly comfortable at the walk, you can add some variation at the trot. Begin at the posting trot on the rail. When your equine is going around in a fairly steady fashion, drop your reins on his neck and continue to post. As you post down the long side, keep your upper body erect and your pelvis rocking forward from your knee. Your knee should be bent so that your legs are positioned on the barrel of your animal. Raise your arms out in front of you, parallel to your shoulders. If your equine drifts away from the rail, you need to post with a little more weight in your outside stirrup. As you go around corners, be sure to turn your eyes a little to the outside of the circle to help maintain your position. As you approach the short side of the arena, bring your arms back, straight out from your shoulders, and keep your upper body erect. As you go through the corners, just rotate your arms and upper body slightly toward the outside of your circle. When you come to the next long side, once again bring your arms in front of and parallel to your shoulders, and repeat the exercise.
 Imprinting is defined as “rapid learning that occurs during a brief receptive period, typically soon after birth or hatching, and establishes a long-lasting behavioral response to a person or object as attachment to a parent or offspring.” 1 When we speak of “imprinting” in the scientific sense, it is a reference to the way the brain accepts input. The brain compartmentalizes impressions and images, and the animal reacts to the stimulus that the image produces. A collection of “imprints and images” produces memories. Imprinting training with a foal of any breed will give him a jump-start on his life with human beings.
 When imprinting your foal, think about the kind of adult you want him to be. A foal is very similar to a human baby regarding emotional needs—both need attention, love, guidance and praise to become loving, cooperative adults. Start your relationship with a positive attitude and approach your foal with love, patience, kindness and respect. Be sure to set reasonable boundaries for his behavior through the way you touch him and speak to him, the facial expressions you use, and even how you smell when you are around him so he can learn to trust and respect you and be happy at the sight of you.
 The most important sensation to which you can expose your equine is touch. If your touch is gentle and considerate, it will feel good to him and he will be interested in your attention. When you run your fingers over his body, being careful not to press too hard on sensitive areas, he will experience pleasure and begin to look forward to your visits. Learning how your equine likes to be touched will also help things go more smoothly when you begin grooming him and tacking him up and during his training lessons, when he must learn to take his cues from your hands, legs and other aids. Even how you mount and sit down in the saddle—for instance, how your seat is placed on his back—denotes your consideration of him through touch. The wrong kind of touch, no matter how slight, can be a trigger for adverse behaviors. However, the right kind of touch—done correctly—produces pleasure in your equine and instills a willingness to perform in a positive way each time you interact with him.
 To begin imprinting training, run your hands all over your equine’s body and down his legs, and put your hands in his mouth and in his ears. His reactions will help you learn how he likes to be touched. Getting your equine used to touch in this way eventually evolves into exposing him to grooming and working with tack and equipment. You are continuing to build on the initial imprinting work, but now, when you are grooming, the grooming tools will become extensions of your hands, and when you introduce various tack and equipment like clippers, they will also become an extension of your hands. Allow your equine to use his sense of touch (usually with his nose) when introducing any new object. Work toward getting your equine’s response to your touch as highly sensitive as possible, so that he can use his own body language to communicate with you. NOTE: Many owners pat their equine on the top of the head with the flat of their hand as a sign of affection, without realizing that, as a rule, most equines don’t take kindly to people patting their foreheads or faces. A pat on the forehead works if you want to distract your equine, but save it for that purpose only. It is much better to show affection by stroking your equine (always in the direction in which his hair lies), in a soothing and reassuring manner.
 The tone of your voice is another important element of imprinting. If your general tone is soothing and encouraging, he is more likely to comply. Then, when he needs to be disciplined, the change in your tone of voice will convey your disapproval before you even have to touch him to make a correction—giving him the opportunity to straighten up before you actually need to apply the physical backup of negative reinforcement. If, no matter what the situation, you always speak in low tones, he will not be able to differentiate between what’s acceptable and what is not, but if you modulate your voice to clearly express what you want to convey, your equine will be much better able to understand and react appropriately.
 The next sense to which you should appeal is your equine’s sense of taste (a no-brainer). When you dispense the oats reward for all of his new positive behaviors, he associates that wonderful taste with you and will follow you to the ends of the earth to get more oats.
 Work on evolving your own body language as a natural and truly wonderful way to “talk” with your equine. You can also use verbal language, but body language should be your primary form of communication.

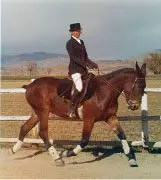

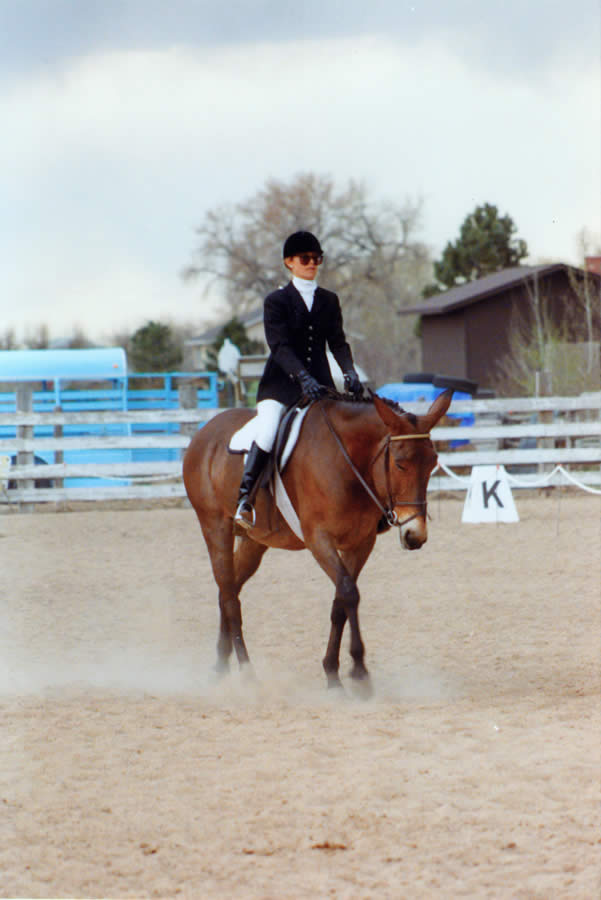

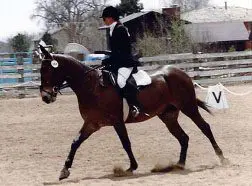
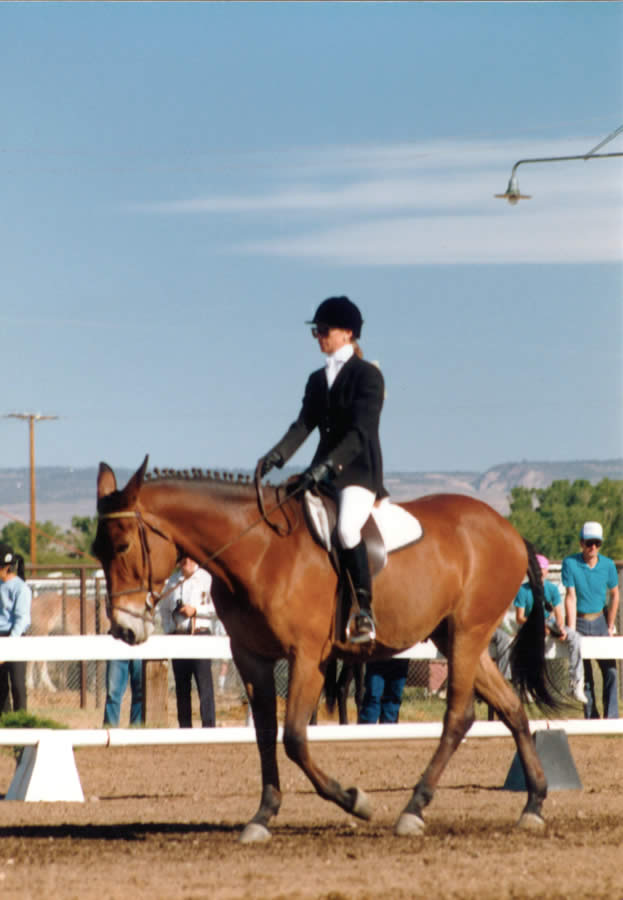
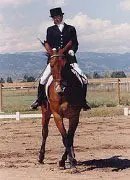


 The old saying, “No foot, no mule” is literally true, as it is in any nomadic animal. If the hooves are not trimmed and balanced properly, it will offset the balance of the equine’s entire body and can compromise longevity in the animal because his entire internal structure will be compromised. Most equines will need to be trimmed or shod every 6-8 weeks whether horse, mule or donkey.


 Work with ground rails and cavalletti helps to build muscle, particularly in the hind quarters. This will help him to carry your weight more easily through lateral movements, stops and lengthening of the gaits. Proper preparation minimizes resistance and frustration. This will be apparent in how your animal carries his tail. Is it hanging in a relaxed fashion, or is he switching his tail periodically, or regularly? You might notice that after the initial introduction of lateral moves, your equine’s forward motion has become a little “shaky” again. It is now time to clarify the connection between forward motion and lateral motion with his increased understanding of your seat and legs (Not so much the reins as your connection to the bit needs to remain quiet!). By employing a few simple exercises, this can be a very simple process.
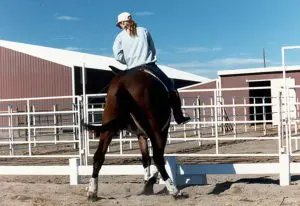 regular rhythm and cadence, proper flexion and bending through his rib cage. In rhythm, change your aids to a slight counter-bend and ask for a turn-on-the-forehand at the fence rail. Send his haunches around with pressure from your leg, well back on his barrel, until he is 180-degrees reversed. At the precise moment he is in the new position to go forward, in the opposite direction, release the pressure on your reins! Then send him forward again from your legs onto the new circle.
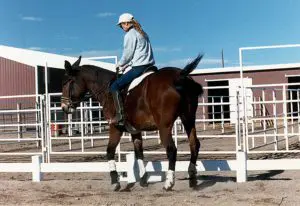 Complete the turn with a series of half-halts from your seat and a squeeze-release action with the reins. If you do this, your final release will come as a natural sequence to the turn and it will be executed in the rhythm and harmony of your equine’s movement. You can do this exercise at the walk, trot and canter, but be sure to slow down to a walk from the faster gaits in their natural sequence…canter, trot, walk and turn…trot, walk and turn. Do not be abrupt and skip the interim gaits.
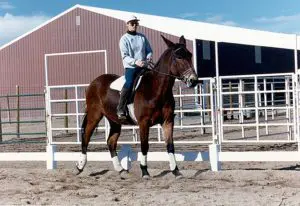 Be careful not to inhibit his forward motion. It is better that he does small circles to complete the turn at first than to fall back over his haunches and pivot on one hind foot. As in the turn-on-the-forehand, nudge his barrel on the opposite side, pushing his haunches into the turn with the squeeze-release action. Longears will tend to lean into a continuous pressure from your legs! Keep practicing this exercise, maintaining his body between your aids.
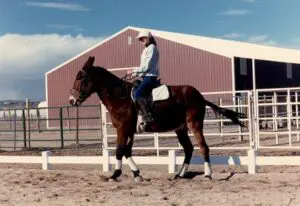 Once your equine gets his footwork figured out through these complicated movements, and has the opportunity to develop his body properly, you can begin to as for more speed and finesse on the turns, but this comes MUCH later! To attempt any more right now will most likely destroy his forward motion, cadence and rhythm. This will cause frustration and fatigue.
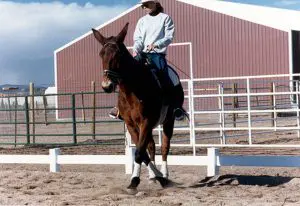 soon? Wouldn’t you rather have a long-lasting and pleasant relationship with a companion that is happy with his work?

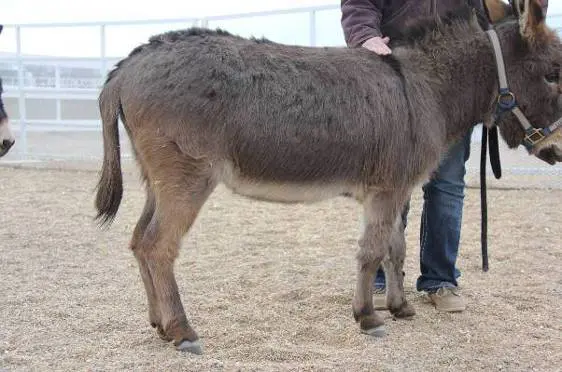


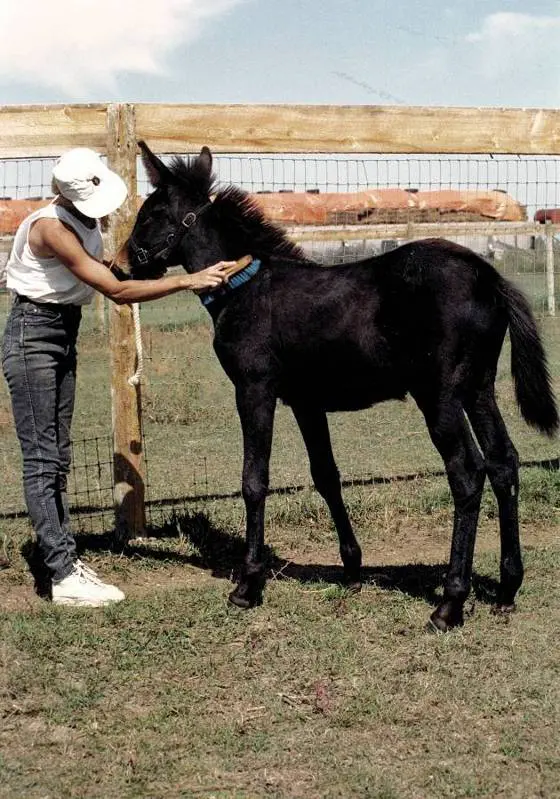

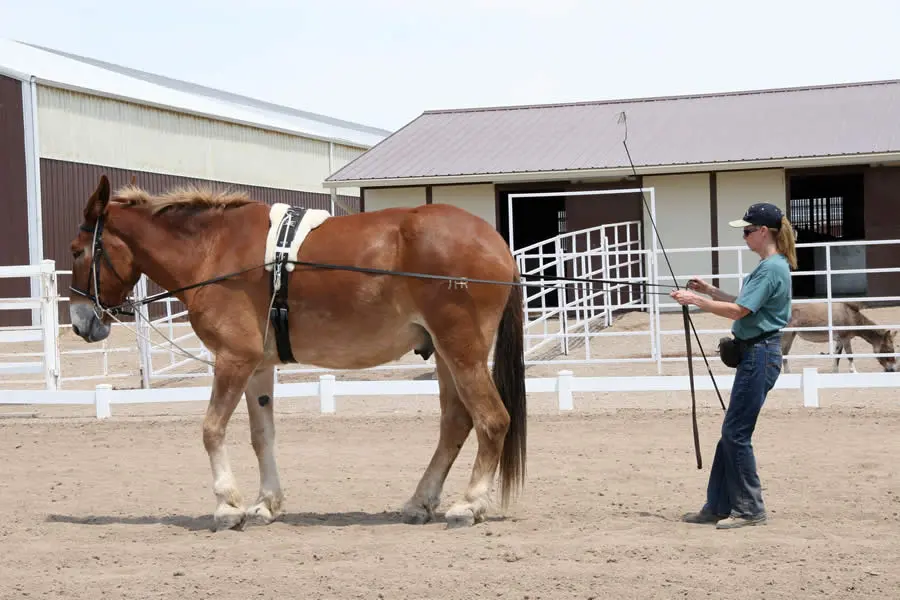


 Although he is often confused with his sire, the donkey, the mule is the symbol of neither the Republicans nor the Democrats. During past political campaigns, certain Republicans actually declined to have their picture taken with a mule, because they were either ignorant of the difference between a mule and a donkey, or they were afraid that the mule would be mistaken for the Democratic Party’s symbol—the donkey.
 Mule stories from the past are numerous in this great country of ours. The number of mules (and horses) in the U.S. peaked in 1919, at 26.5 million. The United States of America was quite literally built on the backs of its mules—they pulled supply wagons in the cities, forged west with the early settlers across the vast prairies, packed hunters’ gear in the mountains, plodded underground with the coal miners and plowed the Southern cotton fields. They have participated in war alongside our brave soldiers, and have found their place in the field of entertainment. They even helped with the excavation of the Pasadena Rose Bowl.
 After the onset of the Industrial Revolution, the number of mules in the U.S. declined, and in 1967, there were less than ten thousand. But happily, in recent years, renewed interest and public awareness have sparked a steady increase in the mule population.
 Obviously, I have one of the worst cases of “Mule Fever” ever suffered! But then, here I am—older, wiser and without any broken bones due to my association with mules. In fact, I can say my life was saved by one of my own mules. I was on my mule, Mae Bea C.T., leading a group of four trail riders on horses up a switchback in the Rocky Mountains, when the trail began to get very narrow. It was 100 feet straight up on the right and 100 feet straight down on the left! I could not see very far ahead because the two-foot trail wrapped around a huge boulder and blocked my forward vision. As I rounded the boulder, with the horses right on my rear, I was faced with a trail that disappeared into a wide landslide of small rocks. I couldn’t go forward and, with the horses directly behind on the wider part of the trail, I couldn’t back up. The horses could turn around where they were, but I couldn’t. I waited for the horses to get turned around, and then indicated to Mae Bea C.T. that I wanted a tight turn on the haunches. She sat her rear back on her haunches and swung her front legs over the 100-foot drop in a smooth and effortless 180-degree turn, facing next in exactly the opposite direction. She then stopped and waited for my next cue to lead the horses safely back down the trail. I shudder to think what could have happened had she been a nervous horse.
 Although the therapeutic value of the mule goes back as far as his own history, the idea of intentionally using mules for actual therapy did not come until much later. One of the most successful therapeutic stories involving mules is that of the Vision Quest Wagon Train. Vision Quest founder, Bob Burton, had a dream to use mules and the discipline and hard work of a real wagon train to help troubled kids. So, in 1976, the first Vision Quest Wagon Train was launched. In this life-changing program, 36 at-risk teens were required to spend one year traveling with six mule-powered wagon teams that went south in the winter and north in the summer. During the journey, the kids learned positive social skills and responsibility in caring for themselves and for their animals, with a solid success rate of 60 percent. (Mules really do make the best teachers!) Today, plans are being made on Facebook for a Vision Quest Wagon Train Reunion in 2012. Clips of the Vision Quest Wagon Train journeys can be seen on YouTube.