MULE CROSSING: Donkeys As Livestock Guardians
 By Meredith Hodges
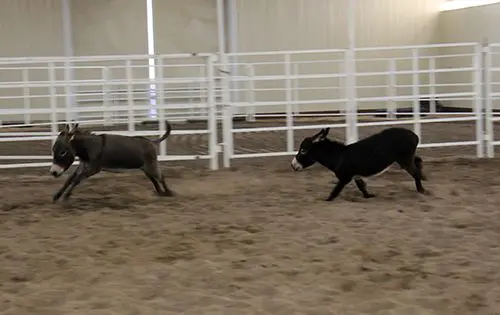
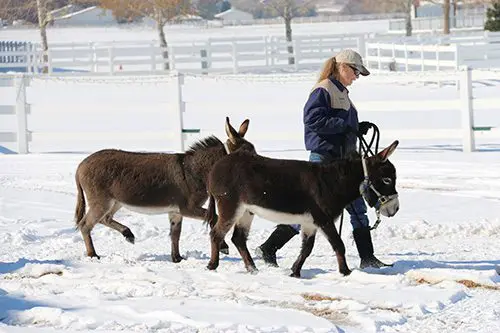
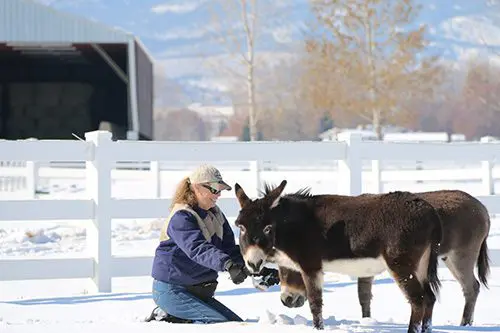
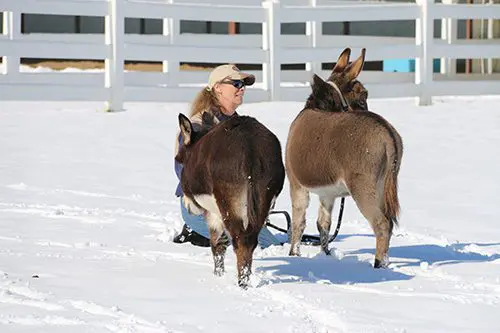
There has been a lot of discussion since the early nineties around using donkeys for small livestock protection and predator control. Donkeys can certainly be a formidable opponent for cats and dogs and other smaller animals. One needs to be careful about who the donkey is pastured with since it is in their nature to pursue and sometimes kill animals that are smaller and weaker than them. This is true in all donkeys, although some individual females tend to be more maternal and are not apt to go after smaller livestock. The males will always be more aggressive than the females and do not make good guardians for smaller livestock.
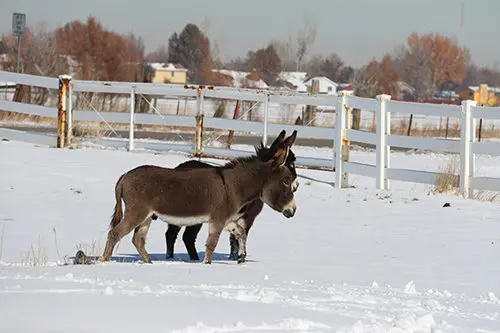
 The other thing to consider is whether or not they have been raised with the livestock they are expected to guard. When raised with the other livestock, they will feel more a part of that “family” and are less likely to do them harm. A donkey that is going to be expected to guard livestock, but was not raised with them, should be carefully introduced to them “over the fence” for several weeks. Then if all seems to go well, you can introduce them in the same pen and watch for any signs of aggression. If there are signs of aggression after a few weeks of being separated, then they probably will never really get along. You must remember that a donkey is NOT a predator, nor a prey animal that will necessarily get along with other livestock. Donkeys prefer to be in a herd with other donkeys. They do not like being alone either. Donkeys have a strong sense of “family” and prefer to be with their own kind. When forced to be with other species, they will blend, but grudgingly.
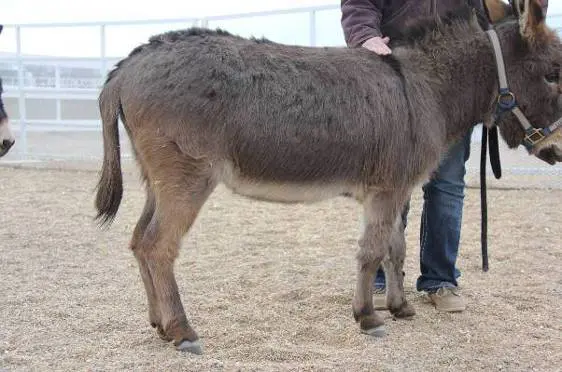
There are three basic sizes of donkeys: Miniatures, Standard Donkeys and Mammoths. Our American donkeys are further identified by their height when being described rather than specific breeds. This is because they are so interbred from being turned loose during the time of the Spanish explorers. There are no real purebred donkeys in America other than the descendants of the original Andalusian donkeys that were bred from George Washington’s stock at Mt. Vernon. One must go to Europe to see the original BREEDS of donkeys. American donkeys are identified as: Miniature Donkeys (36” & under), Small Standard Donkeys (36.01” to 42”), Standard Donkeys (42.01” to 48”), Large Standard Donkeys (48.01” to 56”) and Mammoth Donkeys (Males 56” & over; Females 54” & over).
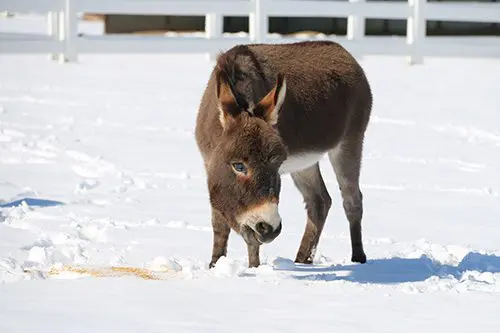
Miniature donkeys are not suitable guardians for livestock at all. They are too small and can fall victim to predators themselves. They simply cannot defend themselves. Standard donkey jennets are the most sought after for predator control, however, keep in mind that they are PREY animals and can fall victim to predators that are fairly large, or predators that run in packs. Mammoth donkeys are simply too slow to react. They lack the quickness and athleticism that it takes to combat a predator. Donkeys will never be able to guard against such predators as bears and mountain lions.
Good ranch dogs that are bred for guarding sheep and other livestock are a much better choice for guardianship. They are quick, clever and always on the alert. Their barking can alert the farmer as well. They can even move the livestock to a safer location on their own and will often chase off a predator pretty easily with their confusing way of attacking.
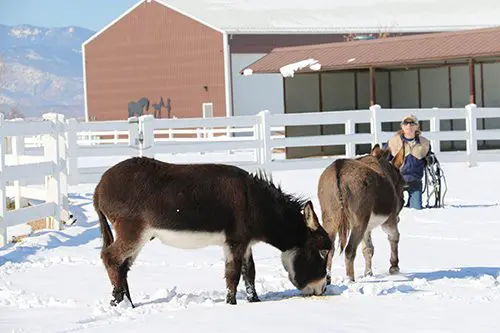
 As with all livestock, donkeys need to be provided with adequate shelter from the elements, whether heat or cold, must be provided trace mineral salt blocks and clean, fresh water. Their time on pasture will need to be monitored for optimum health which will often clash with the grazing needs of sheep, goats and other smaller livestock. Donkeys are desert animals and really easy keepers. It is not uncommon when they colic or founder on too much, or too rich, grass. They cannot be on pasture 24/7.
Donkeys will need regular trims and must therefore, be reasonably trained. They will require  vaccinations twice a year and regular worming. If they are not trained to accept these things, most veterinarians and farriers will be averse to handling them until they are. It takes time and patience to gain the trust of your donkey before you can actually consider him trained.
I have found it better to be smart about livestock control and not make it so easy for the predators. As I said, guard dogs bred for herd management are a much better choice.
“Some of the most important roles of sheep and cattle herding dogs, and herding dogs in general are:
- Protecting the herd from predators
- Keep the animals grouped together
- Help with moving the herd
- Keeping the herd within a perimeter
Best sheep herding dog breeds are:

- Border Collies
While they might not be the best apartment dogs, border collies are one of the best sheep herding dogs.
The border collie is a medium-sized herding dog breed originated in the Anglo-Scottish border of Northumberland, bred for herding livestock, particularly sheep.
Border collies normally reach a weigh between 30 and 55 pounds once they are fully grown. Their high energy level, along with their intellect, devotion, and loyalty to their owners, propels border collies to the top of the best herding dogs.
- German Shepherds
This breed was originally produced for herding sheep, but because of their intelligence, docility, strength, and trainability, they were later introduced to many other jobs. At present, German shepherds are utilized as police dogs, in search and rescue activities, as service dogs in assisting people with disabilities, and more.Because German shepherds have been used since their origins as sheep herding dogs, we can say that they have this activity in their DNA, therefore, making them excellent for grazing sheep and cattle.

- Australian Shepherds
Australian Shepherds (also known as Aussie), despite its controversial name, are a dog breed with origins in the United States and not Australia as many people believe.
The reason this dog breed originally appeared is to help farmers and ranchers herding their livestock. They did their job extremely well ever since.
- Belgian Sheepdogs
Belgian sheepdog is a medium-sized herding dog with origins in Belgium. This breed is also known as Belgian shepherd or Chien de Berger Belge.
The members of this breed can be further classified into four separate varieties based on coat type and color:
- Groenendael
- Laekenois
- Malinois
- Tervuren
Like any shepherd breeds, the Belgian sheepdog was and is still used in herding sheep, cows, and other livestock. That’s because they are highly intelligent, agile, high energy level, and other qualities that a good herding dog should have.
- Shetland Sheepdogs
The quality that most highlights the Shetland sheepdogs is their tremendous loyalty and a very strong bond with the family. Hence, making this breed a very good choice for an affectionate family dog.
- Old English Sheepdogs
Old English sheepdog (also commonly known as shepherd’s dog or bob-tailed sheep dog) is one of England’s oldest sheep herding dogs.
They are massive, muscular dogs with a strong bone structure. Their bodies are covered by dense fur that helps them to quickly adapt to the cold mountain areas.
- Welsh Sheepdogs
Welsh sheepdog is a herding dog breed from Wales, United Kingdom.
This breed can have either a short or long coat, which enables them to also withstand cold climates. Besides, they have longer and stronger legs than border collies, which enables them to easily accommodate almost any terrain.
- Miniature American Shepherds
Miniature American shepherds were traditionally used for herding smaller stock such as goats and sheep, but are nowadays very popular house pets and very frequently in canine competitions of agility, intelligence, and skills.
- Rough Collies
One of the most famous rough collies was Lassie, the canine character loved by everyone in the TV series with the same name.
Rough collie (also known as long-haired collie) is a medium to large size dog breed with a short or beautiful long coat, that has its origins in Scotland, United Kingdom.
Based on the coat type, there are two distinct variations of this breed:
Rough-coat collies
Smooth-coat collies
Even though today we can mostly see these pups in dog shows and canine beauty contests, rough collies were incipiently utilized for herding sheep in various regions of the UK.
- Bearded Collies
Bearded collie (also known as beardie) is a breed of dogs with roots in Scotland. Because of their long, double-coated fur, people often confused them with old English sheepdogs.
They gained the nickname of “bouncing beardies” due to their unique way of facing stubborn ewes, through barking and bouncing on their forelegs.” (1)
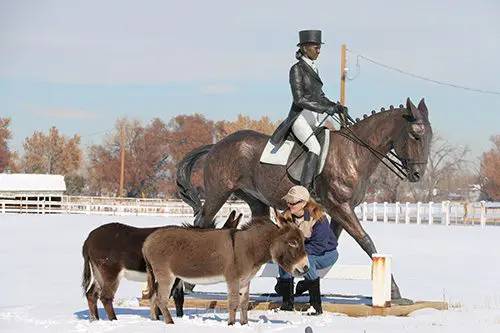
One should NEVER use mules as a guardian as they WILL be dangerous to smaller livestock and other smaller or weaker animals, even older mules! However, I have discovered that when my mules are pastured next to the smaller animals, predators give them a wide berth and thus, skirt the pens where the smaller animals are kept.
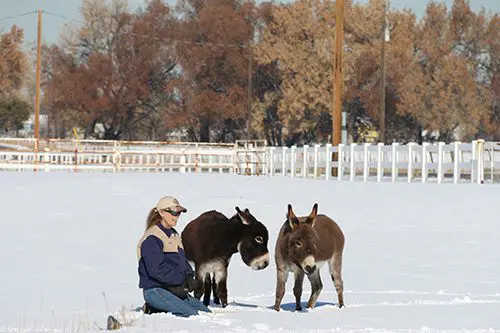
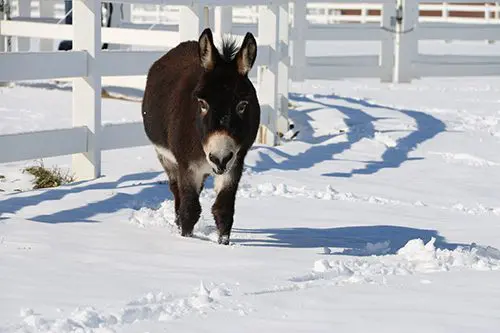
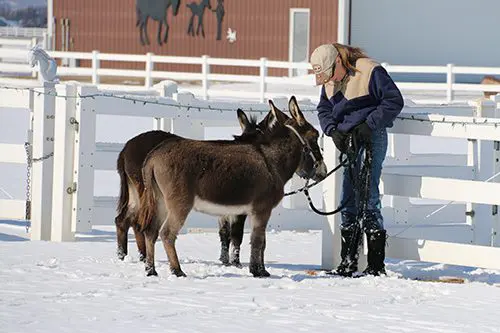
 Since miniature donkeys and mules are always at risk, I add another element of safety for them by lining their pens with metal grating over the stock panels. Then, everyone is also brought in every night and turned out for a limited amount of time during the day. This gives me the opportunity to monitor their diet, check for injuries twice a day and keep them safe overnight. All my equines are taught to come in from turnout upon request. They know there is always a crimped oats reward awaiting them.
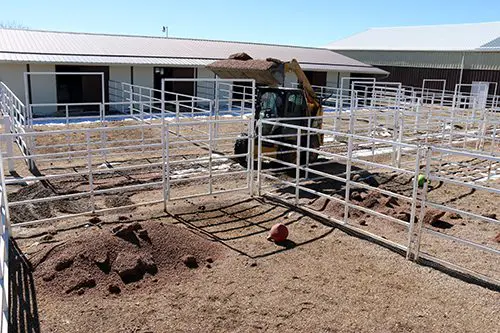
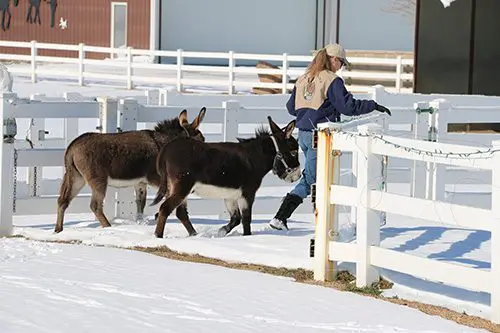
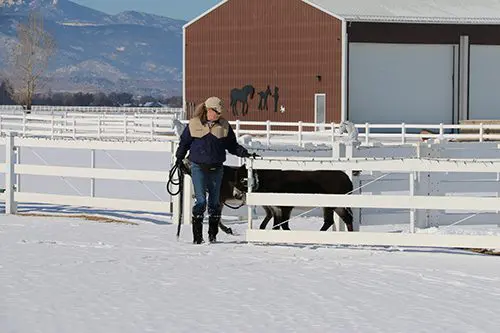
Wooden barns and wire fences can be easily torn down by larger predators. So over the years, I slowly replaced all of my wood barns and wire fences with metal barns, steel panels and vinyl fencing with hot wires on the top. I also run hotwires on the bottom of the vinyl fencing in areas where animals are likely to come through by climbing underneath. The way my barns and pens are laid out, the mule and large donkey pens surround the miniatures’ housing accommodations. It is not uncommon to see large “cats,” bears, coyotes and other predators in the foothills of Colorado where I live. It is even getting worse as more developments are built in the mountains and drive these predators off the mountains in the wintertime.
In summary, I do not recommend using donkeys as guardian animals. We need to remember that they are PREY animals themselves and can be grossly injured in any altercations with a predator. I think there are better choices for livestock guard animals and setting up the environment in which your livestock (donkeys included) is kept. These two considerations will promote the health and welfare of your livestock, and cost you a whole lot less in the long run!
- Taken from “10 Best Sheep Herding Dog Breeds” October 31, 2020 at PetBlog.org/sheep herding dogs
To learn more about Meredith Hodges and her comprehensive all-breed equine training program, visit LuckyThreeRanch.com, MEREDITH HODGES PUBLIC FIGURE Facebook page, or call 1-800-816-7566. Check out her children’s website at JasperTheMule.com. Also, find Meredith on Pinterest, Instagram, MeWe, YouTube and Twitter.
© 2022, 2024 Lucky Three Ranch, Inc. All Rights Reserved.

 By Meredith Hodges
 This lesson will teach you some lateral exercises under saddle that will help your donkey be more responsive laterally. Up to this point, we have been schooling what is called leg yields, or lateral moves, on an angled track. We have begun movements to introduce the side-pass, which is a lateral move, only straight sideways. This is even more difficult for your donkey than the leg yields, since it requires a higher degree of crossing over from his legs. You may have found difficulty in negotiating the side-pass obstacles previously mentioned. First, check to make sure that the placement of your side-pass rail near the fence is correct. It should be about three quarters of your donkey’s length from the fence and lay parallel to the fence so that when he stands with his nose six inches from the fence, the ground rail lies directly under the middle of his barrel, equal distance from the front and rear legs. When you lay out the “T” poles, there must be room for him to swing his shoulders or haunches around to the next pole without touching them. If these steps are done correctly, it should minimize any problems. While ground-driving your donkey, your assistant can help steady him from the front. After some repetition, he should begin to comply easily.
 him to move more sideways at the walk. Do it this way a few times. Once he understands what is expected, you can pick up the trot as the circle becomes larger and yield at the trot to the largest circle. Each time he finishes the cycle, remember to reward him for his efforts. When he is performing well at the walk and trot, we can vary this pattern just a little more. Ask him to canter the larger circle while you begin to spiral down. At about the halfway point, ask him to slow to trot and finish the spiral as small as he can manage at the trot; then start spiraling back out to the larger circle. At the halfway point, pick up the canter and finish onto the largest circle. You can ask him to move laterally at the canter by cueing him as he is in suspension. In others words, when his front legs are out in front, he is on the ground and you would give the release on your reins and legs; when his front legs come back toward you, he is in suspension and you would pull back on the reins and squeeze with your legs. To get the sideways movement, you would pull back ever so slightly harder on the rein in the direction of travel, while maintaining the bend with a steady inside rein. This movement requires timing and coordination and will take a lot of practice, so don’t get discouraged. Just keep trying and you will soon get the right results.
 degree angle to the rail with a partial turn on the forehand. Then ask him to maintain the angle all the way down the long side of the arena. Bend him away from the direction of travel. Keep the inside rein slightly shorter and steady, while giving tugs and releases on the outside rein and kicking him behind the girth on the inside. If he moves his shoulders and not his haunches, hold the front steady, move your leg way back on the inside and kick again, asking him to move his haunches over. Then he will probably move his haunches and not his shoulders, at which point you can keep the haunches steady by locking them between your two legs, well back behind the girth. Then you can move his front quarters sideways by holding the inside rein steady and shorter, pulling and releasing the outside rein in the direction of travel, while tapping him on the inside shoulder with the crop to encourage the movement. In the beginning, you may find yourself going down the rail first haunches, then shoulders, then haunches and so on, but if your persist, he will eventually get it. You need to be alert to when he does respond correctly and lighten your cues so he knows he is performing correctly. And of course, reward him often to let him know that he has done it correctly. Nothing works better than positive reinforcement!
 The next exercise is to leg-yield your donkey from the corner of the arena to the center of the hourglass pattern. Do it just as you practiced it before—make a circle at the second cone and stop him, move his hindquarters parallel to the rail, then ask him to move sideways and forward to the center gate cones. When you arrive at the cone gate, straighten him, walk forward a couple of steps, then finish that side of the hourglass in a straight walk, then trot as he becomes more proficient. When you have completed half of the hourglass, you can go on to the next second cone on the short side of the arena and repeat the exercise. Just remember to stop and reward him for each half of the hourglass. As he learns, you can go longer between rewards. In the next exercise, you will go through the hourglass as usual, but when you reach the cone gates, you will circle around towards the rail, stop at the cone gates, move his hindquarters over and yield from center to corner. When he reaches the corner the first few times, stop and reward him then continue around to the center from the other side and repeat. As before, reward him for each completed move in the beginning. As he gets better, you can start rewarding him less often after completed successions. Always begin by walking until there are absolutely no problems, then he is ready for these exercises at the trot. Any time the trot goes awry, go back and school at the walk again. If he gets too strong with you, you may have to ask him to back a few steps before proceeding. Just make sure that if you ask him to back, you do it slowly, kindly and meticulously.
 By Meredith Hodges


 minimize resistance at any particular stage and reward your donkey lavishly for his honest attempts.
 at the walk and trot. Then dismount and try lunging, first at the trot, then ask him to “Canter.” Use the same cues you did at the walk and trot. Give the verbal command first, then shuffle your feet while raising both of your arms, one pointing in the direction in which you wish to travel, and the other one raised behind you, with the whip in-hand. If he does not comply, then lightly tap the whip to his gaskins once just above the hock, then tap it harder on the fence behind him. He should begin to canter. Even if he canters only two steps, stop him, reward him and then try again. Don’t keep asking for more right away, because he will only get frustrated and stop. If you are patient and consistent, he will canter farther each time. Once he canters fairly well while lunging, you can skip ground-driving and go straight to riding him at the canter. Have your assistant stand in the center of the round pen with the lunge whip and “lunge” him while you ride and cue from his back. Sit very quietly and with a very loose rein, allowing him to canter until you say “Whoa.” Make sure you and your assistant are exactly in unison with your verbal commands, since you do not want to confuse the donkey. If, after a few sessions, he positively refuses to canter, fear not. You can try something else first, and come back to cantering later.
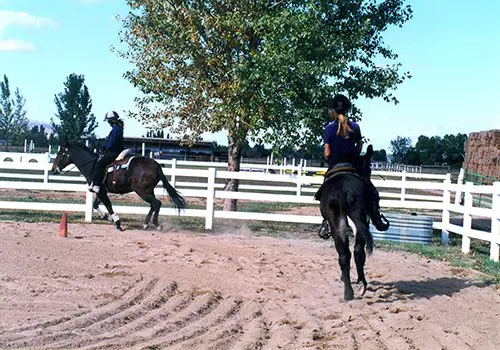 If your donkey hasn’t cantered in the round pen, go back to his lesson at the trot and allow him to succeed and be rewarded. Then take him into the large arena and allow him to follow an experienced animal through the hourglass pattern and along the perimeter of the arena at the walk and trot. Afterwards, go to the perimeter of the arena and have your assistant begin to canter out of a short side and down the long side. Encourage your donkey to follow. If he does not want to canter, slow him down through the short side and encourage him again on the next long side. If he wants to canter but is cutting the corner, let him. It is more important at this stage to get the canter than it is to stay on the rail. Be sure to call out your verbal commands repetitively as he learns to canter. You will say “Canter-Gee” for right and “Canter-Haw” for left. These are really important commands, as donkeys are more responsive to verbal commands than they are to your legs and reins. Let him canter for as long as he will, then stop and reward him. He will go longer periods of time as he gains strength and coordination. Make your circles as large as possible, at least fifty feet in diameter.
 When he is cantering—or loping—easily around the arena, you can begin to facilitate control at the canter by varying your exercises. Have him trot the short sides and canter the long sides of the perimeter of the arena. Be sure he is picking up the proper lead in each direction (more on leads in discs #5 and #6 of my DVD training series, Training Mules and Donkeys). Pick up the lead in the corner each time to help him. Then you can trot the hourglass to the corner of the short side, pick up the canter and canter a circle, half of the arena, come back where you started, trot, and resume the pattern. Just be sure your circles are large enough to encourage good balance. You can ask him to trot along the rail, do a turn on the haunches and canter away on the correct lead. This will help him to learn to canter without the use of a corner. Take him out into the open on the obstacle course and let him canter for some longer distances, both in a straight line and in very large circles. If he breaks to the trot at any time during any of the aforementioned exercises, do not let him continue on at a fast trot. Slow him to the walk, then halt, regroup and begin again. You want to always maintain control.
 The most important thing is to reinforce the verbal commands. Donkeys can be very dead-mouthed and very dead-sided, but they have the most acute hearing you’ll ever perceive and they rarely miss a verbal command. If your donkey is well schooled in his verbal commands, you will never need to set him up for his lead changes—he will always take the one you call for, even if it is a counter-canter. The same goes for every other command. If you want to stop and he is cantering, don’t forget to speak in order: “Canter, Canter, Trot, Trot, Walk and Whoa!” If you say “Canter,” then just “Whoa,” you will produce a sloppy and resistant transition, since donkeys aren’t into sliding stops, although they can do small sliding stops (Lucky Three’s Little Jack Horner was able to slide for fifteen feet). Even professional reining trainers will tell you that an equine has only so many good stops in him, and it is not advisable to do such strenuous and abrupt movements too often. So be concise with your verbal commands and try not to leave any out when “conversing” with your donkey.
 down in training because of their flight instinct and are better equipped to handle walk, trot and canter all at once, moving from a confined area to more space and, ultimately, through obstacles. Donkeys, however, with their freeze instinct, get worried and won’t move if they are overwhelmed and confused. For this reason, their training is approached a little differently.
 Once he has learned the turn on the haunches in the round pen, he can also learn his turn on the forehand on the drivelines. This is a little more difficult, as he will want to try the turn on the haunches. Ask him to “Whoa”” along the rail. Then, keeping your reins taut and even, take a step to the side, away from the direction you wish him to turn. The rein will tighten on that side and will drape around his hip. You will have the sensation of pulling his hip around with the rein. If you are turning right, ask him to “gee around” and give short tugs on the direction rein, while keeping him straight with the other taut rein by holding steady. He will probably want to pull forward the first few times, but hold him as steady as you can, and if he doesn’t want to move his haunches over, just tap him LIGHTLY with the driving whip on the direct rein side. After a couple of tries of “gee-around,” ask him to “haw-around” and track left. Have patience and he will eventually get it. When he is doing fairly well at executing his turns on the haunches and turns on the forehand on the drivelines, you can progress to doing them under saddle. Just remember to keep things slow and accurate. Speed will only bring confusion and resistance at this point. It is better to opt for perfection at a slower and more controllable pace. When you are both more practiced and coordinated, you can add speed.
 Your donkey should be willing to trot in the round pen with just his tack. Up to this point, he has learned his turns at the walk both on the drivelines and under saddle in the round pen, in the open arena and over obstacles. Now he will learn to trot on the drivelines and under saddle. Begin with the usual review, then after he has lunged at the trot, put on the drivelines and drive him at the trot. If he gets balky, your assistant can trot ahead of him with the treat bag and no lead line. Initially, if he goes too fast, just slow him down easily by giving the command to “Whoa” and create a drag on the lines. Your assistant can help if necessary by stepping ahead of him with her arms up, as you did when you were lunging him. Have him go around only as many times as he is willing in the beginning, and reward him for his efforts.
 When he trots well in the round pen, you can begin to add trot to your sessions in the open. Always review first then add the new movement at the end of his lesson. After the review, begin by having him trot through the hour-glass pattern on the drivelines with your assistant, then without. It will be shaky at first and you may feel like you’re riding a drunken sailor! Just be sure to make your rein and leg cues as subtle as possible to prevent over reactions and keep him encouraged forward with a loose rein as he is going forward. Learn to vibrate the reins rather than pulling—this helps to minimize over-reactions. S
 oon, your donkey will be doing the pattern smoothly on your commands alone.
 Using the trot on the obstacle course requires that you be very definite about where and when you do it, so plan ahead. You may ask him to trot straight over ground poles or a tarp, but he must be willing to stop immediately on the other side. In the beginning, having your assistant waiting with a reward on the other side will help to encourage him to comply. When you take her out of the picture, be ready to treat him for good behavior yourself while ground-driving and under-saddle. When your donkey has completed an obstacle, he should always be willing to stop and wait for your next command for as long as it takes. This is the foundation for learning to stand quietly both in harness and under-saddle. This means that you, too, must learn to approach him slowly and quietly from behind while in the drivelines and to sit quietly when halted under-saddle until you present his reward and ask him to move on.
 By now your donkey should be getting much better at his turns on the forehand and haunches on the lead line. He should be leading easily at the walk and trot and squaring up while stopped. He should be lunging at the walk and trot in the round pen, and ground-driving at the walk in the round pen, both straight and through turns and reverses. He should be walking and trotting with a rider in the round pen, without the assistant. He should be both ground-driving and walking with a rider through the hourglass pattern and on the perimeter of the larger arena. Now you are going to ask for a little more detailed control by asking him to walk over and through some very straight-forward obstacles.
 on his own by first ground-driving him through them, then (if he is large enough) by riding him through them. Begin by reviewing his turns on the forehand and haunches. Then attach the drivelines and have your assistant lead him as you drive him from behind. Start with something simple such as ground poles, a tarp or a bridge that he can easily walk over. If he is negotiating the tarp or bridge, ask him to “whoa” when he is standing on it with all four feet, reward him and then proceed. If he is negotiating the ground poles, walk over them. Once he is on the other side, stop him immediately and reward him. Then proceed. Then have your assistant lead him to the mailbox while you ground-drive him, and have him stop parallel to it. Reward him for stopping, then have your assistant open and close the mailbox and reward him again for standing still. Then proceed. Walk him through the parallel poles and stop him. Reward him. Then ask him to back out of them. Reward him again. Then proceed to the tractor tire. Make sure your assistant walks through the tire and not around it, because the donkey will do exactly as he sees her do! Once on the other side of the tire, have your assistant stop and allow the donkey to put his two front feet in the tire and halt. Reward him. Then proceed forward and allow him to walk through the tire to the other side and halt. Reward him again. Your assistant will be giving the treats, since you will need to maintain the drivelines.
 through ahead of him on a schooled animal that he likes, stopping in the appropriate places and rewarding him each step of the way. Depending on how willing your donkey is, this could be the next lesson, on the very same day. Each time you go to the obstacle course, repeat this entire process each time, first on the drivelines with the assistant, then without, ride with the assistant leading, then ride through the obstacles without her. It will not be long before he is going well, as donkeys learn things quickly and thoroughly, although they do have off days and may decide not to comply with a particular obstacle on that particular day. Tomorrow, it may be an entirely different story and he may have no trouble at all with any of them. It’s just the nature of the donkey to “change things up a little” from day to day. They like to keep us honest and on our toes. This is why I have included a separate section in my Training Mules and Donkeys series just for donkeys that is designed to be used WITH the other DVDs. Do the obstacles in a different order each time to prevent your donkey from anticipating and ignoring your cues, and be sure that you are cueing him properly for each obstacle, making your movements as light as possible.
 try it again. If you encounter only mild resistance at any obstacle, try to straighten your donkey out and repeat the obstacle again without the assistant. For instance, let’s suppose your donkey goes through the parallel poles, but won’t stop for the back. Stop him as soon as you can after the poles and ask him to back. Then go forward again in a large circle and come back through again and try to stop him in the middle, between the poles, then back. Give him every opportunity you can to succeed on his own and be sure to reward him for it.
 hands. Draw reins can too often produce an over-reaction, even in the most experienced hands. Do not use the elbow pull in any other part of his training until he has learned to trot well, both in the round pen and in the open. This comes later than the walk work we are doing now.
 You have, thus far, begun to teach your donkey several things: how to begin to execute the turn on the forehand and turn on the haunches, how to walk forward in a round pen from the lunge whip without a saddle or harness (then with the saddle and harness), on the drivelines, and while being ridden. He has also begun to learn how to “trot on” from the lunge whip while tacked up, and how to walk and trot on the lead with an assistant aiding from behind. Do not be alarmed if your donkey’s movements are not perfect. Each time you work with him, he will get better at each of these things, especially if, at the start of each lesson, you review before adding anything new.
 Your assistant will come into play only if your donkey does not respond to your cues first. When he is in a good free walk on a loose rein, give the command to “trot.” Use your voice, then your legs and then go to your crop, if necessary. If this doesn’t work, your assistant can step in behind and encourage him with the lunge whip with one smart strike to the gaskin above the hocks, while shuffling his or her feet to create some noise. This should work, but you, as the rider, must sit absolutely still, maintain a very loose rein and allow the donkey to comply on his own. (Do not keep thumping his sides with your legs, nor keep hitting with the crop.) If all this fails to make him move on, just stop, pet him (no treat this time) and wait until he sighs or resumes chewing, then start over again. He is just trying to figure out what you are asking. This is not disobedience. It is important to note that you should not move from one attempt to the next without letting him chew. This is the way your donkey tells you that he is relaxed and ready to listen. If he just won’t do it, then go back to the lunging and have him trot without the rider once more, then try again at the next lesson. Each donkey is a different individual and will learn at his own pace.
 Set four cones in the four corners of your arena, with ample space for him to walk around the outside of them. Then set two cones in the center of the arena, creating a gate through which the two of you will pass. This will outline an hourglass pattern for you and your donkey to follow, as he perfects the verbal commands to “walk on,” “haw,” “gee” and “whoa.” “Trot” will come later.
 When he is steering well, it is once again time for your assistant to aid you in getting your donkey to go straight along the rail of the arena. Have your assistant walk along the rail, between it and the donkey, with the lead line held loosely in her hand, allowing you to drive the donkey from behind. If you tryto do this without the assistant, you will find that your donkey remembers the hourglass pattern and will try to go to the middle. He needs assistance in learning this deviation from what he has previously learned. When you change direction, keep your assistant between the wall and the donkey to help maintain his straightness. After about two times around in each direction, he should “get it,” and you can drive him without the assistant. Each time you change direction, do a straight crossing on the diagonal. (Short diagonals and half-turns will be taught later in this series.) Donkeys like to bend in half far too much, so you want to discourage this in the beginning and opt for straightness.
 During the next lesson, you can add the perimeter of the arena, just as you did on the drivelines. Have your assistant lead your donkey twice around both directions and across a straight diagonal to change direction. Then you can ride solo. The same rules apply here as they did when learning the pattern. Keep him straight, repeat commands, back up verbal commands with consistent rein and leg cues and if he pulls out to the left, bring him back with the left rein. If he starts to trot, pull straight back and give the command to “whoa.” If· he still won’t stop, keep him straight and stop him at the fence. DO NOT TURN HIM! If you start this, it will become a practically impossible habit to break.
 Now that he is moving out well at the walk, you can teach him a reverse. As he is walking forward easily around the round pen, turn away from him, completely around, until you are in front of him. Step toward him, lay the whip ahead of him and give the command to “reverse.” Be aware of his space. Do not rush at him, or he may turn improperly. You want him to turn into the rail and resume the opposite direction. Give him plenty of time to make the turn and ask him to “walk on.” If he has difficulty, take a few steps forward and, with the whip, tap him gently on the shoulder to encourage him to turn. There is a purpose to turning away from him to turn him rather than just running ahead of him. By turning back the opposite way that he is traveling, you are establishing a new direction of travel, as well as giving him time to see that there will be a change in his movement. Most donkeys learn this very quickly.
 After his first lesson of trot, you can begin to integrate rein cues. During the second trot lesson, you will review all that he has learned up to the trot. Before you go to his trot lesson, you can attach your drivelines and ground-drive him through the walk and reverse while on the lines. He should have no trouble with you at his rear, since you have been lunging him from a close proximity from the beginning. Use your whip as you did for the turn on the haunches—at the shoulder for his turns, and at the gaskin to encourage him forward—but just touch him with it to remind him, don’t strike him. You want his movements to be smooth and correct, not abrupt. Pull as lightly as you can with a squeeze/release on the lines to encourage the turns, and make him move off more from your body language and the whip than you do with the lines. If he does well, stop, remove the lines, and send him back to the rail for his trot work—twice in each direction. (This means twice with trotting steps, not twice around the pen.) Then stop, reward him and tell him school’s out until the next time. Whether you come back tomorrow or a week later, rest assured that your donkey will be right where you left him in his training. They have an incredible memory!
 When he ground drives fairly well at the walk, you can mount him if he is a large enough donkey to ride. Mount him from both sides and dismount a few times at first. When he seems calm, you can stay aboard. Take a treat in your hand and encourage him to bend his head and neck around to each side to take the treat from your hand. At the same time, give short, light tugs on the rein on that side. This will encourage lightness in the bridle later on. Now he is ready to move with you aboard. It is best to use an assistant at this stage.
 steps. You can continue this lesson until he has completed one rotation of the round pen in each direction. Then stop him with “whoa” and ask him to go back a step or two. Give light pulls on both reins in a squeeze/release fashion to start, then, as he begins to move his feet backwards, alternate your pressure on the reins with the front foot that is forward. If he does not wish to back, your assistant can help with pressure to his chest as you did on the lead. Always end your riding or ground-driving lesson with a back, and don’t pull so hard on the reins that he resists by jutting his head out. Encourage him to stay light in the bridle. Then finish your lesson with lunging at the trot.
 By Meredith Hodges
 Take your donkey to the middle of the pen and ask him to “whoa.” Reward him for whoa, then step toward his shoulder—pulling his head toward you—tap him on the flank and stifle, and ask him to “move over.” Do not move your body unless you absolutely have to. You want him to keep his front end bent toward you, step under with his near hind leg, and begin to execute a turn on the forehand. This means his front legs will stay stationary while the hind legs move around them and away from you. You want your donkey to take only one step each time you tap him, so don’t get carried away and tap him too hard. We are laying the foundation for hindquarter control and it is easier to let him move slowly, one step at a time, in the beginning than it is to ask him to slow down from too many steps later on. Watch his hind legs to make sure he crosses in front of the offside hind, and stop and reward him after each tap and step. He will probably double in the barrel and move his front legs as well in the beginning. As long as he moves his hindquarters away from you, reward him and repeat. We can perfect his style as he learns what is expected. The first few times, ask only for one or two steps. When he has done this exercise on the near side (left), repeat them from the off side (right). During each session, you can ask for a few more steps in each direction.
 When he is doing the turn on the forehand fairly easily (it doesn’t have to be perfect), you can begin to teach him to move his shoulders away from you with a turn on the haunches. This is much more difficult, since donkeys love to “glue” their front feet to the ground. Take the side of his halter in your left hand, ask him for one step forward and push his face away from you as far as your arm will reach. Then, in the right hand with the end of the lead, tap him firmly on the shoulder and give the command, “Over.” If his hindquarters come around, leave your left hand on the halter and take your right hand and use your body weight to shove him over one step. Stop, praise and reward him for moving his shoulders (even if you had to do all the work). Now try again, tapping him with the end of the lead. If he still won’t move his shoulders, repeat as before. If he does not begin to try to move his shoulders after three tries, use a riding crop in your right hand and tap the shoulders sharply with it—only once! He will probably be so surprised that he will step over quickly. Be ready to reward him when he does. Then stop your lesson there. You can ask for two steps in each direction during the next session. If you try to do any more, you will encounter resistance and he will be unwilling to perform and may run off, so be patient and be ready to take all the time HE needs.
 Repeat these three exercises until he begins to move easily away when you ask. It may take three or four sessions. When he does comply easily, you can begin to teach him to lunge. Review these exercises every time you begin your training session. Then release the lead from the halter. Hold the lunge whip in your left hand and use your right hand to point to the right (the direction you wish him to go). Raise both your arms in unison and tell him to “walk on.” If he doesn’t move away, lower both arms and raise them again, repeating the command. If he still won’t move out, give the verbal command again and give him a firm tap on the gaskin, just below the tail and above the hock, then take a step back and wait for him to comply (donkeys need time to think). If he still won’t move, repeat this action until he does. Once he does start moving away, follow behind and to the side at a distance that he will tolerate. This distance will vary with the individual donkey.
 wander. When you are the correct distance, he will walk forward, although, in the beginning, he will hesitate after every step or two. Practice moving into him and away from him to get him to move. Try to stay out of his space and keep him moving forward after the initial tap of the whip. If he stops and doesn’t seem to want to move, strike the fence behind him once you have him on the rail. Try NOT to hit him if at all possible. Remember, donkeys freeze when they are confused or frightened and you will get nowhere with him at that point. He needs to learn, but he also needs to enjoy what he is doing. Don’t forget to reward him frequently, but be sure that you ask him to go further each time, or you may find yourself training him to walk only so many steps at a time. In the beginning, ask him to go in only one direction and change directions at each session. You can teach him to reverse and go forward later, once he has learned what you are asking.
 Training your donkey is not really much different than training horses and mules, although there are differences in instinct and attitude that will determine your approach in given situations. The mechanics and techniques, however, remain the same.
 When imprinting the foal, think of the kind of attitude you want to cultivate in him—do not come at him with the idea that he must accept you. This is a forceful and intrusive attitude and can foster resistance. Come at him with love, patience and kindness and these are the things he will learn. Give him respect and ask that he respect you and he will begin to learn about behavioral limitations. If he were in a herd, the adults would demand that he respect their space with well-placed discipline. You must learn to do the same without overdoing it. If he bites or kicks, a well-placed slap on the side of the mouth for biting and on the rump for kicking and a loud, “No!” will do the trick. Rewarding his good behaviors consistently will reinforce repetition of what you desire from him and will foster understanding between you and your donkey. This is the beginning of a long-lasting bond of friendship.
 Whether your donkey is a young foal or an older animal, begin with imprinting and do the steps in sequence. Learn how to properly put on the halter. Let him wear it for a while then take it off, as he could get it caught and injure himself if it is left on. When your donkey is not bothered by you putting on and taking off the halter, you can teach him to be tied. Put the halter on him and tie him to a safe post for one hour. Come by to see him every 10 or 15 minutes, untie him and ask him to “come.” If he does not take a step toward you, just retie him and leave. Come back in 10 minutes and try again. When he takes a step toward you, reward him with a treat and lots of praise. Stroke him on the neck and shoulder or on the poll between the ears, or scratch his chest or rump—whatever he finds most pleasing. Then try a few more steps. Don’t ask for any more steps each day than he is willing to give. Save them for the next time and soon he will lead easily. When he is leading easily, you can start taking walks around the farm and you can begin to introduce him to things he may find frightening. Lead him as close as he will go at your shoulder, then step toward the obstacle as close as the lead will allow and coax him to you. Offer a reward if necessary to entice him, and be sure to reward him when he comes forward. When he is confident about investigating “things” with you, you can progress to an obstacle course.
 At your first try going over logs, a bridge, tires, or other such obstacles, you may find your donkey reluctant to pick up his feet to negotiate an obstacle. He will probably try to go around it any way he can. Stand close to his head, holding him on a shorter lead, and ask him to “come.” If he moves only one foot over a log or tire or onto a bridge, stop, hold him there and give him a reward for his effort. Next, ask for the other foot and, if he is willing, let him walk over the obstacle, then reward him again. If he moves only one foot more, reward that, and proceed—slowly! You don’t want him to just run through it. You want him to come when you say “come” and to whoa when you say “whoa.” You are beginning to establish verbal communication with your donkey, so keep it simple and consistent. Do all obstacles the same way. Donkeys like to get crooked over obstacles. When he has learned to step through or over an obstacle but is not going straight, you can step directly in front of him, holding the halter on both sides, and ask for straightness as he negotiates the obstacle.
 Once he has learned to follow you over and around obstacles, he will be ready to begin the fundamentals of showmanship. Hold your lead in your left hand, keeping your right hand free and straight out in front of you. He should learn to lead with slack in the lead and to follow your shoulder. If he gets too close, you can use your right hand to push him back into position. Once you have begun showmanship training, ALWAYS lead him this way. Teach him to stand squarely on all fours every time he stops. You are not just teaching him to set up, but to carry his body in a balanced fashion so he will develop good posture and balance. When you want to teach him to trot on the lead, give the verbal command to “trot” and slowly move your own legs into a very slow trot. If he is difficult, do not go to the whip. Try to find something toward which he wants to trot. Above all, don’t get discouraged if he won’t trot the first few times, just slow back down and do something he already knows, then quit for the day and try again the next. Eventually, he WILL get it!
 Do the same exercises (outlined in DVD #1 of my
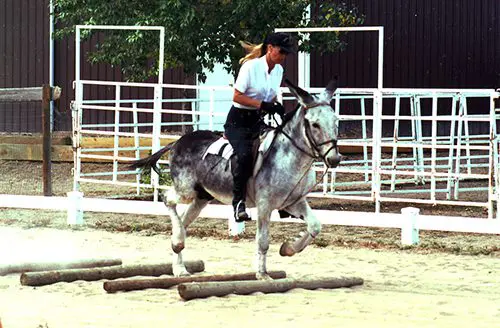 It is important that your donkey be in the best posture he can be in while he is performing at this stage of training. The way that he is moving with his body is the way his muscles and tendons will be strengthened and toned, and the way his bones will become permanently aligned. It is difficult for a rider to maintain this impeccable balance through every step and every stride. For this reason, you will use your “elbow pull” training aid to encourage your donkey’s good posture throughout training, once he has learned the right moves. Adjust your “elbow pull” so that, when tight, his poll can be raised about six inches above his withers. The “elbow pull” will help to maintain his proper frame and good balance without you having to fuss with anything. The “elbow pull” is most helpful during lateral movements, but it also helps him to maintain his balance through transitions and changes of direction. Get in the habit of using it all the time during intermediate training. When he is going well, staying in proper frame, light on the bit and responsive to your cues, and when the “elbow pull” is loose throughout all of his workouts—only then should you remove it. (Use of the “elbow pull” and instructions on how to make it are covered in my
  Now you need to teach your donkey to lengthen his trot. The elbow pull should have helped you to get a true trot out of your donkey. He will not be able to lengthen from a single-foot trot. Do not begin lengthening until the true trot is well established. When you wish to start schooling the lengthening, begin by asking him to lengthen on the long diagonal and corner-to-corner in your arena. Ask him to cover more ground going toward the center and as he approaches the corner, ask him to shorten his stride and collect the trot before the corner. Do not just ask for more speed. A lengthening is a more ground-covering walk, trot or canter, but maintains the same rhythm and cadence. In the beginning it will seem like there is very little difference between the working and lengthened gaits, but as he gets stronger and more agile, the difference will become more apparent.
 Next you will begin to regulate the canter. Place a pole perpendicular to the long side of your arena. Canter around the perimeter of the arena, coming down the long side and over the pole. Each time you approach the pole, about three strides out, start counting to your donkey, “One, two, three, pole.” This will accomplish several things. First, you will learn to gauge your distances and measure your donkey’s strides. Second, your donkey will learn to adjust his strides and they will become more balanced, rhythmic and cadenced. Next, he will become more obedient to your aids. Don’t forget to count out loud to your donkey every time you do this exercise. Remember, donkeys respond best to verbal commands. Do the canter pole several times in each direction, during each session that you work in the arena to help improve his canter.
 Whether you plan to jump or not, the next exercise is beneficial to your donkey’s body conditioning. It will help him to become agile and strong and he will be able to carry your weight a lot more efficiently. First set four cavalletti in your arena and have your donkey trot through them during several lessons. Then, set a cavalletti or cross rail jump in your arena with a ground rail one stride before and after. Begin each session with review and warm up with stretching—turns on the forehand and haunches on the lead; feeding treats from his back, bending his head to your knee on both sides; walking and trotting through the hour-glass pattern on the long rein; walking, trotting and cantering the perimeter of the arena on the long rein. Then you should do a collecting exercise. Ask him to collect on the short sides, and lengthen on the long sides at the walk and then do this at the trot. After the warm-up, stop and rest for three minutes. After the collection exercise, stop and rest for three minutes. He will be working in approximately 15-minute intervals with three-minute breaks in between. This is standard for mules, donkeys and horses.
 For the final segment of his workout, take him along the rail at the trot and come up over the cavalletti or cross rail jump. Two strides out from the ground rail (three strides from the cavalletti), start counting out loud, “One, two, three, JUMP!” Allow your donkey to trot after the cavalletti the first two times through, and the third time over ask him to canter away to the rail and down the long side of the arena. Then stop and reward him for his effort. Give him a brief rest and then repeat the exercise the same way three times with a brief rest after each canter pass. When he has done this pattern three times going in one direction, do the same thing three times going the other direction. If he is lazy, he may need encouragement from the crop, or you may need to wear BLUNT spurs. If he wants to run at the cavalletti, you will need to school him a little differently. You will need to walk to the ground rail, stop and back. Then turn away from the cavalletti, do a circle and approach again at the walk, stop and back. Circle again—at the trot this time—stop, back. Do this twice. The third time, let him trot and jump the cavalletti. After he jumps the cavalletti, a few strides out, ask him to stop and back. This is to help him to let YOU maintain control. It will also help him to maintain his balance and jump correctly, thus avoiding a mishap or fall.