MULE CROSSING: Making History with Mules, Part 2
By Meredith Hodges
As we track mules through history, we find there is a reoccurring theme that paints the mule as both a companion and adversary of man. Those of a certain temperament seem to be able to befriend the mule and those who would be combative suffer at his mercy. Man would rather blame stubbornness on the mule than to claim this stubbornness as his own. Clearly, there is no doubt that the mule is and always has been a hard-working and valuable beast of burden throughout history. His ability, intelligence and judgment are unmatched.
 George Washington was a fairly well educated man and, “the copybook which he transcribed at fourteen years of age a set of moral precepts or Rules of Civility and Decent Behavior in Company and Conversation was preserved.” Practical experience was the foundation for his best training in outdoor occupations and not books. He was a successful tobacco and livestock farmer early in his teens and mastered the art of surveying to plot the fields he inherited. It is no accident that George Washington became not only the father of our country, but also, the first organized mule breeder in America.
George Washington tried to buy some Spanish donkeys to use for mule breeding at Mount Vernon, but found that their exportation from Spain was against the law. Most who have studied mules and donkeys know that King Charles III of Spain then gave Washington the gift of an Andalusian jack and two jennets from Malta. The jack, named Royal Gift, became the foundation sire of Washington’s farm at Mount Vernon and he popularized mule breeding for farm work. Blending the Andalusian and Maltese donkeys produced finer donkeys than those that had been imported for still better quality mule production. Eventually, the law in Spain was changed. George Washington was not the only one who recognized the economical value of mule and donkey power for the growth and prosperity of a new empire. Henry Clay and others began importing numerous donkeys and breeding for mule stock.
George Washington was not devoid of the sense of humor needed to work with mules and donkeys. In a 1786 letter to a neighbor concerning Royal Gift’s failure to perform stud service (as can often happen with donkey jacks, as they are quite particular about their “ladies”), Washington wrote, “Particular attention shall be paid by the Mares which your Servant brought and when my Jack is in the humor they shall desire all the benefits of his labours—for labour it appears to be. At present, tho’ young, he follows what one may suppose to be the example of his late royal master, who cannot, tho’ past his grand climacterick, perform seldomer, or with more majestic solemnity, than he does. However, I am not without hope, that when he becomes a little better acquainted with republican enjoyments, he will amend his manners, and fall into a better & more expeditious mode of doing business. If the case should be otherwise, I should have no disinclination to present his Catholic majesty with as good a thing as he gave me.”
 Respect for donkeys and mules is the only way to motivate them to action. Their rugged individualism will tolerate no less. The mule exemplifies the “All-American,” as set forth by the colonists. The colonists were thought to be stubborn in their quest for individual freedom by the British Crown that super-imposed itself upon their individual liberties. Like the colonists, mules will challenge anyone who challenges their individual liberties! It is only fitting that the mule would be fully revered and appreciated by a man of such distinction as George Washington.
In 1803 Thomas Jefferson completed the Louisiana Purchase. “Over the next 75 years, more than two million square miles revealed their secrets to an army of hunters, soldiers, naturalists and other adventurers.”
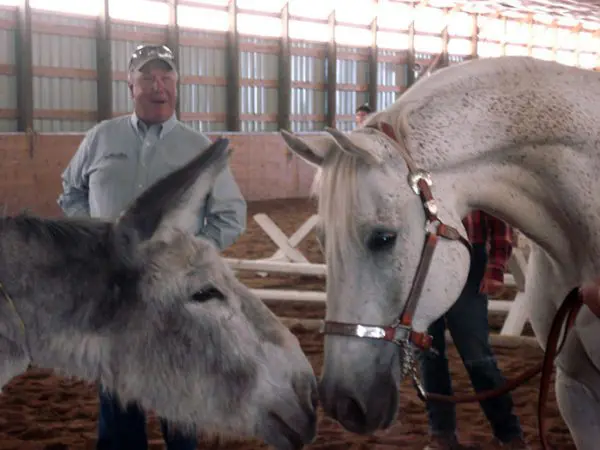
While perusing the pictorial archives of history, you will see that men and their partners, wives, children, dogs and horses were always front and center. But what about their mules? You read about their many perils and victories, but you rarely hear mention of the one humble animal that worked silently, relentlessly in the background—the mule.
In May of 1804, after the official transfer of the Louisiana Purchase, Lewis and Clark began their expedition up the Missouri River. They soon learned to despise the muggy territory, with its humid climate populated by numerous mosquitoes, gnats and other creatures. Even their dogs would howl in pain from the intrusions of this unexpected onslaught. Conditions were tough and it was not unusual for mules and donkeys to be used as pack and draft animals in this rough country. Desert-born donkeys and the hybrid mule are born with the characteristics necessary to endure such strenuous conditions. They are stronger and sturdier than the horse. They require less to sustain good health, need less water and are more resistant to parasites and disease. Without mules and donkeys, the westward migration would have been much more difficult.
 The Erie Canal was the longest canal built in the shortest amount of time for the least amount of money. It had continued success for many years because of the use of donkeys and mules to pull the barges along the tow path. “In the annals of the Erie Canal, we find little credit given to the mules; yet, by virtue of their strength and endurance and sagacity, the western wheat reached New York City in due time and industrial products moved west.”
The mules plodded slowly along the canal, pulling the heavy barges of goods, as did the “mule drivers,” who were most often young boys. Occasionally a mule would fall into  the canal, but it was quickly and safely guided back to shore by the lead around its neck. Where the walls of the canal were too steep to climb back out, the villagers installed ramps at intervals along the canal to serve as an easy escape from the water, should the mules fall in. These ramps were covered with a heavy planking containing thick slats, or “cheats,” where a mule could get traction coming up the ramp. In the off-season, the planking could be removed and held over for the next season.
George Washington wrote that he “crossed over to Wood Creek which empties into the Oneida Lake and affords water communications with Ontario. I shall not rest content until I have explored the western country and traversed those lines which have given bounds to a new empire.” The building of the Erie Canal, the development of New York as the “Empire State,” and the opening of the West owes its success almost single-handedly to the hybrid mule and horse as upon any other single contribution.
In 1849 the California Gold Rush saw men racing westward to make their fortunes. Many were not prepared for what they would find. The West was a tough and unforgiving country. Those who had mules and donkeys fared far better than those who did not. One of the most famous donkeys in history was “Brighty” of the Grand Canyon, who befriended a miner and made his way into folklore and modern-day children’s books. As mining was further developed, mini mules bred from small donkeys and pony mares were used in the mines to haul out coal and ore. They worked well under these adverse conditions and were small enough to easily manage the low-ceiling passageways.
 After the Civil War, farmers were again at a loss for man-power and mule-power. Tennessee joined Kentucky as another leader in the breeding of mules and donkeys. During the war, much of the stock had been destroyed or starved to death, so, from 1883 to the end of the 18th century, there was a surge of asses imported from Spain to replenish the stock. This all but depleted the good stock for sale left in Spain.
Missourians, who still love their mules, became the hub of mule power. Mules would eat poor feed, work in blistering sun and live longer than horses. Mules came in a variety of sizes and colors with a multitude of uses. One Missouri Muleskinner from Springfield chuckled and said, “I’d never used more continuous bad mouth words in my life until I started to work with mules.” Muleskinners themselves are allowed by proxy to use some pretty rank terms, yet no outsider would ever be allowed to address their mules the same way.
From 1883 to 1889, the 20-mule teams moved 20 million pounds of borax from the Death Valley floor in California over the mountains to the Mojave Desert, 165 miles away. They traveled roughly 15 to 18 miles in a day, crossing the steep Panamint Mountains to the railroad. During this 20-day round trip, temperatures could be expected to rise as high as 130 degrees. Still, these remarkable animals plodded relentlessly along, doing their jobs with little or no complaint, except when an impatient muleskinner would inadvertently interfere.
 Terrors of Death Valley seemed to arise from only three causes: extreme heat, excessive dryness of the atmosphere, and lack of water. The president of the Eagle Borax Company, Mr. I. Daunet, was forced to kill his animals so he could drink their blood to survive, as blood can replace water. After this devastating near-death experience, and finding the daunting heat unbearable, Mr. Daunet was happy to remain, thereafter, in his office.
Mules and donkeys have been a great friend of man. There is no more useful or willing animal on earth to aid man in his endeavors. “He has had to plod and work through life against the prejudices of the ignorant. Still, he has been a great friend of man, in war and in peace serving him well and faithfully.” Should we not give mules and donkeys the respect, admiration and credit they so richly deserve? In doing so, would we then enrich our own lives as our country has been enriched by them? Think about it.
To learn more about Meredith Hodges and her comprehensive all-breed equine training program, visit LuckyThreeRanch.com, MEREDITH HODGES PUBLIC FIGURE Facebook page, or call 1-800-816-7566. Check out her children’s website at JasperTheMule.com. Also, find Meredith on Pinterest, Instagram, MeWe, YouTube and Twitter.
© 2011, 2015, 2016, 2020, 2023 Lucky Three Ranch, Inc. All Rights Reserved.

 Many people ask me when the first mules appeared on this earth. Historically, mules have their roots in the Bible. Contrary to the popular belief that mules are so lowly and stubborn that they would have to be the mount of serfs, they were—in the beginning—the mount of kings!
 “And Absolom met the servants of David. And Absolom rode upon a mule, and the mule went under the thick boughs of a great oak, and his head caught hold of the oak, and he was taken up between the Heavens and the earth, and the mule that was under him went away.” (II Samuel 18:9)
 The highest intelligence residing in animals is that of the mule. He inherits athletic ability and “horse sense” from his mother, the horse, and incredible wisdom and strength from his father, the jack. Perhaps the kings of yore finally tired of being publicly humiliated by their superior mules, or perhaps they just couldn’t muster the patience or humor to deal with them anymore, but mules were eventually replaced by horses as the mount of choice, and were subsequently used primarily for packing and draft work.
 There is a volunteer organization in Israel called HAI-BAR, (an Israeli word meaning “wildlife”). This organization was established to protect animals that had thrived in the Holy Land during the Old Testament years, but that are now dangerously close to extinction, due to reckless use of land resources. HAI-BAR South, established in 1964, opened 3000 acres to the general public in 1977 for the express purpose of protecting herds of wild species from Biblical times. A second reserve, HAI-BAR Carmel, was established in the center of Israel near Haifa on Mount Carmel, where 2000 acres were fenced off to accommodate and protect even more Biblical animals. These reserves are still in operation today.
 The unique personality traits of the mule come from the ass. Unlike horses, mules are naturally curious, but are also suspicious and require time to size up a situation before acting. For this reason, it usually takes time for people to warm up to mules and time for mules to warm up to people. Because their judgment of people is unmatched, it is wise when buying a mule to allow him to pick you! A lot of the mule’s so-called“stubbornness” is really a sense of self-preservation. If he has a negative experience, he is not likely to repeat it. His memory serves him well and he never makes the same mistake twice. For this reason, it is important that the personality of the mule and his handler are compatible and that they actually like each other.

 Man has always sought to better himself and his environment. He seeks to set shining examples to all, however, he falls short due to negative aspects in his character. The ass, who has always been humbled, does not seek to set examples, he is an example with his honest and faithful ways. He is quick to accept that which is good and tolerant of all else. This unique character coupled with his physical abilities makes him an excellent life partner.

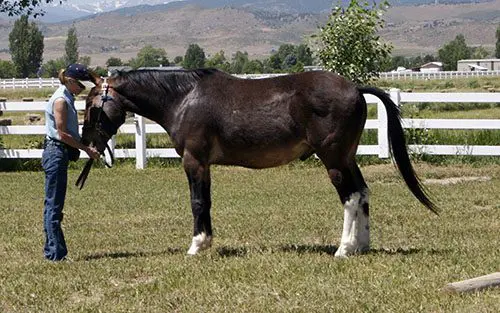
 In the beginning, my home, Lucky Three Ranch was a 10-acre sheep ranch with a small house and hay barn, an old Quonset hut, a feed barn, four three-sided sheds, and a perimeter fence made from sheep fencing with barbed wire on top. It was crossed-fenced around the sheds with some heavily chewed board fences and anything else the previous owner thought could be used for fencing. I’d already had experience with horses, but it wasn’t until my first mule, Lucky Three Sundowner and my first donkey jack, Little Jack Horner, finally arrived at the new Lucky Three Ranch that my lessons with Longears really began!
 One of the first things I found out about Longears is that they are incredible artists, and they will “sculpt” anything and everything they can get their teeth, rumps or hooves on! My Longears immediately set to work sculpting the posts on three sheds that were near the house and the fence posts around them. We tried everything to get this to stop, but to no avail, and in three short years, we ended up with posts that were no bigger than toothpicks in some places and marvelously contoured from top to bottom, into all kinds of remarkable shapes. We hated to put a cramp in our mules’ artistic style but, clearly, the wooden posts and sheds had to be replaced.
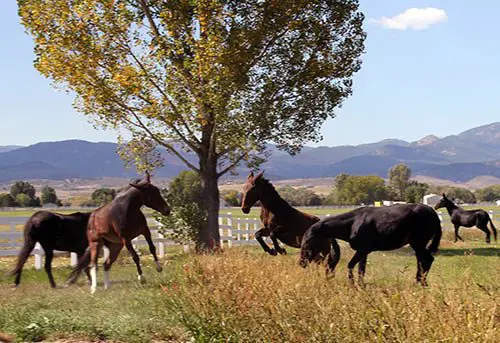
 By now, we had bred three more mules, so while we were working on replacing the three sheds, we put the whole herd of mules and mares into a five-acre pasture. One day, while we were working on the new sheds, the whole herd suddenly showed up behind us! Apparently, one of our equines had pulled a “Houdini,” opening the gate and letting everyone out of the pasture. Being the affectionate and curious animals they are, our Longears (and horses) then decided they’d better come see if we needed any help.
 the north side of the barn began to get soft and muddy again and more pea gravel was needed. Rather than doing the runs one run at a time, the seven mules on the north side of the barn were turned out, and we took down only the panels on the north side, so the delivery truck could dump the pea gravel directly on the site. The remaining mules on the south side of the barn were left in their stalls and runs.
 We spent the next several years taking down barbed wire, mending old field fences and replacing the old sheds with steel Port-A-Stall sheds, replacing cross fences with vinyl, building two more steel barns and lining our indoor arena with steel. As we all know, Longears are very intelligent, and they will use their “smarts” to figure out a way to simplify a task. If you want to step over a fence but it’s a little too high, what do you do? Well, if you’re a mule, you sit on it to push it down, and then you can step over it. Although the horse fencing we used to replace the sheep fencing was fairly high, my Longears still managed to sit on the middle of it, bowing it out into incredible, irregular shapes…after they had first shorted out the hotwire, of course. This was their daily ritual. Maybe they had a crew meeting first thing every morning and planned how they’d do it. Who knows?
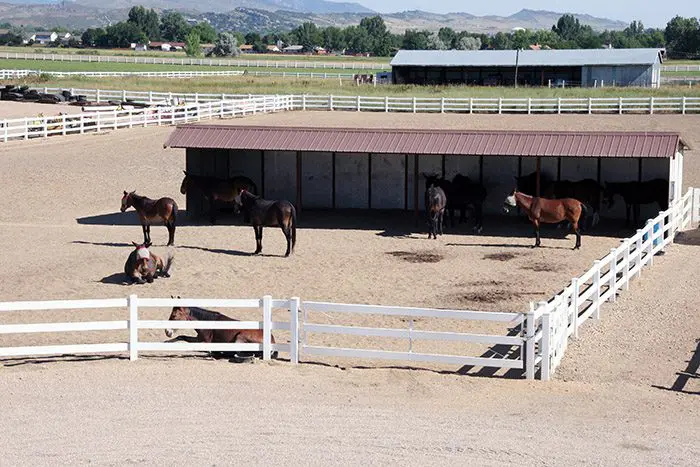 But to this day, I still don’t know how they shorted out the hotwire! One thing my Longears have taught me through our years together is that, if you are going to have mules, you’d better learn to have a good sense of humor or you will never survive their pranks! We learned to drill holes in the posts for a hotwire across the top of the new vinyl fencing and that worked very well, but that was only after they had removed all the vinyl rails from the fence overnight. They were delighted that I had given them their own “Tinker Toy” set. They never left the pen, although they could have! Each time our mules have made “art,” pulled pranks, or managed amazing escapes, we learned how to improve our system and materials, until finally upgrading to an all-steel facility with vinyl fencing topped with a relatively inaccessible hotwire. Now we no longer need to worry about what the mules and donkeys might do…until the next time. (PLEASE don’t tell Ely I said that!)


 Shaping behaviors takes reinforcement to the next level. Now you are working with the tendency of an animal to perform in the right way and guiding that performance toward your ultimate goal. This is called successive approximation. For example, if you are teaching a turn on the haunches on the lead line, you must first ask for one step forward. Then walk toward your animal’s shoulder and ask for the turn. In order to teach him to plant his rear pivot foot before the turn, the process must be broken down into smaller steps. First, ask for the step forward and reward him immediately when he complies. Then move on and ask for one step forward and one to the side, rewarding him again when he’s successful. Then ask for one step forward and two to the side and reward, and so forth.
 An example of shaping a behavior by breaking it down into a string of very small steps is how I taught my donkey, Little Jack Hornerto canter. Although many people tried to tell me that donkeys don’t canter, I had seen donkeys canter when they ran free, so I knew it was possible. First, I set the goal of cantering a circle. No one could run ahead of my donkey fast enough to reward him with oats and negative reinforcement such as the crop didn’t work well at all, so I had to find another kind of reinforcement. Using the pleasure principle of finding the best motivation for an action, I put my cycling broodmares into a pen at one end of our hayfield and I took my jack to the other end. When asked to canter toward those mares, he did so eagerly. He first learned to canter in a straight line. I reinforced the action verbally with, “Good, good,” while we cantered, and then I gave him a food reward once we reached the pen.
 The next time I did the same thing, but this time I turned my donkey in a large half-circle route to the pen, and I rewarded him again the same way. The third time, I asked for a little more of a circle and I got it. Several times later, I was able to get an entire circle before we ran the line to the pen with the mares in it. Once my donkey learned that he could canter easily with me on his back, I didn’t need the mares anymore.
 to trot, I would finish the circle, stop him and praise him with the food reward. It was slow going the first few tries, until I started counting strides and realized the jack was adding one more stride at canter with each attempt. Before long, he was cantering the full circle with ease on command.
 As you begin to understand the principles of shaping and modifying behaviors, it is important to realize that it is a lot like dancing, cooking or any other learned skill—the only way forward is with practice. The more you practice, the better trainer you will become. You have the opportunity to practice positive reinforcement every moment of your life, reinforcing behaviors in everyone—the cat, the dog, your husband or wife, your children. It becomes a game of noticing and praising positive accomplishments while setting clear boundaries to all behaviors, large or small. With practice, you will increase your awareness and, thus, your skill. The success or failure of your efforts to shape behavior in any animal does not depend upon your expertise, but on your patience, respect, consideration and consistency during the process. This may not be the easiest way, but it is extremely effective—and it’s fun!
 When I began working with mules and donkeys, I quickly realized there would be no shortcuts to successful training. I steered clear of fads, trends and shortcuts and, instead, based my training program on Behavior Modification techniques developed by world-famous behaviorist B.F. Skinner over a century ago. For many years now, I have used these techniques to successfully train my own champion mules and donkeys, and I continue to share my method with millions of people through my books, an award-winning DVD series, multiple television shows, my comprehensive website and on Social Media.
 Animals, like humans, need a predictable routine in order to learn. Just as children progress through grade school, building on their knowledge with each successive grade, animals learn best when a solid foundation is laid for each new skill. By creating a logical program from the outset, we avoid the confusion that can lead to resistance.
 Everything we do, every behavior we choose, is based on an instinctual desire to experience pleasure and avoid pain. Our choices reflect our experience. They are “reinforced” by the pain or pleasure they have given us in the past. Behavior Modification uses the same principles of positive and negative reinforcement with an emphasis on positive reinforcement.
 Positive reinforcement also takes the form of verbal cues. When your animal performs the desired behavior, you should, simultaneously and with appropriate enthusiasm, say the word, “Good!” This works well when it isn’t possible to give a food reward right away. Clicker training, which has become a popular and effective means of audible reinforcement, is similar and applies the same concept. It’s immediate, it’s consistent, and it can be used with all mules, donkeys and horses to reinforce behavior. However, I feel that it is better to use your voice than a clicker, as the sound of your voice promotes engagement with your equine on a more intimate level, so your voice will yield better results than clicker training.
 As your equine learns certain behaviors, you can reinforce the learned behaviors less frequently and focus on frequently rewarding new achievements. Gradually, your animal will become satisfied with a verbal reinforcement for established behaviors, and he will comply for longer periods between food rewards. This shift from a predictable, or fixed, schedule of reinforcement to a variableschedule helps with skill progression. For example, in the transition from lunging when your animal was initially given a reward after each set of rotations in the round pen, to riding, he can eventually be ridden through his entire 30 to 40 minute session before receiving a reward.
 Just like humans, all equines have different personalities. They’re not cookie cutters and should not all be treated the same way, so observe your equine whenever possible and see what he naturally likes to do, and then adjust your training program accordingly. Although each animal must go through the same kind of basic training to make sure he is building good core muscle strength in balance and good posture, he will have his own way of learning, so your presentation of the tasks may differ from one animal to the next. When you have multiple animals, treat each one of them like he’s your favorite.
 First, let’s look at conformation. It goes without saying that your equine should appear wellbalanced and in good proportion, with flat knees and smooth joints. He should be free of unsoundness. There are published standards on most breeds, or you can pick up a good 4-H manual or a judging manual to give you an idea of what the ideal is for each breed with regard to conformation
 Begin with a six-foot piece of baling twine or string. The first measurement is from the poll to the middle of the withers. Then measure from the middle of the withers to the loin at the base of the rump. If these measurements are the same, you have a balanced animal that will be able to perform with more ease. If the neck is slightly longer, he will still be athletic because the head and neck are used for balance. But if the neck measurement is shorter, it will be difficult for your equine to balance through certain movements and transitions during all activities.
 Now measure the top of the neck from poll to withers and the bottom of the neck from throatlatch to chest. The top line should be 1.5times that of the bottom, enabling your animal to perform nice, soft movements during all activities. A “u-necked”animal cannot bend properly and will never be able to achieve good collection in balance and good posture. His neck and back will be hollow, making it difficult for him to efficiently carry a rider, which can result in future soundness problems.
 Next, measure the equine’s legs from the elbow to the coronet band, and then from the stifle to the coronet band. Both measurements will be the same in an evenly
 Ideally, your prospect should also be graced with 45-degreeangles at shoulder and hip,and with the same angle at his pasterns. This ideal angle will result in softer gaits and transitions, whereas a straighter hip and shoulder will result in abrupt transitions and a rougher ride. The higher the angle (90+ degrees), the longer the stride will be; and the shorter the angle (90- degrees), the shorter and quicker the stride.
 Now let’s see how your prospect moves. Stick a piece of masking tape at the point of his hip as a visual reference point. Ask someone to assist you by trotting your equine on a lead as you watch the way he moves. Does his hock reach underneath and pass in front of the tape? If it does, his hindquarters will support strenuous athletic movements, his transitions will be more fluid and smoother, and his head and neck will stay level. If his hock does not reach underneath him sufficiently, he will be out of balance and must raise his head and neck through transitions.
 hoof? If he is exact, he is graced with the smooth, fluid way of going of a world-class pleasure animal. If he over-reaches the track, he has wonderful hindquarter engagement and you may have a candidate for Reining,Dressageor jumping. If he under-reaches the track, he is out of balance, causing him to raise his headand neck. He will have difficultythrough transitions and movements, which will undoubtedly make him unsuitable for advanced athletic activities.
 There are some practical tests you can do to help you assess an animal’s trainability. First, ask the person assisting you to hold your equine’s lead rope while you pick up a handful of sand, and then trickle the sand through your fingers near your animal’s head. Does he turn and look at you? If so, this is a good indication that he is interested in what you’re doing, which usually means he will be more trainable than an animal that ignores you.
 Now stand at your animal’s shoulder and gently put your hand over his nose, and then ask him—with a gentle squeeze and release action from your fingers—to bend his head and neck toward you. Do this on both sides. Does he bring his nose around easily or do you feel resistance? If he gives easily, it is a good indication that he is submissive and will be willing to learn more quickly.
 When you go through the basic exercises on the lead line and in the drivelines, there may be times when you experience resistance from your equine. Think of your animal’s resistance as a red flag that could be telling you that you either need to reassess your approach and consider a different path to the same end, or that you may simply need to break a current action down into smaller and more understandable steps. Don’t get caught up in the blame game (“It’s his fault, not mine.”) and lose your temper just because things aren’t going the way you expected. If, instead, you adopt the attitude that your equine is trying to communicate with you and that, when you meet with resistance, it is your responsibility to change what you are doing, you can avoid a lot of frustration during training and things will go more smoothly between the two of you.
 Keep in mind that, regardless of conformation and trainability, when you do the right kinds of exercises toward good posture and balance in their correct order—and with adequate time spent at each stage—and adjust your approach to the training of each individual, the result will be that your equine will feel much more comfortable. He will recognize your efforts on his behalf and, as he progresses, training will come more easily for both of you.
 Once your equine has mastered tying and leading in the small pen, he can then move on to a designated work station where he will not only be groomed, but will also learn to accept tack in preparation for the round pen. This should be a place that has a good stout hitch rail and easy access to your tack and grooming equipment.
 Keep an eye on the pressure you apply whenever using these various grooming tools. Different animals will have different sensitivity to these tools and will tolerate them better if they know you are not going to cause undue pressure or pain. Learn to brush the mane and tail starting at the bottom and working upward, and use a conditioner such as baby oil to keep from pulling or breaking the hair. (Baby oil will also keep other equines from chewing on the tail.) A shedding blade can be an uncomfortable grooming tool when used improperly. When using a shedding blade to remove mud around the head and ears and even on your animal’s body, be careful to minimize his discomfort by monitoring the pressure you apply to each area and working VERY slowly. When bathing him, be extra careful not to get water in his eyes or ears. These types of consideration for your equine’s comfort will help build his trust and confidence in you, and it will help make training easier and more enjoyable for both of you.
  doing. If you are not sure about what tack to use when, go to the Lucky Three Ranch website for more detailed information, or ask the experts in your area. Make sure all tack and equipment fits your animal properly. If it doesn’t, it can cause adverse behaviors during training.
  behavior you are seeing. Equines are very honest about their responses, and if they are not doing what you expect, it has to be in the way you are asking. Also, don’t hurry your equine. When asking for the walk, make sure that the walk is even in cadence, balanced and regular—not hurried. Only after your animal is correct in his execution of one gait, should you move on to the next gait. When first introduced to the Round Pen, it is not uncommon for an equine to begin work at the trot and then, as he becomes more comfortable with the new area, at the walk.
 The arena is the place to really start focusing on forward motion and lateral exercises to further strengthen your equine, and it is the place to begin fine-tuning his balance, first during leading exercises, then Ground Driving and finally while he is carrying a rider. The Hourglass Pattern in the arena is also a good place for you to fine-tune your own riding skills, so that you learn to help your equine maintain good balance and cadence, on straight lines and while bending through the corners. In order for your equine to correctly go through the corners, you will be asking him to bend the muscles through his ribcage so he can remain upright and balanced. Equines are not motorcycles and should not lean around the corners. The power should always come from the hindquarters to keep the front end light, supple and responsive to cues. If his front end is heavy and sluggish, your equine is not adequately stepping underneath with his hind legs and will thus, lose forward impulsion and power and will not properly condition his muscles.
 Training isn’t just a way to teach your equine to do certain “movements,” but a way for you to help him to grow physically and mentally healthy, and to enable him to learn to cope with the demands that will be put on him during his lifetime—much like raising a child to grow up to be a healthy and productive adult.
 The subtleties in your attitude and approach, along with a solid knowledge base, can make all the difference in your training program. Whether your equine is a foal or an older animal that you have just obtained, whether he is trained or untrained, the process is the same and it’s never too late to get started with the right kinds of expectations in mind. You are creating a bond, developing the foundation for a healthy friendship, and setting the ground rules that will dictate the positive extent of your continuing relationship with your animal. It is important to be an active participant in your animal’s training. After all, you wouldn’t have someone else make a friend for you. You’d do it yourself—one-on-one.
 solid foundation with him before moving on to more elaborate maneuvers will yield better results. Remember to always be aware of your equine’s physical, mental and emotional responses during training. For instance, you may think that, once your mule is moving around the round pen at all three gaits with a reverse, he is ready to begin riding, but this may not necessarily be true. Considering that it takes years to really condition muscles to their maximum strength, six to eight months of doing round pen exercises is not really that long a period of time. If you don’t spend at least six months on flatwork leading training and six months on obstacle leading lessons to promote strength and balance in good posture, you can greatly hinder your equine’s ability to perform in the round pen on the circle. In turn, spending less than six to eight months in the round pen will not produce the best results in muscle development. If you move through conditioning too fast, it will affect your animal’s mental attitude toward training and he will very likely experience soreness and emotional depression. As a result, he will most likely become resistant to training.
 know what exercises you should begin with and which exercises should follow. Don’t let yourself get sucked into drilling on something that just isn’t working. If you run into problems and things aren’t working out properly, just go back and try something that is similar in its demand but simpler for you and/or your equine to execute. Sometimes, it is just a manner of approaching the problem differently or leaving it to another day. Like humans, equines have their own individual ways of learning and it’s up to you to figure out what works best with your particular equine on any given day. You can find my suggested approaches to this in my DVD series, Training Mules & Donkeys and Equus Revisited. Note: Don’t forget to reward your animal for positive behavior.
 Benefits of group lessons Equines can learn from each other, so it can be beneficial to work them together. When you are working with foals, it is helpful to take “Mom” along or have her tied nearby during training sessions. Green animals often do better on the trails during the first year if they are ridden along with well-trained trail animals. If you have multiple animals to keep conditioned, you can even lunge them together, provided your work in the round pen has been consistent with each of them separately from the beginning. In driving training, the “group lesson” idea of hitching young animals with the “old pros” has been a common practice for many years. Lunging “teams” together can also provide beneficial exercise. Speaking of “old pros,” it is to your advantage to find a local instructor/trainer with whom you can periodically take lessons. This gives you a way to check to make sure you stay on the right track and continue to improve your own skills. Lists of trainers and instructors can be obtained from the United States Equestrian Federation.
 Only after you have adequately completed lead line flatwork and obstacle training is your equine truly ready to move on to the round pen and begin lunging and learning to balance on a circle at the more active gaits. At this stage, he should be complying willingly, walking with the lead rope slung over his neck and with his head at your shoulder. By now, his core muscles should be properly conditioned and strong enough to support his skeletal system during more active use and more complicated movements. Note: The equine that has not had this prior lead line balance and good posture training will have difficulty in the round pen because he has not learned to stay erect and bend his body through the rib cage when on arcs and circles.
 Before your equine learns to balance with a rider, he must first build muscle so he can sustain his own balance on the circle before carrying a rider. This is also true if you want your animal to learn to lunge on a lunge line. An equine that has not had enough time in the round pen establishing strength, coordination and balance on the circle will have difficulty on the lunge line, because even the slightest pressure on the line will pull him off-balance. Loss of balance will cause stress and even panic in your equine, which can result in him pulling the lunge line right out of your hands and running off. This is not disobedience but rather, fear caused by a loss of balance so do not punish him for this reaction. The animal that has had strength built on the circle before lunging and riding will not exhibit these undesirable behaviors, which are often misinterpreted as disobedience.
 I have found that, in most cases, the larger the animal, the more docile the personality, which seems to be a general rule of thumb. I have also learned that, if a donkey or mule has a tendency to bolt and run, it’s because they don’t necessarily agree with what you are trying to do or how you are trying to do it. Even though horses usually comply fairly easily, it is important to remember that any disobedience on the part of any equine is ALWAYS the handler’s fault. Regardless of the personality type of an equine, he will always have an honest response to any stimulus. If you ask in the right way, you will get the desired response.
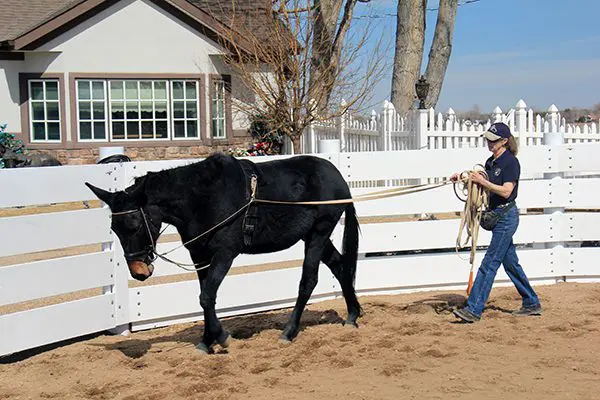 When ground driving, you should not worry about the whip while in the round pen, as the walls will help guide your animal in maintaining the correct position. What you really need to do is keep even contact on both lines (reins) when going in a straight line (or, when in the round pen, on the circle). To get your equine to begin stepping laterally, slightly tighten the outside driveline while maintaining contact on the inside driveline, so that he cannot complete the turn. Stay directly behind his haunches and urge him forward. This will cause him to begin to step sideways, with his face to the wall. Take only a couple of steps this way, and then slowly straighten him out again—you can build-in more lateral steps as he begins to understand what you want. Be sure to reward him with crimped oats every time you halt.
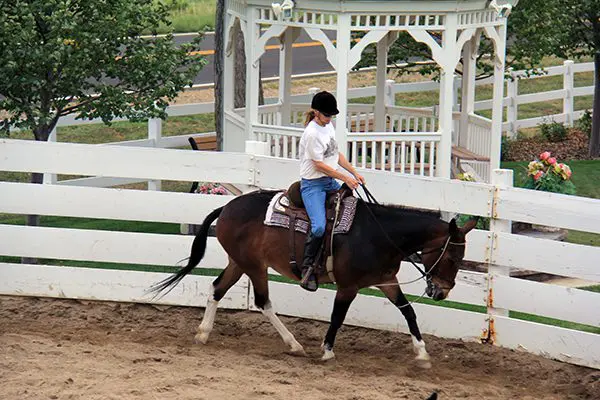 If an animal is trained with sequential, resistance-free training techniques and is given adequate time on groundwork training (a minimum of one year on the lead line and a second year on lunging and ground driving), he will warm up to other people more easily and will be more “sensible” than those animals that are not trained this way. Each new owner should take the time to review these techniques with newly acquired equines, just to create their own personal relationship with that animal and dispel the negativity of any prior relationships the animal might have had. Spending time doing simple basic groundwork training before actually riding allows your relationship with your equine to develop in a safe and healthy way. It will teach both you (the handler) and your equine how to communicate clearly and effectively. The exercises described in this article will condition your equine’s body so he can more easily carry a rider (whether the rider is balanced or not), and help your equine to be more capable of executing whatever demands the future may hold.
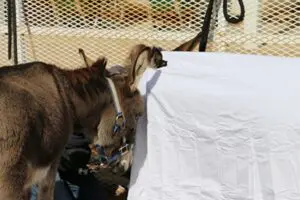
 The Tarp: The Tarp will dramatically affect your equine’s balance and coordination. Its uneven surface and the noise it makes when stepped on will typically put your equine off-balance and may cause him to veer from side to side as he crosses it. You can use the same “Stage One Obstacle” approach, as described in Part 2 of this article, to change his fear into curiosity. Again, as you did with the bridge, break this exercise down into small steps; stopping at the edge of the tarp, stopping with the front feet on the tarp, then all fours, then fronts off and hinds on, and then finally walking off the tarp to a complete halt and squaring up. Just learning to get through the obstacle will diminish your equine’s fear and replace it with curiosity and confidence. Then assume the showmanship position and do all obstacles again with Stage Two strength and balance, and with good posture in mind for both of you. You will know that your equine is ready to move on to the next stage of training in the round pen when you can toss the lead rope over his neck and he will negotiate all obstacles correctly, keeping his head at your shoulder and is showing no visible signs of a loss of balance, or any inability to obey your commands. He will then be placing his feet so that his balance is evenly distributed over all four feet and his foot placement is coordinated and deliberate. At this point, the obstacles in general should be an effortless task.
 their confidence in the handler. When we begin leading training, the equine is introduced to all kinds of obstacles. In Stage One of obstacle training, we first approach the obstacle and encourage them to investigate, changing their fear into curiosity and instilling confidence in them and in their handler. When they are compliant, they are rewarded with crimped oats and praised for being so brave. By the time they have learned to confidently negotiate other obstacles, the trailer is no longer a threat to them. They will most often just follow you right in, knowing (since they have never been trapped into complying) that there is a crimped oats reward waiting for them. For those animals that are still hesitant about the trailer and just won’t follow, we use a second method that restricts backward movement and this is explained in detail
  Jumps: Jumps are a good exercise to do on the lead line, but you must be careful not to over-jump your animal in the beginning. Because they are large, they must have great strength in the hindquarters to boost their heavy bodies over a jump, and if they are not strong enough, they can easily pull a muscle or worse. Jumping should be done only after all other obstacles have been thoroughly mastered. In Stage One, approach the jump the same way you would any other obstacle, building confidence and trust. Then use Stage Two to finesse your equine’s movements. Mules have the ability to jump from a standstill, so you can still use the stop, square up, wait for the command to jump, jump, stop and square up again on the other side. This ability allows you to maintain control of your mule when on the ground with the lead line or in the drivelines. If you are training a horse or a donkey, use a longer lead rope, so after squaring up about four feet in front of the jump, he can get a trotting start to the jump. Whatever equine you are training, be sure to keep the jumps very low in the beginning.
 The Back Through “L”: The Back Through “L” will fine-tune your equine’s response to “Whoa,” and he will learn to allow you to adjust the different quarters of his body and move each of them independently. First, walk forward through the obstacle, then stop at the end and turn around to face backward. Then, slowly and steadily, back through the entire obstacle. Once he has gotten this down fairly well, you can then go back to the beginning, and back one step (but only one!). Then proceed forward to the middle of the first straightaway, stop, back up two steps and square up. Go forward again to the angled rails where they begin the turn, halt, and then move his front feet one or two steps sideways with gentle pulls on your lead line at the halter, into the middle of the second straightaway, and halt. Then ask for one or two steps forward into the second straightaway and halt. His back feet will be cutting the corner into the 90-degree turn, so after he halts, tap him lightly on the hip with the end of your lead rope to move the hindquarters over one or two steps to straighten him into the center of the second straightaway, halt and square up again. Finish the obstacle by walking to the end of the straightaway, halt and square up again. Now do the same series of steps in reverse. This exercise teaches him to maintain his focus and balance throughout the obstacle and to learn to wait for you to move his front and rear quarters into any position required, taking only as many steps as you request. This will improve his negotiation of forward and backward movement, as well as beginning to strengthen the hard-to-condition inside forearm, gaskin and stifle muscles.
 tire. After he is comfortable walking through it, break it down into smaller steps in Stage Two: stop before the tire, then one foot in the tire, then two front feet in the tire, then allow the front feet out and the back feet in and then exit.
 Side Passing the “T”: Because Side Passing the “T” is a complicated and advanced obstacle, it is important that your equine execute the straight forward obstacles and lateral Tractor Tire obstacles before attempting to do the “T.” The “T” is a great way to fine-tune truly sideways lateral motion, where both front and back feet are crossing over diagonally and simultaneously in a balanced fashion, moving the equine laterally to the right and to the left as he negotiates the three different rails in the obstacle. In the same obstacle, you will be breaking the simultaneous motion into a turn on the forehand and a turn on the haunches in the middle of the obstacle, in order to make the turns into the next lateral motion down the next rail. This obstacle uses all the elements that have been taught in previous obstacles. It also lays the groundwork for perfect communication between you and your equine. In order to correctly execute this obstacle, he must pay attention to you at every step.
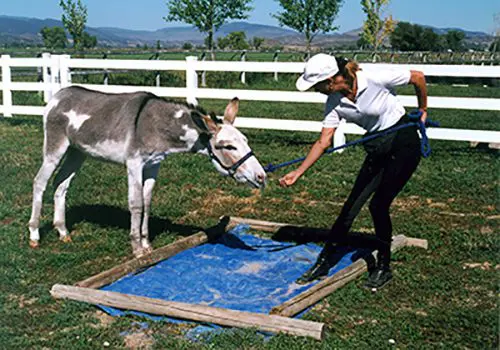 lead line, keep in mind that you are not only teaching your equine to negotiate an obstacle, you are also conditioning the muscles (especially the ones that are closest to the bones) while, at the same time, teaching balance, coordination and self control. In showmanship training, you focused on strength and balance on the flat ground. While working with obstacles on the lead line, you will now begin to add coordination during this second phase of obstacle training. Remember: Do not put obstacles in your equine’s stable area and/or living quarters, in an attempt to make him “live” with the obstacle. This only serves to create insensitivity and in some cases, cause greater fear. The stable area should always be your animal’s resting place, just as our bedrooms are for us—a place of rest, relaxation and privacy.
 When your equine is more willing to come through the obstacle, you can regain your showmanship position, with your left hand carrying the lead line and your right arm extended in front of you, pointing toward the direction in which you will be going. When he is finally listening and will follow at your shoulder over or through the obstacle and stop or back up at any point during the negotiation of the obstacle, you can then turn your attention to whether he is actually traveling forward and backing up in a straight line, and whether or not he is stopping squarely. Do this the same way first on the lead line, then much later in the drivelines and, lastly, under saddle. How he negotiates the obstacles will have a direct bearing on how his muscles are being conditioned and how his balance and coordination are being affected so don’t be afraid to ask for more precision going forward.
 Ground Rails and Cavalletti: Four ground rails and four cavalletti are good tools for straight, forward exercises that will promote stretching of the body in true and correct forward motion. These exercises will also develop rhythm, balance, cadence and suspension within the gaits, first on the lead line, and then later during ground driving and under saddle. Ground rails and cavalletti are also great for enhancing your ability to stay in stride with your animal. You should first do the exercises over the ground rails. Then, for jumping training, you can graduate to the 6″ cavalletti setting, then the 12″ cavalletti setting and, finally, the 18″ cavalletti setting. Your equine will learn to suspend and place his feet in a balanced and deliberate fashion while you learn to do the same. Getting in rhythm with your animal’s stride will improve your equine training experience and make things a lot easier and safer.
 stop at the base, square up your equine and stand for a few seconds. Then ask him to put his two front feet on the bridge, square up and, again, stand for a few seconds. Next, ask him to put all four feet on the middle of the bridge, square up and stand still for a few seconds. Now ask him to take his two front feet off the bridge and leave the two back feet on it and square up again. Most equines can do the first few positions pretty easily, but when the front feet go off the bridge, the equine’s balance is often thrown forward and they find it very difficult to stop in this position. If he is able to sustain this position for several seconds before you give the command to continue forward, he has completed the bridge work.
 Many times I have been asked, “Is training a mule any different than training horses?”
 Showmanship training is not just for the showmanship class at a show. Perfecting your showmanship technique every time you have your equine on a lead line will command his attention to detail, build his confidence in you and insure that he is strengthening his muscles properly throughout his body at the most basic level.
 When you ask for a halt, stop with your feet balanced, your weight distributed equally over both legs and still facing forward. Give your equine a second or two to settle and then turn to face his shoulder. If his legs are already square, you can then give the crimped oats reward for stopping. If they are not square, take a moment to square up his legs and then give the reward. Praise him for standing quietly for a few seconds and allow him to settle. You can then face forward again, point in the direction of travel, give the command to “Walk on” and walk a few more steps before halting again. Add more steps each time before halting. Whenever you practice turning, always turn the equine away from you—never into you. To insure optimum balance, practice leading him through these exercises from BOTH sides.
 When executing a turn to the right, assume your leading position and then point in the direction of travel, asking your equine to take one step forward with the right front foot then cross the left front foot over the right to make the turn. Your own legs should execute the turn in sync with your equine’s front legs, giving him a good example to follow. Although you will rarely have an occasion to actually lead from the right side, be sure to practice from both sides to insure symmetrical muscle development. Dispense rewards, but only after he has completed what you have requested.
 Once he has learned to follow and to do the “moves,” you then need to help him fine-tune these moves, making them as steady, balanced and coordinated as possible. He should learn to walk, trot and back up in straight lines, to stop squarely and to execute smooth, properly arched turns. Remember that your equine will follow your lead, so always pay close attention to your good own posture and “way of going.” Equines and humans have corresponding body parts, so if you are stiff or off-balance in any part of your body, your animal will exhibit the same problem in his body.
 Maintain your own balance and rhythm, and ease into transitions from walk to trot and trot to walk smoothly and in rhythm and cadence—and so will your equine. Ask him to stand squarely each and every time he stops. Set up his back feet first by pushing on the lead rope with your hand directly under his chin in a diagonal motion toward the back foot that is forward. Push and release (in a diagonal motion only) the lead rope toward the forward foot as much as it takes to move it into line with the other back foot. Once the back feet are in line, set his front feet by pulling and releasing gently forward (again, in a diagonal motion only) to align the front legs.
 As your equine gains strength, you will notice that he now carries his body differently. He is more balanced, solid and steady, and is able to stop squarely at every “whoa,” regardless of the gait. As he frolics in the field, notice the dramatic change in his play patterns. He will be much less awkward.
 In the past, when equines ran free, they were unencumbered by human interaction and could build and condition their muscles naturally. Today, with increased population but reduced open lands, their activity is often restricted. It then becomes our responsibility to not only train them, but to prepare them physically to perform and keep them happy in their environment. This responsibility becomes even more important when we ask them to exert more energy than normal, in activities like long trail rides, endurance events, showing and equine-related work. Proper preparation for this modern-day lifestyle will help to minimize your equine’s stress, both physically and mentally.
 Understanding the prey-predator responses can help to guide us in the training of our equines, but because of the change in the environment, it shouldn’t completely define our training methods. The prey animal that is uncomfortable with making direct eye contact with the human “predator,” for instance, is virtually trapped in a confined environment in which he has no control and can therefore become anxious and difficult to handle. We are taught not to make eye contact with him until he is willing to face us. We are taught to “chase” him in a round pen until he does.
 instance, the equine that is “trapped” on a lunge line and asked to reverse toward the handler will inadvertently be improperly set up to take the new trotting diagonal, or the new lead at canter, from a position that actually “tangles” his hind legs and causes him to fumble into the new diagonal or lead. This mistake can become painful and even detrimental to the stifles as he jumps out of the entanglement and can cause resistant behaviors which are often punished on top of the physical pain he is already experiencing.
 his body symmetrically in good equine posture. Once he has established good equine posture and balance over a long period of time doing appropriate exercises, he will then be better able to efficiently reverse towards you on the lunge line by changing direction from a position of balance rather than an awkward imbalance.
 Be a true leader and learn to set boundaries for your equine with appropriate corrections for bad behaviors (which can be found on our website and in our products). Make these corrections quickly and then immediately return to a clear definition of what you expect and make sure that it is easily doable for your equine at each step. Every animal on the planet will correct another’s misbehaving with a very clear and undeniable gesture that will stop the abuser promptly in their tracks. Take note. This is not abusive, but rather a very clear communication of what’s right and what’s clearly wrong. In fact, in the case of the mule attacking the puma that has circulated the internet for the past few years, it was clearly a case of the mule engaging in the hunt with his human “friend.” So, who is really prey and who is predator in this particular scenario? Sometimes we just need to change our perception or understanding of things and deny all-encompassing generalizations and stereotypes.
 being. In the practice of true Behavior Modification, all five senses should be employed: sight, hearing (voice), smell, touch and taste. These are all innate ways to communicate effectively. Any distractions should be eliminated when communicating with your equine—put away the electronic devices, clickers and loud whips, and avoid abrupt noises.
 In Part 1 of Getting Down with Minis, you learned how to begin the relationship with your miniature equine in a positive and natural way that fosters good behavior and a solid relationship between you. You also learned the importance of getting down to your mini’s eye level so that he can make eye contact with you, which discourages striking, jumping on you and other bad behaviors that are common when working with miniature equines. In Part 2, I discussed how important it is to successfully complete the tasks in Part 1 before moving on to Part 2 and explained why it is advisable to work minis in groups, as they perform better when they are with their friends. You also learned how to train minis to go over and around various obstacles. Remember that all of this is to be done with no expectations that may overwhelm your mini—it is better if you maintain an attitude of fun and games. In Part 3, we got down to some serious groundwork training so your mini can be used for the purpose of driving and showing in hand. He learned to lunge and to be ground driven in the round pen and in the open arena through the hourglass pattern and if part of a team, how to do these things as a team. In Part 4, you worked on obstacle exercises on the drive lines to increase strength and coordination.
 Spend as many tire drag lessons as it takes in the round pen to be sure your mini is driving easily and smoothly before graduating him to the open arena with the tire. Just as you did with simple ground driving, once he is ready, let your mini drag the tire while ground driving him through two rotations of the hourglass pattern, and then cross the long diagonal and do two more rotations in the opposite direction. Make halts often so rewards can be dispensed for a job well done. Do not make any abrupt turns or try to add speed before you are completely competent with the lines and your mini is responding obediently. Ground driving is as much for you to learn good Reinsmanship as it is for your mini to learn to drive correctly. If training more than one mini, just tie whichever mini you’re not working with at the moment off to the side and have him wait his turn before ground driving the two as a team. The frequent halts with rewards will teach him to stay clam and remain still when asked.
 Before actually hitching your mini to the vehicle, be sure to check all harness straps and make sure they are correctly adjusted. While you do this, you will also be teaching your mini (or minis if a team) to stand still in the cross ties, which will make hitching much easier. Checking all harness straps can be done anywhere that your fences or hitch rails are close enough together to accommodate the cross ties and still allow enough room for a single mini (or team) and the vehicle. During this lesson, all you need to do is put on and adjust the harness, hitch to your vehicle, have your mini (or team) stand quietly while being rewarded and then take everything back off. Before leading your mini(s) away from the vehicle, spend some time rewarding again for standing still and staying in position.
 your assistant to stand in front and to the side of your mini with a lead rope attached to a ring on the noseband (not the bit) of your mini’s harness bridle. When ground driving a team, you will need to use two assistants. Ask each assistant to stand on either side of the team. Once your mini is harnessed, and when you are seated in the vehicle and ready to go forward, ask your assistant to unsnap the cross ties and release your mini while your assistant stands at his head. Now ask your mini to “walk on.” Let him go just a few steps and then ask him to “Whoa.” If your mini does not stop promptly, your assistant can help by pulling back on the lead rope with a pull/release motion while, at the same time, you pull back on the drive lines with a pull/release motion. When he does stop, have your assistant give him his oats reward. Let your mini settle before asking him to back a couple of steps and halt again. Reward him for halting and end the lesson there. The object is to allow your mini enough time to understand what you are trying to teach him and respond accordingly so he can be rewarded without spending so much time that he gets bored and sucks you into a confrontation.
 When your mini is hitched to a vehicle, make a very large hourglass pattern to accommodate your vehicle. His familiarity with this pattern will help him to feel calm and gain confidence while being driven. Every time you end a lesson, keep your assistant at your mini’s head until your mini is fully unhitched from the vehicle. NOTE: Always remove the harness bridle last. Once he is unhitched, make your mini stand where he is while you come to him, then reward him and lead him away. This is how he will learn to wait for you and will not become antsy and uncontrollable. Routinely practicing good manners, setting up an environment for success and approaching your mini with a calm and deliberate attitude will all help him to become a quiet, safe and reliable driving animal.
 In Part 1, you learned how to begin the relationship with your miniature equine in a positive and natural way that fosters good behavior and a good relationship between you. You also learned the importance of getting down to your mini’s eye level so that he can make eye contact with you, which discourages striking, jumping on you and other bad behaviors that are common when working with miniature equines. In Part 2, I discussed how important it is to successfully complete the tasks in Part 1 before moving on to Part 2, and I explained why it is advisable to work minis in groups, as they perform better when they are with their friends. You also learned how to train minis to go over and around various obstacles. Remember that all of this is to be done with no expectations that may overwhelm your mini—it is better if you maintain an attitude of fun and games. In Part 3, we got down to some serious groundwork training so that your mini can be used for driving and showing in hand. He learned to lunge and to be ground driven in the round pen and in the open arena through the hourglass pattern and, if part of a team, how to do these things as a pair.
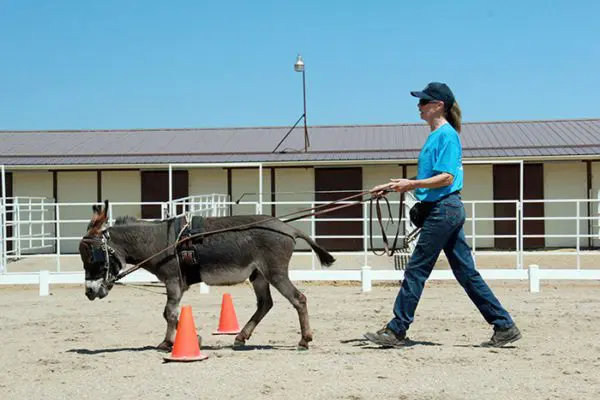 The “Elbow Pull” supports good equine postural balance and acts much like the balance bar that is used by a ballet dancer until she or he is strong enough to hold any postural position in the middle of the room without support. This becomes very important when your mini is in draught (pulling an obstacle or vehicle) in order to make sure he will pull correctly, and symmetrically condition his body’s muscles to avoid future injury to the internal structures within his body.
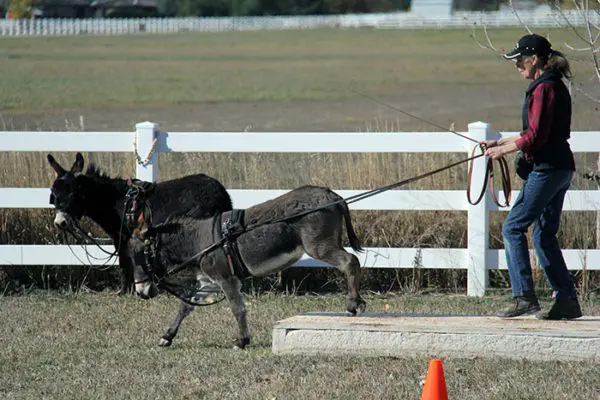 By now your mini has already learned to ground-drive the hourglass pattern and has negotiated the obstacle course on the lead line. There are still more obstacle exercises you can do to strengthen your mini and improve his strength and coordination to prepare him for driving before he is ever hitched to a cart or carriage. Now he is ready to learn to ground-drive the obstacle course. The obstacle course exercises will increase his confidence in being in the lead and help him to go bravely ahead of you upon command.
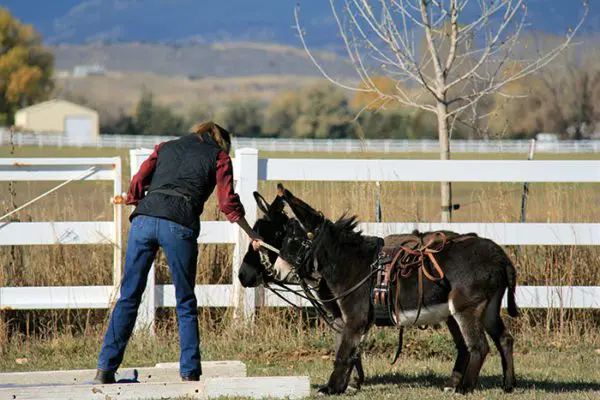 Approach each obstacle on the drive lines and if he balks and refuses to go forward, just stop, gently lay the lines over his back and then lead him through. Then go back and try again on the drive lines. In order to alleviate any fear or confusion your mini may feel, remember to “get down” to his eye level whenever possible. NOTE: Don’t forget to always reward him with his favorite crimped oats for compliance.
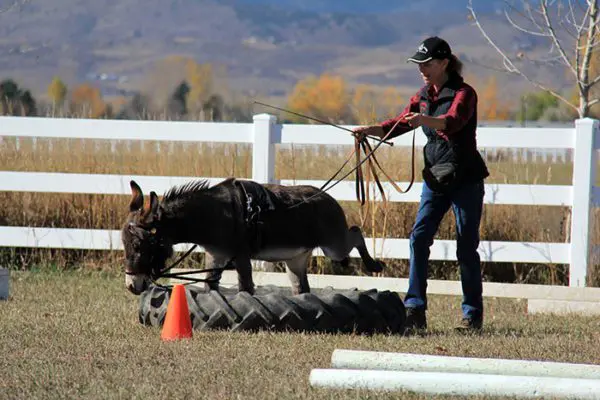 Once your mini is willing to go straight through the obstacle with a calm attitude and no balking, you can then begin to break each obstacle down into smaller, easier steps, rewarding and praising him for each success. If he is apprehensive about any obstacle, you should lead him through these smaller steps with frequent halts before attempting to ground-drive him through. He may need these detailed “explanations” before he is willing to “take the lead.”
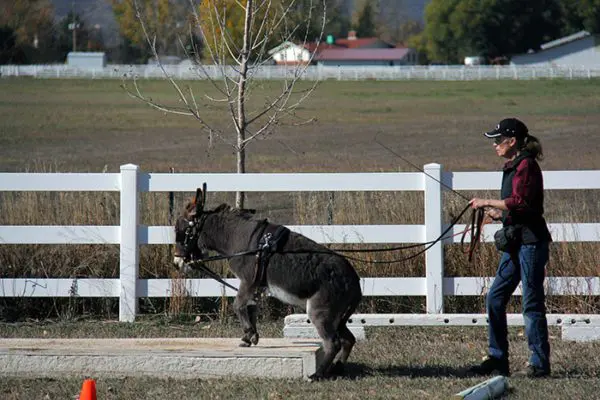 If you are training him on the bridge obstacle, go to the landing, stop, square up, put the lines up and reward, then resume your position and drive him up onto the bridge, but with only his front feet on the bridge, and then stop again. Put up the lines, walk forward and reward. Then drive him completely onto the bridge, stop, square up, put up the lines and reward. If he is having problems squaring up on the lines, then just square him up when you get to his head before you reward him.
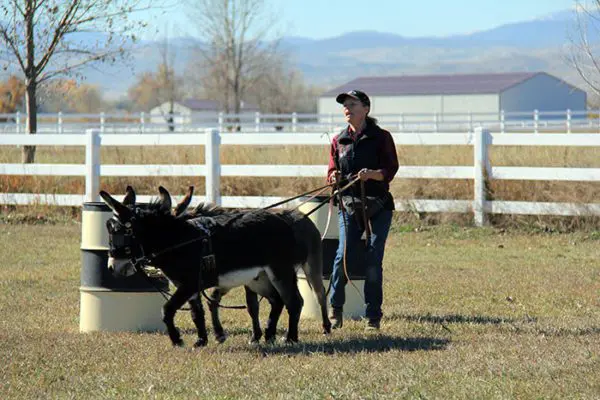 You can ask him to take full responsibility for perfect balance and negotiation of the obstacle later. For now, your primary task is to help him get through the obstacles successfully and with as little help as possible. Breaking obstacles down into smaller steps will increase his balance, coordination, agility and self-confidence. Even after he has become competent while hitched to the vehicle, you can use ground-driving obstacle exercises in the “Elbow Pull” to finesse his movements during future lessons. It will add variety to your mini’s lessons and continue to promote health, coordination and good equine posture.
 In Part 1 of this article, you learned how to begin your relationship with your miniature equine in a positive and natural way, and how “getting down” to their eye level so they can make eye contact with you discourages striking, jumping on you and other bad behaviors that are common when working with miniature equines. Be sure you have successfully completed the lessons in Part 1 before moving on to the lessons in Part 2 or training may not yield the desired positive results. Also, if possible, it is best to work minis in groups if they are used to being with other equines, as they perform better when they are with their “friends” and it doesn’t hurt to train their friends in the same way.
 in Part 1), but this time you will be in the work station and you will have a guest…the farrier. Before the farrier attempts to pick up the first foot, ask him to sit down beside your mini in front of the shoulder on the left side and offer a handful of oats as a way of introducing himself. Next, while you sit at your mini’s head and offer the oats reward for good behavior, have the farrier begin with the near side (left) front foot and work his way around from front to back, and then from back to front on the other side (right). While the farrier is working, talk calmly and encouragingly to your mini, and as long as he is doing what is asked of him, offer rewards generously. He should yield his feet easily, but if he does not don’t offer the reward until he complies.
 Don’t shove your mini when you want him to move over. Rather, give him some oats and use your index finger to tap or poke him on the side of his ribcage. If he doesn’t move over, use your whole hand to give him a slight push, always using a “push and release” movement, which is non-confrontational. You don’t want to keep steadily pushing up against him, because as soon as you give him anything to push against, he will and you could find yourself in a pushing match or, worse, a confrontation with him. As soon as he complies and moves, give him the oats reward and slide your body in next to him to help hold him in position for the farrier as he works with each foot. Don’t be afraid and always stay on the same side as the farrier. If the mini decides to make an abrupt move, he will try to slide around you because equines really don’t like stepping on, or running over, soft, squishy things like our bodies, so if your mini can get out of your way, he will. Even if he was to jump up in the air, he would more than likely jump over or around you, taking the path of least resistance. Trust your mini, stay calm and avoid becoming tense or exhibiting fear and things should go smoothly.
 This approach becomes particularly important when negotiating something like a dock or a bridge where you are not only dealing with an obstacle, but an obstacle that makes you substantially taller than you already appear to your mini. This is another instance when you can “get down” on your mini’s eye level the way you did in the pen and at the work station. Remember to do things in small steps. When you walk onto the surface of the dock or bridge or any other large, flat surface, leave enough room for your mini to come up. When you get to the end of the lead rope, take up the slack and then sit down and offer the reward. Then, once your mini has negotiated the obstacle, give him the oats reward and just have another picnic. If a companion equine is accompanying you, be sure to tie the companion animal in front of the obstacle so your mini can always see him. If you tie him behind, your mini will worry and want to go back instead of forward.
 When you are ready to step down off the dock or bridge, it would be unsafe to be lower than your mini, so at this point you should stand up, go to the end of the obstacle and ask him to come forward off the raised obstacle, making sure he has plenty of room to come off the obstacle without you having to move. Stand quietly and keep the lead rope taut as you verbally encourage him and invite him to come down off the bridge. As soon as he jumps down, ask for a halt and reward him for jumping down and stopping right in front of you. (He will learn to negotiate the obstacle more slowly with practice.) Once he has finished negotiating the obstacle and halted and is chewing on his reward, you can then proceed to the next obstacle. Having definite, purposeful and timely pauses will help alleviate anxiety and resistance in your mini.
 longer he must go without making eye contact with you, the greater the chance of resistance, but eye contact on his level will give him confidence in your judgment and will help to facilitate a real bond between you. If negotiating an obstacle such as a tractor tire or six tires, just extend the lead rope over the tire or tires, sit on that side, keep the rope taut and proceed as you did with the bridge obstacle.
 I call this technique “OATS.” (Observe, Approach, Touch and Sigh). It allows your mini time to observe each situation, then approach and touch the obstacle, finally giving a sigh as a signal that he is relaxed and not afraid. Always reward him for his efforts so he can begin to gain confidence and trust in you. By following the OATS technique you are turning your mini’s fear into curiosity, which will serve to keep him calm in future situations.
 By Meredith Hodges
 The show secretary is responsible for taking minutes of all show committee meetings and often acts as liaison to the show manager. It is the secretary’s duty to see to it that mailing lists are complete and potential exhibitors are notified of the impending show and are kept up to date. The secretary checks the public relations work done on the show by the public relations person, and in some cases, assumes this duty himself. The secretary records entries and receives funds sent in by exhibitors. Any program changes, protests, etc. are recorded by the secretary. The secretary is responsible for recording show results and mailing them to appropriate recipients, and to see that the results are released to the public in a timely fashion. The treasurer is responsible for handling and depositing funds used for the show and often aids the secretary in his duties. It is the treasurer’s duty to see to it that all expenses for the show are accounted for and paid and that a detailed report of such is given to the secretary.
 Judges are selected by the show committee and are paid for their expert opinion. Judges should be briefed by the show secretary as to the duties they will be expected to perform which sometimes may include designing courses for the competitions. A set of rules should be sent to the judge well in advance of the competition to allow for any questions that might need to be answered. The judge should not be asked to interpret the rules. Rules should be made clear enough that he can make his decisions easily, which are in turn deemed final. Judges are given the power to combine, or split classes where appropriate. The judge should not socialize with exhibitors until the competition is over to preserve his objectivity and integrity. When time permits, the judge should give reasons for his decisions to give credence to his choices and to help exhibitors learn. The judge should be knowledgeable, congenial and professional about his duties.
 The ring steward, or judge’s aid, has many varied duties. First and foremost, it is his duty to see to it that exhibitors adhere to the rules of the competition. It is his duty to interpret the use of the rules and not the duty of the judge. The ring steward is responsible for listening to and reporting complaints or protests. Although he has no authority in connection with the management or the judging of a competition, he should point out in a diplomatic manner any instance where rules are not being adhered to and report any violations to officials.
 He needs to be available to judges, officials and exhibitors at all times. He is to supervise and record any timeouts for tack changes or equipment breakage, and to measure animals where required. He is to conduct the breaking of ties in classes and to deliver the judge’s decisions to reporting officials. The ring steward is responsible for all medication forms, reports, and testing, with the aid of the secretary and the veterinarian. He is responsible for the accuracy of competition lists of entries and their class placements as reported by the judge and is to see to it that completed lists are given to the show secretary. The ring steward should protect the interests of the exhibitors as well as the integrity of the show. The ring steward should see that the competition moves along in a timely fashion. He, with his various duties, is a key entity for the success of the show.
 Scorekeepers and timers are used to record scores and times for specific classes and should be equipped with the proper tools to facilitate their jobs. Flags, stopwatches, time sheets, calculators, and writing utensils are necessary items. Scorekeepers should be prepared to keep times and scores updated continually so that championship classes can be announced quickly and easily.
 provided by the Ring Steward. It really helps if he has that “announcer’s voice” and is an animated character!
 Parking Attendants and Stable Managers should be used when necessary to assist exhibitors in loading and unloading, and in the parking of their trucks and trailers. They can make the difference when it comes to traffic congestion at the show. Parking attendants may also be requested to take note of the owner’s vehicles, so that they may be notified quickly in the event of an emergency with their vehicles. This can help prevent theft or vandalism. The Stable Manager sees that each animal is efficiently unloaded from the trailer and is escorted to his respective stall. If the show is providing hay, he will make sure each exhibitor has as much hay as they need and that any other needs are provided. Newt Elsdon was the model Stable Manager and Show Committee member for the Bishop Mule Days Celebration for many years.
 Last, but certainly not least, are the show veterinarian and farrier whose expertise are to be used for emergency show situations. An exhibitor should not expect to use their services for regular maintenance at the show unless pre-arranged. Veterinarians and farriers should be booked well in advance of the show to allow for their busy schedules. Alternates should also be booked and at the show, their areas should be clearly marked and they should be easy to locate.