

MULE CROSSING: The Round Pen
By Meredith Hodges

The Round Pen originated as a useful training aid for Western trainers who were trying to “break” the wild mustangs that were brought in off the range.
-
- There has been spirited debate between English and Western trainers as to the real value of the Round Pen as a training aid, since it can produce undue stress on the fragile joints of the equine-in-training.
- Do not BEGIN training your equine in the Round Pen, because an unbalanced and inexperienced equine in uncontrolled flight, in a truly confined space, can easily injure himself.
- Specific types of leading exercises must be used to teach him to be in good equine posture and balance on straight lines and gradual arcs before your equine is introduced to the Round Pen and asked to balance at all three gaits on a circle.
- He needs work on Leading Training in the Hourglass Pattern in an arena, tacked up with an English Eggbutt snaffle bridle, the “Elbow Pull” and a surcingle or lightweight saddle.

- When his postural core strength is in an adequate Leading balance in the arena, you can add obstacles.
- He will learn verbal commands, body language and will be able to balance his weight equally over all four feet and do all the exercises on verbal commands and hand signals alone. he is then ready to graduate to the Round Pen.
- He needs work on Leading Training in the Hourglass Pattern in an arena, tacked up with an English Eggbutt snaffle bridle, the “Elbow Pull” and a surcingle or lightweight saddle.
- When your equine is properly prepared beforehand, the Round Pen can then become a viable and important training tool.
- He will learn to Lunge freely at all three gaits while remaining in good posture.
- He learns to responds promptly and correctly to verbal commands and body language.
- He learns the basics about lunging on a lunge line.
- He learns how to be lunged on the Drive Lines.
- He learns how to Ground Drive the perimeter, then how to do turns and reverses.
- He will learn how to stand still on command at any time and be mounted.
- He will learn to Lunge freely at all three gaits while remaining in good posture.
- When choosing the site for your Round Pen, pick a spot that is surrounded by activity and even near the road, so it can serve a dual purpose. Not only will you begin to build your equine’s muscle during training sessions—you will get his attention under a variety of distractions. When he is exposed to noise and activity in the Round Pen at this early stage, it is less likely to bother him later under saddle, or in harness. He will gain confidence in any situation.
- Try to pick a site that is flat and not rocky. Ideally, it should have a solid base of hard-packed adobe soil.
- If your ground is not flat, you will need to grade a flat spot and then bring in fill-dirt, shoot it with a transit to make sure it is truly flat. You have spent a lot of time working on your equine’s posture and an irregular ground surface will interfere with that and set him back into poor equine posture.
- Make sure it is tamped and hardened before the three-inch depth of sand is added.
- The diameter of the Round Pen should be approximately 45 feet, so you can easily reach your equine on the rail with your lunge whip when you stand in the center.
- Uneven terrain can cause uneven balance, rhythm and cadence to his gait and will cause irregularity in the footfall pattern, which will result in asymmetrical development of your equine’s muscular-skeletal system. We used fill dirt with a retaining wall to make sure the ground was flat and even so as not to undo our equines’ good posture.
- A smooth, hard under-surface below the sand gives your equine a smooth surface on which to place his feet without fear of injury to the sensitive parts of his hooves from rocks or other debris. His stops will become correct and balanced, and ready him properly for the sliding stops in Reining.
- Even and level ground will assure his regularity of gait and sustained balance on the circle that will build core muscle symmetrically as he circles, maintaining his erect posture and correctly bending through his rib cage with equal weight over all four feet and energy coming from the hindquarters.
- Making sure the circle is actually round so it will help him learn to bend his body properly through the rib cage while he is traveling on the circle.
- If your ground is not flat, you will need to grade a flat spot and then bring in fill-dirt, shoot it with a transit to make sure it is truly flat. You have spent a lot of time working on your equine’s posture and an irregular ground surface will interfere with that and set him back into poor equine posture.
- Once the site is prepped, dig post holes at eight-foot centers on the circle and twenty-three feet from the center of the Round Pen to give you the 45 foot diameter.
-
- Next, pour concrete in the bottoms of the holes and measure the depth of the posts so when the posts are placed in the holes, they will all be at the same height. (There should be three feet of post in the hole and five feet above ground.) Use eight-foot posts.
- All types of wood are toxic to equines to some degree, but treated woods can contain arsenic and should be avoided. Redwood is okay, but the best posts to use are made from steel—they will last much longer than wood. Also, steel posts can be welded with “winged plates” so the boards can be easily bolted to the posts and changed out easily.
- Use two-by-twelve-inch wooden boards for the walls, and a smaller two-by-six-inch board around the bottom to keep the sand inside. Stack four two-inch by twelve-inch boards around on top, with three-inch spaces between the boards and a three-inch top of the post showing.
- The spaces between the wider boards will allow you to get a toe into the fence so you can easily climb in and out of the Round Pen, and it gives you a place to tie an animal at any post.
- Unlike a Round Pen made from corral panels, the twelve-inch boards keep your toes from getting caught or twisted when riding close to the rail. It’s a much safer design and truly functional for all levels of Round Pen training.
- For both trainer and equine safety, the use of electric and wire fences and materials, such as pallets and tires, should be avoided completely. If the equine decides he wants to leave, he can easily get tangled in a lot of these other materials…just not safe for either of you.
- Tie rings can be added onto the outside of selected posts to secure extra equines outside the Round Pen while they wait their turn.
- A Round Pen with solid walls should be avoided. An equine that learns to work in an open Round Pen is less likely to feel “trapped” and fearful of abrupt movements and noises, so he can concentrate on his work. He learns to acknowledge and accept interruptions and will keep on working.
- Using bolts for the two-by-twelve inch rails makes for easy replacement as the boards become worn, and putting a metal cap around the top with angle iron, will discourage chewing when you are not there to supervise.
- The gate posts should always be steel and sunk into 3’ concrete, as wooden posts tend to sag over time. The gate itself should be framed in steel to keep it from warping and sagging. The latch on the gate should be easily accessible from both sides, but the gate needs only to swing into the Round Pen for easy entrances and exits.
- Next, set in the gate (either finished or not) and close it to complete the circle. Check the diameter of the circle and the distance to each post from the center to make sure it is truly 45 feet round and that all posts are upright and level.
- The Round Pen gate pictured swings in and has a sliding barrel bolt at the top that just catches through a four-inch sleeve on the post wing. It is easy to reach over the top for opening.
- Next, pour concrete in the bottoms of the holes and measure the depth of the posts so when the posts are placed in the holes, they will all be at the same height. (There should be three feet of post in the hole and five feet above ground.) Use eight-foot posts.
- Once the cement at the bottom of the post holes is level and completely dry and the posts are sitting in the not-yet-filled post holes, attach the top and bottom boards all the way around, check each post and rail with a level, and then attach wooden braces to the entire Round Pen at each post to hold the position.
- Now pour the concrete into the holes around the posts. Allow enough time for the concrete to set up before removing the braces.
- When the concrete has dried completely, clean the excess concrete from around the holes. Then finish hanging all the board rails, cap them with angle iron and add whatever tie rings you want to the outside of the posts.
- Let some time pass before adding the sand to your Round Pen. Wet weather will actually help to further compact the base, which should be hardened so it can last for many years, so if you are expecting rain or snow, all the better.
- Once the base is hard and dry, add three inches of clean sand to the Round Pen—no more and no less. If the sand is not deep enough, the hard ground can hurt your equine’s limbs and possibly cause laminitis. But if the sand is too deep, it can damage ligaments, tendons and soft tissue.
- If your equine ingests the sand he may colic or founder, so make sure to use your Round Pen for training only, never for turnout or feeding. The equines can develop sand colic from eating off the floor of this kind of pen.
-
- The Round Pen can be used as a holding pen for short periods of time, but do not place food or water inside and use it as a permanent pen.
- It is too small for good health.
- This small area can exacerbate the animal and cause anxiety as their permanent residence. Stress is not good for the animal.
- Equines will put more energy into getting out if they are not comfortable.
- Good Round Pen construction makes all the difference.
- With intelligent construction and attention to detail, your Round Pen will serve a multitude of uses for years to come and can be quite easy to maintain. A metal, angle-iron cap around the top rails will keep the animals from chewing on it when they are left standing and waiting for their lessons to continue.
- Maintenance will be easy and materials cost will not be as expensive in the long run depending on what materials you use. Keep extra boards on hand as replacements at your original lower cost.
- I began by using simple 2” X 12” wooden boards and 8’ posts when I first bought the original 10 acres of the Lucky Three Ranch because I could not afford any more than that. I just kept improving the conditions as I could afford it. I did this with the entire facility…year after year…Barns, Sheds, Fences, Round Pen, Hot Walker, Tack Barn, etc.
- The Round Pen is not the place to START TRAINING. It is a place to get through those difficult learning processes where you need the containment of the equine for more meticulous work. I would even use it for the beginning of obstacle training. It is MUCH easier to teach the equine not to be afraid of obstacles when you do it a very confined space. I begin obstacle training by placing my obstacles in the confined space BEHIND my Round Pen in my indoor arena…so much easier when they don’t have as much space to avoid the tasks! If you cannot place your obstacles this way, then just put them along the side of your Round pen and use them in it as needed.
- I am no longer afraid of getting a loan and paying more money up front if it will save maintenance costs in the long run. Remember that the replacement materials are always getting more expensive and the price never seems to go down! The Round Pen really IS a must for many reasons! It is a truly legitimate investment with its numerous uses. The Round Pen is an essential tool to set you and your equine up for success!
- With intelligent construction and attention to detail, your Round Pen will serve a multitude of uses for years to come and can be quite easy to maintain. A metal, angle-iron cap around the top rails will keep the animals from chewing on it when they are left standing and waiting for their lessons to continue.


 t the top that just catches through a four-inch sleeve on the post wing. It is easy to reach over the top for opening.


To learn more about Meredith Hodges and her comprehensive all-breed equine training program, visit LuckyThreeRanch.com, MEREDITH HODGES PUBLIC FIGURE Facebook page, or call 1-800-816-7566. Check out her children’s website at JasperTheMule.com. Also, find Meredith on Pinterest, Instagram, MeWe, YouTube and Twitter.
Covered in TRAINING MULES & DONKEY: A LOGICAL APPROACH TO TRAINING, TRAINING WITHOUT RESISTANCE and EQUUS REVISITED at www.luckythreeranchstore.com.
© 2013, 2016, 2023 Lucky Three Ranch, Inc. All Rights Reserved.

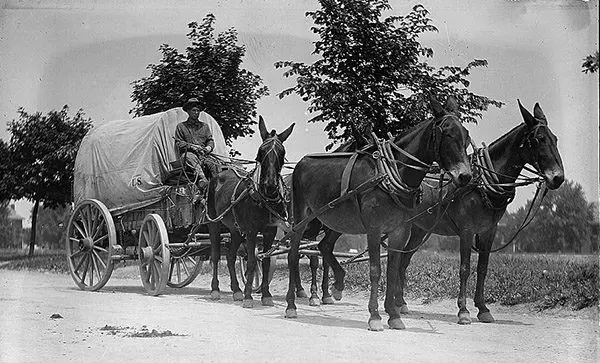 During the surge westward, heavy Conestoga wagons laden with all the possessions one could carry were often pulled by teams of mules that were either leased or owned by the early settlers. When cattlemen developed breeds like Texas Longhorns that could endure the harsh climate of the Great Plains, their mules pulled the chuck wagons that followed the large herds as they were driven the long distances to market. Improved farm equipment beckoned farmers to tame the West and what else could manage the vast land and long work hours save the mule? During these times, little thought was given to the possibility that this coveted land was already occupied by numerous Indian tribes.
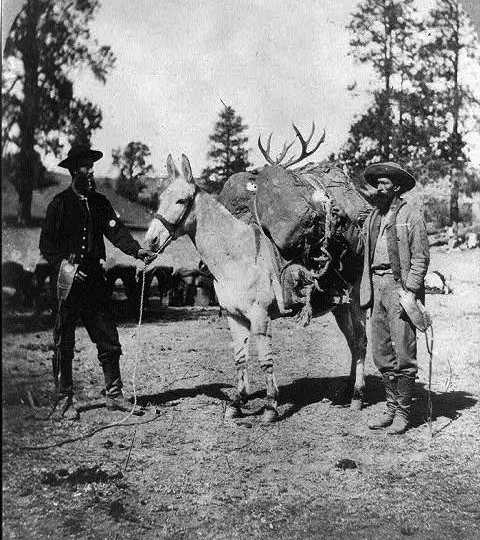 The American government purchased many mules that were two and three years old—entirely too young for use. If they had purchased mules all over the age of four, it would have saved a lot of heartache and expense. Contractors and inspectors seemed to be more concerned with the numbers they could sell to the government than the quality and usefulness of the animals. When purchased for use, this invariably resulted in the mules being put onto a train with teamsters who knew nothing of their character. Those who know mules know the deep affection they develop for human beings with whom they spend much time. Thousands of young mules were rendered useless by the government’s incompetence and ignorance as to their maintenance and training.
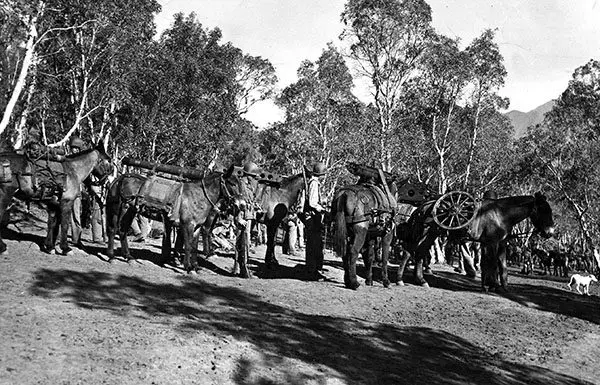 The Indians adopted the Spanish way of packing, as the Spaniards were noted experts. The Americans developed their own American pack saddle, but it was abandoned soon after its creation.
 In 1942, while in the service of the U.S. Army, Art Beaman became familiar with mules in a most curious way. He was working as an Operations Sergeant for a Headquarters in Northern California that determined whether troops were ready for combat. The troops consisted of 204 enlisted men, two veterinarian officers, four horses and 200 mules. Being a non-rider, Art was on and off his horse three times in the first ten minutes of the trip into the mountains. The First Sergeant finally decided to put him on a mule and open his eyes to the redeeming qualities of his mount. The next day, Art was able to say, “That mule and I were really a team…by this time, I trusted my mule so completely that I could have stood up and sang the national anthem as we slipped and skidded along!”
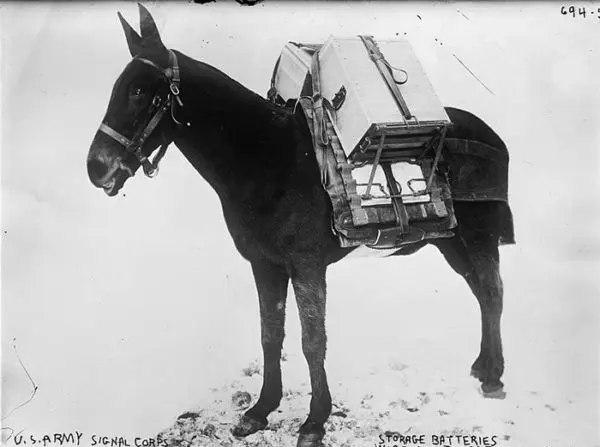 Those who have experienced the spiritual connection with mules all have their own individual stories to tell. From The Black Mule of Aveluy, by Charles G.D. Roberts, comes one of the most amazing World War I battlefield stories I’ve ever heard. It is the story of a man and a big black mule on a rain-scourged battlefield. “The mule lines of Aveluy were restless and unsteady under the tormented dark. All day long a six-inch high-velocity gun firing at irregular intervals from somewhere on the low ridge beyond the Ancre, had been feeling for them. Those terrible swift shells, which travel so fast on their flat trajectory that their bedlam shriek of warning and the rendering crash of their explosion seem to come in the same breathless instant, had tested the nerves of man and beast sufficiently during the daylight; but now, in the shifting obscurity of a young moon harrowed by driven cloudrack, their effect was yet more daunting.”
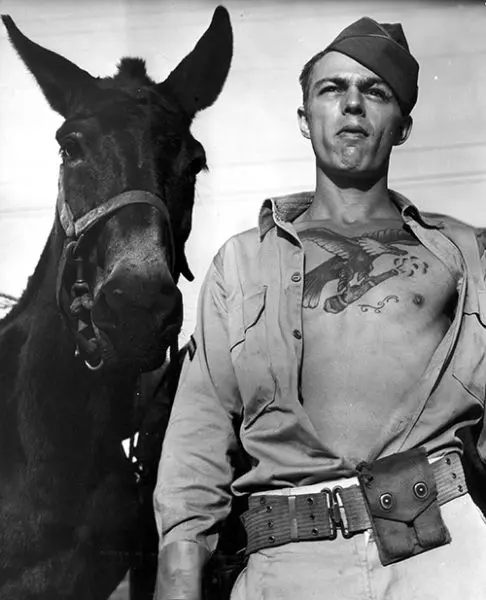 Jimmy Wright remembered the blast and saw where he was. He was afraid his shoulder had been blown off, yet he could move both arms and discovered something was pulling on him. “He reached up his right arm—it was the left shoulder that was being tugged at—and encountered the furry head and ears of his rescuer! Reassured at the sound of his master’s voice, the big mule took his teeth out of Wright’s shoulder and began nuzzling solicitously at his sandy head.”
 George Washington was a fairly well educated man and, “the copybook which he transcribed at fourteen years of age a set of moral precepts or Rules of Civility and Decent Behavior in Company and Conversation was preserved.” Practical experience was the foundation for his best training in outdoor occupations and not books. He was a successful tobacco and livestock farmer early in his teens and mastered the art of surveying to plot the fields he inherited. It is no accident that George Washington became not only the father of our country, but also, the first organized mule breeder in America.
 Respect for donkeys and mules is the only way to motivate them to action. Their rugged individualism will tolerate no less. The mule exemplifies the “All-American,” as set forth by the colonists. The colonists were thought to be stubborn in their quest for individual freedom by the British Crown that super-imposed itself upon their individual liberties. Like the colonists, mules will challenge anyone who challenges their individual liberties! It is only fitting that the mule would be fully revered and appreciated by a man of such distinction as George Washington.
 The Erie Canal was the longest canal built in the shortest amount of time for the least amount of money. It had continued success for many years because of the use of donkeys and mules to pull the barges along the tow path. “In the annals of the Erie Canal, we find little credit given to the mules; yet, by virtue of their strength and endurance and sagacity, the western wheat reached New York City in due time and industrial products moved west.”
 the canal, but it was quickly and safely guided back to shore by the lead around its neck. Where the walls of the canal were too steep to climb back out, the villagers installed ramps at intervals along the canal to serve as an easy escape from the water, should the mules fall in. These ramps were covered with a heavy planking containing thick slats, or “cheats,” where a mule could get traction coming up the ramp. In the off-season, the planking could be removed and held over for the next season.
 After the Civil War, farmers were again at a loss for man-power and mule-power. Tennessee joined Kentucky as another leader in the breeding of mules and donkeys. During the war, much of the stock had been destroyed or starved to death, so, from 1883 to the end of the 18th century, there was a surge of asses imported from Spain to replenish the stock. This all but depleted the good stock for sale left in Spain.
 Terrors of Death Valley seemed to arise from only three causes: extreme heat, excessive dryness of the atmosphere, and lack of water. The president of the Eagle Borax Company, Mr. I. Daunet, was forced to kill his animals so he could drink their blood to survive, as blood can replace water. After this devastating near-death experience, and finding the daunting heat unbearable, Mr. Daunet was happy to remain, thereafter, in his office.

 Many people ask me when the first mules appeared on this earth. Historically, mules have their roots in the Bible. Contrary to the popular belief that mules are so lowly and stubborn that they would have to be the mount of serfs, they were—in the beginning—the mount of kings!
 “And Absolom met the servants of David. And Absolom rode upon a mule, and the mule went under the thick boughs of a great oak, and his head caught hold of the oak, and he was taken up between the Heavens and the earth, and the mule that was under him went away.” (II Samuel 18:9)
 The highest intelligence residing in animals is that of the mule. He inherits athletic ability and “horse sense” from his mother, the horse, and incredible wisdom and strength from his father, the jack. Perhaps the kings of yore finally tired of being publicly humiliated by their superior mules, or perhaps they just couldn’t muster the patience or humor to deal with them anymore, but mules were eventually replaced by horses as the mount of choice, and were subsequently used primarily for packing and draft work.
 There is a volunteer organization in Israel called HAI-BAR, (an Israeli word meaning “wildlife”). This organization was established to protect animals that had thrived in the Holy Land during the Old Testament years, but that are now dangerously close to extinction, due to reckless use of land resources. HAI-BAR South, established in 1964, opened 3000 acres to the general public in 1977 for the express purpose of protecting herds of wild species from Biblical times. A second reserve, HAI-BAR Carmel, was established in the center of Israel near Haifa on Mount Carmel, where 2000 acres were fenced off to accommodate and protect even more Biblical animals. These reserves are still in operation today.
 The unique personality traits of the mule come from the ass. Unlike horses, mules are naturally curious, but are also suspicious and require time to size up a situation before acting. For this reason, it usually takes time for people to warm up to mules and time for mules to warm up to people. Because their judgment of people is unmatched, it is wise when buying a mule to allow him to pick you! A lot of the mule’s so-called“stubbornness” is really a sense of self-preservation. If he has a negative experience, he is not likely to repeat it. His memory serves him well and he never makes the same mistake twice. For this reason, it is important that the personality of the mule and his handler are compatible and that they actually like each other.


 Man has always sought to better himself and his environment. He seeks to set shining examples to all, however, he falls short due to negative aspects in his character. The ass, who has always been humbled, does not seek to set examples, he is an example with his honest and faithful ways. He is quick to accept that which is good and tolerant of all else. This unique character coupled with his physical abilities makes him an excellent life partner.


 In the beginning, my home, Lucky Three Ranch was a 10-acre sheep ranch with a small house and hay barn, an old Quonset hut, a feed barn, four three-sided sheds, and a perimeter fence made from sheep fencing with barbed wire on top. It was crossed-fenced around the sheds with some heavily chewed board fences and anything else the previous owner thought could be used for fencing. I’d already had experience with horses, but it wasn’t until my first mule, Lucky Three Sundowner and my first donkey jack, Little Jack Horner, finally arrived at the new Lucky Three Ranch that my lessons with Longears really began!
 One of the first things I found out about Longears is that they are incredible artists, and they will “sculpt” anything and everything they can get their teeth, rumps or hooves on! My Longears immediately set to work sculpting the posts on three sheds that were near the house and the fence posts around them. We tried everything to get this to stop, but to no avail, and in three short years, we ended up with posts that were no bigger than toothpicks in some places and marvelously contoured from top to bottom, into all kinds of remarkable shapes. We hated to put a cramp in our mules’ artistic style but, clearly, the wooden posts and sheds had to be replaced.
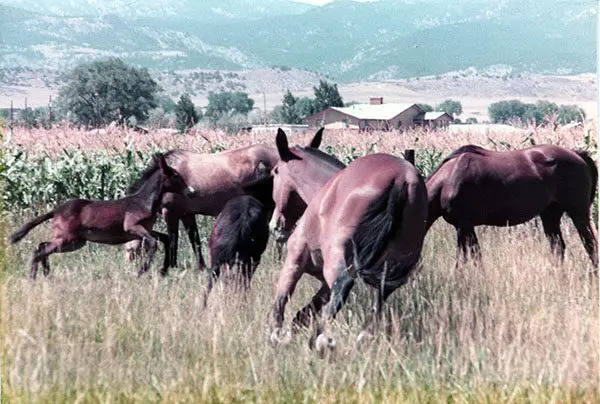 By now, we had bred three more mules, so while we were working on replacing the three sheds, we put the whole herd of mules and mares into a five-acre pasture. One day, while we were working on the new sheds, the whole herd suddenly showed up behind us! Apparently, one of our equines had pulled a “Houdini,” opening the gate and letting everyone out of the pasture. Being the affectionate and curious animals they are, our Longears (and horses) then decided they’d better come see if we needed any help.
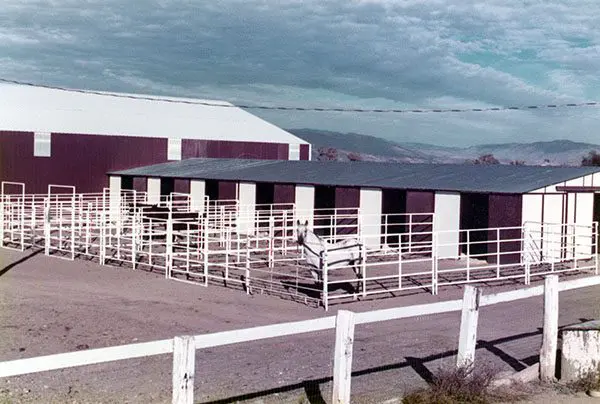 the north side of the barn began to get soft and muddy again and more pea gravel was needed. Rather than doing the runs one run at a time, the seven mules on the north side of the barn were turned out, and we took down only the panels on the north side, so the delivery truck could dump the pea gravel directly on the site. The remaining mules on the south side of the barn were left in their stalls and runs.
 We spent the next several years taking down barbed wire, mending old field fences and replacing the old sheds with steel Port-A-Stall sheds, replacing cross fences with vinyl, building two more steel barns and lining our indoor arena with steel. As we all know, Longears are very intelligent, and they will use their “smarts” to figure out a way to simplify a task. If you want to step over a fence but it’s a little too high, what do you do? Well, if you’re a mule, you sit on it to push it down, and then you can step over it. Although the horse fencing we used to replace the sheep fencing was fairly high, my Longears still managed to sit on the middle of it, bowing it out into incredible, irregular shapes…after they had first shorted out the hotwire, of course. This was their daily ritual. Maybe they had a crew meeting first thing every morning and planned how they’d do it. Who knows?
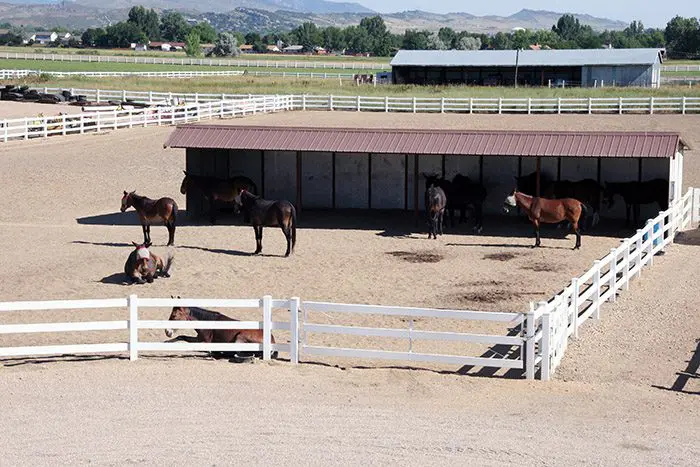 But to this day, I still don’t know how they shorted out the hotwire! One thing my Longears have taught me through our years together is that, if you are going to have mules, you’d better learn to have a good sense of humor or you will never survive their pranks! We learned to drill holes in the posts for a hotwire across the top of the new vinyl fencing and that worked very well, but that was only after they had removed all the vinyl rails from the fence overnight. They were delighted that I had given them their own “Tinker Toy” set. They never left the pen, although they could have! Each time our mules have made “art,” pulled pranks, or managed amazing escapes, we learned how to improve our system and materials, until finally upgrading to an all-steel facility with vinyl fencing topped with a relatively inaccessible hotwire. Now we no longer need to worry about what the mules and donkeys might do…until the next time. (PLEASE don’t tell Ely I said that!)


 Shaping behaviors takes reinforcement to the next level. Now you are working with the tendency of an animal to perform in the right way and guiding that performance toward your ultimate goal. This is called successive approximation. For example, if you are teaching a turn on the haunches on the lead line, you must first ask for one step forward. Then walk toward your animal’s shoulder and ask for the turn. In order to teach him to plant his rear pivot foot before the turn, the process must be broken down into smaller steps. First, ask for the step forward and reward him immediately when he complies. Then move on and ask for one step forward and one to the side, rewarding him again when he’s successful. Then ask for one step forward and two to the side and reward, and so forth.
 An example of shaping a behavior by breaking it down into a string of very small steps is how I taught my donkey, Little Jack Hornerto canter. Although many people tried to tell me that donkeys don’t canter, I had seen donkeys canter when they ran free, so I knew it was possible. First, I set the goal of cantering a circle. No one could run ahead of my donkey fast enough to reward him with oats and negative reinforcement such as the crop didn’t work well at all, so I had to find another kind of reinforcement. Using the pleasure principle of finding the best motivation for an action, I put my cycling broodmares into a pen at one end of our hayfield and I took my jack to the other end. When asked to canter toward those mares, he did so eagerly. He first learned to canter in a straight line. I reinforced the action verbally with, “Good, good,” while we cantered, and then I gave him a food reward once we reached the pen.
 The next time I did the same thing, but this time I turned my donkey in a large half-circle route to the pen, and I rewarded him again the same way. The third time, I asked for a little more of a circle and I got it. Several times later, I was able to get an entire circle before we ran the line to the pen with the mares in it. Once my donkey learned that he could canter easily with me on his back, I didn’t need the mares anymore.
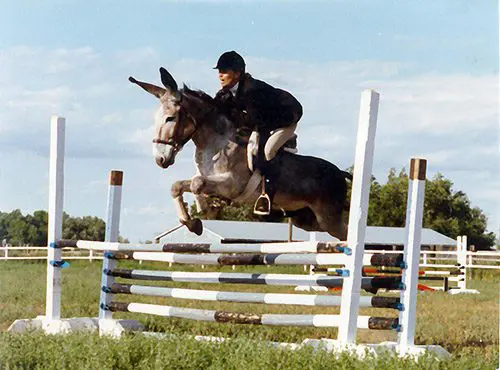 to trot, I would finish the circle, stop him and praise him with the food reward. It was slow going the first few tries, until I started counting strides and realized the jack was adding one more stride at canter with each attempt. Before long, he was cantering the full circle with ease on command.
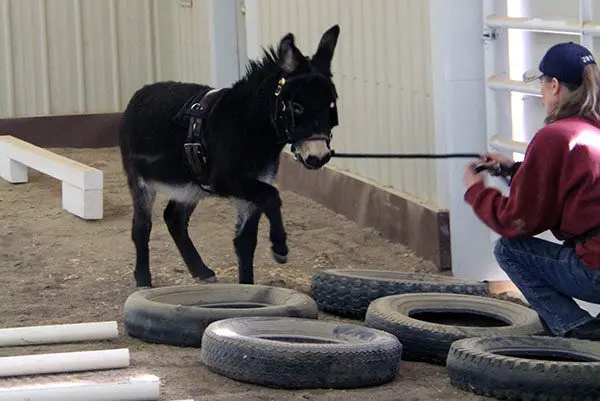
 As you begin to understand the principles of shaping and modifying behaviors, it is important to realize that it is a lot like dancing, cooking or any other learned skill—the only way forward is with practice. The more you practice, the better trainer you will become. You have the opportunity to practice positive reinforcement every moment of your life, reinforcing behaviors in everyone—the cat, the dog, your husband or wife, your children. It becomes a game of noticing and praising positive accomplishments while setting clear boundaries to all behaviors, large or small. With practice, you will increase your awareness and, thus, your skill. The success or failure of your efforts to shape behavior in any animal does not depend upon your expertise, but on your patience, respect, consideration and consistency during the process. This may not be the easiest way, but it is extremely effective—and it’s fun!
 When I began working with mules and donkeys, I quickly realized there would be no shortcuts to successful training. I steered clear of fads, trends and shortcuts and, instead, based my training program on Behavior Modification techniques developed by world-famous behaviorist B.F. Skinner over a century ago. For many years now, I have used these techniques to successfully train my own champion mules and donkeys, and I continue to share my method with millions of people through my books, an award-winning DVD series, multiple television shows, my comprehensive website and on Social Media.
 Animals, like humans, need a predictable routine in order to learn. Just as children progress through grade school, building on their knowledge with each successive grade, animals learn best when a solid foundation is laid for each new skill. By creating a logical program from the outset, we avoid the confusion that can lead to resistance.
 Everything we do, every behavior we choose, is based on an instinctual desire to experience pleasure and avoid pain. Our choices reflect our experience. They are “reinforced” by the pain or pleasure they have given us in the past. Behavior Modification uses the same principles of positive and negative reinforcement with an emphasis on positive reinforcement.
 Positive reinforcement also takes the form of verbal cues. When your animal performs the desired behavior, you should, simultaneously and with appropriate enthusiasm, say the word, “Good!” This works well when it isn’t possible to give a food reward right away. Clicker training, which has become a popular and effective means of audible reinforcement, is similar and applies the same concept. It’s immediate, it’s consistent, and it can be used with all mules, donkeys and horses to reinforce behavior. However, I feel that it is better to use your voice than a clicker, as the sound of your voice promotes engagement with your equine on a more intimate level, so your voice will yield better results than clicker training.
 As your equine learns certain behaviors, you can reinforce the learned behaviors less frequently and focus on frequently rewarding new achievements. Gradually, your animal will become satisfied with a verbal reinforcement for established behaviors, and he will comply for longer periods between food rewards. This shift from a predictable, or fixed, schedule of reinforcement to a variableschedule helps with skill progression. For example, in the transition from lunging when your animal was initially given a reward after each set of rotations in the round pen, to riding, he can eventually be ridden through his entire 30 to 40 minute session before receiving a reward.

 Once your equine has mastered tying and leading in the small pen, he can then move on to a designated work station where he will not only be groomed, but will also learn to accept tack in preparation for the round pen. This should be a place that has a good stout hitch rail and easy access to your tack and grooming equipment.
 Keep an eye on the pressure you apply whenever using these various grooming tools. Different animals will have different sensitivity to these tools and will tolerate them better if they know you are not going to cause undue pressure or pain. Learn to brush the mane and tail starting at the bottom and working upward, and use a conditioner such as baby oil to keep from pulling or breaking the hair. (Baby oil will also keep other equines from chewing on the tail.) A shedding blade can be an uncomfortable grooming tool when used improperly. When using a shedding blade to remove mud around the head and ears and even on your animal’s body, be careful to minimize his discomfort by monitoring the pressure you apply to each area and working VERY slowly. When bathing him, be extra careful not to get water in his eyes or ears. These types of consideration for your equine’s comfort will help build his trust and confidence in you, and it will help make training easier and more enjoyable for both of you.
  doing. If you are not sure about what tack to use when, go to the Lucky Three Ranch website for more detailed information, or ask the experts in your area. Make sure all tack and equipment fits your animal properly. If it doesn’t, it can cause adverse behaviors during training.
  behavior you are seeing. Equines are very honest about their responses, and if they are not doing what you expect, it has to be in the way you are asking. Also, don’t hurry your equine. When asking for the walk, make sure that the walk is even in cadence, balanced and regular—not hurried. Only after your animal is correct in his execution of one gait, should you move on to the next gait. When first introduced to the Round Pen, it is not uncommon for an equine to begin work at the trot and then, as he becomes more comfortable with the new area, at the walk.
 The arena is the place to really start focusing on forward motion and lateral exercises to further strengthen your equine, and it is the place to begin fine-tuning his balance, first during leading exercises, then Ground Driving and finally while he is carrying a rider. The Hourglass Pattern in the arena is also a good place for you to fine-tune your own riding skills, so that you learn to help your equine maintain good balance and cadence, on straight lines and while bending through the corners. In order for your equine to correctly go through the corners, you will be asking him to bend the muscles through his ribcage so he can remain upright and balanced. Equines are not motorcycles and should not lean around the corners. The power should always come from the hindquarters to keep the front end light, supple and responsive to cues. If his front end is heavy and sluggish, your equine is not adequately stepping underneath with his hind legs and will thus, lose forward impulsion and power and will not properly condition his muscles.

 Training isn’t just a way to teach your equine to do certain “movements,” but a way for you to help him to grow physically and mentally healthy, and to enable him to learn to cope with the demands that will be put on him during his lifetime—much like raising a child to grow up to be a healthy and productive adult.
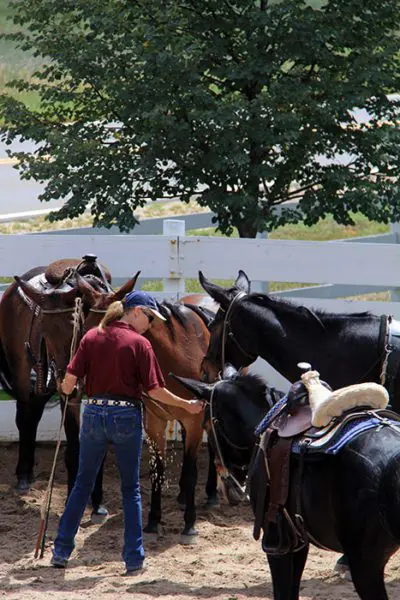 The subtleties in your attitude and approach, along with a solid knowledge base, can make all the difference in your training program. Whether your equine is a foal or an older animal that you have just obtained, whether he is trained or untrained, the process is the same and it’s never too late to get started with the right kinds of expectations in mind. You are creating a bond, developing the foundation for a healthy friendship, and setting the ground rules that will dictate the positive extent of your continuing relationship with your animal. It is important to be an active participant in your animal’s training. After all, you wouldn’t have someone else make a friend for you. You’d do it yourself—one-on-one.
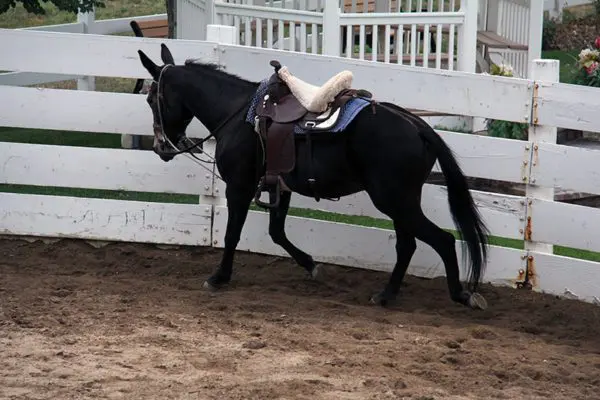 solid foundation with him before moving on to more elaborate maneuvers will yield better results. Remember to always be aware of your equine’s physical, mental and emotional responses during training. For instance, you may think that, once your mule is moving around the round pen at all three gaits with a reverse, he is ready to begin riding, but this may not necessarily be true. Considering that it takes years to really condition muscles to their maximum strength, six to eight months of doing round pen exercises is not really that long a period of time. If you don’t spend at least six months on flatwork leading training and six months on obstacle leading lessons to promote strength and balance in good posture, you can greatly hinder your equine’s ability to perform in the round pen on the circle. In turn, spending less than six to eight months in the round pen will not produce the best results in muscle development. If you move through conditioning too fast, it will affect your animal’s mental attitude toward training and he will very likely experience soreness and emotional depression. As a result, he will most likely become resistant to training.
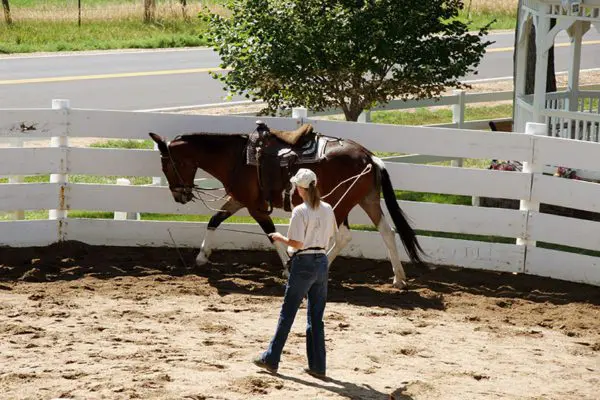 know what exercises you should begin with and which exercises should follow. Don’t let yourself get sucked into drilling on something that just isn’t working. If you run into problems and things aren’t working out properly, just go back and try something that is similar in its demand but simpler for you and/or your equine to execute. Sometimes, it is just a manner of approaching the problem differently or leaving it to another day. Like humans, equines have their own individual ways of learning and it’s up to you to figure out what works best with your particular equine on any given day. You can find my suggested approaches to this in my DVD series, Training Mules & Donkeys and Equus Revisited. Note: Don’t forget to reward your animal for positive behavior.
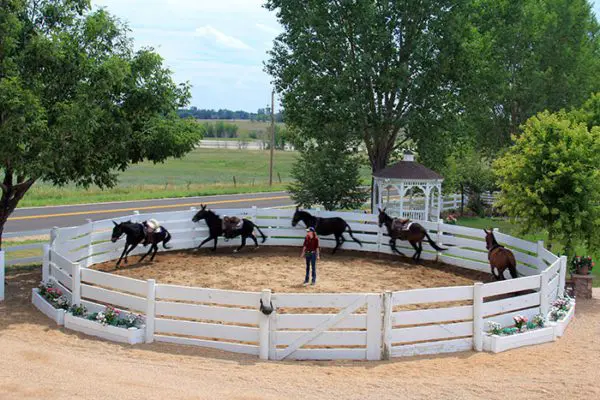 Benefits of group lessons Equines can learn from each other, so it can be beneficial to work them together. When you are working with foals, it is helpful to take “Mom” along or have her tied nearby during training sessions. Green animals often do better on the trails during the first year if they are ridden along with well-trained trail animals. If you have multiple animals to keep conditioned, you can even lunge them together, provided your work in the round pen has been consistent with each of them separately from the beginning. In driving training, the “group lesson” idea of hitching young animals with the “old pros” has been a common practice for many years. Lunging “teams” together can also provide beneficial exercise. Speaking of “old pros,” it is to your advantage to find a local instructor/trainer with whom you can periodically take lessons. This gives you a way to check to make sure you stay on the right track and continue to improve your own skills. Lists of trainers and instructors can be obtained from the United States Equestrian Federation.


 The Tarp: The Tarp will dramatically affect your equine’s balance and coordination. Its uneven surface and the noise it makes when stepped on will typically put your equine off-balance and may cause him to veer from side to side as he crosses it. You can use the same “Stage One Obstacle” approach, as described in Part 2 of this article, to change his fear into curiosity. Again, as you did with the bridge, break this exercise down into small steps; stopping at the edge of the tarp, stopping with the front feet on the tarp, then all fours, then fronts off and hinds on, and then finally walking off the tarp to a complete halt and squaring up. Just learning to get through the obstacle will diminish your equine’s fear and replace it with curiosity and confidence. Then assume the showmanship position and do all obstacles again with Stage Two strength and balance, and with good posture in mind for both of you. You will know that your equine is ready to move on to the next stage of training in the round pen when you can toss the lead rope over his neck and he will negotiate all obstacles correctly, keeping his head at your shoulder and is showing no visible signs of a loss of balance, or any inability to obey your commands. He will then be placing his feet so that his balance is evenly distributed over all four feet and his foot placement is coordinated and deliberate. At this point, the obstacles in general should be an effortless task.
 their confidence in the handler. When we begin leading training, the equine is introduced to all kinds of obstacles. In Stage One of obstacle training, we first approach the obstacle and encourage them to investigate, changing their fear into curiosity and instilling confidence in them and in their handler. When they are compliant, they are rewarded with crimped oats and praised for being so brave. By the time they have learned to confidently negotiate other obstacles, the trailer is no longer a threat to them. They will most often just follow you right in, knowing (since they have never been trapped into complying) that there is a crimped oats reward waiting for them. For those animals that are still hesitant about the trailer and just won’t follow, we use a second method that restricts backward movement and this is explained in detail
  Jumps: Jumps are a good exercise to do on the lead line, but you must be careful not to over-jump your animal in the beginning. Because they are large, they must have great strength in the hindquarters to boost their heavy bodies over a jump, and if they are not strong enough, they can easily pull a muscle or worse. Jumping should be done only after all other obstacles have been thoroughly mastered. In Stage One, approach the jump the same way you would any other obstacle, building confidence and trust. Then use Stage Two to finesse your equine’s movements. Mules have the ability to jump from a standstill, so you can still use the stop, square up, wait for the command to jump, jump, stop and square up again on the other side. This ability allows you to maintain control of your mule when on the ground with the lead line or in the drivelines. If you are training a horse or a donkey, use a longer lead rope, so after squaring up about four feet in front of the jump, he can get a trotting start to the jump. Whatever equine you are training, be sure to keep the jumps very low in the beginning.
 The Back Through “L”: The Back Through “L” will fine-tune your equine’s response to “Whoa,” and he will learn to allow you to adjust the different quarters of his body and move each of them independently. First, walk forward through the obstacle, then stop at the end and turn around to face backward. Then, slowly and steadily, back through the entire obstacle. Once he has gotten this down fairly well, you can then go back to the beginning, and back one step (but only one!). Then proceed forward to the middle of the first straightaway, stop, back up two steps and square up. Go forward again to the angled rails where they begin the turn, halt, and then move his front feet one or two steps sideways with gentle pulls on your lead line at the halter, into the middle of the second straightaway, and halt. Then ask for one or two steps forward into the second straightaway and halt. His back feet will be cutting the corner into the 90-degree turn, so after he halts, tap him lightly on the hip with the end of your lead rope to move the hindquarters over one or two steps to straighten him into the center of the second straightaway, halt and square up again. Finish the obstacle by walking to the end of the straightaway, halt and square up again. Now do the same series of steps in reverse. This exercise teaches him to maintain his focus and balance throughout the obstacle and to learn to wait for you to move his front and rear quarters into any position required, taking only as many steps as you request. This will improve his negotiation of forward and backward movement, as well as beginning to strengthen the hard-to-condition inside forearm, gaskin and stifle muscles.
 tire. After he is comfortable walking through it, break it down into smaller steps in Stage Two: stop before the tire, then one foot in the tire, then two front feet in the tire, then allow the front feet out and the back feet in and then exit.
 Side Passing the “T”: Because Side Passing the “T” is a complicated and advanced obstacle, it is important that your equine execute the straight forward obstacles and lateral Tractor Tire obstacles before attempting to do the “T.” The “T” is a great way to fine-tune truly sideways lateral motion, where both front and back feet are crossing over diagonally and simultaneously in a balanced fashion, moving the equine laterally to the right and to the left as he negotiates the three different rails in the obstacle. In the same obstacle, you will be breaking the simultaneous motion into a turn on the forehand and a turn on the haunches in the middle of the obstacle, in order to make the turns into the next lateral motion down the next rail. This obstacle uses all the elements that have been taught in previous obstacles. It also lays the groundwork for perfect communication between you and your equine. In order to correctly execute this obstacle, he must pay attention to you at every step.
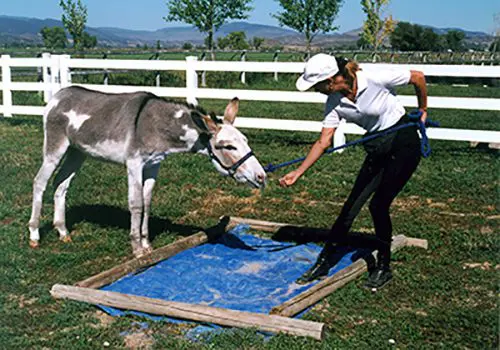 lead line, keep in mind that you are not only teaching your equine to negotiate an obstacle, you are also conditioning the muscles (especially the ones that are closest to the bones) while, at the same time, teaching balance, coordination and self control. In showmanship training, you focused on strength and balance on the flat ground. While working with obstacles on the lead line, you will now begin to add coordination during this second phase of obstacle training. Remember: Do not put obstacles in your equine’s stable area and/or living quarters, in an attempt to make him “live” with the obstacle. This only serves to create insensitivity and in some cases, cause greater fear. The stable area should always be your animal’s resting place, just as our bedrooms are for us—a place of rest, relaxation and privacy.
 When your equine is more willing to come through the obstacle, you can regain your showmanship position, with your left hand carrying the lead line and your right arm extended in front of you, pointing toward the direction in which you will be going. When he is finally listening and will follow at your shoulder over or through the obstacle and stop or back up at any point during the negotiation of the obstacle, you can then turn your attention to whether he is actually traveling forward and backing up in a straight line, and whether or not he is stopping squarely. Do this the same way first on the lead line, then much later in the drivelines and, lastly, under saddle. How he negotiates the obstacles will have a direct bearing on how his muscles are being conditioned and how his balance and coordination are being affected so don’t be afraid to ask for more precision going forward.
 Ground Rails and Cavalletti: Four ground rails and four cavalletti are good tools for straight, forward exercises that will promote stretching of the body in true and correct forward motion. These exercises will also develop rhythm, balance, cadence and suspension within the gaits, first on the lead line, and then later during ground driving and under saddle. Ground rails and cavalletti are also great for enhancing your ability to stay in stride with your animal. You should first do the exercises over the ground rails. Then, for jumping training, you can graduate to the 6″ cavalletti setting, then the 12″ cavalletti setting and, finally, the 18″ cavalletti setting. Your equine will learn to suspend and place his feet in a balanced and deliberate fashion while you learn to do the same. Getting in rhythm with your animal’s stride will improve your equine training experience and make things a lot easier and safer.
 stop at the base, square up your equine and stand for a few seconds. Then ask him to put his two front feet on the bridge, square up and, again, stand for a few seconds. Next, ask him to put all four feet on the middle of the bridge, square up and stand still for a few seconds. Now ask him to take his two front feet off the bridge and leave the two back feet on it and square up again. Most equines can do the first few positions pretty easily, but when the front feet go off the bridge, the equine’s balance is often thrown forward and they find it very difficult to stop in this position. If he is able to sustain this position for several seconds before you give the command to continue forward, he has completed the bridge work.