

Kyle Davidson
Posts by Kyle Davidson:
This is the moment
The following is from the American Wild Horse Conservation:

The first roundups of 2026 have already taken place.
Wild horses have been captured.
Families broken apart.
Operations carried out with little time for the public to respond.
And now, a far larger number are still ahead. The Bureau of Land Management (BLM) plans to remove 14,830 wild horses and burros this year—many immediately after foaling season, when families are most vulnerable.
| PROTECT WILD HORSES → |
Because once large-scale roundups begin, they move fast: Helicopters push horses to exhaustion as they chase them for miles, foals struggle to keep up, and horses of all ages lose their freedom forever.
That’s why AWHC exists, Meredith. We are:
On the Ground: Deploying observers to document roundups and expose the truth
In the Courts: Challenging unlawful actions and fighting for stronger protections
On the Range: Expanding humane fertility control to prevent future roundups
In Washington: Advocating for policy reforms that end this broken system
This work is urgent. And it’s happening right now. But it depends on the support of people who refuse to look away. Because what happens next—for this generation of wild horses—is still being decided.
Will you make a donation to power our work?
| DONATE NOW |
With gratitude,
American Wild Horse Conservation

MULE CROSSING: Understanding the Use of Cruppers and Breeching
By Meredith Hodges
- The purpose of tack and equipment has always been to give man comfort and leverage against the equine’s resistance during training, but I believe that the equine is “talking” with his resistance, and this is a cue to find another alternative to achieve harmony when something isn’t working.
- Trail Riding and Jumping are two activities where it is positively essential to do core postural training with your equine to solidify his symmetrical balance when in motion, or even standing still.
- The animal with deliberate foot placement and a solid balance is a much safer smoother riding animal.
- There is an ongoing discussion about the use of cruppers and breeching when riding mules and donkeys, and even some horses. The purpose of both is to keep the saddle from sliding forward when the equine is in motion, whether he is tracking on flat ground or going up and down hills. Inappropriate use of both devices could give the equine problems.
- Whether or not to use a crupper or breeching is not an either/or decision. My equines taught me that in order to make an educated decision about which to use, one needs to take into account the anatomy of the equine and the effect of a lot of moving parts have on his body in motion during different activities.
 Good conformation is important in allowing the equine to perform to the best of his ability, but so is developing core strength elements such that the skeleton is ideally being supported symmetrically so the equine’s body can move properly and in good equine posture.
- FEEDING: When developing the equine’s body, it is important to know what feeds are the healthiest for him. There are lots of different ways to feed your equines today, but I have found a regimen that works best. I did this through constant and continual research using a field study for more than 50 years with 32 equines of varying breeds, types and sizes.
- Most feeds are tested in laboratories.
- Dehydrated feeds take fluids from the digestive tract and can cause choking (researched with my vet). You cannot add enough water to replace the fluids that are naturally in the digestive tract.
- The oats, Sho Glo, Mazola corn oil and grass hay produce ideal body shape and conditioning, even with minimal exercise.
- Sho Glo gives the body the nutrients it needs for daily maintenance.
- Supplements should not be fed without first getting a base line of what the animal is lacking.
- Salt and other minerals should be free fed in a trace mineral salt block. White salt alone, or minerals measured and put in the feed, can often be the wrong amounts.
- The equine will use the trace mineral salt block when and how often they need to. It is their “Natural instinct.”
- Mazola corn oil (no other) keeps the hair coat healthy, the feet ideally lubricated and hard, and maintains the ideal conditioning of the digestive tract regularity.
- We feed a Brome/Orchard Grass mix that we harvest ourselves. We feed the hay three times a day and the oats mix once a day in the evenings. Never feed broad leaf hay like Alfalfa, or Fescue Grass Hay.
- Fescue Grass Hay has been proven to cause spontaneous abortions. Since it has this toxic effect, it would probably not be good for any equine, pregnant or not.
- Our equines are kept in dry lots, or stalls and runs. We limit their turnout to five hours a day to prevent obesity and other problems like allergies, prolonged exposure to flies and other insects that live in the grassy pastures.
- Use no types of rewards or “treats” besides crimped oats (or any other kind that is broken open). They cannot digest whole oats, and other “treats” can cause gas or other irregularities in the digestive tract that can lead to colic, twists, founder and even allergies.
- Our equines are wormed with Ivermectin every other month with the cycle broken in November with Strongid. This regimen prevents the cycle of worms (No fecal tests are needed because the larvae never have a chance to mature and show up in the manure).
- This regular and frequent use of Ivermectin helps to repel flies along with a weekly spray of Farnam Tri-Tech 14 (sometimes twice a week if the flies are inordinately thick). Ivermectin is a totally safe drug and their bodies do not build up a resistance to it.
- Most equines on other kinds of feeding programs develop bodies with a protruding spine and a “hay belly” hanging from it. The shape is quite different from a balanced body with core strength. They have an indentation along both sides of the spine instead of having a spine that “melds” into the torso with uniform conformity. My feeding program produces an ideal body shape with ALL my equines with minimal exercise. The SHAPE of the animal’s body is important for the correct fit of the tack and equipment.

- Energy and blood circulation find open tracks throughout the body and when unobstructed, will run freely from the core of the body to the extremities in a healthy equine. Core and bulk muscles that are developed symmetrically will support the skeletal frame, the cartilage and ligaments that surround the joints, and the tendons and soft tissues that tie the skeletal frame together.
- All these things work together to support the proper internal organ functions. When the equine is in good posture with symmetrical core strength and balance, the vital organs are unobstructed and function as they should.
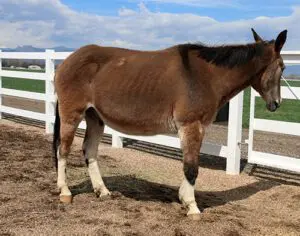
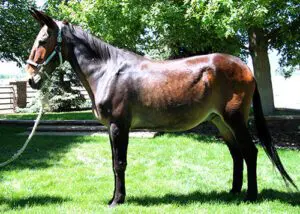
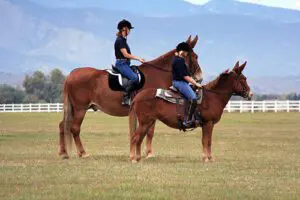
TACK & EQUIPMENT should fit you and your equine like a glove. Good postural movement coupled with close fitting and properly adjusted tack and equipment create harmonious movement with minimal resistance and chafing.
- The tack and equipment we use has an effect on the equine’s movement in spite of his shape. In order to obtain freedom of movement, the elements of the equine’s anatomy must be allowed to move freely through every joint of his body.
- The saddle should be placed over the center of gravity, which is in the center of the torso, equidistant from the stirrup to the front legs and from the back legs. When correctly placed, the front girth will hang four inches behind the elbow (forearm) where the body begins to swell and the skin is thicker than the sensitive skin right behind the forearm (where equines most often get chafed). Then it will definitely clear the point of the shoulder (where they also get chafed and develop white hair).
- I like to use string girths in front because they will stretch slightly, allow air flow and breathe. I like leather girths for the back girth.
- The front girth should be snug, but not too tight. The back girth should be snug, but not as tight as the front girth.
- The back girth should be perpendicular to the ground as they were developed only to hold down the back of the saddle (invented by ropers to balance the saddle when the steer is stopped).
- Using the back girth to hold the saddle back might seem like a good idea, but it puts the pressure on the fragile undercarriage rib bones that can break easily. The rib bones underneath a properly placed back girth are thicker and less likely to break with abrupt pressure.
- Any strap or girth that is too tight will irritate the equine and cause bad behaviors, chafing as well as, saddle shifting. Any strap or girth that is too loose, will not do its job and will cause chafing.
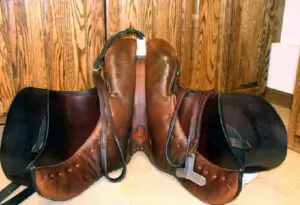
- Mule Bars are not necessary if you have a well-made saddle and have a professional saddle maker shave the saddle tree flat at the withers. My 1972 Circle Y Stock, Equitation and Longhorn saddles have worked on all my mules for more than fifty years with that minor adjustment.
- Most saddles appear to be too high in the gullet and with insufficient body conditioning it puts pressure on both sides of the animal…localized pressure, instead of spreading the pressure points over a wider area underneath the saddle. This is particularly true with sawbuck pack saddles. That is why you see so many pack mules with white spots at the withers…unbalanced loads that will shift.
- When the horn sits lower and the saddle is spread across the back, the pressure points are wider spread and more comfortable for the animal.
- People talk about allowing air to keep the spine depressurized and cool underneath the saddle. They use thicker therapeutic pads, or pads that are pre-shaped, stiff and sit stiffly on the equine’s back.
- I prefer to use Navajo blankets and with older animals, or animals with more withers, I will add a fleece pad underneath it. This allows for more flexibility, compression and molding of the saddle and blankets across the animal’s back…like a glove.
- To allow for more airflow, you just stick your arm under the blanket and across the spine before you tighten the girth. The blankets will move upward into the gullet and provide protection of the spine from any undue pressure. The saddle is not PERCHED on top, and when you get on, you can find a place for yourself over the center of gravity.
- If the animal is in good equine posture with core strength in a solid balance, the saddle and equine will move as one with minimal abrasive movement.
- Beginning with the Leading Training, tacked up in an English, Eggbutt snaffle bridle (sometimes a flash nose band is needed to keep them from flipping the tongue over the bit!) and my “Elbow Pull” postural aid, you can begin to develop ideal postural movement.
- The lessons only need to be about 15-20 minutes a week in my Hourglass Pattern. It is simply important HOW you execute the pattern. Details are very important to allow for self carriage in the equine.
- When fed and tacked up properly, the issue of sweating, which also creates chafing, is minimized.
- CRUPPERS. Many people have approached me with many questions about cruppers. How do you introduce the animal to the crupper?
- It should be done in a Round Pen, properly introduced and coupled with the lunging exercise that they already know. Just allow them the time to get used to it before asking them to do any more than that…even if it takes several lessons.
- Note that you will need to reposition the saddle and readjust the crupper after it stretches a bit with the warmth of the animal’s body.
- Another concern is that the crupper can break the tail when under pressure. If there is enough pressure put on the crupper to break a tail, then the crupper should break first!
- Cruppers should be made of soft double or triple thick English bridle leather, with the buckles up by the cantle of the saddle and not near the tail!
- If an equine gets his tail stuck in buckles at the dock, it will affect his ability to stay in a balanced alignment, and if he falls he could land on the tail that is bent in an arc to one side.
- Proper adjustment of your tack and equipment is KEY! Tail chafing can be prevented by using Johnson’s Baby oil in the mane and tail during weekly grooming. If anything is too loose or too tight, it will cause chafing.
- Chafing occurs when the crupper is adjusted too tight or too loose.
- Use a D-Ring that is SCREWED into the tree at the cantle on Western saddles and use the metal “T” with English saddles. Do not attach it to the leather on the saddle.
- When the skeletal system is adequately supported with symmetrical muscle strength, especially over the top line, the animal is better equipped to use his body efficiently. With the crupper tension properly adjusted, he can tuck his tail and use his leg muscles to support his own weight while his spine remains flexed upward along the top line to support the weight of the rider.
- The extremities have full range of motion so he can pick each step with confidence and no obstructions.
- An animal with insufficient conditioning and balance will hollow his back and neck and try to compensate for his inefficiencies in muscle conditioning and movement.
- When pressure is put on the crupper of an animal with inadequate muscling, there is weakness over the top line and tail that will not support heavy weight going downhill and could possibly do damage to the spine at the dock of the tail.
- Just for the record, I have done lots of trail riding and three years of cross-country jumping over all kinds of terrain (3 miles, up and down hills, over twenty jumps) and have always ridden with a crupper on all of my mules, English or Western, even with heavy riders with nary an incident.
- If using a crupper, the animal has full range of motion in his body and legs with the maximum strength to back up any movement that would help to correct the rider’s position and keep him over the equine’s center of balance.
- BREECHING (or BRITCHEN) originates with pack and driving animals and has a distinctive purpose to keep loads from shifting on pack animals and to provide “brakes” for those in harness.
- Breeching generally has a “crupper” built in with straps on both sides to attach to the saddle and help to stabilize the load. Breeching should be adjusted snugly to do the job of keeping the saddle back, but will also shift the weight back and forth with the walking motion of the back legs and also cause chafing.
- Breeching that is being used with an inanimate object will not necessarily cause as much of a problem when the animal adjusts his own body as it does with a rider on board.
- An equine can adjust his load with his own body movements, but he cannot easily adjust a live load that works against his balance like an unbalanced rider would inadvertently do.
- The problem with breeching on a saddle equine is in the configuration and the way it sits anatomically. When going downhill, the breeching must be snug to do its job properly and it will keep the saddle from sliding forward. However, it also compresses the biceps femoris, a large muscle in the hindquarters that functions to extend the hip and hock joints, and causes a flexion of the stifle, and a rotation of the leg inward.
- When pressure is applied to this area, it restricts circulation and extension of the hind leg backwards and causes compromises in the muscles groups resulting in asymmetrical conditioning. This doesn’t pose a real pressure problem going downhill. The stifle joint is configured so it can lock when needed through a stay mechanism between the stifle and hock, but it should still have the freedom of full range of motion if it is to function properly and not get unduly locked up.
- When the actions in the animal’s body remain symmetrical and orderly all of the joints, including the stifle, are able to function properly. The stifle will usually get locked up only when there are chaotic and unsupported directional actions coming through the joint.
- When the equine has had the benefit of core muscle postural training, his movement will be more symmetrical, and his joints will work properly and in balance. Wear and tear is minimized.
- When going uphill, however, the breeching must still be snug to do its job, but the animal is not allowed full extension of the hind legs, so more pressure is put between backward motion of the femur and the breeching.
- This results in compromised circulation, restricted movement in the hind legs and an inability to control hind quarter foot placement. He is at risk of a misstep that could send him over backwards or sideways.
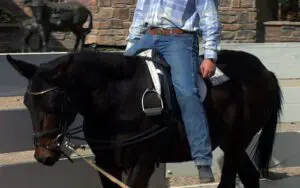
- In a crupper, the animal going uphill has full extension in his hind quarters, an ability to maintain good posture and balance and this results in exact foot placement to maintain that balance comfortably and safely (see photo under CRUPPERS).
- Even when driving, it is important that the harness is adjusted properly.
- The traces need to be the correct distance from the shoulder to the single tree.
- I prefer using collars because the traces are solidly attached and do not ride across the chest like a breast collar harness does and create the possibility of chafing when the equine is in motion.
- I prefer leather over Bio thane and Nylon because they do not warm up with elasticity and flexibility like leather does.
- The crupper assembly should be snug from the surcingle to the tail and adjusted the same way at a saddle crupper in tension and movement. The breeching needs to counter the traces and lock the equine firmly between the front and back, so when he is asked to back, he will have an immediate response. His rear will come into contact with the breeching, which will in turn, immediately begin moving the vehicle backwards. When he resumes forward movement, he will get an immediate response with the vehicle.
- Loose connections create abrupt movements that can spook the animal and may even cause a wreck. A harness that is out of proper adjustment will invariably create chafing.
- WEIGHT & ABILITY OF THE RIDER will determine how much pressure is put against the animal and how much resistance it will cause.
- Even though mules can carry proportionately more weight than a horse of the same size, this doesn’t mean you can indiscriminately weight them down until their knees are shaking.
- Be fair and responsible and do your part in the relationship. Do not expect the animal to carry an obviously overweight body that doesn’t know how to control itself! Learn to ride a balanced seat and practice the basics EVERY TIME YOU RIDE!
- Participate in training activities that prepare you both, first with groundwork and later under saddle. ALWAYS FOLLOW BASIC GROUNDWORK RULES for leading, lunging and Ground Driving!
- Learn to hold the lead rope in your LEFT hand, keep his head at your shoulder, match your steps with his front legs, point in the direction of travel with your right hand and look where you are going. Walk straight lines, gradual arcs and square him up with equal weight over all four feet EVERY TIME you stop.
- We are building NEW habits in their way of moving and the only way that can change is through routine, consistency in the routine and correctness in the execution of the exercises. Since this also requires that you be in good posture as well, you will also reap the benefits from this regimen.
- Along with feeding correctly (as described), these exercises will help equines to drop fat rolls and to begin to take on a more correct shape and become strong in good posture.
- It is important to lead this way because if you’re carrying the lead rope in your hand closest to the halter, it will not promote self-body carriage. With every step you take, your hand moves (however slightly) to the right and left, and this will adversely affect his balance. Remember, that equines balance with their head and neck!
- When Ground Driving, let your steps and hands follow the hind legs.
- As you learn to ride correctly and in balance, you also learn how to ride supportively by balancing on your seat bones with weight from your core (behind your belly button) going down through your legs and up through your torso.
- Take the stress out of going uphill and downhill by staying relaxed in the saddle, rocking your weight through your core and by keeping your body in good posture.
- Do not jam your heels down. Rather, think of keeping your toes up to stay relaxed. Lean the upper body back when going down hill and forward when going up hill.
- Think of the relaxed position of the Man from Snowy River, Bronc Riders and Bull Riders!
- You will then find the crupper much safer and more efficient when riding in all kinds of terrain…even if you are a little heavier than you should be.
- In between rides, use your Round Pen to practice your equitation skills by riding without stirrups and reins. You can do this with or without an assistant.
- Balance your body over your seat bones and RELAX with your legs freely hanging down while sitting up straight to help develop a secure balanced seat.
- While riding like this, you can use your arms straight out in front and parallel to the ground, behind on the cantle, arms stretched out on both sides parallel to the ground. Do all of these movements with your eyes open and then with them closed.
- You will begin to FEEL the movement of your equine and get in sync with HIS motion and the motion of the tack. It will all become much more harmonious and SAFER!
- You and your animal will both be conditioned properly, and he will be able to pick his way efficiently, safely and unobstructed!
- Once everything is in line, the animal, the tack and you should all be in unison with no chafing.
- Crupper or Breeching? The decision becomes your own, but do remember that the breeching has many more straps and much more risk of chafing than does a crupper.
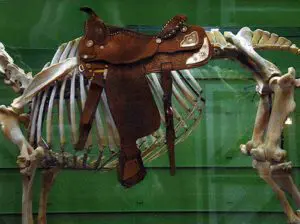
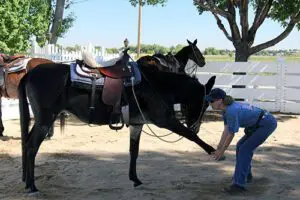
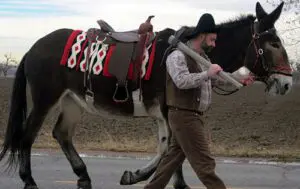
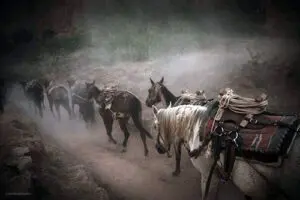
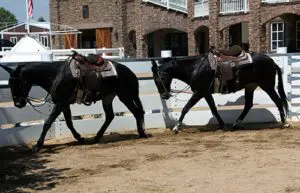
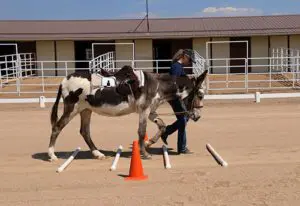
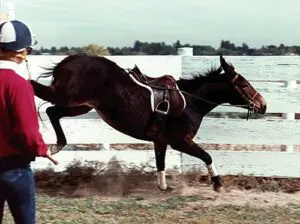
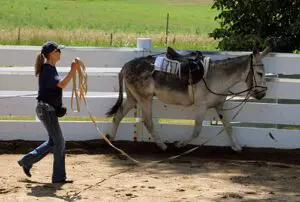
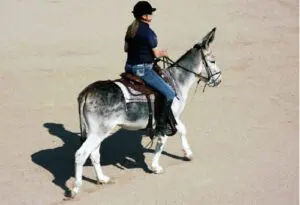
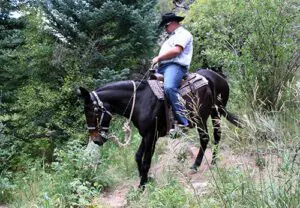 When the skeletal system is adequately supported with symmetrical muscle strength, especially over the top line, the animal is better equipped to use his body efficiently. With the crupper tension properly adjusted, he can tuck his tail and use his leg muscles to support his own weight while his spine remains flexed upward along the top line to support the weight of the rider.
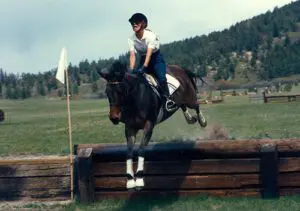 Just for the record, I have done lots of trail riding and three years of cross-country jumping over all kinds of terrain (3 miles, up and down hills, over twenty jumps) and have always ridden with a crupper on all of my mules, English or Western, even with heavy riders with nary an incident.
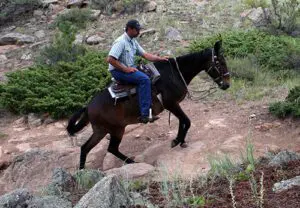 If using a crupper, the animal has full range of motion in his body and legs with the maximum strength to back up any movement that would help to correct the rider’s position and keep him over the equine’s center of balance.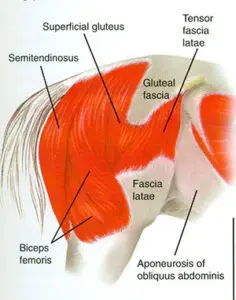
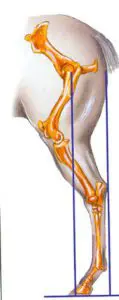
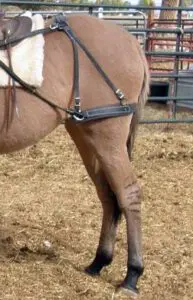 BREECHING (or BRITCHEN) originates with pack and driving animals and has a distinctive purpose to keep loads from shifting on pack animals and to provide “brakes” for those in harness.
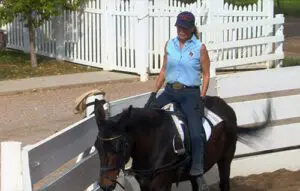
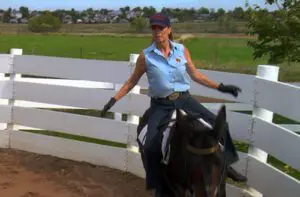
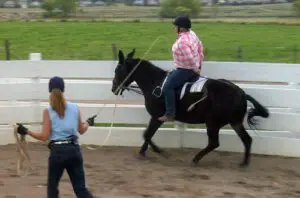
To learn more about Meredith Hodges and her comprehensive all-breed equine training program, visit LuckyThreeRanch.com, MEREDITH HODGES PUBLIC FIGURE Facebook page, or call 1-800-816-7566. Check out her children’s website at JasperTheMule.com. Also, find Meredith on Pinterest, Instagram, MeWe, YouTube and Twitter.
Covered in TRAINING MULES & DONKEY: A LOGICAL APPROACH TO TRAINING, TRAINING WITHOUT RESISTANCE, EQUUS REVISITED and A GUIDE TO RAISING & SHOWING MULES at www.luckythreeranchstore.com.
© 2013, 2016, 2024 Lucky Three Ranch, Inc. All Rights Reserved.

MULE CROSSING: Owning an Equine Is Serious Business, Part 4
By Meredith Hodges

In the final part of this article, the ins and outs of riding precautions and safety will be pinpointed, along with many other crucial details and tips that will help you become not only a better rider, but a better, more understanding equine owner.
As previously discussed, it is human nature to want to just get in the saddle and ride and do all of the glamorous, exciting things with a newly purchased equine that we see others do. The good riders make riding look so easy, and there’s a reason for that—they’re good equine owners. They make sure that their equine is comfortable in what he is learning, they painstakingly go through the training processes for as long as it takes, and caution, safety and courtesy are always top priorities.
Here is a checklist to go through each time BEFORE you ride:
- When you mount your equine, do it in an open area away from buildings, fences and other animals.
- Mount with deliberate grace and don’t just plop yourself onto his back.
- After riding, take the reins over your equine’s head, always being careful to clear his ears.
- Run up your stirrup irons on English saddles when you dismount.
- If your equine is energetic, lunge him before riding.
- Know the proper use of spurs and crops and don’t use them until you’re sure that you really need them.
- Keep small animals under control around your equine.
- Wear protective gear when riding and if you ride at night make sure to have the proper reflectors and keep to the walk.
- Never ride off until ALL riders are mounted and, when mounted, never rush past other equines. If you need to pass, keep it to the walk.
- When riding in a group in an open area, you can ride abreast, but when you are riding single file, always keep an equine’s-length between you and the animal ahead of you.
- While riding, maintain a secure seat and stay in control of your equine at all times.
- Don’t ride in the open until you are familiar with the equine you are riding.
- If your equine becomes frightened, use your voice first to try to calm him. If necessary, dismount and politely introduce him to whatever is spooking him. When he calms down, you can remount.
- When riding, always watch for small children and animals.
- Hold your equine to a walk going up and down inclines, and NEVER fool around while riding.

 (NOTE: I don’t recommend riding along paved roads at all these days. Although you and your equine may be in control, motorists don’t always pay attention while they are driving—which can lead to disaster.)
If you must ride along a road:
- Do not ride bareback, use good judgment, ride single file and ALWAYS use a bridle.
- If there are two or more riders, be sure to maintain sufficient space between equines.
- Avoid heavy traffic, but if you must be in heavy traffic, dismount and lead your animal.
- When riding on the shoulder of a road, remain alert for debris.
- Always obey ALL traffic laws and ride with the traffic, not against it.
When trail riding, here are some important tips to remember:
- If you are an unskilled equestrian, be sure you are riding an equine that is well trained.
- Do not engage in practical jokes or horseplay along the trail.
- Stay alert and think ahead while you ride, and avoid dangerous situations whenever possible.
- Be courteous when riding on a trail. If you meet someone on a narrow incline and cannot pass safely, the one who is coming down the trail should back up the trail to a wider spot when possible.
- Ride a balanced seat and don’t just let your equine wander along or graze while on the trail.
- If you ride alone, tell someone where you will be and bring a cell phone in your pocket—but ALWAYS keep it turned off while riding your equine—any cell phone noise could easily frighten him, possibly causing a major disaster.
- If you are going for an overnight ride, bring a halter and lead, hobbles, clean saddle blankets, horseshoe nails and matches, and make sure your equipment is all in good repair.
- Don’t offer water to your equine while he is hot and sweaty. Let him cool down first and then offer a few sips of water at a time.
- Always tie your equine in a safe place, using a halter and lead rope tied in a safety knot.
- Be very careful with cigarettes, matches and fires.
- Get to know the terrain ahead of time and bring maps with you.
- Know the laws, rules and fire regulations on government trails.
- Be sure your equine is in proper condition for the ride and is adequately trimmed or shod.
- Use extreme caution in wet or boggy areas and always ride at the safest gait.
- Avoid overhanging tree limbs and be sure to warn other riders behind you about any upcoming obstacles on the trail.
 Good habits are built through repetition and reward with regard to consideration for your equine. Eventually, the good habits that are being taught will become the normal way that your animal will move and react to you and to his environment. The details outlined in this article can help contribute to the behavior shaping of your animal, which will determine, as he ages, how willing and obedient he will be in all situations.
Owning an equine is serious business! It is as serious as raising children. With the increase of the human population, there are a lot of metropolitan ideas and products being sold with incredibly creative marketing techniques, but choosing which ones are actually beneficial and not just a sales pitch can often be quite daunting and the wrong choice could get you in trouble with your equine. What kinds of feed work best? Does your equine need supplements or does he do better on a more basic nutrient approach? Has your veterinarian done a baseline test on your equine to determine what supplements are needed if any? What should you use for rewards? What training techniques work best? It is best to consult with rural equine professionals and people who have actually successfully worked with equines during their lives to help you make these determinations. Knowing the right things to do with your equine may seem confusing, but it is really only a matter of learning the “rules of the road.” You would need to do the same in order to be able to drive and properly maintain a car. Once you have learned the routine, it’s easy. Even with all the new and improved ways of doing things, one thing always rings true…KISS…keep it super simple!
It’s so important to have as much knowledge, information and trusted advice as you can get, so that you can make sound, informed choices for both you and your equine partner. Take things slowly and in small steps that you both can easily manage—then you will reach your goals because you’ve developed a firm foundation. When you do your homework up-front, there’s nothing to be afraid of and you’ll be graced with years of unconditional love and pleasure from your equine friend and companion.
To learn more about Meredith Hodges and her comprehensive all-breed equine training program, visit LuckyThreeRanch.com, MEREDITH HODGES PUBLIC FIGURE Facebook page, or call 1-800-816-7566. Check out her children’s website at JasperTheMule.com. Also, find Meredith on Pinterest, Instagram, MeWe, YouTube and Twitter.
Covered in TRAINING MULES & DONKEY: A LOGICAL APPROACH TO TRAINING, TRAINING WITHOUT RESISTANCE, EQUUS REVISITED and A GUIDE TO RAISING & SHOWING MULES at www.luckythreeranchstore.com.
© 2012, 2016, 2018, 2024 Lucky Three Ranch, Inc. All Rights Reserved.


Foaling season has begun
The following is from the American Wild Horse Conservation:
Right now, across the American West, new life is taking its first steps.
Foals are being born on the range—staying close to their mothers, learning how to move with the herd, experiencing their first days of freedom.
This should be a season of hope. But this year, it isn’t.
Because even before foaling season began, the Bureau of Land Management (BLM) quietly carried out multiple “emergency” roundups—removing wild horses with little notice and limited oversight from the public lands they call home.
And now, a much larger wave is coming. The federal government’s 2026 plan calls for 14,830 wild horses and burros to be removed from the range this year.
| PROTECT WILD HORSES → |
Foals will be born into active roundup zones, pregnant mares are at risk of being chased and captured, and families could be separated during the most vulnerable moment of their lives
We’ve already seen how this plays out. That’s why AWHC is already in the fight—right now:
- Documenting roundups the public is meant to miss
- Challenging unlawful removals in court
- Pressuring the government for transparency and accountability
- Expanding humane fertility control to stop this cycle at its source
But this work only continues with support from people like you, Meredith.
| DONATE NOW |
Because every foal born this season deserves the chance to grow up wild—not be swept into a broken system before their life has even begun.
With gratitude,
American Wild Horse Conservation
MULE CROSSING: Winter Fun with Your Equine
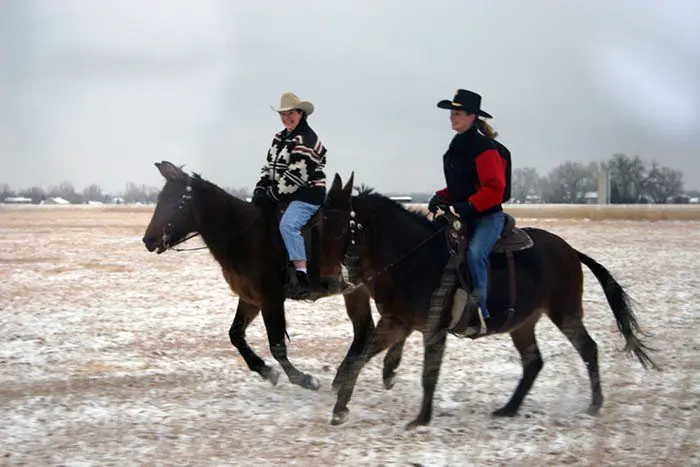 By Meredith Hodges
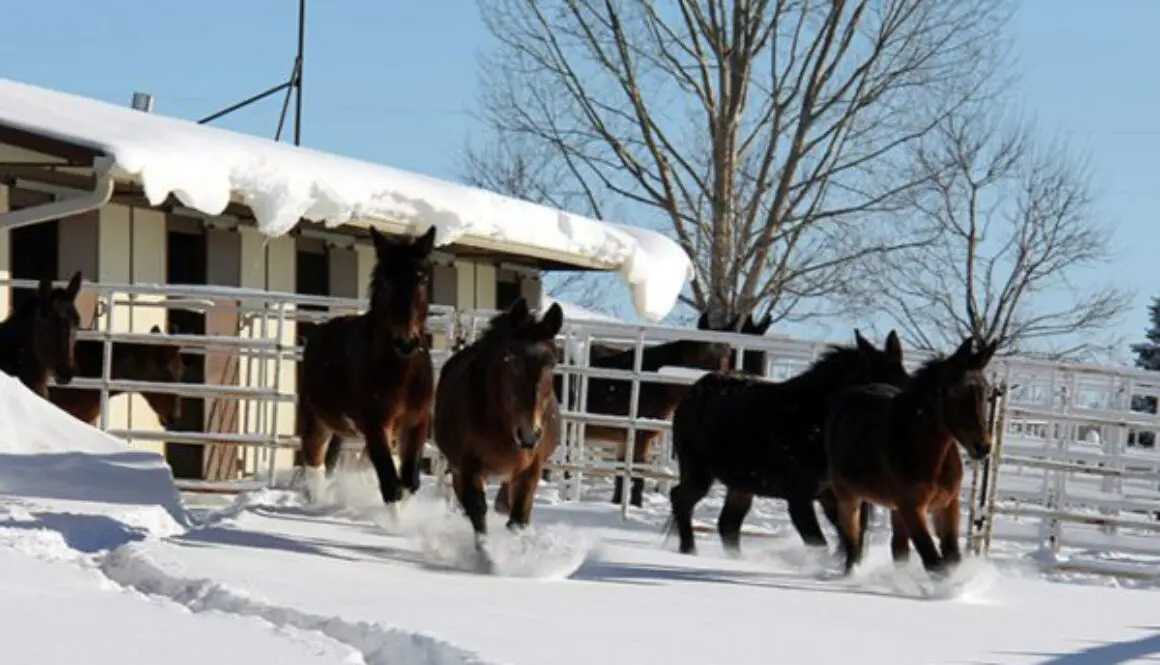
After Spring, Summer and Fall come and go, the cold days of Winter can easily become an excuse to slow down and do less, but Winter can be just as fun and full of activities with your equine as any other season. Along with the basics—food, water and shelter—your equine needs activities to keep him fit and happy. Like any of us, he doesn’t want to be active only part of the year and then left alone during the Winter months, bored and lonely (not to mention the stress he will feel when he has to be reconditioned every Spring). Instead, it’s healthier for him, both physically and mentally, to be active and maintained year-round. This does not mean you need to ride him three or four days a week throughout the Winter. There are lots of other fun, diverse activities you can enjoy together that will adequately maintain his body condition while keeping him interested and happy.
 Of course, in order to enjoy Winter games and sports, you must first be sure to dress appropriately for the weather in your area. If you live in a cool or cold climate, dress in layered clothing you can easily remove if you need to. Wear a hat to conserve your body heat and footwear that keeps your feet warm and dry. What your equine wears in cold weather is equally important. For instance, if your equine’s winter coat tends to be on the thinner side, he may need a blanket for the long Winter nights to keep his body from expending too much energy just trying to stay warm. The blanket will also serve to mat down his coat so there is less chance of it becoming entangled in his tack or harness. If you have a stall for your equine, just for Winter months, you may want to trace-clip him in the areas that do the most sweating so that when he is worked, he will cool down quickly and easily. Promoting good circulation keeps your equine warm, helps his body to stay flexible and supple, and cuts way down on his muscle and bone stiffness. Be sure to begin any and all workouts and recreational activities with consistent and appropriate warm-up exercises.
 Since most inclement weather produces slippery ground surfaces, if your equine is to be used extensively, it is important that he have appropriate shoes on his feet during the slippery seasons. On strictly muddy or slippery surfaces, tapping and drilling studs into his shoes can help immensely in giving him added traction. If cared for properly, you can remove these studs when you don’t need them. If you get snow in your area, you may want to go with borium shoes and rim pads. The borium shoes supply good traction, while the rim pads prevent snow from balling up in your equine’s feet. I also suggest using splint boots on all four of his legs. This will protect against injury and give him added support and protection of his fetlock joints.
If you have a very young equine, make sure to consistently continue your routine of handling him throughout the entire winter. I do not suggest lunging a very young equine unless you have the advantage of an indoor arena, as he could slip and injure himself. But you can still take him for walks on the lead line, ground drive him through various Winter scenes and
spend plenty of time grooming him. All of this will accustom him to Winter’s unique terrain and obstacles, maintain his essential and continued imprinting and bonding with you, build his self-confidence and maintain his good manners.
 The better trained your equine is, the more possibilities there are for Winter sports and games. If the idea of taking lessons at a riding stable that has an indoor arena appeals to you, Winter tends to be a less hectic, more peaceful time of year in which to learn and practice without the added stress and anxiety of showing and other warm weather activities. But even if you want to forego the lessons, there are numerous stables that will rent the use of their indoor arenas for a nominal fee and there are places to trail ride through beautiful Winter scenes. People and equines alike seem to derive great pleasure from these Winter get-togethers when they are carefully and responsibly planned.
 Another great way to have fun with your equine is participating in Winter games and holiday parades. Christmas is always a joyous time to bring your equine out of the barn. Consider decorating your equine, dressing up yourself and then riding or driving in your local Christmas parade. This can be loads of fun! Caroling aboard your equine throughout your neighborhood is also a wonderful way for you, your equine and your neighbors to get into the holiday spirit. Oftentimes when my equines and I have gone out caroling after a Christmas parade, the neighborhood children have come out to sing and dance behind our caroling caravan! This kind of pure joy is contagious and always reminds me of the true meaning of the Christmas season.
There are lots of different Winter games that you can play with your equine and if you have a friend who wants to participate too, there are even more possibilities. With proper shoes on your equine and good, flat ground, and if the weather permits, there are so many gymkhana games that you can play. Or how would you like a brisk cross-country gallop on your equine with a few fences to jump? Or you and a friend can take an exciting ride on a tire or sled, taking turns with one person riding the equine while the other rides the sled or tire. If you have more friends with equines, you can even have Winter races. You are limited only by your own imagination! Remember that any game or sport requires that you consider safety first for both you and your equine: What are your abilities? What are your limitations? What is your level of physical conditioning and that of your equine? Whatever activities the two of you do to keep busy, happy and healthy during the Winter months, the name of the game should always be—FUN!
To learn more about Meredith Hodges and her comprehensive all-breed equine training program, visit LuckyThreeRanch.com, MEREDITH HODGES PUBLIC FIGURE Facebook page, or call 1-800-816-7566. Check out her children’s website at JasperTheMule.com. Also, find Meredith on Pinterest, Instagram, MeWe, YouTube and Twitter.
Covered in TRAINING MULES & DONKEY: A LOGICAL APPROACH TO TRAINING, TRAINING WITHOUT RESISTANCE, EQUUS REVISITED and A GUIDE TO RAISING & SHOWING MULES at www.luckythreeranchstore.com.
© 1990, 2015, 2016, 2019, 2024 Lucky Three Ranch, Inc. All Rights Reserved.

MULE CROSSING: The Round Pen
By Meredith Hodges
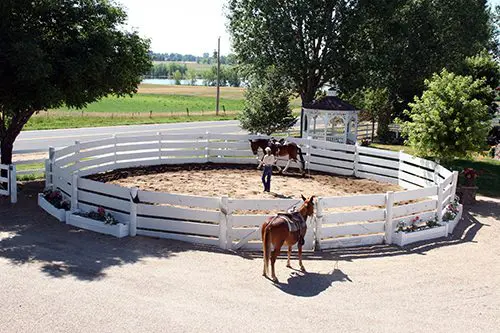
The Round Pen originated as a useful training aid for Western trainers who were trying to “break” the wild mustangs that were brought in off the range.
-
- There has been spirited debate between English and Western trainers as to the real value of the Round Pen as a training aid, since it can produce undue stress on the fragile joints of the equine-in-training.
- Do not BEGIN training your equine in the Round Pen, because an unbalanced and inexperienced equine in uncontrolled flight, in a truly confined space, can easily injure himself.
- Specific types of leading exercises must be used to teach him to be in good equine posture and balance on straight lines and gradual arcs before your equine is introduced to the Round Pen and asked to balance at all three gaits on a circle.
- He needs work on Leading Training in the Hourglass Pattern in an arena, tacked up with an English Eggbutt snaffle bridle, the “Elbow Pull” and a surcingle or lightweight saddle.
- When his postural core strength is in an adequate Leading balance in the arena, you can add obstacles.
- He will learn verbal commands, body language and will be able to balance his weight equally over all four feet and do all the exercises on verbal commands and hand signals alone. he is then ready to graduate to the Round Pen.
- He needs work on Leading Training in the Hourglass Pattern in an arena, tacked up with an English Eggbutt snaffle bridle, the “Elbow Pull” and a surcingle or lightweight saddle.
- When your equine is properly prepared beforehand, the Round Pen can then become a viable and important training tool.
- He will learn to Lunge freely at all three gaits while remaining in good posture.
- He learns to responds promptly and correctly to verbal commands and body language.
- He learns the basics about lunging on a lunge line.
- He learns how to be lunged on the Drive Lines.
- He learns how to Ground Drive the perimeter, then how to do turns and reverses.
- He will learn how to stand still on command at any time and be mounted.
- He will learn to Lunge freely at all three gaits while remaining in good posture.
- When choosing the site for your Round Pen, pick a spot that is surrounded by activity and even near the road, so it can serve a dual purpose. Not only will you begin to build your equine’s muscle during training sessions—you will get his attention under a variety of distractions. When he is exposed to noise and activity in the Round Pen at this early stage, it is less likely to bother him later under saddle, or in harness. He will gain confidence in any situation.
- Try to pick a site that is flat and not rocky. Ideally, it should have a solid base of hard-packed adobe soil.
- If your ground is not flat, you will need to grade a flat spot and then bring in fill-dirt, shoot it with a transit to make sure it is truly flat. You have spent a lot of time working on your equine’s posture and an irregular ground surface will interfere with that and set him back into poor equine posture.
- Make sure it is tamped and hardened before the three-inch depth of sand is added.
- The diameter of the Round Pen should be approximately 45 feet, so you can easily reach your equine on the rail with your lunge whip when you stand in the center.
- Uneven terrain can cause uneven balance, rhythm and cadence to his gait and will cause irregularity in the footfall pattern, which will result in asymmetrical development of your equine’s muscular-skeletal system. We used fill dirt with a retaining wall to make sure the ground was flat and even so as not to undo our equines’ good posture.
- A smooth, hard under-surface below the sand gives your equine a smooth surface on which to place his feet without fear of injury to the sensitive parts of his hooves from rocks or other debris. His stops will become correct and balanced, and ready him properly for the sliding stops in Reining.
- Even and level ground will assure his regularity of gait and sustained balance on the circle that will build core muscle symmetrically as he circles, maintaining his erect posture and correctly bending through his rib cage with equal weight over all four feet and energy coming from the hindquarters.
- Making sure the circle is actually round so it will help him learn to bend his body properly through the rib cage while he is traveling on the circle.
- If your ground is not flat, you will need to grade a flat spot and then bring in fill-dirt, shoot it with a transit to make sure it is truly flat. You have spent a lot of time working on your equine’s posture and an irregular ground surface will interfere with that and set him back into poor equine posture.
- Once the site is prepped, dig post holes at eight-foot centers on the circle and twenty-three feet from the center of the Round Pen to give you the 45 foot diameter.
-
- Next, pour concrete in the bottoms of the holes and measure the depth of the posts so when the posts are placed in the holes, they will all be at the same height. (There should be three feet of post in the hole and five feet above ground.) Use eight-foot posts.
- All types of wood are toxic to equines to some degree, but treated woods can contain arsenic and should be avoided. Redwood is okay, but the best posts to use are made from steel—they will last much longer than wood. Also, steel posts can be welded with “winged plates” so the boards can be easily bolted to the posts and changed out easily.
- Use two-by-twelve-inch wooden boards for the walls, and a smaller two-by-six-inch board around the bottom to keep the sand inside. Stack four two-inch by twelve-inch boards around on top, with three-inch spaces between the boards and a three-inch top of the post showing.
- The spaces between the wider boards will allow you to get a toe into the fence so you can easily climb in and out of the Round Pen, and it gives you a place to tie an animal at any post.
- Unlike a Round Pen made from corral panels, the twelve-inch boards keep your toes from getting caught or twisted when riding close to the rail. It’s a much safer design and truly functional for all levels of Round Pen training.
- For both trainer and equine safety, the use of electric and wire fences and materials, such as pallets and tires, should be avoided completely. If the equine decides he wants to leave, he can easily get tangled in a lot of these other materials…just not safe for either of you.
- Tie rings can be added onto the outside of selected posts to secure extra equines outside the Round Pen while they wait their turn.
- A Round Pen with solid walls should be avoided. An equine that learns to work in an open Round Pen is less likely to feel “trapped” and fearful of abrupt movements and noises, so he can concentrate on his work. He learns to acknowledge and accept interruptions and will keep on working.
- Using bolts for the two-by-twelve inch rails makes for easy replacement as the boards become worn, and putting a metal cap around the top with angle iron, will discourage chewing when you are not there to supervise.
- The gate posts should always be steel and sunk into 3’ concrete, as wooden posts tend to sag over time. The gate itself should be framed in steel to keep it from warping and sagging. The latch on the gate should be easily accessible from both sides, but the gate needs only to swing into the Round Pen for easy entrances and exits.
- Next, set in the gate (either finished or not) and close it to complete the circle. Check the diameter of the circle and the distance to each post from the center to make sure it is truly 45 feet round and that all posts are upright and level.
- The Round Pen gate pictured swings in and has a sliding barrel bolt at the top that just catches through a four-inch sleeve on the post wing. It is easy to reach over the top for opening.
- Next, pour concrete in the bottoms of the holes and measure the depth of the posts so when the posts are placed in the holes, they will all be at the same height. (There should be three feet of post in the hole and five feet above ground.) Use eight-foot posts.
- Once the cement at the bottom of the post holes is level and completely dry and the posts are sitting in the not-yet-filled post holes, attach the top and bottom boards all the way around, check each post and rail with a level, and then attach wooden braces to the entire Round Pen at each post to hold the position.
- Now pour the concrete into the holes around the posts. Allow enough time for the concrete to set up before removing the braces.
- When the concrete has dried completely, clean the excess concrete from around the holes. Then finish hanging all the board rails, cap them with angle iron and add whatever tie rings you want to the outside of the posts.
- Let some time pass before adding the sand to your Round Pen. Wet weather will actually help to further compact the base, which should be hardened so it can last for many years, so if you are expecting rain or snow, all the better.
- Once the base is hard and dry, add three inches of clean sand to the Round Pen—no more and no less. If the sand is not deep enough, the hard ground can hurt your equine’s limbs and possibly cause laminitis. But if the sand is too deep, it can damage ligaments, tendons and soft tissue.
- If your equine ingests the sand he may colic or founder, so make sure to use your Round Pen for training only, never for turnout or feeding. The equines can develop sand colic from eating off the floor of this kind of pen.
-
- The Round Pen can be used as a holding pen for short periods of time, but do not place food or water inside and use it as a permanent pen.
- It is too small for good health.
- This small area can exacerbate the animal and cause anxiety as their permanent residence. Stress is not good for the animal.
- Equines will put more energy into getting out if they are not comfortable.
- Good Round Pen construction makes all the difference.
- With intelligent construction and attention to detail, your Round Pen will serve a multitude of uses for years to come and can be quite easy to maintain. A metal, angle-iron cap around the top rails will keep the animals from chewing on it when they are left standing and waiting for their lessons to continue.
- Maintenance will be easy and materials cost will not be as expensive in the long run depending on what materials you use. Keep extra boards on hand as replacements at your original lower cost.
- I began by using simple 2” X 12” wooden boards and 8’ posts when I first bought the original 10 acres of the Lucky Three Ranch because I could not afford any more than that. I just kept improving the conditions as I could afford it. I did this with the entire facility…year after year…Barns, Sheds, Fences, Round Pen, Hot Walker, Tack Barn, etc.
- The Round Pen is not the place to START TRAINING. It is a place to get through those difficult learning processes where you need the containment of the equine for more meticulous work. I would even use it for the beginning of obstacle training. It is MUCH easier to teach the equine not to be afraid of obstacles when you do it a very confined space. I begin obstacle training by placing my obstacles in the confined space BEHIND my Round Pen in my indoor arena…so much easier when they don’t have as much space to avoid the tasks! If you cannot place your obstacles this way, then just put them along the side of your Round pen and use them in it as needed.
- I am no longer afraid of getting a loan and paying more money up front if it will save maintenance costs in the long run. Remember that the replacement materials are always getting more expensive and the price never seems to go down! The Round Pen really IS a must for many reasons! It is a truly legitimate investment with its numerous uses. The Round Pen is an essential tool to set you and your equine up for success!
- With intelligent construction and attention to detail, your Round Pen will serve a multitude of uses for years to come and can be quite easy to maintain. A metal, angle-iron cap around the top rails will keep the animals from chewing on it when they are left standing and waiting for their lessons to continue.


 t the top that just catches through a four-inch sleeve on the post wing. It is easy to reach over the top for opening.


To learn more about Meredith Hodges and her comprehensive all-breed equine training program, visit LuckyThreeRanch.com, MEREDITH HODGES PUBLIC FIGURE Facebook page, or call 1-800-816-7566. Check out her children’s website at JasperTheMule.com. Also, find Meredith on Pinterest, Instagram, MeWe, YouTube and Twitter.
Covered in TRAINING MULES & DONKEY: A LOGICAL APPROACH TO TRAINING, TRAINING WITHOUT RESISTANCE and EQUUS REVISITED at www.luckythreeranchstore.com.
© 2013, 2016, 2023 Lucky Three Ranch, Inc. All Rights Reserved.

MULE CROSSING: Longears Loving Impact
By Meredith Hodges
“Behold, thy King cometh unto thee:
he is just and having salvation; lowly
and riding upon an ass, and upon a colt
the foal of an ass.” – Zechariah 9:9

These words have been an inspiration to all who have heard them since the time they were written—to those of us who love Longears, the words carry the message of a lifetime and the secrets of a dream. Not only did the Lord Jesus ride into Jerusalem on the back of an ass, but remembrances of that ride are clearly marked on the backs of many asses since in the form of a cross. One can really only guess why asses received this unique blessing, but as the Lord blessed the asses, so they have in return endeavored to bless us with their righteous ways.
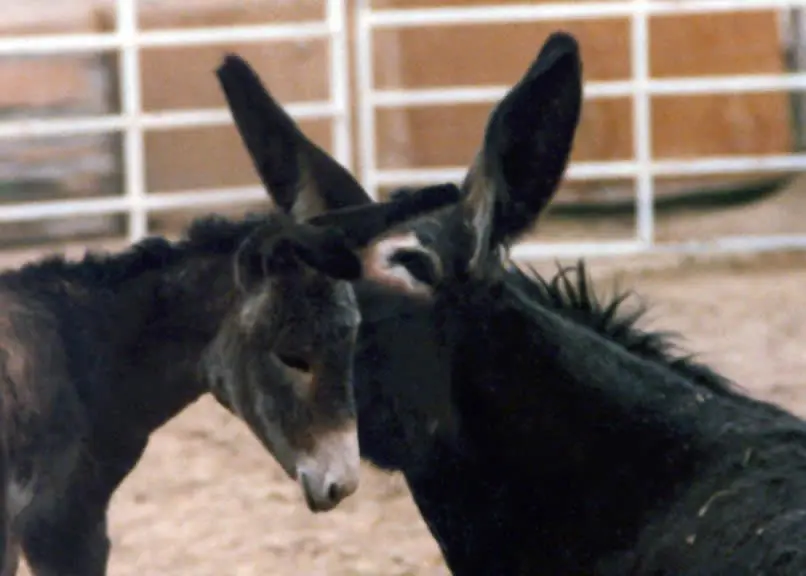 It would seem that the asses were chosen because they represent more fully the characteristics in all of us that are just and good. The most evident inspiring characteristic of the ass is his undying affection for humans and the patience he exhibits when dealing with them; an excellent portrayal of this affection and patience is found in Marguerite Henry’s story of “Brighty of the Grand Canyon.” In addition, asses are not possessive creatures. They do not seek to impress, nor do they have inflated ideas of importance. They are humble, not greedy or selfish and are content to give freely all that they have to give. There is no limit to their endurance and no end to their trust. Unpleasant moments are undoubtedly remembered, yet forgiven when requested and owners are inspired to be more constructive in their management and training methods. Within asses, there is a hidden hope of happiness, contentment, peace and brotherhood. The inspiration of these noble characteristics does not go unnoticed as they ennoble those around them.
Throughout our lifetimes, we are faced with challenges and choices, most of which are met by trial and error. Asses limit and simplify our choices, leaving us less room for trial and error and more chance for success. An example of this could be the man who could not make his donkey cross the bridge over a deep, wide canyon. Failing to cause the donkey to cross the bridge, the man spent much extra time walking his donkey down one side of the canyon and up the other. As they rested at the far side of the bridge, a horse and rider approached the same challenge. The horse balked, but the rider forced him onto the bridge. About the middle of the bridge, the boards were rotted and horse and rider plunged to their death – a costly lesson. “He who trusts in himself is a fool, but he who walks in wisdom is kept safe” (Proverbs). Stop, look, and listen with your heart as well as your ears. Your donkey has much to teach you.
 Man has always sought to better himself and his environment. He seeks to set shining examples to all, however, he falls short due to negative aspects in his character. The ass, who has always been humbled, does not seek to set examples, he is an example with his honest and faithful ways. He is quick to accept that which is good and tolerant of all else. This unique character coupled with his physical abilities makes him an excellent life partner.
Perhaps, the most important and unselfish contribution the donkey has made in this world is his willingness to produce offspring not of his own species. We can only imagine the reasons for this. Perhaps, he saw a chance to combine his incredible character with the physical beauty of the horse, again to try to please us humans and make him more attractive to us. But whatever the reasons, mules and donkeys are attracting more humans with each passing year. They instill in us a desire to support and promote their cause, which in turn becomes our cause. What human can detest the cause of happiness, contentment, peace and brotherhood?
 It is apparent, like never before, the impact that Longears are having on people all over the world. The shows and events including them have grown tremendously over the last 50 years, and the number of people affected by them has increased so much that we now see people in localized areas putting on their own events. In Colorado, for example, the only shows for Longears were incorporated into larger shows such as the Colorado State Fair and the National Western Stock Show. Today, counties are taking initiative to include mules and donkeys in the county fairs, and local riding clubs are inviting them to participate in annual All-Breed shows. Increased understanding and appreciation for the positive qualities of Longears brings more and more people together all the time. Their generous ways have positively influenced people toward a genuine pursuit of happiness. Why is this phenomenon occurring? Because, “We may not realize that everything we do affects not only our lives, but touches others too. A little bit of thoughtfulness shows someone you care and creates a ray of sunshine for both of you to share. Yes, every time you offer someone a helping hand, every time you show a friend you care and understand, every time you have a kind and gentle word to give, you help someone find beauty in this precious life we live. For happiness brings happiness, and loving ways bring love; and giving is the treasure that contentment is made of.” (Amanda Bradley).
To learn more about Meredith Hodges and her comprehensive all-breed equine training program, visit LuckyThreeRanch.com, MEREDITH HODGES PUBLIC FIGURE Facebook page, or call 1-800-816-7566. Check out her children’s website at JasperTheMule.com. Also, find Meredith on Pinterest, Instagram, MeWe, YouTube and Twitter.
© 1985, 2016, 2021, 2023 Lucky Three Ranch, Inc. All Rights Reserved.
MULE CROSSING: Living with Longears
By Meredith Hodges
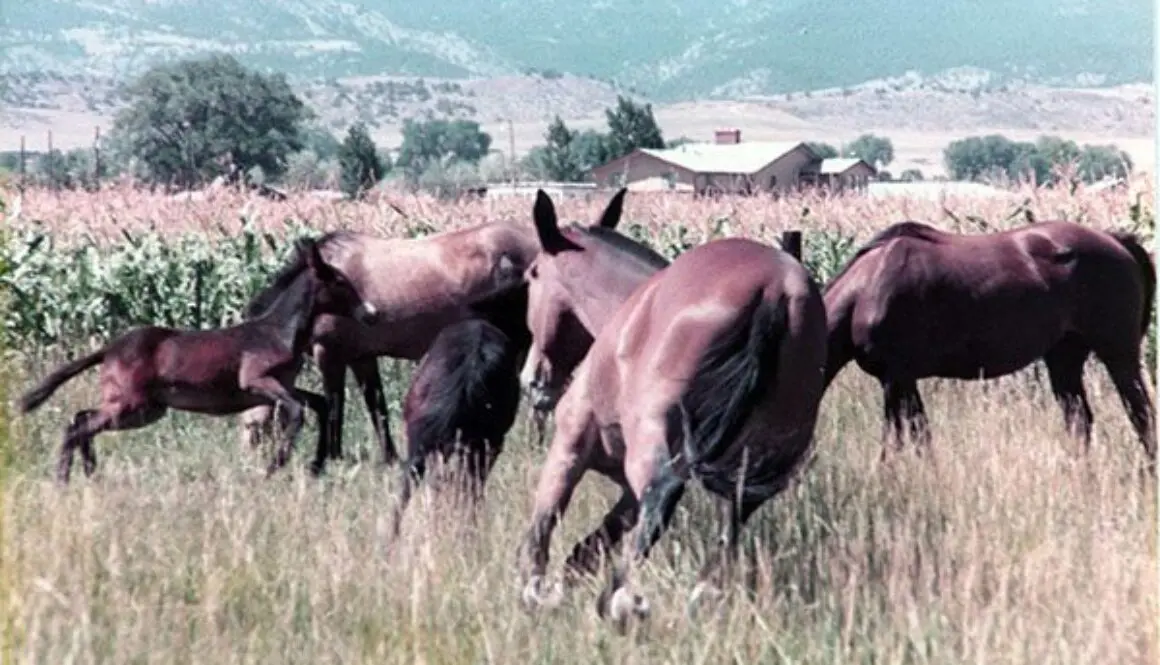
 In the beginning, my home, Lucky Three Ranch was a 10-acre sheep ranch with a small house and hay barn, an old Quonset hut, a feed barn, four three-sided sheds, and a perimeter fence made from sheep fencing with barbed wire on top. It was crossed-fenced around the sheds with some heavily chewed board fences and anything else the previous owner thought could be used for fencing. I’d already had experience with horses, but it wasn’t until my first mule, Lucky Three Sundowner and my first donkey jack, Little Jack Horner, finally arrived at the new Lucky Three Ranch that my lessons with Longears really began!
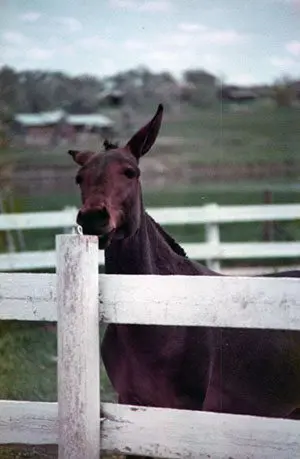 One of the first things I found out about Longears is that they are incredible artists, and they will “sculpt” anything and everything they can get their teeth, rumps or hooves on! My Longears immediately set to work sculpting the posts on three sheds that were near the house and the fence posts around them. We tried everything to get this to stop, but to no avail, and in three short years, we ended up with posts that were no bigger than toothpicks in some places and marvelously contoured from top to bottom, into all kinds of remarkable shapes. We hated to put a cramp in our mules’ artistic style but, clearly, the wooden posts and sheds had to be replaced.
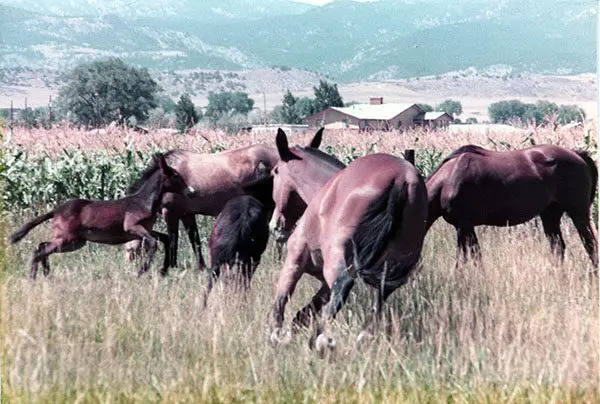 By now, we had bred three more mules, so while we were working on replacing the three sheds, we put the whole herd of mules and mares into a five-acre pasture. One day, while we were working on the new sheds, the whole herd suddenly showed up behind us! Apparently, one of our equines had pulled a “Houdini,” opening the gate and letting everyone out of the pasture. Being the affectionate and curious animals they are, our Longears (and horses) then decided they’d better come see if we needed any help.
When we rounded up the herd and took them back to the pasture, we almost fell over! The herd had sculpted all three support posts on the last existing shed that was in the pasture, so it now looked just like the other three sheds we had just replaced!
With all this creative woodworking going on, we realized the new barn would have to be made of steel. We built a 14-stall, Port-A-Stall barn with steel panels in the runs, and stall floors six inches higher than the floor of the barn alleyway to help keep it from flooding. We added four inches of pea gravel in the runs for good drainage but, after several seasons, the runs on 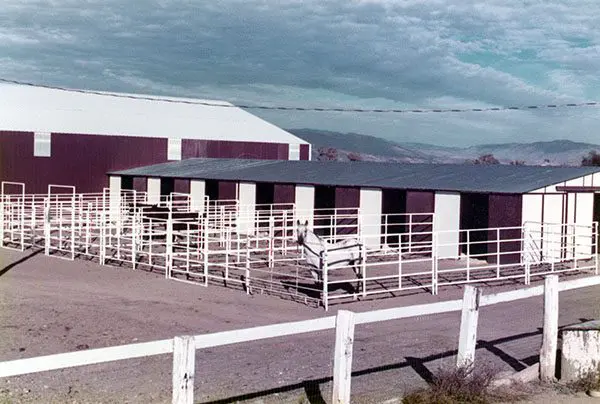 the north side of the barn began to get soft and muddy again and more pea gravel was needed. Rather than doing the runs one run at a time, the seven mules on the north side of the barn were turned out, and we took down only the panels on the north side, so the delivery truck could dump the pea gravel directly on the site. The remaining mules on the south side of the barn were left in their stalls and runs.
It took us all day long to take down the panels, and by the end of the day, we were pretty exhausted. The truck would be bringing the additional pea gravel the next day, so we wrapped up the chores and went to bed. What I didn’t know was that Lucky Three Eclipse (aka “Ely” in the last stall on the south side) had been watching us all day long through the openings in the barn doors. When we came out in the morning, we found that Ely had pulled the pins from the side panels, and by putting his head through the bars of each panel, had arranged them into a huge pen for himself that ran the full length of the barn, trapping the other mules and the stallion in their stalls! Now that the south side pens were also opened up, we decided to use the first truckload of pea gavel on the south side pens and ordered yet another load of pea gravel for the north side pens. After we got the pea gravel in place on the south side, we put the panels back where they belonged, freeing the other mules and stallion on the south side from their stalls. We then put Ely back where he belonged in his stall and pen on the far end, finished the north side pens, returned all the mules from the north side of the barn back into their stalls and runs, and finally got things settled down. I can guarantee you we all had a new appreciation for Ely’s ingenuity!
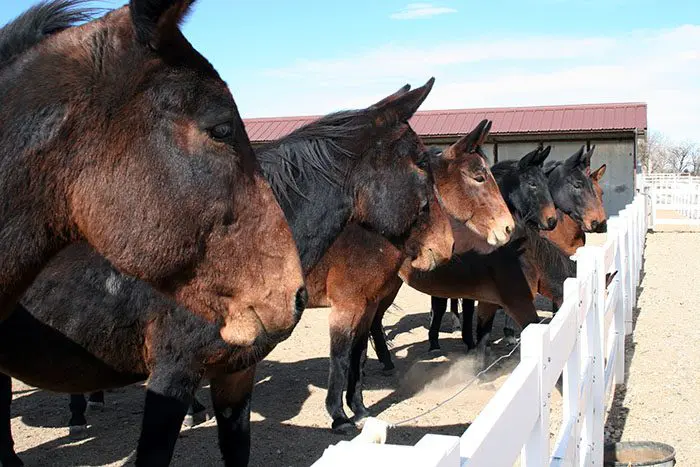 We spent the next several years taking down barbed wire, mending old field fences and replacing the old sheds with steel Port-A-Stall sheds, replacing cross fences with vinyl, building two more steel barns and lining our indoor arena with steel. As we all know, Longears are very intelligent, and they will use their “smarts” to figure out a way to simplify a task. If you want to step over a fence but it’s a little too high, what do you do? Well, if you’re a mule, you sit on it to push it down, and then you can step over it. Although the horse fencing we used to replace the sheep fencing was fairly high, my Longears still managed to sit on the middle of it, bowing it out into incredible, irregular shapes…after they had first shorted out the hotwire, of course. This was their daily ritual. Maybe they had a crew meeting first thing every morning and planned how they’d do it. Who knows?
 But to this day, I still don’t know how they shorted out the hotwire! One thing my Longears have taught me through our years together is that, if you are going to have mules, you’d better learn to have a good sense of humor or you will never survive their pranks! We learned to drill holes in the posts for a hotwire across the top of the new vinyl fencing and that worked very well, but that was only after they had removed all the vinyl rails from the fence overnight. They were delighted that I had given them their own “Tinker Toy” set. They never left the pen, although they could have! Each time our mules have made “art,” pulled pranks, or managed amazing escapes, we learned how to improve our system and materials, until finally upgrading to an all-steel facility with vinyl fencing topped with a relatively inaccessible hotwire. Now we no longer need to worry about what the mules and donkeys might do…until the next time. (PLEASE don’t tell Ely I said that!)
To learn more about Meredith Hodges and her comprehensive all-breed equine training program, visit LuckyThreeRanch.com, MEREDITH HODGES PUBLIC FIGURE Facebook page, or call 1-800-816-7566. Check out her children’s website at JasperTheMule.com. Also, find Meredith on Pinterest, Instagram, MeWe, YouTube and Twitter.
Covered in TRAINING MULES & DONKEY: A LOGICAL APPROACH TO TRAINING, TRAINING WITHOUT RESISTANCE, EQUUS REVISITED and A GUIDE TO RAISING & SHOWING MULES at www.luckythreeranchstore.com.
© 2014, 2015, 2016, 2018, 2024 Lucky Three Ranch, Inc. All Rights Reserved.

Another Augie and Spuds Adventure: A Spooky Adventure at Lucky Three Ranch 10-25-21


“Well, this is new, grooming in our pen, Augie!”
“Yeah this is different, Spuds. Where are we going now?”


“What’s all this in our pen, Augie?”
“Hmm, looks like pumpkins, but smells like oats, Spuds!”

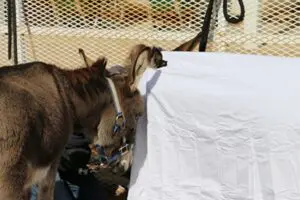
“Now what’s she doing, Augie?!”
“Looks like a sheet to me, Spuds…can you see?!”


“I can see better if I just look down, Augie.”
“That does work better, Spuds. Now what is she doing?!”
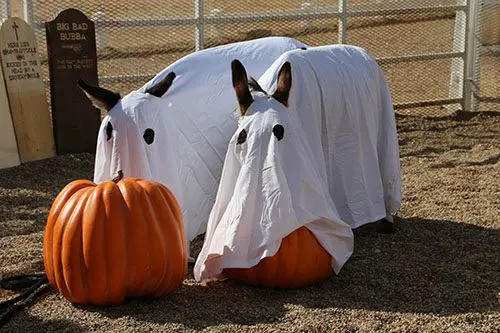
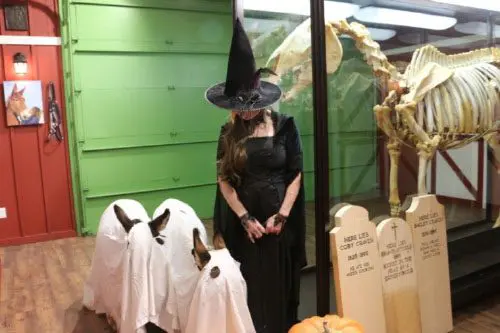
“Guess we are supposed to be ghosts in a graveyard, Augie!”
“What the heck is SHE supposed to be, Spuds?!”


“She is fixing the sheets so we can see better, Augie!”
“Yeah, Spuds. This is MUCH better!”
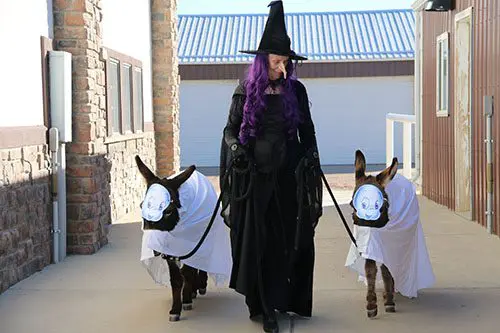
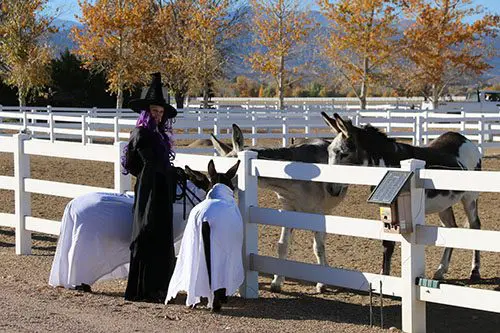
“She sure looks funny, but I like going for a walk, Augie!”
“Wrangler and Chasity don’t seem to mind how we look!”


“We’re back in ASSPEN again, Spuds! This is fun!”
“Check out the Indian behind us, Augie! He’s really cool!”


“ASSPEN is a great town, Augie!”
“Hmm, another graveyard, Spuds! Smells like oats!”
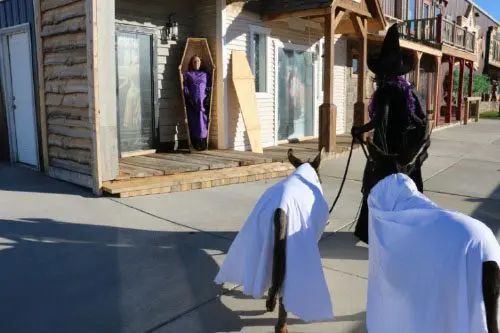

“Why is the lady in a box, Augie?!”
“This is the Undertaker, Spuds…she’s dead!”
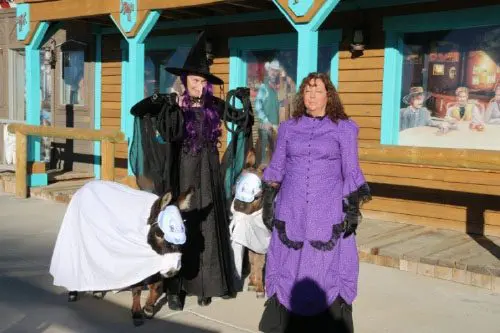
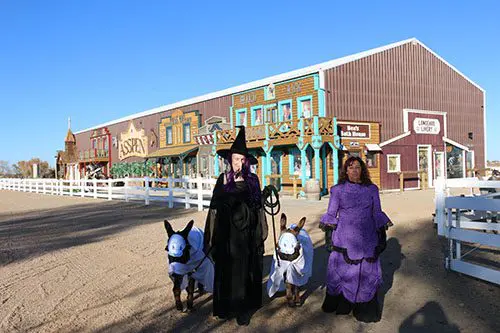
“Mom is hexing her, Augie!”
“It’s okay, Spuds. She’s the WALKING DEAD! What a great Halloween Adventure!”
To learn more about Meredith Hodges and her comprehensive all-breed equine training program, visit LuckyThreeRanch.com or call 1-800-816-7566. Check out her children’s website at JasperTheMule.com. Also, find Meredith on Facebook, YouTube and Twitter.
© 2016, 2017 Lucky Three Ranch, Inc. All Rights Reserved.
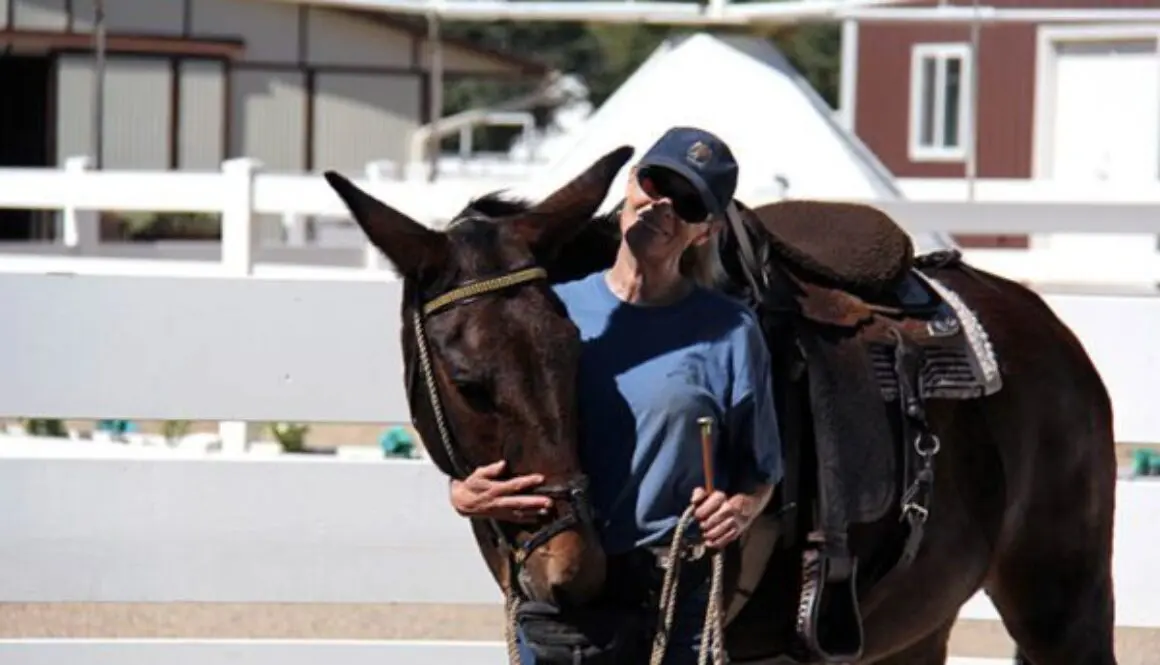
MULE CROSSING: Introduction to Behavior Modification, Part 2
By Meredith Hodges
In Part 1 of Introduction to Behavior Modification, we addressed the steps involved in employing the reward system of training properly whereby desired behaviors are rewarded promptly and negative reinforcement is quick, fair and used sparingly. In Part 2, I will explain how to break down more complex movements into smaller steps that are simple and easy to accomplish, and then how to string them together in order to get the desired response from your equine.
Shaping Behaviors
 Shaping behaviors takes reinforcement to the next level. Now you are working with the tendency of an animal to perform in the right way and guiding that performance toward your ultimate goal. This is called successive approximation. For example, if you are teaching a turn on the haunches on the lead line, you must first ask for one step forward. Then walk toward your animal’s shoulder and ask for the turn. In order to teach him to plant his rear pivot foot before the turn, the process must be broken down into smaller steps. First, ask for the step forward and reward him immediately when he complies. Then move on and ask for one step forward and one to the side, rewarding him again when he’s successful. Then ask for one step forward and two to the side and reward, and so forth.
Eventually, your animal will complete as many steps as you desire and, at the same time, learn to cross one foot over the other and only do as many steps as you ask. B.F. Skinner describes shaping behavior as a response that must first occur for other reasons before it is reinforced with a reward and becomes an operant or “action of choice.” A complex response such as executing the entire turn all at once would never occur naturally correct to be reinforced if you simply “turned the animal around.” He could not possibly understand that he must place the pivot foot before the turn is executed, and would most likely just “swap ends,” with no pivot foot placement and no finesse to the turn. However complex responses can be shaped by separately reinforcing their component parts. Then these parts can be put together in the final form of the operant or “desired action.”
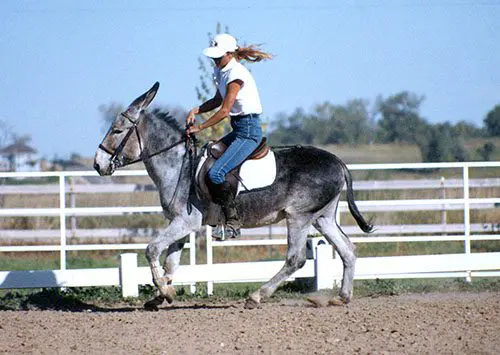 An example of shaping a behavior by breaking it down into a string of very small steps is how I taught my donkey, Little Jack Hornerto canter. Although many people tried to tell me that donkeys don’t canter, I had seen donkeys canter when they ran free, so I knew it was possible. First, I set the goal of cantering a circle. No one could run ahead of my donkey fast enough to reward him with oats and negative reinforcement such as the crop didn’t work well at all, so I had to find another kind of reinforcement. Using the pleasure principle of finding the best motivation for an action, I put my cycling broodmares into a pen at one end of our hayfield and I took my jack to the other end. When asked to canter toward those mares, he did so eagerly. He first learned to canter in a straight line. I reinforced the action verbally with, “Good, good,” while we cantered, and then I gave him a food reward once we reached the pen.
 The next time I did the same thing, but this time I turned my donkey in a large half-circle route to the pen, and I rewarded him again the same way. The third time, I asked for a little more of a circle and I got it. Several times later, I was able to get an entire circle before we ran the line to the pen with the mares in it. Once my donkey learned that he could canter easily with me on his back, I didn’t need the mares anymore.
I took Little Jack Hornerinto the arena and tried to canter the perimeter with him. At first he cantered a few strides and then dropped to trot. Each time he cantered, I praised him verbally, and when he broke 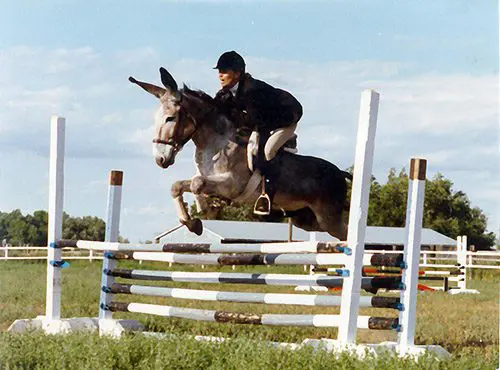 to trot, I would finish the circle, stop him and praise him with the food reward. It was slow going the first few tries, until I started counting strides and realized the jack was adding one more stride at canter with each attempt. Before long, he was cantering the full circle with ease on command.
With training like this, my donkey jack, Little Jack Horner, has performed successfully in Trail, Reining (with spins, slides and flying lead changes), Second Level Dressage and even performed at Bishop Mule Days where he jumped four feet in exhibition —quite remarkable for a 13-hand equine, and a donkey no less!
The Ten Principles of Behavior Shaping
1) Establish and raise your performance criteria in increments small enough to give your animal a reasonable chance of success and create an opportunity for positive reinforcement. If the criteria are too challenging, the animal may fail and give up.
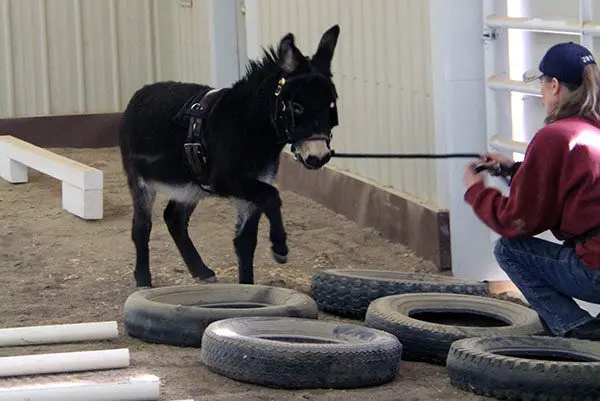
2) Train for one aspect of a behavior at a time. Do not try to teach several skills at once. When training for a dressage test, for example, do not practice the whole test every day. Take a few sections of the test and work on those. Practice going up and down the centerline in straight lines. Practice 20-meter circles. Practice going deep into the corners of the arena with the right amount of bend. Shape the ultimate result by gradually linking the components, and they’ll fit together nicely. Ride the test as a whole, and the quality of the smaller components will suffer.
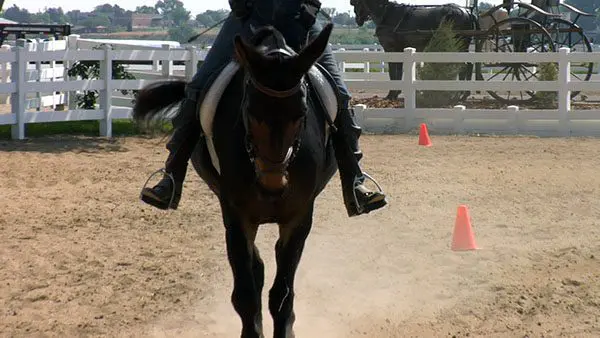
3) Before you move to a new skill, put the current skill or behavior on a variable level of reinforcement. Use a fixed schedule of reinforcement on any new behaviors, rewarding verbally and with oats each time the behavior is performed, but once the animal “gets it,” reward less often and randomly. Then, as you add a new behavior, reinforce that behavior on a fixed schedule, while randomly rewarding learned behaviors.
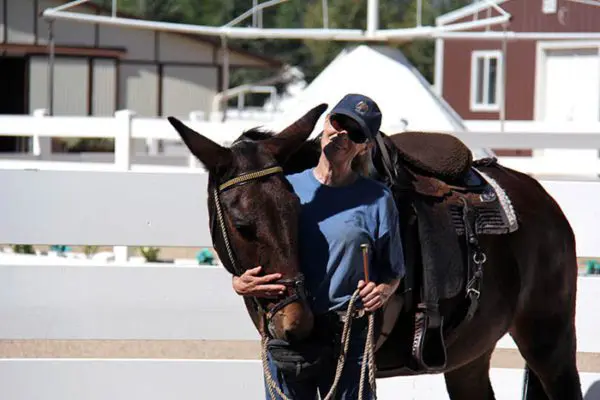
4) When introducing new behaviors, relax expectations on the old ones. What was once learned is not forgotten, but under the pressure of assimilating new behaviors, the old behaviors sometimes temporarily fall apart.
5) Stay ahead of your trainee. Be prepared with what you will ask next, in case your animal has a sudden breakthrough and easily performs the next step. You must keep your equine challenged in order to maintain his interest.
6) Avoid changing trainers in midstream. The animal/trainer relationship is an integral part of the training. Changing trainers disrupts the training process until a new bonded relationship is formed. The owner should be doing the training with only guidance from a professional trainer as the animal will bond to the person who actually does the training.
7) If one shaping process is not working, try another. Individuals, whether animal or human, learn in different ways. Continue with the premise of reinforcement, but find what works best for your animal at any given stage. For example, if you cannot get your equine to back through barrels in a figure eight, simply begin by going forward and always start between the barrels to allay any fears he might have of them.
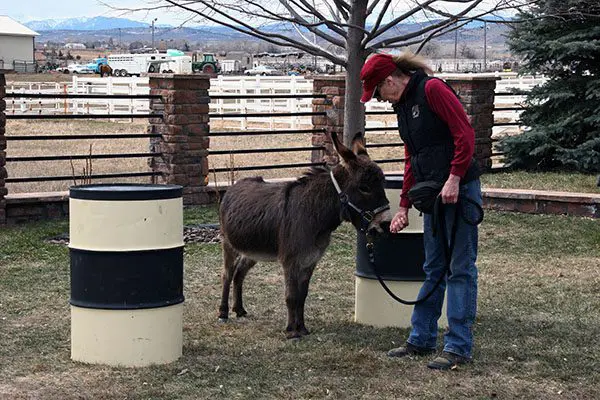
8) Do not interrupt the training process without cause—this constitutes a punishment. When you are training, try to avoid interruptions. When you train using the methods of behavior modification, you are obliged to reinforce the good behaviors. If you aren’t paying attention, you may inadvertently punish a desired behavior if you interrupt it. The most common example of an infringement would be talking to someone while you are training the animal. If you must talk to someone, simply include the equine in the conversation.
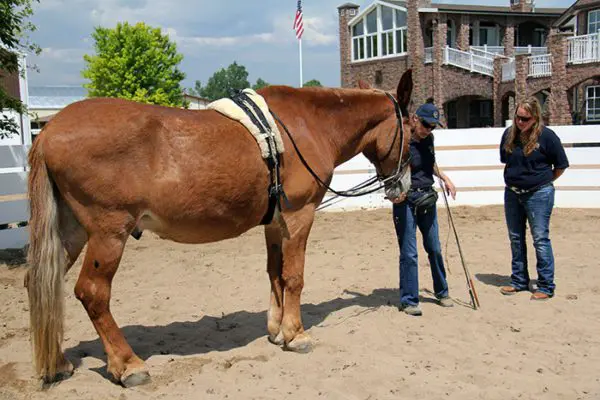
9) If a learned behavior begins to deteriorate, simply review and use fixed reinforcement until it is re-established. Sometimes side effects from negative reinforcement can cause this to occur, but if you remain calm and patient, the animal should relearn quickly.
10) Quit while you’re ahead. At the beginning of the each session, you will likely see improvement from where you were at the end of the session before. Drilling on a desired behavior will make the animal tired and less willing to perform. Better to quit with a good assimilation of the requested behavior, and work to refine it in subsequent sessions.
The Road to Success for You and Your Equine
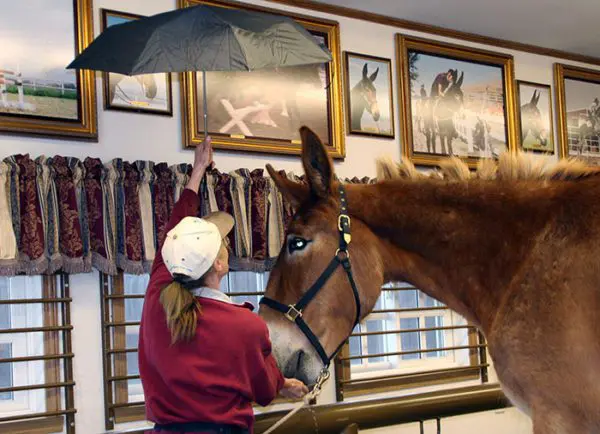 As you begin to understand the principles of shaping and modifying behaviors, it is important to realize that it is a lot like dancing, cooking or any other learned skill—the only way forward is with practice. The more you practice, the better trainer you will become. You have the opportunity to practice positive reinforcement every moment of your life, reinforcing behaviors in everyone—the cat, the dog, your husband or wife, your children. It becomes a game of noticing and praising positive accomplishments while setting clear boundaries to all behaviors, large or small. With practice, you will increase your awareness and, thus, your skill. The success or failure of your efforts to shape behavior in any animal does not depend upon your expertise, but on your patience, respect, consideration and consistency during the process. This may not be the easiest way, but it is extremely effective—and it’s fun!
To learn more about Meredith Hodges and her comprehensive all-breed equine training program, visit LuckyThreeRanch.com, MEREDITH HODGES PUBLIC FIGURE Facebook page, or call 1-800-816-7566. Check out her children’s website at JasperTheMule.com. Also, find Meredith on Pinterest, Instagram, MeWe, YouTube and Twitter.
Covered in TRAINING MULES & DONKEY: A LOGICAL APPROACH TO TRAINING, TRAINING WITHOUT RESISTANCE and EQUUS REVISITED at www.luckythreeranchstore.com.
© 2005, 2011, 2016, 2018, 2024 Lucky Three Ranch, Inc. All Rights Reserved

MULE CROSSING: Introduction to Behavior Modification, Part 1
By Meredith Hodges
“Throughout history, mules and donkeys have been pegged as being stubborn and therefore stupid, but I have found just the opposite to be true. They are intelligent, sensitive animals, and they have a particularly strong survival instinct. They’ll go to great lengths to avoid danger or what they perceive as danger, and the process of training a mule or donkey is the process of earning their trust.”
—Meredith Hodges, internationally recognized mule and donkey training expert
 When I began working with mules and donkeys, I quickly realized there would be no shortcuts to successful training. I steered clear of fads, trends and shortcuts and, instead, based my training program on Behavior Modification techniques developed by world-famous behaviorist B.F. Skinner over a century ago. For many years now, I have used these techniques to successfully train my own champion mules and donkeys, and I continue to share my method with millions of people through my books, an award-winning DVD series, multiple television shows, my comprehensive website and on Social Media.
The techniques presented here work well with not only mules and donkeys, but also with horses and any other trainable animals (and even humans). The program is designed to be resistance free, and the goal is—and always has been—to help people get the best performance and most enjoyment from their animals and to insure that the animal receives the best treatment possible.
Behavior Modification Basics
As a young adult I worked as a psychiatric technician at Sonoma and Napa State Hospitals in California, and the Behavior Modification techniques I learned at that time proved ideal for my later equine training purposes for two major reasons:
˚The system in which the trainer sets performance goals and rewards positive behavior leading to achievement of those goals encourages “good” behavior instead of using fear-inducing punishment to suppress “bad” behavior.
˚The step-by-step approach that builds gradually on learned skills gives the animal a sense of security and achievement that encourages trust and helps minimize resistance.
 Animals, like humans, need a predictable routine in order to learn. Just as children progress through grade school, building on their knowledge with each successive grade, animals learn best when a solid foundation is laid for each new skill. By creating a logical program from the outset, we avoid the confusion that can lead to resistance.
These levels of achievement are at the heart of Behavior Modification as a training tool. Acceptable levels of behavior must be defined at each level of training, beginning with the simplest of expectations and working forward. At each level the animal must accomplish certain tasks, and each accomplishment must be acknowledged and reinforced. Also note that it is critical—especially if you are working with a mule or donkey—that you, the owner, participate in the training process. Mules and donkeys develop a strong bond with their trainer, and if they’ve learned from someone else, their performance for you may suffer in the long run. It is also advisable to consult with an experienced trainer in your area, and if you are working with my Training Mules and Donkeys training series, I am just a phone call away.
Reinforcing Behaviors
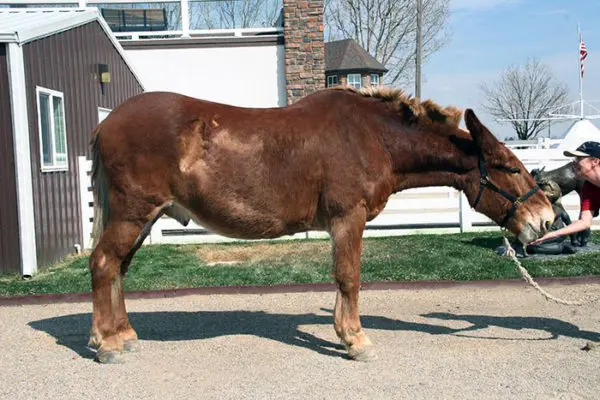 Everything we do, every behavior we choose, is based on an instinctual desire to experience pleasure and avoid pain. Our choices reflect our experience. They are “reinforced” by the pain or pleasure they have given us in the past. Behavior Modification uses the same principles of positive and negative reinforcement with an emphasis on positive reinforcement.
In training, positive reinforcements delivered in the form of rewards. We know that an equine, when rewarded for performing a certain task, will be willing to perform it again in anticipation of another reward. Note, however, that positive reinforcement is not bribery. The reward is not given as an inducement to perform the task, but as a reward for a task completed. The reward should be something the animal loves and will consistently work for, yet something that is nutritionally sound. In the case of equines, rolled or crimped oats work far better than rich snacks full of empty calories and are healthier for your equine.
 Positive reinforcement also takes the form of verbal cues. When your animal performs the desired behavior, you should, simultaneously and with appropriate enthusiasm, say the word, “Good!” This works well when it isn’t possible to give a food reward right away. Clicker training, which has become a popular and effective means of audible reinforcement, is similar and applies the same concept. It’s immediate, it’s consistent, and it can be used with all mules, donkeys and horses to reinforce behavior. However, I feel that it is better to use your voice than a clicker, as the sound of your voice promotes engagement with your equine on a more intimate level, so your voice will yield better results than clicker training.

Negative reinforcement is used not to punish the animal but to encourage them to make a better choice. Negative reinforcement should be brief, to the point and used sparingly. It should never be of long duration or given arbitrarily. Negative reinforcement, such as a slap or a loud “No!” shouldn’t be used so often that it makes the animal unresponsive altogether. Remember that reinforcement by its very definition always strengthens behavior. Punishment is used to suppress behavior and may trigger other undesirable behaviors. B.F. Skinner himself said that positive reinforcement may take more patience, because the effect is slightly deferred, yet it can be as effective as negative reinforcement and has fewer unwanted residual behaviors. When you begin training, you will have to give a verbal and food reward every time the animal performs a desired response. Still, negative reinforcement is necessary to define boundaries.
 As your equine learns certain behaviors, you can reinforce the learned behaviors less frequently and focus on frequently rewarding new achievements. Gradually, your animal will become satisfied with a verbal reinforcement for established behaviors, and he will comply for longer periods between food rewards. This shift from a predictable, or fixed, schedule of reinforcement to a variableschedule helps with skill progression. For example, in the transition from lunging when your animal was initially given a reward after each set of rotations in the round pen, to riding, he can eventually be ridden through his entire 30 to 40 minute session before receiving a reward.
Beware of the “delayed gratification” phenomenon, however. If your animal suspects that it will be too long before he receives a reward, he may be reluctant to even begin. Often a quick reward for a simple task at the beginning of a lesson is incentive enough to get him started. Also keep in mind that reinforcing too soon is ineffective. Your animal should be rewarded immediately after the correct behavior, not before. An animal rewarded too soon or too often can become aggressive and/or resistant to training. Remember, each of your own behaviors elicits a response from your animal. You must be meticulous in the way you ask your animal to perform, and always be aware of your own actions. In Part 2 of Introduction to Behavior Modification, I will explain how to break complex behaviors into small and simple steps to achieve the best results.
To learn more about Meredith Hodges and her comprehensive all-breed equine training program, visit LuckyThreeRanch.com, MEREDITH HODGES PUBLIC FIGURE Facebook page, or call 1-800-816-7566. Check out her children’s website at JasperTheMule.com. Also, find Meredith on Pinterest, Instagram, MeWe, YouTube and Twitter.
Covered in TRAINING MULES & DONKEY: A LOGICAL APPROACH TO TRAINING, TRAINING WITHOUT RESISTANCE and EQUUS REVISITED at www.luckythreeranchstore.com.
© 2005, 2011, 2016, 2018, 2024 Lucky Three Ranch, Inc. All Rights Reserved

MULE CROSSING: Good Basic Training Includes Common Sense, Part 3
By Meredith Hodges
In Part Two of this article, your equine was introduced to the ground rails, cavalletti and bridge obstacles. This helped develop his confidence and trust in you, his handler, while focusing on your animal just getting through each obstacle with true forward movement without hesitation. First, he learned the basics of negotiating these obstacles in Stage One. During Stage Two, when he went back through same the obstacles, he learned to do them in good posture and balance. Now, in order to continue your equine’s mental and physical conditioning, you are ready to proceed to more challenging obstacles.
 The Tarp: The Tarp will dramatically affect your equine’s balance and coordination. Its uneven surface and the noise it makes when stepped on will typically put your equine off-balance and may cause him to veer from side to side as he crosses it. You can use the same “Stage One Obstacle” approach, as described in Part 2 of this article, to change his fear into curiosity. Again, as you did with the bridge, break this exercise down into small steps; stopping at the edge of the tarp, stopping with the front feet on the tarp, then all fours, then fronts off and hinds on, and then finally walking off the tarp to a complete halt and squaring up. Just learning to get through the obstacle will diminish your equine’s fear and replace it with curiosity and confidence. Then assume the showmanship position and do all obstacles again with Stage Two strength and balance, and with good posture in mind for both of you. You will know that your equine is ready to move on to the next stage of training in the round pen when you can toss the lead rope over his neck and he will negotiate all obstacles correctly, keeping his head at your shoulder and is showing no visible signs of a loss of balance, or any inability to obey your commands. He will then be placing his feet so that his balance is evenly distributed over all four feet and his foot placement is coordinated and deliberate. At this point, the obstacles in general should be an effortless task.
The Trailer: The Trailer should be considered just another obstacle, requiring the same basic approach as the bridge. Mules and donkeys are no-nonsense kinds of guys and become suspicious of intimidating techniques such as feeding them in the trailer. This would be bribing and it is quite different from rewarding for a task well done. The equine learns instead to distrust due to the sneaky approach that is used to get them in there. We would rather teach our equines to be trusting and willing by developing  their confidence in the handler. When we begin leading training, the equine is introduced to all kinds of obstacles. In Stage One of obstacle training, we first approach the obstacle and encourage them to investigate, changing their fear into curiosity and instilling confidence in them and in their handler. When they are compliant, they are rewarded with crimped oats and praised for being so brave. By the time they have learned to confidently negotiate other obstacles, the trailer is no longer a threat to them. They will most often just follow you right in, knowing (since they have never been trapped into complying) that there is a crimped oats reward waiting for them. For those animals that are still hesitant about the trailer and just won’t follow, we use a second method that restricts backward movement and this is explained in detail in DVD #1 of my series, Training Mules and Donkeys. When your equine willingly enters the trailer, you can employ Stage Two and ask your equine to step to the entrance of the trailer and square up, then enter with the front feet and leave the back feet on the ground and square up again, then all four feet in the trailer, square up, and, finally, when tied off inside the trailer, square up yet again. Backing out is also broken down into the same small steps to rebalance the same way on the way back out. This builds muscle correctly and enhances your equine’s proprioception (body awareness).
 Jumps: Jumps are a good exercise to do on the lead line, but you must be careful not to over-jump your animal in the beginning. Because they are large, they must have great strength in the hindquarters to boost their heavy bodies over a jump, and if they are not strong enough, they can easily pull a muscle or worse. Jumping should be done only after all other obstacles have been thoroughly mastered. In Stage One, approach the jump the same way you would any other obstacle, building confidence and trust. Then use Stage Two to finesse your equine’s movements. Mules have the ability to jump from a standstill, so you can still use the stop, square up, wait for the command to jump, jump, stop and square up again on the other side. This ability allows you to maintain control of your mule when on the ground with the lead line or in the drivelines. If you are training a horse or a donkey, use a longer lead rope, so after squaring up about four feet in front of the jump, he can get a trotting start to the jump. Whatever equine you are training, be sure to keep the jumps very low in the beginning.
If you want your equine to jump on the lead line, you must go over the jump yourself for the first few sessions, or he will not really understand what you want and may start dodging the jump. Ask him to stand still while you cross the jump to the other side, and then ask him to come. (Remember that a mule can stand closer to the jump, but a horse or a donkey will need some trotting space in order to make the jump). Once your equine takes the jump with no problem, you can teach him to go over the jump ahead of you on a longer lead line. Start off with very small jumps and understand that an equine will jump higher than he needs to jump the first few times. When he is finally tucking his knees under and just barely clearing the top, he is then ready for the jump to be slightly raised. Raise your jumps in three-inch increments and repeat the exercise until your equine is properly clearing each height and not over-jumping before you raise the height again. The lead line stop-and-jump procedure will help strengthen and develop your animal’s hindquarters and will begin to teach him to lengthen and compress his body as needed to control his stride.
 The Back Through “L”: The Back Through “L” will fine-tune your equine’s response to “Whoa,” and he will learn to allow you to adjust the different quarters of his body and move each of them independently. First, walk forward through the obstacle, then stop at the end and turn around to face backward. Then, slowly and steadily, back through the entire obstacle. Once he has gotten this down fairly well, you can then go back to the beginning, and back one step (but only one!). Then proceed forward to the middle of the first straightaway, stop, back up two steps and square up. Go forward again to the angled rails where they begin the turn, halt, and then move his front feet one or two steps sideways with gentle pulls on your lead line at the halter, into the middle of the second straightaway, and halt. Then ask for one or two steps forward into the second straightaway and halt. His back feet will be cutting the corner into the 90-degree turn, so after he halts, tap him lightly on the hip with the end of your lead rope to move the hindquarters over one or two steps to straighten him into the center of the second straightaway, halt and square up again. Finish the obstacle by walking to the end of the straightaway, halt and square up again. Now do the same series of steps in reverse. This exercise teaches him to maintain his focus and balance throughout the obstacle and to learn to wait for you to move his front and rear quarters into any position required, taking only as many steps as you request. This will improve his negotiation of forward and backward movement, as well as beginning to strengthen the hard-to-condition inside forearm, gaskin and stifle muscles.
Five or Six Tires on the Ground: Five or Six Tires on the Ground (3×2 or 3×3) is an obstacle which is used to help develop proprioception (deliberate and balanced foot placement) and coordination, as equines have so many different places to put their feet when walking through tires. Although they will want to waver and step out of the sides, you want them to maintain deliberate foot placement, so carefully plan each step. With each step, stop for a moment and then reward after the completed step. This will break the task down into doable stages and will help to keep your animal in a straight line while you both move through the tires. You can stagger the tires in a number of different ways, giving your equine multiple options for foot placement. He needn’t place his feet in the middle of each tire, but he must move straight forward in balance, correctly and in good posture. This exercise keeps him alert and careful about foot placement while it fine-tunes his proprioception and balancing capabilities.
The Tractor Tire: The Tractor Tire is a wonderful advanced exercise in coordination. The first task (Stage One) is to ask your equine to adjust his stride and simply walk through the middle of the tractor  tire. After he is comfortable walking through it, break it down into smaller steps in Stage Two: stop before the tire, then one foot in the tire, then two front feet in the tire, then allow the front feet out and the back feet in and then exit.
When he is calm with this, you can add to the exercise by stopping him when his front feet are in the middle of the tire and asking him to do a turn on the forehand. While watching his legs, make sure he is properly executing the turn by crossing his near hind in front of the far hind, as he turns without stepping his front feet out of the center of the tire. Allow him to adjust his front feet back to the center of the tire if they get too close to the edge. Just stop moving the hindquarters, halt, adjust the front legs, halt and begin moving the hindquarters again—only one step at a time. In the beginning, be sure to reward every step. As he understands and complies more easily, he can be rewarded less often within the task.
When he can easily do this exercise, you can then put his hind feet in the middle of the tire and do the turn on the haunches, crossing over in front of the hind pivot foot and the inside front foot as he makes the turn. Again, if the hind legs need to be adjusted back to the center of the tire, stop, correct the hind legs, stop again and then continue. In order to maintain his attentiveness and control, always teach general negotiation first for curiosity and confidence (Stage One), followed by breaking the obstacle down into small and doable steps to be rewarded in good posture and balance, and with coordination (Stage Two). The Tractor Tire is a great coordination exercise because it not only addresses forward motion, but simple lateral motion as well. These exercises will begin to strengthen the hard-to-condition inside forearm, gaskin and stifle muscles.
 Side Passing the “T”: Because Side Passing the “T” is a complicated and advanced obstacle, it is important that your equine execute the straight forward obstacles and lateral Tractor Tire obstacles before attempting to do the “T.” The “T” is a great way to fine-tune truly sideways lateral motion, where both front and back feet are crossing over diagonally and simultaneously in a balanced fashion, moving the equine laterally to the right and to the left as he negotiates the three different rails in the obstacle. In the same obstacle, you will be breaking the simultaneous motion into a turn on the forehand and a turn on the haunches in the middle of the obstacle, in order to make the turns into the next lateral motion down the next rail. This obstacle uses all the elements that have been taught in previous obstacles. It also lays the groundwork for perfect communication between you and your equine. In order to correctly execute this obstacle, he must pay attention to you at every step.
In the beginning, you will need to teach your equine to side pass by moving first the front quarters, then the hindquarters at each step to maintain straightness of the body throughout the obstacle. But as he gains more balance and coordination, he will be able to move the feet—both front and back—simultaneously along the side pass rails. This is where the inside forearm, gaskin and stifle muscles will begin to develop properly.
Again, you will know when you have spent adequate time on “Stage Two Obstacle Training” for your equine’s best conditioning when you can throw the lead rope over his neck and without you touching him and with his head at your shoulder, he will easily follow your hands and body language through all obstacles, displaying strength, coordination and balance in good posture and will stay focused throughout.
To learn more about Meredith Hodges and her comprehensive all-breed equine training program, visit LuckyThreeRanch.com, MEREDITH HODGES PUBLIC FIGURE Facebook page, or call 1-800-816-7566. Check out her children’s website at JasperTheMule.com. Also, find Meredith on Pinterest, Instagram, MeWe, YouTube and Twitter.
Covered in TRAINING MULES & DONKEY: A LOGICAL APPROACH TO TRAINING, TRAINING WITHOUT RESISTANCE, EQUUS REVISITED and A GUIDE TO RAISING & SHOWING MULES at www.luckythreeranchstore.com.
© 2015, 2016, 2020, 2024 Lucky Three Ranch, Inc. All Rights Reserved.

MULE CROSSING: Good Basic Training Includes Common Sense, Part 2
By Meredith Hodges
Proper training is much more than just teaching your equine to do “movements.” You are conditioning his body so he can do those movements easily, which in turn produces an equine with a happy and healthy working attitude. In order to do this, you need to be prepared to spend plenty of time during the leading stage of training both on flat ground and then over obstacles, conditioning the “core” muscles that support your animal’s skeletal frame. When training any equine for saddle or driving, you will need to spend an adequate amount of time on correctly conditioning his body. To assure that there is no undue stress on his body, your equine should be at least three years of age when a rider is introduced. If you look at the configuration of the equine spine, it’s easy to see how important it is to strengthen the muscles that support the tall, finger-like spinus processes that protrude from the equine’s interlocking vertebrae—these spinus processes are what a rider actually sits on and must be supported along the topline by strengthened musculature on both sides of the spine.
Approach to Obstacles, Stage One:
At this stage, you need only focus on negotiating the obstacle: replacing fear with curiosity, instilling trust and confidence, and just getting your equine through the obstacle. When doing obstacles on the 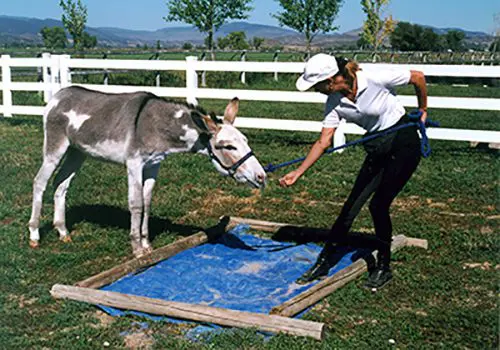 lead line, keep in mind that you are not only teaching your equine to negotiate an obstacle, you are also conditioning the muscles (especially the ones that are closest to the bones) while, at the same time, teaching balance, coordination and self control. In showmanship training, you focused on strength and balance on the flat ground. While working with obstacles on the lead line, you will now begin to add coordination during this second phase of obstacle training. Remember: Do not put obstacles in your equine’s stable area and/or living quarters, in an attempt to make him “live” with the obstacle. This only serves to create insensitivity and in some cases, cause greater fear. The stable area should always be your animal’s resting place, just as our bedrooms are for us—a place of rest, relaxation and privacy.
If your equine is not easily approaching an obstacle such as a bridge, tarp, ground poles, etc., do not wait and withhold the reward until he actually makes it over or through the obstacle. Lower your expectations and go back to your lead line training: Walk to the end of your lead line, hold it taut and wait for your equine to step toward you. Even if he only takes one step at first to comply with your request, give him his crimped oats reward, tell him how brave he is being and praise him for his accomplishment. Let him settle, leave him where he is and walk to the end of the lead line again, getting even closer to the obstacle, and repeat the same routine. When you finally reach the obstacle, step up onto the bridge or tarp, or over the first ground rail, and ask again. Stop him if he tries to run through or over the obstacle and reward him for standing with his front feet on the obstacle. You might even want to back him up, and then reward him for doing the back up before proceeding forward. Next, lead your animal away from the obstacle and then come back, requesting that he put all four feet onto or into the obstacle. Repeat this procedure again and ask him to negotiate the entire obstacle slowly and in control. Breaking the obstacle down into small steps like this will facilitate your animal’s body control and help him to learn to keep his attention on you—and don’t forget your verbal commands.
 When your equine is more willing to come through the obstacle, you can regain your showmanship position, with your left hand carrying the lead line and your right arm extended in front of you, pointing toward the direction in which you will be going. When he is finally listening and will follow at your shoulder over or through the obstacle and stop or back up at any point during the negotiation of the obstacle, you can then turn your attention to whether he is actually traveling forward and backing up in a straight line, and whether or not he is stopping squarely. Do this the same way first on the lead line, then much later in the drivelines and, lastly, under saddle. How he negotiates the obstacles will have a direct bearing on how his muscles are being conditioned and how his balance and coordination are being affected so don’t be afraid to ask for more precision going forward.
Approach to Obstacles, Stage Two:
Now you will be going through the same obstacles, but with body strengthening and coordination in mind. Since, in the beginning, balance is very sketchy at best, you should break all of the following obstacles down into very small steps.
 Ground Rails and Cavalletti: Four ground rails and four cavalletti are good tools for straight, forward exercises that will promote stretching of the body in true and correct forward motion. These exercises will also develop rhythm, balance, cadence and suspension within the gaits, first on the lead line, and then later during ground driving and under saddle. Ground rails and cavalletti are also great for enhancing your ability to stay in stride with your animal. You should first do the exercises over the ground rails. Then, for jumping training, you can graduate to the 6″ cavalletti setting, then the 12″ cavalletti setting and, finally, the 18″ cavalletti setting. Your equine will learn to suspend and place his feet in a balanced and deliberate fashion while you learn to do the same. Getting in rhythm with your animal’s stride will improve your equine training experience and make things a lot easier and safer.
The Bridge: The bridge obstacle will help develop your animal’s eye/hoof coordination. Those first steps onto a bridge will determine how the rest of the body will follow. Approach the bridge, and then  stop at the base, square up your equine and stand for a few seconds. Then ask him to put his two front feet on the bridge, square up and, again, stand for a few seconds. Next, ask him to put all four feet on the middle of the bridge, square up and stand still for a few seconds. Now ask him to take his two front feet off the bridge and leave the two back feet on it and square up again. Most equines can do the first few positions pretty easily, but when the front feet go off the bridge, the equine’s balance is often thrown forward and they find it very difficult to stop in this position. If he is able to sustain this position for several seconds before you give the command to continue forward, he has completed the bridge work.
If your animal is having difficulty with this position on the bridge with you in the showmanship position, you can use a second technique when coming off the bridge. Stand directly in front of your equine and hold the halter on both sides of his face to help keep him from falling forward. This is one time when it is preferred to have a nylon webbed halter that fits his face. If he has been properly trained up to this point, he should not run over you, but will accept the aid of your arms to help support him in the correct position. This is one time when it is acceptable to violate the rules of being in the “danger zone,” which is the area directly in front of your equine. The equine that is trained in this manner will be able to negotiate the bridge and halt at any time upon request with no visible effort (i.e., no change in stride, balance, rhythm or cadence) and will learn to wait and listen carefully to each of your commands, first on the lead line, and then later on the drivelines and finally under saddle.
To learn more about Meredith Hodges and her comprehensive all-breed equine training program, visit LuckyThreeRanch.com, MEREDITH HODGES PUBLIC FIGURE Facebook page, or call 1-800-816-7566. Check out her children’s website at JasperTheMule.com. Also, find Meredith on Pinterest, Instagram, MeWe, YouTube and Twitter.
Covered in TRAINING MULES & DONKEY: A LOGICAL APPROACH TO TRAINING, TRAINING WITHOUT RESISTANCE, EQUUS REVISITED and A GUIDE TO RAISING & SHOWING MULES at www.luckythreeranchstore.com.
© 2015, 2016, 2020, 2024 Lucky Three Ranch, Inc. All Rights Reserved.

MULE CROSSING: Getting Down with Minis, Part 5
By Meredith Hodges
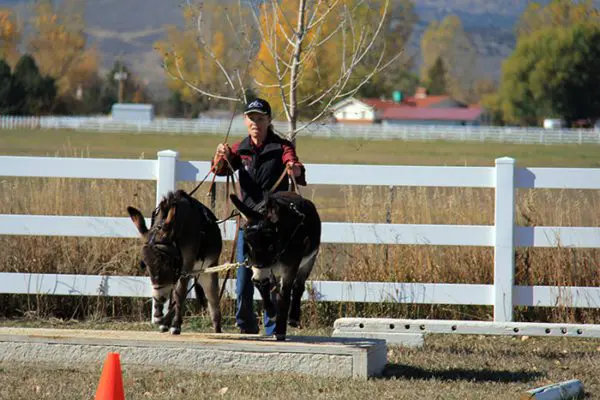 In Part 1 of Getting Down with Minis, you learned how to begin the relationship with your miniature equine in a positive and natural way that fosters good behavior and a solid relationship between you. You also learned the importance of getting down to your mini’s eye level so that he can make eye contact with you, which discourages striking, jumping on you and other bad behaviors that are common when working with miniature equines. In Part 2, I discussed how important it is to successfully complete the tasks in Part 1 before moving on to Part 2 and explained why it is advisable to work minis in groups, as they perform better when they are with their friends. You also learned how to train minis to go over and around various obstacles. Remember that all of this is to be done with no expectations that may overwhelm your mini—it is better if you maintain an attitude of fun and games. In Part 3, we got down to some serious groundwork training so your mini can be used for the purpose of driving and showing in hand. He learned to lunge and to be ground driven in the round pen and in the open arena through the hourglass pattern and if part of a team, how to do these things as a team. In Part 4, you worked on obstacle exercises on the drive lines to increase strength and coordination.
The fifth and final part of this series will illustrate how you can keep things controlled and will help you to consistently set up an environment for success. NOTE: If you are training two minis, it is really just a matter of teaching each of them the same thing, but at each stage of the ground-driving and hitched lessons, you need to teach each mini separately first and then as a team.
These exercises will require an assistant, so ask someone you trust to help you. Make sure, each step of the way, that you tell your assistant clearly and specifically exactly what you need him or her to do. To begin, take your mini back to the round pen and review your previous ground-driving lessons (“walk,” “trot,” “whoa” and “back”) with an “S” turn through the middle in order to change directions. NOTE: Do not use the “reverse” command during these lessons. Do use the “back” command, but only to loosen the traces when detaching your mini from the tire. Attach a tire to the harness traces as a drag so your mini can get used to pulling weight behind him. To do this, first thread some baling twine through the slits at the ends of your traces to create “loops.” The slits in the traces are usually too narrow to allow a line to slide freely back and forth through them, but the baling twine will work well to accommodate this.
Next, take a piece of flat nylon stripping such as a strip of lunge line and tie it to a tire with about six to eight feet of extra line. This extra line will be threaded through the baling twine loops and then be handed back into the hands of your assistant. Now ask your assistant to walk alongside and slightly behind you, holding on to the piece of nylon stripping as you ground drive your mini. Always make sure your assistant is walking on the side away from the fence so as not to trap him or her if things go wrong. If, for any reason, your mini bolts, tell your assistant to simply let go of the nylon stripping. Your mini will quickly be released from the tire. NOTE: If training a team, do the “drag” exercise with each single mini first before exercising them as a team. Working one mini at a time first will help to avoid any major wrecks that can cause your mini(s) any anxiety or distrust.
 Spend as many tire drag lessons as it takes in the round pen to be sure your mini is driving easily and smoothly before graduating him to the open arena with the tire. Just as you did with simple ground driving, once he is ready, let your mini drag the tire while ground driving him through two rotations of the hourglass pattern, and then cross the long diagonal and do two more rotations in the opposite direction. Make halts often so rewards can be dispensed for a job well done. Do not make any abrupt turns or try to add speed before you are completely competent with the lines and your mini is responding obediently. Ground driving is as much for you to learn good Reinsmanship as it is for your mini to learn to drive correctly. If training more than one mini, just tie whichever mini you’re not working with at the moment off to the side and have him wait his turn before ground driving the two as a team. The frequent halts with rewards will teach him to stay clam and remain still when asked.
 Before actually hitching your mini to the vehicle, be sure to check all harness straps and make sure they are correctly adjusted. While you do this, you will also be teaching your mini (or minis if a team) to stand still in the cross ties, which will make hitching much easier. Checking all harness straps can be done anywhere that your fences or hitch rails are close enough together to accommodate the cross ties and still allow enough room for a single mini (or team) and the vehicle. During this lesson, all you need to do is put on and adjust the harness, hitch to your vehicle, have your mini (or team) stand quietly while being rewarded and then take everything back off. Before leading your mini(s) away from the vehicle, spend some time rewarding again for standing still and staying in position.
To begin the next lesson, first review the steps in the previous lesson and make sure your mini (or minis in the case of a team) is standing quietly in the crossties before harnessing to the vehicle. When ground driving a single animal, ask  your assistant to stand in front and to the side of your mini with a lead rope attached to a ring on the noseband (not the bit) of your mini’s harness bridle. When ground driving a team, you will need to use two assistants. Ask each assistant to stand on either side of the team. Once your mini is harnessed, and when you are seated in the vehicle and ready to go forward, ask your assistant to unsnap the cross ties and release your mini while your assistant stands at his head. Now ask your mini to “walk on.” Let him go just a few steps and then ask him to “Whoa.” If your mini does not stop promptly, your assistant can help by pulling back on the lead rope with a pull/release motion while, at the same time, you pull back on the drive lines with a pull/release motion. When he does stop, have your assistant give him his oats reward. Let your mini settle before asking him to back a couple of steps and halt again. Reward him for halting and end the lesson there. The object is to allow your mini enough time to understand what you are trying to teach him and respond accordingly so he can be rewarded without spending so much time that he gets bored and sucks you into a confrontation.
Now your mini is ready to go to the open arena to be driven for the very first time. For the sake of safety, use your assistant (or, in the case of a team, assistants) during lessons until your mini (or team) is driving easily and responding to all of your cues and verbal commands promptly and calmly. Using an assistant helps to guide your mini through his lessons when he can no longer see you out in front. Your assistant will also help your mini to drive forward with confidence, as well as being on-hand to aid you if your mini has problems with turns and backing. Using an assistant also allows you more time to perfect your Reinsmanship and your ability to plan your movements in an organized and logical way.
 When your mini is hitched to a vehicle, make a very large hourglass pattern to accommodate your vehicle. His familiarity with this pattern will help him to feel calm and gain confidence while being driven. Every time you end a lesson, keep your assistant at your mini’s head until your mini is fully unhitched from the vehicle. NOTE: Always remove the harness bridle last. Once he is unhitched, make your mini stand where he is while you come to him, then reward him and lead him away. This is how he will learn to wait for you and will not become antsy and uncontrollable. Routinely practicing good manners, setting up an environment for success and approaching your mini with a calm and deliberate attitude will all help him to become a quiet, safe and reliable driving animal.
To learn more about Meredith Hodges and her comprehensive all-breed equine training program, visit LuckyThreeRanch.com, MEREDITH HODGES PUBLIC FIGURE Facebook page, or call 1-800-816-7566. Check out her children’s website at JasperTheMule.com. Also, find Meredith on Pinterest, Instagram, MeWe, YouTube and Twitter.
Covered in TRAINING MULES & DONKEY: A LOGICAL APPROACH TO TRAINING, TRAINING WITHOUT RESISTANCE, EQUUS REVISITED and A GUIDE TO RAISING & SHOWING MULES at www.luckythreeranchstore.com.
© 2013, 2014, 2015, 2016, 2019, 2024 Lucky Three Ranch, Inc. All Rights Reserved.

MULE CROSSING: Getting Down with Minis, Part 4
By Meredith Hodges
 In Part 1, you learned how to begin the relationship with your miniature equine in a positive and natural way that fosters good behavior and a good relationship between you. You also learned the importance of getting down to your mini’s eye level so that he can make eye contact with you, which discourages striking, jumping on you and other bad behaviors that are common when working with miniature equines. In Part 2, I discussed how important it is to successfully complete the tasks in Part 1 before moving on to Part 2, and I explained why it is advisable to work minis in groups, as they perform better when they are with their friends. You also learned how to train minis to go over and around various obstacles. Remember that all of this is to be done with no expectations that may overwhelm your mini—it is better if you maintain an attitude of fun and games. In Part 3, we got down to some serious groundwork training so that your mini can be used for driving and showing in hand. He learned to lunge and to be ground driven in the round pen and in the open arena through the hourglass pattern and, if part of a team, how to do these things as a pair.
In Part 4, you will learn how toteach your mini to pull correctly and in good equine posture in the hourglass pattern, but without actually pulling anything such as a tire, log or vehicle. We are only concerned with his moving forward in good equine posture while initiating thrust or “impulsion” from the hindquarters. (This training is very similar to a human learning to “lift” correctly using his legs instead of his back.). In order to learn how to do this, your mini will need to be equipped with my self-correcting restraint for equines called the “Elbow Pull.” (How to make the “Elbow Pull” is covered in my Equus Revisited DVD.) When he is in good equine posture, the “Elbow Pull” will remain loose, but if he tries to raise his head too far, it will restrict that movement so that he cannot hollow his neck and back and begin to build muscle in this undesirable posture. The “Elbow Pull” does not pull his head down. Rather, it gives him something to lean against for a few strides at a time until he is able to resume good equine posture and self-carriage again. At first, when the muscles are not able to sustain good posture at all times, he will move in and out of good posture. 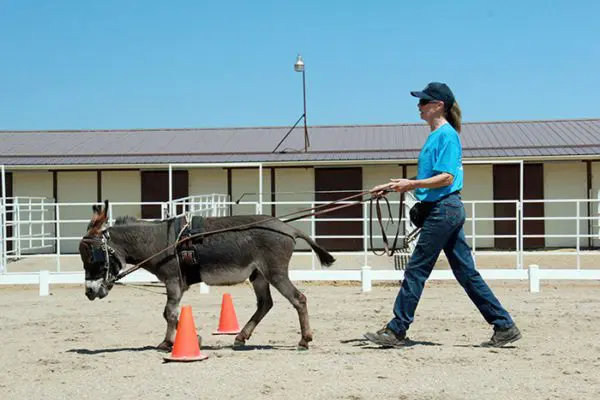 The “Elbow Pull” supports good equine postural balance and acts much like the balance bar that is used by a ballet dancer until she or he is strong enough to hold any postural position in the middle of the room without support. This becomes very important when your mini is in draught (pulling an obstacle or vehicle) in order to make sure he will pull correctly, and symmetrically condition his body’s muscles to avoid future injury to the internal structures within his body.
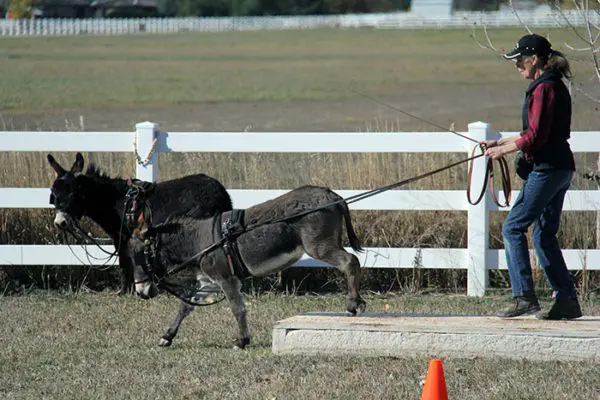 By now your mini has already learned to ground-drive the hourglass pattern and has negotiated the obstacle course on the lead line. There are still more obstacle exercises you can do to strengthen your mini and improve his strength and coordination to prepare him for driving before he is ever hitched to a cart or carriage. Now he is ready to learn to ground-drive the obstacle course. The obstacle course exercises will increase his confidence in being in the lead and help him to go bravely ahead of you upon command.
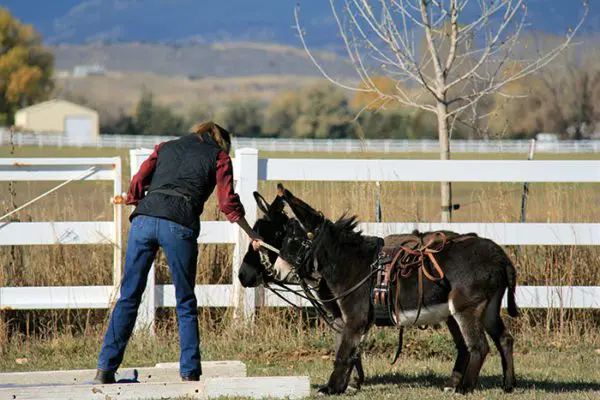 Approach each obstacle on the drive lines and if he balks and refuses to go forward, just stop, gently lay the lines over his back and then lead him through. Then go back and try again on the drive lines. In order to alleviate any fear or confusion your mini may feel, remember to “get down” to his eye level whenever possible. NOTE: Don’t forget to always reward him with his favorite crimped oats for compliance.
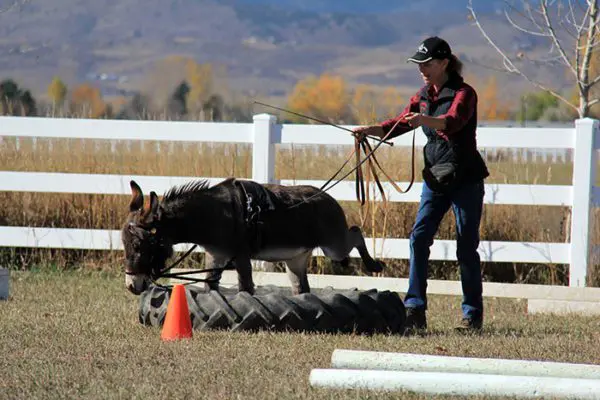 Once your mini is willing to go straight through the obstacle with a calm attitude and no balking, you can then begin to break each obstacle down into smaller, easier steps, rewarding and praising him for each success. If he is apprehensive about any obstacle, you should lead him through these smaller steps with frequent halts before attempting to ground-drive him through. He may need these detailed “explanations” before he is willing to “take the lead.”
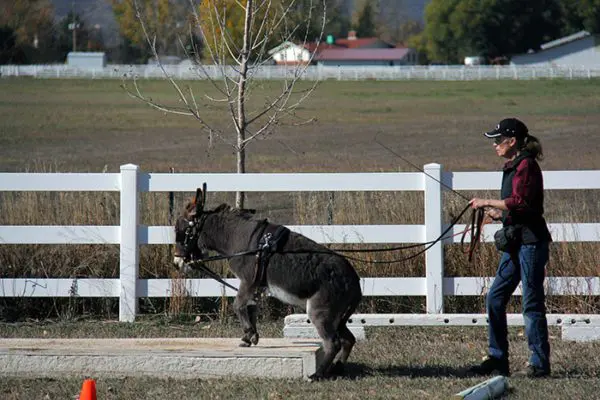 If you are training him on the bridge obstacle, go to the landing, stop, square up, put the lines up and reward, then resume your position and drive him up onto the bridge, but with only his front feet on the bridge, and then stop again. Put up the lines, walk forward and reward. Then drive him completely onto the bridge, stop, square up, put up the lines and reward. If he is having problems squaring up on the lines, then just square him up when you get to his head before you reward him.
The most difficult move your mini will have to do is to put two front feet on the ground while he leaves two back feet on the bridge. Just as you did on the lead line, hold steady on the drive lines and, if necessary, before you ask him to ground-drive ahead of you and hold the position, walk forward to help him to first get into and hold the position. Be sure to give him his reward once he is in the correct stance. You want him to succeed with every effort and you should be ready and willing to help him whenever he really needs it.
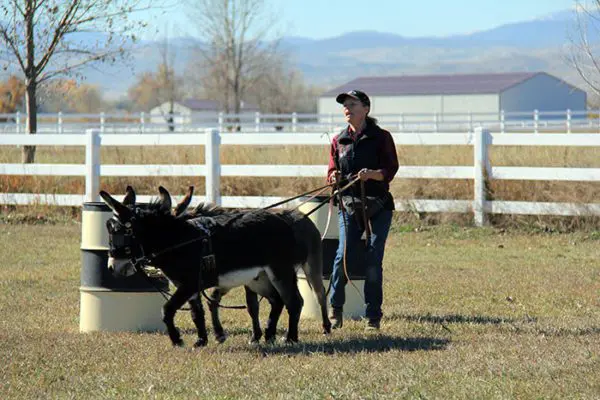 You can ask him to take full responsibility for perfect balance and negotiation of the obstacle later. For now, your primary task is to help him get through the obstacles successfully and with as little help as possible. Breaking obstacles down into smaller steps will increase his balance, coordination, agility and self-confidence. Even after he has become competent while hitched to the vehicle, you can use ground-driving obstacle exercises in the “Elbow Pull” to finesse his movements during future lessons. It will add variety to your mini’s lessons and continue to promote health, coordination and good equine posture.
To learn more about Meredith Hodges and her comprehensive all-breed equine training program, visit LuckyThreeRanch.com, MEREDITH HODGES PUBLIC FIGURE Facebook page, or call 1-800-816-7566. Check out her children’s website at JasperTheMule.com. Also, find Meredith on Pinterest, Instagram, MeWe, YouTube and Twitter.
Covered in TRAINING MULES & DONKEY: A LOGICAL APPROACH TO TRAINING, TRAINING WITHOUT RESISTANCE, EQUUS REVISITED and A GUIDE TO RAISING & SHOWING MULES at www.luckythreeranchstore.com.
© 2013, 2014, 2015, 2016, 2019, 2024 Lucky Three Ranch, Inc. All Rights Reserved.
MULE CROSSING: Organizing a Show
 By Meredith Hodges
Organizing an equine show is certainly no easy task, and it is certain that there will be problems to deal with along the way, but these problems do not need to be monumental if the people who are organizing the show clearly know the parameters of their particular jobs. It is also important that exhibitors know these duties, so that they can contact the proper person if a problem arises.
Organization of a show begins with the show management committee who is responsible for the detailing of the show. Of this committee, there is usually a designated chairman in charge, or show manager. The duty of the show manager is to assign specific duties and delegate authority to others connected with the show. He is the coordinator of the show and will only make decisions that cannot be made by other designated show officials. It is his duty to see that other show officials are doing a thorough job with their duties. The show manager may elect to have an assistant to help him with his many different duties.
 The show secretary is responsible for taking minutes of all show committee meetings and often acts as liaison to the show manager. It is the secretary’s duty to see to it that mailing lists are complete and potential exhibitors are notified of the impending show and are kept up to date. The secretary checks the public relations work done on the show by the public relations person, and in some cases, assumes this duty himself. The secretary records entries and receives funds sent in by exhibitors. Any program changes, protests, etc. are recorded by the secretary. The secretary is responsible for recording show results and mailing them to appropriate recipients, and to see that the results are released to the public in a timely fashion. The treasurer is responsible for handling and depositing funds used for the show and often aids the secretary in his duties. It is the treasurer’s duty to see to it that all expenses for the show are accounted for and paid and that a detailed report of such is given to the secretary.
 Judges are selected by the show committee and are paid for their expert opinion. Judges should be briefed by the show secretary as to the duties they will be expected to perform which sometimes may include designing courses for the competitions. A set of rules should be sent to the judge well in advance of the competition to allow for any questions that might need to be answered. The judge should not be asked to interpret the rules. Rules should be made clear enough that he can make his decisions easily, which are in turn deemed final. Judges are given the power to combine, or split classes where appropriate. The judge should not socialize with exhibitors until the competition is over to preserve his objectivity and integrity. When time permits, the judge should give reasons for his decisions to give credence to his choices and to help exhibitors learn. The judge should be knowledgeable, congenial and professional about his duties.
 The ring steward, or judge’s aid, has many varied duties. First and foremost, it is his duty to see to it that exhibitors adhere to the rules of the competition. It is his duty to interpret the use of the rules and not the duty of the judge. The ring steward is responsible for listening to and reporting complaints or protests. Although he has no authority in connection with the management or the judging of a competition, he should point out in a diplomatic manner any instance where rules are not being adhered to and report any violations to officials.
 He needs to be available to judges, officials and exhibitors at all times. He is to supervise and record any timeouts for tack changes or equipment breakage, and to measure animals where required. He is to conduct the breaking of ties in classes and to deliver the judge’s decisions to reporting officials. The ring steward is responsible for all medication forms, reports, and testing, with the aid of the secretary and the veterinarian. He is responsible for the accuracy of competition lists of entries and their class placements as reported by the judge and is to see to it that completed lists are given to the show secretary. The ring steward should protect the interests of the exhibitors as well as the integrity of the show. The ring steward should see that the competition moves along in a timely fashion. He, with his various duties, is a key entity for the success of the show.
 Scorekeepers and timers are used to record scores and times for specific classes and should be equipped with the proper tools to facilitate their jobs. Flags, stopwatches, time sheets, calculators, and writing utensils are necessary items. Scorekeepers should be prepared to keep times and scores updated continually so that championship classes can be announced quickly and easily.
The announcer is a very important component of any show. He must be able to speak clearly and audibly, to know the general rules and regulations for the show and should be creative enough to keep the spectators engaged throughout the entire show. He needs to be able to spot exhibitors and know their names from the exhibitor numbers displayed on their backs or on their animals. The announcer needs to be able to accurately pronounce the winners of each class as per the judge’s sheet  provided by the Ring Steward. It really helps if he has that “announcer’s voice” and is an animated character!
To assist on the arena floor during class changes, there should be a ground crew available. It is the duty of the ground crew to see to it that the arena is in good repair, dragged and fluffed when necessary, and that the obstacles for specific classes are placed and removed when needed. In over-fences classes, the ground crew may be asked to reset jumps. In gymkhana classes, they are required to reset poles, flags, barrels, etc. It is the responsibility of the ground crew to see to it that obstacles and such are stored properly after the competition and that donated articles are returned to their owners. The ground crew can also be asked to assist in the stabling area hauling manure, delivering bedding, finding stall assignments, or any other related duties. Keeping warm-up arenas ready and working are also the responsibility of the ground crew. There may be a stable manager, but he is usually responsible for receiving stabling forms and arranging stabling assignments, bedding requests and other related clerical duties. The stable manager also oversees the maintenance and work of the ground crew in the stable area.
 Parking Attendants and Stable Managers should be used when necessary to assist exhibitors in loading and unloading, and in the parking of their trucks and trailers. They can make the difference when it comes to traffic congestion at the show. Parking attendants may also be requested to take note of the owner’s vehicles, so that they may be notified quickly in the event of an emergency with their vehicles. This can help prevent theft or vandalism. The Stable Manager sees that each animal is efficiently unloaded from the trailer and is escorted to his respective stall. If the show is providing hay, he will make sure each exhibitor has as much hay as they need and that any other needs are provided. Newt Elsdon was the model Stable Manager and Show Committee member for the Bishop Mule Days Celebration for many years.
 Last, but certainly not least, are the show veterinarian and farrier whose expertise are to be used for emergency show situations. An exhibitor should not expect to use their services for regular maintenance at the show unless pre-arranged. Veterinarians and farriers should be booked well in advance of the show to allow for their busy schedules. Alternates should also be booked and at the show, their areas should be clearly marked and they should be easy to locate.
Organizing a show is a tremendous job, but when duties are outlined clearly, things will run as smoothly as can be expected for any such event. There are probably some things I have forgotten to mention–there is so much to consider, but I hope I have outlined a general idea of what duties to expect from what show committee members. Our mule and donkey shows are constantly improving thanks to conscientious and enthusiastic organizers in our show committees. Hats off to you all!
To learn more about Meredith Hodges and her comprehensive all-breed equine training program, visit LuckyThreeRanch.com, MEREDITH HODGES PUBLIC FIGURE Facebook page, or call 1-800-816-7566. Check out her children’s website at JasperTheMule.com. Also, find Meredith on Pinterest, Instagram, MeWe, YouTube and Twitter.
Covered in TRAINING MULES & DONKEY: A LOGICAL APPROACH TO TRAINING, TRAINING WITHOUT RESISTANCE, EQUUS REVISITED and A GUIDE TO RAISING & SHOWING MULES at www.luckythreeranchstore.com.
© 1993, 2016, 2024 Lucky Three Ranch, Inc. All Rights Reserved.