MULE CROSSING: Maintenance & Grooming
By Meredith Hodges
 Your equine depends upon you for his safety and well-being. The best feed in the world won’t keep him in good health if you neglect other important areas such as vaccinations and worming. It’s up to you to create a program to prevent disease and control parasites. Here are some suggestions for a general health program:
1) Cleanliness is very important. Make sure feed boxes are clean and manure is removed from stalls and paddocks. Do not feed hay or grain on the floor or anywhere it may become contaminated with manure. Similarly, small, heavily used pastures tend to build up a heavy parasite load. Pastures should be rotated and harrowed as frequently as possible to break the life cycle of the parasites.
 2) Internal parasites are the most common danger to the health and well-being of your mule, and you must be prepared to wage a constant battle to control these worms. Follow your vet’s advice to set up a parasite-prevention and control program through regular worming. The drugs that are available today are very effective in removing parasites and breaking the cycle of re-infection. At Lucky Three Ranch, we worm every eight weeks in January, March, May, July and September with Ivermectin and then break the cycle and worm with Strongid in November. Don’t forget to watch out for bot eggs and remove them immediately.
3) Avoid letting your equine drink from public watering facilities. Use your own clean water buckets. Keep an eye out for anything that might injure your equine, and remove or repair it.
Proper treatment of diseases and injuries depends on two very important factors: correct diagnosis and knowledge of the proper treatment. Your job is to become familiar with equine diseases and their symptoms. In case of sickness or injury, know what to do for your animal before help arrives. Understand what simple treatments and remedies are safe to follow. Above all, know when to call a veterinarian.
4) There are many resources available to help you learn how to be better prepared including books, clinics and, especially, advice from an expert such as your own veterinarian or farrier.
Assemble your own equine first aid kit and, with the help of your veterinarian, learn the proper use of each item in the kit. Be prepared to handle the situation before the vet arrives.
When signs of infectious disease appear, isolate infected animals promptly and call your veterinarian right away.
5) Seek your vet’s recommendations for shots and immunizations, and faithfully follow an annual vaccination program. Make sure you keep good records of vaccinations and worming, and be sure to keep track of when they’re next due.
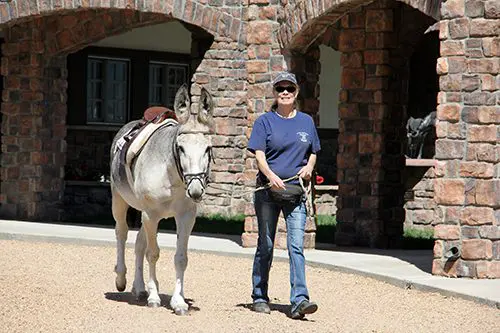
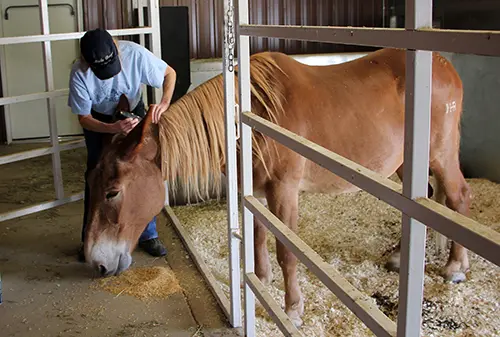
6) One of the best ways to monitor your equine’s health is by establishing a daily grooming routine. Not only will he be rewarded with a shiny coat, but you can watch for cuts and bruises and check the condition of the feet.
 Basic grooming tools include a rubber currycomb to rough up the hair and bring dirt to the surface, a dandy brush to lift out the dirt, a body brush to smooth and shine, a hoof pick to clean the feet and a mane and tail comb and brush. A sweat scraper is handy to remove excess water during and after a bath, or sweat after a workout. A grooming cloth can be used to polish the coat and bring out the shine. In the springtime, a plastic multi-bristled hairbrush and shedding blade are also nice tools to have on-hand to remove dead hair, and a sponge can be used to clean muddy legs.
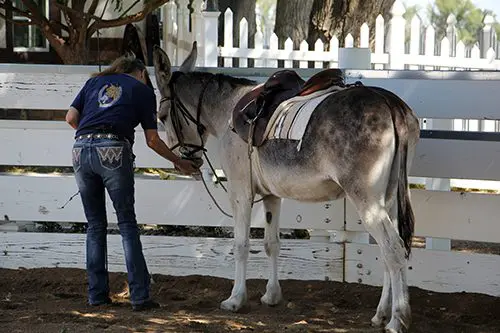
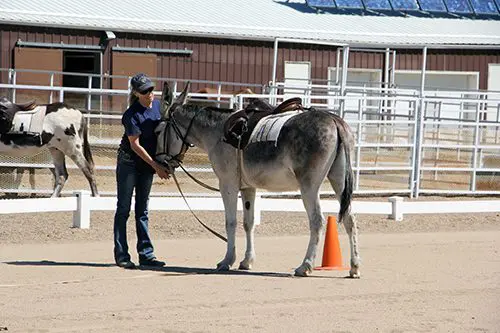
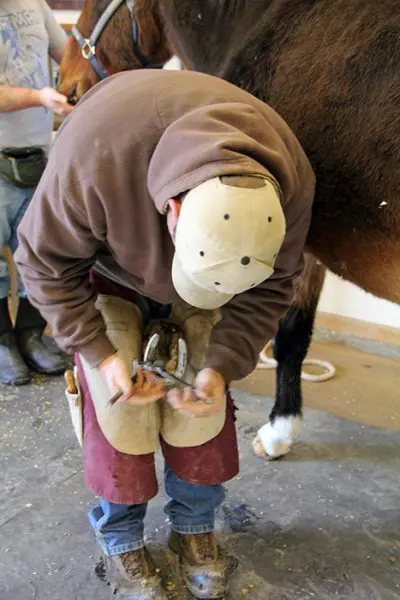
Begin your routine by using a hoof pick to clean the feet. Start with the near front foot, move to the near hind, then the off fore and off hind. If your young mule is skittish, work in whatever order he is comfortable. As he becomes accustomed to having his feet cleaned, you can do them in a consistent order. Clean from heel to toe and watch for infections like thrush and injuries from rocks or nails. This is also a good time to check his shoes. Mules should be shod (if working regularly on very hard surfaces), or trimmed, approximately every six to eight weeks according to use.
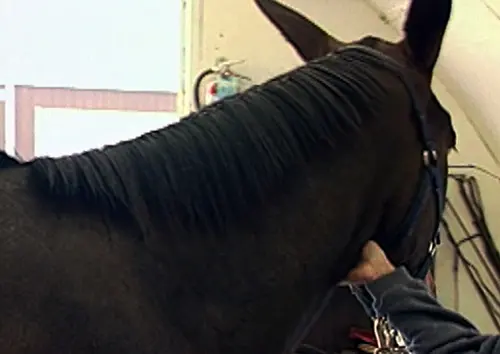
Next, begin to groom the body, starting on the left side at the head. Hold the currycomb in one hand, keeping the other hand on your animal to steady him. Gently curry in small circular strokes, working your way down and back, ending with the hind leg. Next brush vigorously, first with the hairbrush and then with the body brush. During springtime shedding, use your plastic bristle brush on the body to reach the dead hair in the undercoat before you use the shedding blade. Make sure that you apply only as much pressure as feels good to your equine (lighter pressure over bony areas). This should be an enjoyable experience for him.
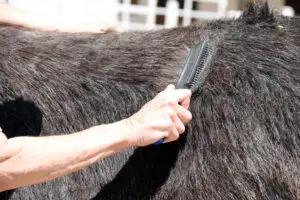 After grooming the left side, move to the right side. Brush the head with a Dandy brush and use a multi-bristled human hairbrush on the mane and tail. By adding a little Johnson’s Baby oil to the mane and tail during grooming, you can train a mane to fall to one side and keep other equines from chewing on manes and tails. Finish with a soft body brush. Finally, use the grooming cloth to wipe around the ears, face, eyes, nose, lips, sheath (if it’s a male) and the dock of the tail.
While paying this much attention to your mule’s body, you will be sure to see anything abnormal such as an abscess, a cut, mites or insects, or a sore. Early discovery and treatment keep problems small.
Besides routine grooming, your equine’s longer hairs can be trimmed as often as needed. Clip the long hairs from the head, the outsides of the ears, on the jaw and around the fetlocks for a neat and clean appearance.
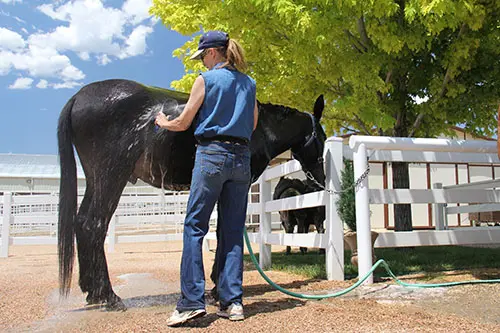
 Mules and donkeys like to be dusty, but they also like to be clean. Bathing every so often will make your Longears look and feel better. All equines enjoy having all that itchy sweat rinsed off after a good workout. I don’t recommend bathing too often with soap because an equine’s skin is sensitive. Soap can irritate it as well as strip away the essential oils. Most of the time, a good rinse, while scraping the excess water off with a shedding blade, will maintain a clean, healthy coat. Of course it’s essential to have a spotless animal if you’re off to a show or parade.
Once your mule has been bathed and is spotlessly clean before the show, all you need to do to prepare him for your class is a quick once-over with a vacuum. Vacuum training is like anything else—take your time, be polite in your approach and make sure your mule understands that this strange, noisy monster is not going to hurt him. Soon he will learn to enjoy being groomed by the vacuum. The vacuum will also promote better circulation to the muscle tissue.
BODY CLIPPING
If you plan to show your mule, you might consider body clipping. If you clip in mid-April or May, you will expedite shedding and the hair that grows in will be more manageable than the heavy winter hair. Equines that are not going to be shown should be left with their natural hair coat, as it insulates them from both cold and heat, and protects them from invasive insects. Mules and donkeys shed more slowly than horses and are not usually fully shed out until late summer.
 There’s a bonus to clipping a show mule or donkey—their hair won’t grow back as quickly as that of a horse. Just remember that clipped animals should be stabled and blanketed during cold weather. If you do blanket your mule, you must be ready to add or remove blankets and hoods as the weather changes each day. To keep the coat from growing back too quickly, it helps to have them under 16 hours of light (summertime light duration).
To body clip your mule, begin with a quick bath. Your clippers will last longer if your mule is clean. When he’s dry, use your rubber currycomb to bring any dirt and dead hair to the surface. Follow with a good brushing. If it’s too cold for a bath, use a vacuum to get him clean.
Begin clipping the legs and head, because these are usually the hardest areas to do. If he’s a little difficult, don’t hesitate to use the restraints you learned about in DVD #2. Use a twisted lead rope hobble to restrain the front legs, a scotch hobble for the rear legs, or a face tie for the head, but be sure to use them as described and don’t be punitive in your approach. Start with small clippers on the coronet band and fetlock, working your way up each leg.
 Do the body last with large animal clippers. Clip against the lay of the hair. Start at the rear and work your way forward, clipping first one side and then the other. Pay special attention to the flanks, the mane and the fuzzy areas under the belly and around the forearms and buttocks.
If your mule has a nice mane, leave it and clip a bridle path. The length of the mane and the bridle path will depend on trends in the event you are participating in. For example, in English riding, manes are kept shorter to make braiding easier, but if your event is reining, keep the mane as long as possible. I like to grow the manes as long as possible (they help to keep flies and insects at bay), give crew cuts through the bridle path to the males and leave a foretop and bridle path on the females.
If you’re packing, you might want to shave or trim the mane short for the sake of simplicity. Many people shave the foretop and bridle path with a #10 blade, and then trim the rest of the mane to half an inch. You may trim the outside edges and backs of the ears, but leave the inside hair to prevent irritation from flies and bugs.
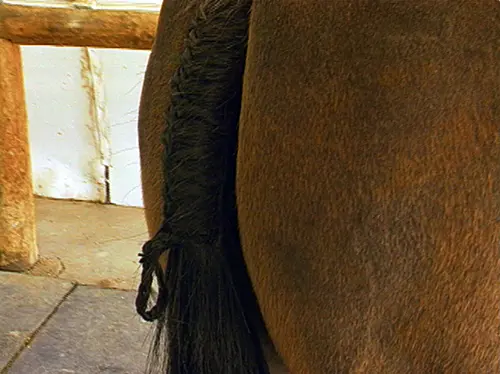
 The tail is another area where there are many variations. I recommend applying Johnson’s Baby oil to the base during each grooming and letting the tail hair grow. This is a good idea if you compete in open events with horses. A second method is to shave the first two inches of the tail for a clean, well-groomed look (however, it does grow back even fuzzier!). A third variation is to “bell” the tail in three tiers. This looks best with a thick tail and is generally used for identification purposes by packers and the military, but is not recommended for normal grooming, as it is difficult to maintain.
Now you’re ready to trim the head. This will include trimming the bridle path, muzzle hairs, hair under the jaw, long hairs around the eyebrows and the backs and edges of the ears.
Lastly, remove chestnuts and ergots by soaking them with baby oil for about 30 minutes and peeling them off. If the ergots don’t peel off, you may cut them off with scissors or nippers.
Now you’ve got an equine that looks great! It will be easy to keep him looking good with a weekly trim that should include bridle path, ears, around the face and coronet bands.
BRAIDING FOR SHOW
 Depending on the event you plan to show in, treatment of the mane varies considerably. For Western pleasure, you may want to simply band the mane so it lies flat. The tiny rubber bands can be purchased in tack shops in colors to match your mule’s hair. Tradition dictates the braiding of the mane for hunters and English classes for a neat, clean appearance. A thick, heavy mane cannot be properly braided and must be thinned until all the hairs are about four to six inches long and lay flat on the neck. This is done by using a mane comb to pull out the long hairs from the underside of the mane. This can be a big job and it’s annoying to your equine, so limit mane pulling to a few minutes a day. Make sure the hair is the same length from poll to withers. Don’t even think about cutting it with scissors—it will just end up short but way too thick to braid.
 You can spritz a little water and hair spray to make the hair easier to handle. The quickest way to secure the braids is by using tiny rubber bands. It’s also very easy to do and it’s great for one-day shows or quick changes between classes.
Sewing with thread or weaving yarn looks very professional and is more permanent, but it’s also more time consuming.
 Once the braid is finished it should be folded once and fastened with either rubber bands or a piece of yarn or thread. It can also be rolled and tacked into place. How you finish your braid will depend upon the time you have and the look you want to achieve, as well as what looks good on your equine!
Braiding the tail begins with a clean, well-groomed tail. Even short hair can be braided if you use a lot of hair spray to make it sticky. Moisten all the hairs along the dock with a damp sponge and bring them forward. Take a section of hair from each side of the tail, as close to the top as possible, pulling the sections out from as far under as you can.
On a horse, you can pick up a third section from the middle of the tail, but on a mule’s thin tail, take the hair from the side. Cross it over one of the outer strands. Begin braiding with three strands down the center of the tail. With each twist of the braid, pick up a little more hair from either side or from the middle. Continue braiding until you reach the root of the tail, then don’t add any more hair, but braid until you reach the end.
 Fasten the end of the braid with a tiny rubber band or a piece of yarn. Now fold the braid once and pull the end up into the braided root, tying it at the base with yarn or thread.
In showmanship and halter classes, it goes without saying that your equine must be groomed to perfection. This means that, for months prior to the show, you’ve given your equine a good brushing or vacuuming at least once a week. Brushing stimulates the skin and brings out the natural oils that make the coat shine. No amount of “shine in a can” will replace the natural luster of an equine that’s been brushed regularly.
To learn more about Meredith Hodges and her comprehensive all-breed equine training program, visit LuckyThreeRanch.com, MEREDITH HODGES PUBLIC FIGURE Facebook page, or call 1-800-816-7566. Check out her children’s website at JasperTheMule.com. Also, find Meredith on Pinterest, Instagram, MeWe, YouTube and Twitter.
Covered in TRAINING MULES & DONKEY: A LOGICAL APPROACH TO TRAINING, TRAINING
WITHOUT RESISTANCE, EQUUS REVISITED and A GUIDE TO RAISING & SHOWING MULES at www.luckythreeranchstore.com.
© 2013, 2016, 2024 Lucky Three Ranch, Inc. All Rights Reserved.

 By Meredith Hodges
 In order to remain an integral part of the A.H.S.A, once we were accepted, we are expected to meet certain criteria. First, our breed organization must have been incorporated in the United States a minimum of five years. Since the American Donkey & Mule Society was founded in 1967, we had already met these criteria.
 records on stock for the purpose of a traceable ancestry and to monitor the accomplishments of our athletic champions. Obviously, registering animals improves the chances to help you monitor the health and well being of your animal. A traceable ancestry gives us the opportunity to explore and examine the strengths and weaknesses of our breeding programs and other related research. Monitoring the successful accomplishments of our champions allows us to set new goals and new challenges for our Longears and keeps them in a favorable light in the public eye. These things are all-important to the stability and growth of our industry. With a well-organized registry drive, we could, no doubt, meet this second criterion with no problem.
 The third criterion was, perhaps, the one that is gave us the biggest problem: “Competitions restricted to a breed or discipline must have been held in at least 20 events during the year immediately preceding an application for recognition either at A.H.S.A.-approved events or at events approved by the breed or discipline.” This alone, is not a problem, since we definitely hold at least 20 events a year that could stand the scrutiny of A.H.S.A. approval. To remain in the A.H.S.A. we must follow up by having “a minimum of 25% of the competitions restricted to a breed or discipline held at A.H.S.A. events annually.” We needed people and clubs to take responsibility for seeing that these competitions continue to survive and thrive in the corning years.
 In order to remain in the A.H.S.A., there are only 2 more requirements:
 However, it isn’t any more so than any other “new” experience. There are many benefits to be gained by joining, and the most important of all was the overall unification of the entire Equine Industry including all breeds and disciplines. Our world is composed of billions of people with many diversified interests. To see that each different interest has the best chance for growth and development, all of those with that particular interest should ban together in support for its very survival. Dissention and arguments within an industry are counter-productive. Those who wanted to see mules and donkeys accepted by the A.H.S.A. as a division were encouraged to write me letters, cards and even call me at the Lucky Three Ranch to let me know their feelings. We wanted to begin the organization for this action. I felt that if I did not receive any responses to this request, I could only assume that our industry was too young and immature for such an action at this time, and the action to join the A.H.S.A. would again be postponed. I pleaded people to PLEASE, for the sake of our growth, consider the options carefully before rejecting this proposal. It could have meant the success or failure of our entire Longears industry!
 By Meredith Hodges
 From Loveland, Colorado, it took two days to reach Dallas. The first night, Cliff Rich and Gary Marble were kind enough to arrange for accommodations for us and our Longears at the Equestrian Center in Canyon, just south of Amarillo. The following day, Cliff led us safely into Dallas for the show. Without his help, we would surely have been lost! At the show we were greeted cheerfully and enthusiastically by several A.D.M.S. members and friends whose hospitable contributions made our trip more than worthwhile. Our deepest thanks go to Cliff Rich, Katharine Bradley, Paul and Betsy Hutchins, Darlene Winters, Grady and Wanda Alexander, Jeb and Sue Wilson, Walter Nunn and Keith and Micki Woods. These folks went out of their way to make our experience a pleasant one.
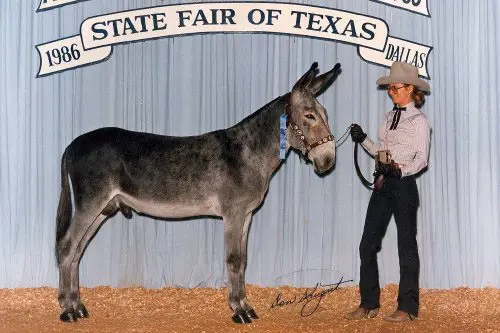 Besides the number of donkey classes made available, there were other things about this show that made it special. Exhibitors were encouraged to decorate their stall areas with photos and facts about mules, donkeys and their farms and ranches. This kind of enthusiasm made for an informative and interesting display for the spectators who strolled through the barn area, helping them to better understand just what was really going on at the show.
 The Donkey & Mule Society of the Carolinas is to be commended on a job well done in the organization and running of this show, with special thanks to Leslie Bruce and Jackie Sanders for their tireless dedication and support. Founders of the American Donkey & Mule Society, Paul and Betsy Hutchins from Denton, Texas, were thrilled with the success of the show while they too made their own personal contributions. Paul’s captivating and humorous comments throughout the show kept the audience perked, while Betsy spent the long hours manning the A.D.M.S. booth, taking new memberships and renewing old ones, selling longears products, and talking Longears with hundreds of eager spectators and exhibitors. Tennessee mule balladeer Marilyn Powell Greene’s melodic voice filled the air, musing on mules and setting an enchanting ambiance to the whole affair. Even I was compelled to travel all the way from Colorado to lend my support to this special Longears event… and I am really glad that I did! I was particularly thrilled that I was able to bring with me my apprentice mule and donkey trainer/breeder, Ruth Elkins, a representative of the British Mule Society! We both had a wonderful time!
 Of particular interest were the driving classes: Single Hitch, Youth Hitch, Multiple, and Parade Hitches, Pleasure Driving, Reinsmanship, Races, and Obstacle classes. There were teams of all different sizes and colors, in beautiful harness, pulling a variety of carts and carriages. Classes were held for both mules and donkeys. As we know, running mules in races of any kind is lucrative at best, but the mules that ran in the harness races at this show were really quite good. Even the donkeys did a respectable job, although there were a couple of them that gave us a chuckle with their deliberate unconcerned attitude during their driver’s enthusiastic “Yee-Hawing” and flailing arms!
 By Meredith Hodges
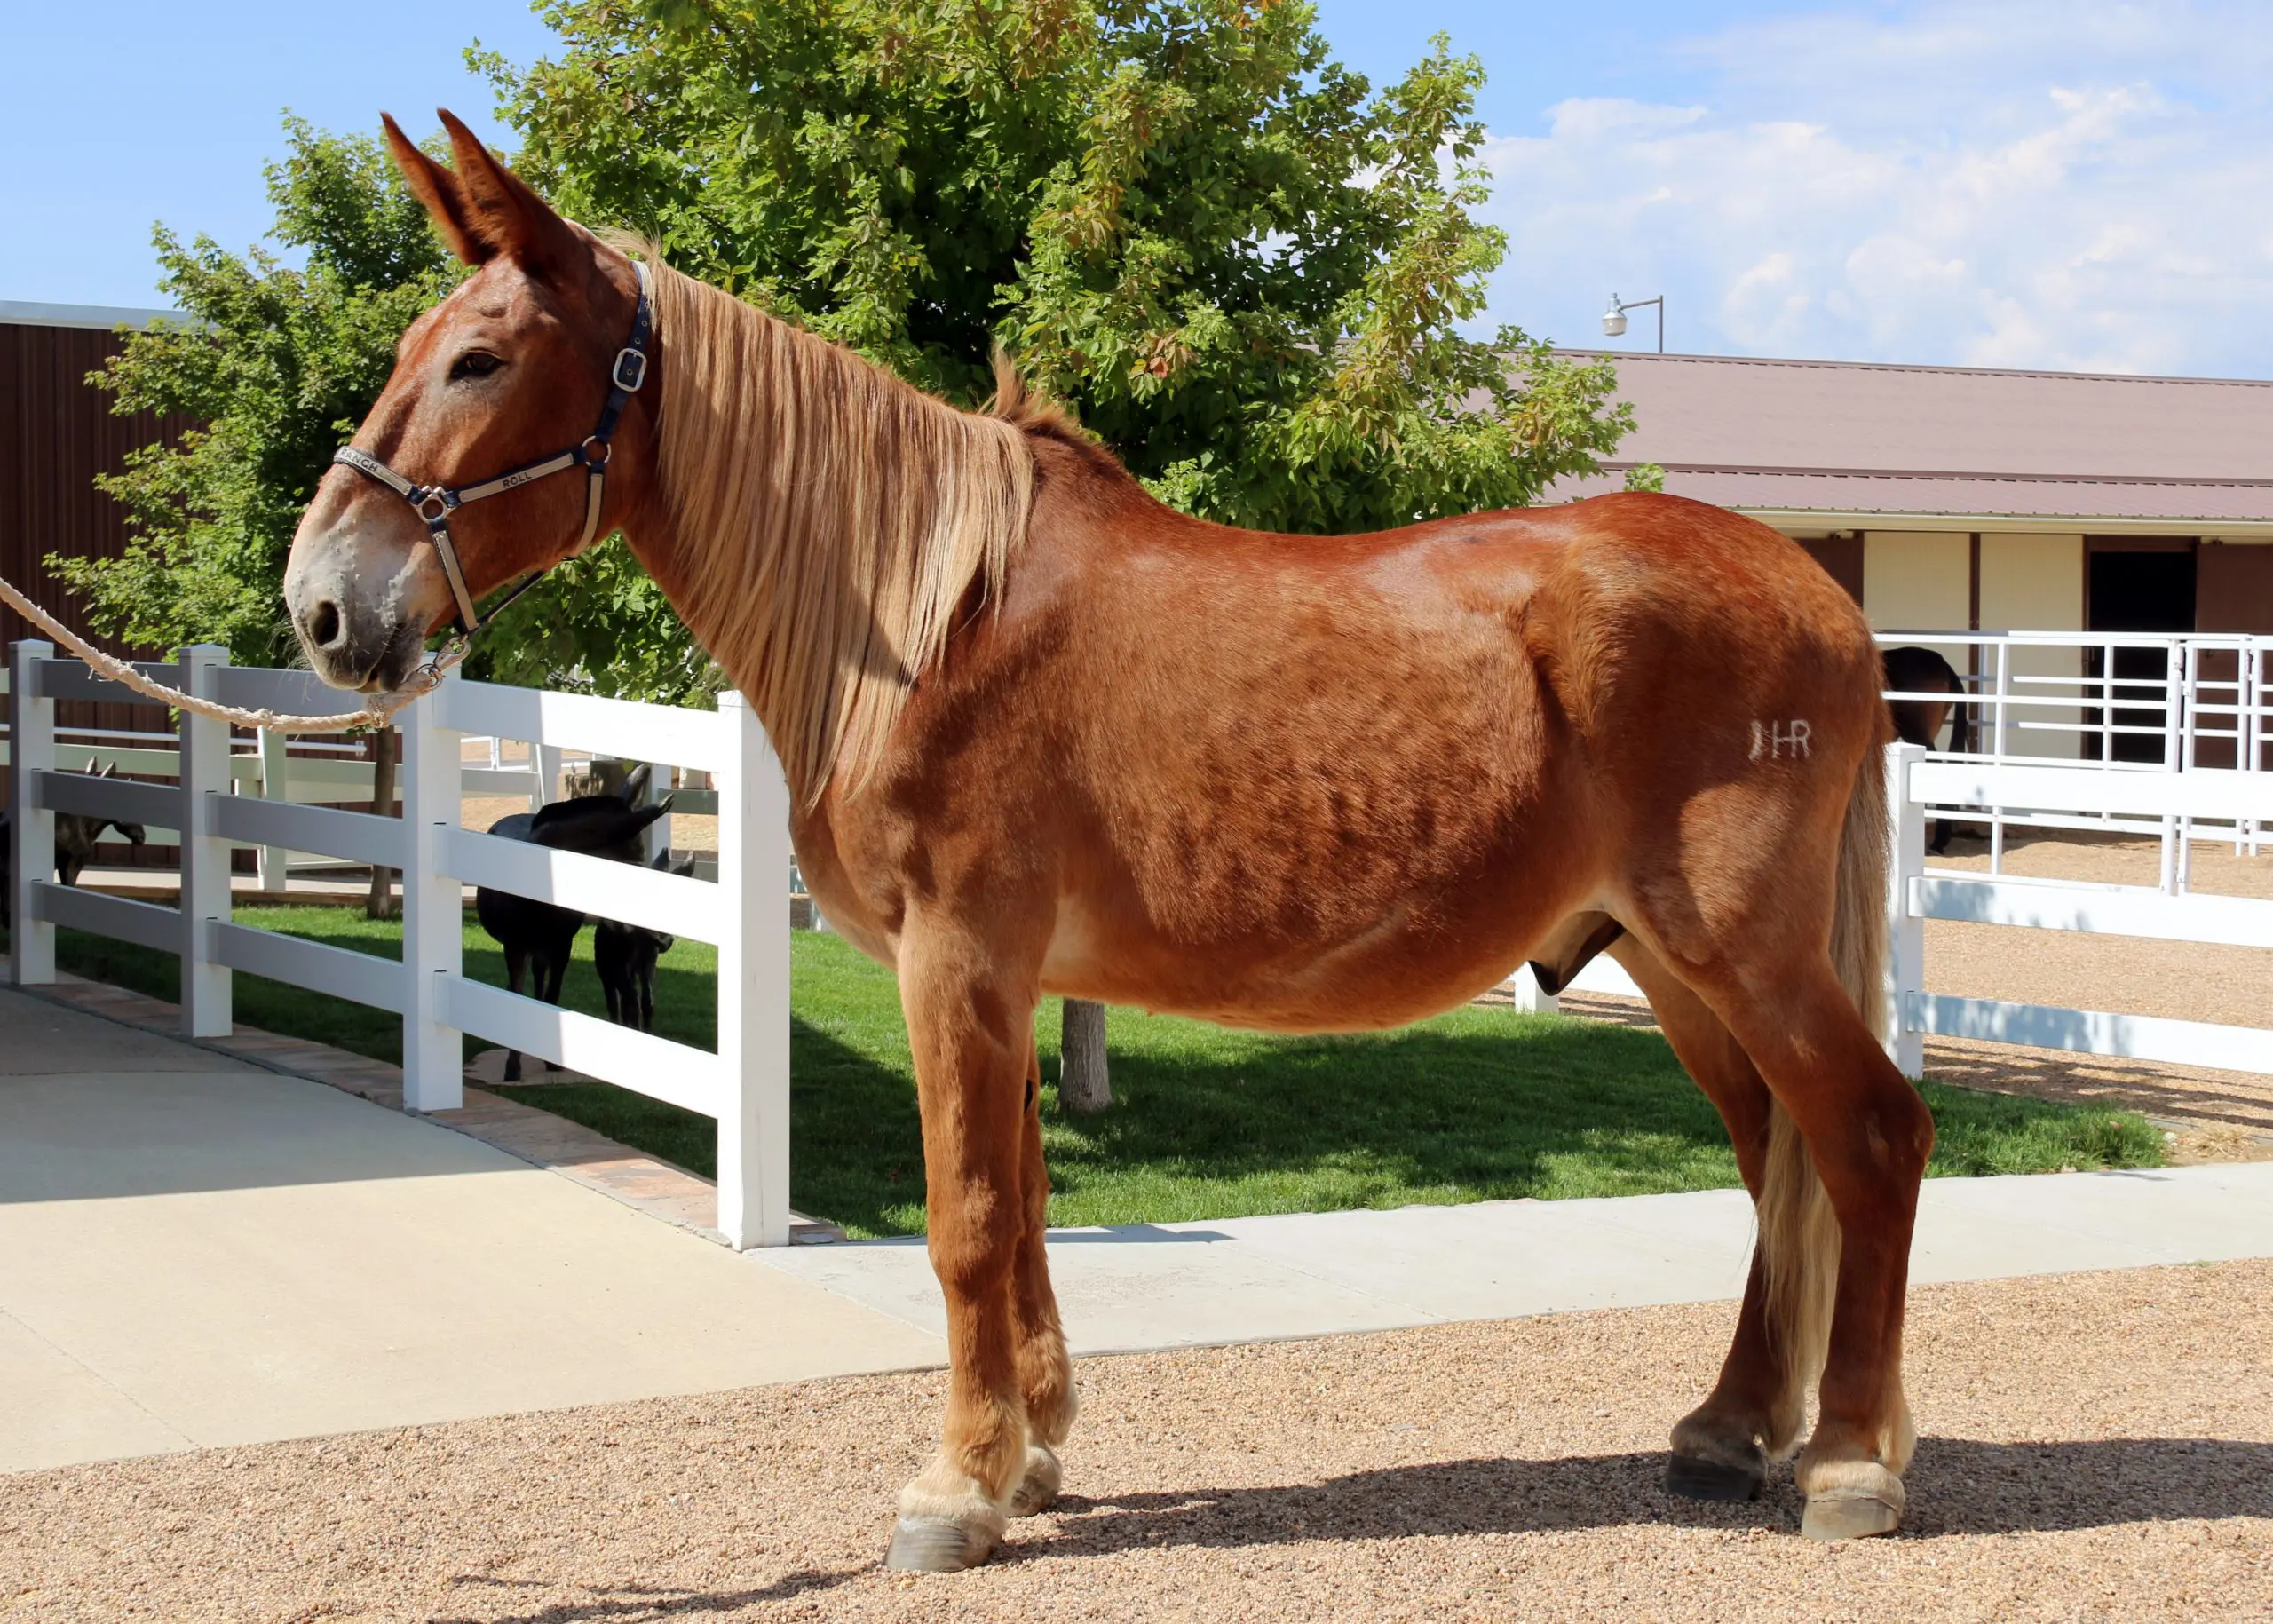
 Mules come in as many different sizes and colors as horses, donkeys and ponies. Donkey sizes range from miniatures that are 36″ and under to Mammoths that are 56″ and over. A mule is a miniature if he measures 50″ or less at the withers. Saddle mules come from a wide variety of the larger pony breeds, all light horse breeds and some draft horse breeds. They range in size from 50″ to 72″.

 Over the past few decades, through trial and error, we equine owners and trainers have discovered that, when communicating with our equines, harsh bits are not really necessary. Rather, it is safer and more beneficial to use milder tack and equipment, to concentrate on learning correct body language and to give clear cues with our hands, seat and legs to elicit the desired response from our equines.
 When it comes to rider/equine communication, bitless and/or brideless techniques do not work as well as the simple, direct rein action of the snaffle bit in concert with your seat and legs.Many people are under the impression that having a bit in the mouth is painful for an equine, and the seeming “nutcracker” action of the snaffle bit when it is in your hands suggests that it might pinch your animal’s tongue when you pull on the reins. The mouthpiece of the snaffle bit actually “breaks” in the middle, allowing it to slide easily across the top of your equine’s tongue. It does not pinch his tongue, but it does put pressure on the corners of his mouth. The snaffle bit is correctly defined as a bit that promotes “direct rein action,” meaning that when you pull right, you go right and when you pull left, you go left. A snaffle bit does not have a shank. If it did have a shank, it would be considered a curb bit, regardless of how short the shank really is (as is the case with a Tom Thumb bit).
 Learning to go forward in the beginning of your equine’s training in a snaffle bridle is paramount to properly developing his body so he will learn to carry a rider in a strong and solid frame and in good equine posture. The forward training teaches him to stretch his head and neck forward, to step well underneath his body to propel himself forward, and to elongate his overall frame to keep the vertebrae in his back from becoming compressed and rigid. When he is moving correctly in a straight line, he will have more suspension and flexibility to his gait, and when he turns he will be able to bend easily through his rib cage.
 Although it would seem that a bitless bridle could achieve this same end, it has a different action on your equine’s head and neck, which inhibits proper bending through turns. The straight forward motion can be achieved with a bitless bridle. However, reins on a bosal (a type of braided rawhide noseband used with the hackamore-type headstall), bitless bridle reins, and other bitless configurations do not have the same lateral effect on the equine’s head and neck as does the snaffle bit. The equine’s head and neck form two sides of a triangle. The rope reins on a bosal, although lower on the nose of the equine than reins that come from the corners of the mouth, can cause the equine’s head to twist slightly sideways during the turn because, during any directional indication, the rawhide bosal around the nose twists through the rope reins which are both secured together underneath the jaw. The rope reins pull the underside of the bosal in the direction of the turn, but the nosepiece goes the opposite way and can cause your equine to improperly tilt his head through the turns. On bitless bridles, the reins are attached substantially higher than the corners of the equine’s mouth. When you pull on the reins attached higher on the equine’s jaw than where the bit would be as is the case with a halter or bitless bridle, the angle of pull is sharper and more abrupt, since the head side of the “triangle” is so much shorter than the length of the neck. It will cause the equine to try to turn his head too sharply from the poll, which can cause kinks and pain in his neck.
 To prove the point, try this experiment. Preferably using an untrained animal, take hold of the halter and gently but firmly pull on the halter in an attempt to make him bend his head and neck to the side. The higher position of the halter is like a bitless bridle and you will feel slight tension and resistance to this action before the animal finally complies. Next, gently insert two fingers into one corner of the equine’s mouth while standing at his shoulder and by squeezing and releasing your fingers, ask him to turn his head and neck to the side toward you. If done correctly, without yanking on him, he should give easily to your cue to submit and turn his head and neck. You will notice that he extends his head and neck slightly forward before turning it to the side.
 Now try this action on yourself. Stand in good posture and, without extending your neck, turn your head to the side. Do you feel the tension at the brainstem on the back of your neck? Now, stand in good posture, stretch your neck in an upward and forward arc and then look around the turn. Can you now feel the release from tension in the back of your neck? Your equine experiences the same feelings. The shorter angle of the side-pulls and bitless bridles will have a more abrupt pull and can cause some pain, while the longer angle coming from the snaffle bit at the corners of his mouth will allow a smoother and painless response. NOTE: Any bit can be painful to an animal when in the hands of an inexperienced rider who uses only the bit for control.
 The equine that has not had this kind of advanced training will possess neither genuinely good posture nor the knowledge of how to respond correctly in an abrupt and unpredictable situation. He will be more apt to be frightened and, as a result, may bolt and run, putting you and everyone around you at risk. However, the equine that is properly and conscientiously taught how to communicate through the snaffle bit will be a safer and more reliable animal to ride and to take into public places. He has learned to stop and wait for cues (communication through the bit) and is less likely to bolt and run if frightened because he understands and trusts the communication coming from his rider. He will now be more correct and solid in his good posture, yielding confidence in his attitude, and he will be a more reliable pleasure and show animal to ride.

 For better or worse, an equine inherits his hooves through his genes. If your mule has inherited good feet—black, oily-looking, and with good shape—then you are fortunate and hoof care and maintenance should be relatively simple. If he has inherited a softer or misshapen foot, you will need to discuss more specialized care with your farrier.
 lubricate your mule’s hooves as needed with one of the commercial products available. But before you use an artificial hoof lubricant, first check with your farrier to make sure that it is actually needed. Many people use hoof products too frequently, which can cause hooves to become too soft. When this begins to happen, you will see horizontal rings appear around the hoof wall, and sometimes, vertical lines. Try not to let the hoof get to this point by using lubricants sparingly, but if you see that these rings are beginning to appear, immediately discontinue use of the lubricant and allow the hoof to harden. Then check with your vet to make sure it is not a founder condition. It does not take much to adequately soften the hooves of an animal with rock-hard feet. During the really dry seasons, lubricant application once a week is usually sufficient.
 Assuming that your mule has a normal set of dark, healthy hooves, he will probably not need to be shod, as long as he is used strictly for pleasure or only sporadically. However, if you are going to use your mule on excessively rocky or hard ground, you might want to look into getting shoes for him. Mules that repetitively participate in more stressful and demanding activities (such as parades, showing and endurance events) should be shod to protect their feet and to keep them healthy. Prevention of bruising or cracking and maintenance of good foot and leg posture is critical to the equine athlete.
 I believe that horses and mules, doing what they would naturally do alone—on terrain that is neither hard nor rocky—do not need to be shod. But mules that are asked to repetitively perform with a human on-board in varying surface situations should be fitted with the proper kind of shoes to help protect them from the additional weight and other demands that will be put upon their bodies. For example, my trail mules wear regular shoes on all four feet when they are being regularly used for trail riding and a variety of other activities, lessening the potential for injury. Then, when there is an occasional misstep on hard ground or rocks or when we trail-ride in the more challenging mountains, the shoes help to absorb some of the shock that would otherwise be absorbed by the hoof itself. It is my experience that young mules (and horses from two to four years of age) bear most of their weight on their front legs until their bodies are carefully and properly conditioned, and this is when you will see the most wear and tear on their feet. Because of this, my young mules that are just beginning saddle training wear regular shoes on the fronts only until their bodies are balanced and their activities clearly defined. Our broodstock, youngsters (under three
 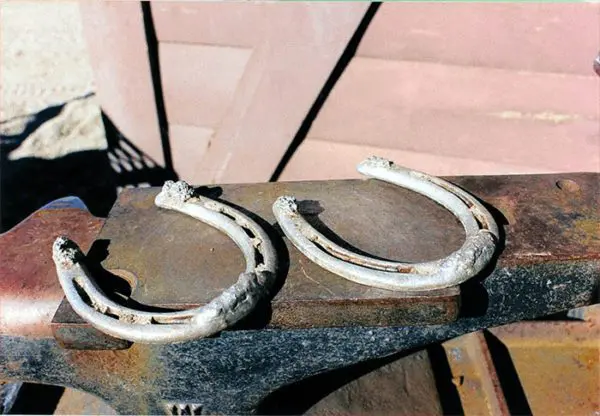 years of age) and equines that are not used under demanding conditions can go barefooted year-round, but they all still get regular trims every six to eight weeks.
 Granted, there are a lot of mules that may not need to be shod, but there are also many that do need shoes, so each individual mule’s feet must be evaluated on a case-by-case basis. Because of this fact, the generalizations that “mules don’t need to be shod” and “all equines should go barefoot” are not always correct. You must take into consideration how your particular mule’s genetics affect his hooves, what he will be used for and how harsh the demands put on him will be on his feet. These important factors will determine whether or not he needs shoes, and if he does need shoes, what kind of shoes will best suit him. And don’t forget to check your mule’s shoes on a regular basis to make sure that all is well and that his shoes are staying on tight, but most of all, that he is comfortable and happy.


 Because my equines reacted so well during training, I had no reason to believe that there was anything wrong with my approach until I began showing them. I started to experience resistant behaviors in my animals that I promptly attributed to simple disobedience. I had no reason to believe that I wasn’t being kind and patient until I met my dressage instructor, Melinda Weatherford. I soon learned that complaining about Sundowner’s negative response to his dressage lessons and blaming HIM was not going to yield any shortcuts to our success. The day she showed up with a big button on her lapel that said, “No Whining” was the end of my complaining and impatience, and the beginning of my becoming truly focused on the tasks at hand. I learned that riding through (and often repeating) mistakes did not pose any real solutions to our problems. I attended numerous clinics from all sorts of notable professionals and we improved slowly, but a lot of the problems were still present. Sundowner would still bolt and run when things got a bit awkward, but he eventually stopped bolting once I changed my attitude and approach, and when he was secure in his core strength in good equine posture.
 good unless I was careful about the way I used it. Body clipping was much more tolerable for them if I did the hard-to-get places first and saved the general body for last. Standing for long periods of time certainly did not yield a calm, compliant attitude when the more tedious places were left until last. After standing for an hour or more, the animal got antsy when I was trying to do more detailed work around the legs, head, flanks and ears after the body; so I changed the order. Generally speaking, I slowed my pace and eliminated any abrupt movements on my part to give the equine adequate time to assess what I would do next and approached each task very CAREFULLY. The results were amazing! I could now groom, clip bridle paths and fly spray everyone with no halters, even in their turnout areas as a herd. They were all beginning to really trust me.
 legs. The core of an equine is at the center of balance in the torso. Similar to bipeds, they need the energy to run freely along the hindquarters and down through the hind legs to create a solid foundation from which to allow the energy in front to rise into suspension to get the most efficient movement. When their weight is shifted too much onto the front end, their ability to carry a rider efficiently and correctly is compromised. To achieve correct energy flow and efficient movement, the animal’s internal supportive structures need to be conditioned in a symmetrical way around the skeletal frame. People can do this by learning to walk with a book on their head and with Pilates exercises, but how can we affect this same kind of conditioning in a quadruped?
 the routine and correctness in the execution of the exercises. Since this requires that you be in good posture as well, you will also reap the benefits from this regimen. Along with feeding correctly (explained on my website at www.luckythreeranch.com), these exercises will help equines to drop fat rolls and begin to develop the top line and abdominal strength in good posture. The spine will then be adequately supported to easily accept a rider. He will be better able to stand still as you pull on the saddle horn to mount.
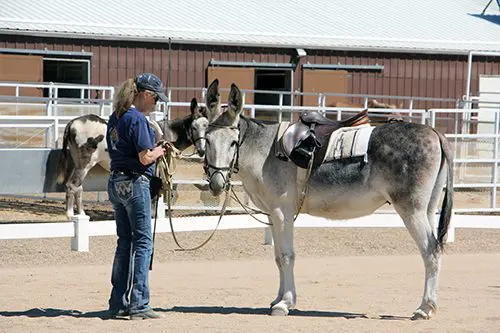
 The task at the leading stage is not only to teach them to follow, but to have your equine follow with his head at your shoulder as you define straight lines and gradual arcs that will condition his body symmetrically on all sides of the skeletal frame. This planned course of action also begins to develop a secure bond between you. Mirror the steps of his front legs as you go through the all movements keeping your own body erect and in good posture. Always look in the direction of travel and ask him to square up with equal weight over all four feet every time he stops and reward him. This kind of leading training develops strength and balance in the equine body at the deepest level so strengthened muscles will hold the bones, tendons, ligaments and even cartilage in correct alignment. Equines that are not in correct equine posture will have issues involving organs, joints, hooves and soft tissue trauma. This is why it is so important to spend plenty of time perfecting your techniques every time you lead your equine.
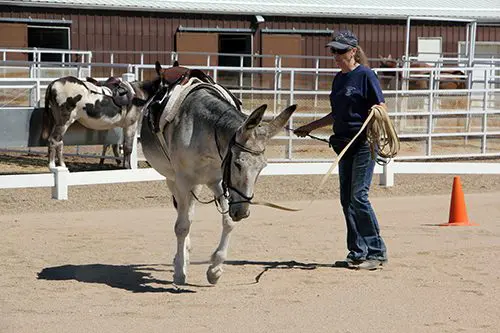
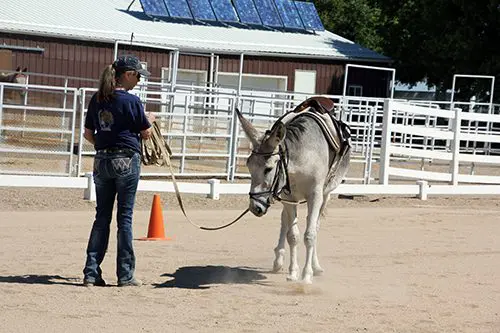
 Loss of balance will cause stress, and even panic that can result in him pulling the lead rope, lunge line or reins under saddle right out of your hands and running off. This is not disobedience, just fear from a loss of balance and it should not be punished, just ignored and then calmly go back to work. The animal that has had core strength built through leading exercises, lunging on the circle and ground driving in the “Elbow Pull” before riding, will not exhibit these seemingly disobedient behaviors. Lunging will begin to develop hard muscle over the core muscles and internal supportive structures you have spent so many months strengthening during leading training exercises. It will further enhance your equine’s ability to perform and stay balanced in action, and play patterns in turnout will begin to change dramatically as this becomes his habitual way of going. Be sure to be consistent with verbal commands during all these beginning stages as they set the stage for better communication and exceptional performance later. Although you need to spend more time in his beginning training than you might want to, this will also add to your equine’s longevity and use-life by as much as 5-10 years. The equine athlete that has a foundation of core strength in good equine posture, whether used for pleasure or show, will be a much more capable and safe performer than one that has not, and he will always be grateful to YOU for his comfort.


 Long before the Founding Fathers drafted our constitution, America began as a religious nation under God, and the mule has his roots in religion just as does the country he has helped to build. The mule of today’s ancestor is the donkey, mentioned in the Bible numerous times as an animal respected by God and blessed by Jesus Christ. The donkey was even chosen to bring Mary and Joseph to Bethlehem and, later, acted as the mount Jesus himself used for his ride into the city of Jerusalem.
 Mules are the true professionals of slapstick humor and professional psychotherapy! When you get into an altercation with a mule, you will seldom get hurt, but you will surely be set straight in a most humiliating way.
 “Mules are the living symbols of the historic and pioneer spirit of the West. Mules were the pack animals of Spanish padres and grizzled prospectors. These animals have a dominant place in frontier history. From 1883 to 1889, the 20-mule teams moved 20 million pounds of borax out of Death Valley, California, to Mojave—165 miles away—traveling 15 to 18 miles a day. The 20-mule teams, the dramatic solution of a transportation problem, soon became a world-famous symbol, the trademark first of the Pacific Borax Company and, today, of the many products made by U.S. Borax.” 2 So began the mule’s vital contributions to industry and the economy.


 I was born LOVING horses in Minneapolis, Minnesota in 1950. I got a pair of chaps and a “bouncing” horse when I was six years old. My Grandmother was always teaching me about Good Posture and Good Manners. She once wanted to take me on a shopping trip to the local mall and requested that I put on one of my frilly dresses. She told me that all the little girls would be wearing them and I flatly refused! You don’t ride horses in frilly dresses! I was a Tom-Boy all the way through! I didn’t want to be a boy, I just wanted to be READY TO RIDE! So, my Grandmother conceded and let me wear my pants! When we got back, she said, “See, I told you all the pretty little girls would be wearing dresses. Now don’t you wish you had worn yours?” “Nope,” I replied and she just shrugged! I still wore my dresses to church!
 We moved to California in 1958 when I finally got my first horse, Duchess! I was still very much a Tom Boy now…cleaning stalls, doing chores on the ranch and riding my horse. In 1961, I even joined 4-H and got 4 Hereford cattle. Now I was a REAL Cowgirl!


 As we improved our skills, I had seven different mules to school, so I would not just practice one thing over and over. I practiced different disciplines on different days during the week. I never “drilled” on anything, but spent limited time teaching the things I had learned slowly, sequentially and logically. The mules really loved this approach, enjoyed the diversity of the lessons and learned quickly.
 Today, the concept of elegance has been greatly compromised by the fast pace of our progressive society. Few of us have neither the time nor the inclination to do what is necessary to cultivate this concept as a major part of our lives. Women today have far too many jobs and responsibilities with which to cope without worrying about being elegant,unless she lives in a densely populated urban area. There are just not a lot of places where a woman can practice being elegant. One of the places she can, however, is in the growing number of Side Saddle classes offered at many of the different Breed Shows across the country. The equestrian art of Side Saddle is currently being revitalized among the different breeds and one of the most enthusiastic groups is our own Longears lovers! But, elegance is not necessarily the only reason our Longears Ladies are riding aside. The lady equestrians of today like to get a more well-rounded education in the art of Horsemanship riding astride,and the perfection of their balanced seat when riding aside only enhances their existing abilities.
  Mules can be lovely, obedient and secure Side Saddle mounts when they are brought along correctly, as has been exhibited nationally by Crystal Ward and her mule, Final Legacy. I also fondly remember Ann Hathaway and her Dressage mule, Baby Huey, exhibiting Side Saddle in the Bishop Mule Days parade years ago. I judged the A.D.M.S. Nationals in Austin, Minnesota, and again, I witnessed a sprinkle of elegant Side Saddle riders on mules. In the state of Colorado, there was a surge of Longears Side Saddle riders beginning in 1983. The Side Saddle class for mules at the National Western Stock Show in Denver, Colorado previously had no less than 10 entries in its beginning in 1983, when the mule division was brought back after a long absence from the show.
 Generally speaking, people are quite impressed with the ladies who ride aside, and a common question often arises, “You sure look elegant, but how on earth can you stay on that way?!” We boldly reply, “Our mules teach us and WE LEARN…we are Lady Muleskinners!”
 This was demonstrated clearly at a Side Saddle clinic given by Patti Chadwick at the Bitterroot Mule Company in Bennett, Colorado on March 23rd of 1993. Six beginning Side Saddle riders of various equitation skills proved to be quite secure in their seats and no one had any real problems to speak of that day! All levels of riders were jumping cavalletti by the end of the clinic! So you see, it isn’t as insecure as one might be inclined to believe. And with an instructor like Patti Chadwick, it was a snap! The name of the game is “balance,” and whether riding aside on a horse, mule, pony or donkey, it is always a rewarding
  challenge to finally be able to master this art.
 English Side Saddle is probably the best one in which to learn, since the seat is better balanced over your animal. The Period Side Saddles are the worst, since most are built and balanced incorrectly for our contemporary riders and equines. The older Side Saddles were built to fit the smaller framed riders and larger animals of yesterday, they just don’t fit the conformation of the animals and the size of the ladies of today. Although most Side Saddles today are bought used, there are saddle companies that are making them again due to increased demand. If you buy a Side Saddle, make sure it fits your equine as well as yourself to assure the best ride. There are Vintage Side Saddles from different cultures. Just make sure the tack, equipment and equine match the accessories that you wear. Since Side Saddle is rather unique and there are not a lot of people showing in Side Saddle, the ladies have learned to accept the lax rules around the classes. If they are separated at all, it is usually split into WESTERN SIDE SADDLE and ENGLISH SIDE SADDLE classes.
 Fitting the Side Saddle to your body is relatively simple. While seated on a chair, measure along the bottom of your thigh from the back of your bent knee to just beyond your hips under your tailbone. The saddle is measured from pommel to cantle and should exceed your leg measurement by no less than two inches. You can ride in a Side Saddle that is a little too large, but not in one that is too small! Consider the width of your saddle to avoid excessive overhang on each side.

 Side Saddle equines that need a warm-up with a male groom will often use a rigged Two-Sided Side Saddles. He would want to ride aside like the lady would do, but he would need to alter his legs position to exercise the animal in a symmetrical and balanced way. Riding astride a Side Saddle is VERY uncomfortable!
 English Side Saddles are used with a Double Bridle or Pelham Bridles where the reins are carried in a balanced fashion on both sides. You should always have a straight line from your elbow to the bit.
 Place the Side Saddle in the middle of your equine’s back such that you are sitting over the equine’s center of gravity…same as regular saddles. Breast collars are optional (do not use breeching with a Side Saddle). Always keep in mind that your rigging keeps the saddle secure on the back of your equine, so the straps should all be snugly adjusted.


 Care & Reconditioning of Side Saddle & Tack:
 There was a surge of shows in 1994 featuring mules being ridden Side Saddle in Fox Hunting, Parades, Open Horse Show classes, and Mule Shows, and they have continued to grow nationally. Mules proved their worth as Side Saddle mounts, primarily on the East Coast, California and Colorado!
 Horse trainers have kept us in awe of their unique and significant talents for centuries, and now that their techniques are more public, many equine professionals will pooh-pooh those who attempt a “kinder” approach to training. Scientists who study the equine in motion—its nutrition, biomechanics, care and maintenance—have their own perceptions to offer as to what we can learn about equines. Because many of these studies and tests are done in the laboratory, scientists rarely have the opportunity to follow their subjects throughout a lifetime of activity, as well as having the opportunity to experience what it really means for you as a rider, to be in balance with your equine when you work together, whether you are leading, lunging, riding or driving. If they did, their findings would probably yield quite different results. With all this progressive scientific thought, it seems to me that common sense can often get lost in the shuffle and respect for the living creature’s physical, mental and emotional needs may not be met.
 degenerative breakdown. For instance, those who get in a hurry in Dressage and do not take a full year at each level in order to develop their equine’s body slowly and methodically may discover, several years later, that their animal has developed ringbone, side bones, arthritis or some other internal malady. These types of injuries and malformations are often not outwardly exhibited until it is too late to do anything about them.

 Tragically, many equines are suffering from abuse every day, while they are trying to please their owners and do what is asked of them. Their owners and trainers take shortcuts that compromise the equine’s health. It could be that these owners and trainers are trying to make choices with limited knowledge and really don’t know whom to believe. But ignorance is not a valid defense and sadly, the animal is the one that ends up suffering.
 The Lucky Three mules have always been worked in good posture, and spend only as much time on the hot walker as it takes for them to dry after a bath. They maintain their good posture while walking and rarely let the hot walker “pull” them into bad posture.
 Like many, I am of the belief that mechanical devices that force an equine into a rounded position do not necessarily put that equine in good posture. I would guess that many trainers think the “Elbow Pull” device that I use is guilty of developing this artificial posture. If that is their opinion, then they do not understand how it works. Rather than pulling the equine’s head down into a submissive position, when adjusted correctly, the “Elbow Pull” acts like a balance bar (like a ballet dancer would use) to help the equine to balance in good posture. It takes time to develop good posture. So, in the beginning, your equine can only sustain good posture for a certain number of measured steps, and then he must “lean” on the “Elbow Pull” in between these moments of sustaining his ideal balance on his own. The “Elbow Pull” simply prevents him from raising his head and neck so high that the neck becomes inverted and the back hollowed, but it does not actually pull his head down. The rope itself is very lightweight and puts virtually no weight on his head and neck at all. Note: Because horses react differently than mules and donkeys when hard-tied, a simple adjustment to allow the “Elbow Pull” to “slip” with a horse is necessary.