

LTR Blog
Posts to share on the LTR blog

MULE CROSSING: Lucky Three Ranch – 45th Anniversary
By Meredith Hodges
It’s hard to believe that I have already spent 45 years in the business with not only mules and donkeys, but a vast array of equine related activities. I have always loved horses and began riding when I was only two years old. I was about as horsey as a girl could be and when not riding, it was still horse books, drawing horses and engaging in anything that remotely resembled a life with equines. At one point, I even designed a 100-stall barn and vowed to rescue every horse in our country that was being abused. Little did I know then, my 100-stall barn would be terribly inadequate.

I actually founded the Lucky Three Ranch in Loveland, Colorado in 1980 although I had many years with horses and six years with mules before then. I moved to Colorado with the intent of going to Colorado State University to get my veterinarian credentials, so I sought out places to live in Fort Collins. It was a fluke that a contract fell through and this tiny little 10-acre sheep ranch became available. I remember standing in the driveway, my vision crystal clear in my head, and told my mother, “This place HAS LOTS of possibilities.” She gave me a condescending nod and said, “It definitely has lots of possibilities.” I don’t think she had any idea of what was to come! But, after all, the vision was MINE!

Since, I began a journey that has led me from equine breeding and training for mules and donkeys, through showing, then judging and giving clinics. I developed the first ever equine training correspondence course with my videos. I revised them for television and was on numerous channels and RFD-TV for 11 years. After going off television, I adapted my award-winning TV Shows for VIDEO ON DEMAND from my website at www.luckythreeranch.com and expanded our presence on Social Media. I have written 3 hardbound books and 3 manuals on equine management and training that all complement each other. They overlap, but are not duplicated. There is a lot to learn and the learning never ends. The addition of the DVDs provided the most comprehensive management and training series ever to hit the equine industry. Since I have always documented EVERYTHING I learned, I produced numerous TELLY AWARD WINNING documentaries that are also in the VOD section of my website. I decided to go this route because of the lack of continuity in the management and training materials that I had to work with while I was growing up. I saw and personally experienced the therapeutic value of equines and became intimately involved with the HEARTS AND HORSES THERAPEUTIC RIDING CENTER (www.heartsandhorses.org) located just a few miles from my Lucky Three Ranch. The interaction with this program inspired me to write my children’s series of books and videos, and even a music CD, Jasper the Mule. I launched this fun and educational children’s series by writing a letter from a baby mule named JASPER to myself stating his concerns about training and his perception of trainers from the mule’s point of view.

The Lucky Three Ranch slowly became even more than the vision that had in my mind 45 years ago! My interest and influence in the equine community grew into something much more expansive than my original 100-stall barn. It grew into the LOVELAND LONGEARS MUSEUM & SCULPTURE PARK at LUCKY THREE RANCH! We opened the ranch to tours and each tour is a personalized clinic for those who attend. I can now reach hundreds of thousands of people worldwide and am now in a position to be able to teach them how to appreciate and enjoy their equines as much as I enjoy mine and share it in a multitude of different ways. It is so incredibly rewarding when I see happy animals with happy owners doing the things that they love together! This is the gift that I have been given in life by my Maker to share with others and their joy is my reward! Thank you to all of my friends and fans for your loyalty and support! I couldn’t have made 45 years without you and the magnificent equines that color my life! The ultimate gift for me is to be able to see all of you enjoying LONGEARS as much as I do, and to see you going forward to accomplish great things and become amazing ambassadors of the breed!


To learn more about Meredith Hodges and her comprehensive all-breed equine training program, visit LuckyThreeRanch.com, MEREDITH HODGES PUBLIC FIGURE Facebook page, or call 1-800-816-7566. Check out her children’s website at JasperTheMule.com. Also, find Meredith on Pinterest, Instagram, MeWe, YouTube and Twitter.
Covered in TRAINING MULES & DONKEY: A LOGICAL APPROACH TO TRAINING, TRAINING WITHOUT RESISTANCE, EQUUS REVISITED and A GUIDE TO RAISING & SHOWING MULES at www.luckythreeranchstore.com.
© 2015, 2016, 2025 Lucky Three Ranch, Inc. All Rights Reserved.

MULE CROSSING: So Much to Learn, So Little Time!
By Meredith Hodges
When I was growing up, equine trainers were considered special people whose special talents were a mystery to common folk like me. Witnessing the cowboys riding the broncs in the rodeos and seeing the upper-level riders at the Olympics made me doubt my ability to ever accomplish what they could do! After all, this was their profession and I was just a young girl with a passionate love for equines. Since I thought I would never be able to train equines, I dreamed of rescuing abused horses and building a 100-stall barn for them somewhere in the Northwest, in Cowboy Country.
 Even if all I was going to do was rescue equines, I knew I would have to have at least some experience in equine management and training, so I read numerous training books and attended many clinics and seminars. The more I learned, the more overwhelmed I became. There were so many vastly different ideas about how to do things with equines. Different authors wrote about different stages of training and they all had a different approach. There was no one author who produced anything with continuity from foal all the way to advanced levels of training. To make matters worse, in the early 1970s when I got involved with Longears, I found that there was virtually nothing available about training them for recreational purposes. That is when I decided to begin documenting everything I learned that worked well (and forgot about what didn’t).
Trying to decide what to feed my equines was a nightmare! The advertising for so many different kinds and brands of feeds and supplements was confusing and I had no idea where to begin, so I just did what the majority of people were suggesting and fed a grass/alfalfa hay mix. It wasn’t until nine years later and the loss of several horses that I decided that maybe the alfalfa wasn’t such a good idea, so I eliminated the use of alfalfa and other products that were exceptionally high in protein. Then, after the death of one of my donkey jacks, I also revisited my use of different types of grains and oils. I discovered that oats were always the healthiest grain and Mazola corn oil was the only oil needed for healthy coats, hooves and digestive tract regularity. The Sho Glo brand of minimal daily vitamins, along with a trace mineral salt block, provided adequate nutritional needs for all my equines, regardless of their types and tasks (from pleasure riding to Combined Training). This revised feeding program, combined with regular worming and bi-annual vaccinations, eliminated the incidence of severe colic and my equines became much healthier, performed better and have exhibited increased longevity.
 Like most people, I started off thinking that leaving equines to just be equines without human interference was the ideal. Oh, how they would just love to exist in a large plot of pasture to live out their days in leisure! I soon found out how deadly that could be to an equine. Equines in the wild will travel for miles, exercising and grazing sporadically, balancing their diet and exercising themselves. Since the majority of the world’s equines are not wild and can no longer run free (no more wide-open spaces available), leaving them alone in a pasture to eat freely only results in obesity and all the ailments that go with it. In reality, allowing this “free grazing” is a passive form of neglect, and is usually the result of just plain human laziness. Equine owners may often feel like they “do not have the time” to do everything correctly, when, in actuality, it takes less time (and is less costly) to correctly feed, manage and train equines. That is how I can successfully be the sole trainer of 30 equines at this late date in my life.
When I began taking Dressage lessons in 1986, it gave me a whole new way to look at the equine, with more concern for his physical, mental and emotional well-being. Doing Dressage with horses was relatively easy, but I wanted to challenge myself to train the first mule in Dressage and see how far he could go. My first mule, Lucky Three Sundowner, must have run off with me over a hundred times in our first five years of Dressage training, which was a very humbling experience. I began to analyze everything in a more critical and logical way to determine what I was doing to make him run off. I no longer just took it for granted that the popular equine training techniques were the only way to train because they obviously didn’t always work with Sundowner. I began to ask myself, “Why?” and, “Is there a better way?” After addressing the elements of Dressage under saddle, I finally realized that not much was mentioned in the training materials about preparing the equine in good posture and balance WITHOUT a rider on board. I came to realize that the runaway incidents were the result of Sundowner and I both being out of good posture and balance. Unknowingly, we were fighting against each other’s balance to try to perform together. This is when I discovered the importance of adequately preparing the equine’s core muscles in good posture to carry a rider BEFORE attempting to ride or drive. No one is born in good posture. It is something that must be taught—to us and to equines. Just letting them run free when they are young does not address good equine posture or core muscle development.
Many equine trainers talk about disengaging the hindquarters. While practicing Dressage, I learned that, in reality, the hindquarters must be engaged and active (much like a motor) for the animal to move correctly and do what is asked of him, and why would anyone want to shut down the motor? When I employed popular equine training techniques with the halter, lead and whip and tried to keep the mule at a distance (not allowing him to come close to me), he would give a quick jerk of his head and neck, bump me with his rear end and take me “skiing” across the arena…if I was dumb enough to hang onto the rope! I thought, “Why not just let go of the rope and when he comes back, reward him for coming back with a handful of oats from my fanny pack? And, why not let him come in close and then continue the imprinting process through his adulthood, so he will get used to me touching his body?” He could then learn to move away from the pressure of my hands and negotiate groundwork obstacles more easily. When you are constantly pushing your equine away from you, you don’t have the opportunity to do much touching, and there is a crucial security and trust that your equine develops from being touched by you. Equines that are used to being touched all over their bodies on a regular basis are less likely to become spooked about things. And the equines that get practice taking those tiny little oats out of your hand are less likely to bite your fingers than those that do not get this kind of practice.
 Trainers in general advise owners to set things up so it is hard for the equine to do the wrong thing. Why not just concentrate on setting him up to be able to easily do the right thing? Wouldn’t you get a better reaction from your equine if he received rewards for a job well done rather than focusing on the punishments and intimidation if he didn’t comply?
For instance, if you want him to jump a barrel, set up three barrels end-to-end and perpendicular to the fence. Now send him over the obstacle on a long lead with nowhere to go but between you and the fence. And when he succeeds, reward him for it. Once he is compliant over the three end-to-end barrels, take one barrel away and do the same thing. When he accomplishes that, then take the next barrel away and make him do the last one against the fence. Don’t forget to reward him each time he succeeds. Once he successfully completes these steps with no problem, place the barrel in the open and send him over it. He should do this confidently because he now knows it is easy and that he will get rewarded for his effort. When you break things down into small, doable steps within your equine’s capabilities that will always be rewarded, you’ll attract his full attention and training will become easy and fun! Just make sure the reward is always the same healthy oats that he loves.
Bosals, side-pulls and bitless bridles can never replace the communication that can be developed through correct practice between your hands and the corners of your equine’s mouth with the direct rein action of a snaffle bit. Bitless bridles have a completely different action that can result in “kinks” in your equine’s neck. To feel this discomfort, try standing completely still and facing straight ahead. Now, without moving, just turn your head to the side. Can you feel the pull on the muscles just below your ear? This is the same action that your equine experiences when the pull comes from the higher point on his nose where the halter noseband (or bitless bridle) would sit. When a mild snaffle bit is placed in the mouth and used with a flash noseband on the bridle, the equine can be prevented from flipping his tongue over the bit and will take an easy contact with the bit, promoting a solid means of communication.
When you take contact with the reins (or, in the case of driving, the lines), the equine’s natural instinct is to initially create some resistance against your hands. He will stretch his nose out to take contact with the intent of pulling on the bit, but will eventually learn to “hold” the bit. When he does this, he elongates his neck and increases the space between his vertebrae, so when he receives the connection to your hands and is asked to stop or turn, it happens easily because it does not create soreness in his neck. Your hands need to be flexible and “giving” to avoid resistance to the bit. You can feel this difference in your own neck when you vertically round it up and out and THEN turn your head to the side…no more pulling on the muscle below the ear. This “comfortable connection” encourages a working connection from his lips to your hands.
 Restraints should only be used to suggest compliance to the equine and not for complete control over any resistance. Patience, calmness and purposeful action during the use of restraints are all paramount in teaching the equine how to cope with things that are difficult for him. In the use of restraints, one runs the risk of being more severe than intended, which will have a negative impact on the equine’s response to the restraint used. I have discovered some very simple restraints that work well.
Working with your equine’s natural movements and paying attention to proper body conditioning produces comfort and ease of performance. For instance, asking your equine to turn toward you when he is being lunged causes confusion, which adversely affects his hindquarters and puts stress on his hocks and stifles. This is why lunging in a round pen or lunging in drive lines is vitally important. Your equine must be allowed to turn away from you when lunging so he can instantaneously set up his hind legs for the correct diagonal at trot and the correct canter lead, thereby avoiding potential injury to his hindquarters.
Desensitization techniques create disengagement in activities. The equine learns to “give up.” They are fearful of the consequences if they do not obey. Training with fear tactics can produce obedience, but not a viable partnership. My psychiatric nursing degree and my studies in Behavior Modification with human beings proved to be useful in understanding the use of Behavior Modification in equines. It also provided me with the basis for my resistance-free, reward-based training program. I prefer to teach my equines good manners in a polite way so that they are fully engaged, respectful, confident and eager to go with me every time I see them—in other words, resistance-free! The rewards from this kind of training are beyond any joy I could have imagined! My journey has proven to me that anyone with the will to listen, learn and question “WHY?” can become his or her own trainer—with amazing results.
To learn more about Meredith Hodges and her comprehensive all-breed equine training program, visit LuckyThreeRanch.com or call 1-800-816-7566. Check out her children’s website at JasperTheMule.com. Also, find Meredith on Facebook, YouTube, Pinterest, Instagram, MeWe and Twitter.
Covered in TRAINING MULES & DONKEY: A LOGICAL APPROACH TO TRAINING, TRAINING WITHOUT RESISTANCE, EQUUS REVISITED and A GUIDE TO RAISING & SHOWING MULES at www.luckythreeranchstore.com.
© 2014, 2016, 2024 Lucky Three Ranch, Inc. All Rights Reserved.

MULE CROSSING: Much Ado About Mules
By Meredith Hodges
 In the early sixties, mules were among those animals quickly becoming extinct in this country. Thanks to the formation of clubs such as The American Donkey and Mule Society, founded in 1967, and the British Donkey Breed Society, founded in 1966, the trend was reversed and the animals began to get the recognition they justly deserved.
With renewed interest in mules and donkeys, clubs and events are springing up all over the country and Colorado is no exception. Those of us in Colorado who have become mule lovers are invited to join the Rocky Mountain Longears Association. The meetings are held in Littleton, Colorado and a newsletter is sent out monthly to keep members informed of the club’s activities and to unite members of the club who cannot attend those meetings. The purpose and goals for this organization are as follows: to promote Longears and publicize the activities of our club, to promote well-mannered, usable, working Longeared animals, to provide entertainment and pleasurable activities for Longears, and to provide the opportunity for the members to help and learn from each other.
 For those of you who are unfamiliar with the breeding of a mule, he is the cross between a male donkey, called a jack, and a female horse, a mare. The reverse of that–a cross between a male horse, a stallion, and a female donkey, a jenny on jennet–is called a hinny, although many still refer to them as mules. Years ago people used low quality mares to breed to jacks to obtain mules, but today we are improving the breed by crossing better quality animals to obtain better and stronger mules.
The Lucky Three Ranch has come a long way since its beginning in 1980. The once 10-acre sheep ranch was successfully converted to a comfortable mule-breeding facility complete with a 14-stall barn, pens, indoor arena, and eight acres left in pasture in its earlier years. We began a breeding program with six broodmares, primarily Quarter Horses, at the ranch, four of which were in foal to Little Jack Horner almost immediately. The Lucky Three Ranch offered the option of obtaining a mule from the ranch, or if you preferred, you were invited to bring in your own mare to be bred to Little Jack Horner. L.J. became a proven sire. Breeding season at the Lucky Three Ranch was from March to August, at which time mares could be booked and brought to the ranch to be bred. Plans for breeding could also be made in advance of the breeding season although no mares were accepted until March. High health standards were maintained for the safety and well-being of the animals. Careful records were kept and a custom made breeding chute insured the safety of mares being bred. Visitors were encouraged to come and tour the facility provided that they called for an appointment first.
 Many have asked about the training of mules. Training mules is much like training horses, but sophisticated trainers would probably agree that they are more like teaching young children. A mule is more likely to perform to the best of his ability if he is allowed to build trust in his trainer. This is where mules and horses differ. Horses have a forgiving nature and are able to forget a loss of temper by the trainer; mules do not forget. When a mule is nervous about a trainer, his ability to perform for the trainer is impaired. Pat Parelli, a California mule trainer, put it quite nicely: “Mules separate crude trainers from artistic trainers.” The mule handled by a crude trainer will generally epitomize the traditional belief that mules are stubborn and ornery. The mule handled by an artistic trainer will not. A technique widely used among mule trainers with great success is the psychological science of Behavior Modification, whereby the animal’s natural behaviors are modified to achieve the desired response through the use of positive reinforcement. Negative reinforcement is also used sparingly. When using negative reinforcement, one must remain calm, patient, and just to ensure the success of the temporary discipline. One must remember that negative reinforcement does not build desirable behavior. It is only used to stop a bad behavior long enough to substitute a desirable behavior. A mule trained in this manner will become a more trustworthy, willing, and predictable friend and companion. Let’s dispel the old saying that mules are “stubborn” and “ornery” and say that there are really no bad mules, only bad trainers.
The success of this method of training was reflected in the accomplishments of Lucky Three Sundowner, the first mule I brought to Colorado. He was sired by Windy Valley Adam and out of Candy Etta, a registered Quarter Horse mare. Sundowner stood 16 hands tall as a three year old. He won first place in the halter class for saddle mules, 56” and over at the National Western Stock Show in January of 1983, then went on to take first place in the Mule Reining competition at the Colorado State Fair in August of 1983. He was shown again at the National Western Stock Show January 14, 1984, in Halter, Western Pleasure, and Reining. Then it was on to the Bishop Mule Days World Show over Memorial Day Weekend 1984.
 The Mule Days celebration in Bishop, California is the largest mule show in the world. Mule lovers, their friends and family enjoy four days of mule-related fun and entertainment. At this particular show there is a little something for everyone: Western cuisine, games, dancing, and conversation in addition to the mule show itself. In 1984, there were over 70 different classes and events for the competitors such as Pleasure classes, Reining classes, Trail, Musical Tires, Barrel Racing and Pole Bending. Also Jumping, Cattle Penning, Steer Stopping, Team Roping, and a Balloon Bust. For the packers: Pack Train classes, Packing contests, Box Hitch and Diamond Hitch packing contests (pro and non-pro), Team Packing and the Team Packing Scramble which you have to see to believe! There are Halter classes, Pulling, Driving classes, and for you race fans: Chariot races, Flat Track races, and yes, even a Backwards race! To highlight the events, there are featured performances by special people and mules. Almost every year, the 20-mule team makes an appearance and in 1981 Slim Pickens, Grand Marshall of the Mule Days Parade, drove his team to victory in a chariot race! In 1984, Colorado’s own Al Kaly Shrine Temple Mule Train World Champion Drill Team out of Colorado Springs gave a memorable performance on their beautifully matched, black army mules. This mule show brings together so many people with different backgrounds and interests for a perfectly glorious weekend. Each year leaves you looking forward to the next.
Even those who do not ride can enjoy the fun and frolic sponsored by “Longears” clubs. The mules of today have truly given new meaning to the word “mule”. The days of the ornery, stubborn, work mule are gone, and in its place, is a wonderfully entertaining new breed capable of competing in any area of equine athletics, performing for charity benefits, and more. Before dismissing him too hastily, see for yourself what he can do at any of Colorado’s mule events. Event schedules can be obtained from any Rocky Mountain Longears Association member. So ask. Join the millions of people who are discovering mules. He’s an intelligent, surefooted, sensible, and entertaining animal, so why not give him a try?
To learn more about Meredith Hodges and her comprehensive all-breed equine training program, visit LuckyThreeRanch.com, MEREDITH HODGES PUBLIC FIGURE Facebook page, or call 1-800-816-7566. Check out her children’s website at JasperTheMule.com. Also, find Meredith on Pinterest, Instagram, MeWe, YouTube and Twitter.
Covered in TRAINING MULES & DONKEY: A LOGICAL APPROACH TO TRAINING, TRAINING WITHOUT RESISTANCE and EQUUS REVISITED at www.luckythreeranchstore.com.
© 1984, 2016, 2024 Lucky Three Ranch, Inc. All Rights Reserved.

MULE CROSSING: Meredith Hodges – An Historical Lady Muleskinner 2017
 By Meredith Hodges
Mules have led me on the journey of a lifetime! My first introduction to mules and donkeys was in 1973 at my mother’s Windy Valley Mule Ranch in Healdsburg, California, where we raised and trained hundreds of mules and donkeys for a variety of uses across America. Many of them we sold to George Chamberlain and they subsequently went to work in the Grand Canyon. At first, I was truly afraid of these animals after hearing all the old myths, but as soon as I met my first mule, I was certain they had to be wrong. Apart from being stronger, tougher and more durable animals, they were also personable, affectionate and quite humorous! Although, at that time they were primarily used for packing and driving, their incredible intelligence and conformation led me to believe that they could be trained to become amazing equine athletes! After all, with the addition of the jack’s strength and intelligence, they are always better overall than the horse out of which they were bred.
 In 1979, I witnessed my first Bishop Mule Days Sierra Nevada packer’s rendezvous. That was where my career in training mules and donkeys in every recreational equine event began. I was “ass-tonished” at the impeccable way these knowledgeable men and women handled their mules, wagons, packs and equipment with such grace and dignity…and not without a proper measure of good humor! I caught a very bad case of “Mule Fever” and began my own pursuit with Longears in ALL forms of equine athletics. Bishop Mule Days grew from the weekend packer’s rendezvous into the weeklong show over Memorial Day weekend that it is today and they continue to add new classes each year to accommodate the accomplishments of a lot of Longears-lovers like myself along the way. Little did I know, the friendships I started then were to last a lifetime!
 In 1980, I founded the Lucky Three Ranch in Loveland, Colorado and embarked on a breeding and training program of my own with Lucky Three Sundowner, the last mule and Little Jack Horner, the last donkey jack born at Windy Valley Ranch in 1980. Sundowner was shipped to the ranch right away, but Little Jack Horner had to wait and be picked up a year later. Just outside of Sparks, Nevada in 1981, we were hailed to pull over by a jolly and quite charming man, Ernie Fanning who ran up to my truck and blurted through the driver’s side window, “I just KNOW you have a Windy Valley jack in the back of that trailer!” To this day, I don’t know how he could tell it was a Windy Valley jack only by the head and ears that showed above the stock trailer back door. All I can say is that man certainly knew his mules and donkeys, and I made yet another friend for life that day!
 Years passed, Bishop Mule Days grew as did my love for Longears and the people that came with them. I bred and showed Longears for many years, then judged and began a promotional career in support of Longears everywhere. Bishop Mule Days was where I met Bonnie Shields, the leading half-ass Tennessee Mule Artist and illustrator for my children’s series of books and DVDs, Jasper the Mule. Even though I no longer showed, I was still a welcome part of the Bishop Mule Days rendezvous family year after year as a respected dignitary and sponsor. One of our greatest thrills was when Bonnie, Jasper and I were invited by Bobby Tanner to ride in the old Borax Wagons pulled by the 20-Mule Team in the Bishop Mule Days parade three years in a row (2012-2014). What an incredible honor that was!
When Bobby Tanner, primary owner and trainer of the 20-Mule Team and Henry Golas from the Death Valley Conservancy approached me with the idea of building new Borax Wagons as exact replicas of the old Borax Wagons used so many years ago, I thought it would undoubtedly be a worthwhile project! The original Borax Wagons sat on their pedestal in Death Valley unprotected from the elements, nearly completely destroyed and certainly not salvageable. I jumped at the opportunity to help sponsor the original building of the Borax wagons and the project was born!
 On January 1, 2017, the new Borax Wagons and the 20-Mule Team made their debut in the Tournament of Roses parade in Pasadena, California. They held a practice in the desert near Bishop before they left for the parade and the mules all did great! On the parade route, they would be asked to make a tight turn onto Colorado Avenue in the midst of a lively crowd and would be asked to “jump the chain” to make that turn. What a spectacular feat to behold and they did it beautifully on parade day.
I was unable to make it for the Tournament of Roses Parade, but a few weeks afterwards I received an amazing surprise from Bobby Tanner! In honor of my contribution to this overwhelming project, I was presented with the official jacket, shirts, vest, scarf and hat that they all wore in the parade! I am humbled and thrilled to be able to be a part of making history the way that we did with these new Borax Wagons and the 20-Mule team. There is discussion about putting these mules and the teamsters “on the road” with their unmatched demonstration of skill and expertise for the public to view as a reminder of our undaunted history. Mules signify and share the strength, tenacity and endurance of the American spirit of those they have served. And although they have always been perceived as an “underdog” and blight on society, mules have risen to the pinnacles of history, as has this LADY MULESKINNERwith her pioneer spirit, right along with them! Only in America!
To learn more about Meredith Hodges and her comprehensive all-breed equine training program, visit LuckyThreeRanch.com, MEREDITH HODGES PUBLIC FIGURE Facebook page, or call 1-800-816-7566. Check out her children’s website at JasperTheMule.com. Also, find Meredith on Pinterest, Instagram, MeWe, YouTube and Twitter.
Covered in TRAINING MULES & DONKEY: A LOGICAL APPROACH TO TRAINING, TRAINING WITHOUT RESISTANCE and EQUUS REVISITED at www.luckythreeranchstore.com.
© 2017, 2024 Lucky Three Ranch, Inc. All Rights Reserved.

MULE CROSSING: Getting Down with Minis, Part 1
By Meredith Hodges
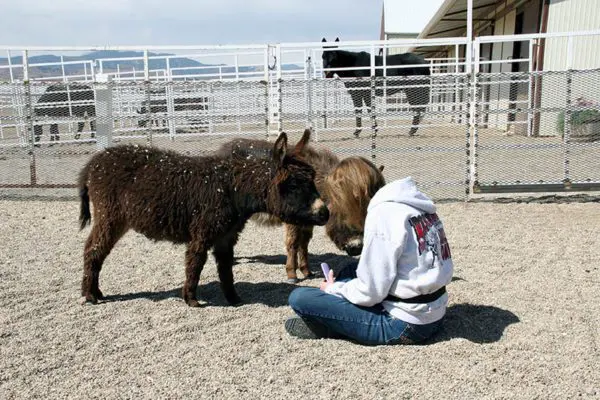
 Miniature horses, donkeys and mules all have one thing in common; everyone else is taller than they are! That makes eye contact with the trainer very difficult if not impossible for them. As the saying goes, the eyes are the window to the soul so it is understandable that they would become anxious if they are unable to look into a person’s eyes to decide whether they are friend or foe. I have five miniature equines: a mini horse named Mirage, a mini mule named Franklin, a mini molly mule named Francis, and two mini donkeys named Augie and Spuds. To help them all succeed and thrive, I’ve structured my training program for them based on the same one I use for all of my other equines, with one important modification. With safety always as my first priority, I work with my minis from a lower position whenever it’s safe to do so. That way, I can make eye contact with them, and I make certain they are always lavishly rewarded with an oats reward for their compliance. The results have been amazing! I’ve received total cooperation from them almost all of the time.
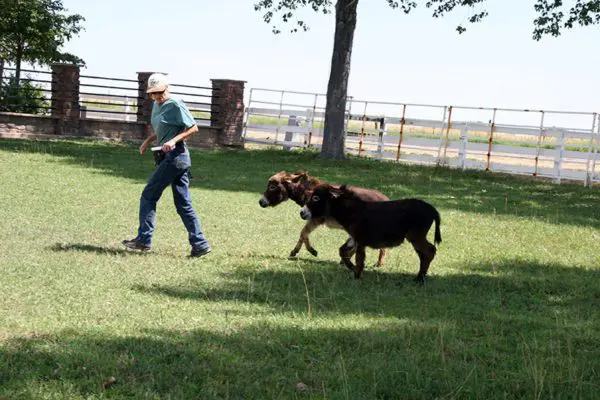
 None of my minis were born at my ranch, so I knew that they would each first need to explore their surroundings a little at a time, and would also need ample time to get used to my staff and me. Mirage, the miniature horse, was my first mini. It wasn’t long after I acquired him that I acquired Franklin, the mini mule, who quickly became Mirage’s buddy. Since both Mirage and Franklin had previous training and because minis seem to accept training more willingly when done with a partner, we did all of Mirage’s and Franklin’s groundwork lessons together and, true to form, they learned very quickly because they were allowed to be together.
Several years later I rescued Francis, a miniature molly mule that was about as schizophrenic as they get. We penned Francis next to Mirage and Franklin for several months before I even attempted to catch her and begin her lessons alongside Mirage and Franklin. Giving her ample time to explore her own pen and to realize this was to be her sanctuary did wonders for her attitude and, after two years of very low-key training, she was able to perform calmly when we were filming the groundwork segment for the DVD, Equus Revisited.
Wherever I went during their lessons, I led all three minis together, and Francis learned to relax and comply with my wishes. I allowed her plenty of time to settle into her new surroundings before I ever asked her to come with Mirage and Franklin to the work station for grooming. The first time I was able to make real eye contact with her was during a walk we took in the hayfield in the middle of the summer. I took all three minis out to the middle of the hayfield, sat down while holding all three lead ropes and we experienced our first “picnic” together. Francis thought I was pretty scary when I first sat down, but she relaxed when she saw that it didn’t phase Mirage or Franklin. Just like human children, all equines learn better when not isolated (taken away from their equine friends) and made to feel that they’re being punished. Keeping this in mind, I lunged all three minis together in the round pen and after lunging, I tied two of them outside of the round pen while I did individual lunging and ground-driving lessons with each one individually. Because of this slow, respectful training and keeping her with her friends while she learned, Francis has made remarkable progress over the years.
 I think it is critically important that all equines have a space they can call their own—their personal oasis of comfort and privacy—so when I got my mini donkeys, Augie and Spuds, I decided that the first thing they would learn about was their living quarters or, as I like to call it, their “bedroom.”
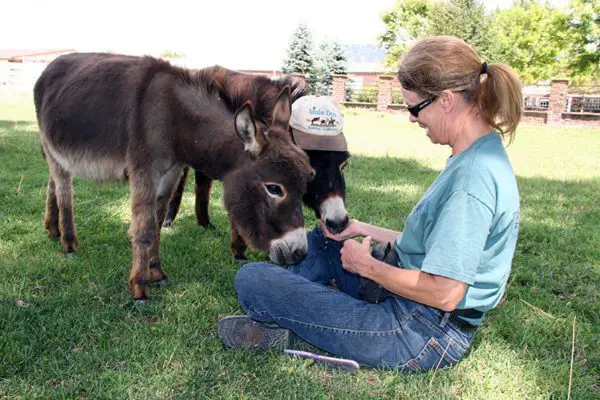
When you go to your mini’s pen, politely stand by the gate and ask “permission” to enter by simply calling his or her name and then waiting for a response. Your mini will most likely come over to you and “invite” you in by showing curiosity and giving you a welcoming look. As you can guess, it is probably your fanny pack full of oats that is really attractive to them, but they will soon learn that you come with the oats so they will no doubt be happy to see you. This is the very first step in reward training.
Begin your relationship with your mini by having a “picnic” with him. Sit yourself down on the ground in the middle of his pen and start playing with a handful of oats while you wait for him to come to you. While you have your picnic in the pen, use just your hands for contact and make sure you have plenty of crimped oats (I use a fanny pack full of oats). Because picnics are supposed to be fun and not intimidating, allow your mini to come and go as he pleases within the confines of his pen. When he becomes confident about coming to you while you’re sitting down, reward him for coming over and interacting with you. Be prepared for the possibility of doing dozens of lessons like this—however long it takes for your mini to build trust in you and feel comfortable. As your relationship progresses, you may try picking up his feet and stroking his legs (which is a good way to prepare your mini for the farrier visits that will come later). There are no expectations and there is no pressure to do anything more…it’s just your mini and you and time for bonding.
 When your mini is comfortable with you coming into his pen and interacting with him, the next step is to ask him to go into a bigger turnout area, where you should repeat the same simple lessons. Now that your mini can be loose in a larger space, ask him to come to join you for another picnic. After a few times, bring a hairbrush with you (It’s the most efficient brush to use on donkey hair).
When you sit down and he comes over for the picnic, show him the brush and let him inspect it, and then reward him for inspecting the brush. When you introduce the brush to his body, do so by first petting him, and then follow where your hand goes with the brush. This has a calming effect and also helps you to identify the more sensitive areas on his body. Always start with his neck, where there’s substantial fatty tissue and no real sensitive areas until you reach the shoulder. During this “playtime,” you can get your mini used to strange things by allowing him to wear your hat. This is an extension of the imprinting (touch) your mini should have received as a foal, only with a foreign object instead of your hands. Remember, imprinting is not just for foals at birth. It is the way you will continue to learn about how to touch your mini throughout his life and how you learn which areas are more sensitive than others. This sets the stage for how you gauge your approach when touching your mini both with your hands and with foreign objects such as grooming equipment and tack at all levels of training.
 A halter doesn’t even come into play until after grooming in the pen is easily achieved and your mini will follow you to and from the pen without the halter. When it is time to introduce the halter, bring it with you into the pen for your picnic. Do the brushing and then show your mini the halter while you sit on the ground. When he sniffs the halter, he should be rewarded. Once he is unafraid of the halter, hold it on both sides of the noseband, feed your mini some oats, and then gently push the noseband of the halter over his nose and then take it off, rewarding him again. At this point you’ve got all kinds of oats in your lap and your mini’s got his head down, eating the oats, so when you put the noseband on again, just reach over his neck, grab the strap of his halter on the other side, bring it behind his ears and fasten it. If done correctly, this should not bother him. Then reward him with more oats, pet him as he complies and say, “Oh, how good is that?!” You can then take the halter off again and end the first lesson there.
 Once your mini is used to having his halter put on, let him graze while supervised in a larger pasture area with his halter on while he drags the lead rope behind him. When you want him to walk away from you, simply stand up and let him go off on his own. After a few minutes, approach him again, grab the end of his lead rope and sit down again. You can give a little tug, say his name and ask him to “Come.” He should come easily when you gently tug on his lead rope. This action makes him look at you and think, “Oh, my human is sitting down again, so I’m going to come over and get more oats!” As he comes toward you, take up the slack on his approach. Once he comes to you easily, you can stand up and ask him to come while you’re standing up and reward him for it. And that’s how to teach a mini to follow you.
During your picnics, put on and take off the halter over several lessons and until he is completely calm before you try to halter your mini at the gate in preparation for leaving the pen. He must be willing to come while you are standing, and he should allow you to put on the halter at the gate using the same rewarding techniques as you use while sitting down. When he accepts the halter at the gate, the next task is to learn to properly lead through a gate and make your way to the work station for the first time. (See “Gate Training” in Part 1 of my DVD series, Equus Revisited.)
When grooming at the work station, start working your way around your animal from front to back, but ignore grooming his head for a while until he’s really comfortable with you. When you finally get to the head, you will have to change to a grooming tool called a dandy brush. First let him see and sniff the dandy brush, and then begin with the forehead. Brush upward toward his ears with the direction of the hair on his forehead and then, if he stands quietly, give him a reward. Don’t try to do his cheeks right away—give him time in the same grooming session to get used to the feel of the brush before you try to brush his cheeks, and make sure he sees the brush coming at him. Anything he sees too abruptly with his peripheral vision can potentially startle and spook him.
 Breaking things down into little do-able steps seems like a long process in the beginning, but as your mini begins to understand the reasoning behind your approach, his reactions to tasks will become calmer, more automatic and more natural for him. When you allow your mini to learn to follow your lead without the halter in the beginning of each task, learning to follow you on the lead rope will be a lot easier for him, and when you finally move on to more specific tasks in training, he will oblige you much more willingly. In Part 2 of “Getting Down With Minis,” I will cover how to approach the tasks necessary for formal training.
To learn more about Meredith Hodges and her comprehensive all-breed equine training program, visit LuckyThreeRanch.com, MEREDITH HODGES PUBLIC FIGURE Facebook page, or call 1-800-816-7566. Check out her children’s website at JasperTheMule.com. Also, find Meredith on Pinterest, Instagram, MeWe, YouTube and Twitter.
Covered in TRAINING MULES & DONKEY: A LOGICAL APPROACH TO TRAINING, TRAINING WITHOUT RESISTANCE, EQUUS REVISITED and A GUIDE TO RAISING & SHOWING MULES at www.luckythreeranchstore.com.
© 2013, 2014, 2015, 2016, 2019,2024 Lucky Three Ranch, Inc. All Rights Reserved.

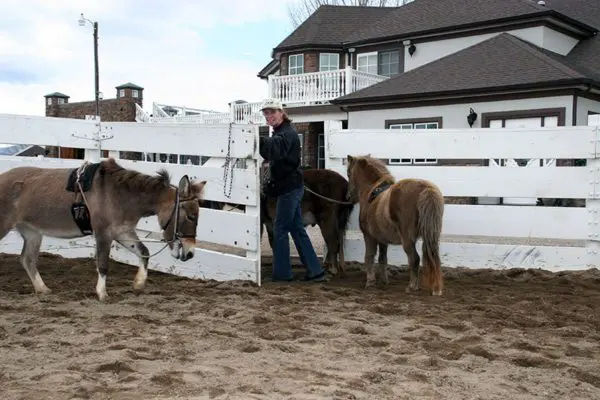
MULE CROSSING: Gate Training
By Meredith Hodges
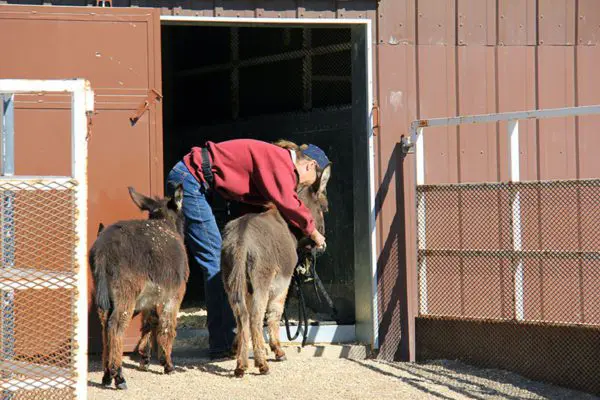
 Learning to go through a gate with respect and consideration for the handler is an important lesson for your equine to learn. Your considerate and consistent approach to retrieving him from his stall, pen or pasture can make all the difference in safety and pleasure for you both. This begins from the time you take him from his stall. Do not go into his area, but rather, ask him to come to you. If you have been consistent rewarding your equine from your fanny pack with the same oats he gets fed every evening, this should not pose a problem. The reason for feeding the oats in the evenings is so he is given the motivation to come back in during the spring months when pasture time must be limited. Feeding only grass hay in the morning gives him incentive to come to you to be haltered for lessons, as he knows his efforts will be rewarded with extra oats. Use verbal commands to “come on!” prefaced by his name. This reinforces his response to verbal commands and familiarity with his name. This will come in handy when you need to fetch him from a pen of multiple animals.
 Going through a gate seems simple enough, but you can really get into trouble if it is not done correctly. Ask your mule to follow your shoulder to the gate and halt squarely, and then reward him (crimped oats) for standing quietly while you unlatch the gate. When going through the gate, if possible, the gate should always open away from you and your mule. When the gate is hinged on the left, transfer your lead line from your left hand (showmanship position) to your right hand, and open the gate with your left hand. Switch positions if the gate is hinged on the right, but always be sure to keep your body, rather than your mule’s body, closest to the gate. Ask your mule to walk through at your shoulder, to turn and face you on the other side of the gate, and to follow you as you close it. Then reward him again and latch the gate.
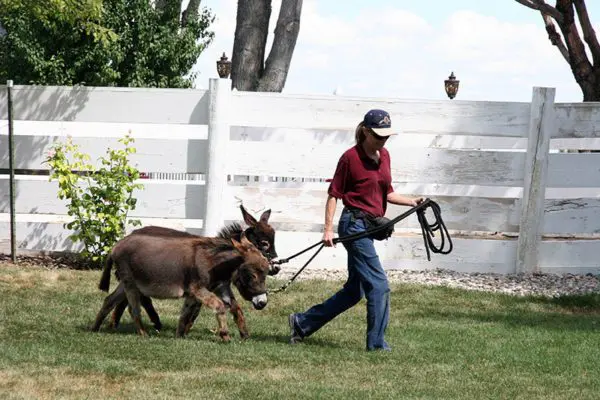
 After latching the gate, turn back to your mule and reward him yet again for being patient and standing still while you latched the gate. This repetitive behavior through gates will teach him to stay with you and wait patiently instead of charging through, or pulling away from you. This is especially helpful when you are leading several animals at once. This way, you can get through a gate safely with as many animals as you choose to lead through together. Even if the gate is only two mules wide, you could lead as many as four through by simply lengthening the lead lines of the back pair, asking the first pair to come through first then encouraging the second pair to come through directly behind them before you turn back to the gate. When trained this way, your mules will all line up like little soldiers on the other side of the gate to receive their rewards. They will stand quietly while you latch the gate and will only proceed from the gate when you ask.
 When you return your mule to a pen with other animals, wave the others away from the gate and return the mule to the pen the same way he was taken out. Lead your mule or mules through the gate, reward them, and then reward the others for staying back.
If you have any problems with kicking, carry a whip with you to keep the problem children at bay while you reward the others first. Do not vary this routine.
 The repetition will build good habits. Once the others have learned that they cannot approach when you wave them away, and each mule knows the routine of going through the gate properly, and you want to take one animal from the herd, you can call his name, wave the others away with your hand, open the gate and allow him to come through and turn (receiving his reward, of course) to put on the halter. You never have to get in the middle of their sometimes-dangerous playfulness again, and your animals will all be easy to catch.
To learn more about Meredith Hodges and her comprehensive all-breed equine training program, visit LuckyThreeRanch.com, MEREDITH HODGES PUBLIC FIGURE Facebook page, or call 1-800-816-7566. Check out her children’s website at JasperTheMule.com. Also, find Meredith on Pinterest, Instagram, MeWe, YouTube and Twitter.
Covered in TRAINING MULES & DONKEY: A LOGICAL APPROACH TO TRAINING, TRAINING WITHOUT RESISTANCE and EQUUS REVISITED at www.luckythreeranchstore.com.
© 2003, 2016, 2017, 2024 Lucky Three Ranch, Inc. All Rights Reserved.


MULE TALK! PODCAST: Maintenance & Grooming with Mules & Donkeys
Maintenance & Grooming
Learn about:
- Use grooming tools that are comfortable for your mules and donkeys.
- Expensive horse/equine grooming tools are not all necessary to keep in your tack room or trailer.
- Insect control around the barn – what works.
- If showing: when to body clip your mule and how to body clip.
- Treating sores/scabs.
- Group grooming.
- Pasteworming is effective in controlling insects and flies – learn what to use!
Learn more on Mule Talk podcast.
For more training info: www.LuckyThreeRanch.Com and click on the Training tab.
Mule Talk is an Every Cowgirl’s Dream production – www.EveryCowgirlsDream.Com

MULE TALK! PODCAST: A Bit About Communication
A Bit About Communication – Achieving Balance & Harmony –
Learn about:
- Different types of bits and the different metals used to develop in equine bits.
- Snaffle bits and the different types that are recommended to use on your mule or donkey.
- Curb/leverage bits used in Western riding.
- The difference between a curb bit and a snaffle bit.
- Bridles and headstalls for your mule/donkey.
Learn more on Mule Talk podcast.
For more training info: www.LuckyThreeRanch.Com and click on the Training tab.
Mule Talk is an Every Cowgirl’s Dream production – www.EveryCowgirlsDream.Com

MULE CROSSING: A Bit About Communication with Your Equine
By Meredith Hodges
 Over the past few decades, through trial and error, we equine owners and trainers have discovered that, when communicating with our equines, harsh bits are not really necessary. Rather, it is safer and more beneficial to use milder tack and equipment, to concentrate on learning correct body language and to give clear cues with our hands, seat and legs to elicit the desired response from our equines.
Nowadays, at the beginning of training, more and more riders are learning to ride “by the seat of their pants;” that is, using body language through the seat, legs and hands, rather than with brute force through the bit. Once a rarity, riding bridleless, or bitless is now part of a preferred way of training for both the equine and the rider.
If you are training your equine at home—in a controlled situation and under optimum conditions—riding bridleless and using the right kinds of techniques can be relatively easy, but there is more to consider than just getting the right response from your equine. As long as you are in a controlled situation, it is safe to ride bridleless for general pleasure riding, but if you become involved in showing at the advanced levels of performance, such as the higher levels of Dressage, Jumping and Combined Training, a finer-tuned communication, which bitless bridles or bridleless riding cannot necessarily provide, is necessary.
 When it comes to rider/equine communication, bitless and/or brideless techniques do not work as well as the simple, direct rein action of the snaffle bit in concert with your seat and legs.Many people are under the impression that having a bit in the mouth is painful for an equine, and the seeming “nutcracker” action of the snaffle bit when it is in your hands suggests that it might pinch your animal’s tongue when you pull on the reins. The mouthpiece of the snaffle bit actually “breaks” in the middle, allowing it to slide easily across the top of your equine’s tongue. It does not pinch his tongue, but it does put pressure on the corners of his mouth. The snaffle bit is correctly defined as a bit that promotes “direct rein action,” meaning that when you pull right, you go right and when you pull left, you go left. A snaffle bit does not have a shank. If it did have a shank, it would be considered a curb bit, regardless of how short the shank really is (as is the case with a Tom Thumb bit).
When you pull the rein on a snaffle bit to indicate your direction of travel, the leading rein pulls on the ring that guides the equine into the direction of travel, while the ring on the other side “pushes” his head into that same direction. Always be sure you are light with your hands and that you gently pull with a squeeze/release action or you could easily pull the snaffle bit all the way through the equine’s mouth, which would cause him pain and break the line of communication.
When you pull directly sideways on a curb bit, it pulls in the direction of travel where the reins are attached at the bottom of the shank, but the upper part of the shank pushes against your equine’s cheek on the same side and can cause confusion by sending simultaneous and opposite signals to your equine because he is being “pushed” in both directions at the same time. It is important to learn to ride with your balance coming primarily from your seat, which your equine can easily follow with the slightest indications from the direct rein snaffle bit and your legs. This will also promote a more secure rider position in your seat, making it easier for you to use the gentle squeeze/release motions with your hands. This way, your equine is encouraged into the direction of travel by the body language of your seat and is gently “guided” by your leading rein, while simultaneously being “pushed” into the correct direction of travel by the off-side ring of the snaffle bit and by your legs.
 Learning to go forward in the beginning of your equine’s training in a snaffle bridle is paramount to properly developing his body so he will learn to carry a rider in a strong and solid frame and in good equine posture. The forward training teaches him to stretch his head and neck forward, to step well underneath his body to propel himself forward, and to elongate his overall frame to keep the vertebrae in his back from becoming compressed and rigid. When he is moving correctly in a straight line, he will have more suspension and flexibility to his gait, and when he turns he will be able to bend easily through his rib cage.
 Although it would seem that a bitless bridle could achieve this same end, it has a different action on your equine’s head and neck, which inhibits proper bending through turns. The straight forward motion can be achieved with a bitless bridle. However, reins on a bosal (a type of braided rawhide noseband used with the hackamore-type headstall), bitless bridle reins, and other bitless configurations do not have the same lateral effect on the equine’s head and neck as does the snaffle bit. The equine’s head and neck form two sides of a triangle. The rope reins on a bosal, although lower on the nose of the equine than reins that come from the corners of the mouth, can cause the equine’s head to twist slightly sideways during the turn because, during any directional indication, the rawhide bosal around the nose twists through the rope reins which are both secured together underneath the jaw. The rope reins pull the underside of the bosal in the direction of the turn, but the nosepiece goes the opposite way and can cause your equine to improperly tilt his head through the turns. On bitless bridles, the reins are attached substantially higher than the corners of the equine’s mouth. When you pull on the reins attached higher on the equine’s jaw than where the bit would be as is the case with a halter or bitless bridle, the angle of pull is sharper and more abrupt, since the head side of the “triangle” is so much shorter than the length of the neck. It will cause the equine to try to turn his head too sharply from the poll, which can cause kinks and pain in his neck.
However, when using the snaffle bit, the direct rein pull coming from the corners of the equine’s mouth affords him a wider range of motion with his head and neck. He is able to stretch his head and neck forward and around in a properly executed horizontal arc through the turn, which in turn, opens the spaces between his vertebrae, allowing him to bend his head and neck into the arc of the turn, painlessly and with greater ease.
 To prove the point, try this experiment. Preferably using an untrained animal, take hold of the halter and gently but firmly pull on the halter in an attempt to make him bend his head and neck to the side. The higher position of the halter is like a bitless bridle and you will feel slight tension and resistance to this action before the animal finally complies. Next, gently insert two fingers into one corner of the equine’s mouth while standing at his shoulder and by squeezing and releasing your fingers, ask him to turn his head and neck to the side toward you. If done correctly, without yanking on him, he should give easily to your cue to submit and turn his head and neck. You will notice that he extends his head and neck slightly forward before turning it to the side.
 Now try this action on yourself. Stand in good posture and, without extending your neck, turn your head to the side. Do you feel the tension at the brainstem on the back of your neck? Now, stand in good posture, stretch your neck in an upward and forward arc and then look around the turn. Can you now feel the release from tension in the back of your neck? Your equine experiences the same feelings. The shorter angle of the side-pulls and bitless bridles will have a more abrupt pull and can cause some pain, while the longer angle coming from the snaffle bit at the corners of his mouth will allow a smoother and painless response. NOTE: Any bit can be painful to an animal when in the hands of an inexperienced rider who uses only the bit for control.
When an equine has been properly schooled and has learned the rules of communication through the snaffle bit, he holds the bit in his mouth and waits for the “feel” of the rider’s cues at the corners of his mouth. After years of practice, he will learn to respond to seat and legs and may not even need constant support of the rein cues—except for minute corrections. As equine and rider progress together, the rider’s cues will become nearly imperceptible until the rider is virtually riding without the active use of the reins. The equine has learned to quietly carry the bit in his mouth in anticipation of any communication coming through the reins. There is no pain because there is no pressure, except for an occasional reminder with a soft squeeze/release of the rider’s little pinky fingers on the reins from time to time.
 The equine that has not had this kind of advanced training will possess neither genuinely good posture nor the knowledge of how to respond correctly in an abrupt and unpredictable situation. He will be more apt to be frightened and, as a result, may bolt and run, putting you and everyone around you at risk. However, the equine that is properly and conscientiously taught how to communicate through the snaffle bit will be a safer and more reliable animal to ride and to take into public places. He has learned to stop and wait for cues (communication through the bit) and is less likely to bolt and run if frightened because he understands and trusts the communication coming from his rider. He will now be more correct and solid in his good posture, yielding confidence in his attitude, and he will be a more reliable pleasure and show animal to ride.
When you take the time to train yourself to ride a balanced seat effectively and get in sync with your equine, you will be a much safer and happier rider, and your “finished” equine will be one that is always dependable. If you like the novelty of bitless and/or brideless riding, using a snaffle bit instead of a bitless bridle during training will help you to achieve strength in correct posture to enhance bitless riding and even brideless riding so that it can be done safely around the farm and in controlled situations like event demonstrations. Properly and consistently training with the goal of clear lines of communication between you and your equine will make everything you ask of him much easier for him to do, and he will become a happy, reliable and willing partner in your mutually satisfying relationship.
To learn more about Meredith Hodges and her comprehensive all-breed equine training program, visit LuckyThreeRanch.com, MEREDITH HODGES PUBLIC FIGURE Facebook page, or call 1-800-816-7566. Check out her children’s website at JasperTheMule.com. Also, find Meredith on Pinterest, Instagram, MeWe, YouTube and Twitter.
Covered in TRAINING MULES & DONKEY: A LOGICAL APPROACH TO TRAINING, TRAINING WITHOUT RESISTANCE, EQUUS REVISITED and A GUIDE TO RAISING & SHOWING MULES at www.luckythreeranchstore.com
© 1992, 2013, 2014, 2016, 2024 Lucky Three Ranch, Inc. All Rights Reserved.

MULE CROSSING: Do Mules Need to Be Shod?
By Meredith Hodges

Do mules need to be shod? Those who are familiar with mules might be tempted to say, “No,” but the answer is a little more complicated than you might think. Although the mule generally has a tougher and more durable foot than the horse, all mules do not have the same feet, nor do all mules apply the same kind of stress to those feet. Therefore, each individual animal has to be considered when answering the question, “To shoe or not to shoe?”
It is commonly known that, when it comes to horses and mules, light-colored hooves are softer and more likely to break down under stress than are the darker, black hooves. Even though the black hoof is naturally harder than the light-colored hoof, if it does not contain sufficient moisture, it can become brittle and can chip away as destructively as can the lighter hoof. Whichever breed of equine you own and whatever the color of their feet, remember that good hoof care is essential for all domesticated equines.
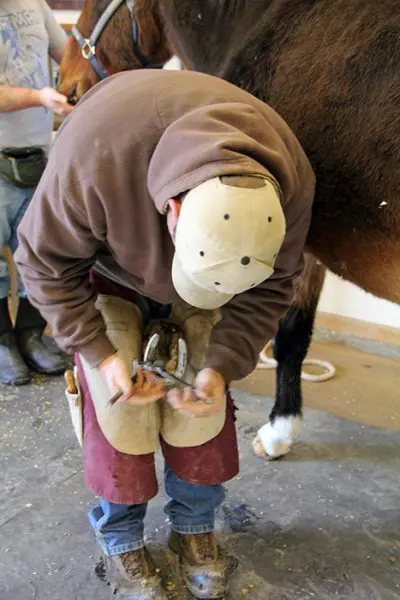 For better or worse, an equine inherits his hooves through his genes. If your mule has inherited good feet—black, oily-looking, and with good shape—then you are fortunate and hoof care and maintenance should be relatively simple. If he has inherited a softer or misshapen foot, you will need to discuss more specialized care with your farrier.
Climate and weather greatly affect the condition of your mule’s feet. Damp weather and muddy footing will tend to soften the walls of any hoof, and perpetual exposure to mud and dampness can cause deterioration of his feet. With the light-colored hoof, which tends to soften more easily, this could spell disaster. It is wise, therefore, during damp weather or if you live in a damp climate, to provide a clean, dry place for your mule to stand. Conversely, extremely hot and dry weather can cause your mule’s feet to become dry and brittle, and they may start to crack due to contraction and expansion of the hoof. For this type of dry weather or climate, you may want to overflow your water tanks regularly so your mule has a place to “cool his feet.” If it is excessively dry, you may even need to manually 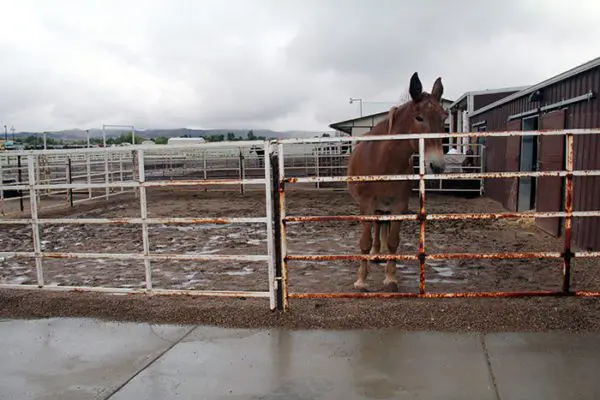 lubricate your mule’s hooves as needed with one of the commercial products available. But before you use an artificial hoof lubricant, first check with your farrier to make sure that it is actually needed. Many people use hoof products too frequently, which can cause hooves to become too soft. When this begins to happen, you will see horizontal rings appear around the hoof wall, and sometimes, vertical lines. Try not to let the hoof get to this point by using lubricants sparingly, but if you see that these rings are beginning to appear, immediately discontinue use of the lubricant and allow the hoof to harden. Then check with your vet to make sure it is not a founder condition. It does not take much to adequately soften the hooves of an animal with rock-hard feet. During the really dry seasons, lubricant application once a week is usually sufficient.
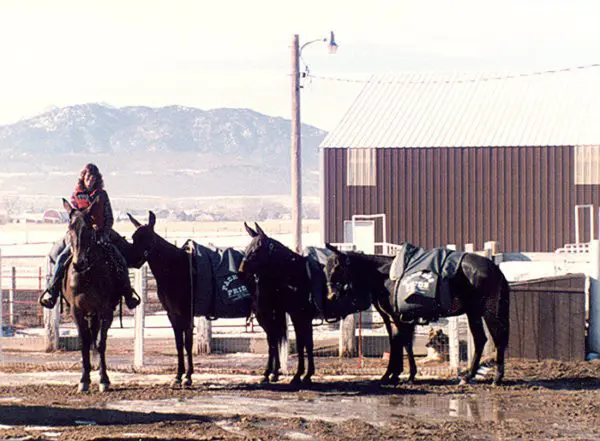 Assuming that your mule has a normal set of dark, healthy hooves, he will probably not need to be shod, as long as he is used strictly for pleasure or only sporadically. However, if you are going to use your mule on excessively rocky or hard ground, you might want to look into getting shoes for him. Mules that repetitively participate in more stressful and demanding activities (such as parades, showing and endurance events) should be shod to protect their feet and to keep them healthy. Prevention of bruising or cracking and maintenance of good foot and leg posture is critical to the equine athlete.
The pack and pleasure mule that is not used much or is used on softer terrain and in places where he does not require shoes must still be trimmed for balance regularly to assure that his feet are evenly worn and that he is not putting undue stress on any joints, muscles or tendons. Failure to have your mule’s hooves regularly trimmed in order to maintain their balance and shape can result in an imbalance in your mule’s feet, which will then cause an imbalance throughout his entire body, inhibiting his performance. However, if trimming is done consistently, the risk of imbalance, accident or injury will be greatly reduced.
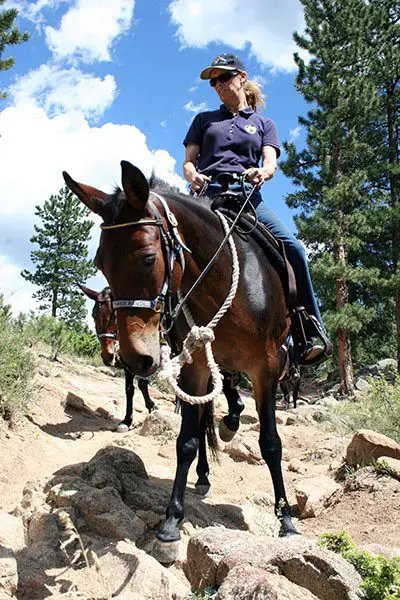 I believe that horses and mules, doing what they would naturally do alone—on terrain that is neither hard nor rocky—do not need to be shod. But mules that are asked to repetitively perform with a human on-board in varying surface situations should be fitted with the proper kind of shoes to help protect them from the additional weight and other demands that will be put upon their bodies. For example, my trail mules wear regular shoes on all four feet when they are being regularly used for trail riding and a variety of other activities, lessening the potential for injury. Then, when there is an occasional misstep on hard ground or rocks or when we trail-ride in the more challenging mountains, the shoes help to absorb some of the shock that would otherwise be absorbed by the hoof itself. It is my experience that young mules (and horses from two to four years of age) bear most of their weight on their front legs until their bodies are carefully and properly conditioned, and this is when you will see the most wear and tear on their feet. Because of this, my young mules that are just beginning saddle training wear regular shoes on the fronts only until their bodies are balanced and their activities clearly defined. Our broodstock, youngsters (under three
  years of age) and equines that are not used under demanding conditions can go barefooted year-round, but they all still get regular trims every six to eight weeks.
All my other stock is shod for the specific purpose for which they are used: The Reining mules wear slider plates during the competition season, and the jumpers are fitted with either regular shoes, a tap and die shoe with studs or a borium shoe for non-skid, depending upon the terrain they will be negotiating. If I were to ask one of my mules to race, I would fit him with the lighter-weight racing plates. Each equine athlete is given a set of shoes particularly designed for the best performance in his event, just as is the case with the human athlete. In the winter, if my mules have the need to wear shoes, I add rim pads to their shoes to help prevent “snowballing.”
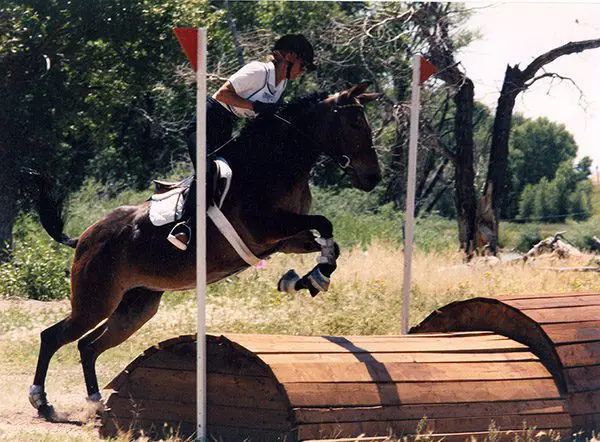 Granted, there are a lot of mules that may not need to be shod, but there are also many that do need shoes, so each individual mule’s feet must be evaluated on a case-by-case basis. Because of this fact, the generalizations that “mules don’t need to be shod” and “all equines should go barefoot” are not always correct. You must take into consideration how your particular mule’s genetics affect his hooves, what he will be used for and how harsh the demands put on him will be on his feet. These important factors will determine whether or not he needs shoes, and if he does need shoes, what kind of shoes will best suit him. And don’t forget to check your mule’s shoes on a regular basis to make sure that all is well and that his shoes are staying on tight, but most of all, that he is comfortable and happy.
To learn more about Meredith Hodges and her comprehensive all-breed equine training program, visit LuckyThreeRanch.com, MEREDITH HODGES PUBLIC FIGURE Facebook page, or call 1-800-816-7566. Check out her children’s website at JasperTheMule.com. Also, find Meredith on Pinterest, Instagram, MeWe, YouTube and Twitter.
Covered in TRAINING MULES & DONKEY: A LOGICAL APPROACH TO TRAINING, TRAINING WITHOUT RESISTANCE, EQUUS REVISITED and A GUIDE TO RAISING & SHOWING MULES at www.luckythreeranchstore.com.
© 2014, 2016, 2019, 2024 Lucky Three Ranch, Inc. All Rights Reserved.


CHASITY’S CHALLENGES: Real Time Update: 5-5-20
5-5-20: My Grandmother taught me that Good Posture, Good Manners and Good Hygiene don’t cost anything but very little time and effort, and the results are nothing less than miraculous! Practicing these simple elements of living can, however, save you a lot of money in veterinary and maintenance costs associated with you and your equines! Preventive measures can deter accidents and good hygiene practices deter poor health. Chasity came to us with a plethora of problems. I have documented and shared a number of things with you about the benefits of postural core strength development that I used with a number of equines here at my ranch. This time, I am documenting this approach with even more details than I ever have before so you can see the types of things that I do from feeding to maintenance to exercise that bring about these amazing results! I will be posting “CHASITY’S CHALLENGES” on the weekends with occasional “real time” updates. Today, we have had Chasity for a month. She came in with very bad equine posture, cataracts in both eyes, Lordosis in her spine (sway-back), fatty deposits over her body and an enlarged, fatty neck crest, overgrown and unbalanced hooves, and a major bacterial infection in her badly swollen teats and udder. Today, the posture is significantly better and the Lordosis is receding, the body fat deposits are gone and the crest is shrunk by 50%, her hooves are balanced and staying that way and the bacterial infection in her teats and udder has been reduced by 70%. When she came in, she was introverted, head shy and was hesitant to engage with us. Today, she is no longer head shy (She “trusts” even though she cannot see very well) and is a happy and willing companion! PHOTO #1 – 3-31-20; PHOTO #2 – 5-5-20; PHOTO #3 – 3-30-20; PHOTO #4 – 5-5-20. Check the CHASITY’S CHALLENGES posts each weekend for lots more details!

3-31-20

5-5-20

3-30-20

5-5-20

MULE TALK! PODCAST: Benefits of Postural Core Strength Training
Meredith shares the benefits for postural core strength training with your mules.
- Discover what happens to your mule(s) that are trained for Postural Core Strength.
- Using the Elbow Pull.
- How to make the Elbow Pull for your mule.
- The benefits of the hourglass pattern – simple and easy to do!
- The benefits of implementing these techniques into your training/riding.
- Emotional, physical benefits of Postural Core Strength Training
Learn more on Mule Talk podcast.
For more training info: www.LuckyThreeRanch.Com and click on the Training tab.
Mule Talk is an Every Cowgirl’s Dream production – www.EveryCowgirlsDream.Com

MULE CROSSING: Benefits of Postural Core Strength Training
By Meredith Hodges
Most equines can be taught to carry a rider in a relatively short time. However, just because they are compliant doesn’t mean their body is adequately prepared for what they will be asked to do and that they are truly mentally engaged in your partnership. We can affect our equine’s manners and teach them to do certain movements and in most cases, we will get the response that we want…at least for the moment. Most of us grow up thinking that getting the animal to accept a rider is a reasonable goal and we are thrilled when they quickly comply. When I was first training equines, I even thought that to spare them the weight of the rider when they were younger and that it would be more beneficial to drive them first as this seemed less stressful for them. Of course, I was then unaware of the multitude of tiny details that were escaping my attention due to my limited education. I had a lot to learn.
 Because my equines reacted so well during training, I had no reason to believe that there was anything wrong with my approach until I began showing them. I started to experience resistant behaviors in my animals that I promptly attributed to simple disobedience. I had no reason to believe that I wasn’t being kind and patient until I met my dressage instructor, Melinda Weatherford. I soon learned that complaining about Sundowner’s negative response to his dressage lessons and blaming HIM was not going to yield any shortcuts to our success. The day she showed up with a big button on her lapel that said, “No Whining” was the end of my complaining and impatience, and the beginning of my becoming truly focused on the tasks at hand. I learned that riding through (and often repeating) mistakes did not pose any real solutions to our problems. I attended numerous clinics from all sorts of notable professionals and we improved slowly, but a lot of the problems were still present. Sundowner would still bolt and run when things got a bit awkward, but he eventually stopped bolting once I changed my attitude and approach, and when he was secure in his core strength in good equine posture.
I thought about what my grandmother had told me years ago about being polite and considerate with everything I did. Good manners were everything to her and I thought I was using good manners. I soon found that good manners were not the only important element of communication. Empathy was another important consideration…to put oneself in the other “person’s” shoes, and that could be attributed to animals as well. So, I began to ask myself how it would feel to me if I was approached and treated the way I was treating my equines. My first epiphany was during grooming. It occurred to me that grooming tools, like a shedding blade, might not feel very  good unless I was careful about the way I used it. Body clipping was much more tolerable for them if I did the hard-to-get places first and saved the general body for last. Standing for long periods of time certainly did not yield a calm, compliant attitude when the more tedious places were left until last. After standing for an hour or more, the animal got antsy when I was trying to do more detailed work around the legs, head, flanks and ears after the body; so I changed the order. Generally speaking, I slowed my pace and eliminated any abrupt movements on my part to give the equine adequate time to assess what I would do next and approached each task very CAREFULLY. The results were amazing! I could now groom, clip bridle paths and fly spray everyone with no halters, even in their turnout areas as a herd. They were all beginning to really trust me.
There was still one more thing my grandmother had said that echoed in my brain, “You are going to be a sorry old woman if you do not learn to stand up straight and move in good posture!” Good posture is not something that we are born with. It is something that must be learned and practiced repetitiously so that it becomes habitual for it to really contribute to your overall health. Good posture begins at the core, “the innermost, essential part of anything.” In a human being, it lies behind the belly button amongst the vital organs and surrounded by the skeletal frame. In a biped, upon signals from the brain, energy impulses run from the core and up from the waist, and simultaneously down through the lower body and  legs. The core of an equine is at the center of balance in the torso. Similar to bipeds, they need the energy to run freely along the hindquarters and down through the hind legs to create a solid foundation from which to allow the energy in front to rise into suspension to get the most efficient movement. When their weight is shifted too much onto the front end, their ability to carry a rider efficiently and correctly is compromised. To achieve correct energy flow and efficient movement, the animal’s internal supportive structures need to be conditioned in a symmetrical way around the skeletal frame. People can do this by learning to walk with a book on their head and with Pilates exercises, but how can we affect this same kind of conditioning in a quadruped?
The first issue I noticed was with leading our animals. When we lead our animals with the lead rope in the right hand, we drop our shoulder and are no longer in good posture. When we walk, our hand moves ever so slightly from left to right as we walk; we inadvertently move the equine’s head back and forth. They balance with their head and neck. Thus, we are forcing them off balance with every step that we take. Since movement builds muscle, they are being asymmetrically conditioned internally and externally with every step we take together. In order to correct this, we must allow the animal to be totally in control of his own body as we walk together. We are cultivating proprioception or “body awareness.”
During the time you do the core strength leading exercises, you should NOT ride the animal as this will inhibit the success of these preliminary exercises. It will not result in the same symmetrical muscle conditioning, habitual behavior and new way of moving. For the best results, lessons need to be routine and done in good posture from the time you take your equine from the pen until the time you put him away. Hold the lead rope in your LEFT hand, keeping slack in the lead rope. Keep his head at your shoulder, match your steps with his front legs, point in the direction of travel with your right hand and look where you are going. Carry his reward of oats in a fanny pack around your waist; he’s not likely to bolt if he knows his reward is right there in the fanny pack.
Plan to move in straight lines and do gradual turns that encourage him to stay erect and bend through his rib cage, keeping an even distribution of weight through all four feet. Square him up with equal weight over all four feet EVERY TIME you stop and reward him with oats from your fanny pack. Then wait patiently for him to finish chewing. We are building NEW habits in the equine’s way of moving and the only way that can change is through routine, consistency in  the routine and correctness in the execution of the exercises. Since this requires that you be in good posture as well, you will also reap the benefits from this regimen. Along with feeding correctly (explained on my website at www.luckythreeranch.com), these exercises will help equines to drop fat rolls and begin to develop the top line and abdominal strength in good posture. The spine will then be adequately supported to easily accept a rider. He will be better able to stand still as you pull on the saddle horn to mount.
When the body is in good posture, all internal organs can function properly and the skeletal frame will be supported correctly throughout his entire body. This will greatly minimize joint problems, arthritis and other anomalies that come from asymmetrical development and compromises in the body. Just as our children need routine, ongoing learning and the right kind of exercise while they are growing up, so do equines. They need boundaries for their behavior clearly outlined to minimize anxious behaviors and inappropriate behavior. The exercises that you do together need to build strength and coordination in good equine posture. The time spent together during leading training and going forward, slowly builds a good solid relationship with your equine and fosters his confidence and trust in you. He will know it is you who actually helps him to feel physically much better than he ever has.
Core muscle strength and balance must be done through correct leading exercises on flat ground. Coordination can be added to his overall carriage with the addition of negotiating obstacles on the lead rope done the same way. Once familiar with the obstacles, you will need to break them down into very small segments where the equine is asked to randomly halt squarely every couple of steps through the obstacle. You can tell when you have successfully achieved core strength in good balance, when your equine will perform accurately with the lead rope slung over his neck. He will stay at your shoulder, respond to hand signals and body language only and does what is expected perfectly. A carefully planned routine coupled with an appropriate feeding program is critical to your equine’s healthy development.
 The task at the leading stage is not only to teach them to follow, but to have your equine follow with his head at your shoulder as you define straight lines and gradual arcs that will condition his body symmetrically on all sides of the skeletal frame. This planned course of action also begins to develop a secure bond between you. Mirror the steps of his front legs as you go through the all movements keeping your own body erect and in good posture. Always look in the direction of travel and ask him to square up with equal weight over all four feet every time he stops and reward him. This kind of leading training develops strength and balance in the equine body at the deepest level so strengthened muscles will hold the bones, tendons, ligaments and even cartilage in correct alignment. Equines that are not in correct equine posture will have issues involving organs, joints, hooves and soft tissue trauma. This is why it is so important to spend plenty of time perfecting your techniques every time you lead your equine.
The equine then needs to build muscle so he can sustain his balance on the circle without the rider before he will be able to balance with a rider. An equine that has not had time in the round pen to establish strength, coordination and balance on the circle, with the help of our postural restraint called the “Elbow Pull,” will have difficulty as he will be pulled off balance with even the slightest pressure. He will most likely raise his head, hollow his back and lean like a motorcycle into the turns. When first introduced to the “Elbow Pull,” his first lesson in the round pen should only be done at the walk to teach him to give to its pressure, arch his back and stretch his spine while tightening his abs. If you ask for trot and he resists against the “Elbow Pull,” just go back to the walk until he can consistently sustain this good posture while the “Elbow Pull” stays loose. He can gain speed and difficulty as his proficiency increases.
 Loss of balance will cause stress, and even panic that can result in him pulling the lead rope, lunge line or reins under saddle right out of your hands and running off. This is not disobedience, just fear from a loss of balance and it should not be punished, just ignored and then calmly go back to work. The animal that has had core strength built through leading exercises, lunging on the circle and ground driving in the “Elbow Pull” before riding, will not exhibit these seemingly disobedient behaviors. Lunging will begin to develop hard muscle over the core muscles and internal supportive structures you have spent so many months strengthening during leading training exercises. It will further enhance your equine’s ability to perform and stay balanced in action, and play patterns in turnout will begin to change dramatically as this becomes his habitual way of going. Be sure to be consistent with verbal commands during all these beginning stages as they set the stage for better communication and exceptional performance later. Although you need to spend more time in his beginning training than you might want to, this will also add to your equine’s longevity and use-life by as much as 5-10 years. The equine athlete that has a foundation of core strength in good equine posture, whether used for pleasure or show, will be a much more capable and safe performer than one that has not, and he will always be grateful to YOU for his comfort.
To learn more about Meredith Hodges and her comprehensive all-breed equine training program, visit LuckyThreeRanch.com, MEREDITH HODGES PUBLIC FIGURE Facebook page, or call 1-800-816-7566. Check out her children’s website at JasperTheMule.com. Also, find Meredith on Pinterest, Instagram, MeWe, YouTube and Twitter.
Covered in TRAINING MULES & DONKEY: A LOGICAL APPROACH TO TRAINING, TRAINING WITHOUT RESISTANCE and EQUUS REVISITED at www.luckythreeranchstore.com
© 2018, 2024 Lucky Three Ranch, Inc. All Rights Reserved.

MULE CROSSING: The Hourglass Pattern & The Elbow Pull
(A SELF-CORRECTING POSTURAL AID FOR EQUINES)
Concept Developed by Richard Shrake and Specific Design by Meredith Hodges
(Trademarked & Published in TRAINING WITHOUT RESISTANCE 2003)
 In my TRAINING MULES & DONKEYS DVD #2, in the TRAINING WITHOUT RESISTANCE manual (2003) and in the SPECIAL FEATURES of my EQUUS REVISITED DVD (2009), I talk about using a postural aid called the “Elbow Pull.” In the EQUUS REVISITED DVD, we teach you how to measure it for your individual equine and how to make it. If you have our video series, in DVD #2, in the TRAINING WITHOUT RESISTANCE manual (2003) and in the EQUUS REVISITED DVD (2009), we talk about using the “Elbow Pull.” We teach you how to measure it for your individual equine and how to make it. The “Elbow Pull” puts your animal into your equine’s ideal posture. He will have full range of motion in every direction when it is adjusted correctly. He will just not be able to raise his head so high that he hollows his neck and back.
He will be able to balance and adjust his body position, encourage the hind quarters to come underneath his body when he is walked, or driven forward. Allowing the equine take short steps, front and back, would let the back sag (swayback-Lordosis) and does not engage the abdominal muscles. The “Elbow Pull” encourages the equine to stretch his spine, round his back and neck upwards (not “hump” it!) and elevates the shoulders when he steps  underneath his body. The elevation (or suspension) in the shoulders allows him to increase the “reach” in his front legs. I use the “Elbow Pull” for Leading Training, Ground Driving and when he is ready, Lunging in the Round Pen. The Leading Training on flat ground through our HOURGLASS PATTERN positively affects his overall postural balance, and Leading through Obstacles adds coordination. You know that he is ready to go on to each stage of Leading Training on flat ground (and then through obstacles) when you can throw the lead rope over his neck and do the exercises with verbal commands, hand signals and body language alone. This is building a new habitual way of traveling is all in preparation for Lunging correctly…keeping his body erect and in a symmetrical balance while he bends to the arc of the circle through his torso without leaning like a motorcycle. It will prevent muscle compromises throughout his body that could cause soreness and compromise organ function.
I continue to use the “Elbow Pull” with each new stage of training to help him maintain his good posture throughout the different tasks. It is a supportive device and when he has problems with his posture, it will become tight. He can “lean” against it for a few strides without going totally out of good posture which gives him relief from the stress of trying to hold his good posture for long periods of time, which is often difficult in the beginning.
When he is again able to hold his good posture, the aid becomes loose all over. The equine is in complete control of this postural aid. Even people have problems maintaining good posture without the occasional reminder of their own good posture until it becomes more habitual.
 None of us were born in good posture. It is something that must be taught. If we are allowed to “slouch” in our posture, it WILL create soreness and physical problems over time, especially when we get much older. After Lunging in good posture for several months, the equine’s habitual way of going will be changed. He will begin to travel in good posture automatically.
Changing habits takes a long time of repetitive behavior to evolve into a new habitual way of acting. As you teach your body through these stages to stay in sync with your equine’s steps, YOUR body becomes more in tune with his way of going and prepares you to be a better rider. This is all a matter or re-programming brain-muscle impulses. The equine will be Ground Driven in the “Elbow Pull” as he adjusts to learning rein cues, and when the weight of the rider is finally added, it is advisable to ride in the “Elbow Pull” until it remains loose all the time. When it does, you can be sure he is strong in his core balance and truly ready to support the rider in any kind of athletic pursuit. The equine learns to carry the rider on top of an upward arc in their spine with the abdominal muscles engaged. This is the same as teaching people to use their whole body correctly and lift with  their legs and not their backs. These kinds of exercises make sure that the animal travels symmetrically, allowing the joints to work as they were designed to do (according to the laws of physics) with no compromises, and promotes optimum function of their internal organs.
With an equine that is over 2 years old and that has not had the benefit of developing core strength in good posture, it is advisable to first use the “Elbow Pull” during detailed and extensive Leading Lessons, both on the flat ground and later over obstacles. An equine under two years of age will not need the “Elbow Pull” support while working on his way of going since repetitive habits have not yet been fully established.
 Lunge the equine in the Round Pen for several months until the animal habitually exhibits an erect posture with equal weight over all four feet and balanced self-body carriage. When you finally begin riding, you should use the “Elbow Pull” while you are riding our Hourglass Pattern under saddle as he adjusts to the added weight and new balance. When the “Elbow Pull” is adjusted correctly and the equine is in good posture, it will not put any pressure on the animal at all. When he is out of good posture, it puts pressure on the poll, the bit rings, behind the forearms and over the back. He will go back to his good posture as soon as he is able in order to release the pressure points.
 Place the “Elbow Pull” over the poll, through the snaffle bit rings, between the animal’s front legs and over the back, then snap the two ends to a surcingle D-ring or D-rings, on the saddle you are using. It should be adjusted so he can only raise his head approximately 3-4 inches above the level of the withers (just before he hollows his neck and back). The “Elbow Pull” needs to be adjusted loosely enough so that he can relieve the pressure at the poll, bit rings, elbows and back without having to drop his head below the withers.
When lunging, if the “Elbow Pull” is correctly adjusted and he still wants to carry his nose to the ground, encouraging him with the whip to speed him up a bit. This will encourage him to engage his hindquarters and raise his head into the correct position. The only way he can really go forward with his nose to the ground is if the hind quarters are not engaged. As soon as the hindquarters are engaged, he will have to raise his head to the correct position to maintain his balance. When being led in the “Elbow Pull,” lowering the head is not a problem because you will have control of the lead rope attached a ring underneath his noseband or a halter (not attached to the bit!). Doing stretching-down exercises during leading training helps to stretch the spine and alleviate any soreness that could be developing with the new postural position. Breaking old habitual muscle positions can cause soreness to begin with, but as the better posture becomes more evolved, it also becomes much more comfortable (as it does in humans). Stay away from medications as much as possible as he works his way to the new posture.
 In the Round Pen, the “Elbow Pull” helps the animal learn to travel in good equine posture without the added weight of a rider first. In doing so, it increases his core strength and the ability for him to carry a more balanced posture of his own volition. The added weight of the rider under saddle will challenge the animal again to maintain this good posture. This will take further strengthening of the muscles. The “Elbow Pull” will keep the animal in the correct posture while carrying the rider, so he doesn’t ever build muscle out of balance and out of good equine posture. When you do this, you are changing old habitual movement into good equine posture and a balanced way of moving. This eventually (after two years) will become his habitual way of moving and playing, even during turnout.
Your equine should stay in the “Elbow Pull” when working for two years to make sure that the muscles are indeed conditioned around correct equine posture through correct and consistent repetition. This means that when your year of Lunging, then Ground Driving is over, and he begins to work with a rider or while being driven, you would still use the “Elbow Pull” to help him stay in good posture for another year with the added weight of the rider on his back. If driving your equine, you should also use it during the first two years in your driving arena during training to promote good equine driving posture and engagement of the hind quarters while pulling. This assures that the muscles are becoming correctly and symmetrically strong (supporting the skeleton), over a balanced and physically aligned frame.
 If you are consistent during his lessons, being in good equine posture will become his normal way of going and will not disappear when you finally ride without it.
The “Elbow Pull” postural aid does not pull their head down. Rather, it gives them full range of motion (up, down, and sideways), but keeps them from raising their heads so high that they hollow their back and neck during initial training. It is a fully self-correcting restraint that gives them something to lean on when they are not yet strong enough in the core (elements that support the skeletal frame…muscles, tendons, ligaments, connective tissue and even cartilage in the joints) to maintain their ideal balance. It encourages them to step well underneath their body, round their back upward from head to tail and puts the spine in an position to allow space between the vertebrae Spinus Processes (and avoid “Kissing Spine”) and to prevent the rider from injuring their spine (according to the laws of Physics). The “Elbow Pull” provides support much like a balance bar does for a beginning ballet dancer, and the principles of good posture are the same as with humans.
Repetition and consistency during training can change habitual bad posture to habitual good posture over a long period of time, usually about two years. Good posture and correct movement can enhance longevity by as much as 5-10 years, enable internal organs to operate efficiently and prevent calcification, arthritis and other compromises like locked stifles that can create soreness in the body.
There is a much different way to secure the “Elbow Pull on a horse. Horses have violent reactions to a hard tie, so  you will need to cross the rope across their back, pull it taut into the correct tension and then secure the snaps, keeping plenty of slack in the rope. You want the rope semi-knot to slip if they brace against it, but you do not want loose snaps on the ends of the rope to swing free to hit the horse anywhere on his body. With horses, you would just twist the rope over the back as shown in the photo, so the snaps are a moot point until the horse learns to give to the Elbow Pull and can be hard tied.
Making the “Elbow Pull”
 Although the “Elbow Pull” is a very simple and straight forward aid to help keep your equine in good posture, it is also a device that needs to be custom made to fit each individual equine. Equines that approximate the same size in the front quarters will probably be able to use the same one. First, you need to obtain a package of 3/8″ X 50′ nylon and polyester twisted rope. This is the way it is sold. Do not substitute any other kind of rope, or leather reins, etc. as this will have a different weight and slippage around the bridle and will not have the same effect.
 You will also need two snaps that are narrow, yet fairly strong that can fit easily through the D-rings on your surcingle, or Western saddle. English saddle D-rings are generally too small and in this situation, we do not attach to them, but rather attach the “Elbow Pull” to itself over the top of the spine. If the rope tends to twist and the snaps slide off to the side, you can often just snap one snap to the D-ring and the other snap snapped to the first snap, or if the “Elbow Pull” is a bit shorter, you can just snap it to the small D-ring on each side. The reason for twisted rope is so you can actually go through the D-rings and snap it into the twisted rope itself for a more exact setting. You would just untwist the rope at the setting point and snap into the middle of the rope so it won’t slide.
 Have the equine stand at the hitch rail with the snaffle bridle on. To get a measurement for how long a piece of rope you will need for his “Elbow Pull,” take a length of rope from the coil. Feed the end of the rope from the inside to the outside of the snaffle bit ring, drape it over the poll of your equine and feed it from the outside of the snaffle bit ring to the inside on the opposite side of your equine. Then pull enough slack to go down through the front legs, behind the forearm, up and over the back such that it hangs one foot, or more (but not less) on the other side of the spine. Then, go back to the side on which you started and do the same on that side with the remainder of the 50″ foot length of rope and cut the rope at the 1-foot mark on the other side of the spine.
 Once you have the proper length of rope for your equine, you will need to unravel 3” – 4″ of one end of the rope and loop it through the ring on your first snap. Then you will braid the rope back into itself. First, pick the loose strand that is on top as you lay the rope across your hand, bend it around the end of the snap and feed it under a twist of the rope such that it creates a loop around the end of your snap and pull it snug. Then take the next loose strand (which would be the middle of the three strands) and feed it under the next twist down from the one you just did. Then do the same with the third loose strand under the third twist in the rope. Take all three strands in your hand, hold the rope so it doesn’t twist and pull all three strands snug. They should all line up.
 Next, turn the rope over so you can see where the angled lines of the twisted rope begins again and feed the first strand under the first twist, the second under the second twist and the third under the third twist. Pull all three strands snug at the same time, turn the rope over, locate the first twist in the line and repeat until you have all 3” – 4″ braided into the twisted rope.
 You will have some loose ends sticking out and nylon rope can slip back out of the braid, so you now need to take a lighter and burn all these ends until they are melted together into the rope, so they will not slip. Be sure that you burn them so they are smooth and without bumps, or it will be difficult to feed the ends through the D-rings. Do the same with your second snap on the other end of the rope. Now you have your own custom made “Elbow Pull!”
THE HOURGLASS PATTERN
(Core Strength Leading Training)

Tack up your animal in a surcingle (or lightweight saddle), a snaffle bridle with a drop noseband (and a ring  underneath to attach to the lead rope) and our “Elbow Pull” self-correcting postural restraint. The bridle with the drop nose band will encourage your equine to take proper contact with the bit and not get in the habit of “waving” his tongue over the bit. Adjust it so it is taut enough to keep his head from going so high that he inverts his neck and back, and not so tight that it pulls his head too low. Stand in front of him once you have secured the “Elbow Pull” on the near side and rock his head from the poll to make sure the tension is correct.
 Begin the “Hourglass Pattern” without doing circles at the cones. Lead your animal with the lead rope in your left hand from the left side with your equine’s head at your shoulder when tracking left, and lead your animal with the lead rope in your right hand with your equine’s head at your shoulder when tracking right. Point your left hand (or right hand) in the direction of travel and look where you are going. Say the animal’s name and give the command to “Walk on.” Then look down to see what leg he is leading with and match your steps with his.
When you stop, say “And…Whoa” and stop with your feet together. Square him up with both hind legs together and then put both front legs together with equal weight over all four feet and reward from a fanny pack of oats around your waist. Stand quietly until he has finished chewing, change sides (and leading position) after every halt so you are always leading from the “inside” of the arc on which you are traveling, and give the command to “Walk on.” You can add circles at the cones and ground rails once he is consistently walking at your shoulder and prompt with the commands.
 You can set up your Hourglass Pattern as pictured above so you can do Leading Training, Obstacle Training, Lunging off and on the Lunge Line, Ground Driving Training and Riding Training without having to move things around. Putting ground rails between the two center cones will encourage your equine to use his hind quarters by stepping well underneath his center of gravity below his torso. This will elevate his front end and produce more action in his joints.
I work multiple animals, up to four at a time by working one in the arena (with and without the lead rope) with the others tied at the hitch rail just outside the arena by the gate. This enables me to get multiple equines done in a short amount of time and reduces the incidence of animals pacing the fence while others are being worked. Using your facility efficiently can greatly reduce time spent on training.
 First he will get proficient on the lead rope in the Hourglass Pattern, and then obstacles will be added at the end of each lesson to facilitate coordination and further increase his postural core strength. During lunging training in good posture, he will be able to sustain equal weight over all four feet and won’t lean from one side to the other. His hind feet will fall into the footprints of the front feet. He will be able to stay in good balance with a consistent rhythm and cadence to all his gaits.
 Remember, when engaging in the Hourglass Pattern exercises, do not DRILL. You will only need to work your equine first one direction through the pattern with the designated halts between the cones, cross the diagonal and work in the other direction. Once around the pattern each way is enough to do the job. Work your equine a minimum of once a week and a maximum of once every other day. Be sure to leave a day of rest in between for the best results. Your equine will look forward to his time with you, so make the MOST of it!!
 To learn more about Meredith Hodges and her comprehensive all-breed equine training program, visit LuckyThreeRanch.com or call 1-800-816-7566. Check out her children’s website at JasperTheMule.com. Also, find Meredith on Facebook, YouTube, Pinterest, Instagram, MeWe and Twitter.
Covered in TRAINING MULES & DONKEY: A LOGICAL APPROACH TO TRAINING, TRAINING WITHOUT RESISTANCE, EQUUS REVISITED, my TRAINING MULES & DONKEYS DVD SERIES and A GUIDE TO RAISING & SHOWING MULES at www.luckythreeranchstore.com
© 2013, 2016, 2024 Lucky Three Ranch, Inc. All Rights Reserved.

MULE CROSSING: From Mules to Riches
By Meredith Hodges
 Long before the Founding Fathers drafted our constitution, America began as a religious nation under God, and the mule has his roots in religion just as does the country he has helped to build. The mule of today’s ancestor is the donkey, mentioned in the Bible numerous times as an animal respected by God and blessed by Jesus Christ. The donkey was even chosen to bring Mary and Joseph to Bethlehem and, later, acted as the mount Jesus himself used for his ride into the city of Jerusalem.
Here is an ancient story, quoted directly from the Bible, illustrating the mule’s wonderful sense of humor: “So Zadok the priest, and Nathan the prophet, and Benaiah the son of Jehoiada and the Cherethites, and the Pelethites, went down and caused Solomon to ride upon king David’s mule, and brought him to Gihon.” I Kings 1:38
“And Absolom met the servants of David. And Absolom rode upon a mule, and the mule went under the thick boughs of a great oak, and his head caught hold of the oak, and he was taken up between the Heavens and the earth, and the mule that was under him went away.” II Samuel 18:9.
 Mules are the true professionals of slapstick humor and professional psychotherapy! When you get into an altercation with a mule, you will seldom get hurt, but you will surely be set straight in a most humiliating way.
In the early days of what was to become the United States of America, mules and horses perpetuated the expansion of the colonists into the Western territories of America. Since these early times, the American mule has acted not only as a pack animal for miners and fur traders penetrating the West, but it has also played an important part in our country’s defense, being able to cross terrain not accessible by any other means, and carrying and pulling heavier loads of weaponry than horses could even begin to carry.
When the fight for freedom from England’s rule was launched with the American Revolution, donkeys and horses were used in varying capacities to help win the battle for our country’s liberty.
Freedom was won as a result of the combined efforts of humans, animals and faith. One need only examine the humble traits and character of mules and donkeys to see that they indeed possessed the faith and the strong constitution to make some very important contributions to this country’s independence.
As they say, an army “marches on its stomach,” so it was a natural for Americans to progress further and delve into agriculture. Because of the extraordinary ability of mules to work for longer periods of time in sometimes harsh and unrelenting climates, their surefootedness and resistance to parasites and disease and with their ability to work long hours, the mule became the gem of agriculture. He learned his job quickly and put his heart and soul into every task.
When American coal mining was booming, the mule was such a valuable member of the mining process, that a good mining mule was considered to actually be more valuable than a human miner. Mining has always been a dangerous business, and the mining mule’s innate sense of self-preservation was well known. “Mules are very smart…They know what they can do and would never do anything they couldn’t or would not want to do. Mules were known to pull at least three full mine cars full of coal. If you hooked up a fourth car they would balk at any commands and just stand there. No way would they pull the fourth car!” 1
 “Mules are the living symbols of the historic and pioneer spirit of the West. Mules were the pack animals of Spanish padres and grizzled prospectors. These animals have a dominant place in frontier history. From 1883 to 1889, the 20-mule teams moved 20 million pounds of borax out of Death Valley, California, to Mojave—165 miles away—traveling 15 to 18 miles a day. The 20-mule teams, the dramatic solution of a transportation problem, soon became a world-famous symbol, the trademark first of the Pacific Borax Company and, today, of the many products made by U.S. Borax.” 2 So began the mule’s vital contributions to industry and the economy.
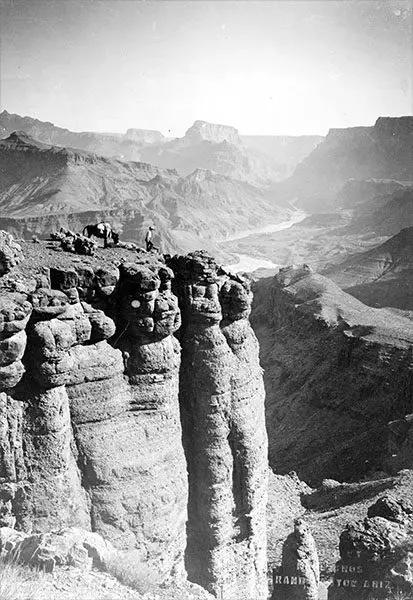
In 1976, under the direction of the North American Trail Ride Conference, the Bicentennial Wagon train became a notable event in American history. Commemorating the trek West that was made so long ago by brave and adventurous pioneers, the Bicentennial journey went from California east to Valley Forge, retracing the steps of these first U.S. settlers. The outriders brought back scrolls of signatures signed by enthusiastic citizens to reaffirm their belief in the principles upon which America was founded. State by state, wagons met up with the main train and joined the trek. No doubt, many of these Bicentennial wagons were pulled by our beloved mules. “Going through my deceased folks’ stuff, I found an ‘Official Souvenir Program’ of the Bicentennial Wagon Train Pilgrimage. It’s interesting reading about the program in 1995–‘96, to have a Conestoga wagon or Prairie Schooner from each of the 50 states across the country on historic trails, ending up at Valley Forge on July third.” 3
Although some Americans have become concerned about the impact donkeys may have on the environment and, in particular, on our state parks, there is no evidence that the burro will reproduce at a rate that will threaten the ecosystem, especially that of the Grand Canyon. In fact, it is possible that the burros have already been in the Grand Canyon for centuries. There is evidence that the erosion attributed to the burros is more often due primarily to other invasive forces, such as humans and the natural erosion that occurs from geological forces and the canyon’s climate. There is also some concern that the donkeys pollute water holes, but the defecation of burros (and mules) has never actually been proven to pollute anything in their environment. Currently, there is an effort to prevent mules from being used in the Grand Canyon, but they are clearly the safest way to traverse and enjoy the beauty of this American natural wonder. Mules and donkeys learn their jobs well and cannot be dissuaded from their purpose of carrying inexperienced tourists to the bottom of the canyon and back up again—with a remarkable safety record. Their smaller hooves do little damage to the trails, and their handlers have the integrity to maintain the trails just as they maintain their precious mules. Cyclists, hikers and motorized vehicles in the parks have the potential to do much more irreparable damage to the environment than any mule or donkey. In truth, it is the human element, rather than mules and donkeys, which does most of the damage to our delicate ecosystem.

America’s journey has been one of courage, determination and great faith. It has been defined by its sequential growth phases of religion, defense, freedom, agriculture, economics, industry and ecology. We have worked alongside mules and donkeys for centuries and have often taken their generous contributions for granted in the course of our fast-paced growth. But the mule and donkey are likely to remain with us as long as they can find a way to make their contributions to society.
Those of us who attend Bishop Mule Days every year and many Longears lovers across this country are very well-acquainted with the incredible assets of the mule, and look forward to singing his praises every year on October 26th, when Mule Appreciation Day rolls around. Let us never forget to thank our trusted equine companions for all they have done to make possible this great country of ours!
To learn more about Meredith Hodges and her comprehensive all-breed equine training program, visit LuckyThreeRanch.com, MEREDITH HODGES PUBLIC FIGURE Facebook page, or call 1-800-816-7566. Check out her children’s website at JasperTheMule.com. Also, find Meredith on Pinterest, Instagram, MeWe, YouTube and Twitter.
Covered in TRAINING MULES & DONKEY: A LOGICAL APPROACH TO TRAINING, TRAINING WITHOUT RESISTANCE, EQUUS REVISITED and A GUIDE TO RAISING & SHOWING MULES at www.luckythreeranchstore.com
© 2012, 2016, 2024 Lucky Three Ranch, Inc. All Rights Reserved.
1Mine Stories, The No. 9 Mine & Museum,Lansford, PA
2Mr. Longears, Volume 6, Number 21, Summer 1979
3ruralheritage.com email thread

