By Meredith Hodges
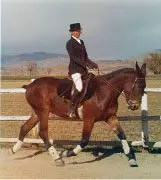
 Lucky Three Sundowner was foaled at my mother’s Windy Valley Ranch in Healdsburg, California in June of 1980. Two weeks later he and his dam, Candy Etta, an AQHA registered mare, were shipped to the Lucky Three Ranch in Loveland, Colorado, where we continued the superior mule breeding and training program that my mother had started. Sunny was a tall, gangly little bay mule foal with an affectionate and willing attitude.
 His show career began at halter and progressed to Western Pleasure and Reining by the time he was three years old. He won the World Championship in Reining at Bishop Mule Days as a four year old in 1984. Although he did very well in these events, he still seemed tense and nervous. For the next two years, I decided to focus on more relaxing events for him in Western Pleasure, Trail and English Pleasure. People were not easily accepting mules in equine events that were reserved for horses and ponies. Mules were universally considered stubborn, uncooperative and only suitable for the activities of farming, packing and pulling heavy loads. I suspected that this was not true and set out to prove it by schooling my mules in every discipline possible. Sunny had won the World Championship in Reining. I believed that schooling in Dressage could only help him in other judged disciplines and I set out to prove it.
During our beginnings in Colorado, there were small mule shows and some schooling horse shows that we could attend to test our skills. However, most people really didn’t believe mules could do all the different events that horses could do and did not want us around. A picture of Colonel Alois Podhajsky hung over my bed since I was small and I have always been in awe of the supreme levels of horsemanship that Dressage horses could attain. My dream was to be able to dance with Sunny in Dressage, but without anyone to help us, how could we ever achieve that level?
In 1986, fellow mule lover Sally McClean and I attended the United States Dressage Federation Convention and asked that mules be accepted into Dressage schooling shows. We were met with resistance, but there were some who were empathetic to our plight and they agreed that we should be allowed to compete at the lower levels to be able to test our skills and be part of the Dressage community. Sunny and I began Dressage lessons with local United States Dressage Federation instructor/trainer, Melinda Weatherford in Fort Collins, Colorado. Since neither Sunny, nor I, were previously schooled in Dressage and because he was a mule, we were faced with a much harder journey than we ever imagined. Lindy certainly had her work cut out for her teaching the two of us!
With acceptance by the U.S.D.F. (United States Dressage Federation), I felt it was important that our World Mule Show in Bishop, California, offered classes in Dressage. There were now a few others who were starting their mules in Dressage and they would need a place to show their progress against their own kind. The Bishop Mule Days Committee agreed and Dressage was included as a part of this truly world-class mule show! With the addition of Dressage, Bishop Mule Days became a 5-day show. Today, Bishop boasts a full week of over 180 different mule and donkey events with over 800 entries each year. Dressage classes grew rapidly with increased interest! People were beginning to realize how much Dressage could influence their Longears’ performance in other classes. Even the donkey classes began to improve and more events were offered for them as well. My own Little Jack Horner was working at Second Level Dressage, which was unheard of for a donkey!
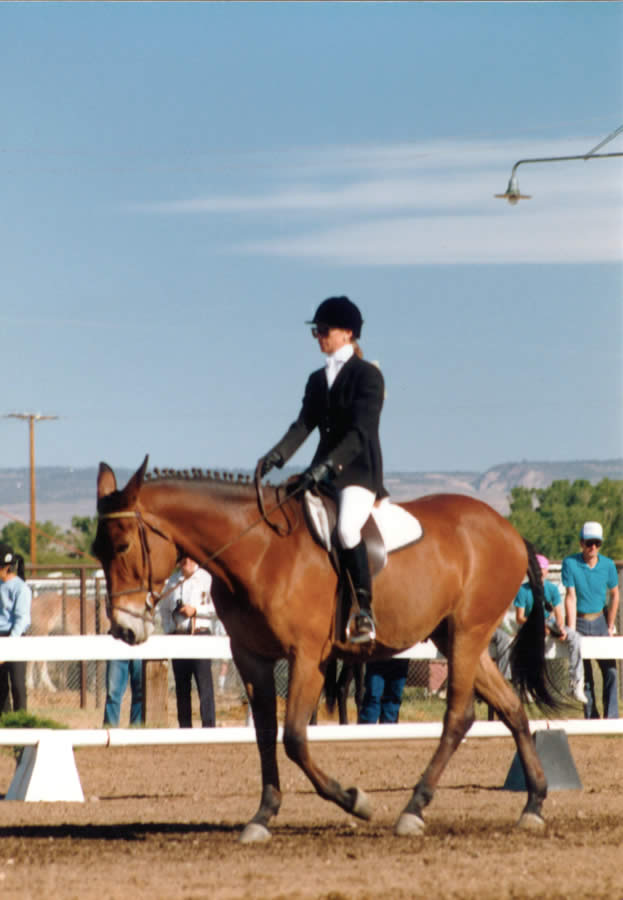
During Sunny’s first Training Level Dressage test in 1988, he got frustrated and ran off with me! Mules will sometimes do that! He scored 5’s and 6’s. The judge’s comment was, “This could be a nice mover if you can get his brain-by teaching him shoulder-in and leg yielding…” Unfortunately, we were eliminated. In 1988, he made his second debut at Training Level Dressage at Bishop Mule Days. He had much improved scores of 6 and 7. The comments, were, “Very pleasing ride, lovely mule, need to work on halts.” The progress Sunny made in just a month was phenomenal!
Sunny really enjoyed the predictable exercise routine and was soon much more relaxed and submissive although, we still had an occasional runaway during practice. It took me awhile to figure out just why Sunny was running off with me. During the Reining training as a three year old, Sunnyhad been forced to continue to gallop after missing his lead changes. From that time on, he would take off every time he thought he made a mistake, even when I didn’t think he had! He thought that was the right thing to do, so I patiently just rode out the runaways on a loose rein and kept asking him verbally to “Whoa.” Each time, the runaways got shorter.
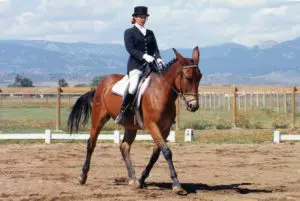
I knew that it was important to make sure his foundation work was stable and consistent, so we spent 1 ½ years schooling at Training Level Dressage. I made sure that he was only schooled every other day, with a day of rest in between. This seemed to help him to relax and settle, but his rhythm and cadence were still irregular at times. Then I thought maybe riding to music might help both of us. So, I sat down in the evenings, watched his training videos and picked music that would fit his natural rhythm at all three gaits. I even wore my Top Hat for our dress rehearsals to help me to set the mood. This staging during practice sessions made a dramatic change in his attitude… and mine!
Suddenly, we both experienced the harmony that we had only heard about that could take place between rider and horse, or in our case, rider and mule! It took a bit longer than expected, but spending that extra time at Training Level really improved his forward motion with strong engagement of his hind quarters. This, in turn, enhanced the lengthening and shortening of his strides within the working and extended gaits. We were ready to ask our coach if we could proceed to the next level. We began work on Leg Yields and attempted a bit of Shoulder-in.
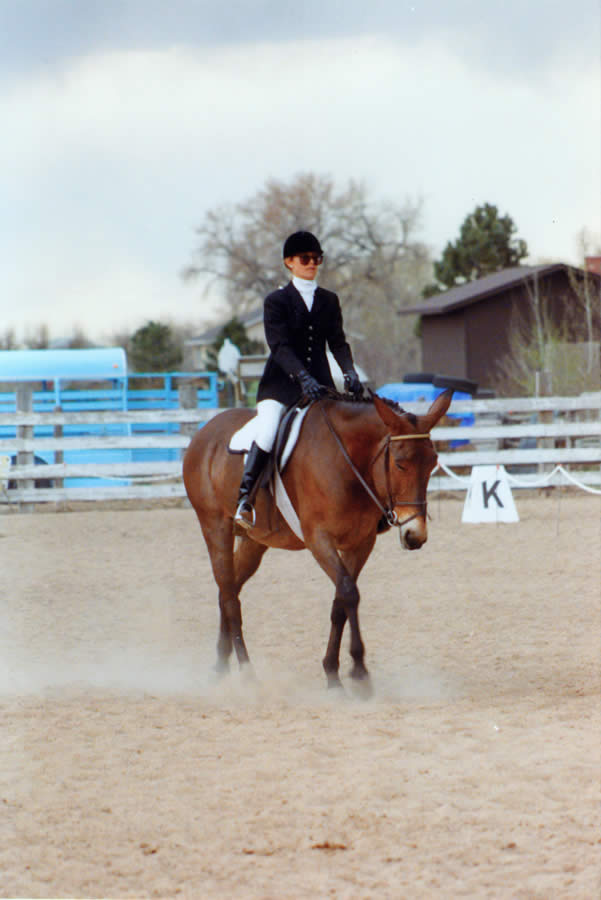
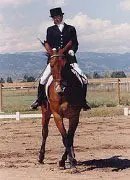
We continued our weekly lessons with Lindy and progressed to First Level Dressage. We learned to sustain good balance, rhythm and cadence at all three working gaits and to lengthen these gaits with alacrity and grace. People at the farm where we took lessons began to stop and watch us in awe! They had never seen such a thing! In May of 1989, he showed at Bishop Mule Days again with scores of 6 and 7. The comments, “Nice moving mule. Good impulsion, but unsteady at times. Good overall.” There were 10 entries that year and Sunny placed first! We were definitely making progress and people were beginning to notice!
Later in the summer of 1989, Sunny and I began to work at Second Level Dressage and entered some local schooling shows against horses to measure our progress. He did very well and was rapidly becoming the “Dressage Spokesperson” for mules! In 1990, he took first in the Bishop Mule Days Second Level Dressage Class. He was honored by Bishop Mule Days when asked to do a special demonstration for their Sunday afternoon performance. Sunny wowed the crowd with his sensitivity, agility and graceful performance!
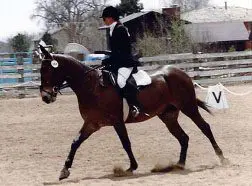
By May of 1991, Sunny was finally beginning to work at Third Level Dressage. Bishop had no Third Level Dressage class. So, they allowed Sunny to compete at Second Level Dressage again that year against four other mules and Dolly Barton who was rapidly becoming a Dressage champion herself – a mule bred by Bonnie Shields, the Tennessee Mule Artist!
Dolly placed first and Sunny placed second. Again, he scored 6’s and 7’s and the comments read, “Very nice ride! Needs more bending through turns and circles and scores will be higher.” Since both mules would be moving up another level by the next year, I went back to the Bishop Mule Days Committee and requested a Third Level Dressage class for 1992. They were so impressed with Lucky Three Sundowner and Dolly Barton that they agreed.
At Bishop Mule Days 1992, Sunny placed first against Dolly Barton in the Third Level Dressage class with scores of 6 and 7. I don’t think he liked being beat by a girl the year before! By 1993, Sunny was working at Fourth Level Dressage. It was at this time that I attempted to change his bridle, from the Eggbutt Snaffle Flash bridle, to a Weymouth Bridle with the curb action Weymouth and Bradoon. He reacted violently to the additional restriction from the Deluxe Weymouth Bridle. He was always compliant and responsive in his Eggbutt Snaffle Bridle, so I opted to go forward in the same bridle to keep him relaxed and happy with his work. He then competed a second year at Bishop Mule Days at Third Level Dressage, where he easily won being the only mule in the class. He had won respect from the horse community and had clearly surpassed his peers!
Quietly at home, with only a few onlookers, Sunny and I danced together to The Emperor’s Waltz by Johann Strauss with Canter Pirouettes, Half Passes, Passage and Piaffe. OUR DREAM TO DANCE TOGETHER HAD FINALLY COME TRUE! Lucky Three Sundowner passed away in October of 2015 at the age of 35 years, but his legacy remains. Dispelling all the old rumors about mules and donkeys, the memories we made together were priceless and paved the way for many more Longears athletes to “strut their stuff” in the equine industry of today! It took 18 years for mules to finally be accepted in the United States Dressage Federation Dressage Division in 2004, but nothing pleases me more than to see Longears successfully competing in the U.S.D.F. Dressage Finals against horses in Lexington, Kentucky! Long live our beloved Longears!
To learn more about Meredith Hodges and her comprehensive all-breed equine training program, visit LuckyThreeRanch.com, MEREDITH HODGES PUBLIC FIGURE Facebook page, or call 1-800-816-7566. Check out her children’s website at JasperTheMule.com. Also, find Meredith on Pinterest, Instagram, MeWe, YouTube and Twitter.
Covered in TRAINING MULES & DONKEY: A LOGICAL APPROACH TO TRAINING, TRAINING WITHOUT RESISTANCE, EQUUS REVISITED and A GUIDE TO RAISING & SHOWING MULES at www.luckythreeranchstore.com.
© 2013, 2016, 2024 Lucky Three Ranch, Inc. All Rights Reserved.


 As you ride your equine through walking exercises, try to stay soft, relaxed and following forward in your inner thighs and seat bones. Get the sensation that your legs are cut off at the knees and let your seat bones walk along with your animal—lightly, and in rhythm with him. If he slows down, just bend your knees and nudge him alternately with your legs below your knees, while keeping your seat and upper legs stable and moving forward. While your legs are still, they should rest gently on his sides in a “hug.” Do not push forward in your seat, but allow him to carry you forward. When collecting the walk on the short side, just bend both knees at the same time, nudging your equine simultaneously on both sides, while you squeeze the reins at the same time.
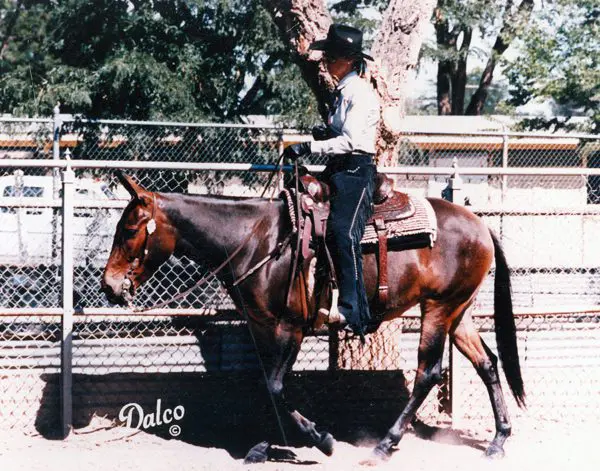 Most of us feel that we do not balance on our reins as much as we actually do. If there is any balancing on the reins at all by the rider, your equine will be unable to achieve proper hindquarter engagement and ultimate self-carriage. Here is a simple exercise you can do to help shift the weight from your hands and upper body to your seat and legs. Begin by putting your equine on the rail at an active working walk. On the long side, drop your reins on his neck and feel your lower-body connection with him as you move along. In order to maintain your shoulder-to-hip plumb line, you will find that you need to tip your pelvis forward and stretch your abdominal muscles with each step. If your lower leg remains in the correct position, this will also stretch the thigh muscles on the front of your leg from hip to knee. There is also a slight side-to-side motion as your animal moves forward that will cause your seat bones to move independently and alternately forward. There is no doubt that you can probably do this fairly easily right from the start, but to maintain this rhythm and body position without thinking about it takes time and repetition.
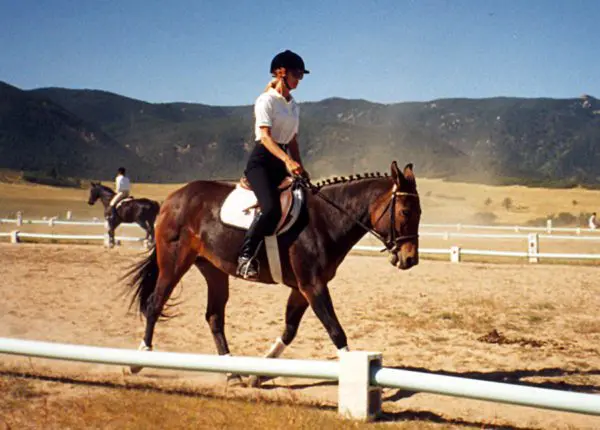 If your animal drifts away from the rail, you will need to post with a little more weight in your outside stirrup. As you go around the corners, be sure to turn your eyes a little to the outside of the circle to help your positioning. As you approach the short side of the arena, bring your arms backwards and straight out from your shoulders in a “T” formation, while keeping your upper body erect. As you go through the corners, just rotate your arms and upper body slightly toward the outside of your circle. When you come to the next long sides, bring your arms, once again, in front and parallel to your shoulders and repeat the exercise.
 Notice the different pressure on your seat bones as you change your arm position. The forward arms will somewhat lighten your seat, while your arms to the side tend to exert a little more pressure. Consequently, you can send your animal more forward by using your seat as you go down the long sides, shortening that stride with a little added pressure from the seat bones on the short sides. When you wish to halt, put your arms behind you at the small of your back to support an erect upper body, and let your weight drop down through your seat bones and legs. Also, remember to use your verbal commands often in the beginning to clarify your aids (effect of the seat, legs and hands) to your equine. If your equine doesn’t stop, just reach down and give a gentle squeeze/release on the reins until he stops, but be sure to remain relaxed and continue to drop your weight into your seat and legs. Keep your inner thighs relaxed and flexible. Do NOT squeeze! Think DOWN through your legs on both sides. Before long, he will begin to make the connection between the weight of your seat and your command to “Whoa,” and your seat will take precedence over your reins.
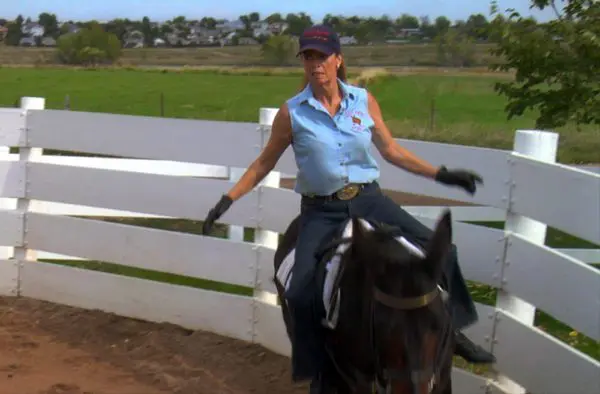


 By Meredith Hodges
 Once you have accumulated a few names, call and make appointments to visit the various trainers. The interview with the trainer is as important to you as it is to him. You will have an opportunity to discuss finance, goals and general care. An appointment will also give you the chance to see his facility and allow you to draw your own conclusions before you make a commitment. There are many good horse trainers available today, but they are not necessarily qualified to train mules. The mule trainer must be a person of extraordinary patience and be well versed in technique… and just as a precaution, you might ask if he’s ever trained a donkey. The mule trainer must know how to appeal to the donkey half of the mule as well as the horse half of the mule to be successful.
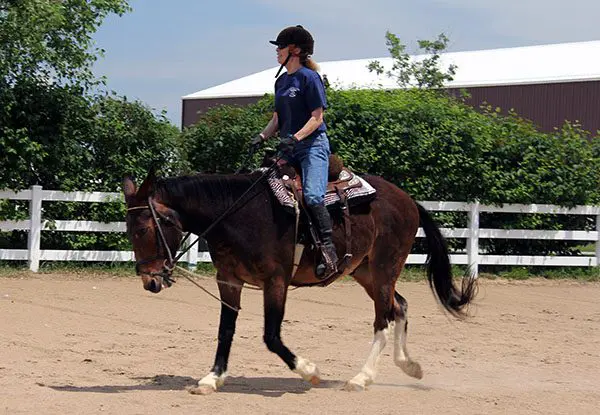 As a consideration to yourself and your mule, do not be afraid to ask the trainer if he will ride for you. You might want to mention the fact that you wish to see him ride at the time you make your appointment. The trainer can then be sure to allot the time necessary to ride for you. As he rides, watch the way he handles the animals. Are his hands light, yet firm? Does he ask for collection and cause the animal to travel smoothly and fluidly? Do his animals move away from leg pressure? Do the animals bend through their circles? Vertical flexion, impulsion, and lateral bend are all the elements of proper shape and any truly good trainer will know and practice these techniques. Beware of the person who claims to be a trainer, but only “rides” your animal. He could conceivably do immeasurable damage.