

MULE CROSSING: Letter from “Jasper” the Mule
By Meredith Hodges
Hi, Meredith!
My name is Jasper. I am a three-year-old, 15HH, bay Quarter Horse mule. I suppose, by people standards, I’m really nothing special, but I’m still me! I heard my owners talking about you the other day. They said that if anyone could help set me straight, it would be you. I didn’t know there was a problem! I always try to do what they want me to, but sometimes that can be hard to figure out! When I was just a foal, people used to come out to see me and my mother.
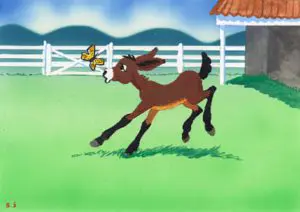 We were pastured on a couple of acres that surrounded an old shed where we used to get in out of the weather. My mother was content to graze and doze day after day – she wasn’t much on excitement. I used to love it when the people came and carried on about how cute I was. Then they would scratch and massage my fuzzy little body. They even got a little playful when I followed them around, romping, playing, and bumping them with my nose. “Oh, look how cute and friendly he is,” they’d say.
One day, when I was about six months old, the people came to play. I was feeling especially good that day and was glad to see some playmates coming to my pasture. Mom doesn’t really like to play much. I let them scratch and pet me for about 10 minutes, but then they started to leave! I didn’t want them to go, so I ran quickly behind one of the older men, nipped him on the butt playfully, and looped my forelegs over his shoulders. Wham! My whole head ached with the sting from that blow and I heard: “Get out of here, you brat!” I didn’t understand. They’d always liked to play before. “I guess we’ll have to start halter breaking this mule and teach him some manners!”
A few days went by before they came back. I was more cautious this time. I wanted to be scratched and loved, but I didn’t want to make them angry with me. Out of nowhere, they began trying to wrap this “thing” around my face! Didn’t even give me a chance to see or smell it! I felt trapped and scared to death! What were they going to do to me now?! Had I been worse than I had thought the other day? Did they want to kill me? I’d seen them whip and beat my mother one time when she wouldn’t go into that dark little room on wheels. She said it was best to do what they wanted, but that room was so small, she wasn’t sure she would fit, so she hesitated. “People don’t like it when you hesitate about doing what they ask, so try to perform quickly,” she said. My mother always helped me try to understand these humans and to appreciate the good things they have given us.
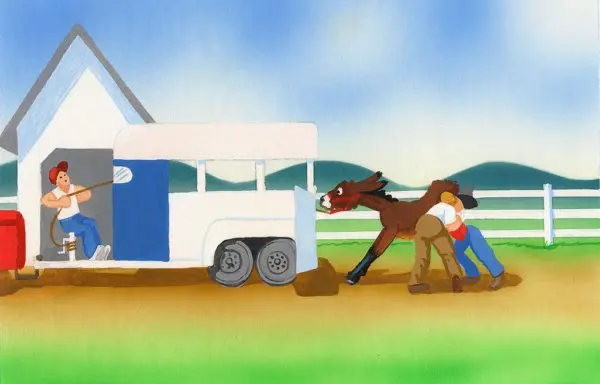 Suddenly, as soon as that “halter thing” was attached to my face, they tried to lead me away from my mother. That’s when I saw the little room on wheels parked along the pasture fence! I called to my mother to come… we were going for a ride! She took a couple of steps toward me when one of the two men shooed her off the other way. I was going alone with these two guys – but where?! Why?! I got scared! I pulled, kicked, bucked to get away, but nothing worked. They were both bigger than me and before long, I found myself locked in that little room on wheels… alone! I was frightened, but I was brave. The ride was short. When they finally opened the doors to let me out, I was an explosion of forced bravery. I came out of that trailer so fast I accidently knocked one of the men down. Whoops! Before I could show him how sorry I was, he jerked on my head and laced me about the head and neck with a long skinny stick that stung like a bee! Better stand still, I thought. Well, they didn’t like that either! They were pulling on my head and hitting me on the rear with that stinging stick! If I followed, it released the pressure from around my face and the man with the stick would stop, so I followed.
That was the first of my days in what they call training. They put me in a small house they called a stall. It had a small yard outside…large enough to walk around in, but not nearly enough room to romp and play. Whenever, the man came to take me out, I had hopes of finally getting a chance to stretch my legs and play a little, but every time I tried to play, he would only get angry with me and force me to stand still. Sometimes he would even tie me up and leave me alone for hours, which was worse than being in my stall! I tried to be good and do what he wanted, but there were always so many new things going on around me that I never really felt relaxed. Maybe, I wasn’t supposed to relax. Even the man who was training me seemed a little nervous and hesitant about how I would react. What was he nervous about? Why did he try to hide it? Is there something about all this that he wasn’t telling me? Will I get hurt?
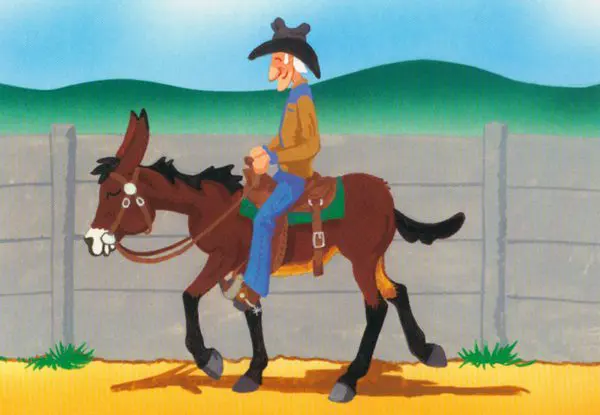 The day they put the saddle on my back when I was two was only one of many confusing times. I didn’t really mind the saddle until they fastened the belt around my middle so tight that I could hardly breathe. I bucked and ran, trying to get it off. “He’s going to be a real tough one,” the man said to my owner. I’m not really sure what he meant. I learned pretty quickly that the bucking only caused more pain as the stirrups thumped against my sensitive body. It was better to move smoothly with that saddle on my back, for sure. It took me awhile to learn to stop and turn when they pulled on that bit in my mouth, but the worst part was trying to keep my balance through all of this! Didn’t they know that I was still very young and growing and not really all that strong despite my size? They would ride me until I was stiff and sore, and then put me back in that small area with no room to stretch and exercise. They gave me rest for days at a time, with no other exercise. It seemed like I was either overworked or over-rested! My muscles never really had a chance to become stronger. They rode me either too long, or not at all. Somehow, though, I managed to learn. I guess we all do, whether it’s the hard way, or not.
The reason that I am writing to you is to ask you to let mule owners know that we mules don’t mean to make mistakes. We love people! They know so many ways to have fun and they can be so pleasant and understanding when they want to be. I just wish that they didn’t think that we are deliberately trying to be bad. The only time I was ever “bad” is when I didn’t understand what they wanted. Even when I was stiff and sore and fed up… at least I tried!
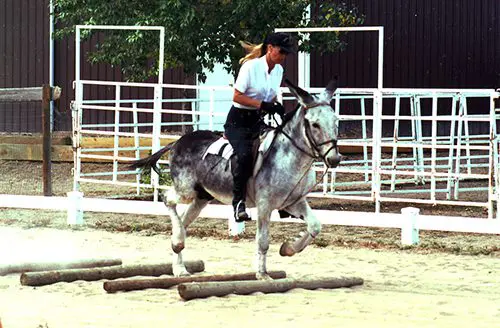
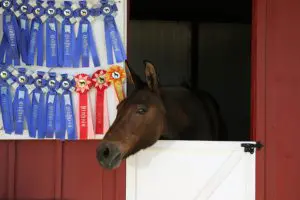 I met Mae Bea C.T. (“Peepers” from Jasper Goes to Bishop) and Ciji at Bishop Mule Days this year. They said that they have a wonderful life – equally balanced with training, pasture time, just plain fun and a lot of consideration for their feelings. Ciji said you were really mad at her for refusing all the jumps in the Hunter Under Saddle class, but that you were fair. You made her do them in the Jumping Class, rode the English Pleasure class and then let her rest for the remainder of the show since you knew she was in heat and had cramps. Ciji admitted that she can sometimes be a little stubborn and unfair herself, so she tried to make up for it by doing her best in the English Pleasure Class, which brought her fourth place.
I wish my owners would be more fair with me. I’m only three years old, and they have already been riding me for a year! If they would only slow down and explain more carefully, maybe I wouldn’t make so many mistakes! Maybe if I had more play time, I wouldn’t get so impatient with their inability to explain… and if they would take time to learn to balance and control their own bodies, maybe they wouldn’t keep throwing me off balance when I am trying to comply. I really like my people and like most mules, I really want to please them. Bea and Ciji said you know how to speak “MULE.” Wish everybody did. It makes it easier to communicate when you speak the same language. Do you think you could teach more people to speak “MULE” so we can all enjoy our lives with our owners as much as your mules enjoy you? I hope so.
Sincerely yours,
JASPER
To learn more about Meredith Hodges and her comprehensive all-breed equine training program, visit LuckyThreeRanch.com, MEREDITH HODGES PUBLIC FIGURE Facebook page, or call 1-800-816-7566. Check out her children’s website at JasperTheMule.com. Also, find Meredith on Pinterest, Instagram, MeWe, YouTube and Twitter.
Covered in TRAINING MULES & DONKEY: A LOGICAL APPROACH TO TRAINING, TRAINING WITHOUT RESISTANCE, EQUUS REVISITED and A GUIDE TO RAISING & SHOWING MULES at www.luckythreeranchstore.com.
© 1990, 2016, 2024 Lucky Three Ranch, Inc. All Rights Reserved.

 It is important that your donkey be in the best posture he can be in while he is performing at this stage of training. The way that he is moving with his body is the way his muscles and tendons will be strengthened and toned, and the way his bones will become permanently aligned. It is difficult for a rider to maintain this impeccable balance through every step and every stride. For this reason, you will use your “elbow pull” training aid to encourage your donkey’s good posture throughout training, once he has learned the right moves. Adjust your “elbow pull” so that, when tight, his poll can be raised about six inches above his withers. The “elbow pull” will help to maintain his proper frame and good balance without you having to fuss with anything. The “elbow pull” is most helpful during lateral movements, but it also helps him to maintain his balance through transitions and changes of direction. Get in the habit of using it all the time during intermediate training. When he is going well, staying in proper frame, light on the bit and responsive to your cues, and when the “elbow pull” is loose throughout all of his workouts—only then should you remove it. (Use of the “elbow pull” and instructions on how to make it are covered in my
  Now you need to teach your donkey to lengthen his trot. The elbow pull should have helped you to get a true trot out of your donkey. He will not be able to lengthen from a single-foot trot. Do not begin lengthening until the true trot is well established. When you wish to start schooling the lengthening, begin by asking him to lengthen on the long diagonal and corner-to-corner in your arena. Ask him to cover more ground going toward the center and as he approaches the corner, ask him to shorten his stride and collect the trot before the corner. Do not just ask for more speed. A lengthening is a more ground-covering walk, trot or canter, but maintains the same rhythm and cadence. In the beginning it will seem like there is very little difference between the working and lengthened gaits, but as he gets stronger and more agile, the difference will become more apparent.
 Next you will begin to regulate the canter. Place a pole perpendicular to the long side of your arena. Canter around the perimeter of the arena, coming down the long side and over the pole. Each time you approach the pole, about three strides out, start counting to your donkey, “One, two, three, pole.” This will accomplish several things. First, you will learn to gauge your distances and measure your donkey’s strides. Second, your donkey will learn to adjust his strides and they will become more balanced, rhythmic and cadenced. Next, he will become more obedient to your aids. Don’t forget to count out loud to your donkey every time you do this exercise. Remember, donkeys respond best to verbal commands. Do the canter pole several times in each direction, during each session that you work in the arena to help improve his canter.
 Whether you plan to jump or not, the next exercise is beneficial to your donkey’s body conditioning. It will help him to become agile and strong and he will be able to carry your weight a lot more efficiently. First set four cavalletti in your arena and have your donkey trot through them during several lessons. Then, set a cavalletti or cross rail jump in your arena with a ground rail one stride before and after. Begin each session with review and warm up with stretching—turns on the forehand and haunches on the lead; feeding treats from his back, bending his head to your knee on both sides; walking and trotting through the hour-glass pattern on the long rein; walking, trotting and cantering the perimeter of the arena on the long rein. Then you should do a collecting exercise. Ask him to collect on the short sides, and lengthen on the long sides at the walk and then do this at the trot. After the warm-up, stop and rest for three minutes. After the collection exercise, stop and rest for three minutes. He will be working in approximately 15-minute intervals with three-minute breaks in between. This is standard for mules, donkeys and horses.
 For the final segment of his workout, take him along the rail at the trot and come up over the cavalletti or cross rail jump. Two strides out from the ground rail (three strides from the cavalletti), start counting out loud, “One, two, three, JUMP!” Allow your donkey to trot after the cavalletti the first two times through, and the third time over ask him to canter away to the rail and down the long side of the arena. Then stop and reward him for his effort. Give him a brief rest and then repeat the exercise the same way three times with a brief rest after each canter pass. When he has done this pattern three times going in one direction, do the same thing three times going the other direction. If he is lazy, he may need encouragement from the crop, or you may need to wear BLUNT spurs. If he wants to run at the cavalletti, you will need to school him a little differently. You will need to walk to the ground rail, stop and back. Then turn away from the cavalletti, do a circle and approach again at the walk, stop and back. Circle again—at the trot this time—stop, back. Do this twice. The third time, let him trot and jump the cavalletti. After he jumps the cavalletti, a few strides out, ask him to stop and back. This is to help him to let YOU maintain control. It will also help him to maintain his balance and jump correctly, thus avoiding a mishap or fall.


 By Meredith Hodges
 This lesson will teach you some lateral exercises under saddle that will help your donkey be more responsive laterally. Up to this point, we have been schooling what is called leg yields, or lateral moves, on an angled track. We have begun movements to introduce the side-pass, which is a lateral move, only straight sideways. This is even more difficult for your donkey than the leg yields, since it requires a higher degree of crossing over from his legs. You may have found difficulty in negotiating the side-pass obstacles previously mentioned. First, check to make sure that the placement of your side-pass rail near the fence is correct. It should be about three quarters of your donkey’s length from the fence and lay parallel to the fence so that when he stands with his nose six inches from the fence, the ground rail lies directly under the middle of his barrel, equal distance from the front and rear legs. When you lay out the “T” poles, there must be room for him to swing his shoulders or haunches around to the next pole without touching them. If these steps are done correctly, it should minimize any problems. While ground-driving your donkey, your assistant can help steady him from the front. After some repetition, he should begin to comply easily.
 him to move more sideways at the walk. Do it this way a few times. Once he understands what is expected, you can pick up the trot as the circle becomes larger and yield at the trot to the largest circle. Each time he finishes the cycle, remember to reward him for his efforts. When he is performing well at the walk and trot, we can vary this pattern just a little more. Ask him to canter the larger circle while you begin to spiral down. At about the halfway point, ask him to slow to trot and finish the spiral as small as he can manage at the trot; then start spiraling back out to the larger circle. At the halfway point, pick up the canter and finish onto the largest circle. You can ask him to move laterally at the canter by cueing him as he is in suspension. In others words, when his front legs are out in front, he is on the ground and you would give the release on your reins and legs; when his front legs come back toward you, he is in suspension and you would pull back on the reins and squeeze with your legs. To get the sideways movement, you would pull back ever so slightly harder on the rein in the direction of travel, while maintaining the bend with a steady inside rein. This movement requires timing and coordination and will take a lot of practice, so don’t get discouraged. Just keep trying and you will soon get the right results.
 degree angle to the rail with a partial turn on the forehand. Then ask him to maintain the angle all the way down the long side of the arena. Bend him away from the direction of travel. Keep the inside rein slightly shorter and steady, while giving tugs and releases on the outside rein and kicking him behind the girth on the inside. If he moves his shoulders and not his haunches, hold the front steady, move your leg way back on the inside and kick again, asking him to move his haunches over. Then he will probably move his haunches and not his shoulders, at which point you can keep the haunches steady by locking them between your two legs, well back behind the girth. Then you can move his front quarters sideways by holding the inside rein steady and shorter, pulling and releasing the outside rein in the direction of travel, while tapping him on the inside shoulder with the crop to encourage the movement. In the beginning, you may find yourself going down the rail first haunches, then shoulders, then haunches and so on, but if your persist, he will eventually get it. You need to be alert to when he does respond correctly and lighten your cues so he knows he is performing correctly. And of course, reward him often to let him know that he has done it correctly. Nothing works better than positive reinforcement!
 The next exercise is to leg-yield your donkey from the corner of the arena to the center of the hourglass pattern. Do it just as you practiced it before—make a circle at the second cone and stop him, move his hindquarters parallel to the rail, then ask him to move sideways and forward to the center gate cones. When you arrive at the cone gate, straighten him, walk forward a couple of steps, then finish that side of the hourglass in a straight walk, then trot as he becomes more proficient. When you have completed half of the hourglass, you can go on to the next second cone on the short side of the arena and repeat the exercise. Just remember to stop and reward him for each half of the hourglass. As he learns, you can go longer between rewards. In the next exercise, you will go through the hourglass as usual, but when you reach the cone gates, you will circle around towards the rail, stop at the cone gates, move his hindquarters over and yield from center to corner. When he reaches the corner the first few times, stop and reward him then continue around to the center from the other side and repeat. As before, reward him for each completed move in the beginning. As he gets better, you can start rewarding him less often after completed successions. Always begin by walking until there are absolutely no problems, then he is ready for these exercises at the trot. Any time the trot goes awry, go back and school at the walk again. If he gets too strong with you, you may have to ask him to back a few steps before proceeding. Just make sure that if you ask him to back, you do it slowly, kindly and meticulously.


 Now that he is moving out well at the walk, you can teach him a reverse. As he is walking forward easily around the round pen, turn away from him, completely around, until you are in front of him. Step toward him, lay the whip ahead of him and give the command to “reverse.” Be aware of his space. Do not rush at him, or he may turn improperly. You want him to turn into the rail and resume the opposite direction. Give him plenty of time to make the turn and ask him to “walk on.” If he has difficulty, take a few steps forward and, with the whip, tap him gently on the shoulder to encourage him to turn. There is a purpose to turning away from him to turn him rather than just running ahead of him. By turning back the opposite way that he is traveling, you are establishing a new direction of travel, as well as giving him time to see that there will be a change in his movement. Most donkeys learn this very quickly.
 After his first lesson of trot, you can begin to integrate rein cues. During the second trot lesson, you will review all that he has learned up to the trot. Before you go to his trot lesson, you can attach your drivelines and ground-drive him through the walk and reverse while on the lines. He should have no trouble with you at his rear, since you have been lunging him from a close proximity from the beginning. Use your whip as you did for the turn on the haunches—at the shoulder for his turns, and at the gaskin to encourage him forward—but just touch him with it to remind him, don’t strike him. You want his movements to be smooth and correct, not abrupt. Pull as lightly as you can with a squeeze/release on the lines to encourage the turns, and make him move off more from your body language and the whip than you do with the lines. If he does well, stop, remove the lines, and send him back to the rail for his trot work—twice in each direction. (This means twice with trotting steps, not twice around the pen.) Then stop, reward him and tell him school’s out until the next time. Whether you come back tomorrow or a week later, rest assured that your donkey will be right where you left him in his training. They have an incredible memory!
 When he ground drives fairly well at the walk, you can mount him if he is a large enough donkey to ride. Mount him from both sides and dismount a few times at first. When he seems calm, you can stay aboard. Take a treat in your hand and encourage him to bend his head and neck around to each side to take the treat from your hand. At the same time, give short, light tugs on the rein on that side. This will encourage lightness in the bridle later on. Now he is ready to move with you aboard. It is best to use an assistant at this stage.
 steps. You can continue this lesson until he has completed one rotation of the round pen in each direction. Then stop him with “whoa” and ask him to go back a step or two. Give light pulls on both reins in a squeeze/release fashion to start, then, as he begins to move his feet backwards, alternate your pressure on the reins with the front foot that is forward. If he does not wish to back, your assistant can help with pressure to his chest as you did on the lead. Always end your riding or ground-driving lesson with a back, and don’t pull so hard on the reins that he resists by jutting his head out. Encourage him to stay light in the bridle. Then finish your lesson with lunging at the trot.

 You have, thus far, begun to teach your donkey several things: how to begin to execute the turn on the forehand and turn on the haunches, how to walk forward in a round pen from the lunge whip without a saddle or harness (then with the saddle and harness), on the drivelines, and while being ridden. He has also begun to learn how to “trot on” from the lunge whip while tacked up, and how to walk and trot on the lead with an assistant aiding from behind. Do not be alarmed if your donkey’s movements are not perfect. Each time you work with him, he will get better at each of these things, especially if, at the start of each lesson, you review before adding anything new.
 Your assistant will come into play only if your donkey does not respond to your cues first. When he is in a good free walk on a loose rein, give the command to “trot.” Use your voice, then your legs and then go to your crop, if necessary. If this doesn’t work, your assistant can step in behind and encourage him with the lunge whip with one smart strike to the gaskin above the hocks, while shuffling his or her feet to create some noise. This should work, but you, as the rider, must sit absolutely still, maintain a very loose rein and allow the donkey to comply on his own. (Do not keep thumping his sides with your legs, nor keep hitting with the crop.) If all this fails to make him move on, just stop, pet him (no treat this time) and wait until he sighs or resumes chewing, then start over again. He is just trying to figure out what you are asking. This is not disobedience. It is important to note that you should not move from one attempt to the next without letting him chew. This is the way your donkey tells you that he is relaxed and ready to listen. If he just won’t do it, then go back to the lunging and have him trot without the rider once more, then try again at the next lesson. Each donkey is a different individual and will learn at his own pace.
 Set four cones in the four corners of your arena, with ample space for him to walk around the outside of them. Then set two cones in the center of the arena, creating a gate through which the two of you will pass. This will outline an hourglass pattern for you and your donkey to follow, as he perfects the verbal commands to “walk on,” “haw,” “gee” and “whoa.” “Trot” will come later.
 When he is steering well, it is once again time for your assistant to aid you in getting your donkey to go straight along the rail of the arena. Have your assistant walk along the rail, between it and the donkey, with the lead line held loosely in her hand, allowing you to drive the donkey from behind. If you tryto do this without the assistant, you will find that your donkey remembers the hourglass pattern and will try to go to the middle. He needs assistance in learning this deviation from what he has previously learned. When you change direction, keep your assistant between the wall and the donkey to help maintain his straightness. After about two times around in each direction, he should “get it,” and you can drive him without the assistant. Each time you change direction, do a straight crossing on the diagonal. (Short diagonals and half-turns will be taught later in this series.) Donkeys like to bend in half far too much, so you want to discourage this in the beginning and opt for straightness.
 During the next lesson, you can add the perimeter of the arena, just as you did on the drivelines. Have your assistant lead your donkey twice around both directions and across a straight diagonal to change direction. Then you can ride solo. The same rules apply here as they did when learning the pattern. Keep him straight, repeat commands, back up verbal commands with consistent rein and leg cues and if he pulls out to the left, bring him back with the left rein. If he starts to trot, pull straight back and give the command to “whoa.” If· he still won’t stop, keep him straight and stop him at the fence. DO NOT TURN HIM! If you start this, it will become a practically impossible habit to break.
 By now your donkey should be getting much better at his turns on the forehand and haunches on the lead line. He should be leading easily at the walk and trot and squaring up while stopped. He should be lunging at the walk and trot in the round pen, and ground-driving at the walk in the round pen, both straight and through turns and reverses. He should be walking and trotting with a rider in the round pen, without the assistant. He should be both ground-driving and walking with a rider through the hourglass pattern and on the perimeter of the larger arena. Now you are going to ask for a little more detailed control by asking him to walk over and through some very straight-forward obstacles.
 on his own by first ground-driving him through them, then (if he is large enough) by riding him through them. Begin by reviewing his turns on the forehand and haunches. Then attach the drivelines and have your assistant lead him as you drive him from behind. Start with something simple such as ground poles, a tarp or a bridge that he can easily walk over. If he is negotiating the tarp or bridge, ask him to “whoa” when he is standing on it with all four feet, reward him and then proceed. If he is negotiating the ground poles, walk over them. Once he is on the other side, stop him immediately and reward him. Then proceed. Then have your assistant lead him to the mailbox while you ground-drive him, and have him stop parallel to it. Reward him for stopping, then have your assistant open and close the mailbox and reward him again for standing still. Then proceed. Walk him through the parallel poles and stop him. Reward him. Then ask him to back out of them. Reward him again. Then proceed to the tractor tire. Make sure your assistant walks through the tire and not around it, because the donkey will do exactly as he sees her do! Once on the other side of the tire, have your assistant stop and allow the donkey to put his two front feet in the tire and halt. Reward him. Then proceed forward and allow him to walk through the tire to the other side and halt. Reward him again. Your assistant will be giving the treats, since you will need to maintain the drivelines.
 through ahead of him on a schooled animal that he likes, stopping in the appropriate places and rewarding him each step of the way. Depending on how willing your donkey is, this could be the next lesson, on the very same day. Each time you go to the obstacle course, repeat this entire process each time, first on the drivelines with the assistant, then without, ride with the assistant leading, then ride through the obstacles without her. It will not be long before he is going well, as donkeys learn things quickly and thoroughly, although they do have off days and may decide not to comply with a particular obstacle on that particular day. Tomorrow, it may be an entirely different story and he may have no trouble at all with any of them. It’s just the nature of the donkey to “change things up a little” from day to day. They like to keep us honest and on our toes. This is why I have included a separate section in my Training Mules and Donkeys series just for donkeys that is designed to be used WITH the other DVDs. Do the obstacles in a different order each time to prevent your donkey from anticipating and ignoring your cues, and be sure that you are cueing him properly for each obstacle, making your movements as light as possible.
 try it again. If you encounter only mild resistance at any obstacle, try to straighten your donkey out and repeat the obstacle again without the assistant. For instance, let’s suppose your donkey goes through the parallel poles, but won’t stop for the back. Stop him as soon as you can after the poles and ask him to back. Then go forward again in a large circle and come back through again and try to stop him in the middle, between the poles, then back. Give him every opportunity you can to succeed on his own and be sure to reward him for it.
 hands. Draw reins can too often produce an over-reaction, even in the most experienced hands. Do not use the elbow pull in any other part of his training until he has learned to trot well, both in the round pen and in the open. This comes later than the walk work we are doing now.

 down in training because of their flight instinct and are better equipped to handle walk, trot and canter all at once, moving from a confined area to more space and, ultimately, through obstacles. Donkeys, however, with their freeze instinct, get worried and won’t move if they are overwhelmed and confused. For this reason, their training is approached a little differently.
 Once he has learned the turn on the haunches in the round pen, he can also learn his turn on the forehand on the drivelines. This is a little more difficult, as he will want to try the turn on the haunches. Ask him to “Whoa”” along the rail. Then, keeping your reins taut and even, take a step to the side, away from the direction you wish him to turn. The rein will tighten on that side and will drape around his hip. You will have the sensation of pulling his hip around with the rein. If you are turning right, ask him to “gee around” and give short tugs on the direction rein, while keeping him straight with the other taut rein by holding steady. He will probably want to pull forward the first few times, but hold him as steady as you can, and if he doesn’t want to move his haunches over, just tap him LIGHTLY with the driving whip on the direct rein side. After a couple of tries of “gee-around,” ask him to “haw-around” and track left. Have patience and he will eventually get it. When he is doing fairly well at executing his turns on the haunches and turns on the forehand on the drivelines, you can progress to doing them under saddle. Just remember to keep things slow and accurate. Speed will only bring confusion and resistance at this point. It is better to opt for perfection at a slower and more controllable pace. When you are both more practiced and coordinated, you can add speed.
 Your donkey should be willing to trot in the round pen with just his tack. Up to this point, he has learned his turns at the walk both on the drivelines and under saddle in the round pen, in the open arena and over obstacles. Now he will learn to trot on the drivelines and under saddle. Begin with the usual review, then after he has lunged at the trot, put on the drivelines and drive him at the trot. If he gets balky, your assistant can trot ahead of him with the treat bag and no lead line. Initially, if he goes too fast, just slow him down easily by giving the command to “Whoa” and create a drag on the lines. Your assistant can help if necessary by stepping ahead of him with her arms up, as you did when you were lunging him. Have him go around only as many times as he is willing in the beginning, and reward him for his efforts.
 When he trots well in the round pen, you can begin to add trot to your sessions in the open. Always review first then add the new movement at the end of his lesson. After the review, begin by having him trot through the hour-glass pattern on the drivelines with your assistant, then without. It will be shaky at first and you may feel like you’re riding a drunken sailor! Just be sure to make your rein and leg cues as subtle as possible to prevent over reactions and keep him encouraged forward with a loose rein as he is going forward. Learn to vibrate the reins rather than pulling—this helps to minimize over-reactions. S
 oon, your donkey will be doing the pattern smoothly on your commands alone.
 Using the trot on the obstacle course requires that you be very definite about where and when you do it, so plan ahead. You may ask him to trot straight over ground poles or a tarp, but he must be willing to stop immediately on the other side. In the beginning, having your assistant waiting with a reward on the other side will help to encourage him to comply. When you take her out of the picture, be ready to treat him for good behavior yourself while ground-driving and under-saddle. When your donkey has completed an obstacle, he should always be willing to stop and wait for your next command for as long as it takes. This is the foundation for learning to stand quietly both in harness and under-saddle. This means that you, too, must learn to approach him slowly and quietly from behind while in the drivelines and to sit quietly when halted under-saddle until you present his reward and ask him to move on.
 By Meredith Hodges


 minimize resistance at any particular stage and reward your donkey lavishly for his honest attempts.