By Meredith Hodges
“Leverage” equipment refers to any restraining device or substance that is used to get an equine’s attention and obtain compliance, but many leverage practices often have the reverse effect and have the potential to cause  distress and pain. This includes harsh bits, chain leads, twitches, hobbles, stocks and even medications. There are times when our equines can really be a handful, so having a little leverage when needed can be a good thing. However, deciding which equipment to use and learning how to use leverage without it becoming abusive can be a bit daunting. There are so many different types of tack, equipment and restraints that it becomes difficult to determine which would be best to use on your equine to correct a particular problem, or if you really need to use anything at all. It may only be a case of needing to be clearer in your approach, in which case, leverage equipment may not be needed. It is important to make an informed decision when using any leverage equipment to be sure that what you are using is helpful and not abusive.
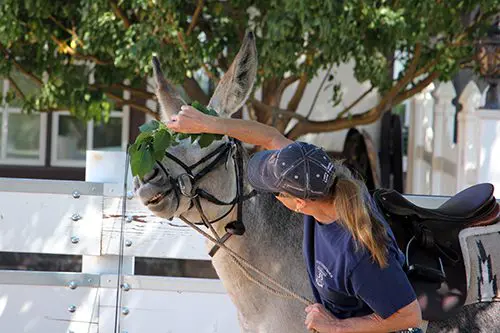
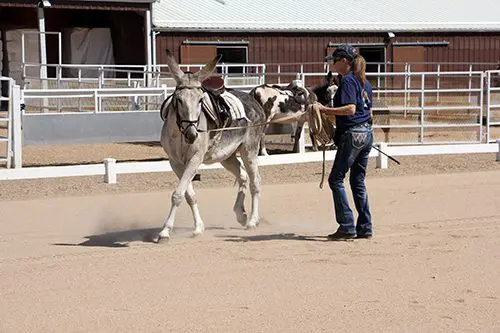
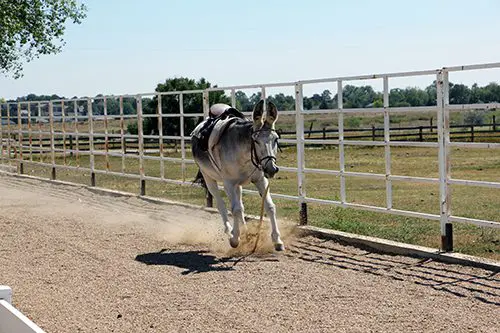
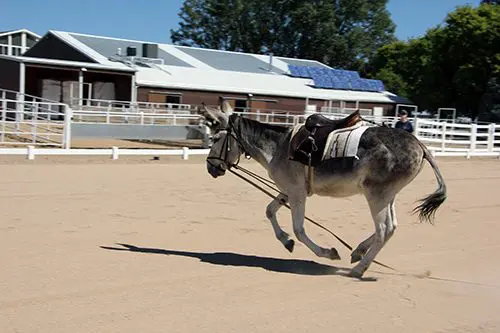
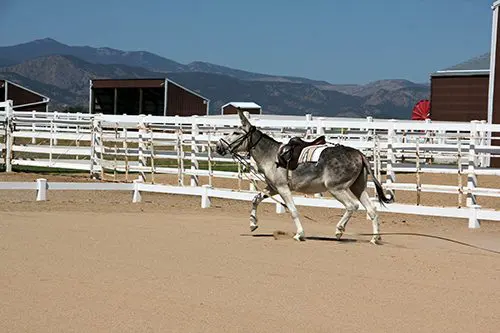
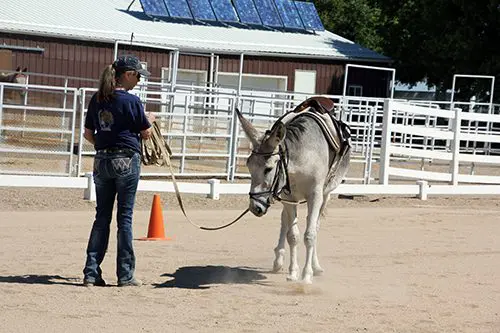
One very common behavioral problem that seems to identify the need for more leverage is the mule that bolts and runs when on the lead rope. This seems like an obvious disobedience to the handler, and the first thing that comes to mind is to use a lead shank with a chain to gain control of the mule. Normal use for a lead shank is during a Showmanship class at a show and it should rarely be used in training unless the equine will be shown at halter and/or showmanship. And then, training with the lead shank should be done only after the animal is following well through all required movements while in his halter and on a lead rope.
Chains are severe and when not used properly, can damage the fragile bones in the underside of the jaw, and the cartilage and bone over the nose of the equine. If the chain is pulled while simply run under the jaw and attached to the ring on the opposite side, a quick jerk can bear down hard into the delicate mandible (jawbone). If the chain is run over the nose, when abrupt pressure is applied it can injure the nasal cartilage or the incisive bones. Because they occur internally, these injuries are often imperceptible to the human eye. The only thing you might see is broken skin, scabs or bumps that arise from repeated use. When properly fitted, the chain on a lead shank goes through the ring of the halter on the left side, threads under the chin and through the ring on the right side of the noseband, and is attached at the throatlatch ring on the right side. This keeps the halter balanced and the action of the chain less severe. When using the lead shank for leverage during training, it can work on some animals but others may decide to fight which can result in injuries such as fractures, causing more severe trauma to these areas. So it is best to avoid use of the lead shank until after completing leading training with the halter and lead rope. Even then, you should learn to use the lead shank properly with the least amount of pressure possible. Avoid using halters that are made with chains. Those types of halters should only be used when showing cattle and can do serious damage to equines.
If, after you’ve employed a kind, considerate and respectful approach along with a food reward, your equine is still being uncooperative, it may be appropriate to use equipment with more leverage such as the “Quick Twist,” but not necessarily chains. Chains do need to be used in some cases, such as with work harness (and most curb bits are now fitted with chains), but when not used correctly, these chains can be abusive. The chains on the pleasure driving harness should clear the legs and heels of the driving equine, and the chin chain on a curb bit should be adjusted so that it is twisted properly and lies flat against the animal’s jaw with an allowance of two fingers between the chain and the jaw, thereby minimizing any chance of injury. If you have a generally compliant equine, it is better to use a leather chin strap on your curb bit rather than a chain.
If, after you’ve employed a kind, considerate and respectful approach along with a food reward, your equine is still being uncooperative, it may be appropriate to use equipment with more leverage such as the “Quick Twist,” but not necessarily chains. Chains do need to be used in some cases, such as with work harness (and most curb bits are now fitted with chains), but when not used correctly, these chains can be abusive. The chains on the pleasure driving harness should clear the legs and heels of the driving equine, and the chin chain on a curb bit should be adjusted so that it is twisted properly and lies flat against the animal’s jaw with an allowance of two fingers between the chain and the jaw, thereby minimizing any chance of injury. If you have a generally compliant equine, it is better to use a leather chin strap on your curb bit rather than a chain.
If you train for leading with a step-by-step program that incorporates a reward system during training, the mule is much less likely to bolt and pull the lead rope from your hands, and horses will not need any more leverage at all. This kind of training invites the equine to remain with you and he is rewarded lavishly when he does. If a horse spooks, you can usually stand still in balance, hang onto the lead rope and quickly regain his attention by staying calm and deliberate yourself.
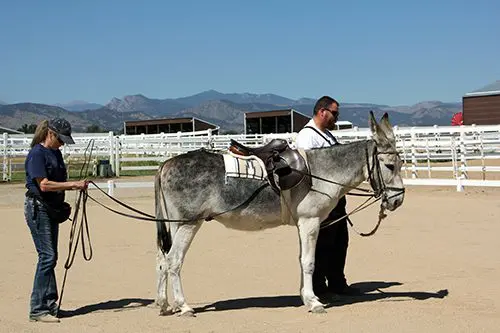
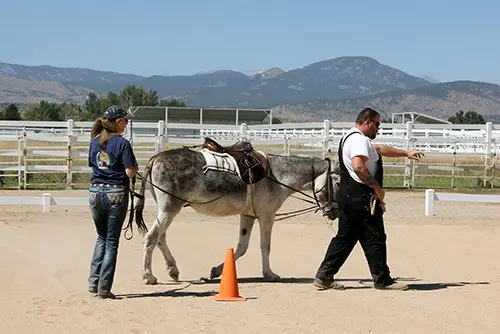
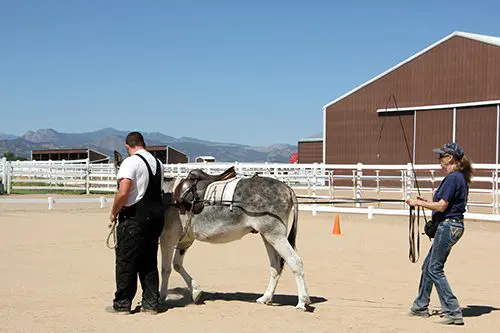
Normally, mules learn to comply with the reward training. However, if a mule has been spooked, he may not care much about the reward in your fanny pack and you might have the need to use something with more leverage. In this case and in cases where a mule doesn’t always comply willingly, I use a new positioning of the lead rope called a “Quick Twist.”
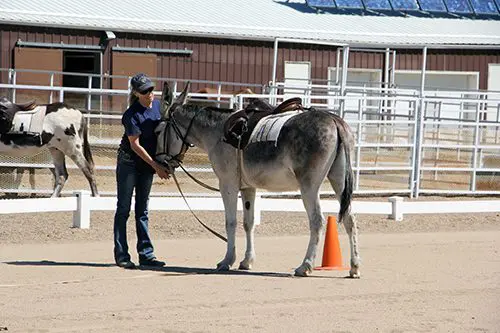
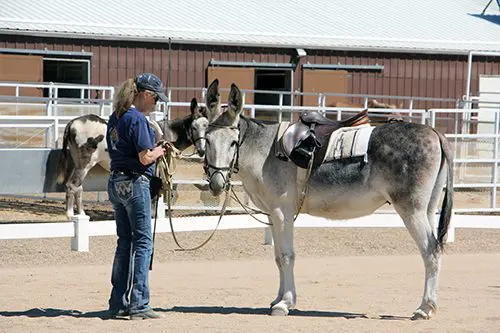
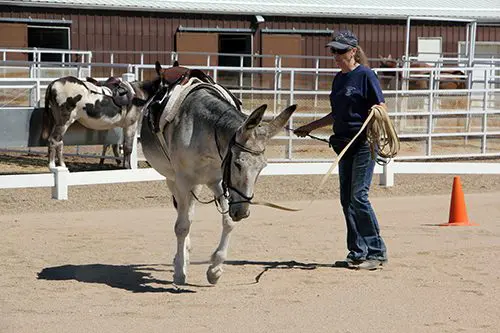
To employ the “Quick Twist” restraint, just take your lead rope and create a loop and feed it through the noseband of your nylon halter (rope halters are too loose and do not work) from back to front and then over the mule’s nose. When you pull on the rope, it will tighten around the end of the his nose below the incisive bones and over the cartilage, making breathing just a little difficult. Don’t keep pulling—just stand quietly and hold the tension snug. Let the equine come forward to you and slacken the rope himself by coming forward and allowing a free flow of air through his nostrils. Then, if the mule does not follow, just walk a step or two, creating tension on the rope, and then stand still again. When he does come forward, stop long enough to reward him with the oats reward before you proceed forward again. Keep the lead rope short and stand still in a balanced way so he cannot get ahead of you and jerk you off your feet. If you are standing still in a balanced position, it will be difficult for him to jerk the lead rope from your hand and leave.
Old-time twitches were made with a chain that could be twisted around the upper lip and used to distract the equine from shots, tube worming and the like, but the main focal point for the equine then becomes the equipment and not the task and, in the wrong hands, this piece of equipment can do a lot of damage to the equine’s sensitive upper lip. Most often, the equine can be more easily distracted by a simple rap on his forehead using your knuckles. Using a twitch at all can become a source of confrontation for many equines. If a twitch must be used, choose a more humane one that is made from aluminum and has a smooth surface. This will clamp down tight enough to hold, but not so tightly on the upper lip that it causes pain or even injury.
Restraints should not be used as a means to control your animal except for a short period of time with the purpose of showing them a correct behavior. Restraints should be used as a support and not a controlling device. Restraints should be “phased out” as soon as possible.
I call this next restraint method the “Face Tie.” For the sake of safety, tie your mule to a good stout hitch rail. Then use our Face Tie technique (TMD DVD #2), running the lead rope around the hitch rail (or fence) and back through the noseband of the halter (nylon halters work best for this). Then come around a second time and loop it through the throatlatch part of the halter and around the hitch rail once more and tie it off. Take up the slack slowly as he gives and be ready to reward him with oats when he complies, then keep taking up the slack until his face is against the fence or hitch rail.
Do not try to bully him into it or he will just pull back. This should be done while he is standing parallel to the hitch rail so that when you pull the rope tight, it pulls his head tightly sideways to the hitch rail. This will keep him from being able to swing his rear end around to block you. Reward him with oats and let him quiet down in this restraint before approaching with your shot. If he manages to keep you off the clear side, you can always go to the other side of the hitch rail and give him the shot from that side without fear of injury. You can do this along a stout fence provided the rails are sturdy. If you do this correctly, it will simply restrain him in a safe manner and keep you out of the line of fire. Each new time that you give shots, try to do it with the rope a little looser each time to fade out the restraint. They will usually just come to expect and go for their position along the hitch rail or fence and will lean into it like they do when you first gave the shots like this. He will soon learn to quiet down immediately when his face is being tied and at best will seem to be saying, “Dang, do we have to do this again?!” But, he will learn to comply.
This is a humane restraint for mules and donkeys, but do not try this with a horse! This is a good restraint to use (and fade out) for any Longears that is difficult to worm, give shots, take blood, clip bridle paths and to use for those that are difficult to bridle. When using the Face Tie for bridling training (or clipping the bridle path), you will only need to go through the noseband and hitch rail (and not through the throatlatch unless you need to prevent them from turning into you). Just make sure when you put on the bridle that you “protect” their sensitive ears with your hands as it goes on and they will learn to trust you. Put the bridle on over the halter for the lessons until they don’t mind the bridling process.
If they lean away from you, you can just pull on the halter to bring the head back to you to finish bridling. Each time you use the “Face Tie” method,” see if you can leave it looser each time until they just stand for putting on the bridle while it is at its loosest. Then you will no longer have to use it.
Keep your lessons short, only 20-40 minutes (depending on how compliant they are) every other day and never two days in a row. They need a day off to ponder what they have learned and when they are allowed this break between lessons, they will come back the next time and do the tasks more easily. They usually leave because they perceive the lesson to be either too long or too difficult (and they would rather play!).
It is always better to not use the Scotch Hobble if you do not need to do it. If your donkey will pick up his feet for you, just give him the opportunity to “meet” your farrier by having him give him a handful of oats. Then see if he will yield his feet. If not, then you go ahead and pick up his foot with the farrier standing beside you, give him the reward for picking up his foot and then hand it off to the farrier while you back up and continue to feed him small handfuls of oats for compliance. Eventually, you should be able to step away and just have a bucket of oats in front of him to eat while the farrier is working on him (and take it away if he won’t comply). If he has a friend, it is always best to do donkeys in groups. They stay calmer that way. Try this FIRST!
Your Longears will only need the kicking training covered in DVD #2 (Simple touch training with a driving whip) if he is resistant to having his hind legs worked with and even then, you should try picking them up with the scotch hobble rigging first. If he kicks with that, just hold the rope taut until he quits. Then, hold the foot off the ground for a couple of seconds and release it where the foot will touch the ground again. He just needs to know that when you pick up the hind foot, you will return it to him if he is good. During all of this, be sure to reward when he is standing still. If he complies easily about picking up his feet easily after trying to pick them up with the rope, you may not need to use the Scotch Hobble in it’s ultimate constraining position.
To employ the Scotch Hobble in its entirety, tie a Bowline knot loosely around the neck. Depending upon the size of the animal, the rope should be 16’-22’ long. Take the excess rope down to the pastern of the hind foot, loop it around the pastern, then back up through the loop around the neck, then back round the pastern a second time. Last, loop the rope around the ropes going from the pastern to the neck to capture them and tie off with a safety knot at the neck loop.
Only tie the Scotch hobble as tightly as is needed, and it is best to leave the toe touching the floor for balance. In some cases, you may have to tie the hind legs higher to prevent kicking on the off side, but be prepared to loosen the rope when the animal stops struggling with his balance. Remember that they can tire and not be able to continue to stand for long periods of time.
When taking the first wrap on the pastern of the hind leg, take the end of the rope well behind him and encourage him to step over it, keeping yourself out of kicking range. Then bring the rope along his side to the front and slip it through the loop around his neck. If he won’t let you go through the loop around his neck, you can just hold the rope taut around his pastern without putting it through the loop first and just allow him to settle before putting it through the loop. Just be very patient. When you get to this point, many animals will begin to kick. Just stand to the side, out of biting and kicking range, and keep the rope taut. Just hang onto it with both hands and stand quietly until he stops struggling. Allow your hands to follow a pull and release with the motion of his leg. If you allow your hands to move forward and back with the pulling of the rope and keep it taut, it won’t come off the pastern. Don’t try to hold his foot stationary at this point. You can easily step out of his way from this distance and position.
When he stops struggling, keep the rope the same tautness, walk to his head and give him a reward for standing still. Pet him and then proceed to go behind him again and take the second loop. Again, stand to the side if he begins to kick and wait for him to stop, allowing your hands to move back and forth with his kicking leg, maintaining the tautness in the rope. This is a give and release action that should not make him as mad as trying to hold the rope tight. Again, when he stops struggling, he is entitled to a reward.
If you do it this way, slowly and in small steps, you will not aggravate him as much and he will be more likely to comply. If you have been patient and meticulous while doing this procedure, tying the last knot around the neck rope should not be a problem, and you will not run the risk of him escaping from it.
Use a soft cotton twisted rope of the correct length measured to your animal for ease and to avoid chafing for the best results. It need not be traumatic if you proceed this way. Use the Scotch Hobble as needed, but each time, tie it as loosely as you are able and still have him stand still. For example, if you have had to raise the toe, don’t raise the toe and let it touch the floor. Next time, have the toe touch the floor with the ropes loosely tied. Next, take only one loop around the pastern, keep the rope fairly loose and tie to the rope around the neck. Lastly, just take the rope to the hind foot, around the pastern and let it lay on the floor. Next time, you won’t have to use it at all. Your goal is to phase out the restraint entirely.
A lot of activity when trailer loading can cause the equine to become anxious and noncompliant and he becomes overstimulated. When having difficulty loading your equine, things will usually go better if you simply give him time to survey the situation.
Do not allow him to back away from the trailer. One step at a time while offering a food reward (and a food reward waiting inside the trailer), with frequent pauses and encouragement to move forward from behind with a tap of the whip, will usually accomplish the task without confrontation. Most equines will willingly follow you right into the trailer if prior obstacle training has been done properly and successfully. Leverage equipment such as butt ropes only refocus the equine’s attention on the equipment and will result in a confrontation.
Hobbles are another form of leverage equipment and there are many different kinds of hobbles for different purposes. The hobbles that have chains on them should be avoided, as the equine can become entangled and the chains can do damage to their legs. Thin leather hobbles or coarse rope can chafe the hair right off the skin around the pastern and can cause severe abrasions that may never heal. Thick leather hobbles are best, as they will break when under extreme stress, releasing before damage to the equine is done. If so inclined, all mules and some horses can gallop in hobbles, so hobbles really aren’t all that effective for leverage. Tying onto a hyline (a rope suspended high between two trees that acts as a hitching line for overnighting equines in the mountains) is a better choice, and if the horses are tied, then the mules should not have to be tied or hobbled because they will generally stay with the horses. Personally, I only use hobbles in a controlled situation at the work station when body clipping my equine’s legs for show.
Sedation and tranquilizers are another form of leverage that is used all too often and, in some cases, can be very dangerous. Mules and donkeys may receive the correct dose, but they can be unaffected when they get over-stimulated, excited and confrontational. They can actually “pop out” of sedation if they get excited enough to release adrenaline in their bodies. In these cases, administering another dose of drugs can easily become an overdose and could result in death. Sedating an equine that is to be trimmed or shod can be dangerous for both the farrier and the equine because the animal is not able to stabilize his balance and his reactions are, for the most part, uncontrolled. The farrier may not have time to get out of the way and the animal could stumble into trouble.
Power tools can be of help to a veterinarian or an equine dentist when doing teeth. Old-fashioned rasps are safer than power tools, but they are clearly more of an aggravation to the equine. However, if power tools are to be used at all, they must be carefully monitored. When floating teeth, the equine dentist must be skilled in the use of his grinding tool and should do only what is necessary to remove sharp points on the equine’s teeth. Power tools can be a good thing when you are dealing with an equine’s mouth and jaw, as having their mouths held open for long periods of time is very tiring for them, so speed is essential, but accuracy and skill are also essential.
I do not approve of using power tools on the equine’s hooves at all. In order for the equine’s body to be properly balanced in good posture, the hooves must first be properly balanced. Power tools cannot possibly shape the hoof with proper curvature in the sole, alignment of angles and equal balance over the hoof walls with appropriate pressure to the heels and frog.
This demands hands-on custom sculpting, as each foot on each equine will be different and all four feet need to be aligned with each individual’s legs and body in mind. The hooves are the basic foundation for the entire body, so they must be done correctly or everything else will be off. This is especially true with the tiny hooves of mini donkeys and mules. Minis can often be kept calm for trims simply by keeping things at their eye level and rewarding their good behavior with crimped oats.
There are things that may seem to allow for shortcuts through certain tasks, but when you are dealing with living creatures there really are no shortcuts. It is always better to take the necessary time to implement training techniques that allow your equine to learn and grow in a logical, step-by-step process that will not overwhelm him or bombard him with too much stimulus at any stage, so that he can become a comfortable and cooperative individual. If you use the correct methods right from the beginning, the need for excessive retraints (that can cause pain and even more resistance) will be greatly diminished and the long-term results will be undeniably better.
To learn more about Meredith Hodges and her comprehensive all-breed equine training program, visit LuckyThreeRanch.com, MEREDITH HODGES PUBLIC FIGURE Facebook page, or call 1-800-816-7566. Check out her children’s website at JasperTheMule.com. Also, find Meredith on Pinterest, Instagram, MeWe, YouTube and Twitter.
Covered in TRAINING MULES & DONKEY: A LOGICAL APPROACH TO TRAINING, TRAINING WITHOUT RESISTANCE, TRAINING DVD #2 andEQUUS REVISITED at www.luckythreeranchstore.com.
© 2013, 2016, 2024 Lucky Three Ranch, Inc. All Rights Reserved.



 Because my equines reacted so well during training, I had no reason to believe that there was anything wrong with my approach until I began showing them. I started to experience resistant behaviors in my animals that I promptly attributed to simple disobedience. I had no reason to believe that I wasn’t being kind and patient until I met my dressage instructor, Melinda Weatherford. I soon learned that complaining about Sundowner’s negative response to his dressage lessons and blaming HIM was not going to yield any shortcuts to our success. The day she showed up with a big button on her lapel that said, “No Whining” was the end of my complaining and impatience, and the beginning of my becoming truly focused on the tasks at hand. I learned that riding through (and often repeating) mistakes did not pose any real solutions to our problems. I attended numerous clinics from all sorts of notable professionals and we improved slowly, but a lot of the problems were still present. Sundowner would still bolt and run when things got a bit awkward, but he eventually stopped bolting once I changed my attitude and approach, and when he was secure in his core strength in good equine posture.
 good unless I was careful about the way I used it. Body clipping was much more tolerable for them if I did the hard-to-get places first and saved the general body for last. Standing for long periods of time certainly did not yield a calm, compliant attitude when the more tedious places were left until last. After standing for an hour or more, the animal got antsy when I was trying to do more detailed work around the legs, head, flanks and ears after the body; so I changed the order. Generally speaking, I slowed my pace and eliminated any abrupt movements on my part to give the equine adequate time to assess what I would do next and approached each task very CAREFULLY. The results were amazing! I could now groom, clip bridle paths and fly spray everyone with no halters, even in their turnout areas as a herd. They were all beginning to really trust me.
 legs. The core of an equine is at the center of balance in the torso. Similar to bipeds, they need the energy to run freely along the hindquarters and down through the hind legs to create a solid foundation from which to allow the energy in front to rise into suspension to get the most efficient movement. When their weight is shifted too much onto the front end, their ability to carry a rider efficiently and correctly is compromised. To achieve correct energy flow and efficient movement, the animal’s internal supportive structures need to be conditioned in a symmetrical way around the skeletal frame. People can do this by learning to walk with a book on their head and with Pilates exercises, but how can we affect this same kind of conditioning in a quadruped?
 the routine and correctness in the execution of the exercises. Since this requires that you be in good posture as well, you will also reap the benefits from this regimen. Along with feeding correctly (explained on my website at www.luckythreeranch.com), these exercises will help equines to drop fat rolls and begin to develop the top line and abdominal strength in good posture. The spine will then be adequately supported to easily accept a rider. He will be better able to stand still as you pull on the saddle horn to mount.
 The task at the leading stage is not only to teach them to follow, but to have your equine follow with his head at your shoulder as you define straight lines and gradual arcs that will condition his body symmetrically on all sides of the skeletal frame. This planned course of action also begins to develop a secure bond between you. Mirror the steps of his front legs as you go through the all movements keeping your own body erect and in good posture. Always look in the direction of travel and ask him to square up with equal weight over all four feet every time he stops and reward him. This kind of leading training develops strength and balance in the equine body at the deepest level so strengthened muscles will hold the bones, tendons, ligaments and even cartilage in correct alignment. Equines that are not in correct equine posture will have issues involving organs, joints, hooves and soft tissue trauma. This is why it is so important to spend plenty of time perfecting your techniques every time you lead your equine.
 Loss of balance will cause stress, and even panic that can result in him pulling the lead rope, lunge line or reins under saddle right out of your hands and running off. This is not disobedience, just fear from a loss of balance and it should not be punished, just ignored and then calmly go back to work. The animal that has had core strength built through leading exercises, lunging on the circle and ground driving in the “Elbow Pull” before riding, will not exhibit these seemingly disobedient behaviors. Lunging will begin to develop hard muscle over the core muscles and internal supportive structures you have spent so many months strengthening during leading training exercises. It will further enhance your equine’s ability to perform and stay balanced in action, and play patterns in turnout will begin to change dramatically as this becomes his habitual way of going. Be sure to be consistent with verbal commands during all these beginning stages as they set the stage for better communication and exceptional performance later. Although you need to spend more time in his beginning training than you might want to, this will also add to your equine’s longevity and use-life by as much as 5-10 years. The equine athlete that has a foundation of core strength in good equine posture, whether used for pleasure or show, will be a much more capable and safe performer than one that has not, and he will always be grateful to YOU for his comfort.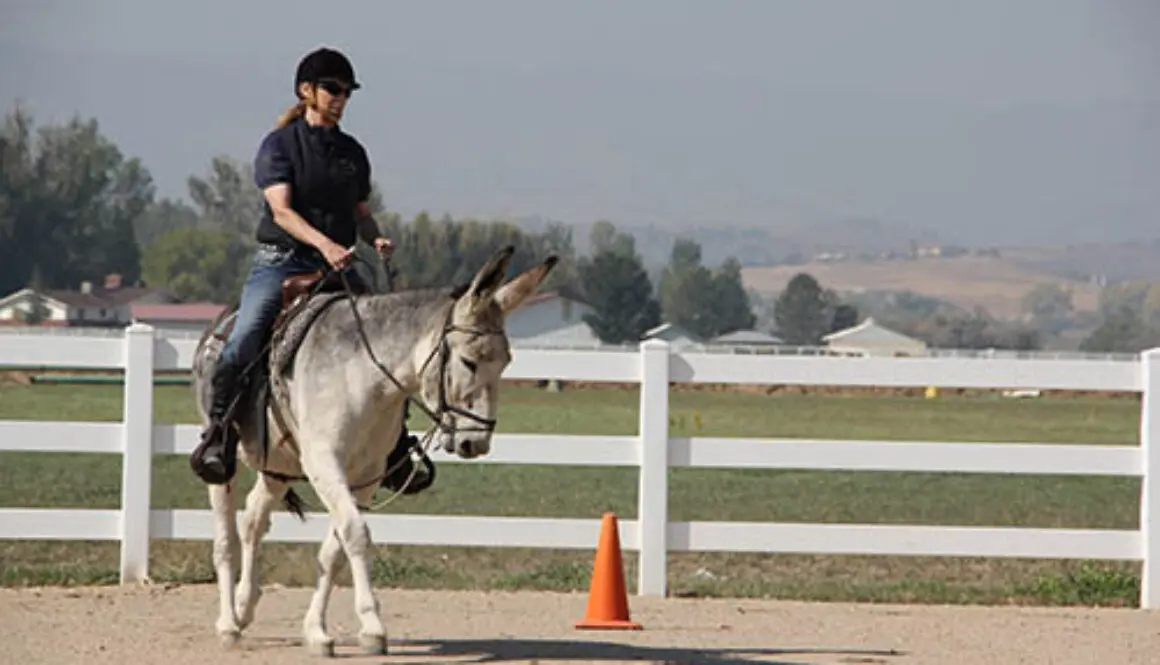


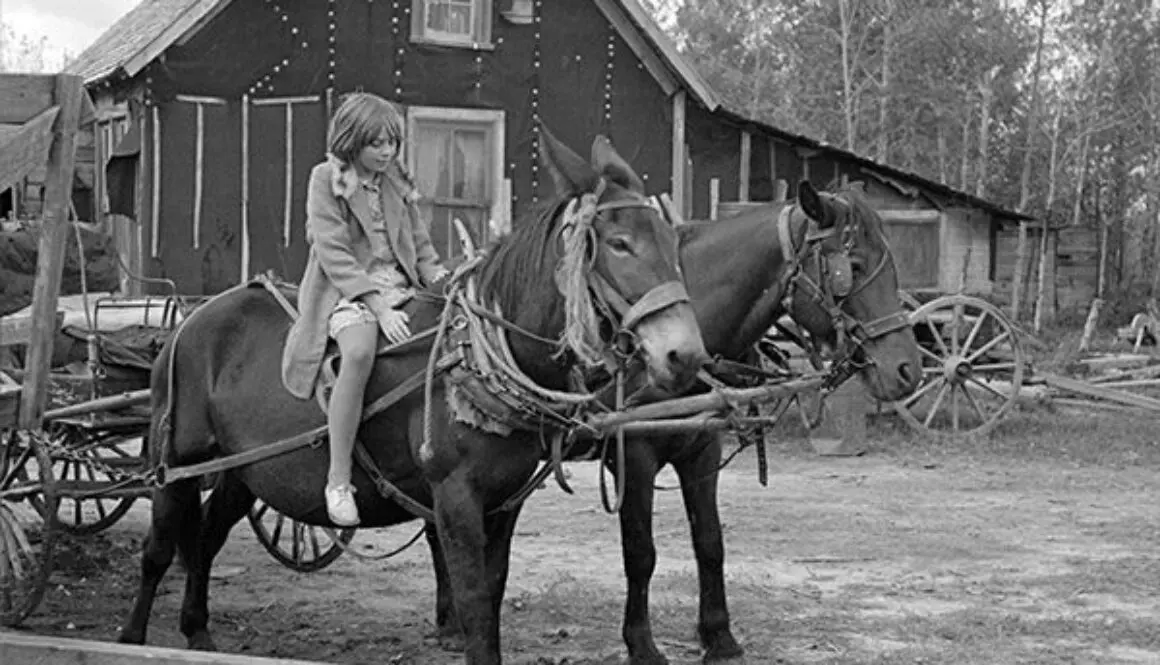
 Long before the Founding Fathers drafted our constitution, America began as a religious nation under God, and the mule has his roots in religion just as does the country he has helped to build. The mule of today’s ancestor is the donkey, mentioned in the Bible numerous times as an animal respected by God and blessed by Jesus Christ. The donkey was even chosen to bring Mary and Joseph to Bethlehem and, later, acted as the mount Jesus himself used for his ride into the city of Jerusalem.
 Mules are the true professionals of slapstick humor and professional psychotherapy! When you get into an altercation with a mule, you will seldom get hurt, but you will surely be set straight in a most humiliating way.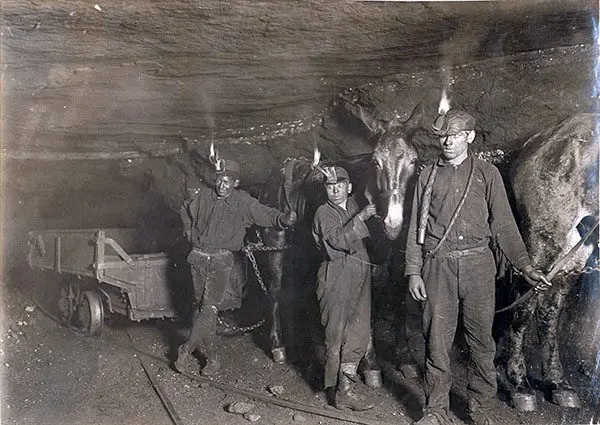
 “Mules are the living symbols of the historic and pioneer spirit of the West. Mules were the pack animals of Spanish padres and grizzled prospectors. These animals have a dominant place in frontier history. From 1883 to 1889, the 20-mule teams moved 20 million pounds of borax out of Death Valley, California, to Mojave—165 miles away—traveling 15 to 18 miles a day. The 20-mule teams, the dramatic solution of a transportation problem, soon became a world-famous symbol, the trademark first of the Pacific Borax Company and, today, of the many products made by U.S. Borax.” 2 So began the mule’s vital contributions to industry and the economy.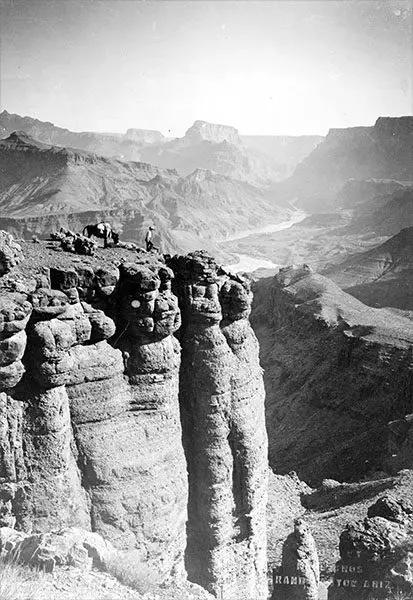


 I was born LOVING horses in Minneapolis, Minnesota in 1950. I got a pair of chaps and a “bouncing” horse when I was six years old. My Grandmother was always teaching me about Good Posture and Good Manners. She once wanted to take me on a shopping trip to the local mall and requested that I put on one of my frilly dresses. She told me that all the little girls would be wearing them and I flatly refused! You don’t ride horses in frilly dresses! I was a Tom-Boy all the way through! I didn’t want to be a boy, I just wanted to be READY TO RIDE! So, my Grandmother conceded and let me wear my pants! When we got back, she said, “See, I told you all the pretty little girls would be wearing dresses. Now don’t you wish you had worn yours?” “Nope,” I replied and she just shrugged! I still wore my dresses to church!
 We moved to California in 1958 when I finally got my first horse, Duchess! I was still very much a Tom Boy now…cleaning stalls, doing chores on the ranch and riding my horse. In 1961, I even joined 4-H and got 4 Hereford cattle. Now I was a REAL Cowgirl!


 As we improved our skills, I had seven different mules to school, so I would not just practice one thing over and over. I practiced different disciplines on different days during the week. I never “drilled” on anything, but spent limited time teaching the things I had learned slowly, sequentially and logically. The mules really loved this approach, enjoyed the diversity of the lessons and learned quickly.
 Today, the concept of elegance has been greatly compromised by the fast pace of our progressive society. Few of us have neither the time nor the inclination to do what is necessary to cultivate this concept as a major part of our lives. Women today have far too many jobs and responsibilities with which to cope without worrying about being elegant,unless she lives in a densely populated urban area. There are just not a lot of places where a woman can practice being elegant. One of the places she can, however, is in the growing number of Side Saddle classes offered at many of the different Breed Shows across the country. The equestrian art of Side Saddle is currently being revitalized among the different breeds and one of the most enthusiastic groups is our own Longears lovers! But, elegance is not necessarily the only reason our Longears Ladies are riding aside. The lady equestrians of today like to get a more well-rounded education in the art of Horsemanship riding astride,and the perfection of their balanced seat when riding aside only enhances their existing abilities.
  Mules can be lovely, obedient and secure Side Saddle mounts when they are brought along correctly, as has been exhibited nationally by Crystal Ward and her mule, Final Legacy. I also fondly remember Ann Hathaway and her Dressage mule, Baby Huey, exhibiting Side Saddle in the Bishop Mule Days parade years ago. I judged the A.D.M.S. Nationals in Austin, Minnesota, and again, I witnessed a sprinkle of elegant Side Saddle riders on mules. In the state of Colorado, there was a surge of Longears Side Saddle riders beginning in 1983. The Side Saddle class for mules at the National Western Stock Show in Denver, Colorado previously had no less than 10 entries in its beginning in 1983, when the mule division was brought back after a long absence from the show.
 Generally speaking, people are quite impressed with the ladies who ride aside, and a common question often arises, “You sure look elegant, but how on earth can you stay on that way?!” We boldly reply, “Our mules teach us and WE LEARN…we are Lady Muleskinners!”
 This was demonstrated clearly at a Side Saddle clinic given by Patti Chadwick at the Bitterroot Mule Company in Bennett, Colorado on March 23rd of 1993. Six beginning Side Saddle riders of various equitation skills proved to be quite secure in their seats and no one had any real problems to speak of that day! All levels of riders were jumping cavalletti by the end of the clinic! So you see, it isn’t as insecure as one might be inclined to believe. And with an instructor like Patti Chadwick, it was a snap! The name of the game is “balance,” and whether riding aside on a horse, mule, pony or donkey, it is always a rewarding
  challenge to finally be able to master this art.
 English Side Saddle is probably the best one in which to learn, since the seat is better balanced over your animal. The Period Side Saddles are the worst, since most are built and balanced incorrectly for our contemporary riders and equines. The older Side Saddles were built to fit the smaller framed riders and larger animals of yesterday, they just don’t fit the conformation of the animals and the size of the ladies of today. Although most Side Saddles today are bought used, there are saddle companies that are making them again due to increased demand. If you buy a Side Saddle, make sure it fits your equine as well as yourself to assure the best ride. There are Vintage Side Saddles from different cultures. Just make sure the tack, equipment and equine match the accessories that you wear. Since Side Saddle is rather unique and there are not a lot of people showing in Side Saddle, the ladies have learned to accept the lax rules around the classes. If they are separated at all, it is usually split into WESTERN SIDE SADDLE and ENGLISH SIDE SADDLE classes.
 Fitting the Side Saddle to your body is relatively simple. While seated on a chair, measure along the bottom of your thigh from the back of your bent knee to just beyond your hips under your tailbone. The saddle is measured from pommel to cantle and should exceed your leg measurement by no less than two inches. You can ride in a Side Saddle that is a little too large, but not in one that is too small! Consider the width of your saddle to avoid excessive overhang on each side.

 Side Saddle equines that need a warm-up with a male groom will often use a rigged Two-Sided Side Saddles. He would want to ride aside like the lady would do, but he would need to alter his legs position to exercise the animal in a symmetrical and balanced way. Riding astride a Side Saddle is VERY uncomfortable!
 English Side Saddles are used with a Double Bridle or Pelham Bridles where the reins are carried in a balanced fashion on both sides. You should always have a straight line from your elbow to the bit.
 Place the Side Saddle in the middle of your equine’s back such that you are sitting over the equine’s center of gravity…same as regular saddles. Breast collars are optional (do not use breeching with a Side Saddle). Always keep in mind that your rigging keeps the saddle secure on the back of your equine, so the straps should all be snugly adjusted.


 Care & Reconditioning of Side Saddle & Tack:
 There was a surge of shows in 1994 featuring mules being ridden Side Saddle in Fox Hunting, Parades, Open Horse Show classes, and Mule Shows, and they have continued to grow nationally. Mules proved their worth as Side Saddle mounts, primarily on the East Coast, California and Colorado!
 Horse trainers have kept us in awe of their unique and significant talents for centuries, and now that their techniques are more public, many equine professionals will pooh-pooh those who attempt a “kinder” approach to training. Scientists who study the equine in motion—its nutrition, biomechanics, care and maintenance—have their own perceptions to offer as to what we can learn about equines. Because many of these studies and tests are done in the laboratory, scientists rarely have the opportunity to follow their subjects throughout a lifetime of activity, as well as having the opportunity to experience what it really means for you as a rider, to be in balance with your equine when you work together, whether you are leading, lunging, riding or driving. If they did, their findings would probably yield quite different results. With all this progressive scientific thought, it seems to me that common sense can often get lost in the shuffle and respect for the living creature’s physical, mental and emotional needs may not be met.
 degenerative breakdown. For instance, those who get in a hurry in Dressage and do not take a full year at each level in order to develop their equine’s body slowly and methodically may discover, several years later, that their animal has developed ringbone, side bones, arthritis or some other internal malady. These types of injuries and malformations are often not outwardly exhibited until it is too late to do anything about them.

 Tragically, many equines are suffering from abuse every day, while they are trying to please their owners and do what is asked of them. Their owners and trainers take shortcuts that compromise the equine’s health. It could be that these owners and trainers are trying to make choices with limited knowledge and really don’t know whom to believe. But ignorance is not a valid defense and sadly, the animal is the one that ends up suffering.
 The Lucky Three mules have always been worked in good posture, and spend only as much time on the hot walker as it takes for them to dry after a bath. They maintain their good posture while walking and rarely let the hot walker “pull” them into bad posture.
 Like many, I am of the belief that mechanical devices that force an equine into a rounded position do not necessarily put that equine in good posture. I would guess that many trainers think the “Elbow Pull” device that I use is guilty of developing this artificial posture. If that is their opinion, then they do not understand how it works. Rather than pulling the equine’s head down into a submissive position, when adjusted correctly, the “Elbow Pull” acts like a balance bar (like a ballet dancer would use) to help the equine to balance in good posture. It takes time to develop good posture. So, in the beginning, your equine can only sustain good posture for a certain number of measured steps, and then he must “lean” on the “Elbow Pull” in between these moments of sustaining his ideal balance on his own. The “Elbow Pull” simply prevents him from raising his head and neck so high that the neck becomes inverted and the back hollowed, but it does not actually pull his head down. The rope itself is very lightweight and puts virtually no weight on his head and neck at all. Note: Because horses react differently than mules and donkeys when hard-tied, a simple adjustment to allow the “Elbow Pull” to “slip” with a horse is necessary.











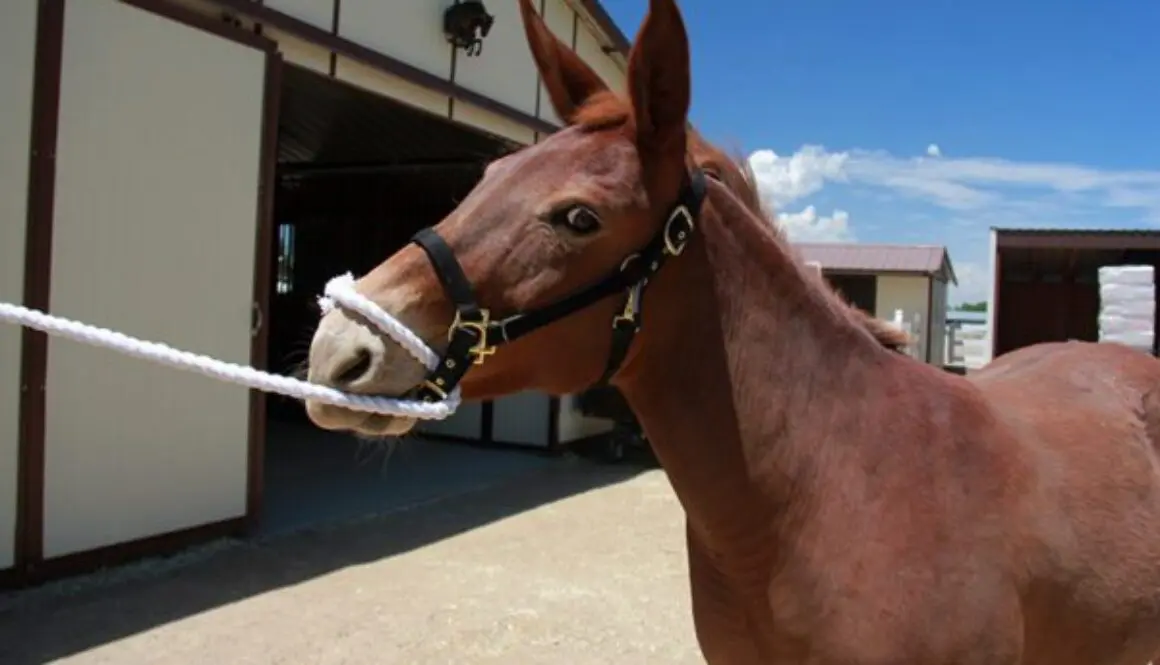

 distress and pain. This includes harsh bits, chain leads, twitches, hobbles, stocks and even medications. There are times when our equines can really be a handful, so having a little leverage when needed can be a good thing. However, deciding which equipment to use and learning how to use leverage without it becoming abusive can be a bit daunting. There are so many different types of tack, equipment and restraints that it becomes difficult to determine which would be best to use on your equine to correct a particular problem, or if you really need to use anything at all. It may only be a case of needing to be clearer in your approach, in which case, leverage equipment may not be needed. It is important to make an informed decision when using any leverage equipment to be sure that what you are using is helpful and not abusive.
 One very common behavioral problem that seems to identify the need for more leverage is the mule that bolts and runs when on the lead rope. This seems like an obvious disobedience to the handler, and the first thing that comes to mind is to use a lead shank with a chain to gain control of the mule. Normal use for a lead shank is during a Showmanship class at a show and it should rarely be used in training unless the equine will be shown at halter and/or showmanship. And then, training with the lead shank should be done only after the animal is following well through all required movements while in his halter and on a lead rope.
 If, after you’ve employed a kind, considerate and respectful approach along with a food reward, your equine is still being uncooperative, it may be appropriate to use equipment with more leverage such as the “Quick Twist,” but not necessarily chains. Chains do need to be used in some cases, such as with work harness (and most curb bits are now fitted with chains), but when not used correctly, these chains can be abusive. The chains on the pleasure driving harness should clear the legs and heels of the driving equine, and the chin chain on a curb bit should be adjusted so that it is twisted properly and lies flat against the animal’s jaw with an allowance of two fingers between the chain and the jaw, thereby minimizing any chance of injury. If you have a generally compliant equine, it is better to use a leather chin strap on your curb bit rather than a chain.
 To employ the “Quick Twist” restraint, just take your lead rope and create a loop and feed it through the noseband of your nylon halter (rope halters are too loose and do not work) from back to front and then over the mule’s nose. When you pull on the rope, it will tighten around the end of the his nose below the incisive bones and over the cartilage, making breathing just a little difficult. Don’t keep pulling—just stand quietly and hold the tension snug. Let the equine come forward to you and slacken the rope himself by coming forward and allowing a free flow of air through his nostrils. Then, if the mule does not follow, just walk a step or two, creating tension on the rope, and then stand still again. When he does come forward, stop long enough to reward him with the oats reward before you proceed forward again. Keep the lead rope short and stand still in a balanced way so he cannot get ahead of you and jerk you off your feet. If you are standing still in a balanced position, it will be difficult for him to jerk the lead rope from your hand and leave.
 Restraints should not be used as a means to control your animal except for a short period of time with the purpose of showing them a correct behavior. Restraints should be used as a support and not a controlling device. Restraints should be “phased out” as soon as possible.
 Do not try to bully him into it or he will just pull back. This should be done while he is standing parallel to the hitch rail so that when you pull the rope tight, it pulls his head tightly sideways to the hitch rail. This will keep him from being able to swing his rear end around to block you. Reward him with oats and let him quiet down in this restraint before approaching with your shot. If he manages to keep you off the clear side, you can always go to the other side of the hitch rail and give him the shot from that side without fear of injury. You can do this along a stout fence provided the rails are sturdy. If you do this correctly, it will simply restrain him in a safe manner and keep you out of the line of fire. Each new time that you give shots, try to do it with the rope a little looser each time to fade out the restraint. They will usually just come to expect and go for their position along the hitch rail or fence and will lean into it like they do when you first gave the shots like this. He will soon learn to quiet down immediately when his face is being tied and at best will seem to be saying, “Dang, do we have to do this again?!” But, he will learn to comply.
 This is a humane restraint for mules and donkeys, but do not try this with a horse! This is a good restraint to use (and fade out) for any Longears that is difficult to worm, give shots, take blood, clip bridle paths and to use for those that are difficult to bridle. When using the Face Tie for bridling training (or clipping the bridle path), you will only need to go through the noseband and hitch rail (and not through the throatlatch unless you need to prevent them from turning into you). Just make sure when you put on the bridle that you “protect” their sensitive ears with your hands as it goes on and they will learn to trust you. Put the bridle on over the halter for the lessons until they don’t mind the bridling process.
 Your Longears will only need the kicking training covered in
  the hind foot, around the pastern and let it lay on the floor. Next time, you won’t have to use it at all. Your goal is to phase out the restraint entirely.
 Hobbles are another form of leverage equipment and there are many different kinds of hobbles for different purposes. The hobbles that have chains on them should be avoided, as the equine can become entangled and the chains can do damage to their legs. Thin leather hobbles or coarse rope can chafe the hair right off the skin around the pastern and can cause severe abrasions that may never heal. Thick leather hobbles are best, as they will break when under extreme stress, releasing before damage to the equine is done. If so inclined, all mules and some horses can gallop in hobbles, so hobbles really aren’t all that effective for leverage. Tying onto a hyline (a rope suspended high between two trees that acts as a hitching line for overnighting equines in the mountains) is a better choice, and if the horses are tied, then the mules should not have to be tied or hobbled because they will generally stay with the horses. Personally, I only use hobbles in a controlled situation at the work station when body clipping my equine’s legs for show.
 I do not approve of using power tools on the equine’s hooves at all. In order for the equine’s body to be properly balanced in good posture, the hooves must first be properly balanced. Power tools cannot possibly shape the hoof with proper curvature in the sole, alignment of angles and equal balance over the hoof walls with appropriate pressure to the heels and frog.

 Since a donkey can become quite stubborn when treated poorly, it is important that you take the time to help your child and donkey get started properly. Even an untried donkey, with proper help, can be a wonderful mount for a child. In the first few weeks together, the child and donkey should simply spend quality time getting to know each other. Teach your child the correct way to handle and groom the donkey. The personal bond between them will develop on its own. This is also a good way to start with mules.
 When your child and donkey have developed confidence in each other, you can begin to teach them the fundamentals of riding. Tack up the donkey in a small saddle suitable for his size and a snaffle bridle and then take him to a small pen to work on the lunge line. Allow your child to sit astride the donkey as he walks around you. Explain to you child the basics of turning and stopping with the direct snaffle rein contact, commonly called “plow-reining.” be sure to instruct the child not to pull hard, or jerk the reins. Donkeys have very sensitive mouths and do not respond well when they are in pain.
 Love and caresses are an excellent reward and the reward of crimped oats certainly does no harm, but tell the child to keep his hands flat so the donkey doesn’t accidently get his fingers! Donkeys are very appreciative animals. If the child and donkey are supervised correctly, it can greatly enhance the entire riding experience. The donkey will protect your child with his excellent judgment and the child will learn to be a patient and understanding person through the interaction with his donkey. The reason is simple: donkeys will not respond unless treated fairly. Many an equestrian in Great Britain has spent his early years astride a donkey and have become better riders because of it! So, if your child expresses an interest in riding, consider starting him with a donkey gelding, or maybe even a jennet. Besides being patient with children, his size is more suitable, he has ample strength to carry children and is an easy keeper, so feed and vet bills can usually be kept to a minimum.
 and will generally get his disposition from the mare. So, if you wish to get a mule for your child, make sure it is an individual with a quiet disposition. Then you can consider such things as size, color and other traits. Be advised that mini mules can be very strong and hyperactive with alpha personalities. IN some cases it might be better to get a larger, quieter mule for your child. The right mule can be just as good a babysitter as the right donkey, and usually more reliable than any horse!
 When you are tacking up your equine, stay in close to put on the saddle and bridle, but when walking around and behind them, give them a wide berth out of kicking range. Give the child detailed lessons on how to bridle and saddle the equine without hurting him, around the ears, eyes, etc. and never use the ears to hold his head still! Teach the child to WALK around equines and not run, or be abrupt, in their movements. Get your child a saddle that they can feel secure in, that has stirrups that will adjust to their short legs, or an alternate set of stirrups that will fit onto an adult saddle for them.
 Children and donkeys, or mules, have not been together much in this country in the recent past. Perhaps it is because we have not given children a chance to show their Longears publicly. Realizing this need, as in horse shows, youth classes have been included in the Longears shows of today to encourage our youth to take an active interest in the promotion of Longears. The jobs these “kids” are dong with their mules and donkeys are wonderful and their contributions are extensive. The values learned by children when dealing with donkeys and mules will stand them in good stead throughout their lives, not to mention the joy they will discover in having such an interactive and affectionate companion.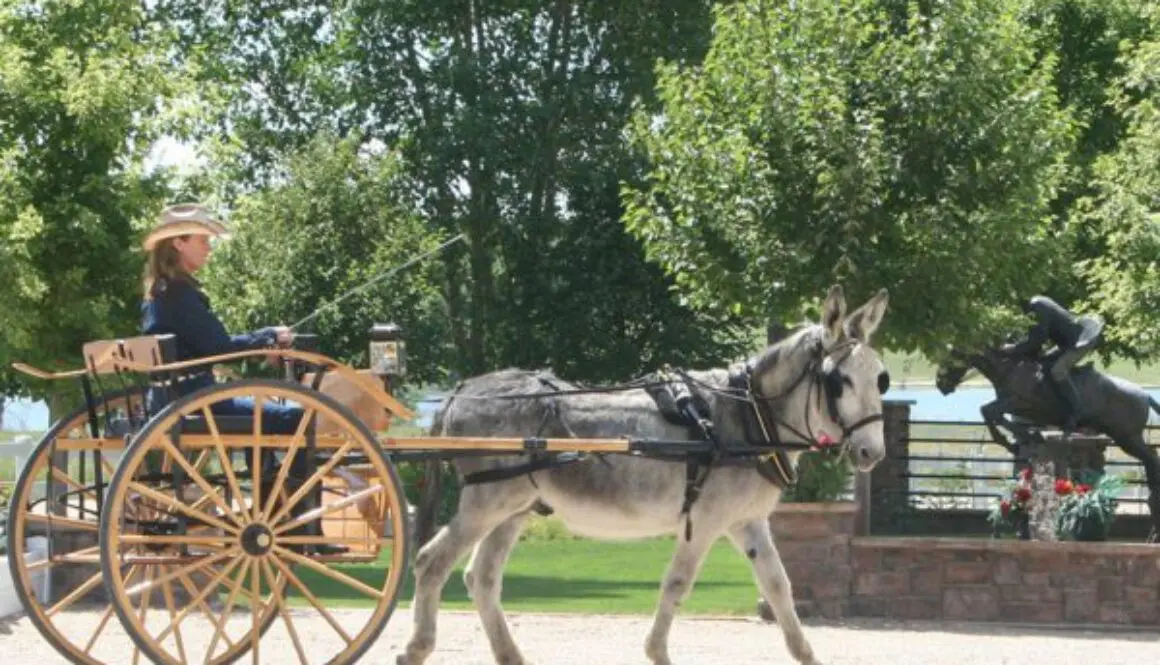


 With the introduction of the automobile came decreased interest in horse-drawn vehicles. Tractors replaced equine-driven vehicles in the fields. It seemed as if equines had been put out of a job! But, as with any change, this was only temporary. Modern society still has need of equine participation, especially from donkeys and mules. The well-schooled driving donkey or mule is much safer and more reliable than any horse. The reason for this is the donkey and mules’ natural sensibility and their positive response to verbal communication. Once they have learned the parameters of their job, if treated fairly, they will calmly and diligently go about their business, flicking their ears back and forth toward the driver, always listening for verbal reinforcement of their behavior. In a pinch, they can more often be prevented from “freaking out” with a few calm and reassuring words. Their strength and durability enables them to work longer and harder hours than can a horse and their variety of sizes and colors provides them as suitable driving animals for a number of driving-related activities.
 Most often we see driving animals in parades. Although it seems simple enough to drive down a parade route, there are a number of things to consider that can complicate the issue. Parade routes are lined with potential hazards and an overload of outside stimuli. Horses that become spooked have been known to bolt and actually run right through crowds of people. I have yet to hear of a donkey or mule that has done such a thing! Perhaps it is because the donkey or mule will not run into trouble if he can possibly avoid it. He will also be more likely to rely upon his driver for support and direction through the safest route. He will stop if in doubt of a situation when properly trained. Mules and donkeys are familiar with teamwork and will work as a team with their driver. The frightened horse just says, “Forget you!” and leaves!
 As the competitor improves, he may move into marathon driving, testing his skills across country and through obstacles (called hazards). The driver may use singles, or teams, depending on his personal preference. The American Driving Society has been more than generous, allowing mules and donkeys to compete in most of their events right along with the horses. For more fun-loving competitors, there are a lot of different driving games, gauged for the ability of the competitors. This allows even the most inexperienced driver some source of enjoyment from which he can derive a sense of accomplishment and excitement.
 Mules and donkeys are used in many tourist areas, pulling cabs and carriages of all varieties, taking tourists in a more leisurely fashion through the streets of history and tradition. Couples can romantically celebrate special moments in their relationships with a relaxing ride in a special cab or buggy. The sensible mule or donkey assures a safe and romantic memory that will stay with you for the rest of your life! We have used our mules to pull carriages for weddings and receptions, adding a touch of class and a little tradition to an otherwise fast-paced and chaotic world!

 Now that you have spent many months teaching your mule to drive and he is doing so well, you have decided that it might be fun to show him in harness. So, what are that kinds of things that a judge looks for in a driving class of mules? Well, it’s basically the same as it is with horses.
 confidently, yet promptly. He should reinback easily upon request, and stand quietly at the halt with all four legs squared. His ears will be relaxed, but attentively turned to the driver most of the time. Ears that are rapidly in motion indicate anxiety and distraction.
 30 minutes. If you condition your mule at the medium trot for 20 minutes straight, without any sweating or breathing hard, he should be able to handle the class with no problem. Another helpful hint is to condition him on uneven ground. Then, when he performs on the flat ground, it will seem a lot easier to him. Remember to condition slowly to avoid overexertion, muscle soreness or injury. If you condition your mule beyond what is expected in the class, you won’t have to worry about him being fit for class! And, as long as he is so well conditioned, be sure he is well-groomed as well.
 with good hock action, on a taut, but light rein, the position being balanced and unconstrained. The steps are
 The next consideration is the appropriateness of the animal to the vehicle he is pulling. A smaller mule should never be used to pull a large wagon, nor should the larger draft mule be used to pull a pony cart! Select a vehicle that pulls easily for your mule and one that is proportionate to his size. The overall picture should be balanced and harmonious. Fifty percent of your total class score will include your mule’s manners, his conditioning, his way of going and the appropriateness of the general turnout.
 where appropriate. Hat, gloves, coat, tie, and a lap apron are required. A whip must be held in hand at all times! Always look where you are going, check the judge for instructions periodically and pay attention to spacing in the arena! The remaining considerations for a judge are the vehicle and the harness with each carrying 15% of your total score. The vehicle should be in good repair, appropriate size and style for your mule, and should fit him properly through the shafts and tugs. The harness should fit him as well as possible and should be adjusted correctly, especially the breeching so it can do its job in the reinback.
 There is a lot to consider as a driving judge, but judges are also human beings, and basically the judge is going to select those mules for placement in the class that HE would most like to drive. If you follow the guidelines that I have described, your Longears will be one of the judge’s favorites!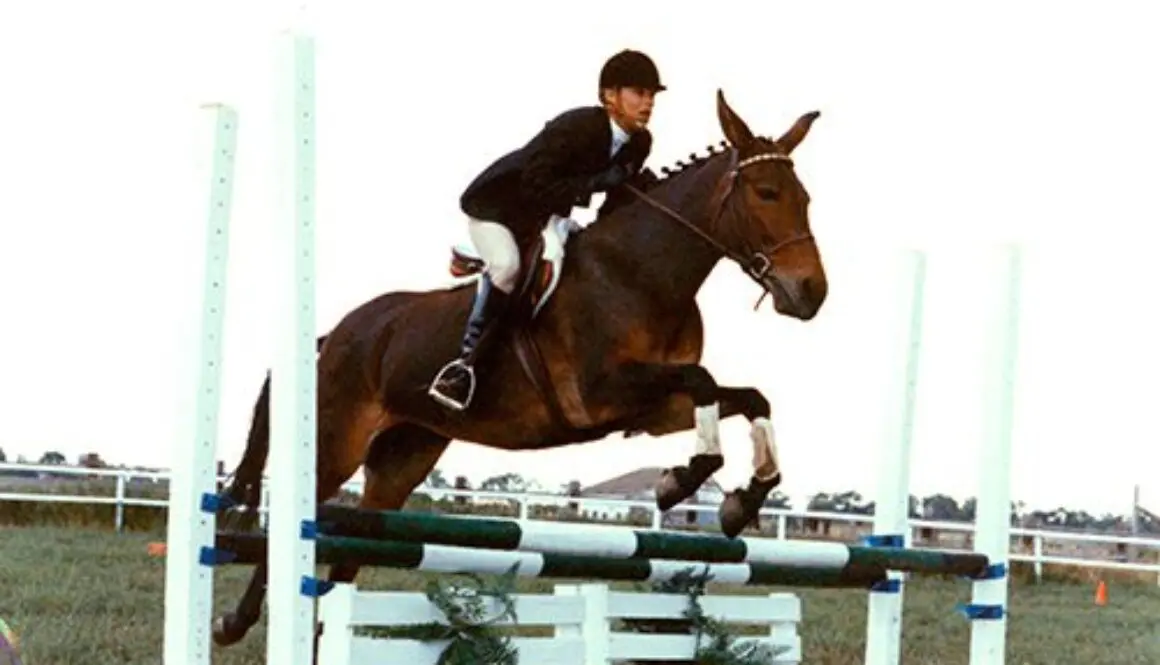

 In 1986, when I first began using my mules in Dressage, you would never have convinced me that I would follow it up with jumping. I was fearful of jumping because of a few bad experiences I had with horses. However, once I took the time to learn to ride and train properly with Dressage and experienced the overall stability of a mule, my fear disappeared.
 If you speak to mule owners all over the world, you will hear at least one tale in ten about a mule jumping out of his pen. If they have the inclination, most mules have the ability to easily clear a fence up to and even over six feet high. The capability is certainly there, but in general, mules lack the motivation to expend the energy to actually jump out, especially when they are well managed.
 of a ballet dancer and that of a a weight lifter. A mule’s muscle structure (like that of a ballet dancer’s) is comprised of longer, smoother muscle with less bulky areas, a trait inherited from the donkey. This gives him a slightly more
  streamlined appearance than that of a horse. And like a ballet dancer, a mule can spring his body effortlessly into the air using the muscles in his hindquarters, giving him the ability to jump either from a standstill or while in motion. For the weight lifter or the horse, this maneuver is not as easy due to their particular muscle structure. So when selecting a horse for advanced jumping, it is wise to select a breed or type of horse that has less bulk muscle and more smooth muscle, like the mule., and both need the thickness o bone to absorb the concussion on the landings.
 Regardless of the mule’s inherent strength and endurance, in the beginning of jumping training, he will lack the muscle development and stamina required to negotiate a course of jumps effortlessly and in stride. Like any other living creature, he can only strengthen the muscles that he uses, so it is up to you to make sure he is doing specific exercises that pinpoint the correct sets of muscles so he can do his job over the jumps, between the jumps, before and after the jumps.
 These three tasks require different postures that need to be supported by different muscle groups, so work on training and strengthening the specific exercises as outlined in DVD #7 of my Training Mules and Donkeys series. A proper conditioning program of exercises for your mule ro donkey will strengthen the muscles needed for jumping and will prepare him for a more polished performance. This is also a good opportunity to fine-tune all the muscles in your own body as you fine-tune those of your mule or any other equine.
 While training your equine to jump, you must ask yourself some very important questions. Does my animal possess the strength of body to carry him from the hindquarters with sufficient impulsion, rhythm and balance? Can he readily lengthen or shorten his stride to accommodate the distance to his fences? Are these adjustments easily made, or does my equine tend to throw his weight onto his forehand during transitions between gaits and over fences? Remember, the animal that is well schooled in jumping will carry his body with ease and make smooth transitions from an uphill balance.
 There are a series of exercises that will help to build your prospect into a beautiful, stylish and exciting jumper, but it will take time and patience— there just aren’t any shortcuts. Taking the time and exercising your patience will produce not only an animal that jumps properly, but one that is also strong and confident in his abilities. This can come in mighty handy later on when you find yourself in more demanding jumping situations. Having taught your equine to jump safely, you will have a more pleasurable and stress-free ride.
 more sure and stable. To me, a mule seems more balanced and stronger throughout than does a horse, and so the chance of taking a misstep or crashing a jump is lessened. Should a loss of balance or error occur, the mule is usually able to more quickly recover than the horse, making for a safer ride.
 Today, mules are jumped in all kinds of events, from Combined Training to Hunter/Jumper classes. Jumping mules adds excitement and variety to training events and events where mules jump in competition under saddle against each other, and even against horses. Coon hunters often display the mule’s natural ability to jump from a standstill by jumping them in-hand over fences, either on hunts or at shows, and some mule owners even try their luck at Fox Hunting.
 other side of the fence and ask the mule to jump it. When this is a class at a show, it is staged very much the same way, but you will see more larger mules on display. By any standards, the mule’s capacity to jump is unquestionable, and there is no doubt he will continue to climb the ladder of equine success. The mule will often exceed people’s expectations, but in most cases he will out-perform his horse counterparts. Hambone proved this to be true when he jumped so well, won against the competition and got mules banned from competing against the horses again!
 First, you should be sure that the trailer in which they are to ride affords safety and comfort and that the plates on both the truck and trailer are up-to-date. Before you leave, you should check over your trailer thoroughly. Make sure the hitch is secure and in good repair, and that there are no weakened welds anywhere. Check your trailer’s tires, bearings, axels and brakes for maximum performance, and make sure all the lights are in working order. Take the trailer mats out and check the floor boards for rot and other weaknesses, and replace all floor boards that are even questionable. It is always good practice to get all new tires for the trip and a new spare.
 Mules and donkeys, like horses, should be “dressed” for their trip. For their overall comfort during long trips, halters should be fleeced, at least over the noseband, to protect from excessive rubbing that can result from being tied. Shipping wraps for their legs are also advisable to prevent injuries from a loss of balance, misstep or kick from another animal in the trailer. Depending on the weather and the kind of trailer you have (either a stock trailer or enclosed trailer) you can use sheets or blankets to protect the rest of your animal’s body.
 When loading your mules and donkeys, pay special attention to each individual’s needs. Animals that lean one way or the other generally do better in a slant load trailer rather than in an in-line trailer, but if you must use an in-line trailer, make sure that the animal that leans has a solid wall or partition on the side to which he leans. You always want to put animals next to each other that get along well, so if you must load a leaner on the wrong side, be sure to put him next to an animal that is able to tolerate his leaning without retaliating if there are no partitions. If you have an open stock trailer, another alternative is to load your animals into the trailer and tie them facing backwards. Many equines actually prefer to ride facing backwards because they find it easier to balance. Note: This alternative is not advisable in a partitioned in-line or slant-load trailer.
 Long before you actually go anywhere, get your animals used to being handled inside the trailer. When unloading, always make them stand and wait. I usually remove my animals’ shipping wraps before I let them come out of the trailer, but if they are packed in pretty tightly, I just remove the leg wraps I can reach. The removal of leg wraps before unloading will add purpose to your Longears’ waiting time (which they quickly come to understand). Frequently offering water at stops gets your animals used to you moving about the trailer while they are loaded. Most equines realize that all of this is for their benefit and you should find them mostly cooperative and appreciative. Having water from home in plastic jugs makes this easy.