

Meredith Hodges

Another Augie and Spuds Adventure: Baling & Stacking Hay 6-21-13
It’s summer time, and there are tons of adventures to be had for two mini donkeys on a bustling ranch like Lucky Three. Today, Spuds and Augie explore the hay field with Meredith and test their bravery against a fearsome, loud machine.

Hey, Spuds! I hear Meredith calling…what’s up?

She’s kinda silly, Augie. Who ever heard of saying “how do you do” to a swather, Augie?

Whoa….look what’s coming!!!

WOW!!! That’s super noisy and REALLY BIG!

Oh look, Spuds, it’s not so scary. This is how they make our hay!

Yeah, and look how they pick it up with this other big machine so they can put it in the barn!

What a fun adventure in the hayfield…we learned a lot today!
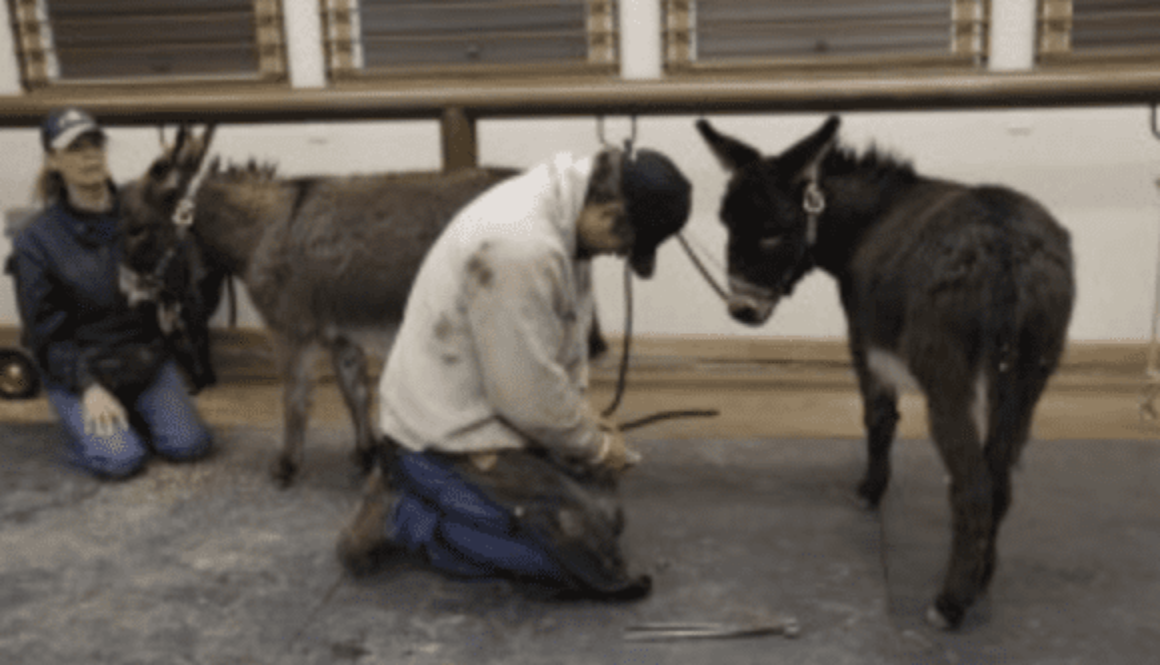
Another Augie and Spuds Adventure: Farrier & Grooming 04-23-13

“Hey, Augie…watcha doin’?!
“I’m practicing my halter stance…you know, four-square!”

“Good idea, Augie! I guess I’ll practice my halter stance right here!”
“And I will wait for my turn at the hitch rail…I wonder what’s up today.”

“Hey Augie, you’ve got some pretty dirty feet down there!”
“Cut with the wise cracks, Spuds!”

“I sure like it when they come down to our eye level, Augie.”
“Yeah, it’s not as scary as it is when all you see is their legs…whatcha doin’ back there, Dean?”

“Your turn, Spuds! This isn’t bad at all!”
“Yeah, it’s all peace, love and OATS!”

“It doesn’t get any better than this!”

“Dang, I was working on a Mohawk…it’s the IN thing with donkeys, you know!”
“Just be happy with your crew cut, Spuds. Crew cuts are always IN!”

“Oooh, here comes the baby oil again!”
“Aah, nuts! Now I can’t chew on your mane and tail…baby oil tastes just awful!”

“Yeah, but we sure are handsome now!”

MULE CROSSING: Riding Side Saddle
 By Meredith Hodges
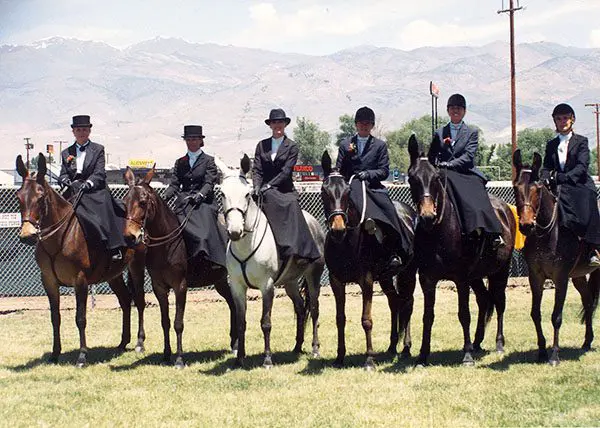
Today, the concept of elegance has been greatly compromised by the fast pace of our open-minded society. Few of us have neither the time nor the inclination to do what is necessary to cultivate this concept as a major part of our lives. Women today have far too many jobs and responsibilities with which to cope without worrying about being elegantunless she lives in a densely populated urban area. There are just not a lot of places where a woman can practice being elegant. One of the places she can, however, is in the growing number of Side Saddle classes offered at many of the different Breed Shows across the country. The equestrian art of Side Saddle is currently being revitalized among the different breeds and one of the most enthusiastic groups is our own Longears lovers! But elegance is not necessarily the only reason our Longears Ladies are riding aside. The lady equestrians of today like to get a more well-rounded education in the art of Horsemanship riding astride, and the perfection of their balanced seat when riding aside only enhances their existing abilities.
 Mules can be lovely, obedient and secure Side Saddle mounts when they are brought along correctly as has been exhibited nationally by Crystal Elzer and her mule, Final Legacy. I also fondly remember Ann Hathaway and her Dressage mule, Baby Huey, exhibiting Side Saddle in the Bishop Mule Days parade years ago. I judged the A.D.M.S. Nationals in Austin, Minnesota, and again, I witnessed a sprinkle of elegant Side Saddle riders on mules. In the state of Colorado, there was a surge of Longears Side Saddle riders beginning in 1983. The Side Saddle class for mules at the National Western Stock Show in Denver, Colorado previously had no less than 10 entries in the Side Saddle Class since its beginning in 1983 when an entire mule division was brought back after a long absence from the show.
 Generally speaking, people are quite impressed with the ladies who ride aside, and a common question often arises, “You sure look elegant, but how on earth can you stay on that way?!”
Actually, riding aside is much more secure than riding astridebecause of the grip you can achieve with your legs around the pommel and leaping horn of the Side Saddle. This was demonstrated clearly at a Side Saddle clinic given by Patti Chadwick at the Bitterroot Mule Company in Bennett, Colorado on March 23rd of 1993. Six beginning Side Saddle riders of various equitation skills proved to be quite secure in their seats and no one had any real problems to speak of that day! All levels of riders were jumping cavalletti by the end of the clinic! So you see, it isn’t as insecure as one might be inclined to believe. And with an instructor like Patti Chadwick, it was a snap! The name of the game is “balance,” and whether riding aside on a horse, mule, pony or donkey, it is always a rewarding challenge to finally be able to master this art.
 My daughter, Dena and I truly enjoyed riding aside both in shows and in parades. Dena was thrilled to be able to finally best seasoned Side Saddle rider, Crystal Elzer in the Bishop Mule Days Side Saddle class. Crystal was a practiced Side Saddle competitor from California at Bishop Mule Days that had bested her for the previous three years.
Side saddles come in three distinct categories: English, Western, and Period side saddles. The English side saddle is probably the best one in which to learn, since the seat is better balanced over your animal. The Period side saddles are the worst, since most are built and balanced incorrectly for our contemporary riders and equines. The older side saddles were built to fit the smaller framed riders and larger animals of yesterday and just don’t fit the conformation of the animals and the size of the ladies of today. Although most side saddles today are bought used, there are saddle companies that are making them again due to increased demand. If you buy a side saddle, make sure it fits your equine as well as yourself to assure the best ride.
Fitting the side saddle to your body is relatively simple. While seated on a chair, measure along the bottom of your thigh from the back of your bent knee to just beyond your hips under your tailbone. The saddle is measured from pommel to cantle and should exceed your leg measurement by no less than two inches. You can ride in a side saddle that is a little too large, but not on one that is too small! Consider the width of your saddle to avoid excessive overhang on each side.
 The training of your equine for Side Saddle should be accomplished fairly easily if your animal has a good foundation to start, and those trained in Dressage will convert the most easily. The absence of the leg on the right side gives problems most often during the left lead canter and during the leg yield left. Though many ladies will use a whip as a substitute for the right leg, it is not necessary. The animal at the higher levels of training (1st Level Dressage and above) have learned to follow your seat, and will do quite nicely staying under your seat as you move through the patterns. If your animal needs additional support, it can come through supportive indications through the reins. To achieve the left and right lead canter, for example, a slight push with your seat and a squeeze/release on the indicating directional rein will tell your animal the correct lead to take. It’s that simple!
 There are quite a few existing Side Saddle organizations today that are available to those of you who might be interested in taking lessons and participating in shows and award programs. You can check your local area for one near you or you can contact the International Side Saddle Organization, 75 Lamington Rd., Branchburg, New Jersey, 08876-3314, (706) 871-ISSO (4776), info@sidesaddle.com. The United States Equestrian Federation can also help you to find qualified instructors in your area. They can be contacted at U.S.E.F., 4047 Iron Works Parkway, Lexington, Kentucky, 40511, (859) 258-2472, FAX (859) 231-6662.
 If you think you might be interested in learning to ride aside, contact one of these organizations to find out what people you should contact in your area to help you and others that share your interest. The feeling of elegance and accomplishment is unmatched. Our world could use a little more whimsy and romance to help the modern woman to enjoy her dignity and elegance in this fast-paced world. Hats off to the lovely ladies who ride aside!
To learn more about Meredith Hodges and her comprehensive all-breed equine training program, visit LuckyThreeRanch.com, MEREDITH HODGES PUBLIC FIGURE Facebook page, or call 1-800-816-7566. Check out her children’s website at JasperTheMule.com. Also, find Meredith on Pinterest, Instagram, MeWe, YouTube and Twitter.
Covered in TRAINING MULES & DONKEY: A LOGICAL APPROACH TO TRAINING, TRAINING WITHOUT RESISTANCE and EQUUS REVISITED at www.luckythreeranchstore.com.
© 2013, 2016, 2024 Lucky Three Ranch, Inc. All Rights Reserved.


MULE CROSSING: Shoulder-In and Lengthening the Trot
By Meredith Hodges
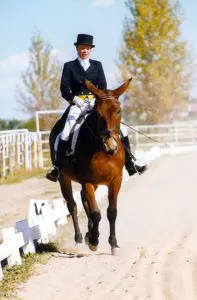 In order to perform the shoulder-in properly, it is important to understand its purpose. The shoulder-in causes the equine to engage his hindquarters so that they carry the bulk of his weight, giving him more freedom and suppleness in his shoulders and front quarters. A strong base must be established to carry this weight forward while the shoulders remain light and free to proceed forward while tracking laterally.
The shoulder-in is done on a straight line. Normally, an animal traveling in a straight line makes two tracks in the dirt behind him, because the front legs are positioned directly in front of the back legs. In the shoulder-in, the shoulders are positioned so that they cause a three-track pattern behind—the inside front foot makes one track, the outside front foot and the inside hind foot make one track, and the outside hind foot makes one track.
 Begin by walking your equine around the perimeter of the arena. When you reach the corner before the long side, make a ten-meter (30-foot) circle. As you close your circle at the start of the long side of the arena, maintain the bend that you had for the circle, using steady pressure on your inside rein. At the same time, nudge your equine with alternate leg pressure in synchronization with his hind legs as they each go forward. Squeeze your outside rein at the same time that you squeeze with your outside leg, and then release the outside rein. Ride the hindquarters straight forward from your seat and legs, as you offset the shoulders with your hands. Be careful that your inside rein is not so tight that your animal bends only his neck to the inside. As you squeeze with the outside aids, feel your equine rock his balance back to the hindquarters, giving you the sensation of pedaling backward on a bicycle. Simultaneously, you should feel the front quarters begin to lighten and become supple.
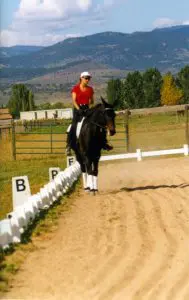 Take your time and don’t try too hard. Be content at first with two or three steps of shoulder-in and then straighten him down the long side of the arena. After a few accurate steps of shoulder-in, as he straightens his body, you will feel him surge forward with more energy. Collect and slow your equine’s gait through the short side of the arena and then repeat the exercise on the next long side. As your equine begins to understand the concept of rocking his balance to the hindquarters, the surge of energy that you feel when he straightens will become more and more powerful.
Much body strength and coordination is involved in this exercise and at first, you may feel like you are all thumbs. Time, patience and practice will bring about positive results, so stay with it. Over time, do this exercise at the walk, the trot and the canter, and do it the same way in both directions in the arena. Don’t forget to praise your animal for each correct step that he gives you.
The next exercise to enhance hindquarter engagement and lengthen the stride is quite simple, yet still a little tricky because lengthening your mule’s stride means covering more distance yet maintaining the same rhythm and cadence. It does not mean speed up, although that is what most equines will try to do. Track the perimeter of the arena again. This time, collect the trot on the short sides, and then urge your equine to lengthen his trot 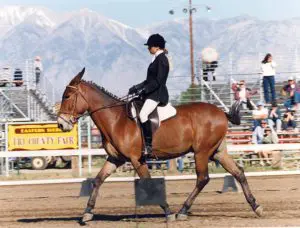 down the long sides. To add variation, ask him to lengthen across the diagonals (from corner to corner) as well. Your equine’s first impulse will probably be to shift his weight to the forehand and just speed up. For this reason, do not push him too hard too soon. At first, just ask for a little more energy—be aware that your rhythm and cadence will not be lost as his stride increases. He will just be spending more time in suspension. Keep the forehand light and free while you ride the hindquarters. Let your hand open slightly with the foreleg going forward on the same side, and close as the leg comes back. This will help you to determine how far you can let that stride go before the balance begins to shift forward. It will also allow you to check the balance with your hands before it begins to shift. If he has too much difficulty, you should go back and practice lengthening over ground rails again to gain more strength and coordination.
 As your equine gains strength in the hindquarters and is better able to carry your weight, his lengthened gaits will continue to improve until, perhaps a year or so later, he will be able to fully extend his stride at the walk, trot and canter. I caution you, however, that if your animal begins to rush, ask for less.
Another exercise that is helpful in lengthening the trot is to canter your equine around the arena, then cross half of your diagonal at the canter. Break to the posting trot and finish the diagonal. After the diagonal, sit the trot through the short side of the arena, pick up the canter on the long side again, and then cross the next available diagonal again and repeat the pattern. The drive that an equine gets from his hindquarters in the canter will carry through into the trot for the few strides on the diagonal and will create the true lengthening. This also holds true when teaching the lengthened walk (add trot work and back to walk) and the lengthened canter (add galloping and back to canter). This is your opportunity to tell your equine, “Yes, yes, this is what I want when I urge you on!”
Learning to ride from back to front (from the hindquarters forward) will greatly improve the harmony between you and your equine. Loss of balance seems to be the single most common cause of disobedience and problems with riding and driving animals. Carrying your weight and his in a properly balanced posture minimizes the chance for a loss of balance, and recovery from such a loss is much easier. Your equine will soon discover that your aids are indeed for his benefit as well as for your own, and he will become more accepting of them over time. As he becomes more balanced, you will find a world of different activities that you and your equine can do!
To learn more about Meredith Hodges and her comprehensive all-breed equine training program, visit LuckyThreeRanch.com, MEREDITH HODGES PUBLIC FIGURE Facebook page, or call 1-800-816-7566. Check out her children’s website at JasperTheMule.com. Also, find Meredith on Pinterest, Instagram, MeWe, YouTube and Twitter.
Covered in TRAINING MULES & DONKEY: A LOGICAL APPROACH TO TRAINING, TRAINING WITHOUT RESISTANCE, EQUUS REVISITED and A GUIDE TO RAISING & SHOWING MULES at www.luckythreeranchstore.com.
© 2016, 2017, 2024 Lucky Three Ranch, Inc. All Rights Reserved.
This article is an excerpt from the book, Training Mules and Donkeys by Meredith Hodges, 2013
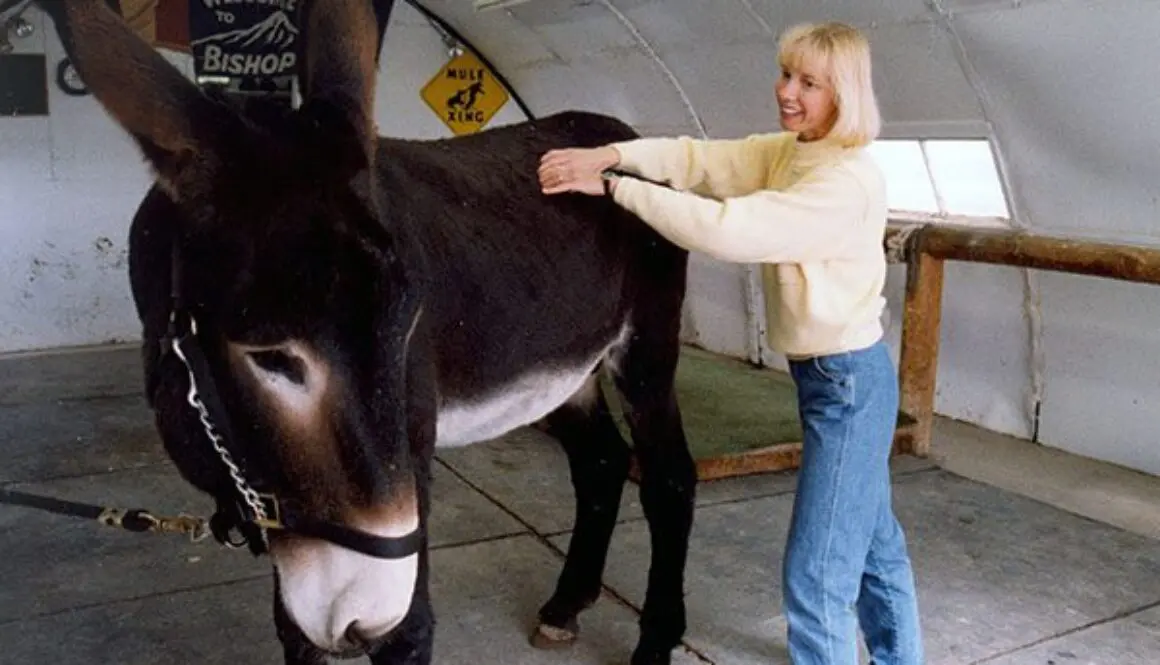
MULE CROSSING: Massage History & Contemporary Equine Use
By Joanne Lang & Meredith Hodges
 Massage History
Historically, massage is both ancient and worldwide. Native and folk cultures all over the world use massage for health and healing. There are highly developed forms of massage found in the writings of such primitive civilizations as Sumer, China, India, Greece and Rome. Arabic peoples in Turkey and the near east preserved the classical Greco-Roman culture during the Middle Ages and brought it back to Europe during the Renaissance. Greek gymnasia and Roman baths evolved into the Turkish bath, which includes a form of massage. Health clubs, workout facilities, swimming pools, steam rooms, whirlpools and massage rooms are all part of this legacy.
Pehr Henrich Ling (1776-1839) and Johann Mezger (1838-1909) were very instrumental in the development of today’s classical Western massage. Active and passive movements to treat medical conditions, commonly called Swedish Movement Cure, was developed by Ling in 19th-century 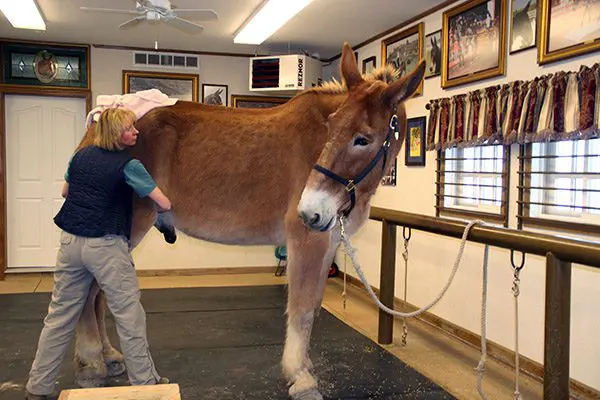 United States. Familiar French terms to describe four broad categories of massage (effleurage, petrissage, tapotement and frictions) were made popular by Johann Mezger. In the 20th century, their work was developed further by their students, and eventually found its way into regular medicine and the alternatives of health and healing. Swedish massage is a popular genre of classic Western massage. It includes Swedish movements, several forms of hydrotherapy, heat lamps, diathermy and colonic irrigation. Swedish massage is still offered at health clubs, some YMCAs, resorts and private clinics, although its heyday was between the 1920s and the 1940s.
Because of its use as a cover for prostitution in the 1950s, massage declined in popularity as a health practice for the more conservative general public. It also lost credibility as a therapeutic source within the medical profession at that time.
The 1960s brought about a revival of massage as a valuable health and healing method. The benefits of massage as a holistic health practice were revitalized by the counterculture and human potential movement. It is now used more often as an alternative or complementary healing process toward health and fitness.
Massage for Equines
Has your equine ever had any of the following problems? Sensitivity to the girth; restricted movement; continual scuffing of the hind legs; avoidance of leads; problems bending; lameness; inability to lock the knees; recurrent colic; loss of power or coordination; breeding difficulties when mounting or being mounted; constant tail swishing or an uneven top line? Has your equine ever had surgery, direct trauma or
resistance to training? Do you push your equine to the limit? If you answered yes to any of these, your animal will benefit from equine massage, a non-invasive type of therapy that, when administered properly, can address all of these problems and more.
 When we ride our animals daily and ask them for repeated movements in Jumping, Reining or Dressage, we demand a lot of their muscular and skeletal systems. This can shorten muscle fibers, restricting range of motion and putting undue stress on muscles and joints. Unforeseen problems can result such as lameness, arthritis, disk degeneration, or worse—a ruptured disk. These crippling dysfunctions do not always wait for the animal to age before they appear. Simple massage can prevent various injuries throughout your animal’s lifetime. Don’t wait for obvious injury to occur—preventive massage increases the length of the muscle fibers, taking pressure off the joints.
 When the muscles are allowed to contract and expand to their full length, they are able to absorb important nutrients that reduce fatigue. Massage also increases blood flow, which helps the body flush harmful toxins, such as lactic acid, that build up from normal use. Massage aids in reprogramming the nervous system to break patterns that can cause atrophy or knotted tissue. The following information is an introduction to some of the basic techniques of massage, which will enable you to identify areas of discomfort in your equine. It is not intended to replace the care of a licensed massage therapist or veterinarian. If you are unsure as to the severity of an injury, consult your vet!
Have you ever had a massage? Remember how good it felt? An increasing number of people in the United States and abroad are recognizing that animals also benefit from massage. At Lucky Three Ranch, I have found that therapeutic equine massage promotes relaxation and reduces stress. It also stimulates healing after an injury and provides significant relief from pain. Your equine may experience soreness when you ask him for some of the advanced moves in his training program. Massage can reduce muscle spasms, and greater joint flexibility and range of motion can be achieved through massage and stretching—resulting in increased ease and efficiency of movement.
 Palpate along the neck, beginning behind the ears and working your way back to the shoulder. Be sure to check the entire neck from poll to shoulder. Is one side more sensitive than the other? Ribs are a very sensitive area. Check each rib and between the ribs. If your donkey is nippy while being cinched or refuses to change leads, it could be from soreness in this area.
As you massage your equine, keep in mind how getting a massage should feel. Keep the pressure light over bony areas like the ribs, back and poll, whereas heavily muscled areas such as the neck and hips can endure more pressure. Always be aware of your animal’s reaction to pressure and respond accordingly. Watch his eyes and ears. As you work look for signs of sensitivity toward the affected area such as biting, raising and lowering the head, moving into or away from pressure, contraction of muscles from your pressure, tossing his head, swishing his tail, picking up his feet, changes in his breathing or wrinkles around his mouth. If there is sensitivity in the neck, the shoulders and upper back may also be involved. If there is soreness in the hips, the ribs and lower back may be involved.
 The neck is a good place to begin your massage, making small circles with your fingertips. Imagine your circles as eyes, searching out lumps and bumps under the skin that are knots in the muscle fibers. Start behind the ears and work your way back to the shoulders. If your animal is heavy in the bridle, if he tips his head to one side, or if he has difficulty bending through the neck, he is exhibiting stiffness in this area.
Next, massage the shoulders and between the front legs. Compare the two sides of the chest muscles. Is one side larger than the other? The shoulders work as shock absorbers and need their strength to pick up the front quarters when jumping. If there is soreness in these areas, your animal will have difficulty performing certain athletic movements.
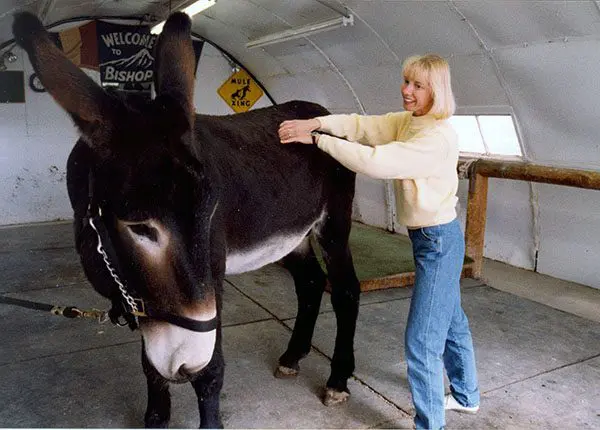 Ribs are a very sensitive area and can refer pain in many directions. Make sure to check each rib and the area in between them. Keep in mind that they span from the back to the belly; this is a large area of sensitivity due to the lack of muscle cover. Include the back when working on the ribs, using your fingertips to feel each vertebra and compare each side for symmetry. If you keep this area relaxed and flexible, your equine will bend more easily throughout his body.
Because muscling is thick in the hip area, you might want to use your fist to exert more pressure there. Using your fist, knead the muscles as if you were kneading dough. The animal will push into 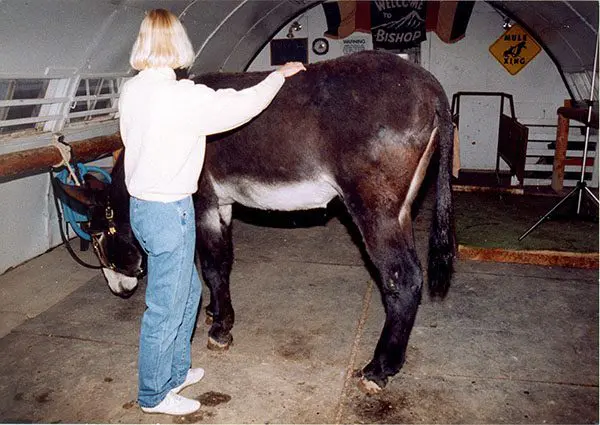 your hand to let you know that it feels good. If he moves away, he is telling you that you are exerting more pressure than he can comfortably endure, and you should go back to using your fingertips. When massaging the hips, the lower back and the last few ribs should be included. Soreness in this area can result from athletic movements like jumping, collection, sliding stops and rollbacks.
Passive range-of-motion exercises involve moving limbs and joints as they were naturally intended to move. Forcing motion can cause tearing of the muscles and a breakdown of the trust you are trying to achieve, so keep your movements gentle and easy. If you encounter resistance, just stop and try again. In order for you to do passive range-of-motion exercises, your animal must be able to trust you and “let go,” allowing you to manipulate his limbs without resistance. If you have an animal that resists, do only as much as he will allow. Over time, he may loosen up and allow you more control. If he doesn’t let go, don’t force the movements—it will foster more harm than good. Some animals are just intolerant.
When moving the limbs and joints, be sure to stay within your animal’s comfort zone. Be aware of the point at which your animal begins to resist and do not reach that point. As your equine begins to trust and understand, and as his muscles and joints loosen, he will afford you a wider range of motion.
 A raised head and perked ears may indicate sensitivity. He is asking for lighter pressure, so learn to pay attention to the things your animal tells you about his body. This animal is still concerned about the pressure. Sometimes you will assume that your pressure is so light it can do nothing, but less is best.
Now he is happy with the pressure. He has dropped his head and has taken a deep breath. This area can be very sensitive if you are doing rollbacks, sliding stops or collection.
 The front legs are a good place to begin your passive range-of-motion exercises. Be prepared to let go and get out of your animal’s way. Shake the limb under the animal and then move the limb forward and back, always being aware of his limitations. Each time you work with your animal, his range will increase.
Small circles are another technique for passive range of motion. The movement re-programs the nervous system, while building trust between you and your animal.
This is an advanced movement, and will take some practice and time to achieve the desired result. Passive range of motion should be done only within the animal’s tolerance, but time will increase his degree of tolerance.
 Massage therapy should never be harmful. For the sake of safety and comfort, do not attempt massage therapy for rashes, boils, open wounds, severe pain, high fevers, cancers, blood clots, severe rheumatoid arthritis, swollen glands, broken bones, direct trauma or if there is any chance of spreading a lymph or circulatory disease, such as blood poisoning. Avoid direct pressure on the trachea.
It is easiest to find sore spots and muscles when your animal is warmed up, so after a ride is a good time to do massage therapy and passive range-of-motion exercises. When performing massage therapy and passive range-of-motion exercises, you will also aid your equine in ridding his body of toxins that build up in muscle tissues and eventually cause stiffness, but you do not need to massage your animal’s entire body every time after you work. For example, if he is having difficulty with leads, you may want to massage only the ribs and mid-back.
 Each time you ride, take the time to quickly go over your animal and assess his sensitive areas: check his range of motion to detect stiffness in the joints. Paying this kind of attention to his body will enhance his athletic performance and provide him with a wonderfully relaxing reward. Stretching the front leg forward is a great movement to make sure that the girth is not pinching your equine after he is saddled. Give your equine the preventive care that he deserves to make your way to a mutually satisfying relationship.
To learn more about Meredith Hodges and her comprehensive all-breed equine training program, visit LuckyThreeRanch.com, MEREDITH HODGES PUBLIC FIGURE Facebook page, or call 1-800-816-7566. Check out her children’s website at JasperTheMule.com. Also, find Meredith on Pinterest, Instagram, MeWe, YouTube and Twitter.
Covered in TRAINING MULES & DONKEY: A LOGICAL APPROACH TO TRAINING, TRAINING WITHOUT RESISTANCE and EQUUS REVISITED at www.luckythreeranchstore.com.
© 2005, 2016, 2024 Lucky Three Ranch, Inc. All Rights Reserved.


LTR Training Tip #85: Collection
Collection is not just flexing the equine’s neck at the poll. Collection adds more suspension in the gait through the engagement of correct postural core muscle strength in good balance.

MULE CROSSING: Mules Accepted by U.S.E.F. in Dressage!
By Meredith Hodges
 It’s 2004 and “You’ve come a long way, Baby!” The movement to have mules accepted by major equine organizations began with the United States Dressage Federation in 1986, 17 years ago! There was still the hurdle of being accepted by the most prestigious equine organization in the country at the time, the American Horse Show Association that sanctioned all upper level shows and competitions. Since then, the mules’ participation in significant horse events was a long, uphill climb and membership in the A.H.S.A. was only a dream. Even though they were accepted at the schooling level back then, there were still many areas that were unwilling to comply with the United States Dressage Federation’s acceptance at this level and mules continued to be discriminated against in many shows and competitions.
However, our undaunted mule riders persisted in their quest for perfection and showed the mule as a competent Dressage and Combined Training candidate. Bishop Mule Days rewarded their efforts and added Dressage classes at Bishop for these dedicated people and their mules. As more riders began using Dressage as a basis for training, and A.H.S.A. judges were being used for the classes at Bishop, even more professional equestrians began to see the competence of our beloved mules and our riders’ dedication to excellence.
 The same kinds of things were happening in the disciplines of Competitive Trail Riding, Endurance, and Driving. The first discipline of the United States Equestrian Federation (formerly the American Horse Show Association) to accept mules was in Endurance Riding, and was then followed by their acceptance in Driving through the valiant efforts of Dave Ketscher and his mules, Mariah Carey and Jeremiah.
 Dressage rider, Carole Sweet, began her quest for acceptance in the U.S.E.F. Dressage Division several years ago and has single-handedly become the proponent of a major rule change in the Dressage Division of the U.S.E.F. This was no easy task as it was critical to take this through proper channels just for consideration! The culmination of all her hard work and persistence was rewarded in December of 2003, when she was notified that the mule issue would be on the agenda for a final decision during the U.S.E.F. convention to be held in January of 2004.
 It was at this time that Carole Sweet requested the assistance and support of anyone who could help at this convention. Linda Pitman from the American Mule Association, Leah Patton, administrator/editor of the American Donkey & Mule Society, and I (Meredith Hodges), longtime longears promoter, judge and animal inspector for the A.D.M.S., descended on the convention, attended appropriate meetings, and lobbied every chance we had in between meetings to make sure that the people involved were informed of the mules’ valuable assets to their organization. It was an exhausting three days, but on January 18, 2004, at the General Board Meeting, the rule was approved with consideration. In the U.S.E.F. Rulebook, it now reads:
GR125 Horse.
1. The term “horse” as used in these rules denotes either a horse or a pony. 2. In all levels of all Federation recognized Driving and Endurance Competitions and in the
 Case of any other federation Rule as it relates to the Driving or Endurance disciplines as The context permits it, the term “horse” shall also include a mule. See DC111.4, EN104.2.1 a. Mules are also eligible to compete in dressage classes with the exception of (1) USET Championships, USET qualifying and selection trails, and observation classes. (2) any other classes designated as qualifying or selection classes for international or international high performance competition, and (3) championships where such participation is prohibited in the championship selection procedures. See DR119.1 BOD 1/18/04. Effective 4/1/04
There were concerns from the Safety Committee, but they approved with the stipulation that they would be keeping an eye on the competitions to make sure that the mules would not pose serious safety concerns.
 “The ‘Vision’ of the United States Equestrian Federation is to provide leadership for equestrian sport in the United States of America, promoting the pursuit of excellence from the grass roots to the Olympic Games, based on a foundation of fair, safe competition and the welfare of it’s horses, and embracing the vision to be the best national equestrian federation in the world.” In keeping with their vision, they have seen the mules as a valuable asset to the Federation and it is both a privilege and an honor to become part of this prestigious organization.
As viable members of this organization, it is now our responsibility to go forward and participate in these events in a considerate and productive manner. Any problems that arise at competitions should be dealt with fairly and through the proper channels. Understand that we will be dealing with people at all levels of Horsemanship, with varying levels of comprehension and ability. The principles of good sportsmanship are paramount as we set the example to beginners and the young riders of the future. No unsportsmanlike conduct will be tolerated and could result in the revocation of this privilege.
 More and more mules are getting into dressage after Carol Sweet’s, Leah Patton’s and my work over eighteen years of petitioning for the acceptance of mules into the United States Equestrian Federation! Shown here are Meredith Hodges and Lucky Three Sundowner, Meredith and Lucky Three Mae Bea C.T., Laura Hermanson and Heart B Dyna, Audrey Goldsmith and Heart B Porter Creek, Sammi Majors and Buckeye and Vicky Busch and Slate. I am so happy to see so many young riders taking advantage poof all our hard work and they are doing so well! We hope even more dressage riders will take advantage of this wonderful opportunity with their mules!
So, fellow “Mule Enthusiasts,” go forward and bask in the sunshine of opportunity that has been so graciously given to us all! Take the opportunities provided to improve your skills and marvel at your own progress! Take advantage of the new comrades you will meet along the way that share your interests, so we can all take our equines into the future with pride and dignity together!
To learn more about Meredith Hodges and her comprehensive all-breed equine training program, visit LuckyThreeRanch.com, MEREDITH HODGES PUBLIC FIGURE Facebook page, or call 1-800-816-7566. Check out her children’s website at JasperTheMule.com. Also, find Meredith on Pinterest, Instagram, MeWe, YouTube and Twitter.
Covered in TRAINING MULES & DONKEY: A LOGICAL APPROACH TO TRAINING, TRAINING WITHOUT RESISTANCE and EQUUS REVISITED at www.luckythreeranchstore.com
© 2004, 2016, 2024 Lucky Three Ranch, Inc. All Rights Reserved.
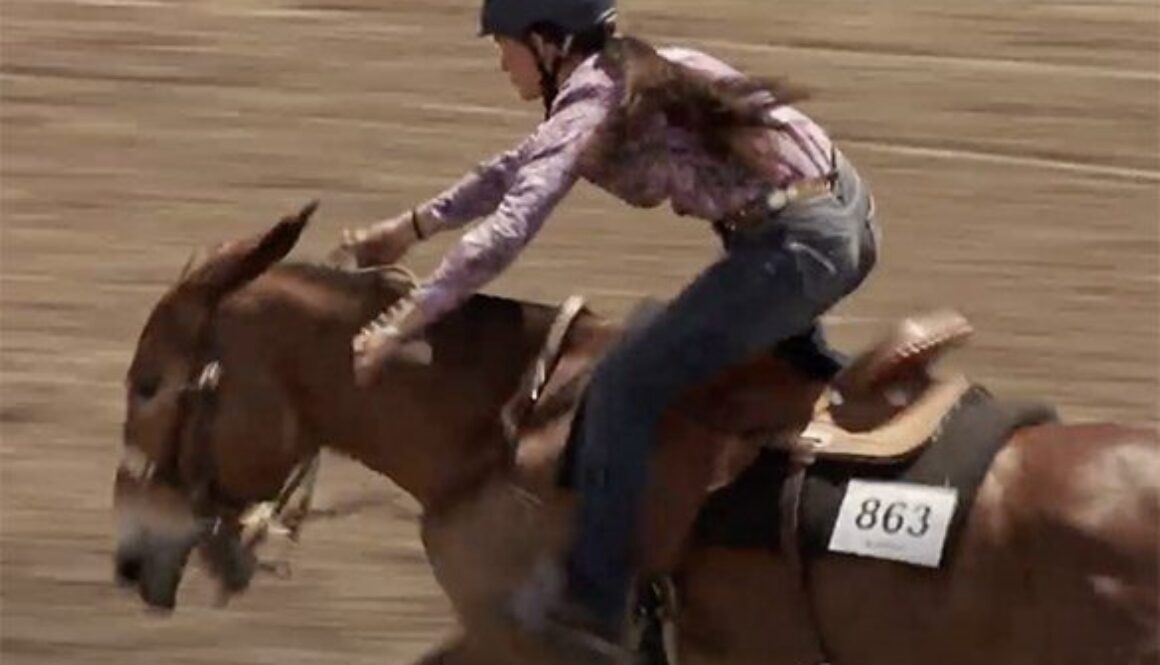

MULE CROSSING: Looking Objectively at Your Equine
By Meredith Hodges
 Before most of us learn anything about horses, mules and donkeys, we tend to initially perceive them as large, strong and durable animals that can safely carry us anywhere we want to go and can participate in any number of equine events. This is essentially true. However, there can be a number of pitfalls along the way if you do not educate yourself and practice good maintenance, feeding and training practices.
Equines, like people, are comprised of living tissue, bones, muscles and tendons that can often experience improper growth and development, which can compromise their performance. This is why it is important to feed your equine’s living tissue, bones, muscles and tendons a healthy diet and exercise him in a way that builds these elements using natural and non-stressful techniques that will help your equine to strengthen properly in the right frame, or posture.
It is also important to make sure the tack you use fits well and is adjusted properly. An equine that is experiencing soreness from ill-fitting tack will be distracted from his best performance. Improve your own skills by taking care of your own body as you observe and condition your equine. The person who eats healthy food, exercises in good posture and improves his or her own general conditioning, coordination and Horsemanship skills will not be out of balance and will not compromise the equine’s ability to perform.
 Let’s take this one step at a time. First, make sure that your equine is stabled in a place where he has adequate shelter from the elements, plenty of room to exercise himself when you are not there, clean water and a good feeding schedule. When an equine is nervous or high strung, it can usually be attributed to this very elemental beginning. Many show horses are kept in 12-foot by 12-foot stalls with limited turnout during the day, usually only an hour or two. Think about this for a minute. The equine is a grazing animal and his natural health is enhanced by what he eats and the fact that he is moving with his head down most of every day of his life. The only time his head is truly raised is when he is on alert.
The equine that is stabled in a stall isn’t urged to have his head down for any more time than it takes to eat up the loose hay after his feedings. His body is forced to remain in a very small range of movement and he can become stiff and sore when asked to do things that require more flexibility in his work. When fed high protein feeds in this situation, he is not able to expend the energy to burn this feed, and it can manifest itself in nervous and anxious behavior. Therefore, it is critical to your equine’s health that he is not only fed the right kinds of feeds and supplements, but that he is able to expend this energy in a healthy way for his body to grow and develop properly.
 Muscles in the equine’s body, like our own, are structured in distinctive layers and are supported by ligaments and tendons. These muscles need to be strengthened in a specific order for optimum performance. Whether he is a foal or an older animal, his athletic conditioning needs this taken into consideration. The first exercises should be passive and easy to facilitate the strengthening of the core muscles closest to the bone. This is done with exercises on the lead line. It is not as important that he learns to negotiate obstacles on the lead line as it is how he negotiates the obstacles on the lead line.
On the approach to an obstacle, your equine needs to be relaxed and comfortable. It is your job as his trainer to show him how to do this. When you lead in good posture, walk straight lines and make smooth, gradual arcs and turns, you will encourage your equine to do the same. Using short pauses between changes of pace or direction will help your equine to stay calm and receptive to training.
 For instance, when approaching a bridge, walk with your equine’s head at your shoulder as if you were in a showmanship class. Stop at the foot of the bridge and encourage your equine to stretch his nose down and investigate the bridge in order to allay any fears he might have. When your animal has indicated he is not afraid by once again raising his head level with his withers, you can proceed. Face the bridge straight on, looking straight ahead and, while keeping his head at your shoulder, take the first step straight forward and onto the bridge, making sure he follows and places one front foot on the bridge itself. Next, ask him to place the other front foot onto the bridge, stop, square up his four feet (as in Showmanship) and reward. Continue forward in a straight line. Once all four of his feet are on the bridge, stop, square up and give him a reward. Then continue across the bridge maintaining your own good posture, hesitate at the last step, and then step off carefully, in good balance and with a coordinated effort. Ask him to place his two front feet on the ground while leaving the back feet on the bridge, stop, square up and reward. Your equine will learn to follow your lead and execute the task in the same balanced and coordinated manner and will be able to halt on command at any location.
In the beginning, your equine may be fearful and nervous about going over the bridge or any other obstacle. It is enough at this time that he gets over his fear and just crosses it, whether it is done with finesse or not. Once he is over the fear of crossing the obstacle, you can begin working on his ability to cross with finesse, balance and coordination. The longer you work on perfecting the negotiation of an obstacle in a balanced and coordinated way, the stronger the participating muscle groups will become and the more comfortable and automatic the movement will become until it develops into a habit.
The part you play in all of this is very important. You will discover that if you are not in balance and coordinated in the way you move with your equine, the less balanced and coordinated he will be. If you don’t walk straight, then neither will he. If you are not confident in your approach, then he won’t be either. Even something as simple as the tack you use will play a big part in your equine’s performance. If the halter is too small or too large, it can cause irregular pressure on your animal, preventing him from complying with your wishes. How you move your equine’s head with the halter and lead line can affect his performance. Pay attention to how hard you need to pull to get even the smallest response and be ready to release pressure immediately upon compliance. But again, when releasing pressure, just give him enough slack to release the pressure and not so much that you have a lot to take back later. This will help him keep his attention on you and the task at hand. Keep this minimal degree of pressure-and-release throughout his work. Even if he backs away from an obstacle, just give little tugs followed by a release to allow him to back and then encourage him to re-approach the obstacle by coming from another angle or by coaxing him with the promise of a reward upon his attempt. Another approach is to go to the end of the lead rope, keep the rope taut and invite him to come forward by revealing the oats reward he will get when he complies. Take up the slack as he approaches. Avoid resistance at all costs!
 Halters that are too loose allow too much lag time between the time you ask by giving a tug and the time the equine receives the message. This usually results in an over-reaction from your equine and then an over-reaction from you as you try to correct the mistake. A halter that is too tight can be a distraction because it can create sore spots—the equivalent to a headache and no one likes to perform with a headache! The lead line typically should be a length that you can easily handle and that will give your equine some room to move away, but that can be reorganized easily, usually about six to eight feet long.
No matter how careful you may be, there will always be times when your equine will experience some kind of soreness from playing too hard in the pasture or from kicking in a stall, to any number of daily hazards. How he is negotiating his obstacles and how he performs certain movements will give you clues to how he is feeling. Learn to watch every step your animal takes, how his feet are placed, how his body is moving and the look on his face as he performs a given task.
 This is when it can be beneficial to know the basics of equine massage therapy. There is a lot that you, as your equine’s trainer, can do without a professional equine masseuse, but you should always consult with a professional for lessons on how you can do your part. Make sure that the equine masseuse you decide to use is a person who knows equines and has at least 500 hours experience with equine massage therapy. Once you learn some massage techniques, you can often alleviate minor soreness exhibited by your equine. When your equine senses that your goal is to make him comfortable as well as successful in his work, he will be much more willing and able to comply.
The specifics of training techniques covered in this article can be found in the Equus Revisited manual and DVD.
To learn more about Meredith Hodges and her comprehensive all-breed equine training program, visit LuckyThreeRanch.com, MEREDITH HODGES PUBLIC FIGURE Facebook page, or call 1-800-816-7566. Check out her children’s website at JasperTheMule.com. Also, find Meredith on Pinterest, Instagram, MeWe, YouTube and Twitter.
Covered in TRAINING MULES & DONKEY: A LOGICAL APPROACH TO TRAINING, TRAINING WITHOUT RESISTANCE and EQUUS REVISITED at www.luckythreeranchstore.com.
© 2004, 2011, 2016, 2017, 2024 Lucky Three Ranch, Inc. All Rights Reserved.


MULE CROSSING: Mule Conformation
By Meredith Hodges
As in any breeding program, when breeding jacks to mares to obtain mules, there are many variables to be taken into consideration that are basic and pertain to both the jack and the mare. However, there are some variables that are particular to each.
 The ideal mule should have a head that is slightly longer than that of a horse, but proportionate to the size of the mule’s body. The features should be prominent and give an overall pleasant appearance. The ears should have length and be nicely shaped, and the eyes should be large, soft and kind, reflecting the mule’s health and intelligence. The forehead should be broad, tapering to a small and delicate muzzle, with a shallow mouth and well-aligned teeth, and the nostrils should be wide to allow for adequate respiration while working. Both the mare and the jack are responsible for the shaping of these characteristics, but the jack has primary responsibility where the length of the ear and the mass of bone are concerned. A jack with a longer ear will, more often than not, throw a longer ear to the mule, while the shape of the ear is determined primarily by the mare. The attractive or unattractive head of the jack can emerge in the resulting mule, so be sure to carefully consider the head on the jack to be used for breeding to produce an attractive head on your mule offspring. Standard-sized jacks and Large Standard jacks most often have a more refined head, while the head of a Mammoth jack may be less refined and possess
  thicker bone, particularly around the eyes and jaw line. In the case of saddle mule production, massive bone on an otherwise attractive head can be very unattractive, so using the smaller jacks would be better for a more refined look in your saddle mule (which is also true for the rest of the mule’s body).
The neck of the mule should have good length and come well back over the shoulders to the withers, with neither an excessive arch nor a u-shape. The withers should be apparent, but will not be as prominent as that of a horse. Many jacks have a characteristically short, thick neck. If it is passed on to the mule, this shortened and thick neck may inhibit the suppleness and agility of the resulting mule. Since donkeys tend to be rather flat over the withers, a mare with good wither development is also recommended to offset the tendency for this trait in the mule. It’s hard to keep a saddle on a mule with little or no withers, despite the use of cruppers and breeching.


The back of the mule should be slightly shorter than that of a horse and nearly straight with only a gentle slope over the top line and with strength over the loins. The croup should be nicely rounded with smooth muscling (indicative of strength and staying power), with the tail set-in neither too high nor too low. Again, the jack/mare combination must be considered in order to obtain a desirable saddle mule. Both the mare and the jack should have good body length to avoid a “boxy” appearance in the mule.
 The shoulders of the mule should be at a nearly 45-degree angle, with a broad collar surface. Most mares will have this angle, but donkeys have a tendency toward short, steep shoulders, so, to insure that the mule has good shoulders and hips, consider a jack with good length and a lower angle through the shoulders and hips.
The curved ribs of the mule should be well sprung and separated around the torso, and extended (not flat and narrow), and should range close to the hipbone. The flank should be well set down from the croup and just above the stifle with a nearly flat appearance (not as indented as that of a horse). The hip, stifle, and gaskin should all have a smooth-muscled look, not bulging, as seen in many horses. The more bulky-muscled mare is generally crossed with the smooth-muscled jack to create a more bulky, yet smooth musculature in the mule than that of the jack. The contribution of bulk muscling from the mare provides more stability to the inherent smooth muscles from the jack and will enhance athletic performance in your mule athlete.
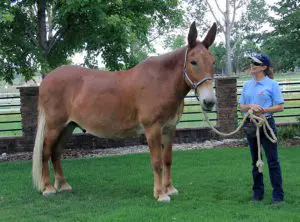 The chest of the mule should be deep and prominent, broad and well developed (it should resemble a turkey’s breast), with little or no line of separation (as is seen in a horse’s chest). Since jacks are generally narrower through the chest than are mares, the mare chosen for breeding should exhibit much width and depth through the chest to compensate for the lack of it in the jack.
The legs of the mule (as with horses) should be nearly straight, broad and clean, with adequate bone density for the size of the mule. The legs should be well braced at all four quarters and properly balanced underneath the mule’s body. The knee should be broad, deep and firmly set and the hock should be broad and muscular. Being slightly “cow hocked” in the rear quarters (with the toes pointed slightly outward) is common in mules and is actually preferred for performance (though not when showing at halter), but pay special attention to the straightness of legs in both the jack and the mare because being extremely “cow hocked” is not acceptable and should be minimized through careful breeding practices.
 If a stockier mule is desired (as in the case of breeding for pack or draft mules), a stockier mare bred to a Mammoth jack will produce the desired thickness of bone in the legs of the mule. If a more refined Thoroughbred appearance is desired, the mare should be bred to a Standard or Large Standard jack in order to reduce the mass of the bone in the legs of the mule and retain refinement throughout the body. This does not affect the height of the mule, as the mare is primarily responsible for the mule’s height, while the jack is primarily responsible for the mule’s bone thickness. The forearm and stifle in the mule should be well developed and thickly covered with smooth muscle that tapers to the knee and hock in regular, well-defined lines. Again, these muscles should be thick and smooth, but not bulging, as in horses. The mare will compensate for the limited bulk muscling in the donkey jack, and the jack will contribute and maintain the smoothness of that additional bulk muscle in the mule.
The old saying, “No Foot, no mule” is literally true, as it is in any nomadic animal. If the hooves are not trimmed and balanced properly, it will offset the balance of the equine’s entire body and can compromise longevity in the animal, because his entire internal structure will be compromised. The hooves of the mule will be smaller and more upright than that of a horse of equal size, and should be well sprung and supported, not contracted. They should have a smooth appearance and look sleek and oily. No ribbing should be apparent and the frog should be well extended, healthy and make adequate contact with the ground for good circulation to the hooves. When being trimmed, the mule should be left with more heel than the horse to maintain the more upright position that complements the shoulders and hips. The shape and condition of the hooves of the jack and the mare are both equally important when considering foot development in the mule.
 The coat and hair of the mule should be soft and shiny, covering pliable skin. The coat should be soft to the touch, denoting good skin health. Length and thickness of the coat are contributed by both jack and mare. Since donkeys have a typically thick coat of hair, a mare with a thinner coat will balance this thick hair coat in the mule, making him look sleeker and more horse-like than his donkey sire.
Although the jack plays a part in the mule’s way of going, the mare plays a larger part in the animation of the mule’s gaits. Mules out of gaited mares will generally exhibit the mare’s way of going and will also be gaited.
Probably the most important trait of the mule is his disposition. This characteristic comes primarily from the mare. Much of the mule’s attitude is formed during his first days with his dam, at which time he will observe and then assume her behavior patterns. Although much of a mule’s attitude development is environmental, there is still an inherent general disposition, so avoid breeding to mares with a negative or sour disposition, as those traits will most likely be passed on to her mule offspring.
Keeping all of these considerations and guidelines in mind when breeding for mules can definitely increase your chances of producing an attractive, usable, and enjoyable equine companion.
To learn more about Meredith Hodges and her comprehensive all-breed equine training program, visit LuckyThreeRanch.com, MEREDITH HODGES PUBLIC FIGURE Facebook page, or call 1-800-816-7566. Check out her children’s website at JasperTheMule.com. Also, find Meredith on Pinterest, Instagram, MeWe, YouTube and Twitter.
Covered in TRAINING MULES & DONKEY: A LOGICAL APPROACH TO TRAINING, TRAINING WITHOUT RESISTANCE and EQUUS REVISITED at www.luckythreeranchstore.com.
© 1986, 2016, 2018, 2024 Lucky Three Ranch, Inc. All Rights Reserved.

MULE CROSSING: Handling Your Mule’s Ears
By Meredith Hodges
Just how sensitive is a mule about having his ears touched? If a mule is handled often and properly, he should be no more sensitive about his ears than he is about any other part of his body. However, if he is rarely handled, mishandled or handled roughly, he can become quite sensitive about any part of his body and in particular, his ears. Bearing this in mind, take the time to desensitize your mule to touch and handling by paying attention to how he likes to be touched in any given area, and then by being polite about handling those more sensitive areas. This is an important part of any training program, both for general management and for safety purposes. This is the heart of imprinting.
The mule that has an aversion to having his ears handled poses a problem with management convenience, but more than that, he can be a safety hazard in many situations. Here are some examples of lack of desensitization causing inconvenience and possibly, a dangerous situation. Inconvenient: Your mule does not want his ears touched, so you have to disassemble his bridle each time you put it on him. Dangerous: Should you accidentally touch his ears while putting the bridle on him, he could possibly thrash his head around and knock you silly! Inconvenient: If you get into a difficult spot on a trail where you have to dismount and move quickly, you may be unable to take the reins over your mule’s head in order to safely lead him. Dangerous: While you try to get the reins over his head without touching his ears, your mule could inadvertently knock you down or lose his balance and fall down while trying to avoid you. The moral is this: If your mule is to be a completely safe riding animal, he must be appropriately desensitized all over his head and body—including his ears—and trust that you will not harm him.
 Desensitization should be humane and considerate—never abusive. When we say we want to desensitize an animal, it simply means that we want him to become accustomed to touch and handling all over his body, particularly in areas such as his head, legs and rear quarters, where he is apt to be the most sensitive. An animal that has not been politely desensitized will tend to react more violently to touch. When properly teaching your mule to become desensitized, your touch should be presented in a pleasurable way, so that your mule not only learns to tolerate it, but to actually enjoy it and look forward to it. An old-time method such as “sacking out” is a somewhat crude technique that is used to desensitize an animal by tying the mule in a corner where he cannot flee, and then flinging a tarp or large canvas all over his body, including the head. Often times, it creates more problems than it can solve because it is rarely done politely. A mule that has been “sacked” about the head can actually become more sensitive because this inconsiderate approach teaches him that humans cannot be trusted. He perceives that they will fling things over his head, blinding him and causing him anxiety for no apparent reason. The mule will stand still only because he cannot move, but if he is given the opportunity to flee or fight back, he will more than likely do so. Thus, the old “obstinate mule” myths are actually most often the result of some fault of the trainer, and not the mule. Sacking out more politely will eliminate these kinds of potential bad habits.
Desensitizing a mule that is sensitive about his ears is a long-term process. First, you must maintain a firm, quiet and tolerant attitude. Nothing your mule does should make you angry enough to lose your temper or your patience. Make sure your mule is tacked with a stout, non-breakable halter and rope. While stroking his nose in a polite and soothing manner, ask your mule to come forward, one step at a time, to a stout hitch rail. If he won’t come easily, just snub your lead on the hitch rail so he cannot go backwards, and keep coaxing him forward until he comes. Take up the slack with each step and then hold until he takes another step forward toward the hitch rail. Wait as long as it takes for him to gain confidence enough to come forward. Do not get into a pulling or pushing match with him—you will only create resistance in him and perpetuate avoidance behaviors—and he will win because he is stronger and he weighs more!
 When his nose is finally up to the rail, run your lead around the post and come through the noseband on his halter and around the post again. Then tie him off snugly, so that his nose is tied as closely as possible to the hitch rail, making sure there is no slack. Now begin softly stroking your mule’s nose, using gentle yet firm strokes. Next, work your way up his forehead, and finally toward his ears. NOTE: Remember to use soft, gentle yet firm strokes, going with the grain of the hair and never against it. Do not “pat” your mule—it’s too threatening.
Let the tips of your fingers find the base of your mule’s ear (away from the open side) and stroke upward, toward the tip. At this point, he will probably thrash his head back and forth to avoid your touch—just remain slow, deliberate, reassuring and gentle about your approach. When he has allowed you to stroke the ear, even if for only a couple of seconds, leave your hand resting on the ear and use your free hand to feed him an oats reward. Don’t take your hand away from the ear until he is chewing calmly and no longer worried about your hand on his ear. Do this with each ear no more than one or two times each session and then go to his shoulder and work your hand in a massaging fashion over his neck, toward his ears. While your thumb cradles an ear, let your fingers move over his poll. With your thumb, gently stroke upward on the back of his ear, while leaving the rest of your hand over his poll. If he jerks away, just keep going back to the same position of thumb cradling the ear and fingers moving over the poll.
 When he will tolerate this, you can then cradle the ear in your fingers and with your thumb, begin to gently rub upward on the inside of the edge of his ear. Do not go too deep into the ear at first. After he is calm with this, you can begin rubbing downward into the ear with your fingers, while cradling the ear in your opposite hand, being very careful not to go too deep. Watch his eyes and allow him to “tell” you how deep to go. If it feels good, his eyebrows will raise and flicker. If he doesn’t like it, he will simply jerk his head away and that is your cue to lighten up. Most mules love to have the insides of their ears rubbed, so find the areas inside your mule’s ear that actually give him pleasure. Each individual mule will be different.
 In the next step, you will be in the same position, but you will close your hand around your mule’s ear and hold it with just enough pressure that he cannot jerk your hand loose. Do not hold too tight, grab or pull the ear—just maintain a quiet, gentle hold on the ear and go with his movement. If he pulls away, just slightly tighten your grip on the ear until he stops pulling and then lighten your grip again. Tighten only when he pulls away, and then immediately release when he stops resisting—tighten and loosen your grip as needed, and be sure to follow his movement. He will soon learn that if he doesn’t fight it, there is no discomfort. Never tightly grip his ear and do not tighten your grip any more than you need to in order to hold onto the ear—you never want to induce pain. Once your mule is tolerant of you holding his ear in this fashion, you can introduce the clippers, should you desire, using the same guidelines of tightening gently yet firmly when he pulls and releasing when he submits. However, introduce the clippers only after he has completely accepted you holding his ears.

Introduce the bridle by holding your right hand flat on the poll between your mule’s ears, and by using your left hand to raise the crown piece over his nose and up to his forehead. Slide your right hand down his forehead a little to meet your left hand. When your hands meet, transfer the crown piece into your right hand, insert the bit with your left hand, and then raise the crown piece up to the base of his ears. Slowly transfer the crown strap back to your left hand. Gently cup the fingers of your right hand around the base of his right ear. Now bend the ear forward and under the crown piece and slide it over your hand (and the ear) into its position behind the ear. While keeping your palm firmly on your mule’s poll, slowly move to the left ear and repeat the same movements.
The bridle should now be in place and you can reward your mule. Do not put on and remove the bridle any more than once per session. Your mule needs to clearly know that this is not just some annoying past time you have discovered, but an act of necessity. He will soon learn that if he cooperates, it won’t take too long. Once the bridle is on, get right to the business at hand and forget the ears for a while.
 When you return with the difficult mule, tie him as before, stand directly in front of him (with the hitch rail between you) and gently remove the bridle with both hands lifting and sliding the crown piece over both of his ears simultaneously, so there is little pressure on his ears as it slides over them. If he still holds the bit in his mouth, hesitate for a minute when the bridle is off his ears and allow HIM to drop the bit. Removing the bridle this way will help to avoid chafing the ears and will avoid the bit hitting his teeth before you remove the bridle the rest of the way. Always removing the bridle in this fashion will encourage him to drop his head and will prevent bad habits such as pulling away or flinging his head.
 When your mule gets used to having his ears handled and being bridled while snubbed and haltered, you can then begin dropping the halter and loosely tying him while he is being bridled. Sometimes it takes a couple of weeks before you can drop the halter—this will vary depending on the individual mule, so just be patient. Your quiet, gentle perseverance will eventually win out and your mule’s ears will be desensitized and quite manageable. After you have mastered his outer ear and inner ear, you may find that your mule actually enjoys having his inner ear stroked or scratched, and bridling becomes easy. Integrating washing his face and cleaning his nostrils and ears during the grooming process should further help him to accept having his ears handled. Handling your mule’s ears can actually become a truly pleasurable experience for your Longears.
To learn more about Meredith Hodges and her comprehensive all-breed equine training program, visit LuckyThreeRanch.com, MEREDITH HODGES PUBLIC FIGURE Facebook page, or call 1-800-816-7566. Check out her children’s website at JasperTheMule.com. Also, find Meredith on Pinterest, Instagram, MeWe, YouTube and Twitter.
Covered in TRAINING MULES & DONKEY: A LOGICAL APPROACH TO TRAINING, TRAINING WITHOUT RESISTANCE, EQUUS REVISITED and A GUIDE TO RAISING & SHOWING MULES at www.luckythreeranchstore.com.
© 1992, 2003, 2012, 2016, 2024 Lucky Three Ranch, Inc. All Rights Reserved.


CHASITY’S CHALLENGES: After the Winter Break: 3-29-21
Due to the colder and more inclement weather here in Colorado, Chasity has been off her exercise program for about three months. It was time to get back to work! No matter how long it has been between lessons, when you have a specific routine, the equines seem to comply easily because they know what to expect, beginning with going to their regular work station to be groomed and tacked up. In order to keep upper respiratory disease at bay, eye infections and ear problems to a minimum, it is advisable to clean these areas with a damp towel regularly. Be polite and wipe the towel in the direction that the hair lays and clean the nostrils with a circular motion. This repetition will prevent them from getting head shy.

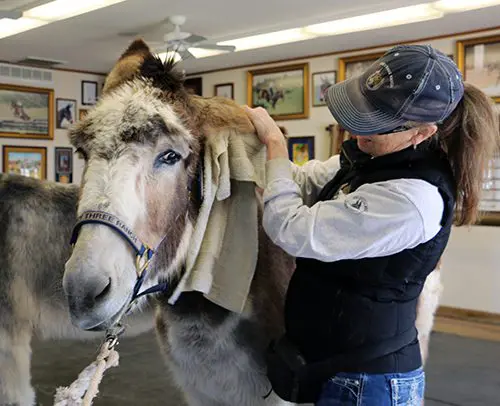
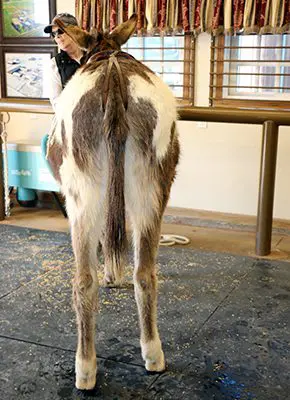
Chasity still thinks the vacuum cleaner is questionable, but she tolerates it now. Not only does it pull the dirt from the skin for healthy hair growth, it also promotes circulation better than massage and does a better job at softening her “fat roll.” I used massage in the beginning when Chasity first came here with her enlarged crest (photo below on the right).


It had become somewhat enlarged again about three weeks ago, but after two sessions with the vacuum cleaner, it has decreased substantially already.


Another valuable therapeutic grooming tool is this simple human, multi-bristled hairbrush. It is not only VERY helpful during shedding, but also works to further stimulate the hair coat and promote better circulation, as well as efficiently removing dirt from the skin. I have found it to be more helpful for healthy hair than any equine grooming tools. The long, thick hair coats of winter and spring stay soft and healthy when I use this hair brush over the entire body. I only clip bridle paths when the weather gets warmer and I leave body clipping for showing. The only other grooming tools I use are a shedding blade to remove mud and a dandy brush to finish the coat. They can have balding spots from rubbing during the shedding season and may even get sores, but I just treat those with Neosporin and they recede quickly. A healthy hair coat will insulate your equine from the heat and cold and protect them from insects better than any artificial products or practices.


Equines do like feeling clean all over and really do appreciate your efforts at keeping them this way…although, they don’t necessarily show it when the first thing they do after a good grooming is to go for a good roll in the dirt!!! Still, they do seem to realize that you care and will show their appreciation in a multitude of other ways…like being happy to leave their companions to go with YOU and stand quietly during grooming, tacking and hoof care!
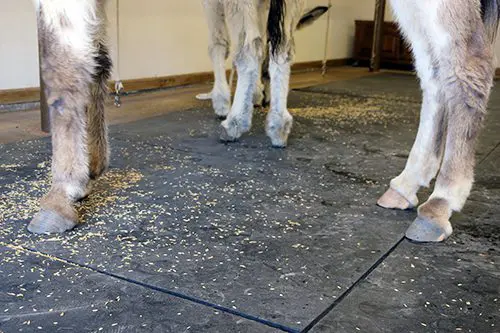
Feeding is a very important consideration for healthy hooves as are regular trims when needed, usually every 8-10 weeks. For donkeys, it can even be longer between trims when they wear their hooves in good balance. Chasity had hoof issues when she first arrived, but is now sporting healthy balanced feet! Remember that Longears will be more upright and have more heel than horses and ponies…and donkeys will typically be more upright and have more heel than mules.

Fitting saddles can be tricky. Make sure the saddle makes even contact behind the withers and over the back with relief from pressure over the spine. Many saddles sit too high and cause centralized and uneven pressure across the back. Pressure points are easily identified after a workout. The back will be sweaty, but the pressure points will be dry.


Place the saddle in the center of the back, behind the shoulder blade, the girth falling 4” behind the forearm where the skin is thicker and body begins to swell. I have successfully used cruppers with the buckles set away from the tail to hold it in place. The crupper is adjusted with just enough tension so the tail will still be able to rest comfortably.

I am using the neck sweat on Chasity for lunging to promote a decrease in the crest. When bridling, I press my thumb on the bars of her mouth to get it open and protect her ears with my hands as I pull the crown piece to the poll. This promotes trust and keeps any equine from getting ear shy.


[one_third_last]

[/one_third_last]
On an English saddle there is a small d-ring that I use to tie up the reins.


Then it is off to the Round Pen. I always stay in sync with their front legs when we walk and execute the gates EXACTLY the same way EVERY TIME! All movements are predictable, never abrupt. They comply due to trust.


I adjust Chasity’s postural restraint, the “Elbow Pull,” and then remind her to give to the tension to get the release with a reward of oats for flexing at the poll. Wrangler, “Mr. Curiosity” watches intently…they do learn from each other!


Chasity’s overall posture has changed dramatically as has her movement. She uses her body much more efficiently.


Chasity has strong hind quarter engagement with an uphill balance to promote enthusiasm, endurance and stamina.


A reward is always in order for a job well done. Her forward stretch has improved greatly in one short year.


The lateral stretches are also much improved. After five rotations of walk, then trot, then reverse and repeat the other direction, 3 sets with a 3 minute break in between, then stop. Done once a week is adequate to maintain conditioning.


I hold the halter crown strap in my hand and protect her ears as I remove Chasity’s bridle. Then I slip the bridle onto my left arm, bring the noseband over her nose with my left hand and fasten the halter to the strap in my right hand. This ensures that I can keep hold of her should she try to pull away. Last, I fasten the tie strap from the hitch rail.


[one_third_last]

[/one_third_last]
I always unfasten the girth on the left, then tie up the girth on the right, slide the saddle back, loosen the crupper from the tail and take off the saddle on the right side. This gets the equine used to being handled from BOTH sides. I always rinse the bits and wipe any dirt from the bridles and saddles before putting them away…saves work in the long run!


I remove Chasity’s neck sweat to see how much sweat is underneath…encouraging! We are definitely making progress!


To end, we do a few more stretches in each direction. These are improving immensely, too!


Then it’s walking IN SYNC back to the barn for turnout in the larger dry lot. They enter the stall, ladies first, and then they both turn around to allow me to remove their halters and to enjoy their last reward. I keep all my donkeys off grass most of the time. I find that they stay healthier and do not run the risk of getting obese that way. They do have large dry lots for turnout on pea gravel every day and a couple of acres of dirt pen for really stretching their legs every other day. They do get some grass when we go for walks, but do not seem to miss it most of the time. They are too busy playing and resting with each other…and looking forward to our next lesson TOGETHER!


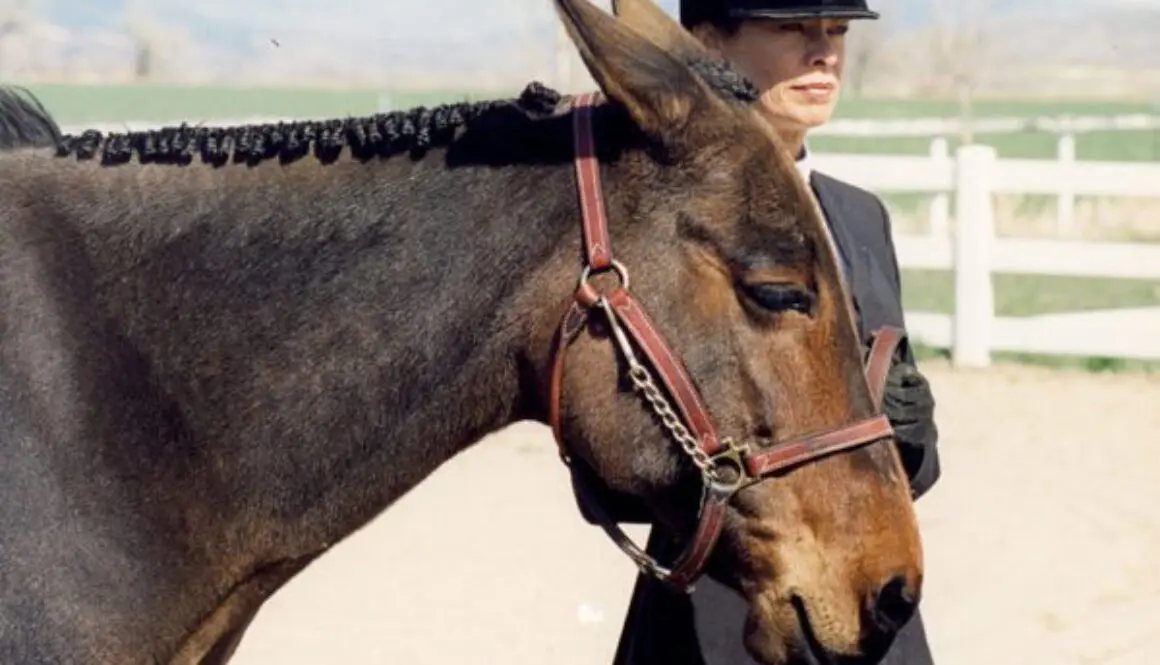
LTR Training Tip #81: Body Clipping for Show
Body clipping in a natural order with respect for your equine’s patience will help the process go much more easily.