

lucky three ranch

MULE CROSSING: Correct Saddle Placement & Related Issues
 By Meredith Hodges
My equines taught me that in order to make an educated decision about which tack and equipment to use, one needs to take into account the anatomy of the equine and the effect it will have on his body movement during different activities. Good conformation is important in allowing the equine to perform to the best of his ability, but so is developing core strength elements (muscles, ligaments, tendons, soft tissue and cartilage) such that the skeleton is ideally symmetrically supported. The equine’s body can then move freely and using his joints properly in good equine posture. This will add longevity to his use life and will minimize arthritis and other problems during his life. Lower vet bills are always a bonus!
 Feeding: When developing the equine’s body, it is important to know what feeds are the healthiest for him. There are lots of different ways to feed your equines today, but I have found a regimen that works best. I did this through constant and continual research using a field study for more than 50 years with 32 equines of varying breeds, types and sizes.
- Most feeds are tested in laboratories.
- Dehydrated feeds take fluids from the digestive tract and can cause choking (researched with my vet). You cannot add enough water to replace the fluids that are naturally in the digestive tract.
- The oats, Sho Glo, Mazola corn oil and grass hay produce ideal body shape and conditioning, even with minimal exercise.
- Sho Glo gives the body the nutrients it needs for daily maintenance.
- Supplements should not be fed without first getting a base line of what the animal is lacking.
- Salt and other minerals should be free fed in a trace mineral salt block. White salt alone, or minerals measured and put in the feed, can often be the wrong amounts.
- The equine will use the trace mineral salt block when and how often they need to. It is their “Natural instinct.”
- Mazola corn oil (no other) keeps the hair coat healthy, the feet ideally lubricated and hard, and maintains the ideal conditioning of the digestive tract regularity.
- We feed a Brome/Orchard Grass mix that we harvest ourselves. We feed the hay three times a day and the oats mix once a day in the evenings. Never feed broad leaf hay like Alfalfa, Clover or Fescue Grass Hay.
- Fescue Grass Hay has been proven to cause spontaneous abortions. Since it has this toxic effect, it would probably not be good for any equine, pregnant or not.
- Our equines are kept in dry lots, or stalls and runs. We limit their turnout to five hours a day to prevent obesity and other problems like allergies, prolonged exposure to flies and other insects that live in the grassy pastures.
- Use no types of rewards or “treats” besides crimped oats (or any other kind that is broken open). They cannot digest whole oats, and other “treats” can cause gas or other irregularities in the digestive tract that can lead to colic, twists, founder and even allergies.
- Our equines are wormed with Ivermectin every other month with the cycle broken in November with Strongid. This regimen prevents the cycle of worms (No fecal tests are needed because the larvae never have a chance to mature and show up in the manure).
- This regular and frequent use of Ivermectin helps to repel flies along with a weekly spray of Farnam Tri-Tech 14 (sometimes twice a week if the flies are inordinately thick). Ivermectin is a totally safe drug and their bodies do not build up a resistance to it.
 Most equines on other kinds of feeding programs develop bodies with a protruding spine and a “hay belly” hanging from it. The shape is quite different from a balanced body with core strength. They have an indentation along both sides of the spine instead of having a spine that “melds” into the torso with uniform conformity. My feeding program produces an ideal body shape with ALL my equines with minimal exercise. The SHAPE of the animal’s body is important for the correct fit of the tack and equipment.
Tack and equipment should fit YOU and YOUR EQUINE like a glove. This will minimize resistive movement that can interfere with your equine’s posture and ability to travel smoothly. When tack and equipment is stabilized, it is easier for you to stabilize your balance seat and improve your riding ability. There are so many saddles and tack to choose from these days that it can be quite daunting. Choices can be difficult for both riding and driving.
The tack and equipment we use has an effect on the equine’s movement in spite of his shape. In order to obtain freedom of movement, the elements of the equine’s anatomy must be considered so he is allowed to move freely through every joint of his body.
Mule Bars are not necessary if you have a well-made saddle and have a professional saddle maker shave the saddle tree flat at the gullet. My 1972 Circle Y Stock, Equitation and Longhorn saddles have worked on all my mules for more than fifty years with that minor adjustment.


If you want to be able to balance your own body in the saddle, it not only needs to fit your equine, but it needs to fit YOUR body as well. The saddle needs to sit LEVEL across his back so you can sit up straight in a balanced position with the only deep contour directly below your seat bones. The rest of your body should be able to move freely through your hip joints You should be able to comfortably sit up straight with your legs resting relaxed below your core that is located behind your belly button. Your relaxed legs should gently “hug” your equine on both sides with your whole body perpendicular to the ground when halted. This way, cues from your legs will not be abrupt and come out of nowhere to startle the equine. Saddles that restrict your position are not really a help to balance your seat and make cues effective.
 The stirrups need to hang straight down over the center of balance on the equine, in the MIDDLE of his torso. Stirrups with Tapaderos can be safer that those without, but if the toes on your boots are too pointed and too long, they can actually hinder you from keeping your feet securely in the stirrups. You should never wear tennis shoes, or shoes with no heels, when riding. Ideally, your weight should be on the ball of your foot with the heel of your boot touching the back of the stirrup to keep your feet from sliding through the stirrups.
The saddle should not simply be PERCHED on top. When you get on, you should be able to easily find the place for your seat bones over the center of gravity. Most saddles appear to be too high in the gullet with too many contours, and with insufficient body condition, it puts localized pressure that can cause chafing on both sides of the animal instead of spreading the pressure points over a wider area underneath the saddle. The saddle should fit such that it is stabilized on the equine when all girths and straps are secured. It will move WITH the animal without excess movement.
 Localized pressure is particularly prevalent with sawbuck pack saddles. That is why you see so many pack mules with white spots at the withers…unbalanced loads that will shift. When the horn sits lower and the saddle pressure is spread across a wider area, the pressure is more comfortable for the animal and will not cause chafing. The saddle horn is another consideration. They are built in so many different ways, but a lot of those ways are cosmetic and often dangerous. Vaqueros that worked regularly with cattle and horses built their saddles with a thick and functional horn. The horns on a lot of saddles are built for function, but there are many that are simply cosmetically built. They are often too high and too narrow…a hazard if you happen to get thrown onto them.
When a saddle does not allow you to ride a balanced seat, it creates unnecessary restive movement that can aggravate the equine and cause them to buck, run off, fall, or worse. Moving WITH the equine’s movement is essential. When your movement is blocked with things like dysfunctional swells in the saddle’s construction, or protrusions that are designed to keep your legs from sliding forward, it prevents you from keeping your balanced seat while following the equine’s motion. I have seen lots of people that get slung over the saddle horn and onto the neck when the equine resists. A girl friend of mine landed right on the saddle horn during an altercation like this with her equine and it still causes her pain, even today, after surgery to fix the injured area. Jumping in a Western saddle with a horn is dangerous and not recommended.
Trees of the past were often fashioned after that of a McClellan saddle that naturally molds itself to the equine structure. They have an open gap across the spine and are not padded in-full the way our modern saddles are…and they can be pretty hard on your rear when you ride from your seat bones. It occurs to me that these saddles were preferred by men because they also left more room for the genitals, although I have never seen this mentioned! However, I have heard cowboys complain about riding a balanced seat because they say it hurts THERE when they do!
I like to use cotton, or Mohair, string girths in front because they will stretch slightly, allow air flow and easy breathing. Beware of nylon string girths that can cause chafing because they do not stretch as well. I like leather girths for the back girth. When leather is properly cured and kept conditioned, it pretty much holds it shape, but will stretch a bit with the warmth from the equine’s body. This is why girths should be tightened a little at a time with a final check after riding for about 10-15 minutes. It is the same for the whole saddle. Saddles that are not made from leather do not mold and stretch with the equine’s body, and will wear out quicker that leather that is well managed.
The front girth should be snug, but not too tight. The back girth should be snug, but not as tight as the front girth. The two girths should be held together underneath with a leather strap that keeps them each in their respective place perpendicular to the ground. The back girth should be perpendicular to the ground and not on an angle to the rear in front of the flanks. They were developed only to hold down the back of the saddle (invented by ropers to balance the saddle when the steer is stopped).
 Using the back girth to hold the saddle back might seem like a good idea, but it puts the pressure on the fragile undercarriage rib bones that can fracture easily. The under-carriage rib bones beneath a properly placed back girth are thicker and less likely to fracture under abrupt pressure. It can also cause too much pressure on the female genitals and small intestines, restricting optimal organ function. The rear girth should always be attached to the front girth underneath, hang perpendicular to the ground and should only be snug enough to keep the back of the saddle down.
ANY strap or girth that is too tight will irritate the equine and cause bad behaviors, chafing and saddle shifting. Any strap, or girth that is too loose, will not do its job, interfere with the equine’s ability to balance his body and will cause chafing.
As you learn to ride correctly and in balance, you also learn how to ride supportively by balancing on your seat bones with weight from your core (behind your belly button) going down through your legs and up through your torso. You can take the stress out of going uphill and downhill by staying relaxed in the saddle, rocking your weight through your core over your seat bones and by keeping your body in good posture.
Do not jam your heels down. Rather, think of keeping your toes up to stay relaxed. Lean the upper body back when going down hill, and forward when going up hill. Keep your upper and lower body in a straight line that operates from YOUR CORE, located behind your belly button. Think of the relaxed position of the Man from Snowy River as he was going over the cliff. Think of how Bronc Riders and Bull Riders balance just to stay on for eight seconds! Your SEAT is the fulcrum of a balanced, teeter-totter motion that will AID your equine in his movement and allow you to stay on board easily.
 The shoulders on the equine are only attached with cartilage and need to be able to “float” freely forward with the legs through the front quarters when in motion. This means that the saddle should fit your equine like a glove and rigged so it cannot slide forward over the Shoulder Blades. When you sit on a horse bareback, your legs will find the “groove” right behind the shoulder blade.
Breast collars are generally used with horses to keep the saddle from sliding backward. Breast collars are not advised to use with mules and donkeys. They are anatomically different from horses.  They do not have as prominent withers and there is a muscle that is located right where your legs fall into the “groove” on a horse. Their torso is comprised of smooth muscle and is straighter across and more compact than that of the horse that possesses more bulk muscle. The natural tendency on a mule or donkey is for the saddle to slide FORWARD, into the shoulder blades. It is advisable to use cruppers or breeching to help the saddle stay stabilized.
When in harness, the collar and traces should be fitted along the same angle as the shoulder blades and the point of draught should be at the base of the neck. The collar should be two inches larger around the neck to allow for free movement. A breast collar and traces should ride from the base of the neck. The breeching should be tight enough to enclose the equine comfortably in the harness assembly so they can easily go forward, or back up, with the immediate response of the vehicle. The tugs will carry the weight of the shafts and will aid in the movement.
People talk about allowing airflow to keep the spine depressurized and cool underneath the saddle. They use thicker therapeutic pads, or pads that are pre-shaped, stiff and sit stiffly on the equine’s back. I prefer to use Navajo blankets, and with older animals, or animals with higher withers, I will add a fleece pad underneath it. This allows for more flexibility, compression and molding of the saddle and blankets across the animal’s back…like a glove. To allow for more airflow, you just stick your arm under the blanket and across the spine before you tighten the girth. The blankets will move upward into the gullet and provide protection of the spine from any undue pressure. If the animal is in good equine posture with core strength in a solid balance, the saddle and equine will move as one with minimal abrasive movement. These can easily be kept clean by washing them in a washing machine and hang drying.
 An animal with insufficient conditioning and balance will hollow his back and neck and try to compensate for his inefficiencies in muscle conditioning and movement. When the equine’s tack and equipment fit properly, the extremities have full range of motion so he can pick each step with confidence and no obstructions. When the skeletal system is adequately supported with symmetrical muscle strength and especially over the top line, the animal is better equipped to use his body efficiently.
Weight & Ability of the Rider will determine how much pressure is put against the animal and how much resistance it will cause. Even though mules can carry proportionately more weight than a horse of the same size, this doesn’t mean you can indiscriminately weight them down until their knees are shaking. Be fair and responsible and do your part in the relationship. Do not expect the animal to carry an obviously overweight body that doesn’t know how to control itself! Learn to ride a balanced seat and practice the basics EVERY TIME YOU RIDE!
 Participate in training activities that prepare you both, first with Groundwork and later under saddle. ALWAYS FOLLOW BASIC GROUNDWORK RULES for Leading, Lunging and Ground Driving! When Leading the equine, learn to hold the lead rope in your LEFT hand, keep his head at your shoulder, match your steps with his front legs, point in the direction of travel with your right hand and look where you are going. Walk straight lines, gradual arcs and square him up with equal weight over all four feet EVERY TIME you stop.
We are building NEW habits in their way of moving and the only way THAT can change is through routine, consistency in the routine and correctness in the execution of the exercises. Since this also requires that you be in good posture as well, you will also reap the benefits from this regimen. It is important to lead this way because if you carrying the lead rope in your hand closest to the halter, it will not promote self-body carriage in the equine. With every step you take, your hand moves (however slightly) to the right and left, and this will adversely affect his balance. Remember, that equines balance with their head and neck!
When Ground Driving, let your steps and hands follow the hind legs. Along with feeding correctly (as described), these exercises will help equines to drop fat rolls, to begin to take on a more correct shape and they will become strong in good posture. Learning to WALK in sync with your equine during Groundwork will make it easier for you to RIDE in sync with your equine.
 Correct saddle placement is critical for the comfort and freedom of movement for your equine. The saddle should be placed over the center of balance, in the MIDDLE of the equine’s back, well behind the shoulder blade. Putting the saddle on a Longears is not the same as putting the saddle on a horse, or pony. Longears have a steeper angle at the shoulder and putting the saddle directly behind the withers as you do on a horse with a 45 degree angle (that sets the saddle further back), will position the saddle too close to the shoulder blade. The saddle should sit well behind the withers on a Longears and clear the shoulder blades to allow for maximum range of motion, proper balance and to prevent galling of the sensitive skin underneath and in front of the girth area just behind the forearms. It will help you know where to place the saddle if you just think about placing it in the middle of their back, then run your arm through the gullet under the saddle blanket, or pad, to allow for air flow over the spine. One way to tell if your saddle is placed correctly is to notice where your girth is hanging. Make sure that the girth is hanging 3-4 inches (about a palm’s width) behind the forearm and not right behind the forearm where the skin is thinner and more sensitive. This position is where the belly begins to swell and the skin is thicker.
 The saddle can easily slip forward if not secured with a crupper snugly fit to the tail with a solid D-ring attached to your Western, English or Side Saddle. If you are using an English or Side Saddle, in order to attach the crupper, you can use a metal “T” that slides underneath the seat between the two sides of the padding. Chafing of the tail from the crupper can be prevented by making sure it is snug, but not too tight, or too loose. When you use a sparing amount of Johnson’s baby oil in the mane and tail during grooming, it will keep the skin underneath the tail from chafing. Johnson’s Baby oil will also prevent equines from chewing on each others’ tails. Mules generally have more swell to their barrels to stop a saddle from sliding backwards than horses. For this reason, Longears will not necessarily need a breast collar (but they do look prettier when the rigging is balanced for a parade!).
A breast collar can actually be counterproductive when trail riding. It will tend to pull the saddle forward and closer to the withers This would be out of alignment with the center of gravity on a Longears. Before you mount, ask your equine to stretch his front legs forward, one at a time, to clear any skin that could get creased under the girth area and to help the girth to lie flat against the skin. I prefer using string girths with all my saddles (English & Side Saddles included). They tend to lie flatter and allow for adequate air circulation and free movement to prevent excessive sweating that can cause chafing in that area.
 If you have given attention to all the details necessary to make sure your equine is comfortable in his tack and equipment, and if he has been privy to all the Groundwork necessary for strong and balanced postural core strength, then mounting should never be an issue at all. He will possess the strength to hold fast to his good equine posture when standing still and your tack and equipment should not shift and make him want to move. Equines become disobedient when they experience a loss of balance. When your equine is slowly and adequately prepared to carry a rider, or pull a vehicle, you are better able to enjoy your time together!
Losses of balance can occur under a variety of circumstances. Paying attention to all the details in preparation for riding that I have described here will prevent most situations where the equine can suffer a loss of balance. Strong postural core strength can allow the equine to stand still while you mount and prevent his moving or running off when being mounted. Yes, you can teach him to sidle over to the fence or a mounting block, but that won’t help you on the trail! A strong and balanced equine with adequate core strength and good posture will be a calm and more confident companion. He will be happy to oblige your every command because he CAN do what you ask!
To learn more about Meredith Hodges and her comprehensive all-breed equine training program, visit LuckyThreeRanch.com, MEREDITH HODGES PUBLIC FIGURE Facebook page, or call 1-800-816-7566. Check out her children’s website at JasperTheMule.com. Also, find Meredith on Pinterest, Instagram, MeWe, YouTube and Twitter.
Covered in TRAINING MULES & DONKEY: A LOGICAL APPROACH TO TRAINING, TRAINING WITHOUT RESISTANCE, EQUUS REVISITED and A GUIDE TO RAISING & SHOWING MULES at www.luckythreeranchstore.com.
© 2013, 2016, 2024 Lucky Three Ranch, Inc. All Rights Reserved.

MULE CROSSING: Winter Fun with Your Equine
 By Meredith Hodges
After Spring, Summer and Fall come and go, the cold days of Winter can easily become an excuse to slow down and do less, but Winter can be just as fun and full of activities with your equine as any other season. Along with the basics—food, water and shelter—your equine needs activities to keep him fit and happy. Like any of us, he doesn’t want to be active only part of the year and then left alone during the Winter months, bored and lonely (not to mention the stress he will feel when he has to be reconditioned every Spring). Instead, it’s healthier for him, both physically and mentally, to be active and maintained year-round. This does not mean you need to ride him three or four days a week throughout the Winter. There are lots of other fun, diverse activities you can enjoy together that will adequately maintain his body condition while keeping him interested and happy.
 Of course, in order to enjoy Winter games and sports, you must first be sure to dress appropriately for the weather in your area. If you live in a cool or cold climate, dress in layered clothing you can easily remove if you need to. Wear a hat to conserve your body heat and footwear that keeps your feet warm and dry. What your equine wears in cold weather is equally important. For instance, if your equine’s winter coat tends to be on the thinner side, he may need a blanket for the long Winter nights to keep his body from expending too much energy just trying to stay warm. The blanket will also serve to mat down his coat so there is less chance of it becoming entangled in his tack or harness. If you have a stall for your equine, just for Winter months, you may want to trace-clip him in the areas that do the most sweating so that when he is worked, he will cool down quickly and easily. Promoting good circulation keeps your equine warm, helps his body to stay flexible and supple, and cuts way down on his muscle and bone stiffness. Be sure to begin any and all workouts and recreational activities with consistent and appropriate warm-up exercises.
 Since most inclement weather produces slippery ground surfaces, if your equine is to be used extensively, it is important that he have appropriate shoes on his feet during the slippery seasons. On strictly muddy or slippery surfaces, tapping and drilling studs into his shoes can help immensely in giving him added traction. If cared for properly, you can remove these studs when you don’t need them. If you get snow in your area, you may want to go with borium shoes and rim pads. The borium shoes supply good traction, while the rim pads prevent snow from balling up in your equine’s feet. I also suggest using splint boots on all four of his legs. This will protect against injury and give him added support and protection of his fetlock joints.
If you have a very young equine, make sure to consistently continue your routine of handling him throughout the entire winter. I do not suggest lunging a very young equine unless you have the advantage of an indoor arena, as he could slip and injure himself. But you can still take him for walks on the lead line, ground drive him through various Winter scenes and
spend plenty of time grooming him. All of this will accustom him to Winter’s unique terrain and obstacles, maintain his essential and continued imprinting and bonding with you, build his self-confidence and maintain his good manners.
 The better trained your equine is, the more possibilities there are for Winter sports and games. If the idea of taking lessons at a riding stable that has an indoor arena appeals to you, Winter tends to be a less hectic, more peaceful time of year in which to learn and practice without the added stress and anxiety of showing and other warm weather activities. But even if you want to forego the lessons, there are numerous stables that will rent the use of their indoor arenas for a nominal fee and there are places to trail ride through beautiful Winter scenes. People and equines alike seem to derive great pleasure from these Winter get-togethers when they are carefully and responsibly planned.
 Another great way to have fun with your equine is participating in Winter games and holiday parades. Christmas is always a joyous time to bring your equine out of the barn. Consider decorating your equine, dressing up yourself and then riding or driving in your local Christmas parade. This can be loads of fun! Caroling aboard your equine throughout your neighborhood is also a wonderful way for you, your equine and your neighbors to get into the holiday spirit. Oftentimes when my equines and I have gone out caroling after a Christmas parade, the neighborhood children have come out to sing and dance behind our caroling caravan! This kind of pure joy is contagious and always reminds me of the true meaning of the Christmas season.
There are lots of different Winter games that you can play with your equine and if you have a friend who wants to participate too, there are even more possibilities. With proper shoes on your equine and good, flat ground, and if the weather permits, there are so many gymkhana games that you can play. Or how would you like a brisk cross-country gallop on your equine with a few fences to jump? Or you and a friend can take an exciting ride on a tire or sled, taking turns with one person riding the equine while the other rides the sled or tire. If you have more friends with equines, you can even have Winter races. You are limited only by your own imagination! Remember that any game or sport requires that you consider safety first for both you and your equine: What are your abilities? What are your limitations? What is your level of physical conditioning and that of your equine? Whatever activities the two of you do to keep busy, happy and healthy during the Winter months, the name of the game should always be—FUN!
To learn more about Meredith Hodges and her comprehensive all-breed equine training program, visit LuckyThreeRanch.com, MEREDITH HODGES PUBLIC FIGURE Facebook page, or call 1-800-816-7566. Check out her children’s website at JasperTheMule.com. Also, find Meredith on Pinterest, Instagram, MeWe, YouTube and Twitter.
Covered in TRAINING MULES & DONKEY: A LOGICAL APPROACH TO TRAINING, TRAINING WITHOUT RESISTANCE, EQUUS REVISITED and A GUIDE TO RAISING & SHOWING MULES at www.luckythreeranchstore.com.
© 1990, 2015, 2016, 2019, 2024 Lucky Three Ranch, Inc. All Rights Reserved.


MULE CROSSING: Fitting Tack Equipment
By Meredith Hodges
Whether riding or driving, the comfort and fit of your tack and equipment is an important consideration if you wish to get the best performance from your equine. Any piece of equipment that does not correctly fit your equine can cause less than optimum performance.
 Consider, for instance, the bridle, which is such an important communication device. Do not select a harsh bit for control. Control comes from logical and sequential practices during training and not from force. The bit should be comfortable and be fitted correctly to facilitate good communication from your hands to the corners of your equine’s mouth. The bit should also be a comfortable width, leaving a half-inch from the hinge on both sides of his mouth. If the bit is placed too high or too low in the animal’s mouth, his fussing while he tries to get comfortable will override his ability to receive clear communication from your hands. NOTE: Be sure the chin chain on a curb bit lies flat and allows for two fingers to fit easily between the chain and his jaw.
All parts of the bridle must fit correctly. For instance, most mules have a broader forehead than does the horse, and therefore must have a larger browband fitted so the ears do not get pinched or rubbed sore. The throatlatch must be adjusted so that it gives the mule plenty of room for flexion without cutting off his air supply. The blinders on a harness bridle also need to be set and bent properly to do their job without chafing the eyes. When one thing is out of place on a unit of equipment it will usually negatively influence other parts of the same unit, and in training, these seemingly insignificant maladjustments can cause resistant behavior in your animal. In the case of an ill-fitting bridle, he might continually open his mouth, bob or shake his head or just subtly refuse to go on the bit. Minimizing discomfort and distraction allows the equine to more easily receive and process communication.
 Although the mule is a tough and durable animal, there are places on his body where his skin is particularly sensitive and easily chafed, so when fitting a harness or saddle you must pay special attention to these parts of his body. The collar on a harness, for example, needs to fit snugly and smoothly in front of the shoulders, allowing your hand to slip easily between the collar and the base of your mule’s throat and chest. A collar that is either too tight or too loose can rub and cause soreness, inhibiting maximum performance. When improperly adjusted, a breast collar harness can also cause rubbing at the points of the shoulders.
The girth area on your equine is particularly sensitive. The surcingle or girth on the harness or saddle should be placed four inches behind your animal’s forearm where the barrel starts to swell, and not over the sensitive area directly behind the forearm. A crupper should be used to keep the saddle from slipping forward and taking the girth with it forward into this sensitive area directly behind the forearm. Placement of the surcingle (with or without harness attached) is important, but you also need to pay attention to the material out of which the harness surcingle or girth is made and its condition. Soft leather usually causes no problem, but if the leather is dirty or stiff, or if a material other than leather is used, some kind of padding may be needed for optimum comfort. String girths work well with saddles when they are kept clean and are made from cotton or a cotton blend, but nylon and other man-made materials can often cause chafing, so be careful about what kind of  material is used for the girth on your harness or saddle. This may also be true in the case of the breeching and the crupper. The cleanliness, correct adjustment and comfort of the harness, saddle and other equipment can actually be a matter of safety for both you and your animal.
Generally speaking, the most common piece of potentially abusive equipment used on mules is the saddle. Riders may be using an ill-fitting saddle and not even realize it because their actual riding time is usually minimal, so the obvious saddle sores that would signify a problem don’t have time to develop. The animal exhibiting behavior that may be labeled as “stubborn” or “ornery” is often simply trying to communicate his discomfort, so taking the time to evaluate these behaviors with reference to equipment can help to produce more positive results. Remember that equines, like people, come in a variety of shapes and sizes, so there is no universal bridle, saddle or harness that will automatically fit your equine any more than there is one size and shape of clothing that will correctly and comfortably fit all people.
 In the past, saddles were constructed to accommodate the physiques of the horses of that time. Over the years, as training programs for mules have evolved and begun to correctly build muscle for equine activities. Saddle makers have also evolved, and now specialize in the construction of saddles that are tailored to the physical differences of individual equines. Saddle trees are now made with different widths and lengths of the bars in the tree, and even different materials are being used to make the trees, allowing for more flexibility and a better fit. Since the mule is structurally different from any horse, it is even more important to carefully consider your choice of saddle for your mule. Saddle makers now make custom saddles with specially designed trees with “mule bars,” but these are not standard and should be fitted to the conformation of the individual mule, with consideration given to the activity for which he will be used. Although they may appear more comfortable, beware of saddles with trees that may be too flexible, as they do not offer the solid foundation to support an unbalanced rider on a poorly conditioned animal. Often, a saddle can be found that will closely fit your animal, and can be made to fit even better with the addition of extra and/or specialized pads, breast collars, breeching or cruppers. However, with extended use, you may find that these simple modifications are inadequate. An equine’s shape will change with physical conditioning and, as the level of performance is increased, it becomes increasingly more important to have equipment that fits properly, affords comfort and lends support.
If equines are to perform to the best of their ability, we need to work them in the best-fitting, most comfortable equipment during each activity. At the same time, we ourselves need to ride in a saddle that works with our own physical structure in the seat, has the correct placement of the stirrups and so on. Getting one saddle to fit both you and your mule can seem like an impossible task, but a good custom saddle maker can certainly help. Ideally, a saddle should meet the individual needs of both the animal and the rider so you can work unobstructed as a team.
Taking the time and effort to find comfortable, proper fitting and supportive tack and equipment will help you get the best results from yourself and your equine and will mean a more pleasurable experience for both of you.
To learn more about Meredith Hodges and her comprehensive all-breed equine training program, visit LuckyThreeRanch.com, MEREDITH HODGES PUBLIC FIGURE Facebook page, or call 1-800-816-7566. Check out her children’s website at JasperTheMule.com. Also, find Meredith on Pinterest, Instagram, MeWe, YouTube and Twitter.
Covered in TRAINING MULES & DONKEY: A LOGICAL APPROACH TO TRAINING, TRAINING WITHOUT RESISTANCE, EQUUS REVISITED and A GUIDE TO RAISING & SHOWING MULES at www.luckythreeranchstore.com.
© 2012, 2016, 2024 Lucky Three Ranch, Inc. All Rights Reserved.


MULE CROSSING: The Round Pen
By Meredith Hodges

The Round Pen originated as a useful training aid for Western trainers who were trying to “break” the wild mustangs that were brought in off the range.
-
- There has been spirited debate between English and Western trainers as to the real value of the Round Pen as a training aid, since it can produce undue stress on the fragile joints of the equine-in-training.
- Do not BEGIN training your equine in the Round Pen, because an unbalanced and inexperienced equine in uncontrolled flight, in a truly confined space, can easily injure himself.
- Specific types of leading exercises must be used to teach him to be in good equine posture and balance on straight lines and gradual arcs before your equine is introduced to the Round Pen and asked to balance at all three gaits on a circle.
- He needs work on Leading Training in the Hourglass Pattern in an arena, tacked up with an English Eggbutt snaffle bridle, the “Elbow Pull” and a surcingle or lightweight saddle.

- When his postural core strength is in an adequate Leading balance in the arena, you can add obstacles.
- He will learn verbal commands, body language and will be able to balance his weight equally over all four feet and do all the exercises on verbal commands and hand signals alone. he is then ready to graduate to the Round Pen.
- He needs work on Leading Training in the Hourglass Pattern in an arena, tacked up with an English Eggbutt snaffle bridle, the “Elbow Pull” and a surcingle or lightweight saddle.
- When your equine is properly prepared beforehand, the Round Pen can then become a viable and important training tool.
- He will learn to Lunge freely at all three gaits while remaining in good posture.
- He learns to responds promptly and correctly to verbal commands and body language.
- He learns the basics about lunging on a lunge line.
- He learns how to be lunged on the Drive Lines.
- He learns how to Ground Drive the perimeter, then how to do turns and reverses.
- He will learn how to stand still on command at any time and be mounted.
- He will learn to Lunge freely at all three gaits while remaining in good posture.
- When choosing the site for your Round Pen, pick a spot that is surrounded by activity and even near the road, so it can serve a dual purpose. Not only will you begin to build your equine’s muscle during training sessions—you will get his attention under a variety of distractions. When he is exposed to noise and activity in the Round Pen at this early stage, it is less likely to bother him later under saddle, or in harness. He will gain confidence in any situation.
- Try to pick a site that is flat and not rocky. Ideally, it should have a solid base of hard-packed adobe soil.
- If your ground is not flat, you will need to grade a flat spot and then bring in fill-dirt, shoot it with a transit to make sure it is truly flat. You have spent a lot of time working on your equine’s posture and an irregular ground surface will interfere with that and set him back into poor equine posture.
- Make sure it is tamped and hardened before the three-inch depth of sand is added.
- The diameter of the Round Pen should be approximately 45 feet, so you can easily reach your equine on the rail with your lunge whip when you stand in the center.
- Uneven terrain can cause uneven balance, rhythm and cadence to his gait and will cause irregularity in the footfall pattern, which will result in asymmetrical development of your equine’s muscular-skeletal system. We used fill dirt with a retaining wall to make sure the ground was flat and even so as not to undo our equines’ good posture.
- A smooth, hard under-surface below the sand gives your equine a smooth surface on which to place his feet without fear of injury to the sensitive parts of his hooves from rocks or other debris. His stops will become correct and balanced, and ready him properly for the sliding stops in Reining.
- Even and level ground will assure his regularity of gait and sustained balance on the circle that will build core muscle symmetrically as he circles, maintaining his erect posture and correctly bending through his rib cage with equal weight over all four feet and energy coming from the hindquarters.
- Making sure the circle is actually round so it will help him learn to bend his body properly through the rib cage while he is traveling on the circle.
- If your ground is not flat, you will need to grade a flat spot and then bring in fill-dirt, shoot it with a transit to make sure it is truly flat. You have spent a lot of time working on your equine’s posture and an irregular ground surface will interfere with that and set him back into poor equine posture.
- Once the site is prepped, dig post holes at eight-foot centers on the circle and twenty-three feet from the center of the Round Pen to give you the 45 foot diameter.
-
- Next, pour concrete in the bottoms of the holes and measure the depth of the posts so when the posts are placed in the holes, they will all be at the same height. (There should be three feet of post in the hole and five feet above ground.) Use eight-foot posts.
- All types of wood are toxic to equines to some degree, but treated woods can contain arsenic and should be avoided. Redwood is okay, but the best posts to use are made from steel—they will last much longer than wood. Also, steel posts can be welded with “winged plates” so the boards can be easily bolted to the posts and changed out easily.
- Use two-by-twelve-inch wooden boards for the walls, and a smaller two-by-six-inch board around the bottom to keep the sand inside. Stack four two-inch by twelve-inch boards around on top, with three-inch spaces between the boards and a three-inch top of the post showing.
- The spaces between the wider boards will allow you to get a toe into the fence so you can easily climb in and out of the Round Pen, and it gives you a place to tie an animal at any post.
- Unlike a Round Pen made from corral panels, the twelve-inch boards keep your toes from getting caught or twisted when riding close to the rail. It’s a much safer design and truly functional for all levels of Round Pen training.
- For both trainer and equine safety, the use of electric and wire fences and materials, such as pallets and tires, should be avoided completely. If the equine decides he wants to leave, he can easily get tangled in a lot of these other materials…just not safe for either of you.
- Tie rings can be added onto the outside of selected posts to secure extra equines outside the Round Pen while they wait their turn.
- A Round Pen with solid walls should be avoided. An equine that learns to work in an open Round Pen is less likely to feel “trapped” and fearful of abrupt movements and noises, so he can concentrate on his work. He learns to acknowledge and accept interruptions and will keep on working.
- Using bolts for the two-by-twelve inch rails makes for easy replacement as the boards become worn, and putting a metal cap around the top with angle iron, will discourage chewing when you are not there to supervise.
- The gate posts should always be steel and sunk into 3’ concrete, as wooden posts tend to sag over time. The gate itself should be framed in steel to keep it from warping and sagging. The latch on the gate should be easily accessible from both sides, but the gate needs only to swing into the Round Pen for easy entrances and exits.
- Next, set in the gate (either finished or not) and close it to complete the circle. Check the diameter of the circle and the distance to each post from the center to make sure it is truly 45 feet round and that all posts are upright and level.
- The Round Pen gate pictured swings in and has a sliding barrel bolt at the top that just catches through a four-inch sleeve on the post wing. It is easy to reach over the top for opening.
- Next, pour concrete in the bottoms of the holes and measure the depth of the posts so when the posts are placed in the holes, they will all be at the same height. (There should be three feet of post in the hole and five feet above ground.) Use eight-foot posts.
- Once the cement at the bottom of the post holes is level and completely dry and the posts are sitting in the not-yet-filled post holes, attach the top and bottom boards all the way around, check each post and rail with a level, and then attach wooden braces to the entire Round Pen at each post to hold the position.
- Now pour the concrete into the holes around the posts. Allow enough time for the concrete to set up before removing the braces.
- When the concrete has dried completely, clean the excess concrete from around the holes. Then finish hanging all the board rails, cap them with angle iron and add whatever tie rings you want to the outside of the posts.
- Let some time pass before adding the sand to your Round Pen. Wet weather will actually help to further compact the base, which should be hardened so it can last for many years, so if you are expecting rain or snow, all the better.
- Once the base is hard and dry, add three inches of clean sand to the Round Pen—no more and no less. If the sand is not deep enough, the hard ground can hurt your equine’s limbs and possibly cause laminitis. But if the sand is too deep, it can damage ligaments, tendons and soft tissue.
- If your equine ingests the sand he may colic or founder, so make sure to use your Round Pen for training only, never for turnout or feeding. The equines can develop sand colic from eating off the floor of this kind of pen.
-
- The Round Pen can be used as a holding pen for short periods of time, but do not place food or water inside and use it as a permanent pen.
- It is too small for good health.
- This small area can exacerbate the animal and cause anxiety as their permanent residence. Stress is not good for the animal.
- Equines will put more energy into getting out if they are not comfortable.
- Good Round Pen construction makes all the difference.
- With intelligent construction and attention to detail, your Round Pen will serve a multitude of uses for years to come and can be quite easy to maintain. A metal, angle-iron cap around the top rails will keep the animals from chewing on it when they are left standing and waiting for their lessons to continue.
- Maintenance will be easy and materials cost will not be as expensive in the long run depending on what materials you use. Keep extra boards on hand as replacements at your original lower cost.
- I began by using simple 2” X 12” wooden boards and 8’ posts when I first bought the original 10 acres of the Lucky Three Ranch because I could not afford any more than that. I just kept improving the conditions as I could afford it. I did this with the entire facility…year after year…Barns, Sheds, Fences, Round Pen, Hot Walker, Tack Barn, etc.
- The Round Pen is not the place to START TRAINING. It is a place to get through those difficult learning processes where you need the containment of the equine for more meticulous work. I would even use it for the beginning of obstacle training. It is MUCH easier to teach the equine not to be afraid of obstacles when you do it a very confined space. I begin obstacle training by placing my obstacles in the confined space BEHIND my Round Pen in my indoor arena…so much easier when they don’t have as much space to avoid the tasks! If you cannot place your obstacles this way, then just put them along the side of your Round pen and use them in it as needed.
- I am no longer afraid of getting a loan and paying more money up front if it will save maintenance costs in the long run. Remember that the replacement materials are always getting more expensive and the price never seems to go down! The Round Pen really IS a must for many reasons! It is a truly legitimate investment with its numerous uses. The Round Pen is an essential tool to set you and your equine up for success!
- With intelligent construction and attention to detail, your Round Pen will serve a multitude of uses for years to come and can be quite easy to maintain. A metal, angle-iron cap around the top rails will keep the animals from chewing on it when they are left standing and waiting for their lessons to continue.


 t the top that just catches through a four-inch sleeve on the post wing. It is easy to reach over the top for opening.


To learn more about Meredith Hodges and her comprehensive all-breed equine training program, visit LuckyThreeRanch.com, MEREDITH HODGES PUBLIC FIGURE Facebook page, or call 1-800-816-7566. Check out her children’s website at JasperTheMule.com. Also, find Meredith on Pinterest, Instagram, MeWe, YouTube and Twitter.
Covered in TRAINING MULES & DONKEY: A LOGICAL APPROACH TO TRAINING, TRAINING WITHOUT RESISTANCE and EQUUS REVISITED at www.luckythreeranchstore.com.
© 2013, 2016, 2023 Lucky Three Ranch, Inc. All Rights Reserved.

MULE CROSSING: Making History with Mules, Part 3
By Meredith Hodges
There was a time before the industrial age when one-third of all fifteen million mules on earth were being utilized by the United States. Mules worked in the fields, carried our packs, pulled heavy barges on the canals, plodded through darkness in the mines, guided supply wagons and streetcars about the cities, carried tourists to exotic places like the Grand Canyon and transported army supplies and light artillery for the government. And to help with all the back-breaking labor he faced, man’s invention of the hybrid mule was truly a stroke of creative genius. “No cultural invention has served so many people in so many parts of the world for so many centuries with energy, power and transport as the mule.”
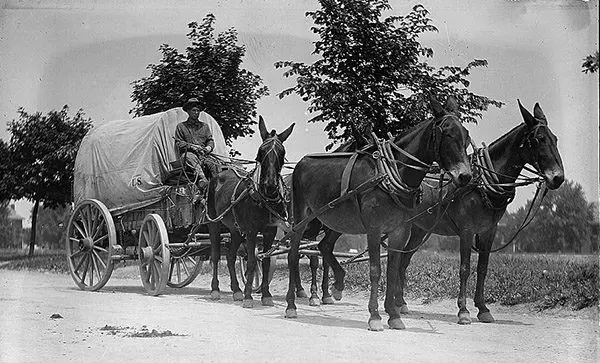 During the surge westward, heavy Conestoga wagons laden with all the possessions one could carry were often pulled by teams of mules that were either leased or owned by the early settlers. When cattlemen developed breeds like Texas Longhorns that could endure the harsh climate of the Great Plains, their mules pulled the chuck wagons that followed the large herds as they were driven the long distances to market. Improved farm equipment beckoned farmers to tame the West and what else could manage the vast land and long work hours save the mule? During these times, little thought was given to the possibility that this coveted land was already occupied by numerous Indian tribes.
The soldiers were caught in an impossible situation. They were bound by duty to protect and serve the early ranchers, miners, farmers and their families, but were unable to derive any profit from their duty. Indian attacks raged at every turn and mules helped carry the artillery and supplies the army needed to protect its citizens. The armies had been used to fighting in an entirely different climate and, when faced with the gale winds, plunging temperatures and blizzards on the Great Plains like they had never seen, it was often the mule that provided the perseverance and determination to see it through. On rare occasions, the mule served as the only source of food, saving the lives of desperate families and often – hungry Indians.
People are generally surprised to learn of the loyal and affectionate nature of the mule. For some reason, they want to believe in a stubborn and vengeful character, but when one reads accounts from individuals, one finds mules to be quite the opposite. In the mid-1800s, the U.S. government, in its infinite wisdom, recognized the value of the mule, yet made foolish provisions for its soldiers in their regard. It was clear that they did not fully understand this animal that resembled the horse but acted nothing like it.
In training mules to harness, they often cut traces to the harness so short and hung so low that the mule’s heels would be clipped by the swingle trees when they walked forward. Not wanting to injure itself, the mule would stop when it became sore. This act was acknowledged as laziness. It was only through the good sense of the real mule teamsters that these kinds of errors were corrected. Swingle trees were hung higher between the hock and the heel to allow for a full stride, and traces were subsequently invented with larger chain links at the ends of the drawing-chains to allow for adjustments in length.
 The American government purchased many mules that were two and three years old—entirely too young for use. If they had purchased mules all over the age of four, it would have saved a lot of heartache and expense. Contractors and inspectors seemed to be more concerned with the numbers they could sell to the government than the quality and usefulness of the animals. When purchased for use, this invariably resulted in the mules being put onto a train with teamsters who knew nothing of their character. Those who know mules know the deep affection they develop for human beings with whom they spend much time. Thousands of young mules were rendered useless by the government’s incompetence and ignorance as to their maintenance and training.
Harvey Riley, author of The Mule, published in 1867, recounts, “While on the plains, I have known Kiowa and Comanche Indians to break into our pickets during the night and steal mules that had been pronounced completely broken down by white men. And these mules they have ridden sixty and sixty-five miles of a single night. How these Indians could do this, I never could tell.” Maybe it’s as simple as, “You can catch more flies with honey than you can with vinegar!”
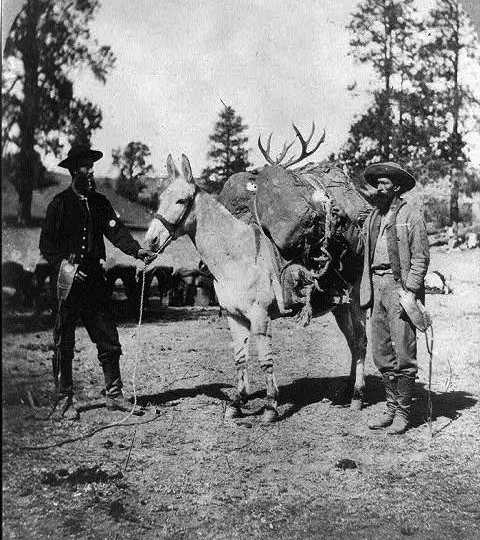
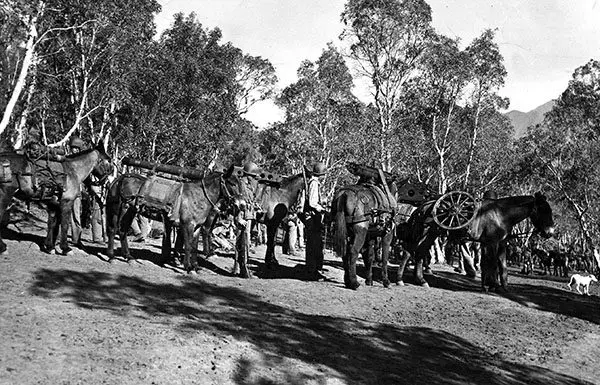
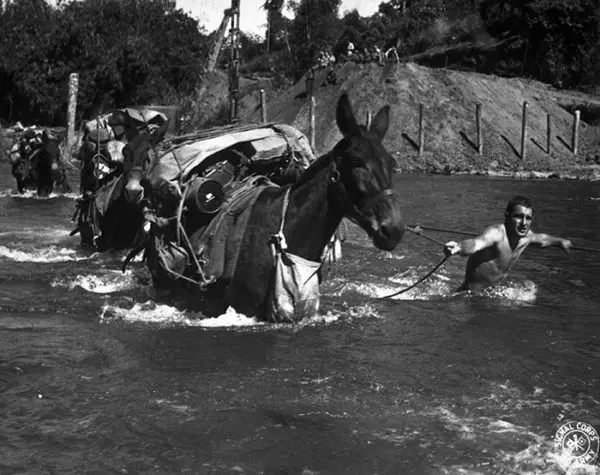
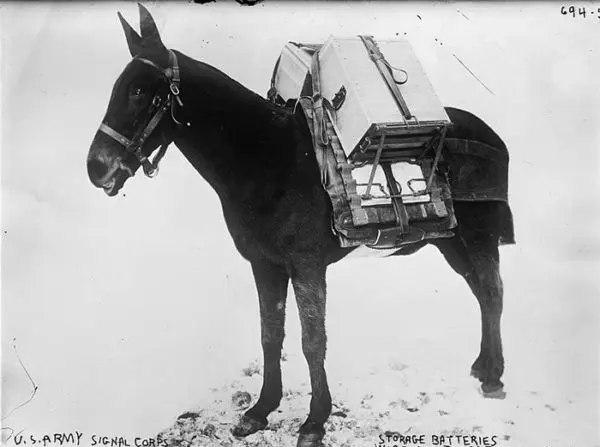
Packing was of great importance to government mules, as they were required to carry a wide variety of heavy items over treacherous terrain. In the Northern and Western territories and in Old and New Mexico, nearly all business was done with pack mules and pack donkeys.
 The Indians adopted the Spanish way of packing, as the Spaniards were noted experts. The Americans developed their own American pack saddle, but it was abandoned soon after its creation.
“While employed at the Quartermaster’s depot at Washington, D.C. as superintendent of the General Hospital Stables, we, at one time, received three hundred mules on which the experiment of packing with this saddle had been tried in the Army of the Potomac. It was said this was one of General Butterfield’s experiments. These animals presented no evidence of being packed more than once; but such was the terrible condition of their backs that the whole number required to be placed at once under medical treatment…yet, in spite of all his skill, and with the best of shelter, fifteen of these animals died from mortification of their wounds and injuries of the spine,” Harvey Riley remembers.
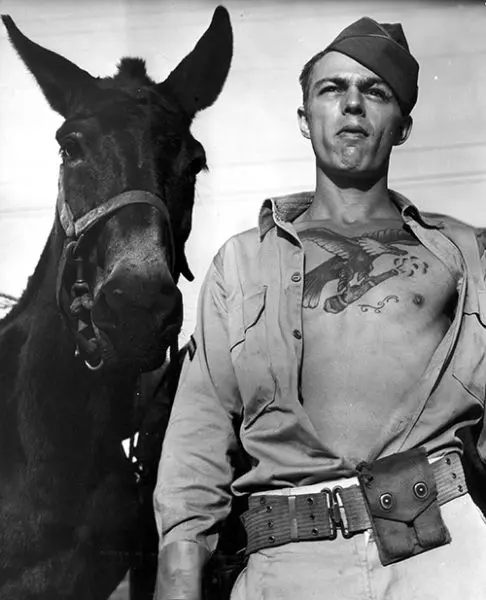
 In 1942, while in the service of the U.S. Army, Art Beaman became familiar with mules in a most curious way. He was working as an Operations Sergeant for a Headquarters in Northern California that determined whether troops were ready for combat. The troops consisted of 204 enlisted men, two veterinarian officers, four horses and 200 mules. Being a non-rider, Art was on and off his horse three times in the first ten minutes of the trip into the mountains. The First Sergeant finally decided to put him on a mule and open his eyes to the redeeming qualities of his mount. The next day, Art was able to say, “That mule and I were really a team…by this time, I trusted my mule so completely that I could have stood up and sang the national anthem as we slipped and skidded along!”
The aftermath of this story is really funny. About a week before his pack troop was to be deployed to the South Pacific, some sideways thinker in the Quartermaster Corps sent 200 green-broke replacement mules for his troop. Not wishing to trade the now fully broke mules for the green-broke mules, Art left the 200 mules on the train overnight while he pondered this dilemma. When he returned the next day, he told the men in charge, “There are the old mules and we have the new ones! Evidently, they believed me, or they didn’t care one way or the other, and the green mules were on their way back to Washington!”
 Those who have experienced the spiritual connection with mules all have their own individual stories to tell. From The Black Mule of Aveluy, by Charles G.D. Roberts, comes one of the most amazing World War I battlefield stories I’ve ever heard. It is the story of a man and a big black mule on a rain-scourged battlefield. “The mule lines of Aveluy were restless and unsteady under the tormented dark. All day long a six-inch high-velocity gun firing at irregular intervals from somewhere on the low ridge beyond the Ancre, had been feeling for them. Those terrible swift shells, which travel so fast on their flat trajectory that their bedlam shriek of warning and the rendering crash of their explosion seem to come in the same breathless instant, had tested the nerves of man and beast sufficiently during the daylight; but now, in the shifting obscurity of a young moon harrowed by driven cloudrack, their effect was yet more daunting.”
A second shell screamed down into the lines, scattering deadly splinters of shell ropes, tether-pegs and mules. When it was all said and done, one lone black mule stood back, still tied to the picket line, unable to free himself. With eyes wide in terror, he sought respite from the onslaught, but was unable to find any. Suddenly, a man with tousled, ginger-colored hair appeared at his nose and put his arms around the mule’s neck, as the mule coughed and sputtered, still stunned from the blast. The man quickly untied the black mule and another that was left from the blast and got them to safety.
After the attack at Aveluy, the black mule and his new driver were given the job of carrying up shells to the forward batteries. Early that next afternoon, they were plunging deep into rugged territory along a sunken road, muddy from perpetual rain showers, when suddenly the inexplicable happened and there was an array of star-showers that blinded the mule. “When he once more saw daylight, he was recovering his feet just below the rim of an old shell-hole. He gained the top, braced his legs, and shook himself vigorously.” His panniers were still heavily loaded and his driver was not in sight. He soon saw his driver clinging to the far edge of the shell-hole, sinking rapidly in the mud. “He reached down with his big yellow teeth, took hold of the shoulder of Jimmy Wright’s tunic, and held on. He braced himself and, with a loud, involuntary snort, began to pull.”
 Jimmy Wright remembered the blast and saw where he was. He was afraid his shoulder had been blown off, yet he could move both arms and discovered something was pulling on him. “He reached up his right arm—it was the left shoulder that was being tugged at—and encountered the furry head and ears of his rescuer! Reassured at the sound of his master’s voice, the big mule took his teeth out of Wright’s shoulder and began nuzzling solicitously at his sandy head.”
For centuries the mule loyally traversed the course of history with man, though he was never given credit for his valuable contributions. In fact, men perpetrated stories to the opposite and the mule’s legacy became one of laziness, stubbornness and disobedience. Only those humans who were of a character to willingly explore the spirit of the mule were there for its redemption. We are thankful that their stories have withstood the test of time. Throughout history, man believed that he was making progress with each new age, but the blind farmer will tell you, “There’s no such thing as a seeing-eye tractor, and while I am farming with my mule, I can hear the birds sing. I never could with a tractor!” Perhaps we should take note and stop to smell the roses and give credit where credit is due.
To learn more about Meredith Hodges and her comprehensive all-breed equine training program, visit LuckyThreeRanch.com, MEREDITH HODGES PUBLIC FIGURE Facebook page, or call 1-800-816-7566. Check out her children’s website at JasperTheMule.com. Also, find Meredith on Pinterest, Instagram, MeWe, YouTube and Twitter.
© 2011, 2015, 2016, 2020, 2023 Lucky Three Ranch, Inc. All Rights Reserved.

MULE CROSSING: Making History with Mules, Part 2
By Meredith Hodges
As we track mules through history, we find there is a reoccurring theme that paints the mule as both a companion and adversary of man. Those of a certain temperament seem to be able to befriend the mule and those who would be combative suffer at his mercy. Man would rather blame stubbornness on the mule than to claim this stubbornness as his own. Clearly, there is no doubt that the mule is and always has been a hard-working and valuable beast of burden throughout history. His ability, intelligence and judgment are unmatched.
 George Washington was a fairly well educated man and, “the copybook which he transcribed at fourteen years of age a set of moral precepts or Rules of Civility and Decent Behavior in Company and Conversation was preserved.” Practical experience was the foundation for his best training in outdoor occupations and not books. He was a successful tobacco and livestock farmer early in his teens and mastered the art of surveying to plot the fields he inherited. It is no accident that George Washington became not only the father of our country, but also, the first organized mule breeder in America.
George Washington tried to buy some Spanish donkeys to use for mule breeding at Mount Vernon, but found that their exportation from Spain was against the law. Most who have studied mules and donkeys know that King Charles III of Spain then gave Washington the gift of an Andalusian jack and two jennets from Malta. The jack, named Royal Gift, became the foundation sire of Washington’s farm at Mount Vernon and he popularized mule breeding for farm work. Blending the Andalusian and Maltese donkeys produced finer donkeys than those that had been imported for still better quality mule production. Eventually, the law in Spain was changed. George Washington was not the only one who recognized the economical value of mule and donkey power for the growth and prosperity of a new empire. Henry Clay and others began importing numerous donkeys and breeding for mule stock.
George Washington was not devoid of the sense of humor needed to work with mules and donkeys. In a 1786 letter to a neighbor concerning Royal Gift’s failure to perform stud service (as can often happen with donkey jacks, as they are quite particular about their “ladies”), Washington wrote, “Particular attention shall be paid by the Mares which your Servant brought and when my Jack is in the humor they shall desire all the benefits of his labours—for labour it appears to be. At present, tho’ young, he follows what one may suppose to be the example of his late royal master, who cannot, tho’ past his grand climacterick, perform seldomer, or with more majestic solemnity, than he does. However, I am not without hope, that when he becomes a little better acquainted with republican enjoyments, he will amend his manners, and fall into a better & more expeditious mode of doing business. If the case should be otherwise, I should have no disinclination to present his Catholic majesty with as good a thing as he gave me.”
 Respect for donkeys and mules is the only way to motivate them to action. Their rugged individualism will tolerate no less. The mule exemplifies the “All-American,” as set forth by the colonists. The colonists were thought to be stubborn in their quest for individual freedom by the British Crown that super-imposed itself upon their individual liberties. Like the colonists, mules will challenge anyone who challenges their individual liberties! It is only fitting that the mule would be fully revered and appreciated by a man of such distinction as George Washington.
In 1803 Thomas Jefferson completed the Louisiana Purchase. “Over the next 75 years, more than two million square miles revealed their secrets to an army of hunters, soldiers, naturalists and other adventurers.”
While perusing the pictorial archives of history, you will see that men and their partners, wives, children, dogs and horses were always front and center. But what about their mules? You read about their many perils and victories, but you rarely hear mention of the one humble animal that worked silently, relentlessly in the background—the mule.
In May of 1804, after the official transfer of the Louisiana Purchase, Lewis and Clark began their expedition up the Missouri River. They soon learned to despise the muggy territory, with its humid climate populated by numerous mosquitoes, gnats and other creatures. Even their dogs would howl in pain from the intrusions of this unexpected onslaught. Conditions were tough and it was not unusual for mules and donkeys to be used as pack and draft animals in this rough country. Desert-born donkeys and the hybrid mule are born with the characteristics necessary to endure such strenuous conditions. They are stronger and sturdier than the horse. They require less to sustain good health, need less water and are more resistant to parasites and disease. Without mules and donkeys, the westward migration would have been much more difficult.
 The Erie Canal was the longest canal built in the shortest amount of time for the least amount of money. It had continued success for many years because of the use of donkeys and mules to pull the barges along the tow path. “In the annals of the Erie Canal, we find little credit given to the mules; yet, by virtue of their strength and endurance and sagacity, the western wheat reached New York City in due time and industrial products moved west.”
The mules plodded slowly along the canal, pulling the heavy barges of goods, as did the “mule drivers,” who were most often young boys. Occasionally a mule would fall into  the canal, but it was quickly and safely guided back to shore by the lead around its neck. Where the walls of the canal were too steep to climb back out, the villagers installed ramps at intervals along the canal to serve as an easy escape from the water, should the mules fall in. These ramps were covered with a heavy planking containing thick slats, or “cheats,” where a mule could get traction coming up the ramp. In the off-season, the planking could be removed and held over for the next season.
George Washington wrote that he “crossed over to Wood Creek which empties into the Oneida Lake and affords water communications with Ontario. I shall not rest content until I have explored the western country and traversed those lines which have given bounds to a new empire.” The building of the Erie Canal, the development of New York as the “Empire State,” and the opening of the West owes its success almost single-handedly to the hybrid mule and horse as upon any other single contribution.
In 1849 the California Gold Rush saw men racing westward to make their fortunes. Many were not prepared for what they would find. The West was a tough and unforgiving country. Those who had mules and donkeys fared far better than those who did not. One of the most famous donkeys in history was “Brighty” of the Grand Canyon, who befriended a miner and made his way into folklore and modern-day children’s books. As mining was further developed, mini mules bred from small donkeys and pony mares were used in the mines to haul out coal and ore. They worked well under these adverse conditions and were small enough to easily manage the low-ceiling passageways.
 After the Civil War, farmers were again at a loss for man-power and mule-power. Tennessee joined Kentucky as another leader in the breeding of mules and donkeys. During the war, much of the stock had been destroyed or starved to death, so, from 1883 to the end of the 18th century, there was a surge of asses imported from Spain to replenish the stock. This all but depleted the good stock for sale left in Spain.
Missourians, who still love their mules, became the hub of mule power. Mules would eat poor feed, work in blistering sun and live longer than horses. Mules came in a variety of sizes and colors with a multitude of uses. One Missouri Muleskinner from Springfield chuckled and said, “I’d never used more continuous bad mouth words in my life until I started to work with mules.” Muleskinners themselves are allowed by proxy to use some pretty rank terms, yet no outsider would ever be allowed to address their mules the same way.
From 1883 to 1889, the 20-mule teams moved 20 million pounds of borax from the Death Valley floor in California over the mountains to the Mojave Desert, 165 miles away. They traveled roughly 15 to 18 miles in a day, crossing the steep Panamint Mountains to the railroad. During this 20-day round trip, temperatures could be expected to rise as high as 130 degrees. Still, these remarkable animals plodded relentlessly along, doing their jobs with little or no complaint, except when an impatient muleskinner would inadvertently interfere.
 Terrors of Death Valley seemed to arise from only three causes: extreme heat, excessive dryness of the atmosphere, and lack of water. The president of the Eagle Borax Company, Mr. I. Daunet, was forced to kill his animals so he could drink their blood to survive, as blood can replace water. After this devastating near-death experience, and finding the daunting heat unbearable, Mr. Daunet was happy to remain, thereafter, in his office.
Mules and donkeys have been a great friend of man. There is no more useful or willing animal on earth to aid man in his endeavors. “He has had to plod and work through life against the prejudices of the ignorant. Still, he has been a great friend of man, in war and in peace serving him well and faithfully.” Should we not give mules and donkeys the respect, admiration and credit they so richly deserve? In doing so, would we then enrich our own lives as our country has been enriched by them? Think about it.
To learn more about Meredith Hodges and her comprehensive all-breed equine training program, visit LuckyThreeRanch.com, MEREDITH HODGES PUBLIC FIGURE Facebook page, or call 1-800-816-7566. Check out her children’s website at JasperTheMule.com. Also, find Meredith on Pinterest, Instagram, MeWe, YouTube and Twitter.
© 2011, 2015, 2016, 2020, 2023 Lucky Three Ranch, Inc. All Rights Reserved.


MULE CROSSING: Making History with Mules Part 1
By Meredith Hodges
 Many people ask me when the first mules appeared on this earth. Historically, mules have their roots in the Bible. Contrary to the popular belief that mules are so lowly and stubborn that they would have to be the mount of serfs, they were—in the beginning—the mount of kings!
“So Zadok the priest, and Nathan the prophet, and Benaiah the son of Jehoiada and the Cherethites, and the Pelethites, went down and caused Solomon to ride upon king David’s mule, and brought him to Gihon.” (I Kings 1:38)
Another Bible passage recounts how Absolom, the son of King David, had a rather unfortunate encounter in which he was clunked on the head by a tree branch while his mule, using common sense, ducked underneath. Those of us who know and love mules can certainly relate to their ability to instill humility in their human counterparts, and everyone can appreciate that, even back then, mules were noted for their completely natural and indubitable humor.
 “And Absolom met the servants of David. And Absolom rode upon a mule, and the mule went under the thick boughs of a great oak, and his head caught hold of the oak, and he was taken up between the Heavens and the earth, and the mule that was under him went away.” (II Samuel 18:9)
Mules are not only psycho-therapists, but they are the true geniuses of slap-stick humor! When you get into an altercation with a mule, you will seldom get hurt, but you will surely be set straight in a most humiliating way.
“And when the ass saw the angel of the Lord, she fell down under Balaam and Balaam’s anger was kindled, and he smote the ass with a staff. And the Lord opened the mouth of the ass, and she said unto Balaam, ‘What have I done unto thee, that thou hast smitten me these three times?’ And Balaam said unto the ass, ‘Because thou hast mocked me, I would there were a sword in mine hand, for now would I kill thee.’ And the ass said unto Balaam, ‘Am not I thine ass, upon which thou hast ridden ever since I was thine unto this day? Was I ever wont to do so unto thee?’ And he said, ‘Nay.” (Numbers 22:23) Mules and donkeys will always be compelled to let us know when our actions are careless and thoughtless—it is in their nature. Whether or not we choose to listen and alter our approach is entirely up to us.
 The highest intelligence residing in animals is that of the mule. He inherits athletic ability and “horse sense” from his mother, the horse, and incredible wisdom and strength from his father, the jack. Perhaps the kings of yore finally tired of being publicly humiliated by their superior mules, or perhaps they just couldn’t muster the patience or humor to deal with them anymore, but mules were eventually replaced by horses as the mount of choice, and were subsequently used primarily for packing and draft work.
Strong and durable animals, mules also played a significant part in Greek and Roman transportation. The mule can travel more than three mph and can easily cover 50 miles in a day. Their usefulness is unmatched, even by oxen, as they can cover more distance much more quickly.
The mule’s ability to survive is truly uncanny, given that he is the hybrid offspring of a jack and a mare and does not produce offspring. On rare occasions, mare mules (or mollies) have been known to reproduce by a jack or stallion, but for the most part, mules are sterile and cannot propagate themselves.
 There is a volunteer organization in Israel called HAI-BAR, (an Israeli word meaning “wildlife”). This organization was established to protect animals that had thrived in the Holy Land during the Old Testament years, but that are now dangerously close to extinction, due to reckless use of land resources. HAI-BAR South, established in 1964, opened 3000 acres to the general public in 1977 for the express purpose of protecting herds of wild species from Biblical times. A second reserve, HAI-BAR Carmel, was established in the center of Israel near Haifa on Mount Carmel, where 2000 acres were fenced off to accommodate and protect even more Biblical animals. These reserves are still in operation today.
The closest ancestral link to the mule is the Somali Wild Ass, found in Northeast Africa. Only a few were still living in the Danakil Desert of Ethiopia when a number of them were captured and brought to HAI-BAR, where they began to once again propagate. The Somali Wild Ass has incredible strength for its size and subsists on desert shrubs as its only food. This explains why our modern-day mules and donkeys can stay healthy and strong on much less feed than today’s horse requires.
 The unique personality traits of the mule come from the ass. Unlike horses, mules are naturally curious, but are also suspicious and require time to size up a situation before acting. For this reason, it usually takes time for people to warm up to mules and time for mules to warm up to people. Because their judgment of people is unmatched, it is wise when buying a mule to allow him to pick you! A lot of the mule’s so-called“stubbornness” is really a sense of self-preservation. If he has a negative experience, he is not likely to repeat it. His memory serves him well and he never makes the same mistake twice. For this reason, it is important that the personality of the mule and his handler are compatible and that they actually like each other.
The old myths, “stubborn as a mule,” and, “a mule will wait for the opportunity for revenge” are just those…myths. I would suppose these opinions arose from those who were probably impatient when dealing with mules. When left to their own devices, mules will learn from their experienced peers and from those who truly care about them. And people who are confrontational with mules will meet with undeniable stubbornness and resistance.
It makes sense that mules and donkeys have become so economically important to Third World countries. They are generally sedate, humble and hard working animals with an intelligence that enables them to learn their job quickly. They can go anywhere man can go, and do the work of many at far less expense—which is more than can be said of any motorized vehicle. Mules and donkeys are still an important part of third world economies. There are educators from The Donkey Sanctuary in Great Britain and other sanctuaries who visit these emerging countries, with the expressed purpose of teaching people how to work more efficiently with their longeared counterparts, since the very existence of many third world nations depends upon this partnership.
To learn more about Meredith Hodges and her comprehensive all-breed equine training program, visit LuckyThreeRanch.com, MEREDITH HODGES PUBLIC FIGURE Facebook page, or call 1-800-816-7566. Check out her children’s website at JasperTheMule.com. Also, find Meredith on Pinterest, Instagram, MeWe, YouTube and Twitter.
© 2010, 2011, 2015, 2016, 2020, 2023 Lucky Three Ranch, Inc. All Rights Reserved.

MULE CROSSING: Longears Loving Impact
By Meredith Hodges
“Behold, thy King cometh unto thee:
he is just and having salvation; lowly
and riding upon an ass, and upon a colt
the foal of an ass.” – Zechariah 9:9

These words have been an inspiration to all who have heard them since the time they were written—to those of us who love Longears, the words carry the message of a lifetime and the secrets of a dream. Not only did the Lord Jesus ride into Jerusalem on the back of an ass, but remembrances of that ride are clearly marked on the backs of many asses since in the form of a cross. One can really only guess why asses received this unique blessing, but as the Lord blessed the asses, so they have in return endeavored to bless us with their righteous ways.
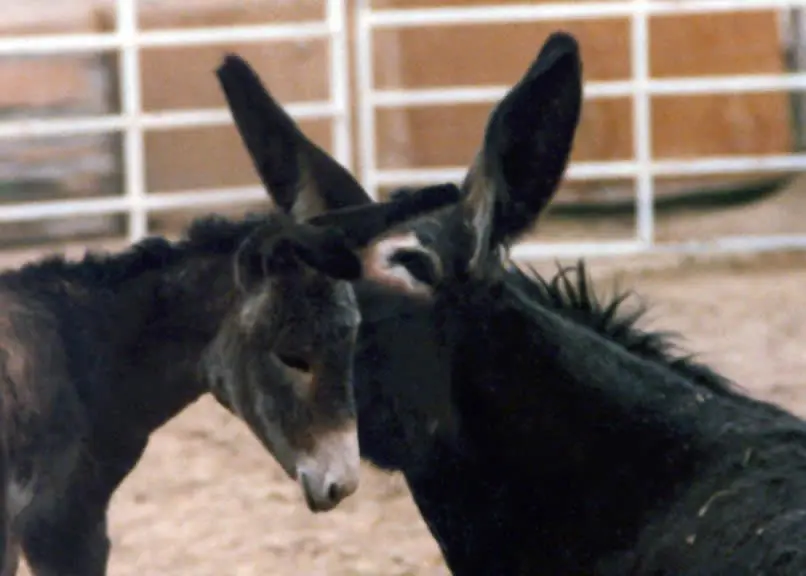 It would seem that the asses were chosen because they represent more fully the characteristics in all of us that are just and good. The most evident inspiring characteristic of the ass is his undying affection for humans and the patience he exhibits when dealing with them; an excellent portrayal of this affection and patience is found in Marguerite Henry’s story of “Brighty of the Grand Canyon.” In addition, asses are not possessive creatures. They do not seek to impress, nor do they have inflated ideas of importance. They are humble, not greedy or selfish and are content to give freely all that they have to give. There is no limit to their endurance and no end to their trust. Unpleasant moments are undoubtedly remembered, yet forgiven when requested and owners are inspired to be more constructive in their management and training methods. Within asses, there is a hidden hope of happiness, contentment, peace and brotherhood. The inspiration of these noble characteristics does not go unnoticed as they ennoble those around them.
Throughout our lifetimes, we are faced with challenges and choices, most of which are met by trial and error. Asses limit and simplify our choices, leaving us less room for trial and error and more chance for success. An example of this could be the man who could not make his donkey cross the bridge over a deep, wide canyon. Failing to cause the donkey to cross the bridge, the man spent much extra time walking his donkey down one side of the canyon and up the other. As they rested at the far side of the bridge, a horse and rider approached the same challenge. The horse balked, but the rider forced him onto the bridge. About the middle of the bridge, the boards were rotted and horse and rider plunged to their death – a costly lesson. “He who trusts in himself is a fool, but he who walks in wisdom is kept safe” (Proverbs). Stop, look, and listen with your heart as well as your ears. Your donkey has much to teach you.
 Man has always sought to better himself and his environment. He seeks to set shining examples to all, however, he falls short due to negative aspects in his character. The ass, who has always been humbled, does not seek to set examples, he is an example with his honest and faithful ways. He is quick to accept that which is good and tolerant of all else. This unique character coupled with his physical abilities makes him an excellent life partner.
Perhaps, the most important and unselfish contribution the donkey has made in this world is his willingness to produce offspring not of his own species. We can only imagine the reasons for this. Perhaps, he saw a chance to combine his incredible character with the physical beauty of the horse, again to try to please us humans and make him more attractive to us. But whatever the reasons, mules and donkeys are attracting more humans with each passing year. They instill in us a desire to support and promote their cause, which in turn becomes our cause. What human can detest the cause of happiness, contentment, peace and brotherhood?
 It is apparent, like never before, the impact that Longears are having on people all over the world. The shows and events including them have grown tremendously over the last 50 years, and the number of people affected by them has increased so much that we now see people in localized areas putting on their own events. In Colorado, for example, the only shows for Longears were incorporated into larger shows such as the Colorado State Fair and the National Western Stock Show. Today, counties are taking initiative to include mules and donkeys in the county fairs, and local riding clubs are inviting them to participate in annual All-Breed shows. Increased understanding and appreciation for the positive qualities of Longears brings more and more people together all the time. Their generous ways have positively influenced people toward a genuine pursuit of happiness. Why is this phenomenon occurring? Because, “We may not realize that everything we do affects not only our lives, but touches others too. A little bit of thoughtfulness shows someone you care and creates a ray of sunshine for both of you to share. Yes, every time you offer someone a helping hand, every time you show a friend you care and understand, every time you have a kind and gentle word to give, you help someone find beauty in this precious life we live. For happiness brings happiness, and loving ways bring love; and giving is the treasure that contentment is made of.” (Amanda Bradley).
To learn more about Meredith Hodges and her comprehensive all-breed equine training program, visit LuckyThreeRanch.com, MEREDITH HODGES PUBLIC FIGURE Facebook page, or call 1-800-816-7566. Check out her children’s website at JasperTheMule.com. Also, find Meredith on Pinterest, Instagram, MeWe, YouTube and Twitter.
© 1985, 2016, 2021, 2023 Lucky Three Ranch, Inc. All Rights Reserved.


MULE CROSSING: Living with Longears
By Meredith Hodges
 In the beginning, my home, Lucky Three Ranch was a 10-acre sheep ranch with a small house and hay barn, an old Quonset hut, a feed barn, four three-sided sheds, and a perimeter fence made from sheep fencing with barbed wire on top. It was crossed-fenced around the sheds with some heavily chewed board fences and anything else the previous owner thought could be used for fencing. I’d already had experience with horses, but it wasn’t until my first mule, Lucky Three Sundowner and my first donkey jack, Little Jack Horner, finally arrived at the new Lucky Three Ranch that my lessons with Longears really began!
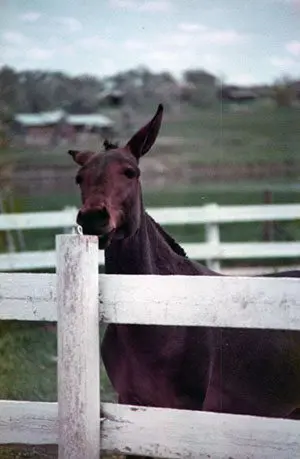 One of the first things I found out about Longears is that they are incredible artists, and they will “sculpt” anything and everything they can get their teeth, rumps or hooves on! My Longears immediately set to work sculpting the posts on three sheds that were near the house and the fence posts around them. We tried everything to get this to stop, but to no avail, and in three short years, we ended up with posts that were no bigger than toothpicks in some places and marvelously contoured from top to bottom, into all kinds of remarkable shapes. We hated to put a cramp in our mules’ artistic style but, clearly, the wooden posts and sheds had to be replaced.
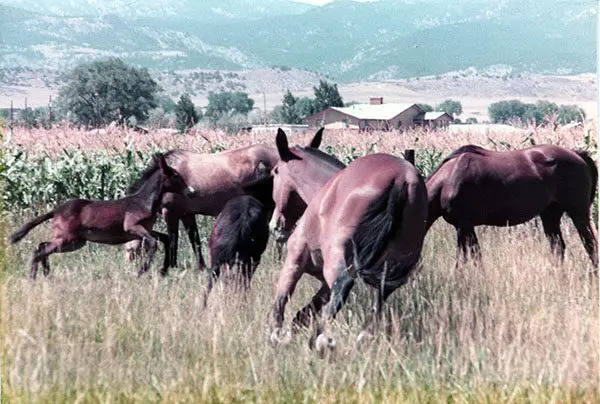 By now, we had bred three more mules, so while we were working on replacing the three sheds, we put the whole herd of mules and mares into a five-acre pasture. One day, while we were working on the new sheds, the whole herd suddenly showed up behind us! Apparently, one of our equines had pulled a “Houdini,” opening the gate and letting everyone out of the pasture. Being the affectionate and curious animals they are, our Longears (and horses) then decided they’d better come see if we needed any help.
When we rounded up the herd and took them back to the pasture, we almost fell over! The herd had sculpted all three support posts on the last existing shed that was in the pasture, so it now looked just like the other three sheds we had just replaced!
With all this creative woodworking going on, we realized the new barn would have to be made of steel. We built a 14-stall, Port-A-Stall barn with steel panels in the runs, and stall floors six inches higher than the floor of the barn alleyway to help keep it from flooding. We added four inches of pea gravel in the runs for good drainage but, after several seasons, the runs on 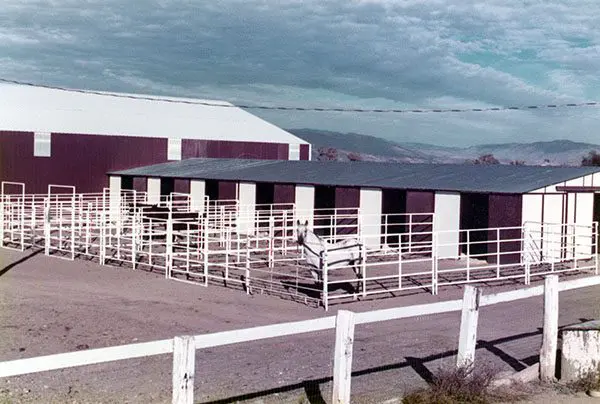 the north side of the barn began to get soft and muddy again and more pea gravel was needed. Rather than doing the runs one run at a time, the seven mules on the north side of the barn were turned out, and we took down only the panels on the north side, so the delivery truck could dump the pea gravel directly on the site. The remaining mules on the south side of the barn were left in their stalls and runs.
It took us all day long to take down the panels, and by the end of the day, we were pretty exhausted. The truck would be bringing the additional pea gravel the next day, so we wrapped up the chores and went to bed. What I didn’t know was that Lucky Three Eclipse (aka “Ely” in the last stall on the south side) had been watching us all day long through the openings in the barn doors. When we came out in the morning, we found that Ely had pulled the pins from the side panels, and by putting his head through the bars of each panel, had arranged them into a huge pen for himself that ran the full length of the barn, trapping the other mules and the stallion in their stalls! Now that the south side pens were also opened up, we decided to use the first truckload of pea gavel on the south side pens and ordered yet another load of pea gravel for the north side pens. After we got the pea gravel in place on the south side, we put the panels back where they belonged, freeing the other mules and stallion on the south side from their stalls. We then put Ely back where he belonged in his stall and pen on the far end, finished the north side pens, returned all the mules from the north side of the barn back into their stalls and runs, and finally got things settled down. I can guarantee you we all had a new appreciation for Ely’s ingenuity!
 We spent the next several years taking down barbed wire, mending old field fences and replacing the old sheds with steel Port-A-Stall sheds, replacing cross fences with vinyl, building two more steel barns and lining our indoor arena with steel. As we all know, Longears are very intelligent, and they will use their “smarts” to figure out a way to simplify a task. If you want to step over a fence but it’s a little too high, what do you do? Well, if you’re a mule, you sit on it to push it down, and then you can step over it. Although the horse fencing we used to replace the sheep fencing was fairly high, my Longears still managed to sit on the middle of it, bowing it out into incredible, irregular shapes…after they had first shorted out the hotwire, of course. This was their daily ritual. Maybe they had a crew meeting first thing every morning and planned how they’d do it. Who knows?
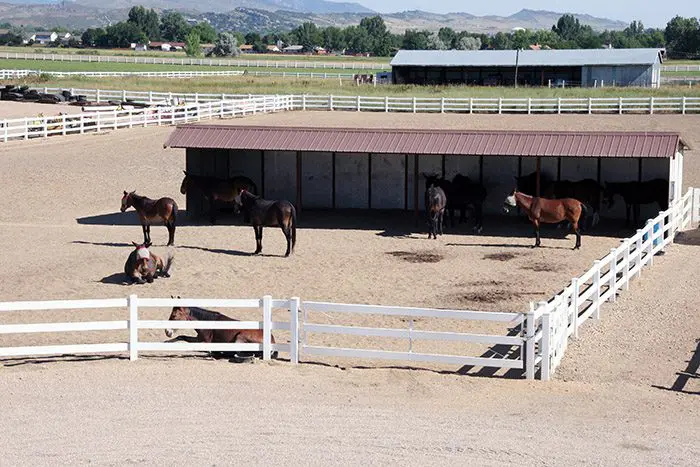 But to this day, I still don’t know how they shorted out the hotwire! One thing my Longears have taught me through our years together is that, if you are going to have mules, you’d better learn to have a good sense of humor or you will never survive their pranks! We learned to drill holes in the posts for a hotwire across the top of the new vinyl fencing and that worked very well, but that was only after they had removed all the vinyl rails from the fence overnight. They were delighted that I had given them their own “Tinker Toy” set. They never left the pen, although they could have! Each time our mules have made “art,” pulled pranks, or managed amazing escapes, we learned how to improve our system and materials, until finally upgrading to an all-steel facility with vinyl fencing topped with a relatively inaccessible hotwire. Now we no longer need to worry about what the mules and donkeys might do…until the next time. (PLEASE don’t tell Ely I said that!)
To learn more about Meredith Hodges and her comprehensive all-breed equine training program, visit LuckyThreeRanch.com, MEREDITH HODGES PUBLIC FIGURE Facebook page, or call 1-800-816-7566. Check out her children’s website at JasperTheMule.com. Also, find Meredith on Pinterest, Instagram, MeWe, YouTube and Twitter.
Covered in TRAINING MULES & DONKEY: A LOGICAL APPROACH TO TRAINING, TRAINING WITHOUT RESISTANCE, EQUUS REVISITED and A GUIDE TO RAISING & SHOWING MULES at www.luckythreeranchstore.com.
© 2014, 2015, 2016, 2018, 2024 Lucky Three Ranch, Inc. All Rights Reserved.

MULE CROSSING: Introduction to Behavior Modification, Part 2
By Meredith Hodges
In Part 1 of Introduction to Behavior Modification, we addressed the steps involved in employing the reward system of training properly whereby desired behaviors are rewarded promptly and negative reinforcement is quick, fair and used sparingly. In Part 2, I will explain how to break down more complex movements into smaller steps that are simple and easy to accomplish, and then how to string them together in order to get the desired response from your equine.
Shaping Behaviors
 Shaping behaviors takes reinforcement to the next level. Now you are working with the tendency of an animal to perform in the right way and guiding that performance toward your ultimate goal. This is called successive approximation. For example, if you are teaching a turn on the haunches on the lead line, you must first ask for one step forward. Then walk toward your animal’s shoulder and ask for the turn. In order to teach him to plant his rear pivot foot before the turn, the process must be broken down into smaller steps. First, ask for the step forward and reward him immediately when he complies. Then move on and ask for one step forward and one to the side, rewarding him again when he’s successful. Then ask for one step forward and two to the side and reward, and so forth.
Eventually, your animal will complete as many steps as you desire and, at the same time, learn to cross one foot over the other and only do as many steps as you ask. B.F. Skinner describes shaping behavior as a response that must first occur for other reasons before it is reinforced with a reward and becomes an operant or “action of choice.” A complex response such as executing the entire turn all at once would never occur naturally correct to be reinforced if you simply “turned the animal around.” He could not possibly understand that he must place the pivot foot before the turn is executed, and would most likely just “swap ends,” with no pivot foot placement and no finesse to the turn. However complex responses can be shaped by separately reinforcing their component parts. Then these parts can be put together in the final form of the operant or “desired action.”
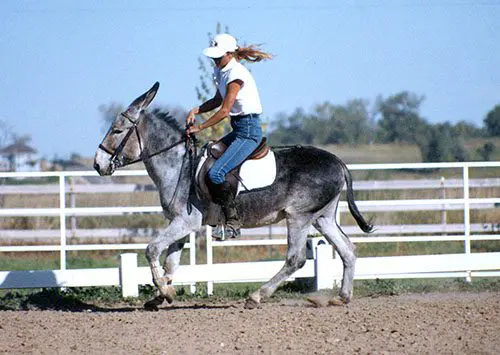 An example of shaping a behavior by breaking it down into a string of very small steps is how I taught my donkey, Little Jack Hornerto canter. Although many people tried to tell me that donkeys don’t canter, I had seen donkeys canter when they ran free, so I knew it was possible. First, I set the goal of cantering a circle. No one could run ahead of my donkey fast enough to reward him with oats and negative reinforcement such as the crop didn’t work well at all, so I had to find another kind of reinforcement. Using the pleasure principle of finding the best motivation for an action, I put my cycling broodmares into a pen at one end of our hayfield and I took my jack to the other end. When asked to canter toward those mares, he did so eagerly. He first learned to canter in a straight line. I reinforced the action verbally with, “Good, good,” while we cantered, and then I gave him a food reward once we reached the pen.
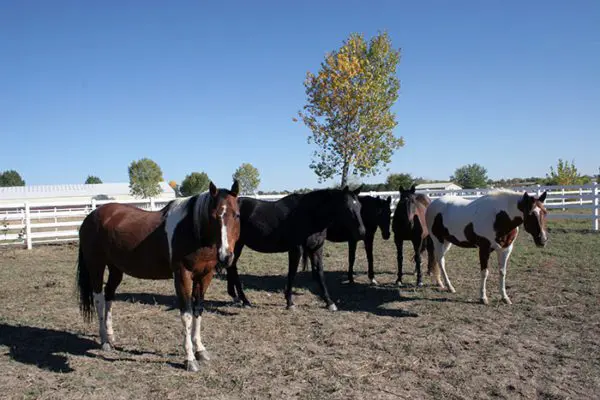 The next time I did the same thing, but this time I turned my donkey in a large half-circle route to the pen, and I rewarded him again the same way. The third time, I asked for a little more of a circle and I got it. Several times later, I was able to get an entire circle before we ran the line to the pen with the mares in it. Once my donkey learned that he could canter easily with me on his back, I didn’t need the mares anymore.
I took Little Jack Hornerinto the arena and tried to canter the perimeter with him. At first he cantered a few strides and then dropped to trot. Each time he cantered, I praised him verbally, and when he broke 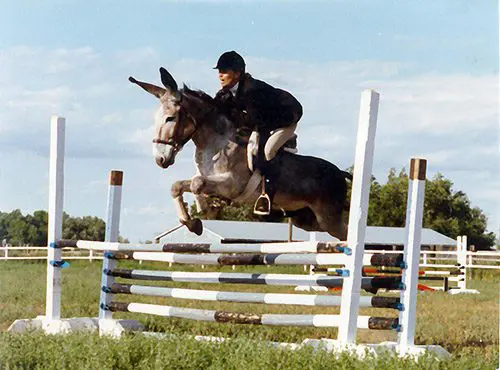 to trot, I would finish the circle, stop him and praise him with the food reward. It was slow going the first few tries, until I started counting strides and realized the jack was adding one more stride at canter with each attempt. Before long, he was cantering the full circle with ease on command.
With training like this, my donkey jack, Little Jack Horner, has performed successfully in Trail, Reining (with spins, slides and flying lead changes), Second Level Dressage and even performed at Bishop Mule Days where he jumped four feet in exhibition —quite remarkable for a 13-hand equine, and a donkey no less!
The Ten Principles of Behavior Shaping
1) Establish and raise your performance criteria in increments small enough to give your animal a reasonable chance of success and create an opportunity for positive reinforcement. If the criteria are too challenging, the animal may fail and give up.
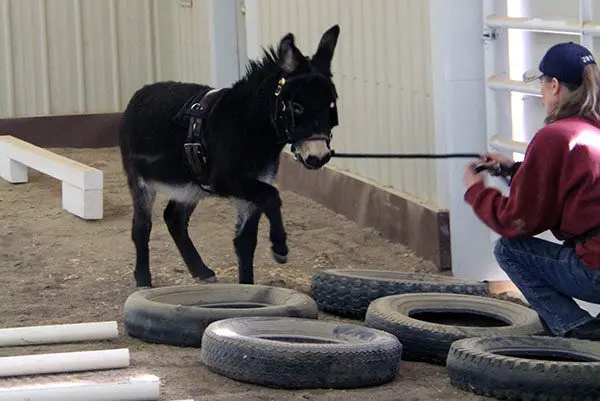
2) Train for one aspect of a behavior at a time. Do not try to teach several skills at once. When training for a dressage test, for example, do not practice the whole test every day. Take a few sections of the test and work on those. Practice going up and down the centerline in straight lines. Practice 20-meter circles. Practice going deep into the corners of the arena with the right amount of bend. Shape the ultimate result by gradually linking the components, and they’ll fit together nicely. Ride the test as a whole, and the quality of the smaller components will suffer.
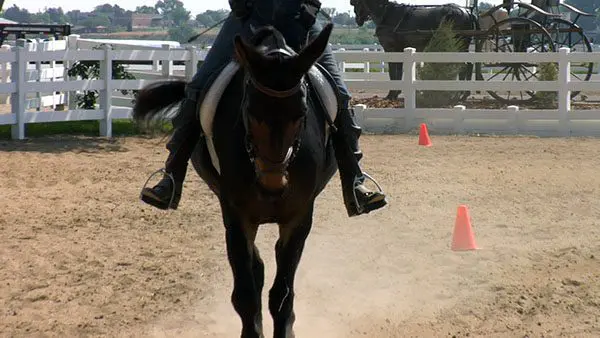
3) Before you move to a new skill, put the current skill or behavior on a variable level of reinforcement. Use a fixed schedule of reinforcement on any new behaviors, rewarding verbally and with oats each time the behavior is performed, but once the animal “gets it,” reward less often and randomly. Then, as you add a new behavior, reinforce that behavior on a fixed schedule, while randomly rewarding learned behaviors.
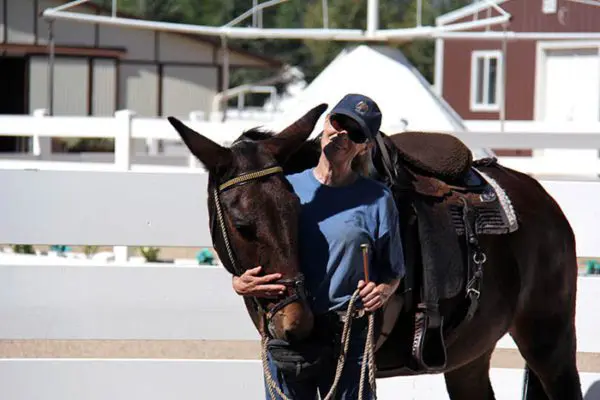
4) When introducing new behaviors, relax expectations on the old ones. What was once learned is not forgotten, but under the pressure of assimilating new behaviors, the old behaviors sometimes temporarily fall apart.
5) Stay ahead of your trainee. Be prepared with what you will ask next, in case your animal has a sudden breakthrough and easily performs the next step. You must keep your equine challenged in order to maintain his interest.
6) Avoid changing trainers in midstream. The animal/trainer relationship is an integral part of the training. Changing trainers disrupts the training process until a new bonded relationship is formed. The owner should be doing the training with only guidance from a professional trainer as the animal will bond to the person who actually does the training.
7) If one shaping process is not working, try another. Individuals, whether animal or human, learn in different ways. Continue with the premise of reinforcement, but find what works best for your animal at any given stage. For example, if you cannot get your equine to back through barrels in a figure eight, simply begin by going forward and always start between the barrels to allay any fears he might have of them.
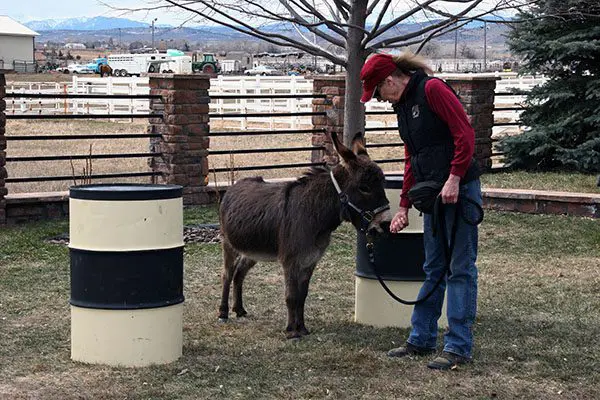
8) Do not interrupt the training process without cause—this constitutes a punishment. When you are training, try to avoid interruptions. When you train using the methods of behavior modification, you are obliged to reinforce the good behaviors. If you aren’t paying attention, you may inadvertently punish a desired behavior if you interrupt it. The most common example of an infringement would be talking to someone while you are training the animal. If you must talk to someone, simply include the equine in the conversation.
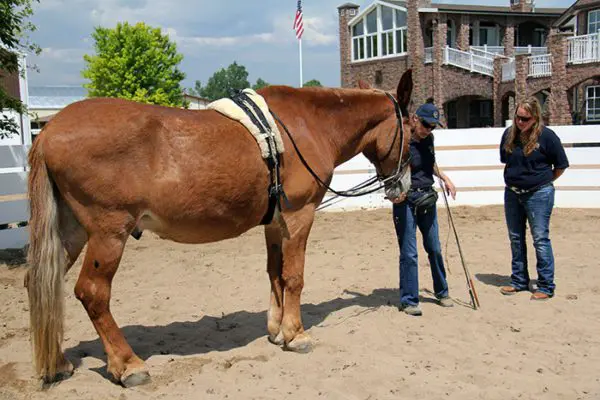
9) If a learned behavior begins to deteriorate, simply review and use fixed reinforcement until it is re-established. Sometimes side effects from negative reinforcement can cause this to occur, but if you remain calm and patient, the animal should relearn quickly.
10) Quit while you’re ahead. At the beginning of the each session, you will likely see improvement from where you were at the end of the session before. Drilling on a desired behavior will make the animal tired and less willing to perform. Better to quit with a good assimilation of the requested behavior, and work to refine it in subsequent sessions.
The Road to Success for You and Your Equine
 As you begin to understand the principles of shaping and modifying behaviors, it is important to realize that it is a lot like dancing, cooking or any other learned skill—the only way forward is with practice. The more you practice, the better trainer you will become. You have the opportunity to practice positive reinforcement every moment of your life, reinforcing behaviors in everyone—the cat, the dog, your husband or wife, your children. It becomes a game of noticing and praising positive accomplishments while setting clear boundaries to all behaviors, large or small. With practice, you will increase your awareness and, thus, your skill. The success or failure of your efforts to shape behavior in any animal does not depend upon your expertise, but on your patience, respect, consideration and consistency during the process. This may not be the easiest way, but it is extremely effective—and it’s fun!
To learn more about Meredith Hodges and her comprehensive all-breed equine training program, visit LuckyThreeRanch.com, MEREDITH HODGES PUBLIC FIGURE Facebook page, or call 1-800-816-7566. Check out her children’s website at JasperTheMule.com. Also, find Meredith on Pinterest, Instagram, MeWe, YouTube and Twitter.
Covered in TRAINING MULES & DONKEY: A LOGICAL APPROACH TO TRAINING, TRAINING WITHOUT RESISTANCE and EQUUS REVISITED at www.luckythreeranchstore.com.
© 2005, 2011, 2016, 2018, 2024 Lucky Three Ranch, Inc. All Rights Reserved

MULE CROSSING: Introduction to Behavior Modification, Part 1
By Meredith Hodges
“Throughout history, mules and donkeys have been pegged as being stubborn and therefore stupid, but I have found just the opposite to be true. They are intelligent, sensitive animals, and they have a particularly strong survival instinct. They’ll go to great lengths to avoid danger or what they perceive as danger, and the process of training a mule or donkey is the process of earning their trust.”
—Meredith Hodges, internationally recognized mule and donkey training expert
 When I began working with mules and donkeys, I quickly realized there would be no shortcuts to successful training. I steered clear of fads, trends and shortcuts and, instead, based my training program on Behavior Modification techniques developed by world-famous behaviorist B.F. Skinner over a century ago. For many years now, I have used these techniques to successfully train my own champion mules and donkeys, and I continue to share my method with millions of people through my books, an award-winning DVD series, multiple television shows, my comprehensive website and on Social Media.
The techniques presented here work well with not only mules and donkeys, but also with horses and any other trainable animals (and even humans). The program is designed to be resistance free, and the goal is—and always has been—to help people get the best performance and most enjoyment from their animals and to insure that the animal receives the best treatment possible.
Behavior Modification Basics
As a young adult I worked as a psychiatric technician at Sonoma and Napa State Hospitals in California, and the Behavior Modification techniques I learned at that time proved ideal for my later equine training purposes for two major reasons:
˚The system in which the trainer sets performance goals and rewards positive behavior leading to achievement of those goals encourages “good” behavior instead of using fear-inducing punishment to suppress “bad” behavior.
˚The step-by-step approach that builds gradually on learned skills gives the animal a sense of security and achievement that encourages trust and helps minimize resistance.
 Animals, like humans, need a predictable routine in order to learn. Just as children progress through grade school, building on their knowledge with each successive grade, animals learn best when a solid foundation is laid for each new skill. By creating a logical program from the outset, we avoid the confusion that can lead to resistance.
These levels of achievement are at the heart of Behavior Modification as a training tool. Acceptable levels of behavior must be defined at each level of training, beginning with the simplest of expectations and working forward. At each level the animal must accomplish certain tasks, and each accomplishment must be acknowledged and reinforced. Also note that it is critical—especially if you are working with a mule or donkey—that you, the owner, participate in the training process. Mules and donkeys develop a strong bond with their trainer, and if they’ve learned from someone else, their performance for you may suffer in the long run. It is also advisable to consult with an experienced trainer in your area, and if you are working with my Training Mules and Donkeys training series, I am just a phone call away.
Reinforcing Behaviors
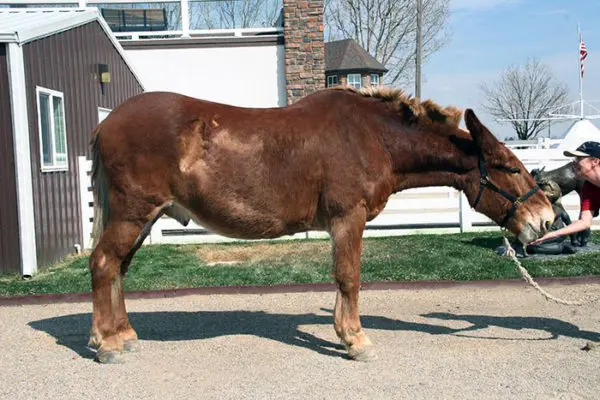 Everything we do, every behavior we choose, is based on an instinctual desire to experience pleasure and avoid pain. Our choices reflect our experience. They are “reinforced” by the pain or pleasure they have given us in the past. Behavior Modification uses the same principles of positive and negative reinforcement with an emphasis on positive reinforcement.
In training, positive reinforcements delivered in the form of rewards. We know that an equine, when rewarded for performing a certain task, will be willing to perform it again in anticipation of another reward. Note, however, that positive reinforcement is not bribery. The reward is not given as an inducement to perform the task, but as a reward for a task completed. The reward should be something the animal loves and will consistently work for, yet something that is nutritionally sound. In the case of equines, rolled or crimped oats work far better than rich snacks full of empty calories and are healthier for your equine.
 Positive reinforcement also takes the form of verbal cues. When your animal performs the desired behavior, you should, simultaneously and with appropriate enthusiasm, say the word, “Good!” This works well when it isn’t possible to give a food reward right away. Clicker training, which has become a popular and effective means of audible reinforcement, is similar and applies the same concept. It’s immediate, it’s consistent, and it can be used with all mules, donkeys and horses to reinforce behavior. However, I feel that it is better to use your voice than a clicker, as the sound of your voice promotes engagement with your equine on a more intimate level, so your voice will yield better results than clicker training.

Negative reinforcement is used not to punish the animal but to encourage them to make a better choice. Negative reinforcement should be brief, to the point and used sparingly. It should never be of long duration or given arbitrarily. Negative reinforcement, such as a slap or a loud “No!” shouldn’t be used so often that it makes the animal unresponsive altogether. Remember that reinforcement by its very definition always strengthens behavior. Punishment is used to suppress behavior and may trigger other undesirable behaviors. B.F. Skinner himself said that positive reinforcement may take more patience, because the effect is slightly deferred, yet it can be as effective as negative reinforcement and has fewer unwanted residual behaviors. When you begin training, you will have to give a verbal and food reward every time the animal performs a desired response. Still, negative reinforcement is necessary to define boundaries.
 As your equine learns certain behaviors, you can reinforce the learned behaviors less frequently and focus on frequently rewarding new achievements. Gradually, your animal will become satisfied with a verbal reinforcement for established behaviors, and he will comply for longer periods between food rewards. This shift from a predictable, or fixed, schedule of reinforcement to a variableschedule helps with skill progression. For example, in the transition from lunging when your animal was initially given a reward after each set of rotations in the round pen, to riding, he can eventually be ridden through his entire 30 to 40 minute session before receiving a reward.
Beware of the “delayed gratification” phenomenon, however. If your animal suspects that it will be too long before he receives a reward, he may be reluctant to even begin. Often a quick reward for a simple task at the beginning of a lesson is incentive enough to get him started. Also keep in mind that reinforcing too soon is ineffective. Your animal should be rewarded immediately after the correct behavior, not before. An animal rewarded too soon or too often can become aggressive and/or resistant to training. Remember, each of your own behaviors elicits a response from your animal. You must be meticulous in the way you ask your animal to perform, and always be aware of your own actions. In Part 2 of Introduction to Behavior Modification, I will explain how to break complex behaviors into small and simple steps to achieve the best results.
To learn more about Meredith Hodges and her comprehensive all-breed equine training program, visit LuckyThreeRanch.com, MEREDITH HODGES PUBLIC FIGURE Facebook page, or call 1-800-816-7566. Check out her children’s website at JasperTheMule.com. Also, find Meredith on Pinterest, Instagram, MeWe, YouTube and Twitter.
Covered in TRAINING MULES & DONKEY: A LOGICAL APPROACH TO TRAINING, TRAINING WITHOUT RESISTANCE and EQUUS REVISITED at www.luckythreeranchstore.com.
© 2005, 2011, 2016, 2018, 2024 Lucky Three Ranch, Inc. All Rights Reserved


MULE CROSSING: Assessing Your Equine
By Meredith Hodges
 Just like humans, all equines have different personalities. They’re not cookie cutters and should not all be treated the same way, so observe your equine whenever possible and see what he naturally likes to do, and then adjust your training program accordingly. Although each animal must go through the same kind of basic training to make sure he is building good core muscle strength in balance and good posture, he will have his own way of learning, so your presentation of the tasks may differ from one animal to the next. When you have multiple animals, treat each one of them like he’s your favorite.
Before you invest a lot of time and effort deciding whether to continue training your equine or that he will be happier as part of the stud barn, take the time to evaluate his athletic potential. The principles discussed in this article—which are applicable to donkeys, mules or horses—were developed by my mentor, the renowned resistance-freehorse trainer, Richard Shrake.
 First, let’s look at conformation. It goes without saying that your equine should appear wellbalanced and in good proportion, with flat knees and smooth joints. He should be free of unsoundness. There are published standards on most breeds, or you can pick up a good 4-H manual or a judging manual to give you an idea of what the ideal is for each breed with regard to conformation
Next, we’ll look at body measurements that are used to gauge your equine’s athletic ability. These measurements will help you assess the kinds of activities for which your animal is best suited, so you can plan whether or not to take his training beyond the basics.
 Begin with a six-foot piece of baling twine or string. The first measurement is from the poll to the middle of the withers. Then measure from the middle of the withers to the loin at the base of the rump. If these measurements are the same, you have a balanced animal that will be able to perform with more ease. If the neck is slightly longer, he will still be athletic because the head and neck are used for balance. But if the neck measurement is shorter, it will be difficult for your equine to balance through certain movements and transitions during all activities.
Next, measure your equine around the throatlatch. Then measure around the collar from the withers to the chest at the point of shoulder and back to the withers. This measurement should be twice that of the throatlatch, which indicates that your equine will be better able to flex at the poll,making him easier to collect and bring into the correct framefor optimum performance.
 Now measure the top of the neck from poll to withers and the bottom of the neck from throatlatch to chest. The top line should be 1.5times that of the bottom, enabling your animal to perform nice, soft movements during all activities. A “u-necked”animal cannot bend properly and will never be able to achieve good collection in balance and good posture. His neck and back will be hollow, making it difficult for him to efficiently carry a rider, which can result in future soundness problems.
 Next, measure the equine’s legs from the elbow to the coronet band, and then from the stifle to the coronet band. Both measurements will be the same in an evenly
balanced animal. This means he will be a good pleasure prospect, with smooth movements at the walk and trot. If he’s a bit longer in front, he will be a good prospect for Reining, jumping or Dressage because his trot and canter will be smooth,with greater impulsion from the hindquarters with an uphill balance. An animal that is higher in the rear will find it difficult to balance, so he’s probably not going to be a good athletic prospectbecause the weight will be unevenly dumped on his front quarters.
 Ideally, your prospect should also be graced with 45-degreeangles at shoulder and hip,and with the same angle at his pasterns. This ideal angle will result in softer gaits and transitions, whereas a straighter hip and shoulder will result in abrupt transitions and a rougher ride. The higher the angle (90+ degrees), the longer the stride will be; and the shorter the angle (90- degrees), the shorter and quicker the stride.
 Now let’s see how your prospect moves. Stick a piece of masking tape at the point of his hip as a visual reference point. Ask someone to assist you by trotting your equine on a lead as you watch the way he moves. Does his hock reach underneath and pass in front of the tape? If it does, his hindquarters will support strenuous athletic movements, his transitions will be more fluid and smoother, and his head and neck will stay level. If his hock does not reach underneath him sufficiently, he will be out of balance and must raise his head and neck through transitions.
Finally, ask the person assisting you to lead your equine while you watch him walk through smooth sand. Does his hind hoof fall into the track made by his front  hoof? If he is exact, he is graced with the smooth, fluid way of going of a world-class pleasure animal. If he over-reaches the track, he has wonderful hindquarter engagement and you may have a candidate for Reining,Dressageor jumping. If he under-reaches the track, he is out of balance, causing him to raise his headand neck. He will have difficultythrough transitions and movements, which will undoubtedly make him unsuitable for advanced athletic activities.
These measurements can be quite helpful in determining your animal’s athletic future, and they can be trusted because the laws of physics are at work. But there is more to being a great athlete than just conformation. You must also assess at the personality of each individual animal. Again—these principles apply to mules, donkeys and horses.
First, let’s look at your animal’s trainability. One of the benefits of owning a registered animal is that you will have plenty of background information regarding his gene pool. Some lines are famous for being smart, athletic and good-natured. Some are known as being high-strung and nervous, perhaps making them inappropriate for certain riders. Plan to do your research before you look at a prospective animal being sold by a private owner or at an auction.
 There are some practical tests you can do to help you assess an animal’s trainability. First, ask the person assisting you to hold your equine’s lead rope while you pick up a handful of sand, and then trickle the sand through your fingers near your animal’s head. Does he turn and look at you? If so, this is a good indication that he is interested in what you’re doing, which usually means he will be more trainable than an animal that ignores you.
The next test is to run your finger lightly from your equine’s girth, across the barrel to the flank. Do this on both sides. Does he tolerate this with little movement, or does he twitch and even flinch? This test will give you an idea of how he will react to your legs when you are riding. (The animal that is less touchy will be the one who learns your cues most efficiently, whereas the one that flinches is more likely to overreact.)
 Now stand at your animal’s shoulder and gently put your hand over his nose, and then ask him—with a gentle squeeze and release action from your fingers—to bend his head and neck toward you. Do this on both sides. Does he bring his nose around easily or do you feel resistance? If he gives easily, it is a good indication that he is submissive and will be willing to learn more quickly.
The final check is a simple test to assess your equine’s reaction under pressure. Ask the person assisting you to hold the lead rope while you make an abrupt move, such as jumping and flapping your arms. What is your equine’s reaction? If he tries to run off, he’s probably not the best candidate for equine sports such as Side Saddle or driving, which require a steady animal. On the other hand, if he stops to look at you and tries to figure out what you’re doing, he may be a really great candidate for advanced training.
 When you go through the basic exercises on the lead line and in the drivelines, there may be times when you experience resistance from your equine. Think of your animal’s resistance as a red flag that could be telling you that you either need to reassess your approach and consider a different path to the same end, or that you may simply need to break a current action down into smaller and more understandable steps. Don’t get caught up in the blame game (“It’s his fault, not mine.”) and lose your temper just because things aren’t going the way you expected. If, instead, you adopt the attitude that your equine is trying to communicate with you and that, when you meet with resistance, it is your responsibility to change what you are doing, you can avoid a lot of frustration during training and things will go more smoothly between the two of you.
And remember, just because a certain approach worked with one equine doesn’t mean it will work the same way with a different equine, so treat each animal as an individual and stay on your toes. Equines are as diverse in their personalities as humans and each individual may have a different way of learning from one to the other. Look at training as the cultivation of the relationship you want to have with each individual animal and adjust your own actions accordingly.
 Keep in mind that, regardless of conformation and trainability, when you do the right kinds of exercises toward good posture and balance in their correct order—and with adequate time spent at each stage—and adjust your approach to the training of each individual, the result will be that your equine will feel much more comfortable. He will recognize your efforts on his behalf and, as he progresses, training will come more easily for both of you.
To learn more about Meredith Hodges and her comprehensive all-breed equine training program, visit LuckyThreeRanch.com, MEREDITH HODGES PUBLIC FIGURE Facebook page, or call 1-800-816-7566. Check out her children’s website at JasperTheMule.com. Also, find Meredith on Pinterest, Instagram, MeWe, YouTube and Twitter.
Covered in TRAINING MULES & DONKEY: A LOGICAL APPROACH TO TRAINING, TRAINING WITHOUT RESISTANCE, EQUUS REVISITED and A GUIDE TO RAISING & SHOWING MULES at www.luckythreeranchstore.com.
© 2014, 2016, 2024 Lucky Three Ranch, Inc. All Rights Reserved.

MULE CROSSING: Keys To Successful Training, Part 1: Your Working Environment
By Meredith Hodges
The Work Station
It is important that your equine feels safe and comfortable in his surroundings. For this reason, you should use the same place each day to groom and prepare him for his lessons. In the beginning, use a small pen (approximately 400 to 500 square feet) that allows you access to your equine for imprinting, tying, leading and grooming, as described in DVDs #1 and #8 of my series, Training Mules & Donkeys (plus disc #9 when dealing with donkeys), and in Part 1 of Equus Revisited. All the while, you will also be teaching him good ground manners. Remember, routine fosters confidence and trust.
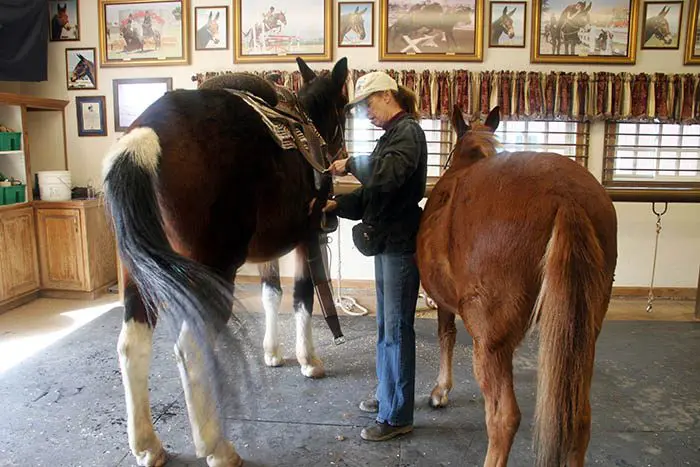 Once your equine has mastered tying and leading in the small pen, he can then move on to a designated work station where he will not only be groomed, but will also learn to accept tack in preparation for the round pen. This should be a place that has a good stout hitch rail and easy access to your tack and grooming equipment.
When working around your equine at the work station, pay special attention to his body language. If he becomes tense or skittish, acknowledge his concerns with a stroke on his neck, supportive words to him and a reward of crimped oats when he settles down. Always learn to wait for him to settle down before you proceed.
Don’t make too much out of unimportant details. For instance, if your equine is pawing the ground, don’t insist that he be still unless you need to approach him and do something specific with him. Many of your animal’s anxious behaviors get unintentionally rewarded by giving him too much attention, which can actually cause the behaviors to escalate. If you ignore pawing, cribbing, throwing of the head, pushing with the nose, stomping and other anxious behaviors, they will lessen over time, provided that you step in, ask him to stop and reward your animal, but only when he is being quiet.
Before you begin to groom your equine—whether you’re going to brush, vacuum or clip him—make sure you give him the time to figure out what you are going to do. He will exhibit his acceptance with a sigh, relaxation of his musclesor with a turn or dropping of the head. Once he has accepted the presence of the item to be used, such as a brush, vacuum or clippers, you can begin. Don’t forget to always start at the front and work your way back to the tail.
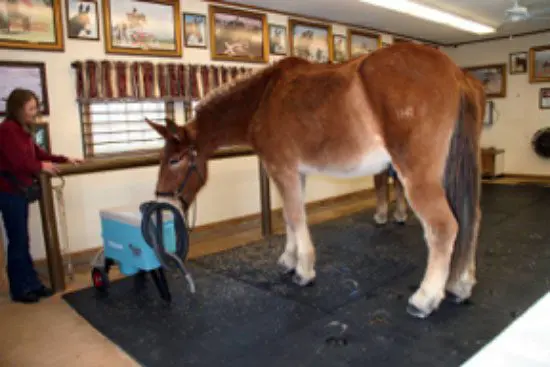 Keep an eye on the pressure you apply whenever using these various grooming tools. Different animals will have different sensitivity to these tools and will tolerate them better if they know you are not going to cause undue pressure or pain. Learn to brush the mane and tail starting at the bottom and working upward, and use a conditioner such as baby oil to keep from pulling or breaking the hair. (Baby oil will also keep other equines from chewing on the tail.) A shedding blade can be an uncomfortable grooming tool when used improperly. When using a shedding blade to remove mud around the head and ears and even on your animal’s body, be careful to minimize his discomfort by monitoring the pressure you apply to each area and working VERY slowly. When bathing him, be extra careful not to get water in his eyes or ears. These types of consideration for your equine’s comfort will help build his trust and confidence in you, and it will help make training easier and more enjoyable for both of you.
Tack and Equipment
In order to elicit the correct response from your equine, always make sure you are using the correct tack for whatever you are 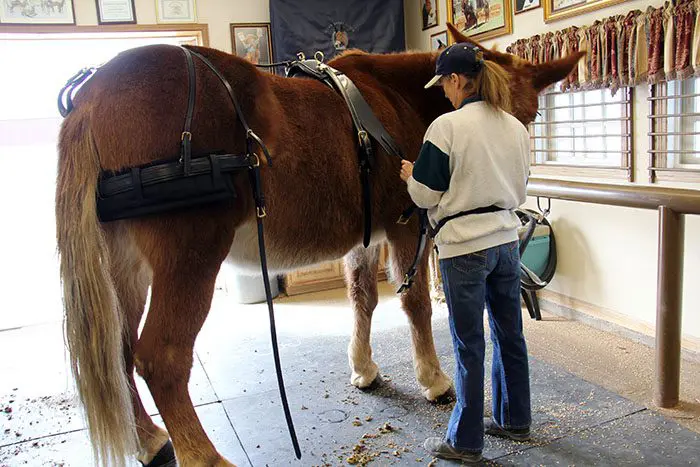 doing. If you are not sure about what tack to use when, go to the Lucky Three Ranch website for more detailed information, or ask the experts in your area. Make sure all tack and equipment fits your animal properly. If it doesn’t, it can cause adverse behaviors during training.
In the Round Pen
Once your equine is leading well in the small pen, he should be in consistently good posture with square halts, easily negotiating trail obstacles in the open and relatively relaxed while at the work station, he is ready to move to a confined area in your arena to work in the Hourglass Pattern in the “Elbow Pull” (see TRAINING/TRAINING TIPS on my website at www.luckythreeranch.com). When these exercises have been completed, he is ready to graduate to the Round Pen.
Once in the Round Pen, you will have an opportunity to assess your animal’s progress so you can begin work on balancing on the circle in good posture and conditioning the hard muscle masses in preparation for performance. The size of your Round Pen is important—45 feet in diameter is ideal. If it is any larger, as you will have difficulty reaching him with the lunging whip, which means you won’t be able to have enough control over him. If your Round Pen it is any smaller, it will interfere with your equine’s balance and ability to develop the right muscle groups. It should be made with relatively solid walls and be high enough so your animal cannot jump out. Your Round Pen can be made of a variety of different of materials, such as 2-inch by 12-inch boards and posts or stock panels. Never use electric fencing, pallets, tires or other non-solid materials. The ground surface should be a three- to four-inch–thick base of soft dirt or sand.
While working in the Round Pen, be aware of how your own body language and verbal commands elicit certain behaviors in your animal. If something isn’t working right, look to yourself and ask yourself what you might be doing to cause the adverse 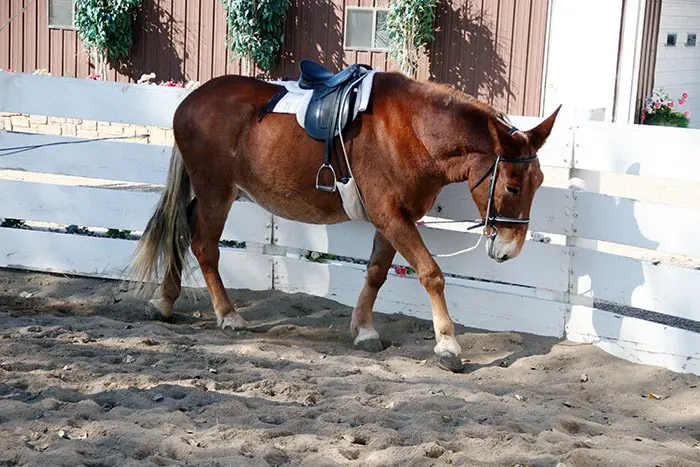 behavior you are seeing. Equines are very honest about their responses, and if they are not doing what you expect, it has to be in the way you are asking. Also, don’t hurry your equine. When asking for the walk, make sure that the walk is even in cadence, balanced and regular—not hurried. Only after your animal is correct in his execution of one gait, should you move on to the next gait. When first introduced to the Round Pen, it is not uncommon for an equine to begin work at the trot and then, as he becomes more comfortable with the new area, at the walk.
If you just let your equine go in an unrestricted frame, he can build muscle incorrectly, which will most likely cause problems later on. To be sure you are building muscle evenly throughout his body, in the correct posture and on both sides, use the “Elbow Pull” self-correcting restraint I devised, as described in DVD #2 of Training Mules & Donkeys. There is a lot of additional FREE information under TRAINING/TRAINING TIPS on my website at www.luckythreeranch.com.
As explained in DVD #1 of Training Mules & Donkeys, while you were doing passive exercises on the lead rope in the small pen, then in the Hourglass Pattern, you were also building the core muscle groups that are closest to the bone. Now that you are in the Round Pen, you will begin to build your equine’s bulk muscle in strategic areas that will strengthen him and make carrying a rider or pulling a cart a lot easier for him. It will also minimize the chance for soreness or injury, as well as resistant behaviors. Keep sessions short, 30-40 minutes, and only every other day at the most. When muscles are exercised, they need to be stressed to a point just before fatigue, and then rested afterwards for one day before repeating. This is the correct and safe way to build muscle. Any other approach will cause fatigue and actually start deteriorating muscle tissue. Remember to use relaxation techniques and warm-up and cooling down exercises with your equine before and after every workout.
In the Arena
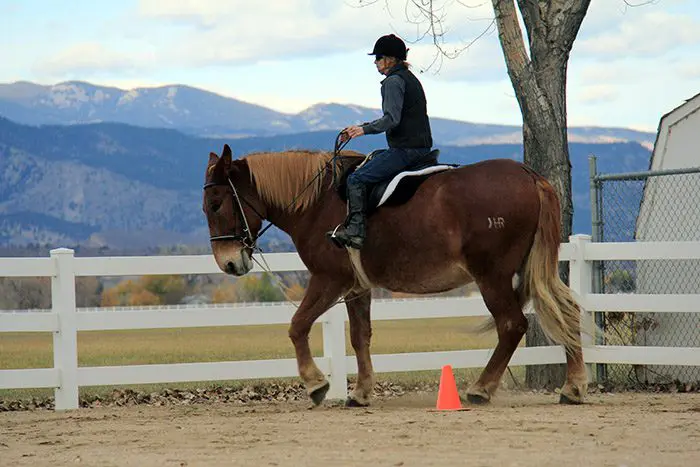 The arena is the place to really start focusing on forward motion and lateral exercises to further strengthen your equine, and it is the place to begin fine-tuning his balance, first during leading exercises, then Ground Driving and finally while he is carrying a rider. The Hourglass Pattern in the arena is also a good place for you to fine-tune your own riding skills, so that you learn to help your equine maintain good balance and cadence, on straight lines and while bending through the corners. In order for your equine to correctly go through the corners, you will be asking him to bend the muscles through his ribcage so he can remain upright and balanced. Equines are not motorcycles and should not lean around the corners. The power should always come from the hindquarters to keep the front end light, supple and responsive to cues. If his front end is heavy and sluggish, your equine is not adequately stepping underneath with his hind legs and will thus, lose forward impulsion and power and will not properly condition his muscles.
Open Areas
Open areas are good for stretching and relaxing at all three gaits. They can be used for negotiation of obstacles and to execute large flowing patterns. You can also practice stretching exercises, as described in DVD #5 of Training Mules & Donkeys. Then proceed to working on more collection on the short sides of the arena, and go back to stretching exercises again before you quit the lesson. The open areas allow for a wide variety of training exercises by giving you the space to use numerous patterns and obstacles. Try using cones to mark your patterns—this benefits both you and your animal by helping you both stay focused. An arena without cones is like a house without furniture.
As far as the open road and in traffic, these areas are for seasoned animals only, so please do not even consider using these areas to school your equine—the results could be disastrous! With the heavy traffic these days, it is really safest to avoid heavily traveled roads entirely. For a pleasurable experience, stick to areas where you and your equine can trail ride safely and comfortablly. The important thing to remember is to follow this logical and sequential approach as far as the location and exercise sequence in your training practices to keep things easy and enjoyable for you both.
To learn more about Meredith Hodges and her comprehensive all-breed equine training program, visit LuckyThreeRanch.com, MEREDITH HODGES PUBLIC FIGURE Facebook page, or call 1-800-816-7566. Check out her children’s website at JasperTheMule.com. Also, find Meredith on Pinterest, Instagram, MeWe, YouTube and Twitter.
Covered in TRAINING MULES & DONKEY: A LOGICAL APPROACH TO TRAINING, TRAINING WITHOUT RESISTANCE and EQUUS REVISITED at www.luckythreeranchstore.com.
© 2004, 2005, 2013, 2016, 2018, 2024 Lucky Three Ranch, Inc. All Rights Reserved.
