By Meredith Hodges
 It is important to know the differences among rewards, treats, coaxing and bribing in order to correctly employ the reward system of training called Behavior Modification.
Rule Number One: Treats and bribery should never be used during training. However, the appropriate dispensing of rewards and coaxing will produce the correct behaviors.
In order to reward your equine correctly for performing tasks, it is important to know the difference between a reward and a treat, and between coaxing and bribing. Let’s begin with some basic definitions of these terms:
Reward: something desirable given for a completed task
Treat: an unexpected gift given simply because it will be enjoyed
Coax: to gently persuade without dispensing the reward
Bribe: to persuade the animal by indiscriminately dispensing treats
Remember to give your equine a reward only after a specific task you’ve asked for has been performed—or even an assimilation of that task, which means the taking of baby steps toward completing the task. The reward should be given immediately upon completion of the task and then your equine should be allowed time to enjoy his reward before moving on to the next task. If your equine is given a food reward for only good behaviors, he will be more likely to continue to repeat only those behaviors for which he is rewarded and you can begin to “shape” his behavior in a positive way.
Treats, on the other hand, are a food that your equine especially likes, which are given randomly and without purpose. Giving random treats during training can result in crossed signals and confusion in your animal. Treats such as peppermints and even “horse treats” are generally an inappropriate food source for equines and when dispensed too freely, have actually been known to cause equine health problems, so forego treats of any kind during the training process.
Coaxing and bribing can seem like the same thing, but they are not. Bribery suggests the actual dispensing of a reward before the task has been completed. Bribery is the indiscriminate dispensing of treats and is not the way to clearly communicate to your equine which is truly a positive behavior and which is not. Rewards and coaxing are often confused with bribery, but rewards are dispensed for a task only when it has been completed, and coaxing using the promise of a reward can often be used to help your equine to stop balking and attempt to perform the task you have requested. Then the reward is given only when he has completed the task.
As an example of coaxing, you can extend a handful of crimped oats to lure your equine closer to an obstacle, but he should not receive the handful of oats until he completes the required task or travels enough distance toward the obstacle to deserve a reward. If your equine just won’t come all the way to an obstacle, even to get a reward, you can modify the task by asking your equine to just come closer to the obstacle and then halt (but without backing up). Then the reward can be dispensed for the partial approach and halt, because these actions still qualify as an assimilation of the bigger task that is to be completed. If he backs away at all, he should not be rewarded and you will have to go back to the beginning of the task and try again.
A kind word or a pat on the head may be enjoyable for your equine, but it doesn’t necessarily insure that the desired behavior will be repeated. However, a food reward insures that desirable behaviors will be repeated, because food is a solid, tangible reward. The food reward will back up the petting, (the petting is something that you probably do all the time anyway). When you visit your equine, you most likely pat him on the nose or head and say hello, but there are no real demands for any particular task being asked of your equine—you and your equine are simply interacting. You’re getting him used to touch, discovering how he likes to be touched and learning about his responses, which is actually part of imprinting.
The problem with carrots, apples and other foods people use for treats is that they’re not something for which the equine will continue to work and are not healthy choices for your animal in large quantities. After a limited amount of time, equines can easily become satiated on most treats. It’s like a kid with a bunch of candy bars. Once they become full they don’t want any more candy and they’ll stop working for the treat. Many foods used as treats, when given too freely, may also cause your animal to become tense or hyperactive. However, it’s been my experience that an equine will continue to work for crimped oats as long as you dole them out. Crimped oats are healthy for the body and they don’t cause an equine to become tense and difficult to handle.
When you’re using rewards, always start with lavish rewards for all new behaviors. This means that, every time you teach something new, you’re going to give lavish rewards for even the slightest assimilation toward the correct behavior. For instance, if your foal is tied to the fence and upon your approach, he quits pulling, it’s time to try to walk away from the fence with him and see if he will follow you. In this first leading lesson, you’ll untie him and ask him to take a step toward you. If he does, lavishly reward that step toward you, wait for him to finish chewing his oats and then ask him to take another step forward and toward you. If he complies and takes another step forward, lavishly reward that step too. During the first lesson, you will be rewarding every single step he takes toward you. Remember to keep the lesson short (about 15 minutes) and ask for only as many steps as he willingly gives you.
Between lessons, let your equine have a day off in order to rest. When you return for the second lesson, tie him to the fence and review with him your last lesson from the very beginning. He should remember the previous lessons and be willing to follow you right away in order to be rewarded. If he seems willing to follow your lead, untie him and ask him to take a step forward just as he did before, but this time, instead of dispensing the food reward when he takes the first step forward, simply say, “Good boy” and ask him for a second step forward before you reward him with the oats. You will now be progressing from one step forward before you reward to two steps forward before you reward.
If he won’t take the second step forward, then give the reward for the first step, wait for him to finish chewing and ask again for two steps before rewarding him again. If he complies, you can then reward him every two steps during that lesson and quit after fifteen minutes. Give him another day between lessons and then proceed in the same manner, beginning with a review of the previous lesson, then a reward for the first step, and then for every two steps. During this lesson, you can now ask for three steps, and you can continue asking for three or more steps during this lesson, provided that he takes these steps willingly and then stops obediently on his own to receive his reward. You no longer need to count the steps as long as he is offering more steps between rewards each time. If, because of his enthusiasm, he begins to charge ahead, stop him and immediately reward him for halting. This will insure that he keeps his attention on you and the task at hand. This methodical, deliberate process is setting the stage for a positive and healthy working relationship with your equine.
This is how you begin with leading training, and also how you should proceed with all the new things that you will be teaching your equine. In the beginning of leading training, he gets rewarded for even an assimilation of what you’re asking. For example, when you get to negotiating obstacles, your goal may be to cross over a bridge, but when your equine sees the bridge ahead, he may stop or start backing up. At this point, allow him to back until he stops. Go back and repeat the steps you did prior to approaching the obstacle. Then, asking for only one step at a time, proceed as you did during his flatwork leading training toward the bridge, rewarding each step he takes. Tell him verbally how brave he is and continue to reward any steps he takes toward the obstacle before proceeding forward. Remember to stop at any interval where he becomes tense, ask for one more step to be rewarded, and then allow him to settle and refocus before asking any more from him.
Once he goes to the bridge without a problem, you no longer have to reward him all the way up to the bridge. Just reward him when he actually gets to the bridge. Next, step up onto the bridge and ask him to take a step up onto the bridge with his two front feet, which is another new task. If he puts one foot on the bridge or even tries to lift up a foot and put it on the bridge, make sure you reward that behavior. Once he has a foot firmly placed on the bridge, keep tension on the lead rope and ask for his other front foot to come up onto the bridge. If he places his second foot on the bridge, you can then reward him for having both front feet on the bridge. Next, you’re going to continue forward and just walk over the bridge to the other side, pause and reward. Then quit this lesson. In his next lesson, if needed, repeat the approach the same way if he starts to balk. If not, ask him to step both front feet up onto the bridge, stop, make sure he is standing squarely, and reward that behavior.
Now you no longer need to reward for one foot on the bridge. This is called “fading or phasing out” the reward for a previous behavior (one step), while introducing the new behavior of walking to the bridge, halting and then putting two front feet up on the bridge. Wait for a moment for him to chew his reward and then ask him to continue onto the bridge, stop and square up with four feet on the bridge and reward. If he does not comply and won’t stop on the bridge, just go back to the beginning, approach the bridge as described and try again until he stops to be rewarded with all four feet placed squarely on the bridge
Then you ask him, to place his two front feet on the ground while leaving his two back feet on the bridge. Then have him stop and square up to be rewarded. This is a difficult position and if he cannot succeed by the third attempt, you may have to step in front and aid in his balance, then reward him when he settles in this position.
The last step over the bridge is to bring the hind feet off the bridge, stop and square up one more time before he gets rewarded. This does two things. It causes your equine to be attentive to the number of steps you are asking and it puts him in good posture at each stage so that his body will develop properly. In future lessons, the steps in the approach to the bridge no longer need to be rewarded and as he becomes more attentive, he will learn to stop any time you ask and wait for your cue to proceed. After several months of this meticulous attention to these detailed steps, he will not necessarily need to be rewarded with the food reward each time—a pat on the neck and kind words of support should be sufficient. Rewards can then be given for whole “blocks” of steps when he successfully completes them.
Here is a question a lot of people ask: “This is fine while my animal and I are still working from the ground, but what happens when I finally get on to ride? Do I keep rewarding every new behavior when I ride?” The answer to that question is, “No, you don’t.” If you do your ground work correctly, it will address all the things that you’ll be doing while you’re riding before you actually even get on. Your equine has been lavishly rewarded for stopping when you pull on the reins and the drive lines, and he’s been rewarded for turning and backing and everything else he needs to learn before you actually get on him, so the only thing left to get used to would be exposure to your legs on his sides. He will soon learn that your legs push him in the direction of the turn you are indicating with your reins. For this action, he does not need to be rewarded.
In the natural progression of correct training—including during mounting training—your equine should also be getting rewarded when you’re first getting him used to your being on-board. Give him the oats reward for standing still while you attempt to mount (i.e., walking toward him, holding the left rein and reaching for the saddle horn), and then when you hang from each side of his body with a foot in the stirrup (first on one side and then on the other side), and, finally, from each side of his body while you sit on his back. When you ask him to turn his head to take the oats from your hand, you can be sure his attention will be on you because this action will force him to look at you in order to receive his oats. Then reward him again for standing still as you dismount. Consequently, by the time you actually get to the point of riding in an open arena, he’s been rewarded for having you on his back and for behaving well through all the exercises demanded from him during round pen training.
You may first want to lunge your equine when you move into the open arena. Lunge him on the lunge line and reward him during that part of your arena workout. When you are ready to mount in the open arena, have a few oats in your pockets to offer him when you mount on each side the first few times. This will ensure that his attention stays focused on you. Once he is used to being ridden, you will no longer have to reward him in the middle of riding lessons. If he does not keep his attention on his work in the open arena, this signifies that not enough time has been spent on the ground work and you should back up your training regimen to the point that he is maintaining attentiveness and performing correctly, even if it means going back to the round pen or leading work. If, in the ground work stages, you give plenty of food rewards in the correct manner, by the time you groom and tack up, your equine should have been sufficiently rewarded and will not require another reward until after your workout when you return to the work station and un-tack him. This is called delayed gratification. When you un-tack him and do your last minute grooming before putting him away, again be generous with the crimped oats and praise your equine for a job well done. Rewards are dispensed very specifically and pave the road to a solid foundation of trust and friendship.
To learn more about Meredith Hodges and her comprehensive all-breed equine training program, visit LuckyThreeRanch.com, MEREDITH HODGES PUBLIC FIGURE Facebook page, or call 1-800-816-7566. Check out her children’s website at JasperTheMule.com. Also, find Meredith on Pinterest, Instagram, MeWe, YouTube and Twitter.
© 2013, 2016, 2018, 2021, 2022 Lucky Three Ranch, Inc. All Rights Reserved.


 No training series would be complete without examination of the principles and philosophy behind the training techniques. The philosophy of my training techniques is based on the principle that we are not, in fact, training our equines. In fact, we are cultivating relationships with them by assigning meaning to our own body language that they can understand.
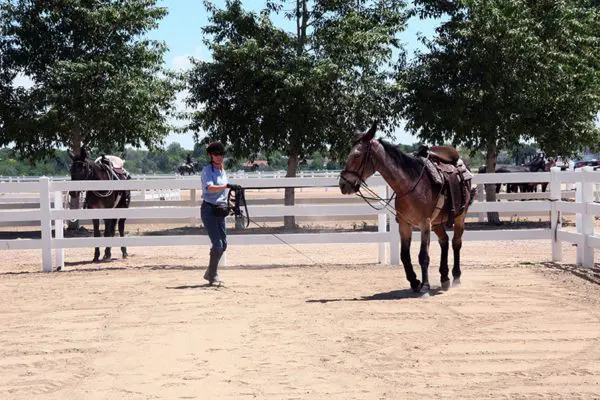 For instance, we had a 3-year-old mule learning to lunge without the benefit of the round pen. The problem was that she refused to go around you more than a couple of times without running off. Assess the situation first by brainstorming all the probable reasons she might keep doing such an annoying thing. Is she frightened? Is she bored? Is she mischievous? Has she been calm and accepting of most things until now? And most important, is my own body language causing this to occur?
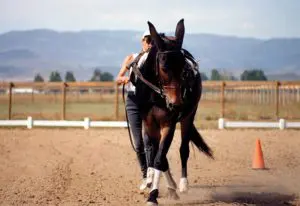 As mental changes occur, so do physical changes. As muscles develop and coordination gets better, the animal will gain confidence. As a trainer, you will need to do less and less to cause certain movements. For example, in the case of the leg yield, you may have to turn your mule’s head a little in the opposite direction to get him to step sideways and forward. As he becomes stronger, more coordinated, and understands your request, you can then begin to straighten his body more with less effort. Granted, we have begun by doing this the wrong way, yet we have put our mule “on the road” to the right way. We have assimilated an action in response to our leg that can now be perfected over time. In essence, you have simply said, “First you learn to move away from my leg, then you can learn to do it gracefully!”
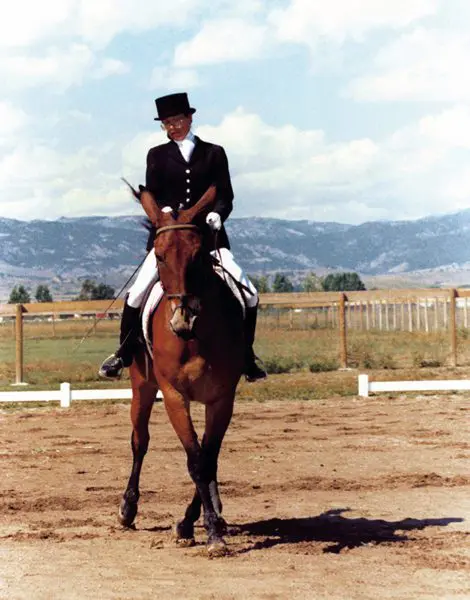 In training horses and mules, there is really little difference in one’s techniques or approach, provided we maintain patience and understanding and a good rewards system. The major difference between these two equines is their ability to tolerate negative reinforcement, or punishment. The mule, being part donkey, does not tolerate punitive action very well unless he is fully aware that the fault was his own and the punishment is fair. For instance, you ask for a canter lead and your mule keeps trotting, one good smack with the whip, or one good gig with the spurs, is negative reinforcement that will bring about the desired response, but be careful of an over-reaction from an overdone cue. More than one good smack or gig could cause either a runaway or an extremely balky animal. This kind of resistance comes from the donkey and requires a much different approach when training donkeys. The horse part of the mule allows us an easier time of overcoming this type of resistance in mules, making them different and easier to train than donkeys.


 “Mules separate crude trainers from artistic trainers.” The mule handled by a crude trainer will generally epitomize the traditional belief that mules are stubborn and ornery. The mule handled by an artistic trainer will not.
 Horse training trends have evolved from Buck Branaman, Pat Parelli, Clinton Anderson, etc. and their Round Pen training techniques using ropes on the equines. Natural Horsemanship rose from these methods, using less restraint on the equine.
 This gave way to the new trend of teaching them to lie down. Equines do not lie down easily, so it wasn’t always used as an easy way to mount. It really shouldn’t be used that way because of the added stress put on the equine’s body that can cause arthritis and other problems with the hooves, and joints, as they age.
 I saw a horse being exhibited at the WEG that was forced to bow with ropes. I thought it could be beneficial to find out how long it would take for an equine to learn to bow of his accord with his own muscle strength. Lance learned to do it by himself with only slight encouragement from me in 18 months.
 If the argument is that amounting block can’t be brought along for trail riding, it makes more sense to simply acquire a shorter animal.
 If you find restraints are not sufficient to help with your equine, you may be dealing with an outlaw, in which case it is best to put him out of his misery before he injures someone. Be careful however about blaming the animal for his response to an inhumane trainer. Some can be rehabilitated, some cannot, but you will need to know what you are doing. Kindness alone is not the answer.
 Today good mule trainers apply the basic techniques of Behavior Modification (reward system training) in their programs. That is, getting the desired response through positive reinforcement and ignoring, as much as possible, the undesired behavior. Negative reinforcement, or punishment, is used sparingly, is never severe and is only used to set boundaries to behavior.


 By Meredith Hodges
 In 1979, I witnessed my first Bishop Mule Days Sierra Nevada packer’s rendezvous. That was where my career in training mules and donkeys in every recreational equine event began. I was “ass-tonished” at the impeccable way these knowledgeable men and women handled their mules, wagons, packs and equipment with such grace and dignity…and not without a proper measure of good humor! I caught a very bad case of “Mule Fever” and began my own pursuit with Longears in ALL forms of equine athletics. Bishop Mule Days grew from the weekend packer’s rendezvous into the weeklong show over Memorial Day weekend that it is today and they continue to add new classes each year to accommodate the accomplishments of a lot of Longears-lovers like myself along the way. Little did I know, the friendships I started then were to last a lifetime!
 In 1980, I founded the Lucky Three Ranch in Loveland, Colorado and embarked on a breeding and training program of my own with Lucky Three Sundowner, the last mule and Little Jack Horner, the last donkey jack born at Windy Valley Ranch in 1980. Sundowner was shipped to the ranch right away, but Little Jack Horner had to wait and be picked up a year later. Just outside of Sparks, Nevada in 1981, we were hailed to pull over by a jolly and quite charming man, Ernie Fanning who ran up to my truck and blurted through the driver’s side window, “I just KNOW you have a Windy Valley jack in the back of that trailer!” To this day, I don’t know how he could tell it was a Windy Valley jack only by the head and ears that showed above the stock trailer back door. All I can say is that man certainly knew his mules and donkeys, and I made yet another friend for life that day!
 Years passed, Bishop Mule Days grew as did my love for Longears and the people that came with them. I bred and showed Longears for many years, then judged and began a promotional career in support of Longears everywhere. Bishop Mule Days was where I met Bonnie Shields, the leading half-ass Tennessee Mule Artist and illustrator for my children’s series of books and DVDs, Jasper the Mule. Even though I no longer showed, I was still a welcome part of the Bishop Mule Days rendezvous family year after year as a respected dignitary and sponsor. One of our greatest thrills was when Bonnie, Jasper and I were invited by Bobby Tanner to ride in the old Borax Wagons pulled by the 20-Mule Team in the Bishop Mule Days parade three years in a row (2012-2014). What an incredible honor that was!
 On January 1, 2017, the new Borax Wagons and the 20-Mule Team made their debut in the Tournament of Roses parade in Pasadena, California. They held a practice in the desert near Bishop before they left for the parade and the mules all did great! On the parade route, they would be asked to make a tight turn onto Colorado Avenue in the midst of a lively crowd and would be asked to “jump the chain” to make that turn. What a spectacular feat to behold and they did it beautifully on parade day.
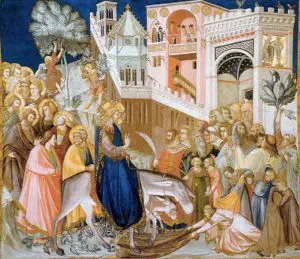 Long before the Founding Fathers drafted our constitution, the roots of America were as a religious nation under God. Today’s mule also has his roots in religion. The mule’s ancestor—the donkey—is mentioned in the Bible numerous times as an animal acknowledged by God and blessed by Jesus Christ. The donkey was even chosen to bring Mary and Joseph to Bethlehem and, later, as the mount Jesus himself used for his ride into the city of Jerusalem.
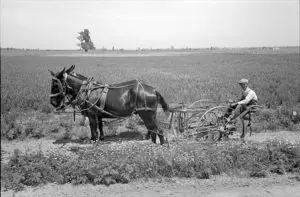 As early-nineteenth-century America continued to develop and its population grew, the American people came to depend more and more on self-sustaining agriculture. Because of the mule’s extraordinary ability to work long hours in sometimes harsh and unrelenting climates, his sure footedness which allowed them to cross terrain not accessible by any other means, and his resistance to parasites and disease, he became the prized gem of agriculture and remained so for the next hundred and fifty years.
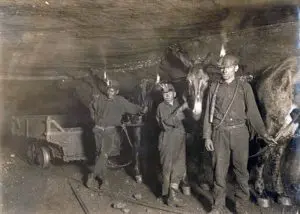 In 1882, the Harmony Borax Works opened with one big problem—how to get their product 165 miles across the treacherous Mojave Desert from Death Valley to the nearest railroad spur. The answer? Mules! “The borax wagons were built in Mojave at a cost of $900 each…When the two wagons were loaded with ore and a 500-gallon water tank was added, the total weight of the mule train was 73,200 pounds or 36 and a half tons. When the mules were added to the wagons, the caravan stretched over 100 feet. The Twenty Mule Teams hauled more than 20 million pounds of borax out of Death Valley between 1883 and 1889.” 1
 Because of their traits of strength, intelligence and loyalty, mules were a crucial part of our country’s greatest conflicts, from the Civil War through the Spanish American War, and in both World War I and World War II. A well-known tale from the Civil War states that, “In a battle at Chattanooga, a Union general’s teamsters became scared and deserted their mule teams. The mules stampeded at the sound of battle and broke from their wagons. They started toward the enemy with trace-chains rattling and wiffletrees snapping over tree stumps as they bolted pell-mell toward the bewildered Confederates. The enemy believed it to be an impetuous cavalry charge; the line broke and fled.” 3 During World War I, mules and horses were still the primary way that artillery was carried into battle. Although the 75mm Howitzers proved too heavy for most horses, it was a common sight to see the big guns strapped to the back of a sturdy mule.
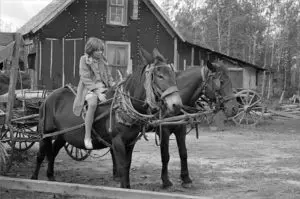 One of the world’s greatest natural wonders, the Grand Canyon, has been home to mules since the 1800s. First brought in by prospectors, it was soon realized that the tourists wanted a way down to the Canyon floor, and so began the Grand Canyon mule pack trips. Famous mule-riding visitors to the Grand Canyon have included Presidents Theodore Roosevelt and Howard Taft, famed naturalist John Muir and painter/sculptor Frederic Remington.


 The ideal mule should have a head that is slightly longer than that of a horse, but proportionate to the size of the mule’s body. The features should be prominent and give an overall pleasant appearance. The ears should have length and be nicely shaped, and the eyes should be large, soft and kind, reflecting the mule’s health and intelligence. The forehead should be broad, tapering to a small and delicate muzzle, with a shallow mouth and well-aligned teeth, and the nostrils should be wide to allow for adequate respiration while working. Both the mare and the jack are responsible for the shaping of these characteristics, but the jack has primary responsibility where the length of the ear and the mass of bone are concerned. A jack with a longer ear will, more often than not, throw a longer ear to the mule, while the shape of the ear is determined primarily by the mare. The attractive or unattractive head of the jack can emerge in the resulting mule, so be sure to carefully consider the head on the jack to be used for breeding to produce an attractive head on your mule offspring. Standard-sized jacks and Large Standard jacks most often have a more refined head, while the head of a Mammoth jack may be less refined and possess
  thicker bone, particularly around the eyes and jaw line. In the case of saddle mule production, massive bone on an otherwise attractive head can be very unattractive, so using the smaller jacks would be better for a more refined look in your saddle mule (which is also true for the rest of the mule’s body).

 The shoulders of the mule should be at a nearly 45-degree angle, with a broad collar surface. Most mares will have this angle, but donkeys have a tendency toward short, steep shoulders, so, to insure that the mule has good shoulders and hips, consider a jack with good length and a lower angle through the shoulders and hips.
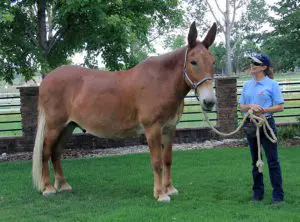 The chest of the mule should be deep and prominent, broad and well developed (it should resemble a turkey’s breast), with little or no line of separation (as is seen in a horse’s chest). Since jacks are generally narrower through the chest than are mares, the mare chosen for breeding should exhibit much width and depth through the chest to compensate for the lack of it in the jack.
 If a stockier mule is desired (as in the case of breeding for pack or draft mules), a stockier mare bred to a Mammoth jack will produce the desired thickness of bone in the legs of the mule. If a more refined Thoroughbred appearance is desired, the mare should be bred to a Standard or Large Standard jack in order to reduce the mass of the bone in the legs of the mule and retain refinement throughout the body. This does not affect the height of the mule, as the mare is primarily responsible for the mule’s height, while the jack is primarily responsible for the mule’s bone thickness. The forearm and stifle in the mule should be well developed and thickly covered with smooth muscle that tapers to the knee and hock in regular, well-defined lines. Again, these muscles should be thick and smooth, but not bulging, as in horses. The mare will compensate for the limited bulk muscling in the donkey jack, and the jack will contribute and maintain the smoothness of that additional bulk muscle in the mule.
 The coat and hair of the mule should be soft and shiny, covering pliable skin. The coat should be soft to the touch, denoting good skin health. Length and thickness of the coat are contributed by both jack and mare. Since donkeys have a typically thick coat of hair, a mare with a thinner coat will balance this thick hair coat in the mule, making him look sleeker and more horse-like than his donkey sire.
 Horse trainers have kept us in awe of their unique and significant talents for centuries, and now that their techniques are more public, many equine professionals will pooh-pooh those who attempt a “kinder” approach to training. Scientists who study the equine in motion—its nutrition, biomechanics, care and maintenance—have their own perceptions to offer as to what we can learn about equines. Because many of these studies and tests are done in the laboratory, scientists rarely have the opportunity to follow their subjects throughout a lifetime of activity, as well as having the opportunity to experience what it really means for you as a rider, to be in balance with your equine when you work together, whether you are leading, lunging, riding or driving. If they did, their findings would probably yield quite different results. With all this progressive scientific thought, it seems to me that common sense can often get lost in the shuffle and respect for the living creature’s physical, mental and emotional needs may not be met.
 degenerative breakdown. For instance, those who get in a hurry in Dressage and do not take a full year at each level in order to develop their equine’s body slowly and methodically may discover, several years later, that their animal has developed ringbone, side bones, arthritis or some other internal malady. These types of injuries and malformations are often not outwardly exhibited until it is too late to do anything about them.

 Tragically, many equines are suffering from abuse every day, while they are trying to please their owners and do what is asked of them. Their owners and trainers take shortcuts that compromise the equine’s health. It could be that these owners and trainers are trying to make choices with limited knowledge and really don’t know whom to believe. But ignorance is not a valid defense and sadly, the animal is the one that ends up suffering.
 The Lucky Three mules have always been worked in good posture, and spend only as much time on the hot walker as it takes for them to dry after a bath. They maintain their good posture while walking and rarely let the hot walker “pull” them into bad posture.
 Like many, I am of the belief that mechanical devices that force an equine into a rounded position do not necessarily put that equine in good posture. I would guess that many trainers think the “Elbow Pull” device that I use is guilty of developing this artificial posture. If that is their opinion, then they do not understand how it works. Rather than pulling the equine’s head down into a submissive position, when adjusted correctly, the “Elbow Pull” acts like a balance bar (like a ballet dancer would use) to help the equine to balance in good posture. It takes time to develop good posture. So, in the beginning, your equine can only sustain good posture for a certain number of measured steps, and then he must “lean” on the “Elbow Pull” in between these moments of sustaining his ideal balance on his own. The “Elbow Pull” simply prevents him from raising his head and neck so high that the neck becomes inverted and the back hollowed, but it does not actually pull his head down. The rope itself is very lightweight and puts virtually no weight on his head and neck at all. Note: Because horses react differently than mules and donkeys when hard-tied, a simple adjustment to allow the “Elbow Pull” to “slip” with a horse is necessary.
 By Meredith Hodges
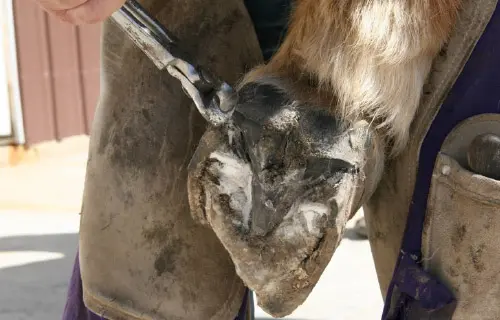
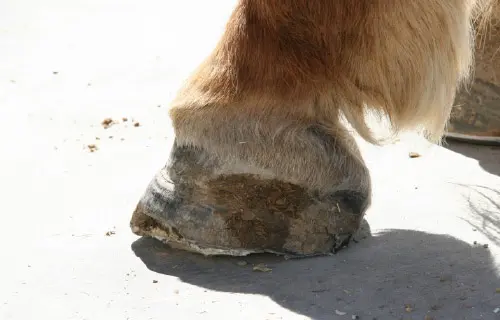
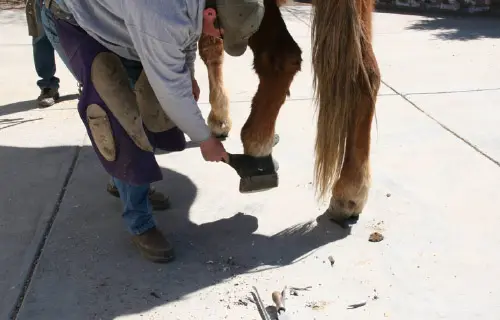
 Once the heavier coat is eliminated, a weekly grooming will keep his coat nicely maintained. Daily grooming before a show, or every other day, is even better. Each time you groom him before riding, check and clip as needed the muzzle hairs, around the eyes and ears, and around the coronet bands. Leave the hairs inside the ears to prevent irritation from bugs and flies, but trim the outside edges and backs of the ears. An ounce of corn oil in his feed daily will assure a healthy sheen in his coat on show day without the use of artificial highlighters. Trimming, or shoeing, your mule on a regular six-eight week schedule will assure that his feet will not need attending at the last minute. A routine vaccination, deworming, Coggins testing and a permanent brand inspection will make sure he is ready for transport to any show anywhere at any time. Then, all that remains to be done right before the show is minor clipping, bathing, and polishing hooves.
 Then, tack up your animal, checking each piece of equipment to make sure that it is in working order. Go ahead and practice the class. Then, as you unpack your mule, set the tack aside from the rest in your tack room for cleaning later. Do this for each animal in each class. Your animals will do better at the show if they get plenty of rest before the show, so it is wise to spend the day before the show cleaning your tack, clothes, and equipment. Before you begin to clean, load all the items into your trailer that are all ready to go without cleaning. Then, as you clean the remaining items, load them directly into the trailer as you finish them.
 can be left until morning, or last minute, provided that you put them in a highly visible spot with a list of what is to be put in attached. Do not try to rely on your memory, as it will be clouded by the excitement and anticipation of the show.
 If classes are spaced fairly close together and you are using more than one animal, it is wise to tack up the other animals ahead of time so they are ready to go. If you are using only one saddle for more than one animal, the other animals can still be bridled with the halter slipped over it, so they can be tied and waiting. Be sure to tie up the reins so they will not be chewed or stepped on. If you are using the same mule throughout the show, tacking and stripping should not be too time-consuming if your equipment is well organized.
 It is important to know the differences among rewards, treats, coaxing and bribing in order to correctly employ the reward system of training called Behavior Modification.
 Remember to give your equine a reward only after a specific task you’ve asked for has been performed—or even an assimilation of that task, which means the taking of baby steps toward completing the task. The reward should be given immediately upon completion of the task and then your equine should be allowed time to enjoy his reward before moving on to the next task. If your equine is given a food reward for only good behaviors, he will be more likely to continue to repeat only those behaviors for which he is rewarded and you can begin to “shape” his behavior in a positive way.
 As an example of coaxing, you can extend a handful of crimped oats to lure your equine closer to an obstacle, but he should not receive the handful of oats until he completes the required task or travels enough distance toward the obstacle to deserve a reward. If your equine just won’t come all the way to an obstacle, even to get a reward, you can modify the task by asking your equine to just come closer to the obstacle and then halt (but without backing up). Then the reward can be dispensed for the partial approach and halt, because these actions still qualify as an assimilation of the bigger task that is to be completed. If he backs away at all, he should not be rewarded and you will have to go back to the beginning of the task and try again.
 Between lessons, let your equine have a day off in order to rest. When you return for the second lesson, tie him to the fence and review with him your last lesson from the very beginning. He should remember the previous lessons and be willing to follow you right away in order to be rewarded. If he seems willing to follow your lead, untie him and ask him to take a step forward just as he did before, but this time, instead of dispensing the food reward when he takes the first step forward, simply say, “Good boy” and ask him for a second step forward before you reward him with the oats. You will now be progressing from one step forward before you reward to two steps forward before you reward.
 This is how you begin with leading training, and also how you should proceed with all the new things that you will be teaching your equine. In the beginning of leading training, he gets rewarded for even an assimilation of what you’re asking. For example, when you get to negotiating obstacles, your goal may be to cross over a bridge, but when your equine sees the bridge ahead, he may stop or start backing up. At this point, allow him to back until he stops. Go back and repeat the steps you did prior to approaching the obstacle. Then, asking for only one step at a time, proceed as you did during his flatwork leading training toward the bridge, rewarding each step he takes. Tell him verbally how brave he is and continue to reward any steps he takes toward the obstacle before proceeding forward. Remember to stop at any interval where he becomes tense, ask for one more step to be rewarded, and then allow him to settle and refocus before asking any more from him.
 Now you no longer need to reward for one foot on the bridge. This is called “fading or phasing out” the reward for a previous behavior (one step), while introducing the new behavior of walking to the bridge, halting and then putting two front feet up on the bridge. Wait for a moment for him to chew his reward and then ask him to continue onto the bridge, stop and square up with four feet on the bridge and reward. If he does not comply and won’t stop on the bridge, just go back to the beginning, approach the bridge as described and try again until he stops to be rewarded with all four feet placed squarely on the bridge
 The last step over the bridge is to bring the hind feet off the bridge, stop and square up one more time before he gets rewarded. This does two things. It causes your equine to be attentive to the number of steps you are asking and it puts him in good posture at each stage so that his body will develop properly. In future lessons, the steps in the approach to the bridge no longer need to be rewarded and as he becomes more attentive, he will learn to stop any time you ask and wait for your cue to proceed. After several months of this meticulous attention to these detailed steps, he will not necessarily need to be rewarded with the food reward each time—a pat on the neck and kind words of support should be sufficient. Rewards can then be given for whole “blocks” of steps when he successfully completes them.
 In the natural progression of correct training—including during mounting training—your equine should also be getting rewarded when you’re first getting him used to your being on-board. Give him the oats reward for standing still while you attempt to mount (i.e., walking toward him, holding the left rein and reaching for the saddle horn), and then when you hang from each side of his body with a foot in the stirrup (first on one side and then on the other side), and, finally, from each side of his body while you sit on his back. When you ask him to turn his head to take the oats from your hand, you can be sure his attention will be on you because this action will force him to look at you in order to receive his oats. Then reward him again for standing still as you dismount. Consequently, by the time you actually get to the point of riding in an open arena, he’s been rewarded for having you on his back and for behaving well through all the exercises demanded from him during round pen training.
 Many times I have been asked, “Is training a mule any different than training horses?”
 Showmanship training is not just for the showmanship class at a show. Perfecting your showmanship technique every time you have your equine on a lead line will command his attention to detail, build his confidence in you and insure that he is strengthening his muscles properly throughout his body at the most basic level.
 When you ask for a halt, stop with your feet balanced, your weight distributed equally over both legs and still facing forward. Give your equine a second or two to settle and then turn to face his shoulder. If his legs are already square, you can then give the crimped oats reward for stopping. If they are not square, take a moment to square up his legs and then give the reward. Praise him for standing quietly for a few seconds and allow him to settle. You can then face forward again, point in the direction of travel, give the command to “Walk on” and walk a few more steps before halting again. Add more steps each time before halting. Whenever you practice turning, always turn the equine away from you—never into you. To insure optimum balance, practice leading him through these exercises from BOTH sides.
 When executing a turn to the right, assume your leading position and then point in the direction of travel, asking your equine to take one step forward with the right front foot then cross the left front foot over the right to make the turn. Your own legs should execute the turn in sync with your equine’s front legs, giving him a good example to follow. Although you will rarely have an occasion to actually lead from the right side, be sure to practice from both sides to insure symmetrical muscle development. Dispense rewards, but only after he has completed what you have requested.
 Once he has learned to follow and to do the “moves,” you then need to help him fine-tune these moves, making them as steady, balanced and coordinated as possible. He should learn to walk, trot and back up in straight lines, to stop squarely and to execute smooth, properly arched turns. Remember that your equine will follow your lead, so always pay close attention to your good own posture and “way of going.” Equines and humans have corresponding body parts, so if you are stiff or off-balance in any part of your body, your animal will exhibit the same problem in his body.
 Maintain your own balance and rhythm, and ease into transitions from walk to trot and trot to walk smoothly and in rhythm and cadence—and so will your equine. Ask him to stand squarely each and every time he stops. Set up his back feet first by pushing on the lead rope with your hand directly under his chin in a diagonal motion toward the back foot that is forward. Push and release (in a diagonal motion only) the lead rope toward the forward foot as much as it takes to move it into line with the other back foot. Once the back feet are in line, set his front feet by pulling and releasing gently forward (again, in a diagonal motion only) to align the front legs.
 As your equine gains strength, you will notice that he now carries his body differently. He is more balanced, solid and steady, and is able to stop squarely at every “whoa,” regardless of the gait. As he frolics in the field, notice the dramatic change in his play patterns. He will be much less awkward.


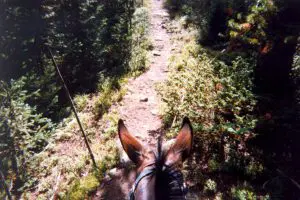
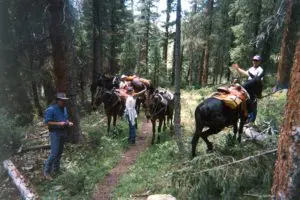

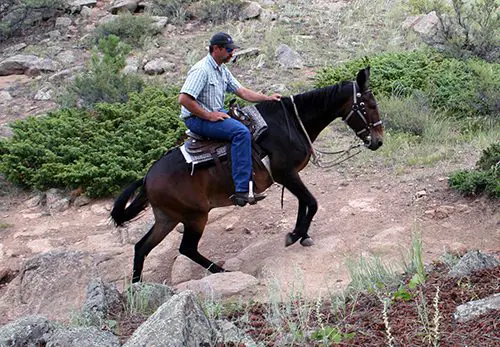 We are fortunate to be able to share our time with such intelligent, tough and durable equines as our beloved mules. But you should also remember to do your part in the relationship. Be patient and willing to take the time to allow your relationship to grow and for training to become solid before you indulge in the challenges that trail riding can present. Plan ahead and scout the locations where you desire to ride. With the growth of urban populations, open areas that welcomed riders in the past are not as numerous as they once were. Many areas now welcome hikers and even bicycles, but not equines. Find the designated trails and camp grounds that will accept equines when planning your treks.
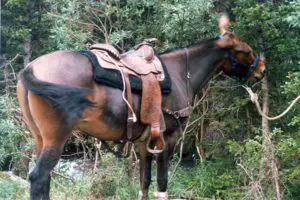
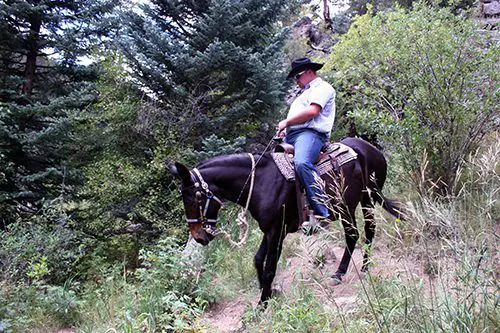 Even a ride that is planned to be short can turn into challenge if the weather changes suddenly, so be sure to plan for the worst case scenario. Tack up your equine in comfortable tack and equipment that fits like a glove. I like to ride with a crupper because it will hold the saddle in the correct placement when adjusted correctly and will allow for full range of movement, particularly behind when climbing uphill. If you use a breast collar, make sure it is loosely fitted so it does not pull your saddle forward and into the shoulder blades. Be sure to pack your saddle bags with the barest necessities for any ride far from home: Compass, water, rain gear, a Swiss Army knife, buck knife, hoof pick, lighter, fence pliers, Granola Bars or Trail Mix, a sleeping bag, a warm coat, Bear Spray and a First Aid Kit (at the very least Gauze, Vet Wrap and Neosporin).
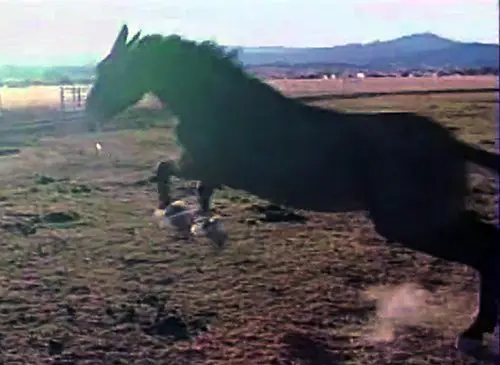 If planning an overnight trip, you will probably need a pack mule, or horse, to carry the extra food and additional necessities you will need like tents, blankets, sleeping bags, more food, extra clothes, High Lines and extra halters, and food for your equines. Lots of places will not allow your equines to graze in the parks, but some do. I do not like using picket lines where the equine is tied low with a halter, or with a rope around a foot. I do not like to use hobbles either (Mules can run off in hobbles with no trouble at all!). It is too easy for equines to get tangled up or injure themselves when they are restricted this way. They can get sprained tendons and ligaments, or severe rope burns that will leave them scarred for life. I prefer to bring their favorite horse “friend” along and tie the horse, and mules that tend to wander, to a High Line. Most of the mules can be allowed to run free and won’t leave your camp with the horse there, but do not leave halters on them. Again, they could become tangled up and injure themselves. If you have spent adequate time during training to build a solid relationship with your mules, they are much less likely to wander off and get lost. They will choose to stay near you.
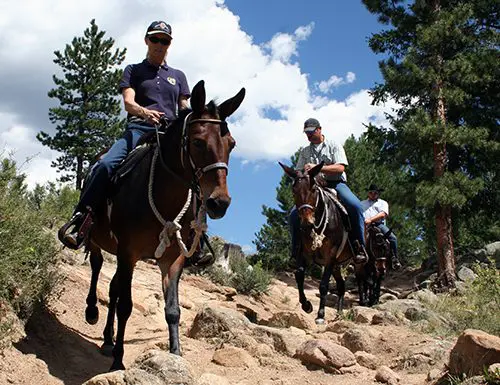 If you can, choose a place where you can establish a base and park your truck and trailer. You can then tie them on a High Line during the evening and put them back into the trailer for the night. This might be better if you are an area where there are a lot of large predators. Just don’t leave the truck and trailer windows open so a predator can get in. Stock trailers are the best for this purpose since they also have more room in them and are fully enclosed. Any food that could be attractive to predators should be mounted high in a tree, at least 50-100 yards away from your camp and your equines.