MULE CROSSING: Donkey Training, Part 3
By Meredith Hodges
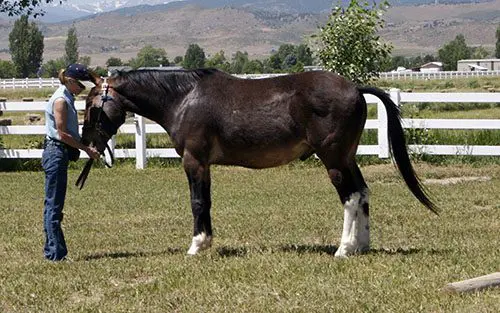
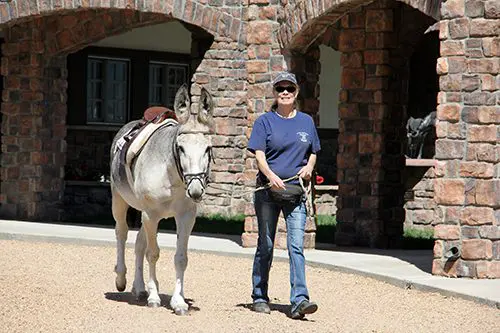
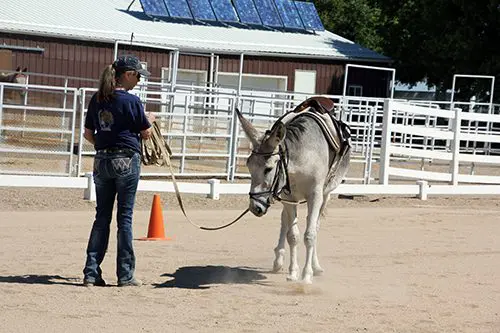
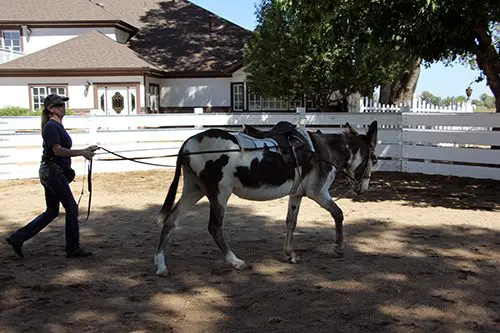
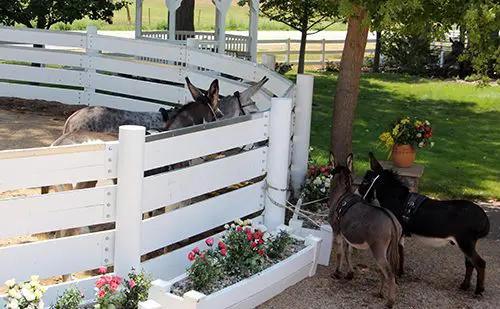
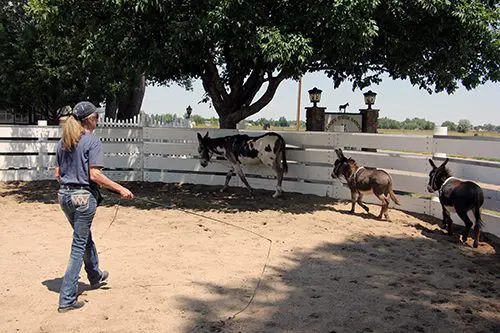
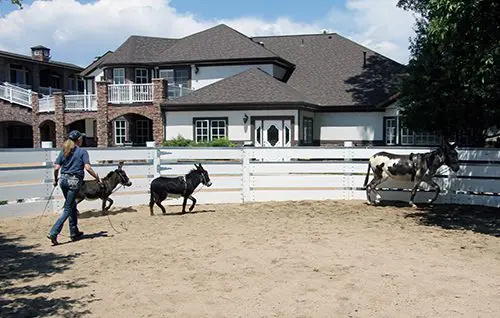
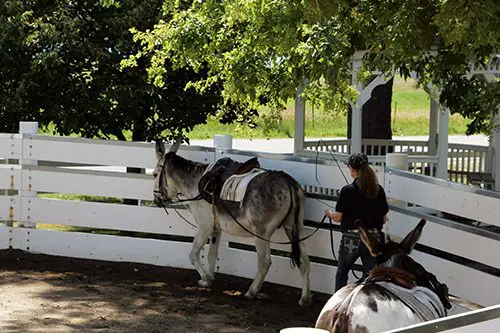
Prior to each training session with your donkey, review all that he has previously learned: Always lead him to and from the work station in a showmanship manner, holding the lead in your left hand with your right arm extended forward; groom him and clean his feet; review the turn on the forehand and turn on the hindquarters in the round pen; and send him forward to the rail in the round pen at the walk. You may have discovered that you need to follow him more closely than you would a horse or mule. Staying in the middle of the round pen while you lunge your donkey may not be practical to keep him moving. Just stay behind him and to the side while driving him forward with your lunge whip, touching him with it only when absolutely necessary. Match your steps with his steps—walk only as fast as HE chooses. If you get in a hurry, he will stop. Be sure to give the command to “whoa” each time you want him to stop, and then reward him.
 Now that he is moving out well at the walk, you can teach him a reverse. As he is walking forward easily around the round pen, turn away from him, completely around, until you are in front of him. Step toward him, lay the whip ahead of him and give the command to “reverse.” Be aware of his space. Do not rush at him, or he may turn improperly. You want him to turn into the rail and resume the opposite direction. Give him plenty of time to make the turn and ask him to “walk on.” If he has difficulty, take a few steps forward and, with the whip, tap him gently on the shoulder to encourage him to turn. There is a purpose to turning away from him to turn him rather than just running ahead of him. By turning back the opposite way that he is traveling, you are establishing a new direction of travel, as well as giving him time to see that there will be a change in his movement. Most donkeys learn this very quickly.
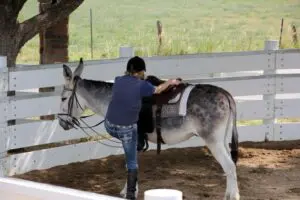
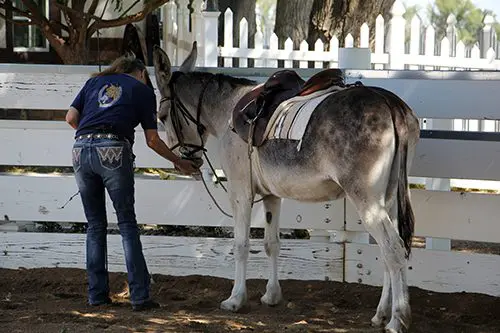
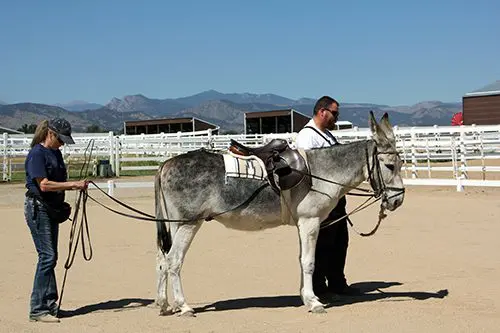
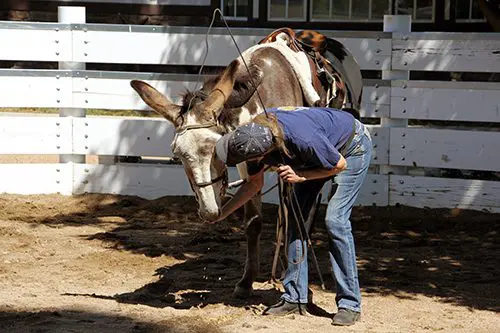
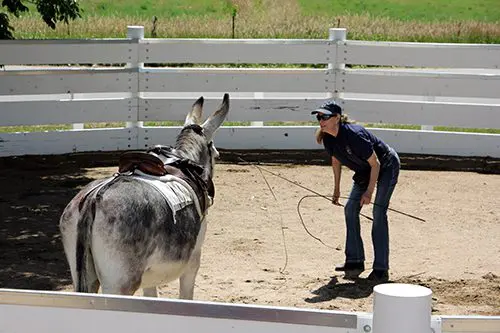
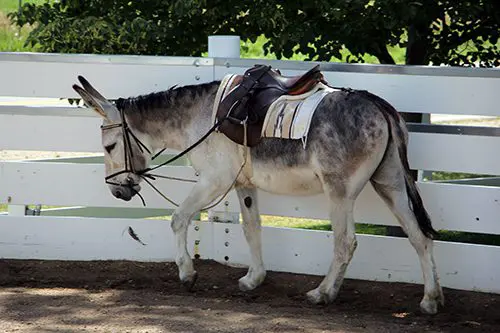
So far, your donkey has worked only in his halter. This is the point at which mules and donkeys may differ. Your donkey has learned the walk and the reverse. Now he needs to learn the command to “trot.” Some donkeys will take exception to this command if they do not see a purpose in it. It is at this point that you should introduce the saddle, and/or driving harness (if he is too small to ride). You should also introduce him to the bridle at the same time. Let him see the harness (or saddle), then slowly put it on him. Most donkeys will let you do this quite easily.
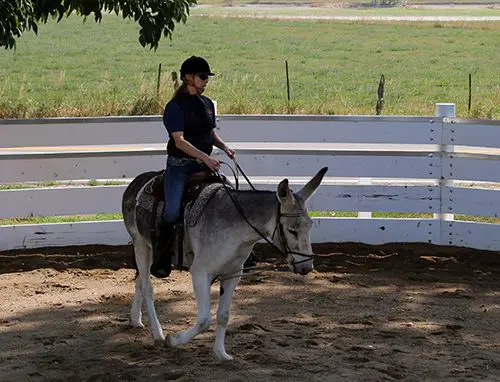
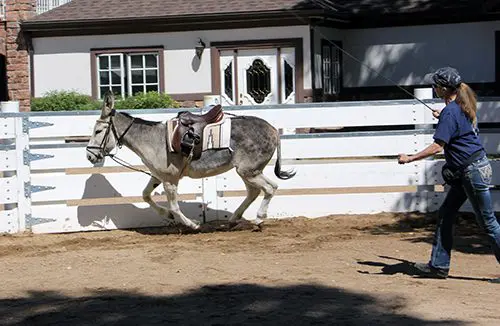
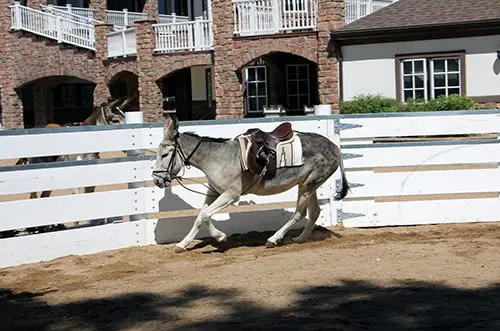
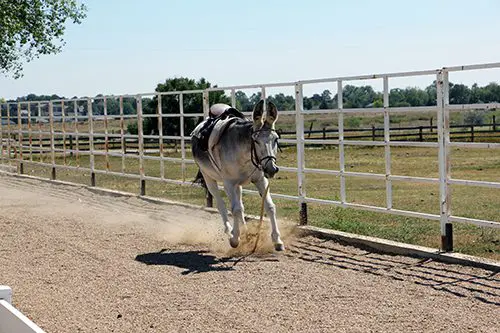
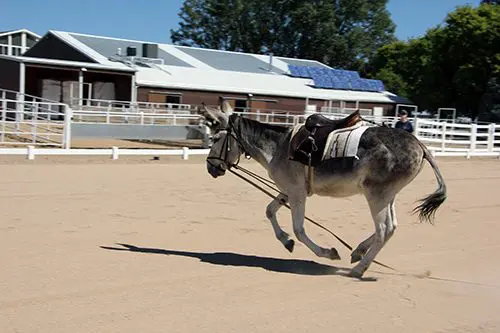
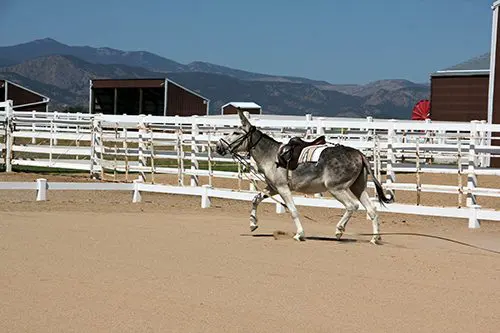
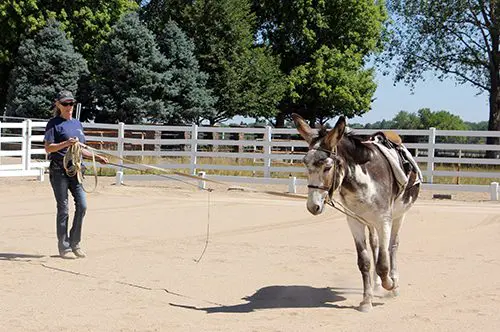
Once he is tacked up, send him, at the walk, to the rail of the round pen again. Then give the command to “trot” and move toward his hindquarters with the whip, shuffling your feet in the dirt to make some noise. If he trots at this point, do not strike him with the whip or he will stop. If he isn’t trotting, you may strike him with the whip once at the gaskin, above the hock. Then keep shuffling your feet and move forward as he does, maintaining the same distance between the two of you. Move your arms up and down in big motions to encourage him forward. If needed, you can strike the fence behind him. If you invade his space, he will stop. If he trots, even a few steps, stop him with the command to “whoa” and reward him for his compliance. Do this one more time to clarify that you DO want him to trot. Then end the lesson here. He will be better at the next session, and at each new session, he will offer more steps of trot. Each time he trots, ask him to go only as far as he is comfortable, as long as it is just a little farther than the time before, and ask him to trot only twice in each direction. Donkeys don’t appreciate too much repetition.
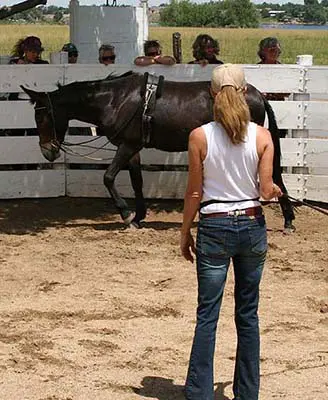
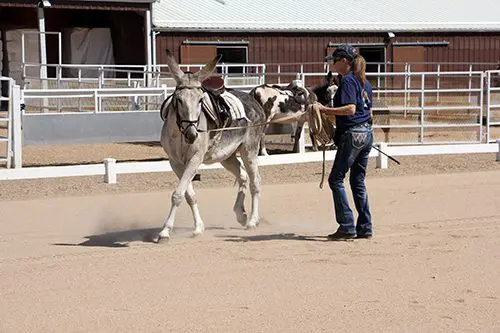
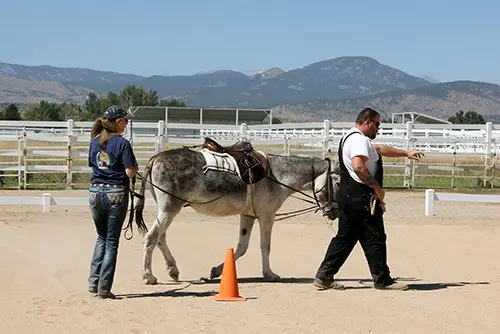
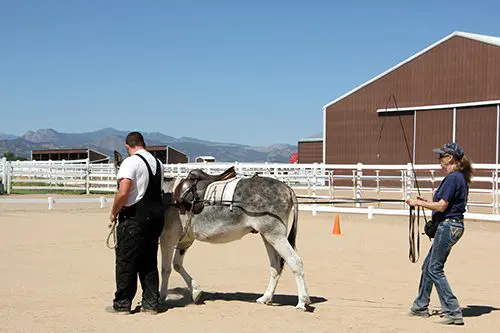
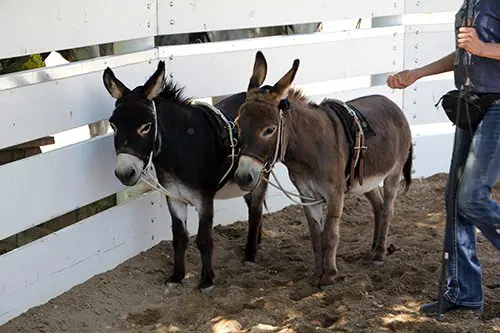
 After his first lesson of trot, you can begin to integrate rein cues. During the second trot lesson, you will review all that he has learned up to the trot. Before you go to his trot lesson, you can attach your drivelines and ground-drive him through the walk and reverse while on the lines. He should have no trouble with you at his rear, since you have been lunging him from a close proximity from the beginning. Use your whip as you did for the turn on the haunches—at the shoulder for his turns, and at the gaskin to encourage him forward—but just touch him with it to remind him, don’t strike him. You want his movements to be smooth and correct, not abrupt. Pull as lightly as you can with a squeeze/release on the lines to encourage the turns, and make him move off more from your body language and the whip than you do with the lines. If he does well, stop, remove the lines, and send him back to the rail for his trot work—twice in each direction. (This means twice with trotting steps, not twice around the pen.) Then stop, reward him and tell him school’s out until the next time. Whether you come back tomorrow or a week later, rest assured that your donkey will be right where you left him in his training. They have an incredible memory!
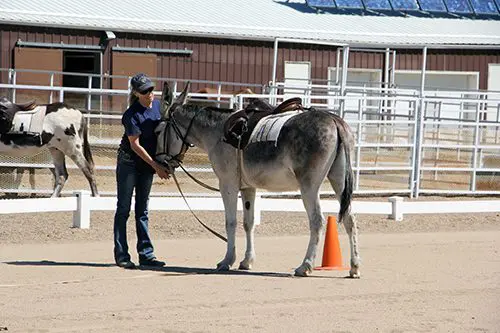
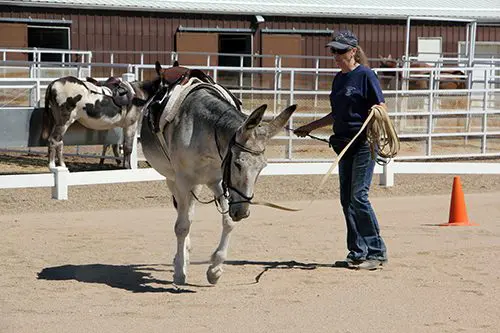
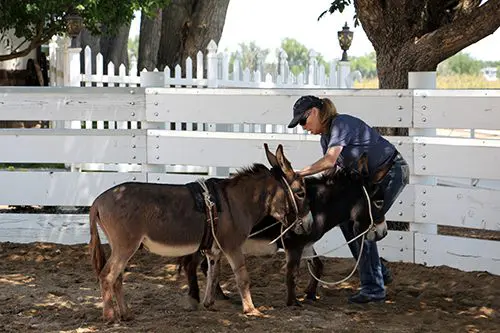
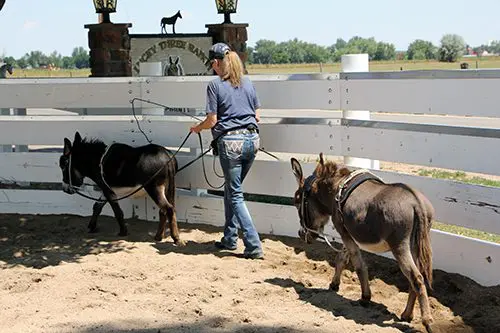
At the next lesson with your donkey, review all you did before and add turning through the middle of the pen, and turning both into the rail and away from the rail on the drivelines using your body language and your whip cues (as lightly as possible). Be clear with your verbal commands. For instance, tell him to “walk on,” and repeat the words as he walks on. When you wish to turn, give the command to “whoa,” then “gee” for a right turn, and “walk on” to continue forward. When you wish to turn left, ask him to “whoa” then use the command “haw” for the left turn, and “walk on” to continue forward. Be very careful not to pull too hard on the reins, as this will cause an over-reaction. After his ground-driving lesson, take off the drive lines and resume his lesson on lunging at the trot. Remember not to overdo any one stage of training. Two times seems to be the magic number, then go on to the next step. In other words, lunge at the walk twice each way, ground drive straight twice each way, ground drive reverse twice each way, ground drive turns twice each way, and lunge at the trot twice each way. This will keep him from becoming bored and resistant.
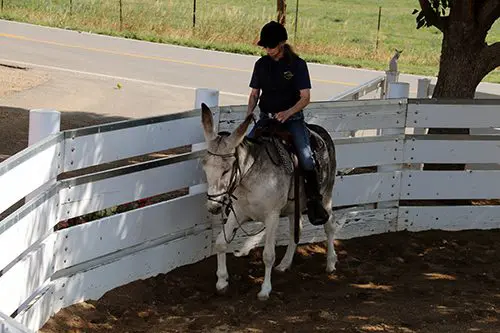
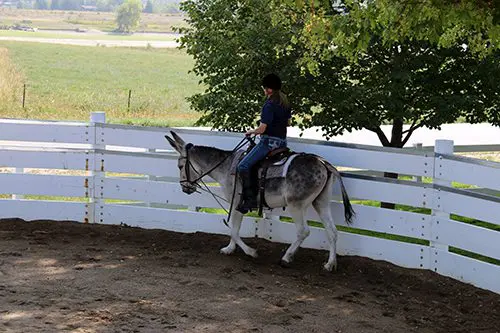
 When he ground drives fairly well at the walk, you can mount him if he is a large enough donkey to ride. Mount him from both sides and dismount a few times at first. When he seems calm, you can stay aboard. Take a treat in your hand and encourage him to bend his head and neck around to each side to take the treat from your hand. At the same time, give short, light tugs on the rein on that side. This will encourage lightness in the bridle later on. Now he is ready to move with you aboard. It is best to use an assistant at this stage.
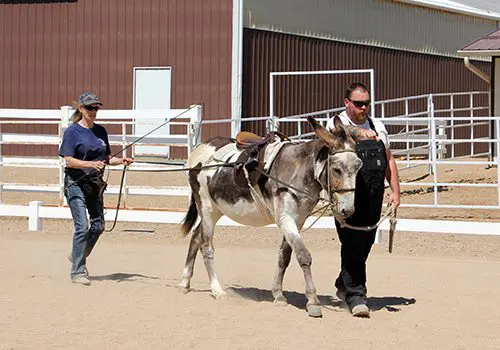
Have your assistant lead your donkey forwards a few steps with you aboard. Both of you should give the command to “walk on” as you squeeze with your legs once or twice, then the assistant can lead your donkey off. Have a riding crop in your hand to use if he does not comply. This will take the place of the lunge whip. Use it only if you have to and tap him only once lightly for every command you give. After just a few steps, say “whoa” and reward him, even if it is just two  steps. You can continue this lesson until he has completed one rotation of the round pen in each direction. Then stop him with “whoa” and ask him to go back a step or two. Give light pulls on both reins in a squeeze/release fashion to start, then, as he begins to move his feet backwards, alternate your pressure on the reins with the front foot that is forward. If he does not wish to back, your assistant can help with pressure to his chest as you did on the lead. Always end your riding or ground-driving lesson with a back, and don’t pull so hard on the reins that he resists by jutting his head out. Encourage him to stay light in the bridle. Then finish your lesson with lunging at the trot.
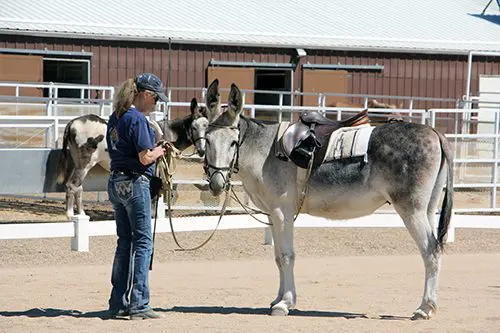
Donkeys learn a little differently than do mules or horses. Their responses are initially much slower but if you are clear with your intent, they learn completely. In halter training, your donkey learned to walk when you pull and to move away when you apply pressure to a certain area of his body. In the round pen, he learned to walk away from you and to walk and turn on the drivelines. He learned to walk with you on his back (with someone leading him to help reinforce the cues you were giving him). You and your assistant must be in tune with each other so as not to confuse your donkey. He will learn that the verbal command comes first, the legs come second (when you ride), and the crop (or whip) comes last. As he learns, he will begin to respond more closely to the initial verbal command. Ground driving is the same, with the reins in place of the legs. At first, you may need to use the voice, reins and whip, but as he learns, you will find him reacting sooner and sooner, until he is actually complying on the verbal command alone. Yes, donkeys are that smart!
You may have been having trouble with the trot on the lead up to this point, but now your donkey should be ready to do that as well. After your trotting lesson in the round pen, leave the area in a showmanship fashion, with the lead in your left hand and a treat in your extended right hand. Give the command to “trot” and slowly move into a trot yourself. If he still does not wish to trot, have your assistant move up from behind, just as you did when you were lunging him at the trot in the round pen, and he should comply. Take a few steps of trot, then ask him to “whoa,” give him his treat and “walk on.” It won’t take but a few lessons before he begins to understand the verbal commands. You just need to take it slowly enough and be consistent enough so that he has the opportunity to understand. Don’t get in a hurry, or you will find yourself in a sea of confusion!
To learn more about Meredith Hodges and her comprehensive all-breed equine training program, visit LuckyThreeRanch.com, MEREDITH HODGES PUBLIC FIGURE Facebook page, or call 1-800-816-7566. Check out her children’s website at JasperTheMule.com. Also, find Meredith on Pinterest, Instagram, MeWe, YouTube and Twitter.
Covered in TRAINING MULES & DONKEY: A LOGICAL APPROACH TO TRAINING, TRAINING WITHOUT RESISTANCE and EQUUS REVISITED at www.luckythreeranchstore.com.
© 1999, 2016, 2024 Lucky Three Ranch, Inc. All rights reserved.

 By Meredith Hodges
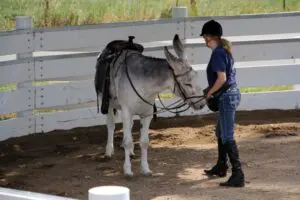
 Take your donkey to the middle of the pen and ask him to “whoa.” Reward him for whoa, then step toward his shoulder—pulling his head toward you—tap him on the flank and stifle, and ask him to “move over.” Do not move your body unless you absolutely have to. You want him to keep his front end bent toward you, step under with his near hind leg, and begin to execute a turn on the forehand. This means his front legs will stay stationary while the hind legs move around them and away from you. You want your donkey to take only one step each time you tap him, so don’t get carried away and tap him too hard. We are laying the foundation for hindquarter control and it is easier to let him move slowly, one step at a time, in the beginning than it is to ask him to slow down from too many steps later on. Watch his hind legs to make sure he crosses in front of the offside hind, and stop and reward him after each tap and step. He will probably double in the barrel and move his front legs as well in the beginning. As long as he moves his hindquarters away from you, reward him and repeat. We can perfect his style as he learns what is expected. The first few times, ask only for one or two steps. When he has done this exercise on the near side (left), repeat them from the off side (right). During each session, you can ask for a few more steps in each direction.
 When he is doing the turn on the forehand fairly easily (it doesn’t have to be perfect), you can begin to teach him to move his shoulders away from you with a turn on the haunches. This is much more difficult, since donkeys love to “glue” their front feet to the ground. Take the side of his halter in your left hand, ask him for one step forward and push his face away from you as far as your arm will reach. Then, in the right hand with the end of the lead, tap him firmly on the shoulder and give the command, “Over.” If his hindquarters come around, leave your left hand on the halter and take your right hand and use your body weight to shove him over one step. Stop, praise and reward him for moving his shoulders (even if you had to do all the work). Now try again, tapping him with the end of the lead. If he still won’t move his shoulders, repeat as before. If he does not begin to try to move his shoulders after three tries, use a riding crop in your right hand and tap the shoulders sharply with it—only once! He will probably be so surprised that he will step over quickly. Be ready to reward him when he does. Then stop your lesson there. You can ask for two steps in each direction during the next session. If you try to do any more, you will encounter resistance and he will be unwilling to perform and may run off, so be patient and be ready to take all the time HE needs.
 Repeat these three exercises until he begins to move easily away when you ask. It may take three or four sessions. When he does comply easily, you can begin to teach him to lunge. Review these exercises every time you begin your training session. Then release the lead from the halter. Hold the lunge whip in your left hand and use your right hand to point to the right (the direction you wish him to go). Raise both your arms in unison and tell him to “walk on.” If he doesn’t move away, lower both arms and raise them again, repeating the command. If he still won’t move out, give the verbal command again and give him a firm tap on the gaskin, just below the tail and above the hock, then take a step back and wait for him to comply (donkeys need time to think). If he still won’t move, repeat this action until he does. Once he does start moving away, follow behind and to the side at a distance that he will tolerate. This distance will vary with the individual donkey.
 wander. When you are the correct distance, he will walk forward, although, in the beginning, he will hesitate after every step or two. Practice moving into him and away from him to get him to move. Try to stay out of his space and keep him moving forward after the initial tap of the whip. If he stops and doesn’t seem to want to move, strike the fence behind him once you have him on the rail. Try NOT to hit him if at all possible. Remember, donkeys freeze when they are confused or frightened and you will get nowhere with him at that point. He needs to learn, but he also needs to enjoy what he is doing. Don’t forget to reward him frequently, but be sure that you ask him to go further each time, or you may find yourself training him to walk only so many steps at a time. In the beginning, ask him to go in only one direction and change directions at each session. You can teach him to reverse and go forward later, once he has learned what you are asking.


 t the top that just catches through a four-inch sleeve on the post wing. It is easy to reach over the top for opening.


 Only after you have adequately completed lead line flatwork and obstacle training is your equine truly ready to move on to the round pen and begin lunging and learning to balance on a circle at the more active gaits. At this stage, he should be complying willingly, walking with the lead rope slung over his neck and with his head at your shoulder. By now, his core muscles should be properly conditioned and strong enough to support his skeletal system during more active use and more complicated movements. Note: The equine that has not had this prior lead line balance and good posture training will have difficulty in the round pen because he has not learned to stay erect and bend his body through the rib cage when on arcs and circles.
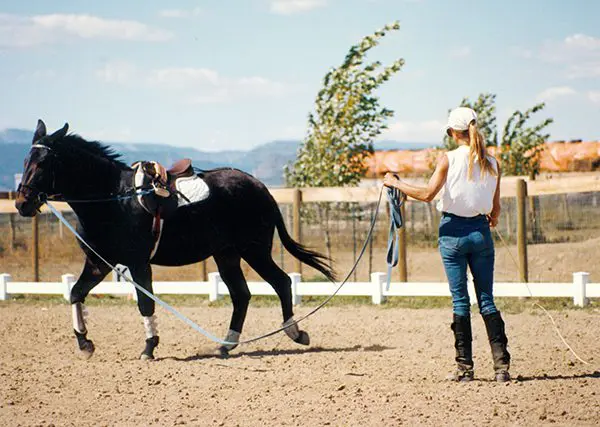 Before your equine learns to balance with a rider, he must first build muscle so he can sustain his own balance on the circle before carrying a rider. This is also true if you want your animal to learn to lunge on a lunge line. An equine that has not had enough time in the round pen establishing strength, coordination and balance on the circle will have difficulty on the lunge line, because even the slightest pressure on the line will pull him off-balance. Loss of balance will cause stress and even panic in your equine, which can result in him pulling the lunge line right out of your hands and running off. This is not disobedience but rather, fear caused by a loss of balance so do not punish him for this reaction. The animal that has had strength built on the circle before lunging and riding will not exhibit these undesirable behaviors, which are often misinterpreted as disobedience.
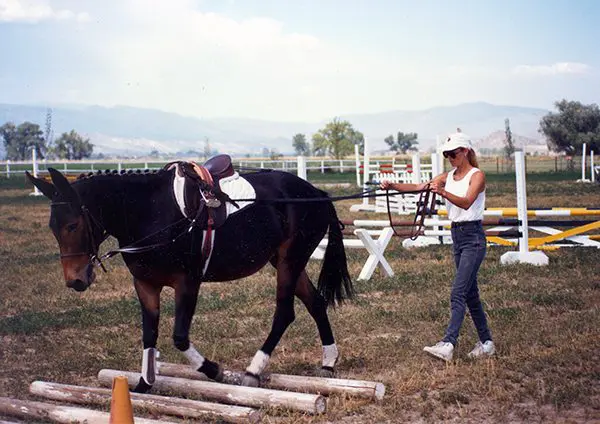 I have found that, in most cases, the larger the animal, the more docile the personality, which seems to be a general rule of thumb. I have also learned that, if a donkey or mule has a tendency to bolt and run, it’s because they don’t necessarily agree with what you are trying to do or how you are trying to do it. Even though horses usually comply fairly easily, it is important to remember that any disobedience on the part of any equine is ALWAYS the handler’s fault. Regardless of the personality type of an equine, he will always have an honest response to any stimulus. If you ask in the right way, you will get the desired response.
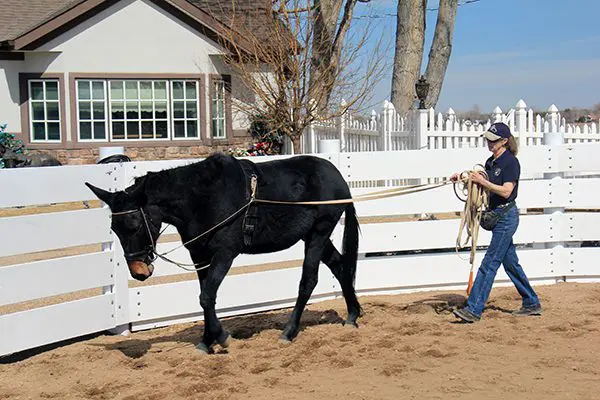 When ground driving, you should not worry about the whip while in the round pen, as the walls will help guide your animal in maintaining the correct position. What you really need to do is keep even contact on both lines (reins) when going in a straight line (or, when in the round pen, on the circle). To get your equine to begin stepping laterally, slightly tighten the outside driveline while maintaining contact on the inside driveline, so that he cannot complete the turn. Stay directly behind his haunches and urge him forward. This will cause him to begin to step sideways, with his face to the wall. Take only a couple of steps this way, and then slowly straighten him out again—you can build-in more lateral steps as he begins to understand what you want. Be sure to reward him with crimped oats every time you halt.
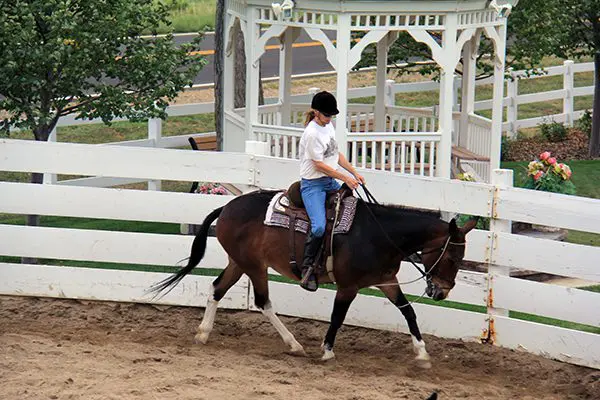 If an animal is trained with sequential, resistance-free training techniques and is given adequate time on groundwork training (a minimum of one year on the lead line and a second year on lunging and ground driving), he will warm up to other people more easily and will be more “sensible” than those animals that are not trained this way. Each new owner should take the time to review these techniques with newly acquired equines, just to create their own personal relationship with that animal and dispel the negativity of any prior relationships the animal might have had. Spending time doing simple basic groundwork training before actually riding allows your relationship with your equine to develop in a safe and healthy way. It will teach both you (the handler) and your equine how to communicate clearly and effectively. The exercises described in this article will condition your equine’s body so he can more easily carry a rider (whether the rider is balanced or not), and help your equine to be more capable of executing whatever demands the future may hold.
 In Part 1, you learned how to begin the relationship with your miniature equine in a positive and natural way that fosters good behavior and a good relationship between you. You also learned the importance of getting down to your mini’s eye level so that he can make eye contact with you, which discourages striking, jumping on you and other bad behaviors that are common when working with miniature equines. In Part 2, I discussed how important it is to successfully complete the tasks in Part 1 before moving on to Part 2, and I explained why it is advisable to work minis in groups, as they perform better when they are with their friends. You also learned how to train minis to go over and around various obstacles. Remember that all of this is to be done with no expectations that may overwhelm your mini—it is better if you maintain an attitude of fun and games. In Part 3, we got down to some serious groundwork training so that your mini can be used for driving and showing in hand. He learned to lunge and to be ground driven in the round pen and in the open arena through the hourglass pattern and, if part of a team, how to do these things as a pair.
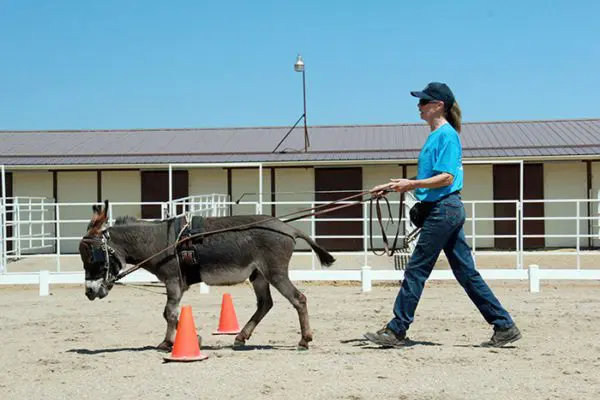 The “Elbow Pull” supports good equine postural balance and acts much like the balance bar that is used by a ballet dancer until she or he is strong enough to hold any postural position in the middle of the room without support. This becomes very important when your mini is in draught (pulling an obstacle or vehicle) in order to make sure he will pull correctly, and symmetrically condition his body’s muscles to avoid future injury to the internal structures within his body.
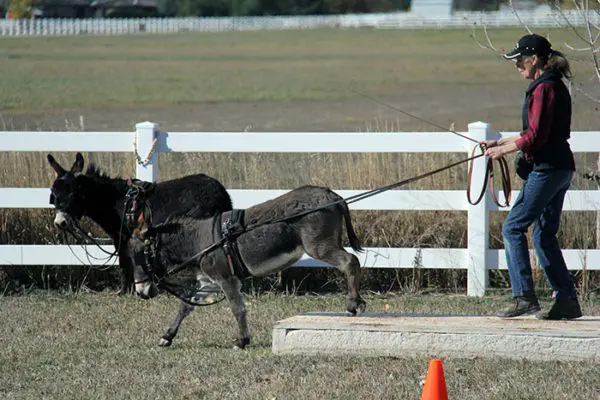 By now your mini has already learned to ground-drive the hourglass pattern and has negotiated the obstacle course on the lead line. There are still more obstacle exercises you can do to strengthen your mini and improve his strength and coordination to prepare him for driving before he is ever hitched to a cart or carriage. Now he is ready to learn to ground-drive the obstacle course. The obstacle course exercises will increase his confidence in being in the lead and help him to go bravely ahead of you upon command.
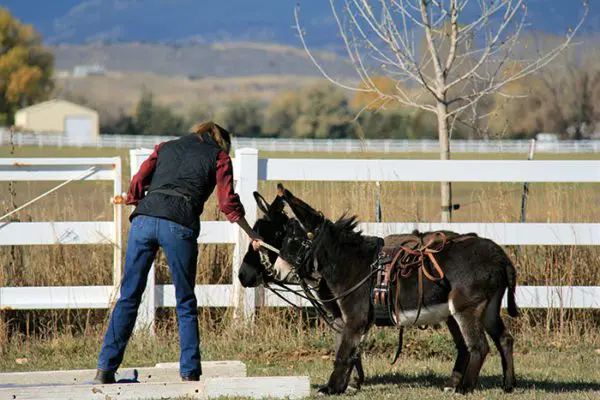 Approach each obstacle on the drive lines and if he balks and refuses to go forward, just stop, gently lay the lines over his back and then lead him through. Then go back and try again on the drive lines. In order to alleviate any fear or confusion your mini may feel, remember to “get down” to his eye level whenever possible. NOTE: Don’t forget to always reward him with his favorite crimped oats for compliance.
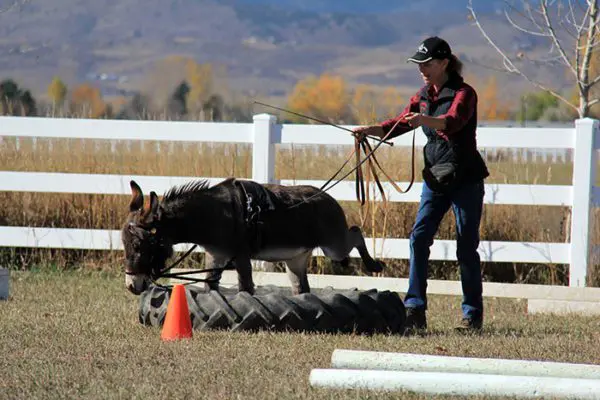 Once your mini is willing to go straight through the obstacle with a calm attitude and no balking, you can then begin to break each obstacle down into smaller, easier steps, rewarding and praising him for each success. If he is apprehensive about any obstacle, you should lead him through these smaller steps with frequent halts before attempting to ground-drive him through. He may need these detailed “explanations” before he is willing to “take the lead.”
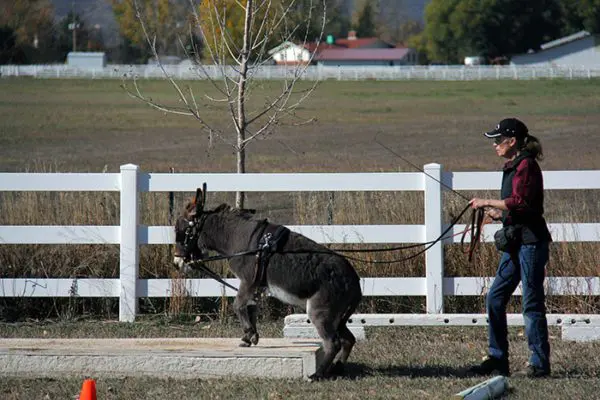 If you are training him on the bridge obstacle, go to the landing, stop, square up, put the lines up and reward, then resume your position and drive him up onto the bridge, but with only his front feet on the bridge, and then stop again. Put up the lines, walk forward and reward. Then drive him completely onto the bridge, stop, square up, put up the lines and reward. If he is having problems squaring up on the lines, then just square him up when you get to his head before you reward him.
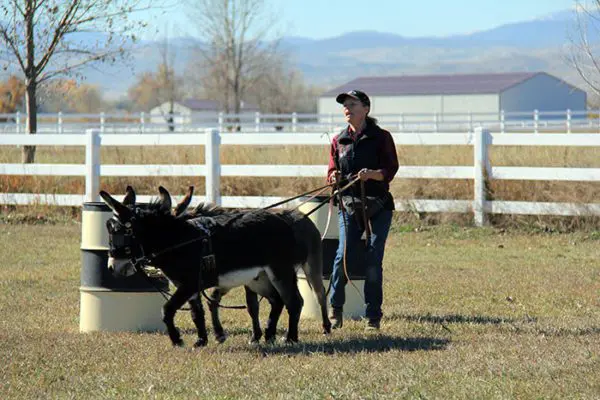 You can ask him to take full responsibility for perfect balance and negotiation of the obstacle later. For now, your primary task is to help him get through the obstacles successfully and with as little help as possible. Breaking obstacles down into smaller steps will increase his balance, coordination, agility and self-confidence. Even after he has become competent while hitched to the vehicle, you can use ground-driving obstacle exercises in the “Elbow Pull” to finesse his movements during future lessons. It will add variety to your mini’s lessons and continue to promote health, coordination and good equine posture.