By Meredith Hodges
- Does the Lucky Three Ranch participate in filming? Since my parents gave me a Brownie camera when I was five years old, I have been fascinated with taking pictures. They also gave me a diary after I learned to write. When I got older and began my interaction and training with mules in 1973, I always documented those interactions with my mules and donkeys in pursuit of learning the best way to manage and train them. I wanted to give them the best opportunity to exceed people’s expectations of them and dispel the old rumors. I kept diaries, wrote articles for international equestrian magazines from 1982 to present day, took photographs and video of every lesson, clinic and show to document their progress. I consolidated a group of articles in 1993 and published my first hardbound book, TRAINING MULES AND DONKEYS: A LOGICAL APPROACH TO LONGEARS.
- I worked with three different production companies from 1997-2017 producing my 10-tape video series (first in VHS and later upgraded to DVDs). By 2009, I had published two more hardbound books, A GUIDE TO RAISING & SHOWING MULES and DONKEY TRAINING, and another manual, EQUUS REVISITED with a matching DVD.
- From 2005-2007, I published five hardbound children’s books for a series for kids followed with corresponding DVDs and a coloring book. At the same time we did a lot of video short pieces such as TEACH YOUR MULES AMAZING THINGS and began the TRAINING TIPS series (67 TIPS).
- By 2017, I decided that the production companies were not doing justice to my brand considering their exorbitant costs. So, Lucky Three Productions, L.L.C. was born when my crew decided that we could probably do everything they were doing and could probably do it better…and we DID! We do EVERYTHING with two guys and three girls at the ranch working remotely with our graphics artist, two videographers, our JASPER Mascot & Social Media/Website person. Since then, we have flourished and produced eight documentaries, a total of 126 TRAINING TIPS, 31 LONGEARS MUSIC videos, 195 MULE CROSSINGarticles and 4 LONGEARS DIARY series that are all posted under TRAINING on my website at luckythreeranch.com . There is much more educational and fun LONGEARS things and biographical information to peruse.
- Instead of making every new project a singular production, and shooting for that only, we shoot photos and video of everything we do every day, keep diaries, log everything and then use the materials for multiple projects going forward, shortens the time need to do the various projects because there is very little shooting pieces that we need and significantly lowers the cost of production. This expands the use of everything we do from articles, to training tips, to advertising, to social media to new video projects and anything else we might dream up. If you can dream it, you can do it! You just need to learn how to be super-organized and efficient about the way that you work…and still continue the training with the equines as needed to add to our intellectual property library. As we all age and the ranch work changes, there are always new things to shoot and film.
- How do you select the animal(s) for the scenes? By temperament and disposition. All my equines are able to do whatever I ask for the filming that we do and for the people that will ride them. Ours is a complete training and exercise program that builds up their core balance and strength at the skeletal level for ultimate performance, and instills confidence & ability.
When working with the Longears, we do not set up the filming to get the perfect shots. We actually do everything at the time the equines are learning so people will know what to expect. This kind of training takes time and precision in communication with the animals to produce the results one would need for getting them to do anything and everything perfectly. And, it is a never-ending process! All the filming and documentation we do is to undeniably validate the integrity and quality of our management and training program. With this kind of foundation, the Longears training is impeccable and they are ready, willing and able for photos and filming.
- Training Mules & Donkeys is our brand and we now have our own production company, Lucky Three Productions, L.L.C., and self-published…
- 31 – Meredith Hodges Training Mules and Donkeys TV Shows – on RFD TV for 11 years
- 3 – Hardbound Training Books:
1) Training Mules & Donkeys: A Logical Approach to Training
2) A Guide to Raising & Showing Mules
3) Donkey Trainin
- 3 – Softbound Training Manuals (Produced in English, French, German & Spanish
1) Training Without Resistance (Corresponds with Videos #1 through #7)
2) Equine Management & Donkey Training (Corresponds with Videos #8 – #10)
3) Equus Revisited (Critique of Natural Horsemanship Principles)
4) Equus Revisited Extended Features (VOD Shorts & Equus Revisited DVD)
– The Equine’s Skeletal Structure – Developing Your Hands
– The Equine’s Skull – Choosing the Right Bit
– How to Make the Elbow Pull – The Elbow Pull for Good Posture
– Multiple Uses of the Elbow Pull – Building Coordination through Obstacles
– Obstacles under Saddle
- 11 – Training Videos that correspond with the manuals listed above
- Foal Training – Preparing for Performance: Driving
- Preparing for Performance: Groundwork
– Basic Foundation for Saddle – Intermediate Saddle Training
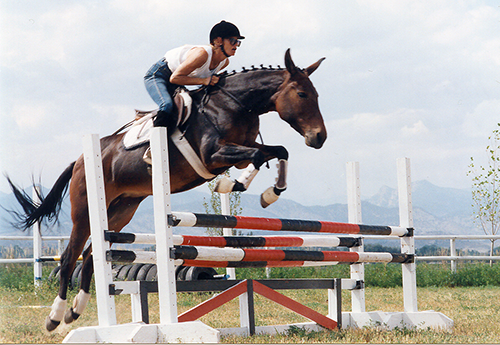
- Advanced Saddle Training – Jumping
– Management, Fitting and Grooming – Donkey Training: Introduction and Basic Training
– Donkey Training: Saddle Training and Jumping
– Equus Revisited
- Give Your Equine the Athletic Edge (VOD)

- Teach Your Mules Amazing Things (Video Shorts)
- Housekeeping
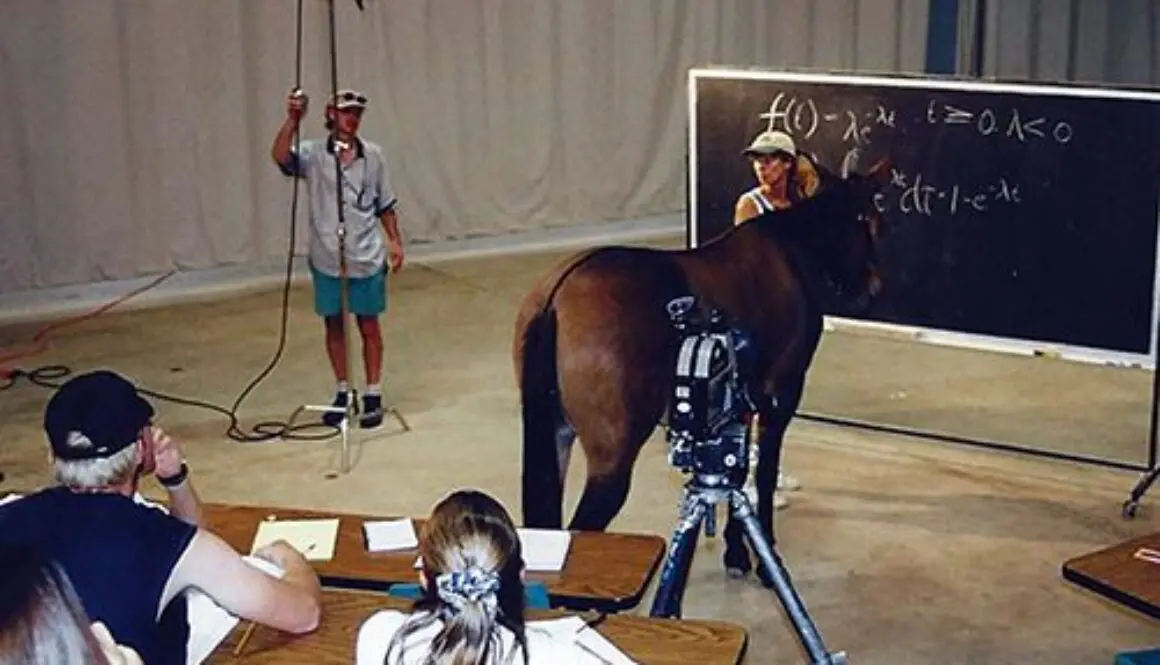
- Chess Game – Classroom
- Magic Show – Paratroopers
- Trampoline
- Documentaries:
1) Lucky Three Ranch & the Road to Bishop 6) Making of the Jasper Carousel
2) The Bishop All-Stars 7) Lucky Three Hay Production
3) The Bishop Experience
4) Walk On: Exploring Therapeutic Riding
5) Rock and Roll: Diary of a Rescue
- Jasper the Mule Children’s Series
1) Jasper: The Story of a Mule (Book, Video & VOD)
2) Jasper: A Christmas Caper (Book, Video & VOD)
3) Jasper: A Precious Valentine (Book, Video & VOD)
4) Jasper: A Fabulous Fourth (Book, Video & VOD)
5) Jasper: A Turkey Tale (Book, Video & VOD)
6) Jasper: An April Mule’s Day (Book)
7) Jasper Goes to Bishop (Coloring Book, Video & VOD)
My lifetime mission has always been to prove that mules could do everything that horses could do in all kinds of recreational equestrian disciplines to further their use in modern America. As I learned more about Longears’ personalities and abilities, I began to develop my own unique training program, utilizing my observations and my background in Behavior Modification. Over the next ten years, guided by the resistance-free training techniques of Richard Shrake and merging the knowledge of many other trainers from multiple equestrian disciplines (such as Major Anders Lindgren of the Swedish Olympic Team in Dressage, Rick Noffsinger in Driving, Bruce Davidson, Denny Emerson and Jim Graham of the US Olympic Team in Combined Training, Steve Schwartzenberger and Al Dunning in Reining and some of the very best Western trainers like Tom Dorrance, Ray Hunt, Buck Branaman, John Lyons, Pat Parelli and Clinton Anderson) I used only the very best theories and techniques they had to offer. I combined them into a comprehensive management and training program that I called Training Mules and Donkeys.
My evolving techniques proved successful in showing my animals in both Horse and Mule Shows. In 1984 Lucky Three Sundowner became the World Champion Bridle Reined Mule at Bishop Mule Days in Bishop, California. He then became the World Champion 3rd level Dressage Mule in 1992, and again in 1993, while working at home at 4th Level Dressage.
|
|
During the 1970s and early 1980s, most competitive equestrian events were closed to mules and donkeys. In 1986 I lobbied the United States Dressage Federation (U.S.D.F.) Convention, wrote campaign letters, and held forums and discussions with various breed organizations in an effort to change the U.S.D.F. rules to include mules and donkeys in competition. Mules were eventually limited to schooling shows only, and not allowed at the upper levels in the U.S.D.F. shows that were governed by the A.H.S.A. I diligently worked with other mule enthusiasts to get mules accepted by the A.H.S.A. On January 18, 2004, mules were finally accepted by the A.H.S.A., now called the United States Equestrian Federation (U.S.E.F.). The rule was approved with consideration. Mules were now accepted in the Dressage Division of the U.S.E.F.
In 1990 my Sire-Supreme jack donkey, Little Jack Horner, jumped four feet in exhibition at Bishop Mule Days, winning a Special Award and making him the only formal jumping donkey in the world.
- HOLLYWOOD MULES & THEIR TRAINERS
The film titled Hollywood Horses focuses on the great Silver Screen Movie Horses from the old Hollywood movies, westerns, frontier epics, and the Trainers Cowboys, Wranglers and rental stables.
Information on Hollywood’s movie stable owner Fat Jones, and others including Glen Randall, Corky Randall, Tom Sweet, Ralph McCutcheon, Jack Lindell, Les Hilton, Kenny Lee, Denny Allen, Dave Richardson, and two women who ran a business together, Stevie Myers and Joan Edwards. Many have since passed away – and in several instances, their children, are running the remaining stables. Fat was in business until his death in 1963. Then it was sold to Dyke Johnson whom is NOT related to actor Ben Johnson. Ben also started out as a wrangler and was Fat’s son-in-law.
This is a tribute to the old horses and the popularity they enjoyed from the 1930’s to the 1960’s. The Californian local history of the San Fernando Valley where the rental stables were located and many films were shot. In the early days, before large trailers were used to haul the horses to their location, wranglers and cowboys would round them up herding them to the movie sets. The old western cattle driving technique met the modern world of motion picture making.
- What attributes are desired in film animals? They must be manageable, but they will also need to have attributes that are complementary to their roles in the script.
- How are the animals paid and who receives the payment? The animals are leased from various stables with their trainers that are in the business of making them available to Hollywood Producers. The stable receives payment for the loan of the animals.
- Are there rules regarding how often the animal(s) get a break and for how long? The animals would be governed by each State’s animal advocacy groups like PETA, ASPCA, Humane Society, etc.
- MULE AND DONKEY TRAINING FOR FILM
- Donkeys and horses are frequently used over mules in films because they are easier to train for specific roles.
- Mules are often found in the background of numerous films
- Mules have specific likes and dislikes when it comes to people so actors with an “attitude” could have problems with them.
- Horses frequently have more “starring” roles in films.
- Rumors about Longears supersede the reality of their true character and skill.
- Training horses for movie roles is a fascinating process that combines equine expertise, patience, and creativity, but much of the training used is “Old School.”
- Here are some key steps involved that are used primarily with horses. They don’t always work well with mules the way they execute the training. You MUST train mules the way that horses SHOULD be trained. That is probably why the mules don’t seem to have very many leading roles.
- Desensitization:
- Horses need to become comfortable with unusual sights, sounds, and props they’ll encounter on set. Trainers gradually introduce them to things like cameras, lights, costumes, and loud noises.
- Basic Obedience: Horses must respond to cues reliably. They learn commands like “walk,” “trot,” “canter,” and “stop.” Rein pressure, leg cues, and voice commands play a crucial role.
- Stunt Training: For action scenes, horses learn to perform specific movements, such as rearing, bucking, or falling. Stunt doubles may handle these challenging sequences.
- Trick Training: Horses can learn tricks like bowing, nodding, or lying down. These add flair to character interactions.
- Mounted Actors: Horses must adapt to different actors’ riding styles. They practice working with specific performers to build trust and coordination.
- Trail Exposure:
- Movie sets often involve outdoor locations. Horses train on trails, bridges, and uneven terrain.
- Crowd Scenes: Horses learn to remain calm amidst crowds, crew, and other animals.
- Transportation Training: Loading onto trailers or standing still during transport scenes is essential.
- Emotional Scenes: Horses can convey emotions. Trainers work on expressions like fear, curiosity, or relaxation.
- Safety Measures: Trainers prioritize safety, using protective gear and ensuring horses are comfortable.
- Remember, each horse has its own individual personality and learning pace. Patience, positive reinforcement, and understanding contribute to successful equine performances on the big screen!
- People might be surprised at the number of films where you can find mules and donkeys. Mostly, they were used as “stand-ins,” but as time passed and the old rumors became diluted, they claimed their place in the film industry. Here are some of the more popular movies that were produced with Longears starring roles, but there are even more where they are shown in a positive light.
- Any unusual moments on film that you would like to share?
When we were filming and doing the narration for Jasper: The Story of a Mule with Animator, Bill Melendez, our narrator, Lee Horsley and I went for a ride on my mules. He had a scar on his face, so I asked him about it. During a shoot, he was thrown to the ground when his horse tripped and fell. He was rushed to the hospital, treated for a broken nose and jaw, and then had to return to the set to finish his shoot right afterward. That was when I discovered how merciless Hollywood could be…it’s all about the money! I think Lee decided that day that he’d rather ride a mule!
|
|
- LONGEARS MOVIES. Mules may not have played a lot of starring roles, but they have always been “Stand-ins” in the background of historic movies and hold a very special place in people’s hearts that know them. Rumors have it that mules and donkeys are stubborn and not a pleasant animal to ride. Their history actually proves otherwsie. They have an incredible sense of self-preservation and will not be forced to put themselves at risk. When treated with a polite attitude and the right approach, there is no better equine as a companion…they wil keep you SAFE if you are willing to listen to them!
- OBJECTIVE BURMA! (Errol Flynn – Merrill’s Marauders – Parachute Mules into Burma 1945) Objective Burma is a gripping war drama film that was released in the year 1945. The movie stars the legendary actor Errol Flynn in the lead role, along with James Brown and William Prince. The film is directed by Raoul Walsh and is considered to be one of the best war movies of all time. The movie takes place during World War II in the year 1942. A group of American soldiers, led by Captain Nelson (Errol Flynn) are sent on a mission to destroy a Japanese radar station in Burma. The mission is considered to be one of the most dangerous military operations of the time and the soldiers have to face numerous obstacles along the way.
The film begins with the soldiers being dropped off by the Allied Forces near the Burmese border. They trek through the dense jungle, where they have to fight off various enemies and dangerous animals. Finally, they reach the location of the radar station and successfully destroy it.
However, things take a turn for the worse when a group of Japanese soldiers spot the Americans and decide to retaliate. In the ensuing battle, many of the American soldiers are killed or captured by the enemy forces. Captain Nelson, along with a handful of soldiers, manages to flee and seek refuge in the jungle.
The remaining soldiers are faced with the daunting task of trying to make their way back to their base, which is located hundreds of miles away. They have to navigate through the treacherous jungle, evade the enemy forces that are pursuing them, and survive without proper food and water.
As they journey deeper into the jungle, the soldiers come across a tribe of friendly Burmese people who agree to help them on their journey. Together, they face numerous challenges and obstacles, including hostile Japanese troops, natural disasters, and unpredictable terrain.
Throughout the movie, the soldiers are confronted with the brutal reality of war and are forced to rely on their training and instinct to survive. The performances of the lead actors, especially Errol Flynn, are remarkable and bring a sense of authenticity and credibility to the film.
In conclusion, Objective Burma is a timeless classic that captures the true essence of war. It showcases the bravery and courage of the soldiers who fought for their country, as well as the hardships and struggles they had to endure. The movie is a poignant reminder of the sacrifices made by those who fought in World War II, and it remains a must-watch for anyone interested in war movies.
- MULE TRAIN (Gene Autry 1950) The film was released on February 22, 1950, by Columbia Pictures. Prospectors have discovered a natural cement mine that yields material of astonishing durability. But greedy contractor Sam Brady enjoys a monopoly on the transportation of crushed rock, which is being used to build a local dam. U.S. Marshal Gene Autry, however, discovers that Brady has used this method before, and his dams always burst shortly after construction, flooding entire towns. Despite Brady’s power, Autry campaigns to have the new dam made of cement.
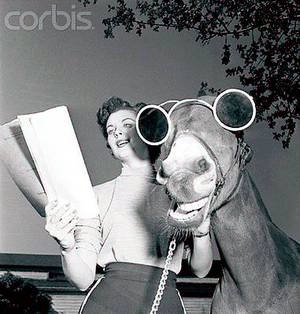
- FRANCIS THE TALKING MULE (Donald O’Connor 1950-56)
The book and film series focused on the exploits of Francis, an experienced Army mule, and Peter Stirling (played by Donald O’Connor), the young soldier whom he befriends. Francis then stays with Peter through civilian life and back in the military. In the original 1950 film, the mule identifies himself to the commanding general as “Francis…123rd Mule Detachment…[serial number] M52519.” With a plot device like the later series Mister Ed, Francis would usually talk only to Peter, thus causing problems for his nominal “master.”
As the titles indicated, each film had a different setting or gimmick, exposing the world-wise mule and the naive GI to race track excitement, the world of journalism, and many branches of the military, from West Point to the WACs to the Navy. The basic plots were fairly similar, however. Stirling, with the sage but sardonic advice of Francis (gleaned from overhearing generals plan strategy or from discussions with other equines), would triumph over his own incompetence. However, inevitably he would be forced to reveal that his adviser was a mule, and be subject to mental analysis (sometimes more than once per film) until the grand reveal, when Francis displayed his talent (usually either to individuals, or to a large group). Some of the Francis films had animated trailers.
 Francis (1950) a.k.a. Francis the Talking Mule
Francis Goes to the Races (1951)
Francis Goes to West Point (1952)
Francis Covers the Big Town (1953)
Francis Joins the WACS (1954)
Francis in the Navy (1955)
Francis in the Haunted House (1956)
The mule who appeared on-screen was a female named Molly, selected because she was easy to handle. She was purchased from Ed Frazier in Drexel, Missouri. According to author Pauline Bartel, Universal Studio paid $350 for the animal but made millions from the film series. Mollywas trained by Les Hilton, an apprentice of Will Rogers; Hilton went on to train Bamboo Harvester, the horse that played Mister Ed. To create the impression that the mule was actually talking, Hilton used a thread fed into the animal’s mouth which would cause Molly to try to remove it by moving her lips, the same technique used for Mister Ed.
- DEATH VALLEY DAYS (Stanley Andrews as “The Old Ranger”, first host of Death Valley Days 1952-1970) Death Valley Days is one of the first anthology series to appear on television, featuring different characters and stories each episode.[5] The stories were based in fact, all within the legends and lore of California’s Death Valley. Style varied by episode, with some being drama and others comedy. Most were human-interest stories of miners and homesteaders in Death Valley, where borax was mined.As the series continued on the air, episodes began to focus on nearly any portion of the American West, not just the Death Valley country. Most episodes portrayed events in the late 19th century, the heyday of the “Old West”. Some, however, were set in much earlier times, especially the Spanish colonial era, and a few recounted stories from the early 20th century. Each of the 452 television episodes was introduced by a host. The longest running was “The Old Ranger,” a character played by veteran actor Stanley Andrews from 1952 to 1964. While the series followed the anthology format, with all new stories and characters in each episode, the series utilized many character actors over its 18-year run.
- GUNSMOKE (James Arness & Ken Curtis & Mule Ruth 1955-1975) Curtis remains best known for his role as Festus Haggen, the scruffy, cantankerous, and illiterate deputy in Gunsmoke. He joined the regular Gunsmoke cast in 1964, superseding the previous deputy, Chester Goode, played by Dennis Weaver. While Marshal Matt Dillon had a total of five deputies over two decades, Festus held the role the longest (11 years), in 304 episodes. Festus was patterned after “Cedar Jack” (Frederick Munden), a man from Curtis’ Las Animas childhood. Cedar Jack, who lived 15 miles south of town, made a living cutting cedar fence posts. Curtis observed many times that Jack came to Las Animas, where he would often end up drunk and in Curtis’ father’s jail. Festus’ character was known, in part, for the nasally, twangy, rural accent which Curtis developed for the role, but which did not reflect Curtis’ actual voice.
- LEGEND OF THE LOST (John Wayne 1957) Legend of the Lost is a 1957 Italian-American adventure film produced and directed by Henry Hathaway, shot in Technirama and Technicolor by Jack Cardiff, and starring John Wayne, Sophia Loren, and Rossano Brazzi. The location shooting for the film took place near Tripoli, Libya.In Timbuktu, experienced guide Joe January (John Wayne) reluctantly joins a Saharan treasure hunting expedition led by Paul Bonnard (Rossano Brazzi), a man obsessed with confirming his dead father’s claim to have found a lost city. Dita (Sophia Loren), a woman of dubious reputation, becomes infatuated with Paul and his willingness to overlook her past. She invites herself along, despite Joe’s protests. During the tough, dry ordeal, Joe and Dita become attracted to each other, raising tensions.Just as they run out of water, they stumble upon the ancient city and a well. There, they find three human skeletons, a woman and two men. It becomes evident that Paul’s father had found his woman in the arms of his guide, killed them and then himself. There is also no obvious treasure to be found. Paul’s faith in his father is shattered and he becomes drunk.However; they find the treasure after Joe deciphers the clues left by Paul’s father in his bible. They load it and prepare to leave in the morning. Paul makes an attempt to seduce Dita; she rejects him and he gets into a fight with Joe, who protects her. Joe and Dita wake up to find that Paul had sneaked away during the night, taking all the animals, supplies and treasure with him and leaving his companions to die.Joe and Dita pursue him on foot and eventually catch up. Paul is unconscious from dehydration. While Joe and Dita dig for desperately needed water, Paul regains consciousness. He buries the treasure and attacks Joe from behind with a knife. Dita shoots and kills Paul. When they spot a caravan approaching in the distance, Joe and Dita are saved.
- MR ED (1961-1966 The horse Bamboo Harvester portrayed Ed throughout the run. Ed’s stable mate, a quarter horse named Pumpkin, also served as Bamboo Harvester’s stunt double for the show. Pumpkin later appeared again in the television series Green Acres.Bamboo Harvester’s trainer was Les Hilton. To create the impression that Ed was having a conversation, Hilton initially used a thread technique he had employed for Lubin’s earlier Mule films; in time, though, this became unnecessary. As actor Alan Young recounted: “It was initially done by putting a piece of nylon thread in his mouth. But Ed actually learned to move his lips on cue when the trainer touched his hoof. In fact, he soon learned to do it when I stopped talking during a scene! Ed was very smart.”
- BRIGHTY OF THE GRAND CANYON (Joseph Cotten – January 1966) Based on the novel Brighty of the Grand Canyon by Marguerite Henry (New York, 1953).
- DINGUS MCGEE (Frank Sinatra, George Kennedy – Mules Pulling Stagecoach 1970) Hoke Birdsill rides into Yerkey’s Hole demanding the law take action because Dingus Magee has robbed him. Since no law exists, the mayor, Belle, who also runs the town’s bordello, sees to it that Hoke himself becomes the new sheriff. Dingus keeps getting away with his crimes, helped by Anna Hot Water, his young Indian companion, but when he tries to steal from Belle, he finds Hoke has beaten him to it. Hoke and his mule enjoy being on the other side of the law, so Dingus turns the tables, becoming sheriff to go after him. After being rivals for so long, Dingus and Hoke eventually team up, burning Belle’s brothel to the ground.
- TWO MULES FOR SISTER SARA (Clint Eastwood & Shirley Maclaine 1970) Just after the American Civil War, a former soldier named Hogan rides up on a naked woman about to be raped by bandits. He kills the bandits and discovers the woman is a nun, Sister Sara, who is raising money to assist Mexican revolutionaries fighting French occupying forces. When Sara requests that Hogan take her to the Mexican camp, he agrees, as he had previously arranged to help the revolutionaries attack the French garrison in exchange for half the garrison’s treasury.As the duo heads towards the camp, evading French troops all the while, Hogan is surprised that the nun swears and drinks whiskey. While on their way to destroy a French ammunition train, Hogan is shot at by Yaquis and seriously wounded with an arrow. Sara is able to tend to his wounds, and she is able to set the charges that Hogan detonates to destroy the train. Eventually the two reach Juarista commander Col. Beltran’s camp. Sara begs the local villagers for money needed to purchase dynamite for the assault on the garrison. In the lead-up to the attack, Sara reveals to Hogan that she is not a nun, but a prostitute posing as a nun because she is wanted by the French for her support of the revolutionaries. Although Hogan is shocked, the two team up to infiltrate the fort and let a squad of revolutionaries in through a trapdoor, while two other squads attack the gates and a fourth act as sharpshooters.Expecting the French army to be drunk for Bastille Day, they instead find that the train’s destruction has put the garrison on high alert. Hogan and Sara infiltrate the fortress by Hogan posing as a bounty hunter who has captured Sara and is turning her in for the reward. The ruse works, and Hogan and Sara engage the French commanding officers while the garrison’s gates are breached for the Mexican revolutionaries to swarm through. A battle ensues; the French are defeated, and the Mexicans capture the fort. As promised, Hogan receives half the riches. Now wealthy and with his job completed, Hogan sets off with Sara, with whom he has fallen in love, to open a gambling house in San Francisco.
- GUS (Don Knotts & Tim Conway 1976) Low-ranking football team The California Atoms are at a constant loss until they recruit a new player – a mule named Gus. It turns out that Gus is an amazing placekicker with a 100-yard field goal ability! Just as the Atoms begin to leave their losing streak in the dust, crooks attempt to kidnap their new star. Whether it’s a surefooted race to the goal posts or a riotous chase down the supermarket aisles, the action in this Disney favorite is sure to make your family cheer!
- MULE FEATHERS (Rory Calhoun & Don Knotts 1978) A preacher travels with a telepathic mule In this Western comedy, a sagebrush flim-flam man makes a career out of swindling naive settlers and pulling off the occasional train robbery.
- THE APPLE DUMPLING GANG (& RIDES AGAIN– Don Knotts, Tim Conway & a mule named Clarise1975) Set in the Wild West in the year 1879, a slick gambler named Russell Donovan (Bill Bixby) comes to the town of Quake City en-route to open a casino in New Orleans. In Quake City, Donovan meets his old associate, John Wintle. Wintle is leaving for San Francisco that night and asks Donovan to sign for valuables coming in on tomorrow’s stagecoach. Donovan accepts a down payment and promises to pick up the valuables. The next day, Donovan realizes he has been duped into taking care of three little orphans, Bobby, Clovis, and Celia Bradley. The stagecoach driver Magnolia “Dusty” Clydesdale (Susan Clark) explains that Wintle is in fact the children’s relative and their legal guardian. With him gone and Donovan promising to care for the “valuables”, they are now wards of Donovan. The town’s sheriff, barber, Justice of the Peace, and judge Homer McCoy (Harry Morgan) tells Donovan that he is legally obligated unless he can have someone else take custody of the children.
- THE POSTMAN (Kevin Costner 1997) In a post-apocalyptic world in 2013, an unnamed nomad wanders the scattered communities of the Utah flatlands, trading performances of long-forgotten Shakespearean plays for food and water. At one town, the nomad is forced at gunpoint into the ranks of the Holnists that killed his mule. This neo-feudalist militia, brand him on his shoulder with their symbol, a figure 8. The Holnists, under their leader, General Bethlehem, are the de facto authority in the area, collecting tribute and recruits from local towns. When the nomad escapes, he takes refuge in a long-deceased postman’s mail vehicle.With the postman’s uniform and mail bag, he arrives in the settlement of Pineview claiming to be from the newly-restored U.S. government. He convinces Pineview’s leader, Sheriff Briscoe, to let him in by showing a letter addressed to elderly villager Irene March. The postman inspires a teenager named Ford Lincoln Mercury, who asks to be sworn in as a member of the postal service and even helps him to reactivate the long abandoned post office in the town. When the postman leaves for the town of Benning, he carries a pile of mail left at the post office door by the townspeople.In a recitation of King Henry V’s speech prior to the siege of Harfleur, the postman rallies himself and his followers to war. The mounted carriers and Holnists meet across a field. Not wanting any more carnage, the postman instead challenges Bethlehem to a personal hand-to-hand duel, with their troops as witnesses, which is his privilege due to once having been a member of Bethlehem’s troops. The postman wins the fight but spares Bethlehem’s life to maintain morale.Thirty years later, the postman’s grown daughter Hope, accompanied by other public figures and servicemen (including postal workers), speaks at a ceremony unveiling a bronze statue by territorial waters in St. Rose, Oregon, in tribute to her father, who has recently died (1973–2043).
- MULE PEOPLE (Ted Faye – Gold Creek Productions 1997) People who appreciate mules are a unique breed of folks. In this video you’ll get to know some of them at Bishop Mule Days in Bishop, California. You’ll meet eleven-year-old Cameron Brooks along with trainers Cindy Powell and Jerry Villines whose mules, they all claim, can do anything a horse can do…only better. Hang onto your hats for a wild ride with Ron “Tash” Hudson. Then share in the poignant climatic moments as Mr. Jensen has to sell his pride and joy. His 20 well-trained mules, and all of his wagons. If you didn’t know any before, after watching this video, you’ll be glad you met these…Mule People.
- MULE FOR SALE (Ted Faye – Gold Creek Productions 2003) Join the fun and excitement of the world’s largest mule auction. Filmmaker Ted Faye takes you on a journey to Dickon, Tennessee where Dickie and Rufus Reese carry on a family tradition: The Reese Brothers Mule Auction. Find out why people buy mules, what they are used for and where the mules end up. We follow a mule from the time it is brought to the auction to the time it is sold. Discover the story of the mule and meet the people who buy and sell them. An intriguing look at the event that few have experienced first-hand.
- LONGEARS EVERYWHERE (Video Mike Kerson 2004) Bishop Mule Days with Jerry Tindell & Video Mike: Twitchell, Von (Actor), Shields, Bonnie (Actor), Kerson, Mike (Director) Format: DVD
- HOOVES AND ROSES (Video Mike Kerson 2006) Pasadena Tournament of Roses Parade
- LOVE THOSE LONGEARS (Video Mike Kerson 2006) Video Mike is passionate about equines – and all his love and respect for both the critters and their people shines through in this video. Every year Video Mike produces an action-packed Bishop Mule Days Highlights video, and each year he chooses some aspect of the week-long event for a more in-depth look.
- MULES ON SNOWSHOES (Video Mike Kerson 2006 ) Bill Balfrey’s family came to the remote Northern California town of Etna by covered wagon in the 1850’s. As Bill was growing up, he made friends with the Smith brothers, Bill and Ralph, who, in the early 1900’s, delivered the mail by mule train from Etna to Sawyers Bar and points down river. Come along with the two Bills, Ralph and others as they take us back to a time when tunnels had to be hand-dug through the 10-foot snowdrifts, the mules wore snowshoes, and the mail was delivered!
- CHASING THE RAINBOW: ADVENTURES OF THE DESERT PROSPECTORS (Ted Faye – Gold Creek Productions 2007) The last great Gold Rush in America played out in the deserts of Nevada and California. It began with those who roamed the barren hills seeking their fortune. Most traveled with their tools, some food, a blanket and a jackass. They were called single-blanket-jackass-prospectors. Most never made the fortune they sought, but many discovered something else: freedom and a kind of peace in the wilderness and every now and then, some wild times in the local towns. This the story o those who spent their lives “Chasing the Rainbow.”
- TOMMY AND THE COOL MULE (Grant Barker & Ice T 2009) Tommy Braxton’s father goes to war and never returns, forcing Tommy to become the man of the house and help support his mom and sister. Tommy makes a friend and finds a way to save his family’s farm when he meets Jackie-A – a talking mule. Against all odds, Tommy and Jackie-A triumph in a race over the other bullies and their horses in the country stock show, in a spectacular display of resolve and determination that caps off a winning family adventure!
- SEASONS: A YEAR IN THE LIFE OF A PACK STATION (Video Mike Kerson 2010) Follow the Virginia Lakes Pack Outfit through springtime preparations, competing at Bishop Mule Days, and on to the summer pack season. You’ll ride with guests, scientists, and government work parties into the spectacular Eastern Sierra Wilderness, and experience back country life at its finest. You’ll meet the people who work at the pack station, as well as the guests. Take a look behind the scenes as problems are solved, crises are met, and the crew lives the disappearing life of the back country. With the coming of autumn, the pack station gets ready for winter, and the cycle begins again.
- HITCH UP YOUR MULE & THE HIDDEN TRAIL (Ted Faye – Gold Creek Productions 2010) Hitch up your mules, mule-skinner Bobby Tanner of Bishop, California shows how to hitch up a 20-Mule Team. Bobby has revived the art of driving a long line of animals with a single rope called a jerk line, which is tied to a lead mule. The Hidden Trail is an expedition to the China Lakes Naval Air Weapons Station in the Mojave Desert to retrace the historic route of the Twenty Mule Team from Death Valley. Ruts from the original Twenty Mule Team can still be seen.
- BISHOP MULE DAYS (Video Mike Kerson 2011-2019) At 4000’ elevation, Bishop is nestled between two beautiful mountain ranges midway between Los Angeles, California and Reno, Nevada on U.S. Highway 395. Bishop is the center for recreational activity in the Eastern Sierra. In addition to the packing activities specific to the region, there are activities such as fishing, hiking, hunting, and fantastic sight-seeing of fall colors, mountains, creeks, and high desert. World class skiing is also available on nearby Mammoth Mountain in Mammoth Lakes, California.Mule Days is a six-day event that takes place each year Tuesday to Sunday the week before Memorial Day. Mule Days is held on the Tri-County Fairgrounds in Bishop, California. Our 14-show event begins with preliminaries on Tuesday through Thursday and features event finals, comic events and packing events Friday through Sunday. Video Mike Kerson has been filing this from 2011-2019.At 4000’ elevation, Bishop is nestled between two beautiful mountain ranges midway between Los Angeles, California and Reno, Nevada on U.S. Highway 395. Bishop is the center for recreational activity in the Eastern Sierra. In addition to the packing activities specific to the region, there are activities such as fishing, hiking, hunting, and fantastic sight-seeing of fall colors, mountains, creeks, and high desert. World class skiing is also available on nearby Mammoth Mountain in Mammoth Lakes, California.Mule Days is a six-day event that takes place each year Tuesday to Sunday the week before Memorial Day. Mule Days is held on the Tri-County Fairgrounds in Bishop, California. Our 14-show event begins with preliminaries on Tuesday through Thursday and features event finals, comic events and packing events Friday through Sunday.
- PALOUSE THRESHING BEE (Video Mike Kerson 2012) The Palouse Empire Threshing Association holds an old-fashioned wheat threshing bee in Colfax, Washington – the heart of the Palouse. Using only authentic, original equipment and raft animals, the public is treated to a day of living history, featuring the majesty of draft horses and mules.
- THE TWENTY MULE TEAM OF DEATH VALLEY (Ted Faye – Gold Creek Productions 2012) This program will show you how the Twenty Mule Team rose from a mundane means of transportation to become a national icon. Using spectacular, original color film, archival footage, photographs and reenactments, this documentary brings to life the Twenty Mule Team of Death Valley.
- HISTORY OF THE ARMY MULES (2013) Just outside of Fort Brag on a ranch in Lumber Bridge North Carolina there are two brothers mules unaware of how their lives are about to change forever. These animals the embodiment of strength hardiness and perseverance are about to embark on a journey that will lead them through the gates of the world’s Premier leader development institution. They are about to take their place in history as the new generation of mascots for the corps of cadets at the United States Military Academy at West Point. The tradition of mules as mascots for the Army dates back to 1899. Mules were an obvious choice. The mule reflects the long-standing usefulness of the animal in the United States Army, enabling soldiers to perform military operations, transporting guns, supplies and ammunition. Strong, hardy and durable, the mule is the perfect symbol for the corps of cadets. Not much was known about the official mules until 1936 when Mr. Jackson, named for Thomas J. Stonewall Jackson, arrived from Fort Royal, Virginia. Starting with him there have been 15 official mules: Poncho, Hannibal 1, K.C. MO, Trotter, Hannibal 2, Buckshot, Spartacus, Ranger I, Blackjack, Traveler and Trooper. At time this video was made, the members of the current and now retiring mule Corps are Raider, Ranger I and General Scott.We bid farewell and honor them for their service and now, as the Legacy continues, the two new mascots embark on their Journey several hundred miles north to West Point’s hallowed grounds just outside the greatest city in the world. They will be entering into a story of tradition where their presence represents inspiration, strength and steadfast perseverance They will help to reinforce the motto of duty, honor and country that continues to sustain the corps of cadets and the long gray line. Currently, those who have been added are: Ranger II, Stryker, Raider, Ranger III and Paladin.
- STORM RIDER is a 2013 American drama film written and directed by Craig Clyde and starring Kevin Sorbo, Kristy Swanson and C. Thomas Howell. It was filmed in Wallsburg, Utah.Cast:
Kevin Sorbo as Sam Fielding
Kristy Swanson as Jody Peterson
Danielle Chuchran as Dani Fielding
Jacob Buster as Jordan Fielding
Darien Willardson as Kevin Winslow
Sam Sorbo as Vanessa Fielding
Terence Goodman as Cameron Winslow
C. Thomas Howell as Mitch
Sarah Bernstein as Brooke
Jacque Grey as Marie Houghton
Amanda Swanson as Addy Jane
Joey Miyashima as Sheriff KikuchiEdwin L. Carpenter of The Dove Foundation gave it a positive review, writing that it “is well worth your time.” Tracy Moore of Common Sense Media gave the film two stars out of five.
- THE MULE (Clint Eastwood 2018) The Mule is a 2018 American crime drama film starring and directed by Clint Eastwood, who also produced with Dan Friedkin, Jessica Meier, Tim Moore, Kristina Rivera, and Bradley Thomas. The screenplay, written by Nick Schenk, is based on the 2014 The New York Times article “The Sinaloa Cartel’s 90-Year-Old Drug Mule” by Sam Dolnick, which recounts the story of Leo Sharp, a World War II veteran in his 80s who became a drug courier for the Sinaloa Cartel. Toby Keith contributed the theme song “Don’t Let the Old Man In”, which reached number 41 on Billboard’s Country Airplay chart and became Keith’s highest-charting single since “Drunk Americans” reached number 27 in early 2015.
- LOST SEA EXPEDITION (Bernie Harberts 2019) The true story of a lone 14-month wagon voyage across America. Filmed by Bernie Harberts, it is a tale of water and desert, loneliness and companionship. Lakota, Christian and secular beliefs about the origin of a land. Harberts, his mule and his lens capture the essence of the American West. The Lost Sea Expedition is the story of a solo mule wagon voyage across America. Because mule Polly and I (Bernie Harberts) traveled alone, without a film crew or chase vehicle, It took a lot of people and communities to turn the experience in to a series for Public Television. This is where we thank them. The credit list is ongoing. If you were part of the Lost Sea Expedition series and didn’t find yourself on the list (hey, some days I forgot to hook Polly’s traces chains too…) then drop us a line.
- TWO SINNERS AND A MULE (Cam Gigandet 2023) Two ladies of pleasure were kicked out of town and run across a Bounty Hunter shot to hell. After nursed back to health, the ladies decide he needs their help to track down, Gila Grimes, a ruthless, murdering bandit, for half of the bounty.
- Mules and donkeys are working their way into the hearts of many people in this new Industrial Age. Horses have been used for so many films for decades, but the unique character of mules and donkeys are drawing attention from everyone…everywhere!
To learn more about Meredith Hodges and her comprehensive all-breed equine training program, visit LuckyThreeRanch.com, MEREDITH HODGES PUBLIC FIGURE Facebook page, or call 1-800-816-7566. Check out her children’s website at JasperTheMule.com. Also, find Meredith on Pinterest, Instagram, MeWe, YouTube and Twitter.
© 2013, 2016, 2024 Lucky Three Ranch, Inc. All Rights Reserved.


 First, you should be sure that the trailer in which they are to ride affords safety and comfort and that the plates on both the truck and trailer are up-to-date. Before you leave, you should check over your trailer thoroughly. Make sure the hitch is secure and in good repair, and that there are no weakened welds anywhere. Check your trailer’s tires, bearings, axels and brakes for maximum performance, and make sure all the lights are in working order. Take the trailer mats out and check the floor boards for rot and other weaknesses, and replace all floor boards that are even questionable. It is always good practice to get all new tires for the trip and a new spare.
 Mules and donkeys, like horses, should be “dressed” for their trip. For their overall comfort during long trips, halters should be fleeced, at least over the noseband, to protect from excessive rubbing that can result from being tied. Shipping wraps for their legs are also advisable to prevent injuries from a loss of balance, misstep or kick from another animal in the trailer. Depending on the weather and the kind of trailer you have (either a stock trailer or enclosed trailer) you can use sheets or blankets to protect the rest of your animal’s body.
 When loading your mules and donkeys, pay special attention to each individual’s needs. Animals that lean one way or the other generally do better in a slant load trailer rather than in an in-line trailer, but if you must use an in-line trailer, make sure that the animal that leans has a solid wall or partition on the side to which he leans. You always want to put animals next to each other that get along well, so if you must load a leaner on the wrong side, be sure to put him next to an animal that is able to tolerate his leaning without retaliating if there are no partitions. If you have an open stock trailer, another alternative is to load your animals into the trailer and tie them facing backwards. Many equines actually prefer to ride facing backwards because they find it easier to balance. Note: This alternative is not advisable in a partitioned in-line or slant-load trailer.
 Long before you actually go anywhere, get your animals used to being handled inside the trailer. When unloading, always make them stand and wait. I usually remove my animals’ shipping wraps before I let them come out of the trailer, but if they are packed in pretty tightly, I just remove the leg wraps I can reach. The removal of leg wraps before unloading will add purpose to your Longears’ waiting time (which they quickly come to understand). Frequently offering water at stops gets your animals used to you moving about the trailer while they are loaded. Most equines realize that all of this is for their benefit and you should find them mostly cooperative and appreciative. Having water from home in plastic jugs makes this easy.
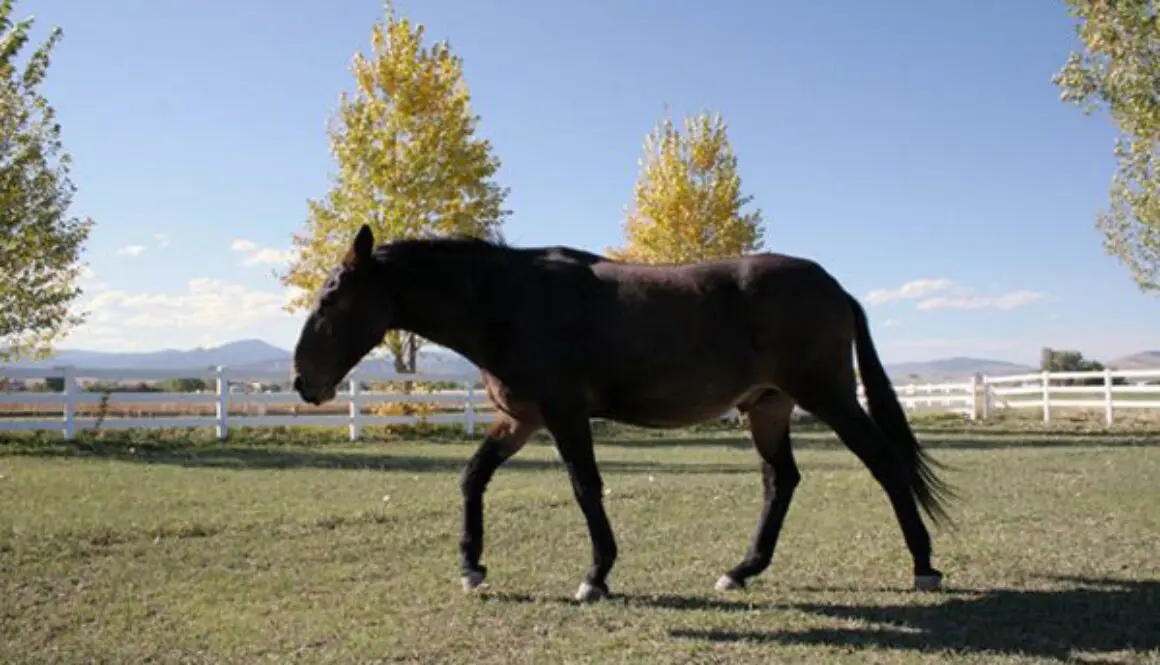


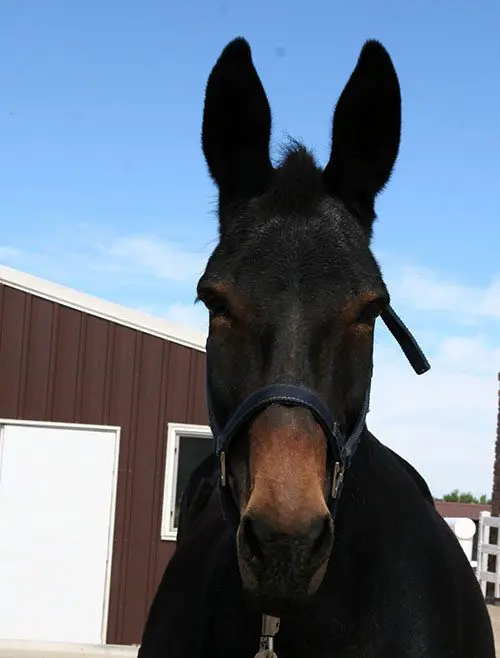 It’s hard to put your finger on it, but there’s just something a little more special about Vicki. She is way above average when it comes to mules and she definitely commandsyour attention. She embodies the spirit of free expression and an almost eerie reincarnation of a perfect dream…with long ears! Could this “presence” be something genetic, passed down through the ages of Trakehner (and possibly Arabian) breeding? It would seem so.
 Instead of going on the road to do clinics, I thought long and hard and decided to do an equestrian correspondence training course instead. I opted for this after considering that when I went to clinics as a student, I was one of 20 people and only got limited attention during those clinics. When I put into practice at home what I had learned at the clinics, I realized that I had only received the highlights of training and it was full of holes! When I tried to contact the clinicians to ask a question, I was either answered by someone in the office, or not answered at all. The clinicians were most often too busy and out of touch. The one thing I didn’t realize by making this decision was the incredible learning opportunity I had opened up for myself that I could, in turn, pass on to my clients.
 When they told me mules would not work well in a snaffle bit, I learned how to make that work. When they said they were not suitable for Dressage, I based my entire training program on those principles. When they told me not to give food rewards, I paid my mules for their efforts with a generous reward of crimped oats. When they told me not to talk to my equines, I spoke three languages to them: verbal language, body language and “touch” language. I can truthfully say that today I realize that it wasn’t the mules that were so stubborn, but rather…it was me! This positive kind of stubbornness did pay off, as I was to soon discover.
 Little Jack Horner had gone through my entire training series right along with my mules and had learned everything that I taught them. He may not have made it to Fourth Level Dressage, but he made it to Second Level Dressage with gait lengthening and lateral work. He overcame his “donkey” behaviors and gave a phenomenal performance, jumping four feet in exhibition at Bishop Mule Days. His Reining was accurate though somewhat limited by his donkey conformation. Still, he could always elicit a supportive laugh and a wide grin! He competed successfully at dressage driving shows and won world championships in driving at Bishop Mule Days.
 It was during this experience that I realized that Little Jack Horner had become deaf and could not hear one word of what I was saying, even when I was yelling. I was sitting in the Meadowbrook cart, he had blinders on his harness bridle and could not see me, so verbal language and body language were of no help to him at all. Lucky for us, we still had the “touch” language that we had developed between us and we thoroughly enjoyed the experience of driving yet again.

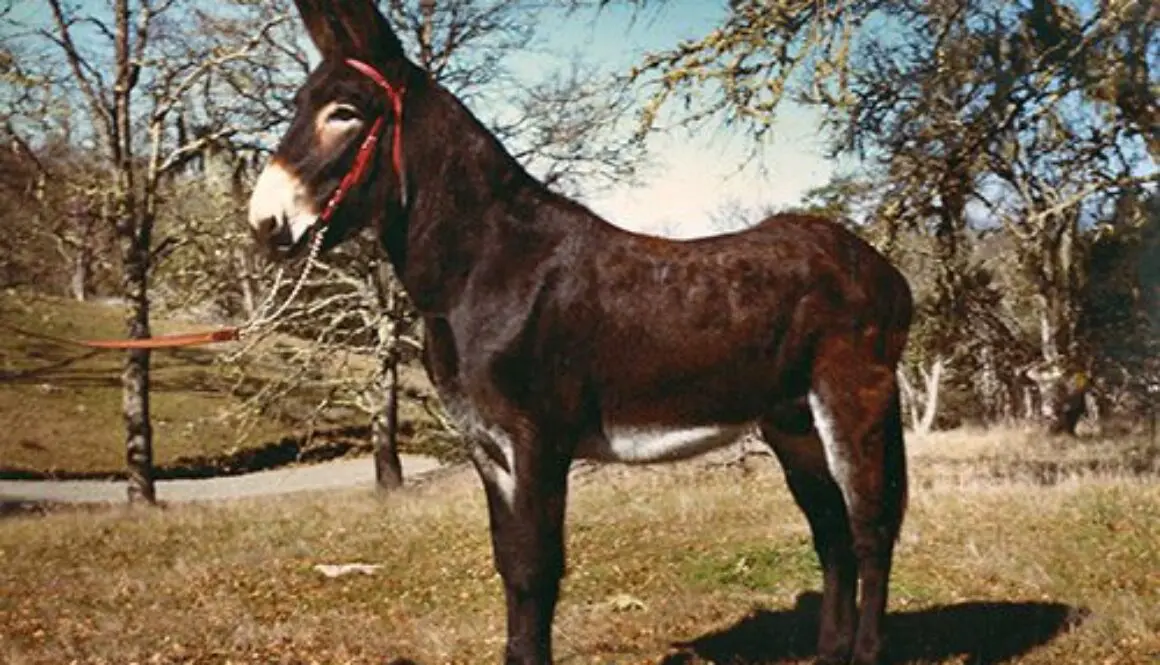
 When choosing a jack to breed to your mares and jennets, there are many important factors to consider. Conformation is the most obvious, but size, type, disposition and genetics are equally significant. As a direct result of the donkey’s evolution our choices in jacks are considerably limited these days. In the days when donkeys were widely used as beasts of burden, conformational soundness was an important consideration in their ability to do physical work. Today, the donkey is not as widely used in this manner, becoming more of an owner’s pleasure animal. In some cases, he is simply another pet. As a result, not much care has been taken to preserve his conformational integrity, thus limiting the availability of true breeding stock.
 Although the conformation of the ideal jack can only be approximated, you should always try to choose a jack that is as close to the ideal as possible for your breeding programs. (Perpetuating undesirable conformation traits will only compound future breeding problems.) The first conformational consideration is the jack’s overall balance and proportion. His torso should be well connected to the front and rear quarters, with plenty of width and depth from heart girth to the flank, which allows for maximum efficiency of the heart and lungs. The topline from the withers to the tail should be relatively straight, with only a gentle slope from the withers to the croup, and neither excessively long nor short-backed. A longish back is acceptable, provided there is not a lot of distance between the last rib and the point of the hip, as this causes weakness through the loins. The unusually short-backed jack does not have adequate lateral and vertical flexibility in his movement. A rigidly straight back is discouraged, as is a back that sags too drastically in the middle (except in the case of an aged animal).
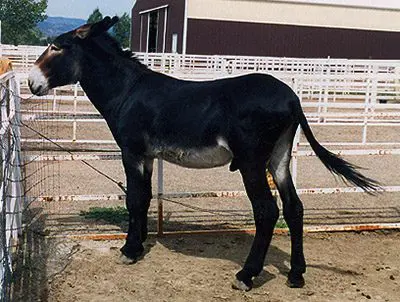 Proportionately, the jack should not be too narrow in the chest, through the rib cage and in the rear quarters—nor should he be too wide in these areas. These faults in proportion can interfere with his action, causing him to be “pin-toed” (splay-footed) or “pigeon-toed” (toed-in). The pin-toed jack will brush his knees and fetlocks together in deep footing, causing him to be a slow mover, or he may even cross his legs over one another, increasing the possibility of a fall.
 the animal’s body weight too far on the forehand, making turns and stops more difficult. It could also increase the possibility of falling. The croup should be smooth and round over the rump, with a tail set neither too high nor too low.
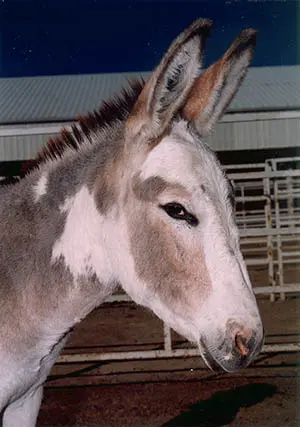 possible weakness in the hoof itself. If it is a cosmetic problem, it can often be managed successfully by adding one ounce a day of Mazola corn oil to the diet. If it is a genetic problem, a jack with hoof problems should be avoided when breeding and should probably be castrated.
 The basic conformation for the breeding jack should be the same regardless of size, although there are specific considerations with regard to type and use. The jack generally contributes more to the thickness of bone in his offspring, but not necessarily to their height. Therefore, when breeding for saddle mules and donkeys, the more refined-boned Standard or Large Standard jacks are preferred. On the other hand, when breeding for a draft mule or donkey, you would want to preserve more thickness of bone and use a stockier jack, such as a Large Standard or Mammoth. Use the same guidelines when breeding for miniatures; stocky begets stocky and refined begets refined. When breeding for saddle mules, you may want to keep the refinement, so you would use a Standard or Large Standard jack to breed to a saddle horse mare. However, if you wish to have a pack mule that is not overly tall, you might then want to breed a Mammoth jack to a saddle horse mare.
 information, thereby giving us all a better understanding of Longears production. So, don’t be afraid to ask the breeder whatever questions you may have.
 By Meredith Hodges
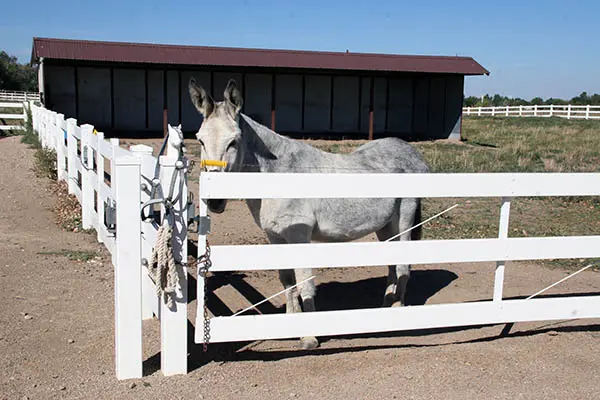 jack has a roomy area, free of refuse and debris, and adequately fenced. The fences should be high enough to discourage his leaning over the top and strong enough to bear his weight on impact. Also, they must be constructed so that there are no protrusions that could cause him injury. If females (or other animals) are present, the jack may run back and forth along the fence and catch his head on anything that is protruding. Hot wires along the inside of a weaker fence will often serve this purpose. However, a hot wire used alone is not sufficient. If your jack becomes frightened, he could run through an electric wire before he even knows that it is there. Giving him a clean, comfortable area where his limits are clearly defined will help him to be a calmer and more manageable animal.
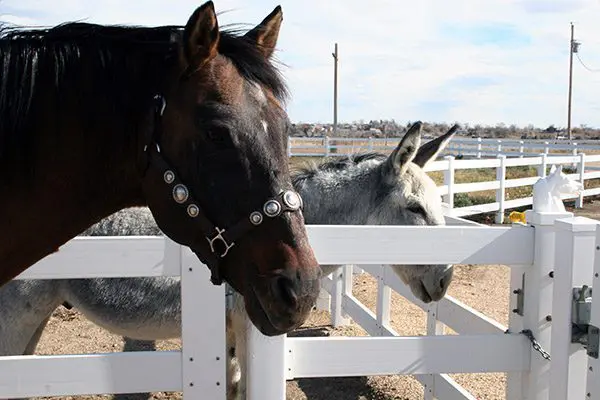 Many people opt to keep jacks in solitude, but this is not really good for them. Being a natural herd animal, they need social interaction. When they don’t have company nearby, jacks can become depressed (donkeys have actually been known to die from depression—they can stop eating and simply give up). To remedy this, jacks can be pastured or penned next to other animals, as long as the fencing is adequate between them. Of course, you also need to take into consideration the personality types of the animals involved, as well as being careful to make sure they are compatible. This can fulfill their need for companionship and keep them happy in confinement. As long as there are no cycling horse or donkey females around, jacks can be pastured next to mules of both genders. I had my own jack, Little Jack Horner, penned next to our teaser stallion for many years and they actually liked each other! We never had any trouble with them at all.
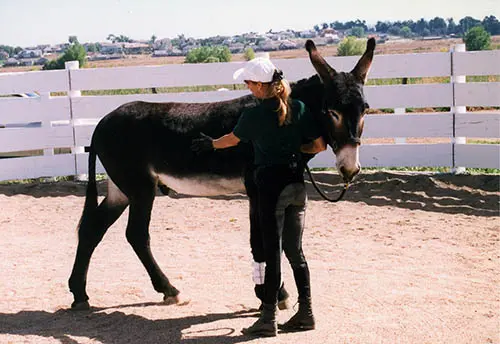 When he is flawless with his leading training, you can get him used to the bridle and a surcingle or lightweight saddle, and then move on to ground driving. Lunging is not as important, since most donkeys do not like to lunge. I suppose they don’t see much purpose in going around in a circle more than once to come back to the same place over and over again. Taking the time to properly train your donkey jack at halter and in the drivelines will enhance his obedience, and will make him more comfortable and relaxed. During the breeding process, it can even speed up his readiness.
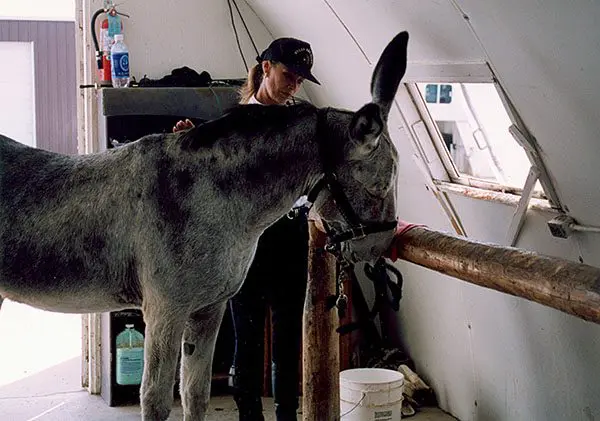 or out the door). If you are going to breed him, the mare should first be prepared. Next, once you are both out the door, ask him to whoa and square up all four feet. Then you can lead him to the breeding area, where you can then tie him to the hitch rail a little ways away from the waiting mare. By being consistent in your manner of going from the stall to the breeding area, the jack will learn not to be pushy and aggressive toward you.
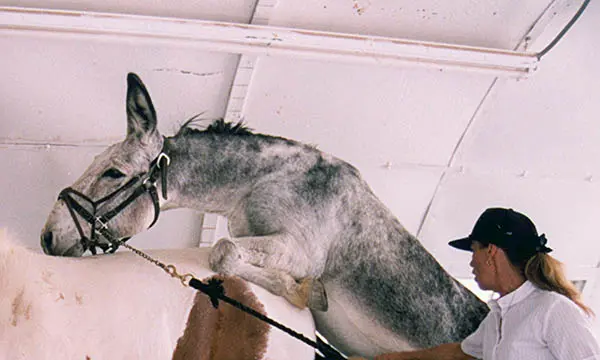 Just to be on the safe side with your jack while breeding, use either a muzzle or a dropped noseband (snugly fit low on his nose)—this will prevent biting injuries to you or to the mare. When he is finished, make him stand quietly behind the mare while you rinse him off. Allow him that last sniff to the mare’s behind, and then take him back to his stall (or pen), ask him to stand still while you remove the halter and then let him go. That last sniff appears to be an assertion of his act and of his manhood. If you try to lead him away before he sniffs, he might not come with you and he might become even more aggressive toward the mare. Remember to do things with your jack in a routine way, and always with safety in mind—this will allow him to relax and use the manners he has learned. NOTE: Women who are menstruating should never handle jacks or stallions during that particular time, since the scent can trigger aggressive and dangerous behaviors in these animals.
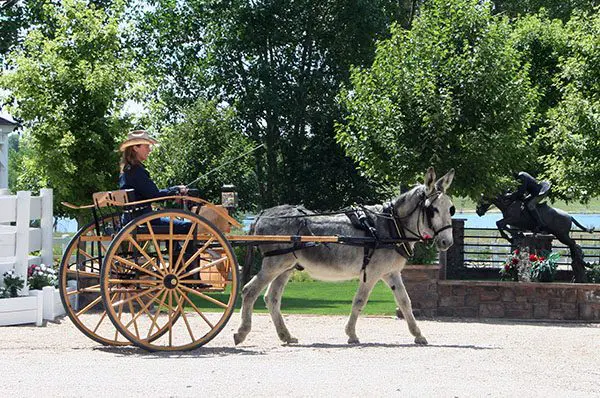 plenty of time and done your homework during his leading lessons, your jack will learn to be obedient on the lead shank, even during breeding.
 Good conformation is important in allowing the equine to perform to the best of his ability, but so is developing core strength elements such that the skeleton is ideally being supported symmetrically so the equine’s body can move properly and in good equine posture.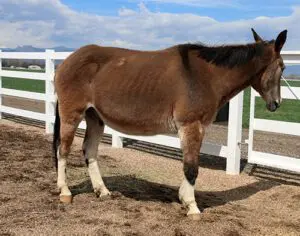
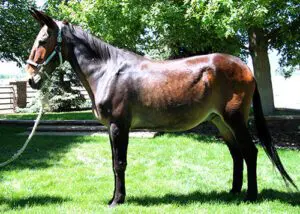
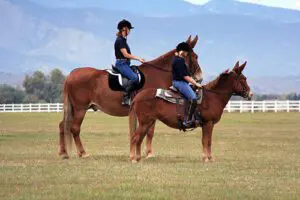
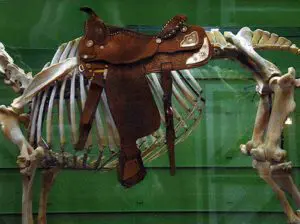
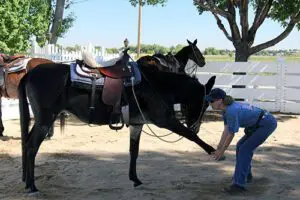
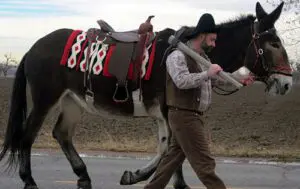
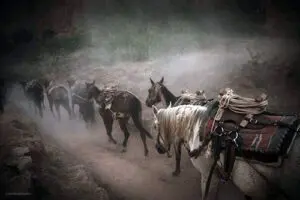
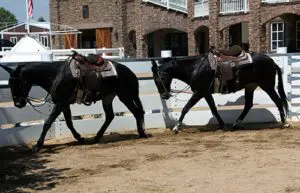
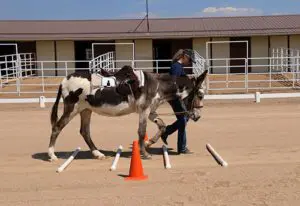
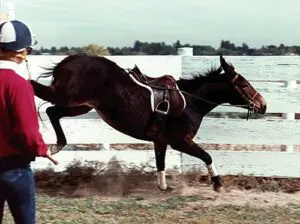
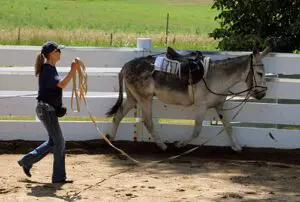
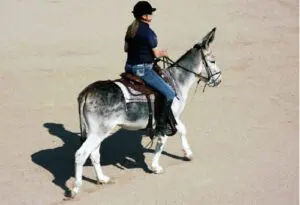
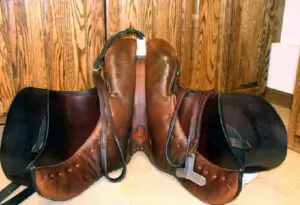
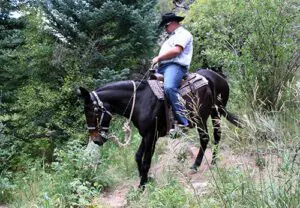 When the skeletal system is adequately supported with symmetrical muscle strength, especially over the top line, the animal is better equipped to use his body efficiently. With the crupper tension properly adjusted, he can tuck his tail and use his leg muscles to support his own weight while his spine remains flexed upward along the top line to support the weight of the rider.
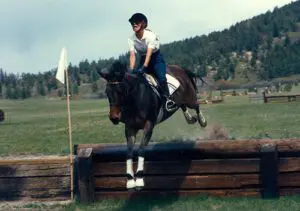 Just for the record, I have done lots of trail riding and three years of cross-country jumping over all kinds of terrain (3 miles, up and down hills, over twenty jumps) and have always ridden with a crupper on all of my mules, English or Western, even with heavy riders with nary an incident.
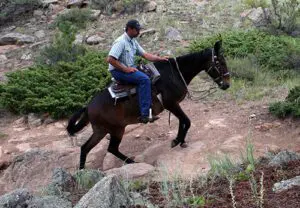 If using a crupper, the animal has full range of motion in his body and legs with the maximum strength to back up any movement that would help to correct the rider’s position and keep him over the equine’s center of balance.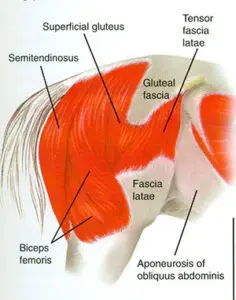
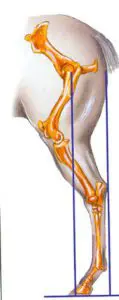
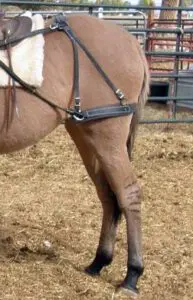 BREECHING (or BRITCHEN) originates with pack and driving animals and has a distinctive purpose to keep loads from shifting on pack animals and to provide “brakes” for those in harness.
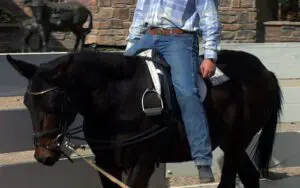
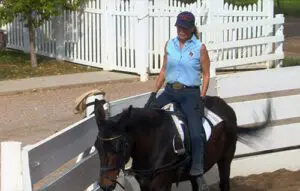
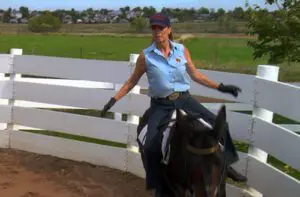
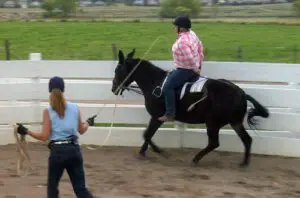


 (NOTE: I don’t recommend riding along paved roads at all these days. Although you and your equine may be in control, motorists don’t always pay attention while they are driving—which can lead to disaster.)
 Good habits are built through repetition and reward with regard to consideration for your equine. Eventually, the good habits that are being taught will become the normal way that your animal will move and react to you and to his environment. The details outlined in this article can help contribute to the behavior shaping of your animal, which will determine, as he ages, how willing and obedient he will be in all situations.


 By Meredith Hodges
 The other thing to consider is whether or not they have been raised with the livestock they are expected to guard. When raised with the other livestock, they will feel more a part of that “family” and are less likely to do them harm. A donkey that is going to be expected to guard livestock, but was not raised with them, should be carefully introduced to them “over the fence” for several weeks. Then if all seems to go well, you can introduce them in the same pen and watch for any signs of aggression. If there are signs of aggression after a few weeks of being separated, then they probably will never really get along. You must remember that a donkey is NOT a predator, nor a prey animal that will necessarily get along with other livestock. Donkeys prefer to be in a herd with other donkeys. They do not like being alone either. Donkeys have a strong sense of “family” and prefer to be with their own kind. When forced to be with other species, they will blend, but grudgingly.
 As with all livestock, donkeys need to be provided with adequate shelter from the elements, whether heat or cold, must be provided trace mineral salt blocks and clean, fresh water. Their time on pasture will need to be monitored for optimum health which will often clash with the grazing needs of sheep, goats and other smaller livestock. Donkeys are desert animals and really easy keepers. It is not uncommon when they colic or founder on too much, or too rich, grass. They cannot be on pasture 24/7.
 vaccinations twice a year and regular worming. If they are not trained to accept these things, most veterinarians and farriers will be averse to handling them until they are. It takes time and patience to gain the trust of your donkey before you can actually consider him trained.

 Since miniature donkeys and mules are always at risk, I add another element of safety for them by lining their pens with metal grating over the stock panels. Then, everyone is also brought in every night and turned out for a limited amount of time during the day. This gives me the opportunity to monitor their diet, check for injuries twice a day and keep them safe overnight. All my equines are taught to come in from turnout upon request. They know there is always a crimped oats reward awaiting them.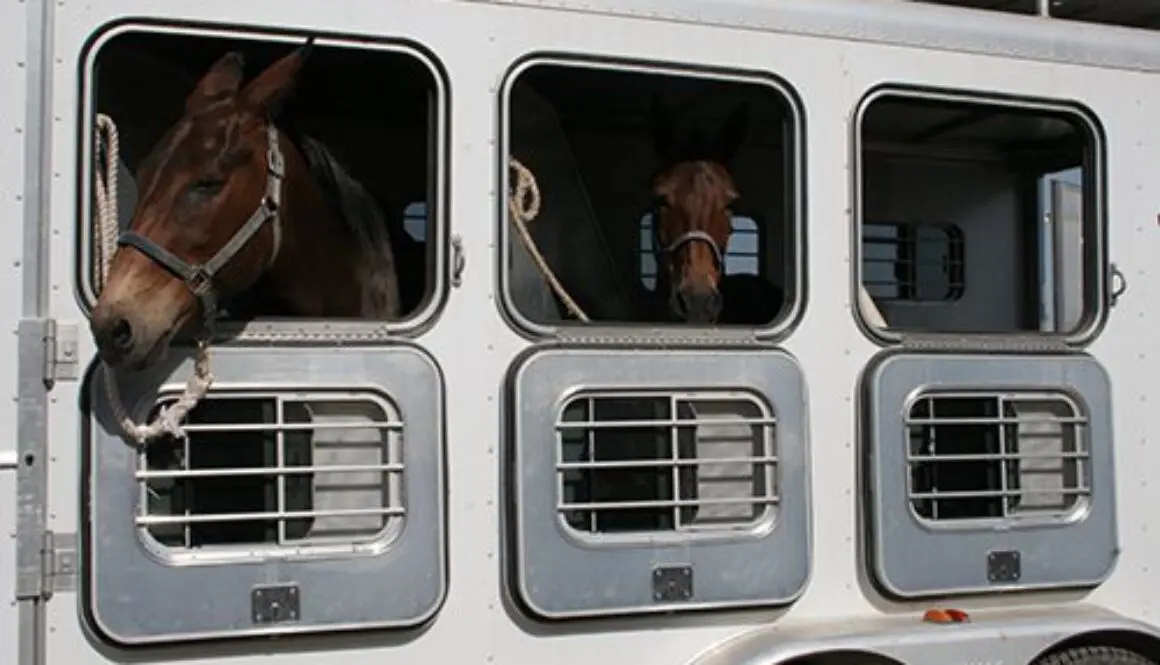


 By Meredith Hodges
 This lesson will teach you some lateral exercises under saddle that will help your donkey be more responsive laterally. Up to this point, we have been schooling what is called leg yields, or lateral moves, on an angled track. We have begun movements to introduce the side-pass, which is a lateral move, only straight sideways. This is even more difficult for your donkey than the leg yields, since it requires a higher degree of crossing over from his legs. You may have found difficulty in negotiating the side-pass obstacles previously mentioned. First, check to make sure that the placement of your side-pass rail near the fence is correct. It should be about three quarters of your donkey’s length from the fence and lay parallel to the fence so that when he stands with his nose six inches from the fence, the ground rail lies directly under the middle of his barrel, equal distance from the front and rear legs. When you lay out the “T” poles, there must be room for him to swing his shoulders or haunches around to the next pole without touching them. If these steps are done correctly, it should minimize any problems. While ground-driving your donkey, your assistant can help steady him from the front. After some repetition, he should begin to comply easily.
 him to move more sideways at the walk. Do it this way a few times. Once he understands what is expected, you can pick up the trot as the circle becomes larger and yield at the trot to the largest circle. Each time he finishes the cycle, remember to reward him for his efforts. When he is performing well at the walk and trot, we can vary this pattern just a little more. Ask him to canter the larger circle while you begin to spiral down. At about the halfway point, ask him to slow to trot and finish the spiral as small as he can manage at the trot; then start spiraling back out to the larger circle. At the halfway point, pick up the canter and finish onto the largest circle. You can ask him to move laterally at the canter by cueing him as he is in suspension. In others words, when his front legs are out in front, he is on the ground and you would give the release on your reins and legs; when his front legs come back toward you, he is in suspension and you would pull back on the reins and squeeze with your legs. To get the sideways movement, you would pull back ever so slightly harder on the rein in the direction of travel, while maintaining the bend with a steady inside rein. This movement requires timing and coordination and will take a lot of practice, so don’t get discouraged. Just keep trying and you will soon get the right results.
 degree angle to the rail with a partial turn on the forehand. Then ask him to maintain the angle all the way down the long side of the arena. Bend him away from the direction of travel. Keep the inside rein slightly shorter and steady, while giving tugs and releases on the outside rein and kicking him behind the girth on the inside. If he moves his shoulders and not his haunches, hold the front steady, move your leg way back on the inside and kick again, asking him to move his haunches over. Then he will probably move his haunches and not his shoulders, at which point you can keep the haunches steady by locking them between your two legs, well back behind the girth. Then you can move his front quarters sideways by holding the inside rein steady and shorter, pulling and releasing the outside rein in the direction of travel, while tapping him on the inside shoulder with the crop to encourage the movement. In the beginning, you may find yourself going down the rail first haunches, then shoulders, then haunches and so on, but if your persist, he will eventually get it. You need to be alert to when he does respond correctly and lighten your cues so he knows he is performing correctly. And of course, reward him often to let him know that he has done it correctly. Nothing works better than positive reinforcement!
 The next exercise is to leg-yield your donkey from the corner of the arena to the center of the hourglass pattern. Do it just as you practiced it before—make a circle at the second cone and stop him, move his hindquarters parallel to the rail, then ask him to move sideways and forward to the center gate cones. When you arrive at the cone gate, straighten him, walk forward a couple of steps, then finish that side of the hourglass in a straight walk, then trot as he becomes more proficient. When you have completed half of the hourglass, you can go on to the next second cone on the short side of the arena and repeat the exercise. Just remember to stop and reward him for each half of the hourglass. As he learns, you can go longer between rewards. In the next exercise, you will go through the hourglass as usual, but when you reach the cone gates, you will circle around towards the rail, stop at the cone gates, move his hindquarters over and yield from center to corner. When he reaches the corner the first few times, stop and reward him then continue around to the center from the other side and repeat. As before, reward him for each completed move in the beginning. As he gets better, you can start rewarding him less often after completed successions. Always begin by walking until there are absolutely no problems, then he is ready for these exercises at the trot. Any time the trot goes awry, go back and school at the walk again. If he gets too strong with you, you may have to ask him to back a few steps before proceeding. Just make sure that if you ask him to back, you do it slowly, kindly and meticulously.