

MULE CROSSING: Donkey Training, Part 7
By Meredith Hodges
If your donkey has any problems with the trot after the previously described exercises, it will probably be in the hourglass pattern while under saddle. If he has difficulty maintaining the trot through the turns and serpentines through the middle, and continues to bulge either one way or the other, you can try one more thing to help him. Have your assistant ride a seasoned animal through the pattern ahead of you while you follow a few strides behind. Don’t ride too close, or too far away. Your donkey should be more than willing to follow. After all, doing things with friends is always more appealing.
When his trot work is going well, it is time for your donkey to learn to canter. Begin with a complete review in the round pen—lunging at the walk and trot, ground-driving at the walk and trot, turns at the walk and trot, and riding  at the walk and trot. Then dismount and try lunging, first at the trot, then ask him to “Canter.” Use the same cues you did at the walk and trot. Give the verbal command first, then shuffle your feet while raising both of your arms, one pointing in the direction in which you wish to travel, and the other one raised behind you, with the whip in-hand. If he does not comply, then lightly tap the whip to his gaskins once just above the hock, then tap it harder on the fence behind him. He should begin to canter. Even if he canters only two steps, stop him, reward him and then try again. Don’t keep asking for more right away, because he will only get frustrated and stop. If you are patient and consistent, he will canter farther each time. Once he canters fairly well while lunging, you can skip ground-driving and go straight to riding him at the canter. Have your assistant stand in the center of the round pen with the lunge whip and “lunge” him while you ride and cue from his back. Sit very quietly and with a very loose rein, allowing him to canter until you say “Whoa.” Make sure you and your assistant are exactly in unison with your verbal commands, since you do not want to confuse the donkey. If, after a few sessions, he positively refuses to canter, fear not. You can try something else first, and come back to cantering later.
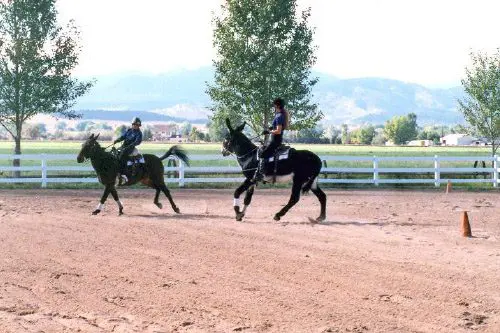
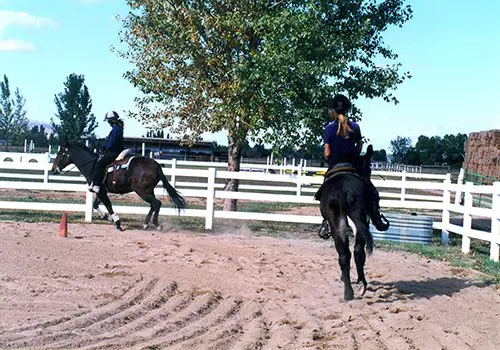 If your donkey hasn’t cantered in the round pen, go back to his lesson at the trot and allow him to succeed and be rewarded. Then take him into the large arena and allow him to follow an experienced animal through the hourglass pattern and along the perimeter of the arena at the walk and trot. Afterwards, go to the perimeter of the arena and have your assistant begin to canter out of a short side and down the long side. Encourage your donkey to follow. If he does not want to canter, slow him down through the short side and encourage him again on the next long side. If he wants to canter but is cutting the corner, let him. It is more important at this stage to get the canter than it is to stay on the rail. Be sure to call out your verbal commands repetitively as he learns to canter. You will say “Canter-Gee” for right and “Canter-Haw” for left. These are really important commands, as donkeys are more responsive to verbal commands than they are to your legs and reins. Let him canter for as long as he will, then stop and reward him. He will go longer periods of time as he gains strength and coordination. Make your circles as large as possible, at least fifty feet in diameter.
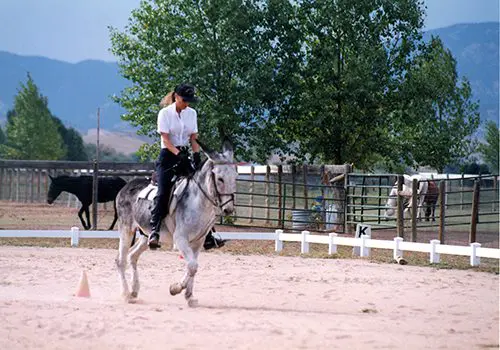
 When he is cantering—or loping—easily around the arena, you can begin to facilitate control at the canter by varying your exercises. Have him trot the short sides and canter the long sides of the perimeter of the arena. Be sure he is picking up the proper lead in each direction (more on leads in discs #5 and #6 of my DVD training series, Training Mules and Donkeys). Pick up the lead in the corner each time to help him. Then you can trot the hourglass to the corner of the short side, pick up the canter and canter a circle, half of the arena, come back where you started, trot, and resume the pattern. Just be sure your circles are large enough to encourage good balance. You can ask him to trot along the rail, do a turn on the haunches and canter away on the correct lead. This will help him to learn to canter without the use of a corner. Take him out into the open on the obstacle course and let him canter for some longer distances, both in a straight line and in very large circles. If he breaks to the trot at any time during any of the aforementioned exercises, do not let him continue on at a fast trot. Slow him to the walk, then halt, regroup and begin again. You want to always maintain control.
As your donkey canters more and more, he will become better balanced and better coordinated. He will become stronger and be able to carry the canter for longer periods of time, so don’t get in a hurry. He will DO as he is ABLE. This is the nature of the donkey. When he is cantering easily and is obedient through his transitions from walk to trot to canter and from canter to trot to walk, you can begin to teach him to change leads and negotiate smaller circles. Begin in the large arena and review his previous lessons, ending with turns on the haunches along the rail. Designate a circle in the middle of your arena, and, starting along the rail, pick up a canter, make a full circle, ride along the rail a short distance, then ask him to stop, do a turn on the haunches into the rail and resume the canter on a circle the opposite direction and repeat. This will help him to be more prompt into the canter.
Next, you will circle at one end of the arena, taking up half of the space. After about two or three circles, straighten your donkey as he rounds toward the middle of the arena. Ask him to trot through the center on a straight line, then pick up the opposite lead and circle once or twice in the other half of the arena. Ask him to “Canter-Gee,” “Canter-Gee,” “Canter-Gee,” and “Trot-Trot.” “Trot-Trot,” and “Canter-Haw,” “Canter-Haw,” and so on. If he misses the change of lead, just stop him and start again, only this time, bring him to a walk in the middle, then pick up the trot and canter as you round the new bend. If he gets strong and tries to rush, you may even have to stop him in the middle, walk, then trot, then canter on the new bend. Remember, you do not want to teach your donkey to run through any of your cues! That’s a really tough habit to break. Don’t canter for too long and be sure to reward him after every lead change at the end of at least one circle following the change. Neither do you want him to change leads and stop.
 The most important thing is to reinforce the verbal commands. Donkeys can be very dead-mouthed and very dead-sided, but they have the most acute hearing you’ll ever perceive and they rarely miss a verbal command. If your donkey is well schooled in his verbal commands, you will never need to set him up for his lead changes—he will always take the one you call for, even if it is a counter-canter. The same goes for every other command. If you want to stop and he is cantering, don’t forget to speak in order: “Canter, Canter, Trot, Trot, Walk and Whoa!” If you say “Canter,” then just “Whoa,” you will produce a sloppy and resistant transition, since donkeys aren’t into sliding stops, although they can do small sliding stops (Lucky Three’s Little Jack Horner was able to slide for fifteen feet). Even professional reining trainers will tell you that an equine has only so many good stops in him, and it is not advisable to do such strenuous and abrupt movements too often. So be concise with your verbal commands and try not to leave any out when “conversing” with your donkey.
While in the open, after he is getting more adept at the canter and he’s changing leads fairly easily and accurately, you can begin to teach him to change leads on a straight line. You will need a large open area, as you will be doing fairly big circles off each side of the straight line. Step One: Begin at walk, then trot (don’t forget your verbal commands!), then canter-haw, small circle, then straight for a few steps, trot-trot, then canter-gee, small circle, straighten, and repeat on the straight line. . Step Two: Ask for the new lead without the circle. If he starts rushing and ignoring your aids, just have him come down to walk, then trot, then canter again. If he doesn’t quite get it, go back to the exercise with the circles. You can add an interim step, provided he does not get too bent. You can begin on the straight line at the canter, ask for the trot and slightly bend him onto a new circle, then bend him back to the straight line once he has the lead. Be careful with this, though. If he is too committed to the circle, you can throw him off balance and defeat your purpose.
Now you can go back to the round pen and lunge at the canter. Many times, donkeys are just not comfortable with the size of a round pen canter circle. It seems to worry them because they are so sensitive to even the slightest loss of balance when trying to perform. I think you will find that your donkey, after learning to canter in a more open space, is more than willing to accommodate you in the round pen. By the same token, we have not bothered with the lunge line in the round pen and in the open for the same reason. After your donkey is sufficiently broke to saddle or harness or both, he will lunge very nicely on the lunge line.
To learn more about Meredith Hodges and her comprehensive all-breed equine training program, visit LuckyThreeRanch.com, MEREDITH HODGES PUBLIC FIGURE Facebook page, or call 1-800-816-7566. Check out her children’s website at JasperTheMule.com. Also, find Meredith on Pinterest, Instagram, MeWe, YouTube and Twitter.
Covered in TRAINING MULES & DONKEY: A LOGICAL APPROACH TO TRAINING, TRAINING WITHOUT RESISTANCE and EQUUS REVISITED at www.luckythreeranchstore.com.
© 1999, 2016, 2024 Lucky Three Ranch, Inc. All rights reserved.


 down in training because of their flight instinct and are better equipped to handle walk, trot and canter all at once, moving from a confined area to more space and, ultimately, through obstacles. Donkeys, however, with their freeze instinct, get worried and won’t move if they are overwhelmed and confused. For this reason, their training is approached a little differently.
 Once he has learned the turn on the haunches in the round pen, he can also learn his turn on the forehand on the drivelines. This is a little more difficult, as he will want to try the turn on the haunches. Ask him to “Whoa”” along the rail. Then, keeping your reins taut and even, take a step to the side, away from the direction you wish him to turn. The rein will tighten on that side and will drape around his hip. You will have the sensation of pulling his hip around with the rein. If you are turning right, ask him to “gee around” and give short tugs on the direction rein, while keeping him straight with the other taut rein by holding steady. He will probably want to pull forward the first few times, but hold him as steady as you can, and if he doesn’t want to move his haunches over, just tap him LIGHTLY with the driving whip on the direct rein side. After a couple of tries of “gee-around,” ask him to “haw-around” and track left. Have patience and he will eventually get it. When he is doing fairly well at executing his turns on the haunches and turns on the forehand on the drivelines, you can progress to doing them under saddle. Just remember to keep things slow and accurate. Speed will only bring confusion and resistance at this point. It is better to opt for perfection at a slower and more controllable pace. When you are both more practiced and coordinated, you can add speed.
 Your donkey should be willing to trot in the round pen with just his tack. Up to this point, he has learned his turns at the walk both on the drivelines and under saddle in the round pen, in the open arena and over obstacles. Now he will learn to trot on the drivelines and under saddle. Begin with the usual review, then after he has lunged at the trot, put on the drivelines and drive him at the trot. If he gets balky, your assistant can trot ahead of him with the treat bag and no lead line. Initially, if he goes too fast, just slow him down easily by giving the command to “Whoa” and create a drag on the lines. Your assistant can help if necessary by stepping ahead of him with her arms up, as you did when you were lunging him. Have him go around only as many times as he is willing in the beginning, and reward him for his efforts.
 When he trots well in the round pen, you can begin to add trot to your sessions in the open. Always review first then add the new movement at the end of his lesson. After the review, begin by having him trot through the hour-glass pattern on the drivelines with your assistant, then without. It will be shaky at first and you may feel like you’re riding a drunken sailor! Just be sure to make your rein and leg cues as subtle as possible to prevent over reactions and keep him encouraged forward with a loose rein as he is going forward. Learn to vibrate the reins rather than pulling—this helps to minimize over-reactions. S
 oon, your donkey will be doing the pattern smoothly on your commands alone.
 Using the trot on the obstacle course requires that you be very definite about where and when you do it, so plan ahead. You may ask him to trot straight over ground poles or a tarp, but he must be willing to stop immediately on the other side. In the beginning, having your assistant waiting with a reward on the other side will help to encourage him to comply. When you take her out of the picture, be ready to treat him for good behavior yourself while ground-driving and under-saddle. When your donkey has completed an obstacle, he should always be willing to stop and wait for your next command for as long as it takes. This is the foundation for learning to stand quietly both in harness and under-saddle. This means that you, too, must learn to approach him slowly and quietly from behind while in the drivelines and to sit quietly when halted under-saddle until you present his reward and ask him to move on.
 I remember back in 1982 when summer came and we had to search high and low for shows in which we could compete with our mules! As they say, “You’ve come a long way, baby!” Mule shows are now so numerous that it is becoming very difficult to decide which ones to attend. Years ago, our mules were not necessarily welcome at horse competitions, and today that has changed as well – making our decisions about where to compete is even more complicated. It is truly amazing to see the tremendous growth in popularity of the mule over the past 30 to 40 years, but then I guess it was inevitable given all their redeeming qualities! It really isn’t that unusual that people would begin to prefer mules once they received accurate and truthful information about them. Granted, you have to be smarter than the mule in order to train one, but once you train one properly, you have a wonderful companion and a top competitor in the equine world. More and more, the criticism of mules has changed to general curiosity and a willingness to learn more about these unique animals. Many people have taken a great deal of time and effort to bring these animals into the public eye. To name them all would take volumes, but their work is certainly appreciated!
 As I said, there are many all-mule and donkey shows that you can attend in most states across the U.S. Most of them are held in conjunction with State Fairs. However, there are others that are promoted with horse and mule races as well. The American Donkey & Mule Society sponsors a National Mule and Donkey Show that floats from state to state. The 1992 A.D.M.S. Nationals were held in conjunction with the South Carolina State Fair. There were some truly lovely mules to see in our eastern United States.
 Breed shows are another place you will see mules today. In many places, you will see mules competing in their classes sandwiched between classes for anything from Draft Horses to Arabians and Saddlebreds. Many of these breed shows not only included a mule division, but allowed mules to compete in their Open Classes as well against the various horse breeds. In 1991, our own Lucky Three Mae Bea C.T. competed in an Open English Pleasure class of primarily Saddlebreds and American Show Horses to sixth place of 20 entries. It is nice to know that the judges were taking mules seriously, as well!
 The American Driving Society has been quite supportive itself! They encourage mules to participate in the many facets of driving that they offer, from pleasure, to fun events to actual marathon driving. In these shows, the mules are allowed to compete directly with the horses. Shows such as these tend to really test the knowledge and expertise of the trainer and the conditioning and response of the animals. Integrity in progressive learning is encouraged while stark competitiveness and politics take a back seat. This type of situation is much more appealing to the novice who wants to learn and improve his and his animal’s skills.
 The United States Combined Training Association left it up to each region to decide whether, or not, to allow mules to compete and some areas are more tolerant than others. Dressage and Combined Training offers the ultimate in fitness and conditioning of both animal and rider. Because it requires so much physical exertion and skill, everyone is accustomed to discussion on gross errors and wrecks with little or no embarrassment. This makes for a great learning environment with a lot of positive social interaction. We have had a lot of fun for three years competing with the Mountain States Combined Training Association and the Windy Wyoming Combined Training Association. They were a great group of folks from the organizers to the competitors. When Lucky Three Mae Bea C.T. came in second in 1992 in the Open Novice Division at the Abbe Ranch Horse Trials in Larkspur in June, organizer Susan Farmer presented our ribbon and warmly said, “We’re not prejudiced here! Congratulations!” I think it is more important to these folks to see that people enjoy the sport and more over, to continue to want to participate and learn. This makes for attainable long term goals, and even more… it makes for long term friendships.
 If you are not really the competitive type, but enjoy the simpler side of showing in gymkhana events and pleasure classes, there are a lot of small Open Shows that you can attend sponsored by various saddle clubs across the U.S. They will usually let the mules compete right along with the horses. Learning and having fun are again the key issues here.
 By now your donkey should be getting much better at his turns on the forehand and haunches on the lead line. He should be leading easily at the walk and trot and squaring up while stopped. He should be lunging at the walk and trot in the round pen, and ground-driving at the walk in the round pen, both straight and through turns and reverses. He should be walking and trotting with a rider in the round pen, without the assistant. He should be both ground-driving and walking with a rider through the hourglass pattern and on the perimeter of the larger arena. Now you are going to ask for a little more detailed control by asking him to walk over and through some very straight-forward obstacles.
 on his own by first ground-driving him through them, then (if he is large enough) by riding him through them. Begin by reviewing his turns on the forehand and haunches. Then attach the drivelines and have your assistant lead him as you drive him from behind. Start with something simple such as ground poles, a tarp or a bridge that he can easily walk over. If he is negotiating the tarp or bridge, ask him to “whoa” when he is standing on it with all four feet, reward him and then proceed. If he is negotiating the ground poles, walk over them. Once he is on the other side, stop him immediately and reward him. Then proceed. Then have your assistant lead him to the mailbox while you ground-drive him, and have him stop parallel to it. Reward him for stopping, then have your assistant open and close the mailbox and reward him again for standing still. Then proceed. Walk him through the parallel poles and stop him. Reward him. Then ask him to back out of them. Reward him again. Then proceed to the tractor tire. Make sure your assistant walks through the tire and not around it, because the donkey will do exactly as he sees her do! Once on the other side of the tire, have your assistant stop and allow the donkey to put his two front feet in the tire and halt. Reward him. Then proceed forward and allow him to walk through the tire to the other side and halt. Reward him again. Your assistant will be giving the treats, since you will need to maintain the drivelines.
 through ahead of him on a schooled animal that he likes, stopping in the appropriate places and rewarding him each step of the way. Depending on how willing your donkey is, this could be the next lesson, on the very same day. Each time you go to the obstacle course, repeat this entire process each time, first on the drivelines with the assistant, then without, ride with the assistant leading, then ride through the obstacles without her. It will not be long before he is going well, as donkeys learn things quickly and thoroughly, although they do have off days and may decide not to comply with a particular obstacle on that particular day. Tomorrow, it may be an entirely different story and he may have no trouble at all with any of them. It’s just the nature of the donkey to “change things up a little” from day to day. They like to keep us honest and on our toes. This is why I have included a separate section in my Training Mules and Donkeys series just for donkeys that is designed to be used WITH the other DVDs. Do the obstacles in a different order each time to prevent your donkey from anticipating and ignoring your cues, and be sure that you are cueing him properly for each obstacle, making your movements as light as possible.
 try it again. If you encounter only mild resistance at any obstacle, try to straighten your donkey out and repeat the obstacle again without the assistant. For instance, let’s suppose your donkey goes through the parallel poles, but won’t stop for the back. Stop him as soon as you can after the poles and ask him to back. Then go forward again in a large circle and come back through again and try to stop him in the middle, between the poles, then back. Give him every opportunity you can to succeed on his own and be sure to reward him for it.
 hands. Draw reins can too often produce an over-reaction, even in the most experienced hands. Do not use the elbow pull in any other part of his training until he has learned to trot well, both in the round pen and in the open. This comes later than the walk work we are doing now.
 You have, thus far, begun to teach your donkey several things: how to begin to execute the turn on the forehand and turn on the haunches, how to walk forward in a round pen from the lunge whip without a saddle or harness (then with the saddle and harness), on the drivelines, and while being ridden. He has also begun to learn how to “trot on” from the lunge whip while tacked up, and how to walk and trot on the lead with an assistant aiding from behind. Do not be alarmed if your donkey’s movements are not perfect. Each time you work with him, he will get better at each of these things, especially if, at the start of each lesson, you review before adding anything new.
 Your assistant will come into play only if your donkey does not respond to your cues first. When he is in a good free walk on a loose rein, give the command to “trot.” Use your voice, then your legs and then go to your crop, if necessary. If this doesn’t work, your assistant can step in behind and encourage him with the lunge whip with one smart strike to the gaskin above the hocks, while shuffling his or her feet to create some noise. This should work, but you, as the rider, must sit absolutely still, maintain a very loose rein and allow the donkey to comply on his own. (Do not keep thumping his sides with your legs, nor keep hitting with the crop.) If all this fails to make him move on, just stop, pet him (no treat this time) and wait until he sighs or resumes chewing, then start over again. He is just trying to figure out what you are asking. This is not disobedience. It is important to note that you should not move from one attempt to the next without letting him chew. This is the way your donkey tells you that he is relaxed and ready to listen. If he just won’t do it, then go back to the lunging and have him trot without the rider once more, then try again at the next lesson. Each donkey is a different individual and will learn at his own pace.
 Set four cones in the four corners of your arena, with ample space for him to walk around the outside of them. Then set two cones in the center of the arena, creating a gate through which the two of you will pass. This will outline an hourglass pattern for you and your donkey to follow, as he perfects the verbal commands to “walk on,” “haw,” “gee” and “whoa.” “Trot” will come later.
 When he is steering well, it is once again time for your assistant to aid you in getting your donkey to go straight along the rail of the arena. Have your assistant walk along the rail, between it and the donkey, with the lead line held loosely in her hand, allowing you to drive the donkey from behind. If you tryto do this without the assistant, you will find that your donkey remembers the hourglass pattern and will try to go to the middle. He needs assistance in learning this deviation from what he has previously learned. When you change direction, keep your assistant between the wall and the donkey to help maintain his straightness. After about two times around in each direction, he should “get it,” and you can drive him without the assistant. Each time you change direction, do a straight crossing on the diagonal. (Short diagonals and half-turns will be taught later in this series.) Donkeys like to bend in half far too much, so you want to discourage this in the beginning and opt for straightness.
 During the next lesson, you can add the perimeter of the arena, just as you did on the drivelines. Have your assistant lead your donkey twice around both directions and across a straight diagonal to change direction. Then you can ride solo. The same rules apply here as they did when learning the pattern. Keep him straight, repeat commands, back up verbal commands with consistent rein and leg cues and if he pulls out to the left, bring him back with the left rein. If he starts to trot, pull straight back and give the command to “whoa.” If· he still won’t stop, keep him straight and stop him at the fence. DO NOT TURN HIM! If you start this, it will become a practically impossible habit to break.

 Now that he is moving out well at the walk, you can teach him a reverse. As he is walking forward easily around the round pen, turn away from him, completely around, until you are in front of him. Step toward him, lay the whip ahead of him and give the command to “reverse.” Be aware of his space. Do not rush at him, or he may turn improperly. You want him to turn into the rail and resume the opposite direction. Give him plenty of time to make the turn and ask him to “walk on.” If he has difficulty, take a few steps forward and, with the whip, tap him gently on the shoulder to encourage him to turn. There is a purpose to turning away from him to turn him rather than just running ahead of him. By turning back the opposite way that he is traveling, you are establishing a new direction of travel, as well as giving him time to see that there will be a change in his movement. Most donkeys learn this very quickly.
 After his first lesson of trot, you can begin to integrate rein cues. During the second trot lesson, you will review all that he has learned up to the trot. Before you go to his trot lesson, you can attach your drivelines and ground-drive him through the walk and reverse while on the lines. He should have no trouble with you at his rear, since you have been lunging him from a close proximity from the beginning. Use your whip as you did for the turn on the haunches—at the shoulder for his turns, and at the gaskin to encourage him forward—but just touch him with it to remind him, don’t strike him. You want his movements to be smooth and correct, not abrupt. Pull as lightly as you can with a squeeze/release on the lines to encourage the turns, and make him move off more from your body language and the whip than you do with the lines. If he does well, stop, remove the lines, and send him back to the rail for his trot work—twice in each direction. (This means twice with trotting steps, not twice around the pen.) Then stop, reward him and tell him school’s out until the next time. Whether you come back tomorrow or a week later, rest assured that your donkey will be right where you left him in his training. They have an incredible memory!
 When he ground drives fairly well at the walk, you can mount him if he is a large enough donkey to ride. Mount him from both sides and dismount a few times at first. When he seems calm, you can stay aboard. Take a treat in your hand and encourage him to bend his head and neck around to each side to take the treat from your hand. At the same time, give short, light tugs on the rein on that side. This will encourage lightness in the bridle later on. Now he is ready to move with you aboard. It is best to use an assistant at this stage.
 steps. You can continue this lesson until he has completed one rotation of the round pen in each direction. Then stop him with “whoa” and ask him to go back a step or two. Give light pulls on both reins in a squeeze/release fashion to start, then, as he begins to move his feet backwards, alternate your pressure on the reins with the front foot that is forward. If he does not wish to back, your assistant can help with pressure to his chest as you did on the lead. Always end your riding or ground-driving lesson with a back, and don’t pull so hard on the reins that he resists by jutting his head out. Encourage him to stay light in the bridle. Then finish your lesson with lunging at the trot.
 By Meredith Hodges
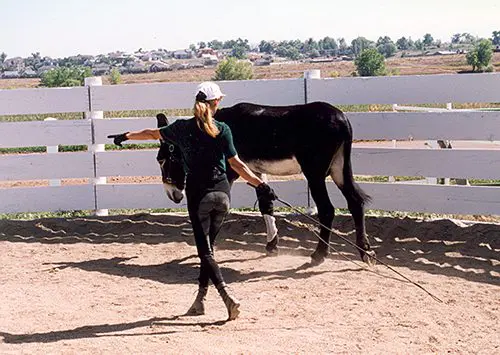
 Take your donkey to the middle of the pen and ask him to “whoa.” Reward him for whoa, then step toward his shoulder—pulling his head toward you—tap him on the flank and stifle, and ask him to “move over.” Do not move your body unless you absolutely have to. You want him to keep his front end bent toward you, step under with his near hind leg, and begin to execute a turn on the forehand. This means his front legs will stay stationary while the hind legs move around them and away from you. You want your donkey to take only one step each time you tap him, so don’t get carried away and tap him too hard. We are laying the foundation for hindquarter control and it is easier to let him move slowly, one step at a time, in the beginning than it is to ask him to slow down from too many steps later on. Watch his hind legs to make sure he crosses in front of the offside hind, and stop and reward him after each tap and step. He will probably double in the barrel and move his front legs as well in the beginning. As long as he moves his hindquarters away from you, reward him and repeat. We can perfect his style as he learns what is expected. The first few times, ask only for one or two steps. When he has done this exercise on the near side (left), repeat them from the off side (right). During each session, you can ask for a few more steps in each direction.
 When he is doing the turn on the forehand fairly easily (it doesn’t have to be perfect), you can begin to teach him to move his shoulders away from you with a turn on the haunches. This is much more difficult, since donkeys love to “glue” their front feet to the ground. Take the side of his halter in your left hand, ask him for one step forward and push his face away from you as far as your arm will reach. Then, in the right hand with the end of the lead, tap him firmly on the shoulder and give the command, “Over.” If his hindquarters come around, leave your left hand on the halter and take your right hand and use your body weight to shove him over one step. Stop, praise and reward him for moving his shoulders (even if you had to do all the work). Now try again, tapping him with the end of the lead. If he still won’t move his shoulders, repeat as before. If he does not begin to try to move his shoulders after three tries, use a riding crop in your right hand and tap the shoulders sharply with it—only once! He will probably be so surprised that he will step over quickly. Be ready to reward him when he does. Then stop your lesson there. You can ask for two steps in each direction during the next session. If you try to do any more, you will encounter resistance and he will be unwilling to perform and may run off, so be patient and be ready to take all the time HE needs.
 Repeat these three exercises until he begins to move easily away when you ask. It may take three or four sessions. When he does comply easily, you can begin to teach him to lunge. Review these exercises every time you begin your training session. Then release the lead from the halter. Hold the lunge whip in your left hand and use your right hand to point to the right (the direction you wish him to go). Raise both your arms in unison and tell him to “walk on.” If he doesn’t move away, lower both arms and raise them again, repeating the command. If he still won’t move out, give the verbal command again and give him a firm tap on the gaskin, just below the tail and above the hock, then take a step back and wait for him to comply (donkeys need time to think). If he still won’t move, repeat this action until he does. Once he does start moving away, follow behind and to the side at a distance that he will tolerate. This distance will vary with the individual donkey.
 wander. When you are the correct distance, he will walk forward, although, in the beginning, he will hesitate after every step or two. Practice moving into him and away from him to get him to move. Try to stay out of his space and keep him moving forward after the initial tap of the whip. If he stops and doesn’t seem to want to move, strike the fence behind him once you have him on the rail. Try NOT to hit him if at all possible. Remember, donkeys freeze when they are confused or frightened and you will get nowhere with him at that point. He needs to learn, but he also needs to enjoy what he is doing. Don’t forget to reward him frequently, but be sure that you ask him to go further each time, or you may find yourself training him to walk only so many steps at a time. In the beginning, ask him to go in only one direction and change directions at each session. You can teach him to reverse and go forward later, once he has learned what you are asking.
 Training your donkey is not really much different than training horses and mules, although there are differences in instinct and attitude that will determine your approach in given situations. The mechanics and techniques, however, remain the same.
 When imprinting the foal, think of the kind of attitude you want to cultivate in him—do not come at him with the idea that he must accept you. This is a forceful and intrusive attitude and can foster resistance. Come at him with love, patience and kindness and these are the things he will learn. Give him respect and ask that he respect you and he will begin to learn about behavioral limitations. If he were in a herd, the adults would demand that he respect their space with well-placed discipline. You must learn to do the same without overdoing it. If he bites or kicks, a well-placed slap on the side of the mouth for biting and on the rump for kicking and a loud, “No!” will do the trick. Rewarding his good behaviors consistently will reinforce repetition of what you desire from him and will foster understanding between you and your donkey. This is the beginning of a long-lasting bond of friendship.
 Whether your donkey is a young foal or an older animal, begin with imprinting and do the steps in sequence. Learn how to properly put on the halter. Let him wear it for a while then take it off, as he could get it caught and injure himself if it is left on. When your donkey is not bothered by you putting on and taking off the halter, you can teach him to be tied. Put the halter on him and tie him to a safe post for one hour. Come by to see him every 10 or 15 minutes, untie him and ask him to “come.” If he does not take a step toward you, just retie him and leave. Come back in 10 minutes and try again. When he takes a step toward you, reward him with a treat and lots of praise. Stroke him on the neck and shoulder or on the poll between the ears, or scratch his chest or rump—whatever he finds most pleasing. Then try a few more steps. Don’t ask for any more steps each day than he is willing to give. Save them for the next time and soon he will lead easily. When he is leading easily, you can start taking walks around the farm and you can begin to introduce him to things he may find frightening. Lead him as close as he will go at your shoulder, then step toward the obstacle as close as the lead will allow and coax him to you. Offer a reward if necessary to entice him, and be sure to reward him when he comes forward. When he is confident about investigating “things” with you, you can progress to an obstacle course.
 At your first try going over logs, a bridge, tires, or other such obstacles, you may find your donkey reluctant to pick up his feet to negotiate an obstacle. He will probably try to go around it any way he can. Stand close to his head, holding him on a shorter lead, and ask him to “come.” If he moves only one foot over a log or tire or onto a bridge, stop, hold him there and give him a reward for his effort. Next, ask for the other foot and, if he is willing, let him walk over the obstacle, then reward him again. If he moves only one foot more, reward that, and proceed—slowly! You don’t want him to just run through it. You want him to come when you say “come” and to whoa when you say “whoa.” You are beginning to establish verbal communication with your donkey, so keep it simple and consistent. Do all obstacles the same way. Donkeys like to get crooked over obstacles. When he has learned to step through or over an obstacle but is not going straight, you can step directly in front of him, holding the halter on both sides, and ask for straightness as he negotiates the obstacle.
 Once he has learned to follow you over and around obstacles, he will be ready to begin the fundamentals of showmanship. Hold your lead in your left hand, keeping your right hand free and straight out in front of you. He should learn to lead with slack in the lead and to follow your shoulder. If he gets too close, you can use your right hand to push him back into position. Once you have begun showmanship training, ALWAYS lead him this way. Teach him to stand squarely on all fours every time he stops. You are not just teaching him to set up, but to carry his body in a balanced fashion so he will develop good posture and balance. When you want to teach him to trot on the lead, give the verbal command to “trot” and slowly move your own legs into a very slow trot. If he is difficult, do not go to the whip. Try to find something toward which he wants to trot. Above all, don’t get discouraged if he won’t trot the first few times, just slow back down and do something he already knows, then quit for the day and try again the next. Eventually, he WILL get it!
 Do the same exercises (outlined in DVD #1 of my
 It is important that your donkey be in the best posture he can be in while he is performing at this stage of training. The way that he is moving with his body is the way his muscles and tendons will be strengthened and toned, and the way his bones will become permanently aligned. It is difficult for a rider to maintain this impeccable balance through every step and every stride. For this reason, you will use your “elbow pull” training aid to encourage your donkey’s good posture throughout training, once he has learned the right moves. Adjust your “elbow pull” so that, when tight, his poll can be raised about six inches above his withers. The “elbow pull” will help to maintain his proper frame and good balance without you having to fuss with anything. The “elbow pull” is most helpful during lateral movements, but it also helps him to maintain his balance through transitions and changes of direction. Get in the habit of using it all the time during intermediate training. When he is going well, staying in proper frame, light on the bit and responsive to your cues, and when the “elbow pull” is loose throughout all of his workouts—only then should you remove it. (Use of the “elbow pull” and instructions on how to make it are covered in my
  Now you need to teach your donkey to lengthen his trot. The elbow pull should have helped you to get a true trot out of your donkey. He will not be able to lengthen from a single-foot trot. Do not begin lengthening until the true trot is well established. When you wish to start schooling the lengthening, begin by asking him to lengthen on the long diagonal and corner-to-corner in your arena. Ask him to cover more ground going toward the center and as he approaches the corner, ask him to shorten his stride and collect the trot before the corner. Do not just ask for more speed. A lengthening is a more ground-covering walk, trot or canter, but maintains the same rhythm and cadence. In the beginning it will seem like there is very little difference between the working and lengthened gaits, but as he gets stronger and more agile, the difference will become more apparent.
 Next you will begin to regulate the canter. Place a pole perpendicular to the long side of your arena. Canter around the perimeter of the arena, coming down the long side and over the pole. Each time you approach the pole, about three strides out, start counting to your donkey, “One, two, three, pole.” This will accomplish several things. First, you will learn to gauge your distances and measure your donkey’s strides. Second, your donkey will learn to adjust his strides and they will become more balanced, rhythmic and cadenced. Next, he will become more obedient to your aids. Don’t forget to count out loud to your donkey every time you do this exercise. Remember, donkeys respond best to verbal commands. Do the canter pole several times in each direction, during each session that you work in the arena to help improve his canter.
 Whether you plan to jump or not, the next exercise is beneficial to your donkey’s body conditioning. It will help him to become agile and strong and he will be able to carry your weight a lot more efficiently. First set four cavalletti in your arena and have your donkey trot through them during several lessons. Then, set a cavalletti or cross rail jump in your arena with a ground rail one stride before and after. Begin each session with review and warm up with stretching—turns on the forehand and haunches on the lead; feeding treats from his back, bending his head to your knee on both sides; walking and trotting through the hour-glass pattern on the long rein; walking, trotting and cantering the perimeter of the arena on the long rein. Then you should do a collecting exercise. Ask him to collect on the short sides, and lengthen on the long sides at the walk and then do this at the trot. After the warm-up, stop and rest for three minutes. After the collection exercise, stop and rest for three minutes. He will be working in approximately 15-minute intervals with three-minute breaks in between. This is standard for mules, donkeys and horses.
 For the final segment of his workout, take him along the rail at the trot and come up over the cavalletti or cross rail jump. Two strides out from the ground rail (three strides from the cavalletti), start counting out loud, “One, two, three, JUMP!” Allow your donkey to trot after the cavalletti the first two times through, and the third time over ask him to canter away to the rail and down the long side of the arena. Then stop and reward him for his effort. Give him a brief rest and then repeat the exercise the same way three times with a brief rest after each canter pass. When he has done this pattern three times going in one direction, do the same thing three times going the other direction. If he is lazy, he may need encouragement from the crop, or you may need to wear BLUNT spurs. If he wants to run at the cavalletti, you will need to school him a little differently. You will need to walk to the ground rail, stop and back. Then turn away from the cavalletti, do a circle and approach again at the walk, stop and back. Circle again—at the trot this time—stop, back. Do this twice. The third time, let him trot and jump the cavalletti. After he jumps the cavalletti, a few strides out, ask him to stop and back. This is to help him to let YOU maintain control. It will also help him to maintain his balance and jump correctly, thus avoiding a mishap or fall.


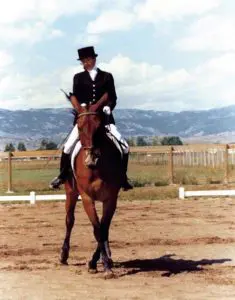 When proper attention is given to the development of balanced, postural core muscle strength from the very beginning, the equine develops strength symmetrically throughout his body as he grows. Muscles are stressed and relaxed at critical intervals, allowing for healthy mental, physical and emotional growth. When the equine feels good in his body, it clears his mind to concentrate on his performance. The result is an equine that is happy in his work and in his world.
 Dressage training has evolved from a useful tool to strengthen and balance a useful horse to just another name in Big Business. Today, equines are thought of as economic commodity, or a breeding investment, and are used in events such as Reining, Cutting, Stadium Jumping, Racing, Steeplechase, Eventing, Hunting, Dressage and just-for-pleasure riding. Monetary investment is high, and never was the old adage of “horse poor” more prevalent than now!
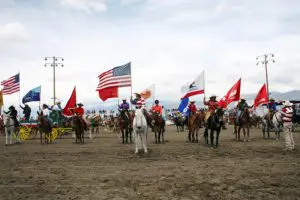 Owners can expect to spend thousands of dollars in a year for no more than a pleasure riding equine, and the cost increases with the status of the activities. The cost of supporting an equine provides economic success to a multitude of businesses such as feed stores, tack and equipment, truck and trailer sales, drug companies, motels, gas stations, county fairgrounds, breed registries, brand inspection, clothing stores, veterinarians, farriers, and the list goes on.
 Breeding for bigger, better and faster equines, has given people the false idea that these horses perform almost solely from their heredity. This has changed how they are being trained and judged. Today, many equine competitions are no longer judged by an expert who really knows the definition of correct movement. We are inundated with terminology from the Masters that is most often misunderstood and distorted.
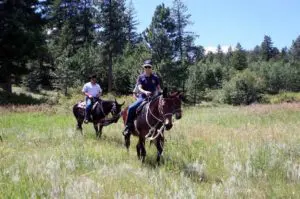 To those who are not schooled in Dressage, collection can mean a lot of things that are contrary to the actual definition, including the belief that it means to merely break at the poll and arc the head and neck. People also believe that an equine is on the bit if he arcs his head and neck and flexes at the poll. What this actually means is that the equine has taken contact with the bit, and can feel the hands of the rider through the reins, and respond lightly and obediently whether his head and neck are arched or not. Vertical flexion is the result of correct collection that involves the entire body of the equine, when the equine is flexible from head to tail with the hindquarters properly engaged. It is not the act of bringing the equine’s chin to his chest. Lateral flexion is when the equine bends his whole body through his rib cage to the arc of a circle, and is not just bending his head and neck to your knee.
 You would teach him to lunge on the lunge line in the Round Pen first with enough slack in the line so it drags on the ground as he circles. Keep a slightly open fist on the line and close your first as the outside front leg comes forward into suspension. He will feel this pressure and bring that front leg onto the circle instead of going straight forward with it. This is the cue you will use when lunging him on the line in the open arena.


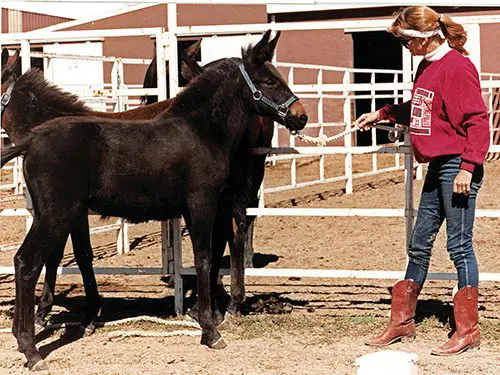 Many veterinarians and farriers refuse to work on mules. Some are slaves to the old wives’ tales about mules being stubborn, ornery and dangerous, and some are subject to owners who cannot manage their own animals. The professionals that primarily studied with horses are more apt to be tolerant of a misbehaving horse than of a misbehaving mule. They have a better idea of what to expect and how to deal with it.
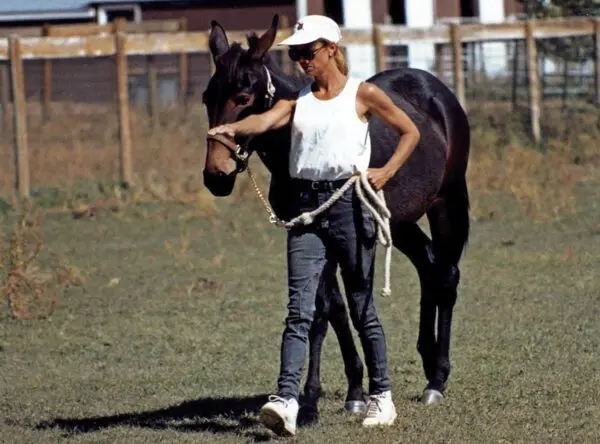 upon their arrival; (2) the animals are not handled regularly or trained correctly and are difficult to treat; (3) owners use excitable disciplinary tactics while the professional is working on the animal, putting him in physical jeopardy; and (4) owners do not follow up on treatment instructions. True, these complaints apply to both horse and mule owners. To dispel old rumors about mules, it is important that all your equines are easily managed. The veterinarian or Farrier will not be as quick to forgive a mule. The mule foal learns his behavior from his dam. A calm and obedient mare makes for a calm and obedient foal.
 You are the one that interacts with the animal most often and should know the details that the vet could not possibly know. Good records are important for clear communication with your vet. With each visit, update him on your equine’s management & training status. Alert the vet as to any changes in the equine’s behavior or medical status. Ask questions and learn about what your vet is doing with each visit to increase your knowledge and understanding.
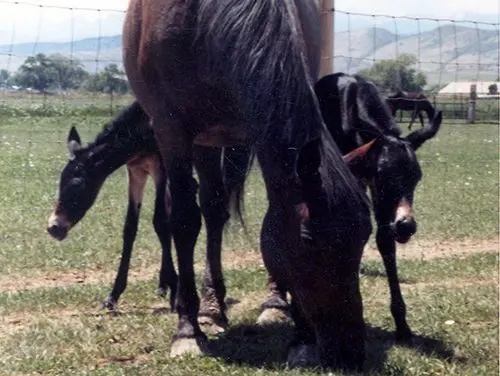 As in RH incompatibility in humans, if the foal’s blood type is the same as the mare’s blood type, there is no problem. If the foal’s blood type is different from the mare’s, antibodies may be created in the mare’s blood. That is when the problems begin. Mares should be tested for the possibility for an N.I. baby 1-3 weeks before foaling, but you can also test at 30 days before foaling, and again later closer to the time of foaling, to allow more preparation time. Consult your veterinarian well before the mare’s delivery date to make a plan for testing.
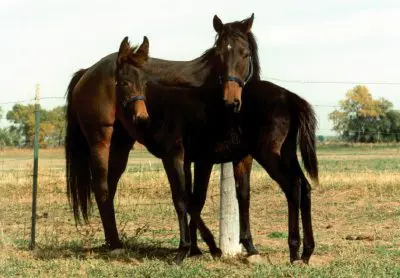 Decide on a foaling location. Decide about the birth location…at home, or remotely managed. If she is to be foaling at home, pick a large stall and run to allow for plenty of room and easy access to the mare and foal. It is helpful to install a camera for monitoring the mare since you must catch the foal before it suckles the mare. Keep the mare and foal inside a safe stall for the first 24-36 hours. The stall and run can be next to other animals fence provided there are no health risks. Having other equines near can help to keep the mare from feeling alone and anxious.
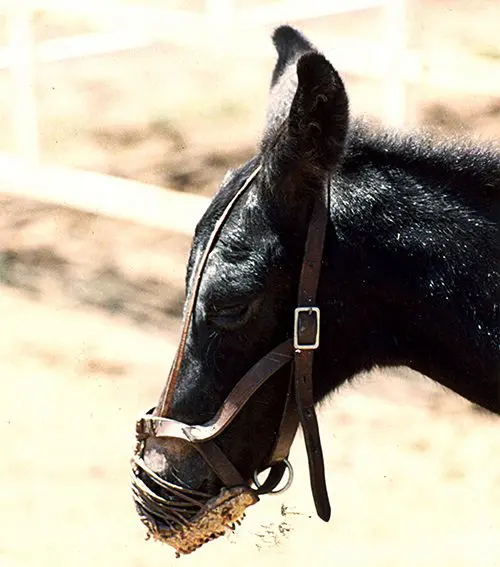 Be sure to have a muzzle on hand for the N.I. foal. Do not confuse a grazing muzzle with an N.I. muzzle. You can obtain an N.I. Foal Muzzle from:
 Be present for the birth of the foal, imprint, and muzzle the foal immediately. Tie the mare to a stout post in the stall next to the feeder (with about 3’ of slack), take the muzzle off of the foal, feed the foal replacement colostrum and after the predetermined amount of colostrum has been provided over the first few hours of life Milk out the mare every 2 hours. When you are bottle feeding the foal, position him at the mare’s flank. Putting him onto the mare to suckle later will then be easier. Have grass hay in the feeder to help keep the mare occupied while you work. Make sure the foal starts to receive the replacement colostrum as soon as it has a suckle reflex. Consult with your veterinarian about the amount to feed the foal at each feeding and how often to feed the foal.
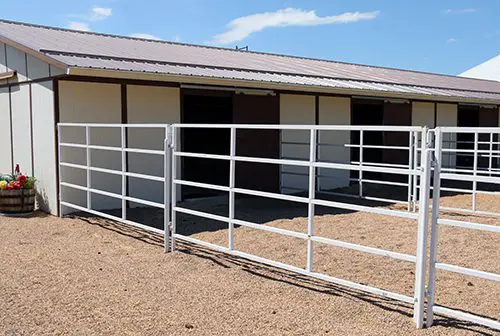 When the muzzle is removed, you can open the stall door and they can be turned into the run together (with the stall door remaining open). Keep them both separated from other animals until the foal is finally weaned. The foal should not be weaned until he is sixth months old. They should not be turned out with other animals to prevent the risk of injury to the foal. If there are other mares with foals, they are safe turnout mates.
 In Part 1 of Equine Behavior: Look Who’s Talking, we discussed the evolution of man’s self-discovery and how he applied this to his approach to equines. If we want to manage our equines in a healthy way and accomplish even the most basic performance with them, there is much to consider during the training process. In the not-so-distant past, the prevalent belief was that, if you had a reasonably large patch of grass with a fence around it, you could have a horse. We now know it takes much more than this!
 Born in Athens, Greece in 431 BC and referred to today as the original “Horse Whisperer,” Xenophon is considered to be the founder of military Horsemanship. He is credited with the beginning of structured, classical equine training over 1,000 years ago, when equines were trained with military defense in mind.1 The equine’s training was critical to the defense of his rider, and this meant that the animal had to be strong, healthy and obedient. Man discovered that when he paid attention to the mental and physical needs of the equine, he got a more willing and obedient response, and the result was a healthier and more protective companion than one that was forced into submission. Harnessing the defense mechanisms of the horse was not only awe-inspiring but effective.
 As man’s environment changed, he changed with it. However, when dealing with equines, he neglected to realize that he had changed the equine’s natural habitat forever and had begun a compression of space and freedom that would ultimately result in anxious and nervous behaviors in the equine. The equine’s negative response to this environment was most obvious when he was subjugated by man. Man misperceived the equine’s adverse behaviors as deliberate disobedience.
 The learned behaviors coming from other sources such as environment do not replace but, rather, become yet another integral part of the whole equine. It is easy to believe that if you reward good behavior it will be repeated, but not so easy to identify all good behaviors and reward them promptly. It is even more difficult to learn to identify bad behaviors, punish them accordingly and re-route behavior to the positive again. This requires the handler to move away from an observational post and become involved and engaged with the equine on a whole new level.
 The sum total of the effect an individual has on others is referred to as his “social stimulus value.” The social stimulus value of a human being takes into account his or her height, hair color, general physique, vitality and so forth. It includes distinctive behavior patterns such as habits and mannerisms. The sum total of the effect an individual equine has on other equines is referred to as his “status in the pecking order.” It also includes distinctive behavior patterns such as habits and mannerisms.
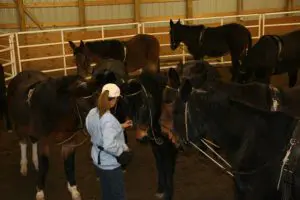 At first, it disturbed me when I could not turn my much older animals out with the adult male mules. I thought they should be able to get along, until I began to think of them in terms of rebellious teenagers who did not appreciate the sage advice of their elders. The “guidance” of the elder equines was not appreciated at all, so I separated the groups during turnout and later integrated them during training, after they had learned to be polite and considerate to the other equines.
 As they proceed through the training program, their expressions soften with acceptance. They then begin to show interest that ultimately results in an animal that is confident and trusting. You can see the soul emanating from their eyes and watch their overall carriage change to one of confidence and trust. These are simply behavioral manifestations of the equine’s introspection, or the way he perceives himself in his world. Change his world in a kind and understanding way and so will his perceptions change. The equine whose personality develops in a healthy way will exhibit more courage and less fear in the face of stressful situations and extreme weather conditions. The bond and trust in the handler is stronger than his sense of fear and you can see it in his face.
 Learning to be polite and considerate and giving pleasure with concrete reasons that are physical, mental and emotional in nature yield true health, and not just a perverse image. Be careful of arrogance. Arrogance stems from a masterful or Godlike approach, devoid of humility, that may elevate one’s ego, but invariably creates a “victim” equine instead of a willing and grateful partner and companion.


 What kind of equine handler are you? When interacting with your Longears or any equine, are you an observer or a participant? Are you fully aware of the reasons for your equine’s behaviors? Behavior in general is most often motivated by a stimulus that elicits a response, yet the early years of physiological development are most dependent on heredity. Heredity includes not only physical characteristics, but mental, emotional and instinctual behaviors as well. We are taught that if an equine’s knees are beginning to fuse, he is ready for training. Is the animal really ready for training just because his knees are beginning to fuse? Physical development is called maturation, and we often determine the equine’s capabilities by maturation alone, with no consideration for the whole animal.
 When the stallion signals danger, it is this mare that will lead the herd, while the stallion generally brings up the rear. During estrus, the mare cycles every 21 days during the warmer months of the year. The mare accepts the stallion for only seven days out of the 21-day cycle. The stallion may cover her several times during that period and will do the same with the other mares in the herd. Not all mares will accept the advances of the stallion at certain times and, because they are as different as people are in their genetic makeup, not all of them will become pregnant every time.
 A mule will pin its ears when it is concentrating very hard and when it is following you and wants attention. Mules and donkeys are basically very friendly and rarely lay their ears flat back in pure anger like a horse will. When they are angry, you will know it. Scratching in different areas will produce different results. If you scratch their jowls, for instance, they may perk their ears forward, but when you rub their forehead, they will lay their ears back. If you scratch the insides of the ears, some will like it and tilt the head sideways with quivering eyebrows while others will jerk away at your impolite intrusion.
 At first, Arabian horses were thought to be silly and difficult—not the ideal mount for the common man. Later, the intelligence of the Arabian was discovered and explained by saying that, because the Arabian’s eyes are set lower in the head and the forehead is broader than most other equines, there is more brain space in the skull. This is also true of most mules and, particularly, Arabian mules. Once man believed in the equine’s intelligence and had a scientific reason for it, training was modified and approached a little differently. Man was then able to learn even more about the horses he was training. It wasn’t long before man discovered that this didn’t always hold true and there had to be more to consider when assessing the whole human being and, consequently, the whole horse.
