

MULE CROSSING: Benefit of Organizational Skills
 By Meredith Hodges
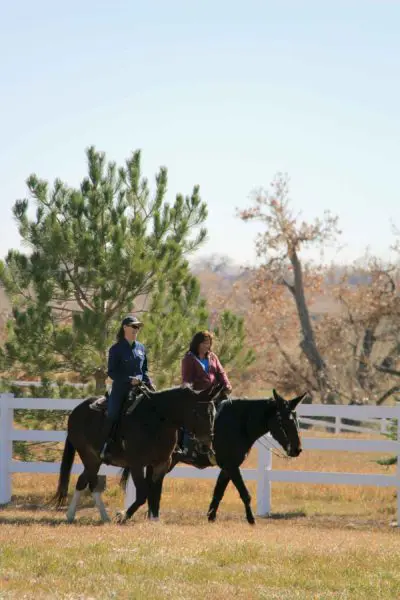
People have often asked me how on earth can only three people—my daughter, my husband and myself—manage to prepare and show as many as 18 head of mules and donkeys for one show?! They say that we must be crazy, and maybe we are a little crazy, but a few simple rules of organization have made this possible.
The first consideration is the grooming of the animals themselves. Anyone who has had to body clip an animal knows how tedious and time-consuming this can be. Mule and donkey hair does not appear to grow back as quickly, nor as radically, as does horse hair, so you can clip your mule, or donkey, as far as 2-3 weeks in advance of your show and do touch up work just before the show. If you have no shows until summer, you may want to body clip in mid-April anyway. It is at this time that the winter hair begins to shed and the summer hair starts to come in. If you clip off the winter hair and blanket him for the remainder of the spring, the hair that grows in will be much more manageable than the heavy winter hair and will greatly reduce grooming time before the show.
 Once the heavier coat is eliminated, a weekly grooming will keep his coat nicely maintained. Daily grooming before a show, or every other day, is even better. Each time you groom him before riding, check and clip as needed the muzzle hairs, around the eyes and ears, and around the coronet bands. Leave the hairs inside the ears to prevent irritation from bugs and flies, but trim the outside edges and backs of the ears. An ounce of corn oil in his feed daily will assure a healthy sheen in his coat on show day without the use of artificial highlighters. Trimming, or shoeing, your mule on a regular six-eight week schedule will assure that his feet will not need attending at the last minute. A routine vaccination, deworming, Coggins testing and a permanent brand inspection will make sure he is ready for transport to any show anywhere at any time. Then, all that remains to be done right before the show is minor clipping, bathing, and polishing hooves.
Each individual mule, or donkey, should have his own personal show halter and bridle for convenience. Driving animals should each have their own set of harness. This will help to reduce the time between tack changes while at the show.
Dress rehearsals before the show at home are quite beneficial. Prepare as if you are about to enter each class, one at a time. First, pick the clothing you will need to wear and store it in a designated place in your house. You do not have to actually wear them for the rehearsal. As you pick out the items, take note of the things that need to be cleaned or polished, and set them to the side of the rest of your other clothes.
 Then, tack up your animal, checking each piece of equipment to make sure that it is in working order. Go ahead and practice the class. Then, as you unpack your mule, set the tack aside from the rest in your tack room for cleaning later. Do this for each animal in each class. Your animals will do better at the show if they get plenty of rest before the show, so it is wise to spend the day before the show cleaning your tack, clothes, and equipment. Before you begin to clean, load all the items into your trailer that are all ready to go without cleaning. Then, as you clean the remaining items, load them directly into the trailer as you finish them.
When the basic gear for you and your animal is loaded, make a checklist for feed, buckets, hoses, brushes, forks, brooms, and shovels, etc., that you will need for general care, load them, and check them off. When you have finished, lay out all the items that you will need for transport (i.e. sheets, blankets, shipping boots, etc.), so they are easily available. If you proceed in this manner, the risk of forgetting any important items is minimized. It is best to make sure that your trailer is fully loaded (except the animals) the night before you leave as this gives you overnight to think of anything you might have missed. Items such as your ice chest  can be left until morning, or last minute, provided that you put them in a highly visible spot with a list of what is to be put in attached. Do not try to rely on your memory, as it will be clouded by the excitement and anticipation of the show.
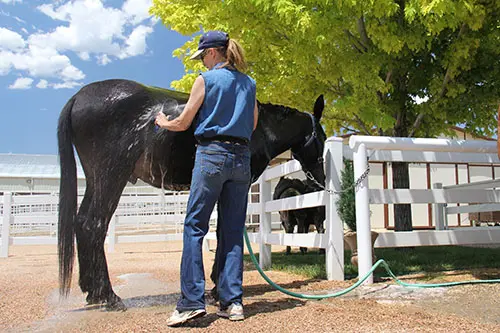
If you are taking a number of mules and donkeys to the show, it is wise to bathe with soap at home the day before; then, cover the animal with a sheet or blanket and leg wraps. The day of the show, you would then only need to rinse, or vacuum, any excess dirt. This will minimize grooming time at the show.
Post the show schedule where you will be tacking up for each class and organize your clothing and equipment such that it is ready to go and easily accessible. Once the show actually begins, you will not have time to go hunting for misplaced items. Take note of your clothing changes and wear things that are easily changed. For instance, if your Western classes are before your English classes, you can wear your breeches underneath your Western slacks and chaps. Changing from English attire to Driving and Side Saddle attire is easily done by wearing your English clothing, then, simply change your headgear and add a lap rug for driving, or an apron for Side Saddle. Changes of your boots are pretty much optional, as English boots are easily hidden beneath properly fitting Western chaps and are appropriate footwear for English, Driving and Side Saddle.
 If classes are spaced fairly close together and you are using more than one animal, it is wise to tack up the other animals ahead of time so they are ready to go. If you are using only one saddle for more than one animal, the other animals can still be bridled with the halter slipped over it, so they can be tied and waiting. Be sure to tie up the reins so they will not be chewed or stepped on. If you are using the same mule throughout the show, tacking and stripping should not be too time-consuming if your equipment is well organized.
Shows should be fun and exciting, but it can easily turn into a nightmare when things are out of place and chaotic. Make your motel and stabling reservations early and leave for the show well ahead of schedule to allow for breakdowns or other unforeseen emergencies. By all means, bring friends to help you, but give them a briefing and a list of jobs they can do. They won’t be much help if they have to keep asking what to do the day of the show! If you are going any distance at all, have your truck and trailer checked over thoroughly before you leave. There is nothing more frustrating than a major breakdown on the roadside with a trailer full of animals!
In summary, with routine grooming, farrier care, vet care, regular Coggins testing during the show season and permanent brand inspections, you can greatly reduce your show preparation time. Dress rehearsals, individual tack for each animal and organized loading will assure that all your tack and equipment will be readily available. Advanced motel and stabling reservations will afford you and your animals much needed rest when you arrive. Having your truck and trailer checked before you leave will make sure that you arrive in plenty of time. And, organization of tack and equipment when you do arrive will heighten the chances for an enjoyable and relaxing show!
To learn more about Meredith Hodges and her comprehensive all-breed equine training program, visit LuckyThreeRanch.com, MEREDITH HODGES PUBLIC FIGURE Facebook page, or call 1-800-816-7566. Check out her children’s website at JasperTheMule.com. Also, find Meredith on Pinterest, Instagram, MeWe, YouTube and Twitter.
Covered in TRAINING MULES & DONKEY: A LOGICAL APPROACH TO TRAINING, TRAINING WITHOUT RESISTANCE, EQUUS REVISITED and A GUIDE TO RAISING & SHOWING MULES at www.luckythreeranchstore.com
© 1991, 2016, 2024 Lucky Three Ranch, Inc. All Rights Reserved.

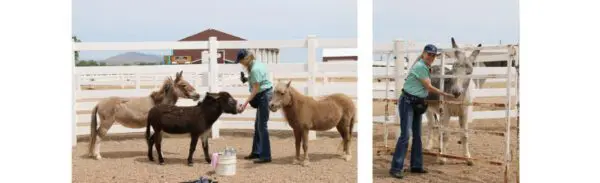
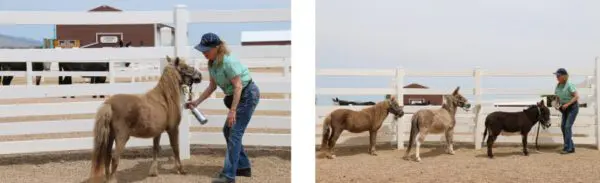
 Miniature mules and horses settle into their lunging lessons very well, but miniature donkeys (and donkeys in general) really don’t like to be lunged. They just don’t seem to see much purpose in it unless you make it fun for them. If you have a mini donkey, when teaching him to lunge it is helpful if you employ the aid of another type of equine of comparative size (such as a miniature horse or mule) to help “lead” your mini donkey through the lessons. Before I first began lunging my two mini donkeys, Augie and Spuds, I introduced them to Franklin the mini mule, Francis the mini molly mule and Mirage the mini horse by putting them altogether in the larger indoor arena space, and then I put them all in the round pen together. Before I began giving any of them specific instructions, they were all allowed some time to investigate each other and establish their pecking order. Before long all five were lunging cooperatively together, although Spuds did feel the need to kick at Mirage a few times so Mirage would allow him enough space to perform. (Mirage can be a bully sometimes and needed to be put in his place.)
 It is important that your tack and other “mini” equipment fit well. Check the harness to make sure the bridle fits and the bit is placed correctly, and be sure to adjust the blinders on your harness bridle so they don’t rub against your mini’s eyes. Fitting miniature donkeys for harness can sometimes be difficult, but I was fortunate to find Chimacum Tack, a tack and harness manufacturing company that does a fantastic job with miniature donkey, mule and horse harness. I suggest that you make the fitting a lesson in itself—you can even introduce your mini to the cart he will be pulling without actually hitching him up to it. Just as you have with all other obstacles, first let him inspect the tack. Then, once you have put it on him, have him stand quietly in the spot in front of the cart where he will eventually stand. Don’t forget to amply reward him and he should be more than willing to comply.
 At this stage of training, lessons over obstacles can now be done with more finesse. You can begin lateral work over small rails placed in front of a fence, backing through the walk-through “L” and doing lateral work in the tractor tire. In advanced tractor tire work, if you judge it to be safe, get down on your knees so you are on your mini’s level. Now ask your mini to put all four feet inside the tractor tire, and to then make a turn on the haunches. Direct his head in the direction you choose to go first and ask him to slowly turn while all of his feet are still inside the tire. Do this by poking him in the shoulder with your index finger (just as you did when repositioning him for the farrier) and asking him to move his front end over and around the inside of the tire. Do this in one direction and then in the other direction. Stay low, maintain eye contact and don’t be too forceful in your movements.
 By now you have taught your mini to follow on the lead while you both explore and have all kinds of adventures around your property, inspecting new things and having picnics everywhere imaginable. If your mini is to learn to be driven, he now needs to have the confidence to take the lead. When you begin this process, review (with your mini) leading together from the work station to the round pen. If you are training a team and dealing with two minis, tie their halters together at the side rings with about eighteen inches of 3/8-inch nylon rope with small snaps on each end between them, and use one lead rope snapped to the center of the tie rope between them. Begin by taking your position in the lead while carrying a dressage whip. Slowly work your way in beside them on the near (left) side, tap them each once gently on the hindquarters with the whip to let them know you expect them to continue forward and ahead of you (even though you are moving more slowly than they are on an angle to gradually work your way in behind them). Pretty soon, you should be directly behind them, encouraging them both forward if they do stop with a gentle tap of the dressage whip, but only one tap for each balky step.
 In subsequent lessons going forward, the next steps are to attach the drive lines and ground-drive your mini in the round pen. Ground-drive around the rail in each direction at the walk and do smaller circles from the rail and back to the rail around the larger circle. Execute an “S” turn through the middle to change directions and do the same going in the opposite direction. End each lesson with a square halt and a back. If he does not do any of these moves with ease, just be happy with what he offers and stop the lesson there. This will give your mini a lesson in communication through the bit. It is imperative that he learns this. You always have the next lesson to continue forward and you want to avoid any confrontation that will cause resistant behavior. It is easier to prevent the behavior from occurring than to have to correct it later. If you are ground-driving two minis, work each mini alone first and then follow this exact same procedure with your team.
 Moving to an open arena changes your mini’s perception of space and he will often feel like playing, so set up the cones of the hourglass pattern for him. Ground-driving through the hourglass pattern will help to maintain his attention and give him a point of focus for his lessons. Ground-drive your mini as you did in the round pen, but now he will be driven through the hourglass pattern with random halts. If you have any balking, just stop, reward for stopping, regroup and try again. Remember to go slowly and use frequent halts and backs in order to reward your mini. This helps him to stay attentive to your hands. Remember to do a full halt yourself—in good posture—before you step forward to reward him. If you pay attention to your own posture and the quality of your walk and halts, he will pay attention to his.
 There are classes at various shows (both open horse shows and miniature shows), where minis are not only driven in harness with a variety of carts and small carriages, but they also do trail courses and jumping on the lead line. Miniatures enjoy performing and have personality-plus, which audiences love! How well-trained your mini is will determine his willingness to do a multitude of fun activities, so make training fun and exciting for your mini. Enjoy the small victories along the way, use your creativity, reward lavishly and look forward to your adventures together.


 Even if all I was going to do was rescue equines, I knew I would have to have at least some experience in equine management and training, so I read numerous training books and attended many clinics and seminars. The more I learned, the more overwhelmed I became. There were so many vastly different ideas about how to do things with equines. Different authors wrote about different stages of training and they all had a different approach. There was no one author who produced anything with continuity from foal all the way to advanced levels of training. To make matters worse, in the early 1970s when I got involved with Longears, I found that there was virtually nothing available about training them for recreational purposes. That is when I decided to begin documenting everything I learned that worked well (and forgot about what didn’t).
 Like most people, I started off thinking that leaving equines to just be equines without human interference was the ideal. Oh, how they would just love to exist in a large plot of pasture to live out their days in leisure! I soon found out how deadly that could be to an equine. Equines in the wild will travel for miles, exercising and grazing sporadically, balancing their diet and exercising themselves. Since the majority of the world’s equines are not wild and can no longer run free (no more wide-open spaces available), leaving them alone in a pasture to eat freely only results in obesity and all the ailments that go with it. In reality, allowing this “free grazing” is a passive form of neglect, and is usually the result of just plain human laziness. Equine owners may often feel like they “do not have the time” to do everything correctly, when, in actuality, it takes less time (and is less costly) to correctly feed, manage and train equines. That is how I can successfully be the sole trainer of 30 equines at this late date in my life.
 Trainers in general advise owners to set things up so it is hard for the equine to do the wrong thing. Why not just concentrate on setting him up to be able to easily do the right thing? Wouldn’t you get a better reaction from your equine if he received rewards for a job well done rather than focusing on the punishments and intimidation if he didn’t comply?
 Restraints should only be used to suggest compliance to the equine and not for complete control over any resistance. Patience, calmness and purposeful action during the use of restraints are all paramount in teaching the equine how to cope with things that are difficult for him. In the use of restraints, one runs the risk of being more severe than intended, which will have a negative impact on the equine’s response to the restraint used. I have discovered some very simple restraints that work well.
 In the early sixties, mules were among those animals quickly becoming extinct in this country. Thanks to the formation of clubs such as The American Donkey and Mule Society, founded in 1967, and the British Donkey Breed Society, founded in 1966, the trend was reversed and the animals began to get the recognition they justly deserved.
 For those of you who are unfamiliar with the breeding of a mule, he is the cross between a male donkey, called a jack, and a female horse, a mare. The reverse of that–a cross between a male horse, a stallion, and a female donkey, a jenny on jennet–is called a hinny, although many still refer to them as mules. Years ago people used low quality mares to breed to jacks to obtain mules, but today we are improving the breed by crossing better quality animals to obtain better and stronger mules.
 Many have asked about the training of mules. Training mules is much like training horses, but sophisticated trainers would probably agree that they are more like teaching young children. A mule is more likely to perform to the best of his ability if he is allowed to build trust in his trainer. This is where mules and horses differ. Horses have a forgiving nature and are able to forget a loss of temper by the trainer; mules do not forget. When a mule is nervous about a trainer, his ability to perform for the trainer is impaired. Pat Parelli, a California mule trainer, put it quite nicely: “Mules separate crude trainers from artistic trainers.” The mule handled by a crude trainer will generally epitomize the traditional belief that mules are stubborn and ornery. The mule handled by an artistic trainer will not. A technique widely used among mule trainers with great success is the psychological science of Behavior Modification, whereby the animal’s natural behaviors are modified to achieve the desired response through the use of positive reinforcement. Negative reinforcement is also used sparingly. When using negative reinforcement, one must remain calm, patient, and just to ensure the success of the temporary discipline. One must remember that negative reinforcement does not build desirable behavior. It is only used to stop a bad behavior long enough to substitute a desirable behavior. A mule trained in this manner will become a more trustworthy, willing, and predictable friend and companion. Let’s dispel the old saying that mules are “stubborn” and “ornery” and say that there are really no bad mules, only bad trainers.
 The Mule Days celebration in Bishop, California is the largest mule show in the world. Mule lovers, their friends and family enjoy four days of mule-related fun and entertainment. At this particular show there is a little something for everyone: Western cuisine, games, dancing, and conversation in addition to the mule show itself. In 1984, there were over 70 different classes and events for the competitors such as Pleasure classes, Reining classes, Trail, Musical Tires, Barrel Racing and Pole Bending. Also Jumping, Cattle Penning, Steer Stopping, Team Roping, and a Balloon Bust. For the packers: Pack Train classes, Packing contests, Box Hitch and Diamond Hitch packing contests (pro and non-pro), Team Packing and the Team Packing Scramble which you have to see to believe! There are Halter classes, Pulling, Driving classes, and for you race fans: Chariot races, Flat Track races, and yes, even a Backwards race! To highlight the events, there are featured performances by special people and mules. Almost every year, the 20-mule team makes an appearance and in 1981 Slim Pickens, Grand Marshall of the Mule Days Parade, drove his team to victory in a chariot race! In 1984, Colorado’s own Al Kaly Shrine Temple Mule Train World Champion Drill Team out of Colorado Springs gave a memorable performance on their beautifully matched, black army mules. This mule show brings together so many people with different backgrounds and interests for a perfectly glorious weekend. Each year leaves you looking forward to the next.
 By Meredith Hodges
 In 1979, I witnessed my first Bishop Mule Days Sierra Nevada packer’s rendezvous. That was where my career in training mules and donkeys in every recreational equine event began. I was “ass-tonished” at the impeccable way these knowledgeable men and women handled their mules, wagons, packs and equipment with such grace and dignity…and not without a proper measure of good humor! I caught a very bad case of “Mule Fever” and began my own pursuit with Longears in ALL forms of equine athletics. Bishop Mule Days grew from the weekend packer’s rendezvous into the weeklong show over Memorial Day weekend that it is today and they continue to add new classes each year to accommodate the accomplishments of a lot of Longears-lovers like myself along the way. Little did I know, the friendships I started then were to last a lifetime!
 In 1980, I founded the Lucky Three Ranch in Loveland, Colorado and embarked on a breeding and training program of my own with Lucky Three Sundowner, the last mule and Little Jack Horner, the last donkey jack born at Windy Valley Ranch in 1980. Sundowner was shipped to the ranch right away, but Little Jack Horner had to wait and be picked up a year later. Just outside of Sparks, Nevada in 1981, we were hailed to pull over by a jolly and quite charming man, Ernie Fanning who ran up to my truck and blurted through the driver’s side window, “I just KNOW you have a Windy Valley jack in the back of that trailer!” To this day, I don’t know how he could tell it was a Windy Valley jack only by the head and ears that showed above the stock trailer back door. All I can say is that man certainly knew his mules and donkeys, and I made yet another friend for life that day!
 Years passed, Bishop Mule Days grew as did my love for Longears and the people that came with them. I bred and showed Longears for many years, then judged and began a promotional career in support of Longears everywhere. Bishop Mule Days was where I met Bonnie Shields, the leading half-ass Tennessee Mule Artist and illustrator for my children’s series of books and DVDs, Jasper the Mule. Even though I no longer showed, I was still a welcome part of the Bishop Mule Days rendezvous family year after year as a respected dignitary and sponsor. One of our greatest thrills was when Bonnie, Jasper and I were invited by Bobby Tanner to ride in the old Borax Wagons pulled by the 20-Mule Team in the Bishop Mule Days parade three years in a row (2012-2014). What an incredible honor that was!
 On January 1, 2017, the new Borax Wagons and the 20-Mule Team made their debut in the Tournament of Roses parade in Pasadena, California. They held a practice in the desert near Bishop before they left for the parade and the mules all did great! On the parade route, they would be asked to make a tight turn onto Colorado Avenue in the midst of a lively crowd and would be asked to “jump the chain” to make that turn. What a spectacular feat to behold and they did it beautifully on parade day.
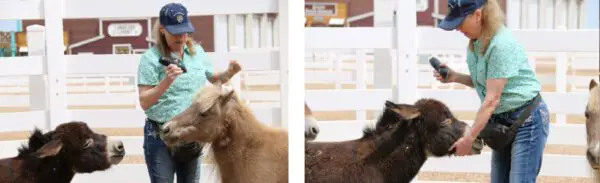
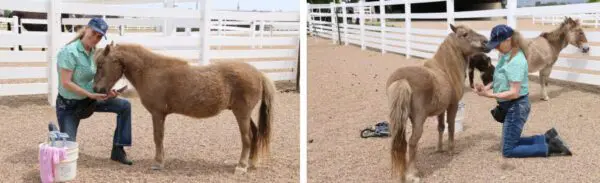
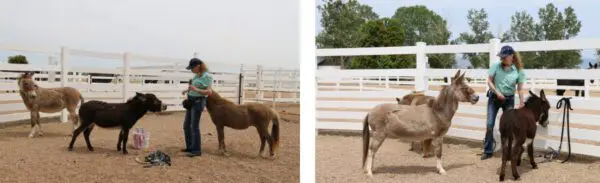
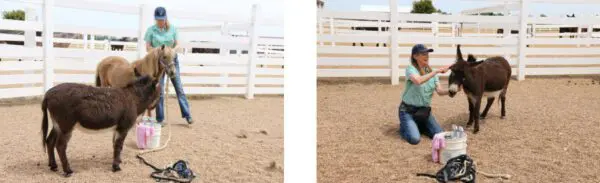
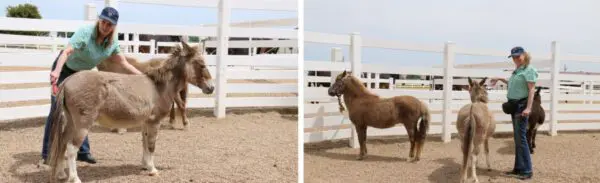
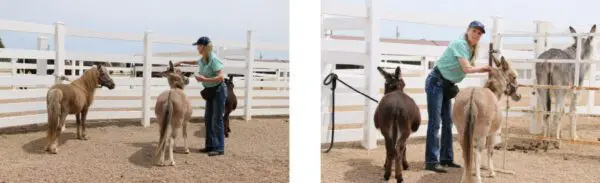

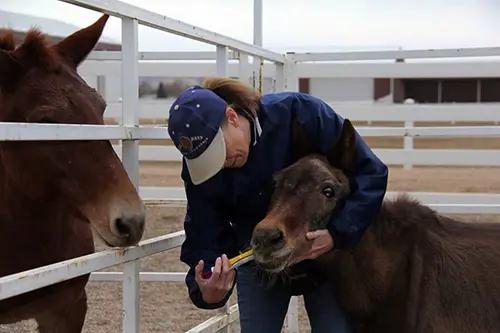
 Miniature horses, donkeys and mules all have one thing in common; everyone else is taller than they are! That makes eye contact with the trainer very difficult if not impossible for them. As the saying goes, the eyes are the window to the soul so it is understandable that they would become anxious if they are unable to look into a person’s eyes to decide whether they are friend or foe. I have five miniature equines: a mini horse named Mirage, a mini mule named Franklin, a mini molly mule named Francis, and two mini donkeys named Augie and Spuds. To help them all succeed and thrive, I’ve structured my training program for them based on the same one I use for all of my other equines, with one important modification. With safety always as my first priority, I work with my minis from a lower position whenever it’s safe to do so. That way, I can make eye contact with them, and I make certain they are always lavishly rewarded with an oats reward for their compliance. The results have been amazing! I’ve received total cooperation from them almost all of the time.
 None of my minis were born at my ranch, so I knew that they would each first need to explore their surroundings a little at a time, and would also need ample time to get used to my staff and me. Mirage, the miniature horse, was my first mini. It wasn’t long after I acquired him that I acquired Franklin, the mini mule, who quickly became Mirage’s buddy. Since both Mirage and Franklin had previous training and because minis seem to accept training more willingly when done with a partner, we did all of Mirage’s and Franklin’s groundwork lessons together and, true to form, they learned very quickly because they were allowed to be together.
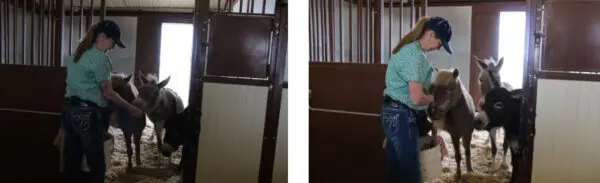
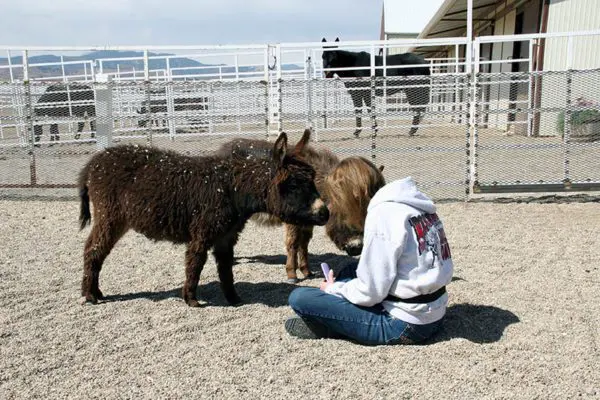 I think it is critically important that all equines have a space they can call their own—their personal oasis of comfort and privacy—so when I got my mini donkeys, Augie and Spuds, I decided that the first thing they would learn about was their living quarters or, as I like to call it, their “bedroom.”
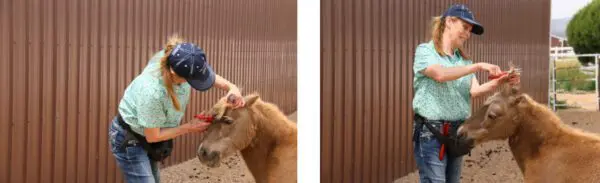
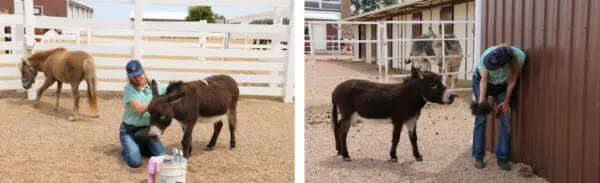
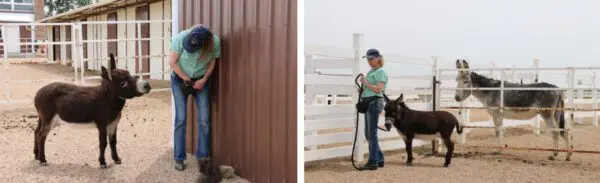
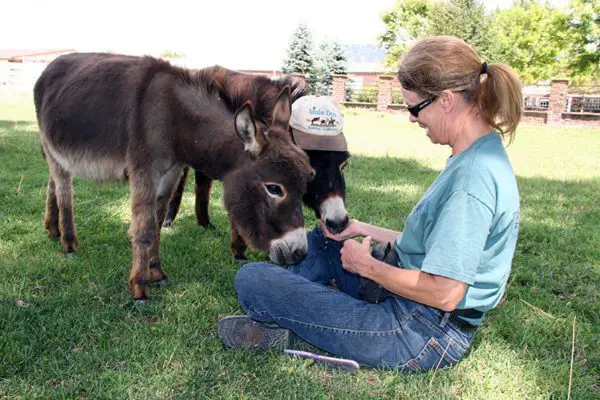 When your mini is comfortable with you coming into his pen and interacting with him, the next step is to ask him to go into a bigger turnout area, where you should repeat the same simple lessons. Now that your mini can be loose in a larger space, ask him to come to join you for another picnic. After a few times, bring a hairbrush with you (It’s the most efficient brush to use on donkey hair).
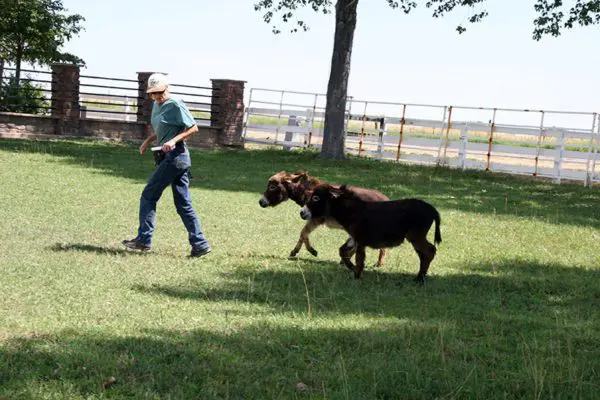 A halter doesn’t even come into play until after grooming in the pen is easily achieved and your mini will follow you to and from the pen without the halter. When it is time to introduce the halter, bring it with you into the pen for your picnic. Do the brushing and then show your mini the halter while you sit on the ground. When he sniffs the halter, he should be rewarded. Once he is unafraid of the halter, hold it on both sides of the noseband, feed your mini some oats, and then gently push the noseband of the halter over his nose and then take it off, rewarding him again. At this point you’ve got all kinds of oats in your lap and your mini’s got his head down, eating the oats, so when you put the noseband on again, just reach over his neck, grab the strap of his halter on the other side, bring it behind his ears and fasten it. If done correctly, this should not bother him. Then reward him with more oats, pet him as he complies and say, “Oh, how good is that?!” You can then take the halter off again and end the first lesson there.
 Once your mini is used to having his halter put on, let him graze while supervised in a larger pasture area with his halter on while he drags the lead rope behind him. When you want him to walk away from you, simply stand up and let him go off on his own. After a few minutes, approach him again, grab the end of his lead rope and sit down again. You can give a little tug, say his name and ask him to “Come.” He should come easily when you gently tug on his lead rope. This action makes him look at you and think, “Oh, my human is sitting down again, so I’m going to come over and get more oats!” As he comes toward you, take up the slack on his approach. Once he comes to you easily, you can stand up and ask him to come while you’re standing up and reward him for it. And that’s how to teach a mini to follow you.
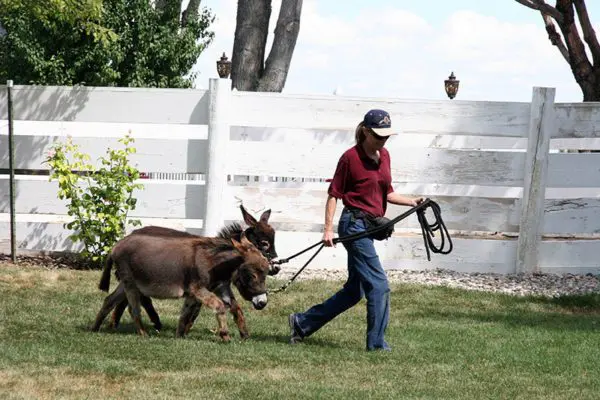 Breaking things down into little do-able steps seems like a long process in the beginning, but as your mini begins to understand the reasoning behind your approach, his reactions to tasks will become calmer, more automatic and more natural for him. When you allow your mini to learn to follow your lead without the halter in the beginning of each task, learning to follow you on the lead rope will be a lot easier for him, and when you finally move on to more specific tasks in training, he will oblige you much more willingly. In Part 2 of “Getting Down With Minis,” I will cover how to approach the tasks necessary for formal training.


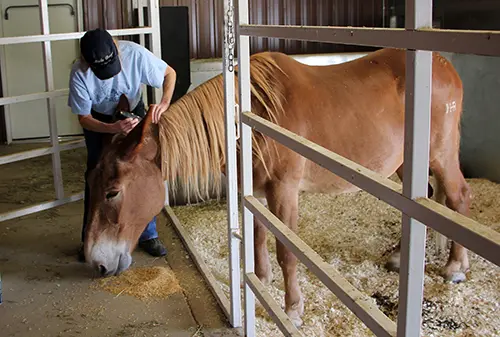
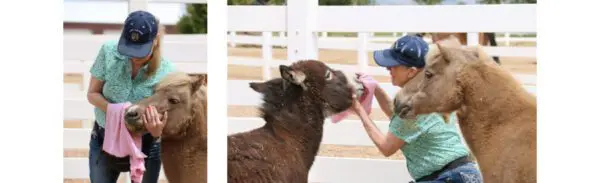
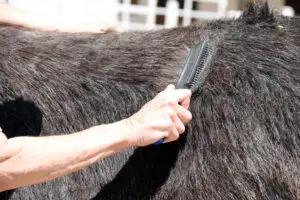 After grooming the left side, move to the right side. Brush the head with a Dandy brush and use a multi-bristled human hairbrush on the mane and tail. By adding a little Johnson’s Baby oil to the mane and tail during grooming, you can train a mane to fall to one side and keep other equines from chewing on manes and tails. Finish with a soft body brush. Finally, use the grooming cloth to wipe around the ears, face, eyes, nose, lips, sheath (if it’s a male) and the dock of the tail.

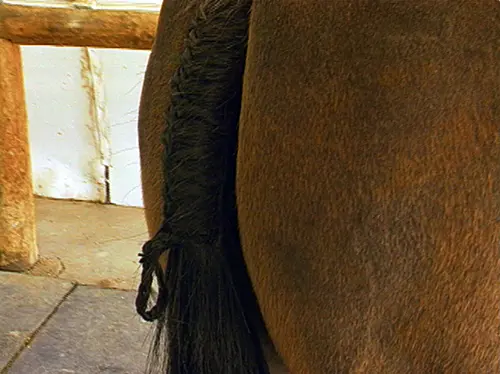
 You can spritz a little water and hair spray to make the hair easier to handle. The quickest way to secure the braids is by using tiny rubber bands. It’s also very easy to do and it’s great for one-day shows or quick changes between classes.


 Over the past few decades, through trial and error, we equine owners and trainers have discovered that, when communicating with our equines, harsh bits are not really necessary. Rather, it is safer and more beneficial to use milder tack and equipment, to concentrate on learning correct body language and to give clear cues with our hands, seat and legs to elicit the desired response from our equines.
 When it comes to rider/equine communication, bitless and/or brideless techniques do not work as well as the simple, direct rein action of the snaffle bit in concert with your seat and legs.Many people are under the impression that having a bit in the mouth is painful for an equine, and the seeming “nutcracker” action of the snaffle bit when it is in your hands suggests that it might pinch your animal’s tongue when you pull on the reins. The mouthpiece of the snaffle bit actually “breaks” in the middle, allowing it to slide easily across the top of your equine’s tongue. It does not pinch his tongue, but it does put pressure on the corners of his mouth. The snaffle bit is correctly defined as a bit that promotes “direct rein action,” meaning that when you pull right, you go right and when you pull left, you go left. A snaffle bit does not have a shank. If it did have a shank, it would be considered a curb bit, regardless of how short the shank really is (as is the case with a Tom Thumb bit).
 Learning to go forward in the beginning of your equine’s training in a snaffle bridle is paramount to properly developing his body so he will learn to carry a rider in a strong and solid frame and in good equine posture. The forward training teaches him to stretch his head and neck forward, to step well underneath his body to propel himself forward, and to elongate his overall frame to keep the vertebrae in his back from becoming compressed and rigid. When he is moving correctly in a straight line, he will have more suspension and flexibility to his gait, and when he turns he will be able to bend easily through his rib cage.
 Although it would seem that a bitless bridle could achieve this same end, it has a different action on your equine’s head and neck, which inhibits proper bending through turns. The straight forward motion can be achieved with a bitless bridle. However, reins on a bosal (a type of braided rawhide noseband used with the hackamore-type headstall), bitless bridle reins, and other bitless configurations do not have the same lateral effect on the equine’s head and neck as does the snaffle bit. The equine’s head and neck form two sides of a triangle. The rope reins on a bosal, although lower on the nose of the equine than reins that come from the corners of the mouth, can cause the equine’s head to twist slightly sideways during the turn because, during any directional indication, the rawhide bosal around the nose twists through the rope reins which are both secured together underneath the jaw. The rope reins pull the underside of the bosal in the direction of the turn, but the nosepiece goes the opposite way and can cause your equine to improperly tilt his head through the turns. On bitless bridles, the reins are attached substantially higher than the corners of the equine’s mouth. When you pull on the reins attached higher on the equine’s jaw than where the bit would be as is the case with a halter or bitless bridle, the angle of pull is sharper and more abrupt, since the head side of the “triangle” is so much shorter than the length of the neck. It will cause the equine to try to turn his head too sharply from the poll, which can cause kinks and pain in his neck.
 To prove the point, try this experiment. Preferably using an untrained animal, take hold of the halter and gently but firmly pull on the halter in an attempt to make him bend his head and neck to the side. The higher position of the halter is like a bitless bridle and you will feel slight tension and resistance to this action before the animal finally complies. Next, gently insert two fingers into one corner of the equine’s mouth while standing at his shoulder and by squeezing and releasing your fingers, ask him to turn his head and neck to the side toward you. If done correctly, without yanking on him, he should give easily to your cue to submit and turn his head and neck. You will notice that he extends his head and neck slightly forward before turning it to the side.
 Now try this action on yourself. Stand in good posture and, without extending your neck, turn your head to the side. Do you feel the tension at the brainstem on the back of your neck? Now, stand in good posture, stretch your neck in an upward and forward arc and then look around the turn. Can you now feel the release from tension in the back of your neck? Your equine experiences the same feelings. The shorter angle of the side-pulls and bitless bridles will have a more abrupt pull and can cause some pain, while the longer angle coming from the snaffle bit at the corners of his mouth will allow a smoother and painless response. NOTE: Any bit can be painful to an animal when in the hands of an inexperienced rider who uses only the bit for control.
 The equine that has not had this kind of advanced training will possess neither genuinely good posture nor the knowledge of how to respond correctly in an abrupt and unpredictable situation. He will be more apt to be frightened and, as a result, may bolt and run, putting you and everyone around you at risk. However, the equine that is properly and conscientiously taught how to communicate through the snaffle bit will be a safer and more reliable animal to ride and to take into public places. He has learned to stop and wait for cues (communication through the bit) and is less likely to bolt and run if frightened because he understands and trusts the communication coming from his rider. He will now be more correct and solid in his good posture, yielding confidence in his attitude, and he will be a more reliable pleasure and show animal to ride.