 By Meredith Hodges
My equines taught me that in order to make an educated decision about which tack and equipment to use, one needs to take into account the anatomy of the equine and the effect it will have on his body movement during different activities. Good conformation is important in allowing the equine to perform to the best of his ability, but so is developing core strength elements (muscles, ligaments, tendons, soft tissue and cartilage) such that the skeleton is ideally symmetrically supported. The equine’s body can then move freely and using his joints properly in good equine posture. This will add longevity to his use life and will minimize arthritis and other problems during his life. Lower vet bills are always a bonus!
Feeding: When developing the equine’s body, it is important to know what feeds are the healthiest for him. There are lots of different ways to feed your equines today, but I have found a regimen that works best. I did this through constant and continual research using a field study for more than 50 years with 32 equines of varying breeds, types and sizes.
- Most feeds are tested in laboratories.
- Dehydrated feeds take fluids from the digestive tract and can cause choking (researched with my vet). You cannot add enough water to replace the fluids that are naturally in the digestive tract.
- The oats, Sho Glo, Mazola corn oil and grass hay produce ideal body shape and conditioning, even with minimal exercise.
- Sho Glo gives the body the nutrients it needs for daily maintenance.
- Supplements should not be fed without first getting a base line of what the animal is lacking.
- Salt and other minerals should be free fed in a trace mineral salt block. White salt alone, or minerals measured and put in the feed, can often be the wrong amounts.
- The equine will use the trace mineral salt block when and how often they need to. It is their “Natural instinct.”
- Mazola corn oil (no other) keeps the hair coat healthy, the feet ideally lubricated and hard, and maintains the ideal conditioning of the digestive tract regularity.
- We feed a Brome/Orchard Grass mix that we harvest ourselves. We feed the hay three times a day and the oats mix once a day in the evenings. Never feed broad leaf hay like Alfalfa, Clover or Fescue Grass Hay.
- Fescue Grass Hay has been proven to cause spontaneous abortions. Since it has this toxic effect, it would probably not be good for any equine, pregnant or not.
- Our equines are kept in dry lots, or stalls and runs. We limit their turnout to five hours a day to prevent obesity and other problems like allergies, prolonged exposure to flies and other insects that live in the grassy pastures.
- Use no types of rewards or “treats” besides crimped oats (or any other kind that is broken open). They cannot digest whole oats, and other “treats” can cause gas or other irregularities in the digestive tract that can lead to colic, twists, founder and even allergies.
- Our equines are wormed with Ivermectin every other month with the cycle broken in November with Strongid. This regimen prevents the cycle of worms (No fecal tests are needed because the larvae never have a chance to mature and show up in the manure).
- This regular and frequent use of Ivermectin helps to repel flies along with a weekly spray of Farnam Tri-Tech 14 (sometimes twice a week if the flies are inordinately thick). Ivermectin is a totally safe drug and their bodies do not build up a resistance to it.
Most equines on other kinds of feeding programs develop bodies with a protruding spine and a “hay belly” hanging from it. The shape is quite different from a balanced body with core strength. They have an indentation along both sides of the spine instead of having a spine that “melds” into the torso with uniform conformity. My feeding program produces an ideal body shape with ALL my equines with minimal exercise. The SHAPE of the animal’s body is important for the correct fit of the tack and equipment.
Tack and equipment should fit YOU and YOUR EQUINE like a glove. This will minimize resistive movement that can interfere with your equine’s posture and ability to travel smoothly. When tack and equipment is stabilized, it is easier for you to stabilize your balance seat and improve your riding ability. There are so many saddles and tack to choose from these days that it can be quite daunting. Choices can be difficult for both riding and driving.
The tack and equipment we use has an effect on the equine’s movement in spite of his shape. In order to obtain freedom of movement, the elements of the equine’s anatomy must be considered so he is allowed to move freely through every joint of his body.
Mule Bars are not necessary if you have a well-made saddle and have a professional saddle maker shave the saddle tree flat at the gullet. My 1972 Circle Y Stock, Equitation and Longhorn saddles have worked on all my mules for more than fifty years with that minor adjustment.
If you want to be able to balance your own body in the saddle, it not only needs to fit your equine, but it needs to fit YOUR body as well. The saddle needs to sit LEVEL across his back so you can sit up straight in a balanced position with the only deep contour directly below your seat bones. The rest of your body should be able to move freely through your hip joints You should be able to comfortably sit up straight with your legs resting relaxed below your core that is located behind your belly button. Your relaxed legs should gently “hug” your equine on both sides with your whole body perpendicular to the ground when halted. This way, cues from your legs will not be abrupt and come out of nowhere to startle the equine. Saddles that restrict your position are not really a help to balance your seat and make cues effective.
The stirrups need to hang straight down over the center of balance on the equine, in the MIDDLE of his torso. Stirrups with Tapaderos can be safer that those without, but if the toes on your boots are too pointed and too long, they can actually hinder you from keeping your feet securely in the stirrups. You should never wear tennis shoes, or shoes with no heels, when riding. Ideally, your weight should be on the ball of your foot with the heel of your boot touching the back of the stirrup to keep your feet from sliding through the stirrups.
The saddle should not simply be PERCHED on top. When you get on, you should be able to easily find the place for your seat bones over the center of gravity. Most saddles appear to be too high in the gullet with too many contours, and with insufficient body condition, it puts localized pressure that can cause chafing on both sides of the animal instead of spreading the pressure points over a wider area underneath the saddle. The saddle should fit such that it is stabilized on the equine when all girths and straps are secured. It will move WITH the animal without excess movement.
Localized pressure is particularly prevalent with sawbuck pack saddles. That is why you see so many pack mules with white spots at the withers…unbalanced loads that will shift. When the horn sits lower and the saddle pressure is spread across a wider area, the pressure is more comfortable for the animal and will not cause chafing. The saddle horn is another consideration. They are built in so many different ways, but a lot of those ways are cosmetic and often dangerous. Vaqueros that worked regularly with cattle and horses built their saddles with a thick and functional horn. The horns on a lot of saddles are built for function, but there are many that are simply cosmetically built. They are often too high and too narrow…a hazard if you happen to get thrown onto them.
When a saddle does not allow you to ride a balanced seat, it creates unnecessary restive movement that can aggravate the equine and cause them to buck, run off, fall, or worse. Moving WITH the equine’s movement is essential. When your movement is blocked with things like dysfunctional swells in the saddle’s construction, or protrusions that are designed to keep your legs from sliding forward, it prevents you from keeping your balanced seat while following the equine’s motion. I have seen lots of people that get slung over the saddle horn and onto the neck when the equine resists. A girl friend of mine landed right on the saddle horn during an altercation like this with her equine and it still causes her pain, even today, after surgery to fix the injured area. Jumping in a Western saddle with a horn is dangerous and not recommended.
Trees of the past were often fashioned after that of a McClellan saddle that naturally molds itself to the equine structure. They have an open gap across the spine and are not padded in-full the way our modern saddles are…and they can be pretty hard on your rear when you ride from your seat bones. It occurs to me that these saddles were preferred by men because they also left more room for the genitals, although I have never seen this mentioned! However, I have heard cowboys complain about riding a balanced seat because they say it hurts THERE when they do!
I like to use cotton, or Mohair, string girths in front because they will stretch slightly, allow air flow and easy breathing. Beware of nylon string girths that can cause chafing because they do not stretch as well. I like leather girths for the back girth. When leather is properly cured and kept conditioned, it pretty much holds it shape, but will stretch a bit with the warmth from the equine’s body. This is why girths should be tightened a little at a time with a final check after riding for about 10-15 minutes. It is the same for the whole saddle. Saddles that are not made from leather do not mold and stretch with the equine’s body, and will wear out quicker that leather that is well managed.
The front girth should be snug, but not too tight. The back girth should be snug, but not as tight as the front girth. The two girths should be held together underneath with a leather strap that keeps them each in their respective place perpendicular to the ground. The back girth should be perpendicular to the ground and not on an angle to the rear in front of the flanks. They were developed only to hold down the back of the saddle (invented by ropers to balance the saddle when the steer is stopped).
Using the back girth to hold the saddle back might seem like a good idea, but it puts the pressure on the fragile undercarriage rib bones that can fracture easily. The under-carriage rib bones beneath a properly placed back girth are thicker and less likely to fracture under abrupt pressure. It can also cause too much pressure on the female genitals and small intestines, restricting optimal organ function. The rear girth should always be attached to the front girth underneath, hang perpendicular to the ground and should only be snug enough to keep the back of the saddle down.
ANY strap or girth that is too tight will irritate the equine and cause bad behaviors, chafing and saddle shifting. Any strap, or girth that is too loose, will not do its job, interfere with the equine’s ability to balance his body and will cause chafing.
As you learn to ride correctly and in balance, you also learn how to ride supportively by balancing on your seat bones with weight from your core (behind your belly button) going down through your legs and up through your torso. You can take the stress out of going uphill and downhill by staying relaxed in the saddle, rocking your weight through your core over your seat bones and by keeping your body in good posture.
Do not jam your heels down. Rather, think of keeping your toes up to stay relaxed. Lean the upper body back when going down hill, and forward when going up hill. Keep your upper and lower body in a straight line that operates from YOUR CORE, located behind your belly button. Think of the relaxed position of the Man from Snowy River as he was going over the cliff. Think of how Bronc Riders and Bull Riders balance just to stay on for eight seconds! Your SEAT is the fulcrum of a balanced, teeter-totter motion that will AID your equine in his movement and allow you to stay on board easily.
The shoulders on the equine are only attached with cartilage and need to be able to “float” freely forward with the legs through the front quarters when in motion. This means that the saddle should fit your equine like a glove and rigged so it cannot slide forward over the Shoulder Blades. When you sit on a horse bareback, your legs will find the “groove” right behind the shoulder blade.
Breast collars are generally used with horses to keep the saddle from sliding backward. Breast collars are not advised to use with mules and donkeys. They are anatomically different from horses. They do not have as prominent withers and there is a muscle that is located right where your legs fall into the “groove” on a horse. Their torso is comprised of smooth muscle and is straighter across and more compact than that of the horse that possesses more bulk muscle. The natural tendency on a mule or donkey is for the saddle to slide FORWARD, into the shoulder blades. It is advisable to use cruppers or breeching to help the saddle stay stabilized.
When in harness, the collar and traces should be fitted along the same angle as the shoulder blades and the point of draught should be at the base of the neck. The collar should be two inches larger around the neck to allow for free movement. A breast collar and traces should ride from the base of the neck. The breeching should be tight enough to enclose the equine comfortably in the harness assembly so they can easily go forward, or back up, with the immediate response of the vehicle. The tugs will carry the weight of the shafts and will aid in the movement.
People talk about allowing airflow to keep the spine depressurized and cool underneath the saddle. They use thicker therapeutic pads, or pads that are pre-shaped, stiff and sit stiffly on the equine’s back. I prefer to use Navajo blankets, and with older animals, or animals with higher withers, I will add a fleece pad underneath it. This allows for more flexibility, compression and molding of the saddle and blankets across the animal’s back…like a glove. To allow for more airflow, you just stick your arm under the blanket and across the spine before you tighten the girth. The blankets will move upward into the gullet and provide protection of the spine from any undue pressure. If the animal is in good equine posture with core strength in a solid balance, the saddle and equine will move as one with minimal abrasive movement. These can easily be kept clean by washing them in a washing machine and hang drying.
An animal with insufficient conditioning and balance will hollow his back and neck and try to compensate for his inefficiencies in muscle conditioning and movement. When the equine’s tack and equipment fit properly, the extremities have full range of motion so he can pick each step with confidence and no obstructions. When the skeletal system is adequately supported with symmetrical muscle strength and especially over the top line, the animal is better equipped to use his body efficiently.
Weight & Ability of the Rider will determine how much pressure is put against the animal and how much resistance it will cause. Even though mules can carry proportionately more weight than a horse of the same size, this doesn’t mean you can indiscriminately weight them down until their knees are shaking. Be fair and responsible and do your part in the relationship. Do not expect the animal to carry an obviously overweight body that doesn’t know how to control itself! Learn to ride a balanced seat and practice the basics EVERY TIME YOU RIDE!
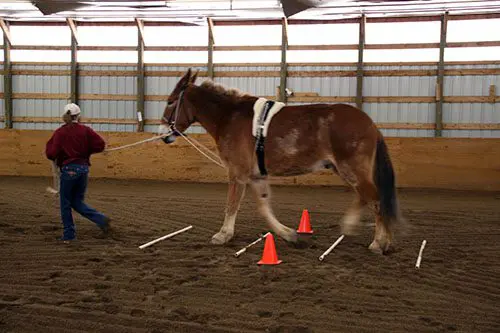
Participate in training activities that prepare you both, first with Groundwork and later under saddle. ALWAYS FOLLOW BASIC GROUNDWORK RULES for Leading, Lunging and Ground Driving! When Leading the equine, learn to hold the lead rope in your LEFT hand, keep his head at your shoulder, match your steps with his front legs, point in the direction of travel with your right hand and look where you are going. Walk straight lines, gradual arcs and square him up with equal weight over all four feet EVERY TIME you stop.
We are building NEW habits in their way of moving and the only way THAT can change is through routine, consistency in the routine and correctness in the execution of the exercises. Since this also requires that you be in good posture as well, you will also reap the benefits from this regimen. It is important to lead this way because if you carrying the lead rope in your hand closest to the halter, it will not promote self-body carriage in the equine. With every step you take, your hand moves (however slightly) to the right and left, and this will adversely affect his balance. Remember, that equines balance with their head and neck!
When Ground Driving, let your steps and hands follow the hind legs. Along with feeding correctly (as described), these exercises will help equines to drop fat rolls, to begin to take on a more correct shape and they will become strong in good posture. Learning to WALK in sync with your equine during Groundwork will make it easier for you to RIDE in sync with your equine.
Correct saddle placement is critical for the comfort and freedom of movement for your equine. The saddle should be placed over the center of balance, in the MIDDLE of the equine’s back, well behind the shoulder blade. Putting the saddle on a Longears is not the same as putting the saddle on a horse, or pony. Longears have a steeper angle at the shoulder and putting the saddle directly behind the withers as you do on a horse with a 45 degree angle (that sets the saddle further back), will position the saddle too close to the shoulder blade. The saddle should sit well behind the withers on a Longears and clear the shoulder blades to allow for maximum range of motion, proper balance and to prevent galling of the sensitive skin underneath and in front of the girth area just behind the forearms. It will help you know where to place the saddle if you just think about placing it in the middle of their back, then run your arm through the gullet under the saddle blanket, or pad, to allow for air flow over the spine. One way to tell if your saddle is placed correctly is to notice where your girth is hanging. Make sure that the girth is hanging 3-4 inches (about a palm’s width) behind the forearm and not right behind the forearm where the skin is thinner and more sensitive. This position is where the belly begins to swell and the skin is thicker.
The saddle can easily slip forward if not secured with a crupper snugly fit to the tail with a solid D-ring attached to your Western, English or Side Saddle. If you are using an English or Side Saddle, in order to attach the crupper, you can use a metal “T” that slides underneath the seat between the two sides of the padding. Chafing of the tail from the crupper can be prevented by making sure it is snug, but not too tight, or too loose. When you use a sparing amount of Johnson’s baby oil in the mane and tail during grooming, it will keep the skin underneath the tail from chafing. Johnson’s Baby oil will also prevent equines from chewing on each others’ tails. Mules generally have more swell to their barrels to stop a saddle from sliding backwards than horses. For this reason, Longears will not necessarily need a breast collar (but they do look prettier when the rigging is balanced for a parade!).
A breast collar can actually be counterproductive when trail riding. It will tend to pull the saddle forward and closer to the withers This would be out of alignment with the center of gravity on a Longears. Before you mount, ask your equine to stretch his front legs forward, one at a time, to clear any skin that could get creased under the girth area and to help the girth to lie flat against the skin. I prefer using string girths with all my saddles (English & Side Saddles included). They tend to lie flatter and allow for adequate air circulation and free movement to prevent excessive sweating that can cause chafing in that area.
If you have given attention to all the details necessary to make sure your equine is comfortable in his tack and equipment, and if he has been privy to all the Groundwork necessary for strong and balanced postural core strength, then mounting should never be an issue at all. He will possess the strength to hold fast to his good equine posture when standing still and your tack and equipment should not shift and make him want to move. Equines become disobedient when they experience a loss of balance. When your equine is slowly and adequately prepared to carry a rider, or pull a vehicle, you are better able to enjoy your time together!
Losses of balance can occur under a variety of circumstances. Paying attention to all the details in preparation for riding that I have described here will prevent most situations where the equine can suffer a loss of balance. Strong postural core strength can allow the equine to stand still while you mount and prevent his moving or running off when being mounted. Yes, you can teach him to sidle over to the fence or a mounting block, but that won’t help you on the trail! A strong and balanced equine with adequate core strength and good posture will be a calm and more confident companion. He will be happy to oblige your every command because he CAN do what you ask!
To learn more about Meredith Hodges and her comprehensive all-breed equine training program, visit LuckyThreeRanch.com, MEREDITH HODGES PUBLIC FIGURE Facebook page, or call 1-800-816-7566. Check out her children’s website at JasperTheMule.com. Also, find Meredith on Pinterest, Instagram, MeWe, YouTube and Twitter.
Covered in TRAINING MULES & DONKEY: A LOGICAL APPROACH TO TRAINING, TRAINING WITHOUT RESISTANCE, EQUUS REVISITED and A GUIDE TO RAISING & SHOWING MULES at www.luckythreeranchstore.com.
© 2013, 2016, 2024 Lucky Three Ranch, Inc. All Rights Reserved.

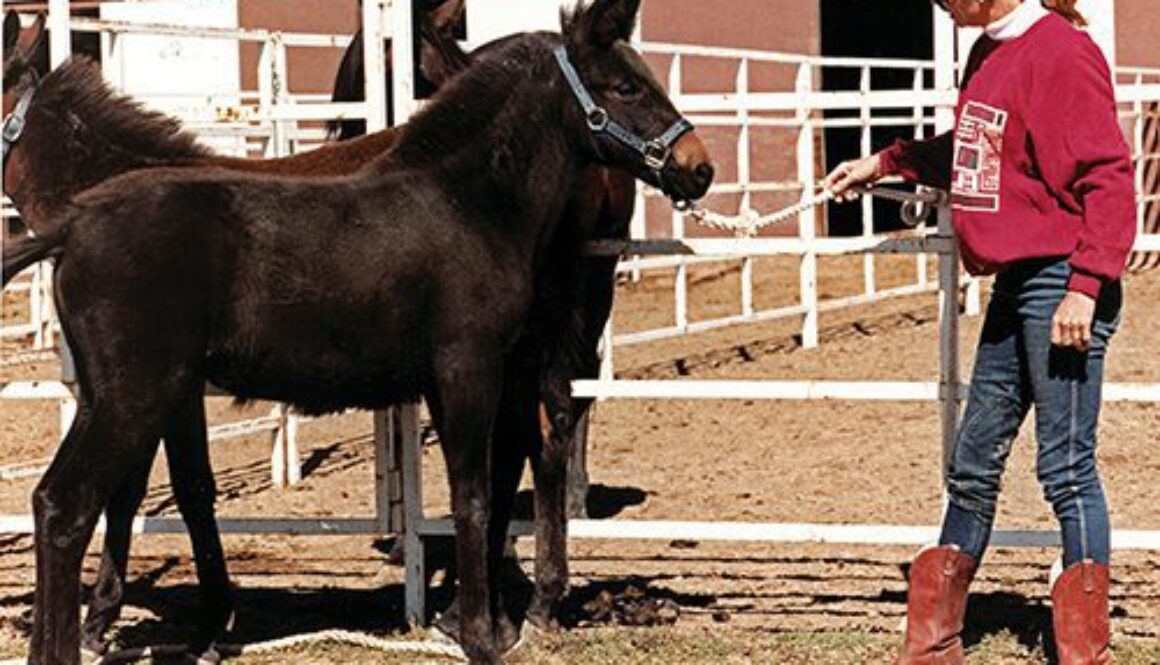

 Instead of going on the road to do clinics, I thought long and hard and decided to do an equestrian correspondence training course instead. I opted for this after considering that when I went to clinics as a student, I was one of 20 people and only got limited attention during those clinics. When I put into practice at home what I had learned at the clinics, I realized that I had only received the highlights of training and it was full of holes! When I tried to contact the clinicians to ask a question, I was either answered by someone in the office, or not answered at all. The clinicians were most often too busy and out of touch. The one thing I didn’t realize by making this decision was the incredible learning opportunity I had opened up for myself that I could, in turn, pass on to my clients.
 When they told me mules would not work well in a snaffle bit, I learned how to make that work. When they said they were not suitable for Dressage, I based my entire training program on those principles. When they told me not to give food rewards, I paid my mules for their efforts with a generous reward of crimped oats. When they told me not to talk to my equines, I spoke three languages to them: verbal language, body language and “touch” language. I can truthfully say that today I realize that it wasn’t the mules that were so stubborn, but rather…it was me! This positive kind of stubbornness did pay off, as I was to soon discover.
 Little Jack Horner had gone through my entire training series right along with my mules and had learned everything that I taught them. He may not have made it to Fourth Level Dressage, but he made it to Second Level Dressage with gait lengthening and lateral work. He overcame his “donkey” behaviors and gave a phenomenal performance, jumping four feet in exhibition at Bishop Mule Days. His Reining was accurate though somewhat limited by his donkey conformation. Still, he could always elicit a supportive laugh and a wide grin! He competed successfully at dressage driving shows and won world championships in driving at Bishop Mule Days.
 It was during this experience that I realized that Little Jack Horner had become deaf and could not hear one word of what I was saying, even when I was yelling. I was sitting in the Meadowbrook cart, he had blinders on his harness bridle and could not see me, so verbal language and body language were of no help to him at all. Lucky for us, we still had the “touch” language that we had developed between us and we thoroughly enjoyed the experience of driving yet again.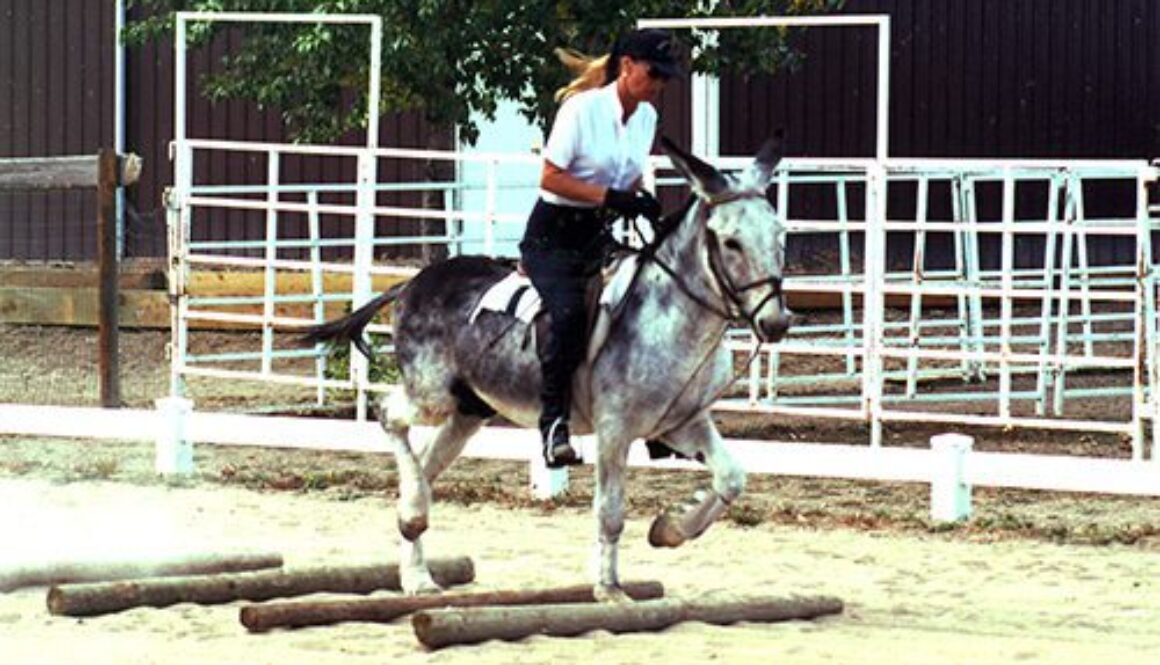
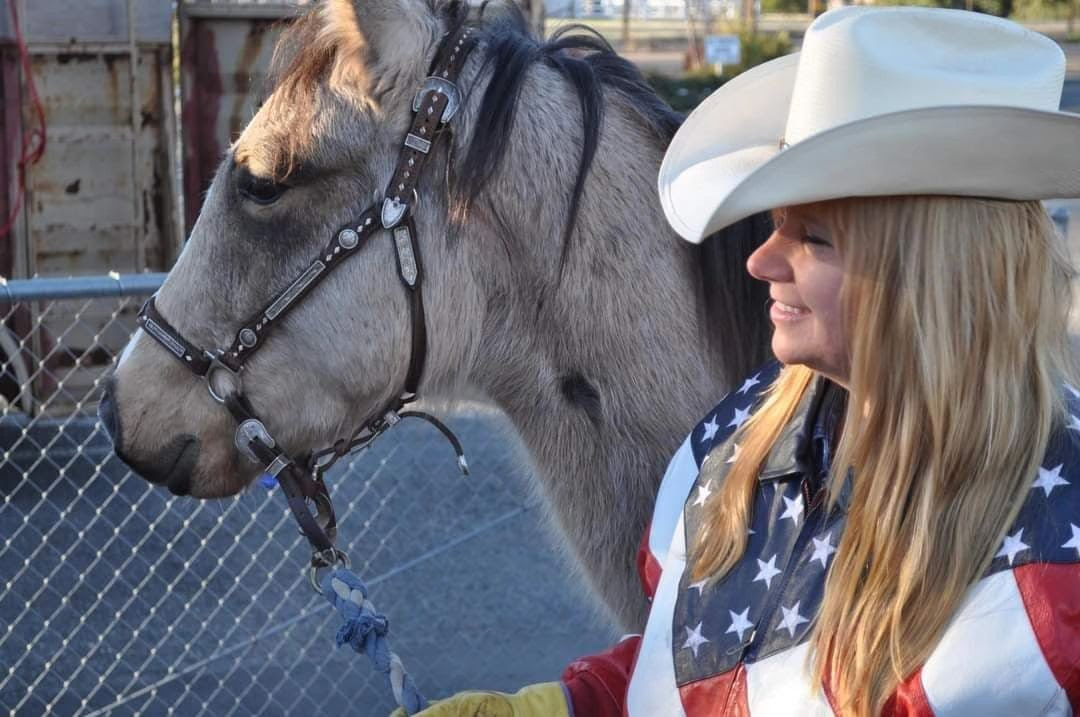


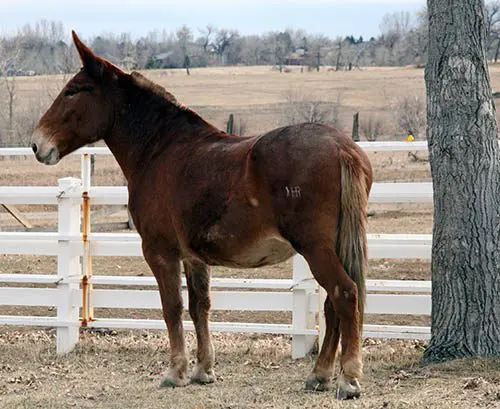



 Although he is often confused with his sire, the donkey, the mule is the symbol of neither the Republicans nor the Democrats. During past political campaigns, certain Republicans actually declined to have their picture taken with a mule, because they were either ignorant of the difference between a mule and a donkey, or they were afraid that the mule would be mistaken for the Democratic Party’s symbol—the donkey.
 Mule stories from the past are numerous in this great country of ours. The number of mules (and horses) in the U.S. peaked in 1919, at 26.5 million. The United States of America was quite literally built on the backs of its mules—they pulled supply wagons in the cities, forged west with the early settlers across the vast prairies, packed hunters’ gear in the mountains, plodded underground with the coal miners and plowed the Southern cotton fields. They have participated in war alongside our brave soldiers, and have found their place in the field of entertainment. They even helped with the excavation of the Pasadena Rose Bowl.
 After the onset of the Industrial Revolution, the number of mules in the U.S. declined, and in 1967, there were less than ten thousand. But happily, in recent years, renewed interest and public awareness have sparked a steady increase in the mule population.
 Obviously, I have one of the worst cases of “Mule Fever” ever suffered! But then, here I am—older, wiser and without any broken bones due to my association with mules. In fact, I can say my life was saved by one of my own mules. I was on my mule, Mae Bea C.T., leading a group of four trail riders on horses up a switchback in the Rocky Mountains, when the trail began to get very narrow. It was 100 feet straight up on the right and 100 feet straight down on the left! I could not see very far ahead because the two-foot trail wrapped around a huge boulder and blocked my forward vision. As I rounded the boulder, with the horses right on my rear, I was faced with a trail that disappeared into a wide landslide of small rocks. I couldn’t go forward and, with the horses directly behind on the wider part of the trail, I couldn’t back up. The horses could turn around where they were, but I couldn’t. I waited for the horses to get turned around, and then indicated to Mae Bea C.T. that I wanted a tight turn on the haunches. She sat her rear back on her haunches and swung her front legs over the 100-foot drop in a smooth and effortless 180-degree turn, facing next in exactly the opposite direction. She then stopped and waited for my next cue to lead the horses safely back down the trail. I shudder to think what could have happened had she been a nervous horse.
 Although the therapeutic value of the mule goes back as far as his own history, the idea of intentionally using mules for actual therapy did not come until much later. One of the most successful therapeutic stories involving mules is that of the Vision Quest Wagon Train. Vision Quest founder, Bob Burton, had a dream to use mules and the discipline and hard work of a real wagon train to help troubled kids. So, in 1976, the first Vision Quest Wagon Train was launched. In this life-changing program, 36 at-risk teens were required to spend one year traveling with six mule-powered wagon teams that went south in the winter and north in the summer. During the journey, the kids learned positive social skills and responsibility in caring for themselves and for their animals, with a solid success rate of 60 percent. (Mules really do make the best teachers!) Today, plans are being made on Facebook for a Vision Quest Wagon Train Reunion in 2012. Clips of the Vision Quest Wagon Train journeys can be seen on YouTube.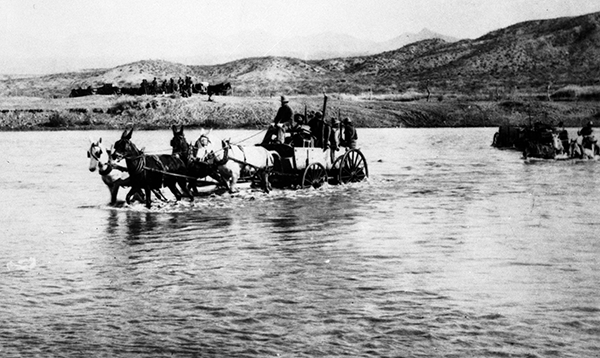
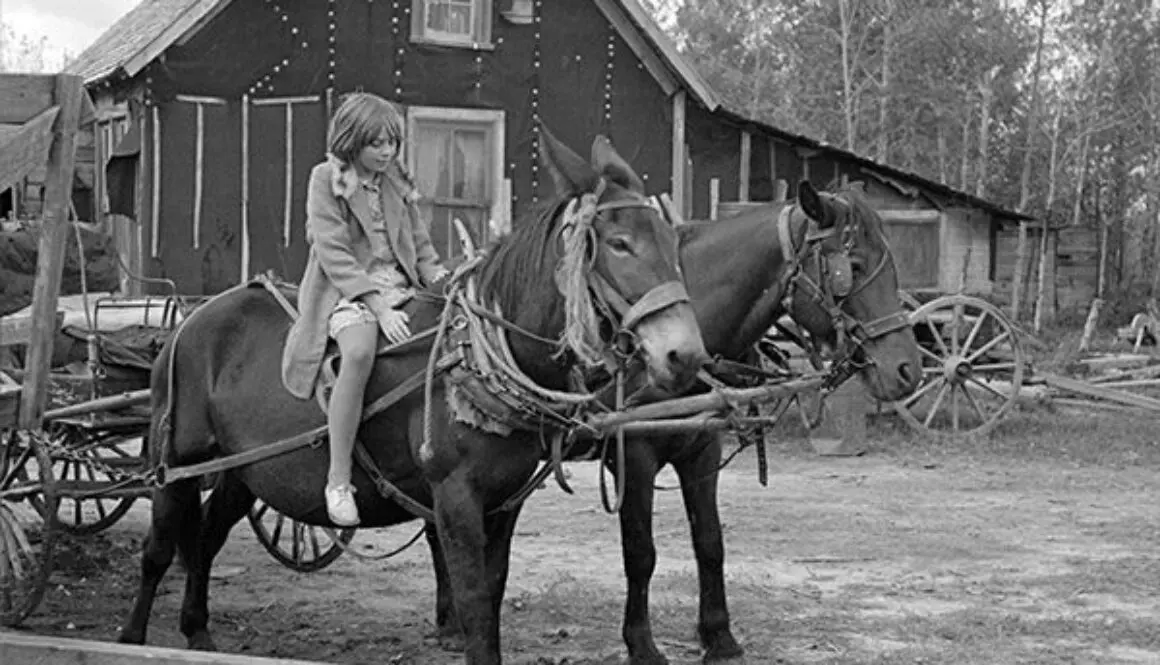
 Long before the Founding Fathers drafted our constitution, America began as a religious nation under God, and the mule has his roots in religion just as does the country he has helped to build. The mule of today’s ancestor is the donkey, mentioned in the Bible numerous times as an animal respected by God and blessed by Jesus Christ. The donkey was even chosen to bring Mary and Joseph to Bethlehem and, later, acted as the mount Jesus himself used for his ride into the city of Jerusalem.
 Mules are the true professionals of slapstick humor and professional psychotherapy! When you get into an altercation with a mule, you will seldom get hurt, but you will surely be set straight in a most humiliating way.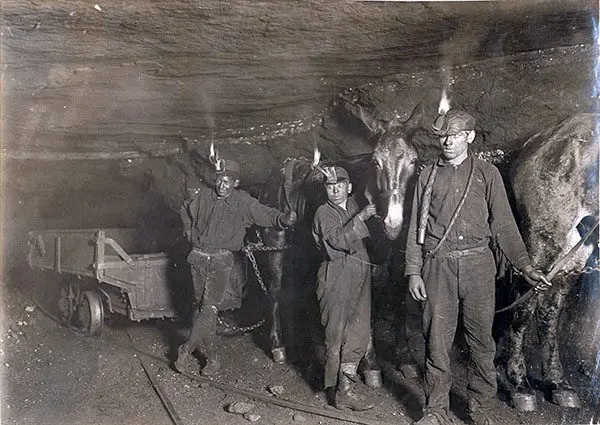
 “Mules are the living symbols of the historic and pioneer spirit of the West. Mules were the pack animals of Spanish padres and grizzled prospectors. These animals have a dominant place in frontier history. From 1883 to 1889, the 20-mule teams moved 20 million pounds of borax out of Death Valley, California, to Mojave—165 miles away—traveling 15 to 18 miles a day. The 20-mule teams, the dramatic solution of a transportation problem, soon became a world-famous symbol, the trademark first of the Pacific Borax Company and, today, of the many products made by U.S. Borax.” 2 So began the mule’s vital contributions to industry and the economy.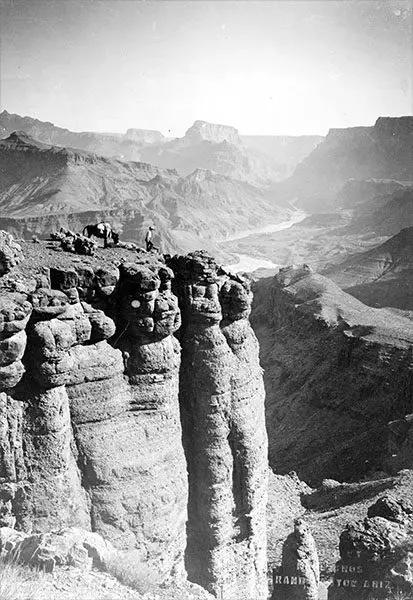

 Even if all I was going to do was rescue equines, I knew I would have to have at least some experience in equine management and training, so I read numerous training books and attended many clinics and seminars. The more I learned, the more overwhelmed I became. There were so many vastly different ideas about how to do things with equines. Different authors wrote about different stages of training and they all had a different approach. There was no one author who produced anything with continuity from foal all the way to advanced levels of training. To make matters worse, in the early 1970s when I got involved with Longears, I found that there was virtually nothing available about training them for recreational purposes. That is when I decided to begin documenting everything I learned that worked well (and forgot about what didn’t).
 Like most people, I started off thinking that leaving equines to just be equines without human interference was the ideal. Oh, how they would just love to exist in a large plot of pasture to live out their days in leisure! I soon found out how deadly that could be to an equine. Equines in the wild will travel for miles, exercising and grazing sporadically, balancing their diet and exercising themselves. Since the majority of the world’s equines are not wild and can no longer run free (no more wide-open spaces available), leaving them alone in a pasture to eat freely only results in obesity and all the ailments that go with it. In reality, allowing this “free grazing” is a passive form of neglect, and is usually the result of just plain human laziness. Equine owners may often feel like they “do not have the time” to do everything correctly, when, in actuality, it takes less time (and is less costly) to correctly feed, manage and train equines. That is how I can successfully be the sole trainer of 30 equines at this late date in my life.
 Trainers in general advise owners to set things up so it is hard for the equine to do the wrong thing. Why not just concentrate on setting him up to be able to easily do the right thing? Wouldn’t you get a better reaction from your equine if he received rewards for a job well done rather than focusing on the punishments and intimidation if he didn’t comply?
 Restraints should only be used to suggest compliance to the equine and not for complete control over any resistance. Patience, calmness and purposeful action during the use of restraints are all paramount in teaching the equine how to cope with things that are difficult for him. In the use of restraints, one runs the risk of being more severe than intended, which will have a negative impact on the equine’s response to the restraint used. I have discovered some very simple restraints that work well.

 By Meredith Hodges
 Feeding: When developing the equine’s body, it is important to know what feeds are the healthiest for him. There are lots of different ways to feed your equines today, but I have found a regimen that works best. I did this through constant and continual research using a field study for more than 50 years with 32 equines of varying breeds, types and sizes.
 Most equines on other kinds of feeding programs develop bodies with a protruding spine and a “hay belly” hanging from it. The shape is quite different from a balanced body with core strength. They have an indentation along both sides of the spine instead of having a spine that “melds” into the torso with uniform conformity. My feeding program produces an ideal body shape with ALL my equines with minimal exercise. The SHAPE of the animal’s body is important for the correct fit of the tack and equipment.

 The stirrups need to hang straight down over the center of balance on the equine, in the MIDDLE of his torso. Stirrups with Tapaderos can be safer that those without, but if the toes on your boots are too pointed and too long, they can actually hinder you from keeping your feet securely in the stirrups. You should never wear tennis shoes, or shoes with no heels, when riding. Ideally, your weight should be on the ball of your foot with the heel of your boot touching the back of the stirrup to keep your feet from sliding through the stirrups.
 Localized pressure is particularly prevalent with sawbuck pack saddles. That is why you see so many pack mules with white spots at the withers…unbalanced loads that will shift. When the horn sits lower and the saddle pressure is spread across a wider area, the pressure is more comfortable for the animal and will not cause chafing. The saddle horn is another consideration. They are built in so many different ways, but a lot of those ways are cosmetic and often dangerous. Vaqueros that worked regularly with cattle and horses built their saddles with a thick and functional horn. The horns on a lot of saddles are built for function, but there are many that are simply cosmetically built. They are often too high and too narrow…a hazard if you happen to get thrown onto them.
 Using the back girth to hold the saddle back might seem like a good idea, but it puts the pressure on the fragile undercarriage rib bones that can fracture easily. The under-carriage rib bones beneath a properly placed back girth are thicker and less likely to fracture under abrupt pressure. It can also cause too much pressure on the female genitals and small intestines, restricting optimal organ function. The rear girth should always be attached to the front girth underneath, hang perpendicular to the ground and should only be snug enough to keep the back of the saddle down.
 The shoulders on the equine are only attached with cartilage and need to be able to “float” freely forward with the legs through the front quarters when in motion. This means that the saddle should fit your equine like a glove and rigged so it cannot slide forward over the Shoulder Blades. When you sit on a horse bareback, your legs will find the “groove” right behind the shoulder blade.
 They do not have as prominent withers and there is a muscle that is located right where your legs fall into the “groove” on a horse. Their torso is comprised of smooth muscle and is straighter across and more compact than that of the horse that possesses more bulk muscle. The natural tendency on a mule or donkey is for the saddle to slide FORWARD, into the shoulder blades. It is advisable to use cruppers or breeching to help the saddle stay stabilized.
 An animal with insufficient conditioning and balance will hollow his back and neck and try to compensate for his inefficiencies in muscle conditioning and movement. When the equine’s tack and equipment fit properly, the extremities have full range of motion so he can pick each step with confidence and no obstructions. When the skeletal system is adequately supported with symmetrical muscle strength and especially over the top line, the animal is better equipped to use his body efficiently.
 Participate in training activities that prepare you both, first with Groundwork and later under saddle. ALWAYS FOLLOW BASIC GROUNDWORK RULES for Leading, Lunging and Ground Driving! When Leading the equine, learn to hold the lead rope in your LEFT hand, keep his head at your shoulder, match your steps with his front legs, point in the direction of travel with your right hand and look where you are going. Walk straight lines, gradual arcs and square him up with equal weight over all four feet EVERY TIME you stop.
 Correct saddle placement is critical for the comfort and freedom of movement for your equine. The saddle should be placed over the center of balance, in the MIDDLE of the equine’s back, well behind the shoulder blade. Putting the saddle on a Longears is not the same as putting the saddle on a horse, or pony. Longears have a steeper angle at the shoulder and putting the saddle directly behind the withers as you do on a horse with a 45 degree angle (that sets the saddle further back), will position the saddle too close to the shoulder blade. The saddle should sit well behind the withers on a Longears and clear the shoulder blades to allow for maximum range of motion, proper balance and to prevent galling of the sensitive skin underneath and in front of the girth area just behind the forearms. It will help you know where to place the saddle if you just think about placing it in the middle of their back, then run your arm through the gullet under the saddle blanket, or pad, to allow for air flow over the spine. One way to tell if your saddle is placed correctly is to notice where your girth is hanging. Make sure that the girth is hanging 3-4 inches (about a palm’s width) behind the forearm and not right behind the forearm where the skin is thinner and more sensitive. This position is where the belly begins to swell and the skin is thicker.
 The saddle can easily slip forward if not secured with a crupper snugly fit to the tail with a solid D-ring attached to your Western, English or Side Saddle. If you are using an English or Side Saddle, in order to attach the crupper, you can use a metal “T” that slides underneath the seat between the two sides of the padding. Chafing of the tail from the crupper can be prevented by making sure it is snug, but not too tight, or too loose. When you use a sparing amount of Johnson’s baby oil in the mane and tail during grooming, it will keep the skin underneath the tail from chafing. Johnson’s Baby oil will also prevent equines from chewing on each others’ tails. Mules generally have more swell to their barrels to stop a saddle from sliding backwards than horses. For this reason, Longears will not necessarily need a breast collar (but they do look prettier when the rigging is balanced for a parade!).
 If you have given attention to all the details necessary to make sure your equine is comfortable in his tack and equipment, and if he has been privy to all the Groundwork necessary for strong and balanced postural core strength, then mounting should never be an issue at all. He will possess the strength to hold fast to his good equine posture when standing still and your tack and equipment should not shift and make him want to move. Equines become disobedient when they experience a loss of balance. When your equine is slowly and adequately prepared to carry a rider, or pull a vehicle, you are better able to enjoy your time together!

 Since a donkey can become quite stubborn when treated poorly, it is important that you take the time to help your child and donkey get started properly. Even an untried donkey, with proper help, can be a wonderful mount for a child. In the first few weeks together, the child and donkey should simply spend quality time getting to know each other. Teach your child the correct way to handle and groom the donkey. The personal bond between them will develop on its own. This is also a good way to start with mules.
 When your child and donkey have developed confidence in each other, you can begin to teach them the fundamentals of riding. Tack up the donkey in a small saddle suitable for his size and a snaffle bridle and then take him to a small pen to work on the lunge line. Allow your child to sit astride the donkey as he walks around you. Explain to you child the basics of turning and stopping with the direct snaffle rein contact, commonly called “plow-reining.” be sure to instruct the child not to pull hard, or jerk the reins. Donkeys have very sensitive mouths and do not respond well when they are in pain.
 Love and caresses are an excellent reward and the reward of crimped oats certainly does no harm, but tell the child to keep his hands flat so the donkey doesn’t accidently get his fingers! Donkeys are very appreciative animals. If the child and donkey are supervised correctly, it can greatly enhance the entire riding experience. The donkey will protect your child with his excellent judgment and the child will learn to be a patient and understanding person through the interaction with his donkey. The reason is simple: donkeys will not respond unless treated fairly. Many an equestrian in Great Britain has spent his early years astride a donkey and have become better riders because of it! So, if your child expresses an interest in riding, consider starting him with a donkey gelding, or maybe even a jennet. Besides being patient with children, his size is more suitable, he has ample strength to carry children and is an easy keeper, so feed and vet bills can usually be kept to a minimum.
 and will generally get his disposition from the mare. So, if you wish to get a mule for your child, make sure it is an individual with a quiet disposition. Then you can consider such things as size, color and other traits. Be advised that mini mules can be very strong and hyperactive with alpha personalities. IN some cases it might be better to get a larger, quieter mule for your child. The right mule can be just as good a babysitter as the right donkey, and usually more reliable than any horse!
 When you are tacking up your equine, stay in close to put on the saddle and bridle, but when walking around and behind them, give them a wide berth out of kicking range. Give the child detailed lessons on how to bridle and saddle the equine without hurting him, around the ears, eyes, etc. and never use the ears to hold his head still! Teach the child to WALK around equines and not run, or be abrupt, in their movements. Get your child a saddle that they can feel secure in, that has stirrups that will adjust to their short legs, or an alternate set of stirrups that will fit onto an adult saddle for them.
 Children and donkeys, or mules, have not been together much in this country in the recent past. Perhaps it is because we have not given children a chance to show their Longears publicly. Realizing this need, as in horse shows, youth classes have been included in the Longears shows of today to encourage our youth to take an active interest in the promotion of Longears. The jobs these “kids” are dong with their mules and donkeys are wonderful and their contributions are extensive. The values learned by children when dealing with donkeys and mules will stand them in good stead throughout their lives, not to mention the joy they will discover in having such an interactive and affectionate companion.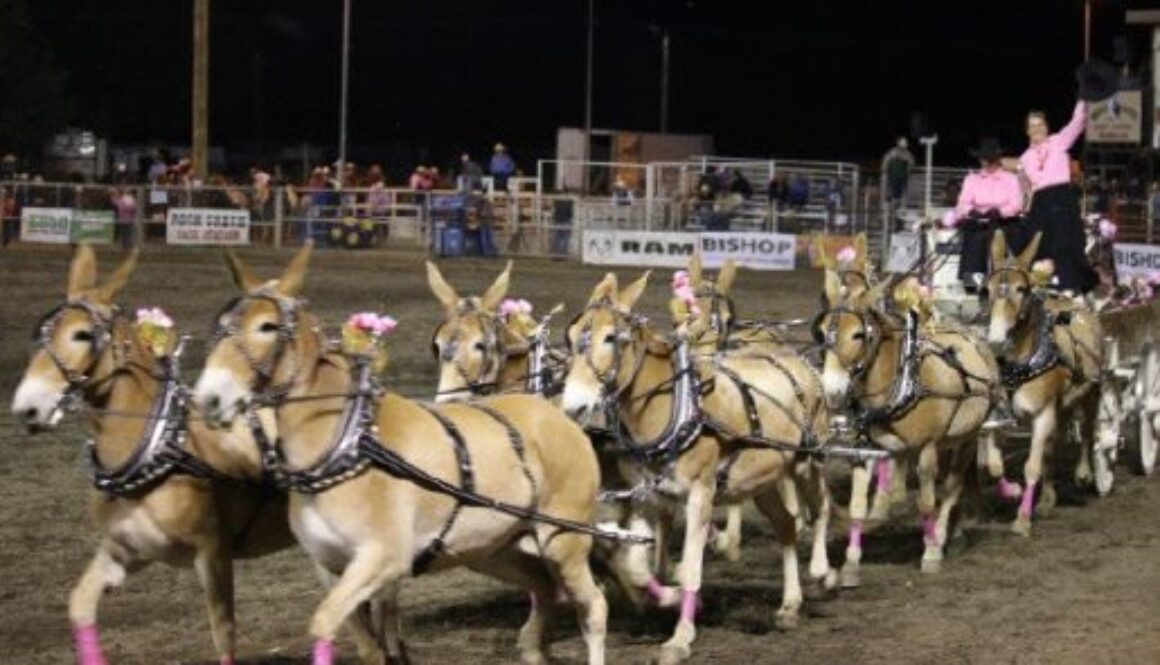
 jack, and a female horse, called a mare. Mules can either be male or female, but they are unable to reproduce because of an odd number of chromosomes in their genetic makeup. When training mules, one needs to take into account the donkey half of the mule as well as the horse half. Horses can often be trained without the benefit of a personal relationship, but mules are different. The donkey is inherently a warm, affectionate and loving creature that thrives on close relationships with their humans. When this closeness is absent, the donkey or mule can seem stubborn and uncooperative. Thus, there is the old saying, “Stubborn as a mule!”
 enclosure by himself, or just with his dam.
 Competition is fun and exciting but can easily become a devastating experience for both of you if the focus is winning against others. Rather, the focus should be to compete against yourself. If you are doing better than the time before, then you are doing well. You don’t need a blue ribbon to mark your improvement. When you go to a show with this attitude, you gain more open communication and friendships with others who have the same interests as you do. You are able to learn from those who are more experienced; judges and officials can help you to improve. This makes the whole showing experience more enjoyable and mutually beneficial to all.
 Strangely enough, the gate in the trail class just didn’t appear to his mule to be like the gate at home, and the mule would go nowhere near it! He, too, was humbled and left the class with nothing.
 develop patience and consistency in training, neatness in you and your mule’s appearance, and pride in yourself and your mule.
 more flies with honey than you can with vinegar.” I used to think in my head, “I don’t really want to catch flies and I don’t even like honey,” but I got her point and she was right. When I got frustrated that my mules were not doing exactly what I wanted them to do, I began to ask myself, “Why not?” I thought I knew everything, until I realized how much I had yet to learn. That is when I stopped trying to force things and became grateful for everything good that happened, every day! People told me that my Longears and my other equines needed a job to be worthy of my respect and support. I thought about it for awhile. Then I realized…my equines never told me they needed a job!
 the same way toward others? When I opened my heart and my mind to my animals and others…that was when I really discovered how little I knew and how much I had yet to learn. I realized at that time that this would be an endless endeavor, but a lot of time to share and enjoy life!
 what they gave to me…and the gifts they gave just kept coming. They were now true companions, partners, friends and our experiences together were quite literally becoming joyful!
 kids was denied. In response to this denial from 4-H Club Leaders, I wrote my book, A GUIDE TO RAISING & SHOWING MULES…for kids and beginners. No longer could the 4-H Leaders use this excuse and mules began cropping up in equine performance throughout the country!
 entire career, but with my own stubbornness and conviction, I have been able to show folks a better approach.
 Longears have made their way into our society as yet another viable addition for the entertainment of the general population. More people than ever are taking on this challenge and making their mark as Mule Trainers. There is probably nothing as exciting as watching the drivers and their multiple hitches in shows and parades, the least of which is
  not the 20-Mule Team that is now being exhibited all over America. What a thrill to behold! People are now truly enjoying the affection and companionship these amazing equines have to offer! A light has been shown on the mules of the past! Those that thought mules could not be controlled, are now enjoying the companionship of their own leading celebrities of the equine community! So reject criticism, reject negativity and become a member of this new world of Longears and experience the joy that they have to offer! It’s quite simply…awesome!

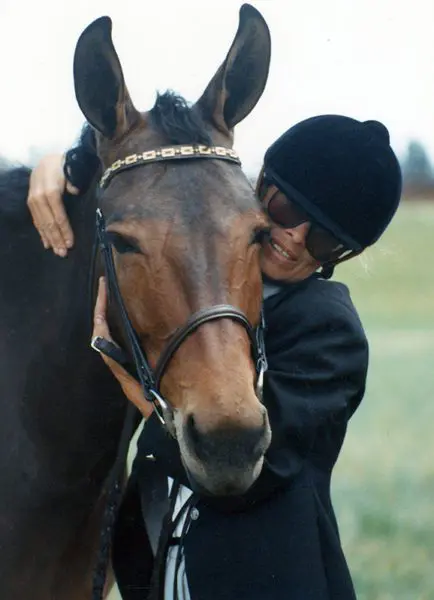 No training series would be complete without examination of the principles and philosophy behind the training techniques. The philosophy of my training techniques is based on the principle that we are not, in fact, training our equines. In fact, we are cultivating relationships with them by assigning meaning to our own body language that they can understand.
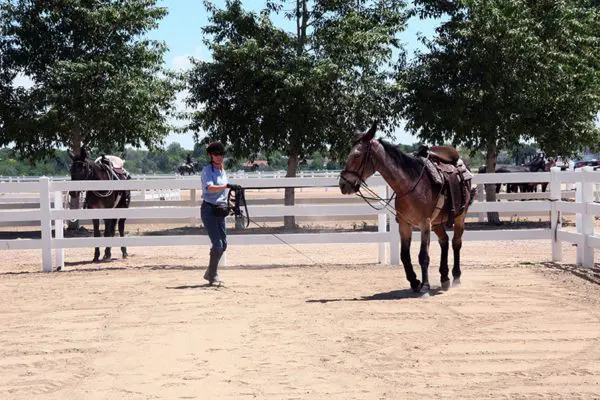 For instance, we had a 3-year-old mule learning to lunge without the benefit of the round pen. The problem was that she refused to go around you more than a couple of times without running off. Assess the situation first by brainstorming all the probable reasons she might keep doing such an annoying thing. Is she frightened? Is she bored? Is she mischievous? Has she been calm and accepting of most things until now? And most important, is my own body language causing this to occur?
 As mental changes occur, so do physical changes. As muscles develop and coordination gets better, the animal will gain confidence. As a trainer, you will need to do less and less to cause certain movements. For example, in the case of the leg yield, you may have to turn your mule’s head a little in the opposite direction to get him to step sideways and forward. As he becomes stronger, more coordinated, and understands your request, you can then begin to straighten his body more with less effort. Granted, we have begun by doing this the wrong way, yet we have put our mule “on the road” to the right way. We have assimilated an action in response to our leg that can now be perfected over time. In essence, you have simply said, “First you learn to move away from my leg, then you can learn to do it gracefully!”
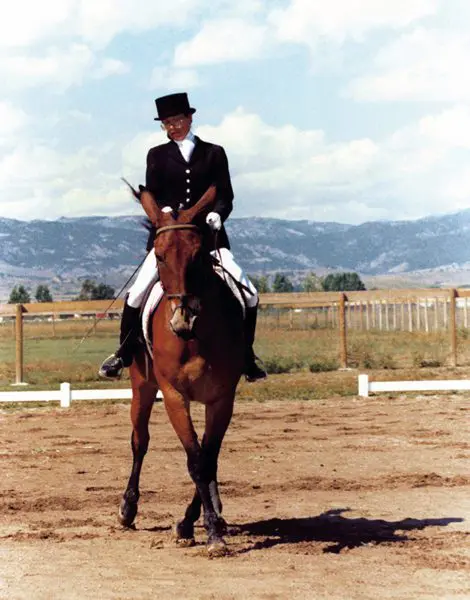 In training horses and mules, there is really little difference in one’s techniques or approach, provided we maintain patience and understanding and a good rewards system. The major difference between these two equines is their ability to tolerate negative reinforcement, or punishment. The mule, being part donkey, does not tolerate punitive action very well unless he is fully aware that the fault was his own and the punishment is fair. For instance, you ask for a canter lead and your mule keeps trotting, one good smack with the whip, or one good gig with the spurs, is negative reinforcement that will bring about the desired response, but be careful of an over-reaction from an overdone cue. More than one good smack or gig could cause either a runaway or an extremely balky animal. This kind of resistance comes from the donkey and requires a much different approach when training donkeys. The horse part of the mule allows us an easier time of overcoming this type of resistance in mules, making them different and easier to train than donkeys.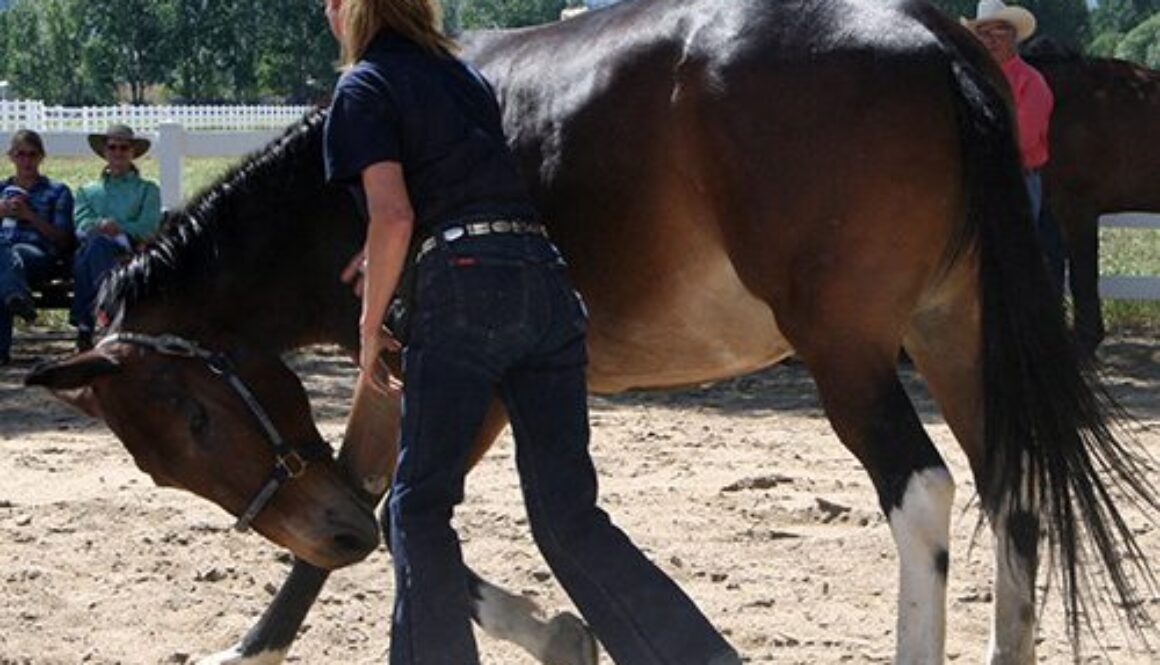
 “Mules separate crude trainers from artistic trainers.” The mule handled by a crude trainer will generally epitomize the traditional belief that mules are stubborn and ornery. The mule handled by an artistic trainer will not.
 Horse training trends have evolved from Buck Branaman, Pat Parelli, Clinton Anderson, etc. and their Round Pen training techniques using ropes on the equines. Natural Horsemanship rose from these methods, using less restraint on the equine.
 This gave way to the new trend of teaching them to lie down. Equines do not lie down easily, so it wasn’t always used as an easy way to mount. It really shouldn’t be used that way because of the added stress put on the equine’s body that can cause arthritis and other problems with the hooves, and joints, as they age.
 I saw a horse being exhibited at the WEG that was forced to bow with ropes. I thought it could be beneficial to find out how long it would take for an equine to learn to bow of his accord with his own muscle strength. Lance learned to do it by himself with only slight encouragement from me in 18 months.
 If the argument is that amounting block can’t be brought along for trail riding, it makes more sense to simply acquire a shorter animal.
 If you find restraints are not sufficient to help with your equine, you may be dealing with an outlaw, in which case it is best to put him out of his misery before he injures someone. Be careful however about blaming the animal for his response to an inhumane trainer. Some can be rehabilitated, some cannot, but you will need to know what you are doing. Kindness alone is not the answer.
 Today good mule trainers apply the basic techniques of Behavior Modification (reward system training) in their programs. That is, getting the desired response through positive reinforcement and ignoring, as much as possible, the undesired behavior. Negative reinforcement, or punishment, is used sparingly, is never severe and is only used to set boundaries to behavior.


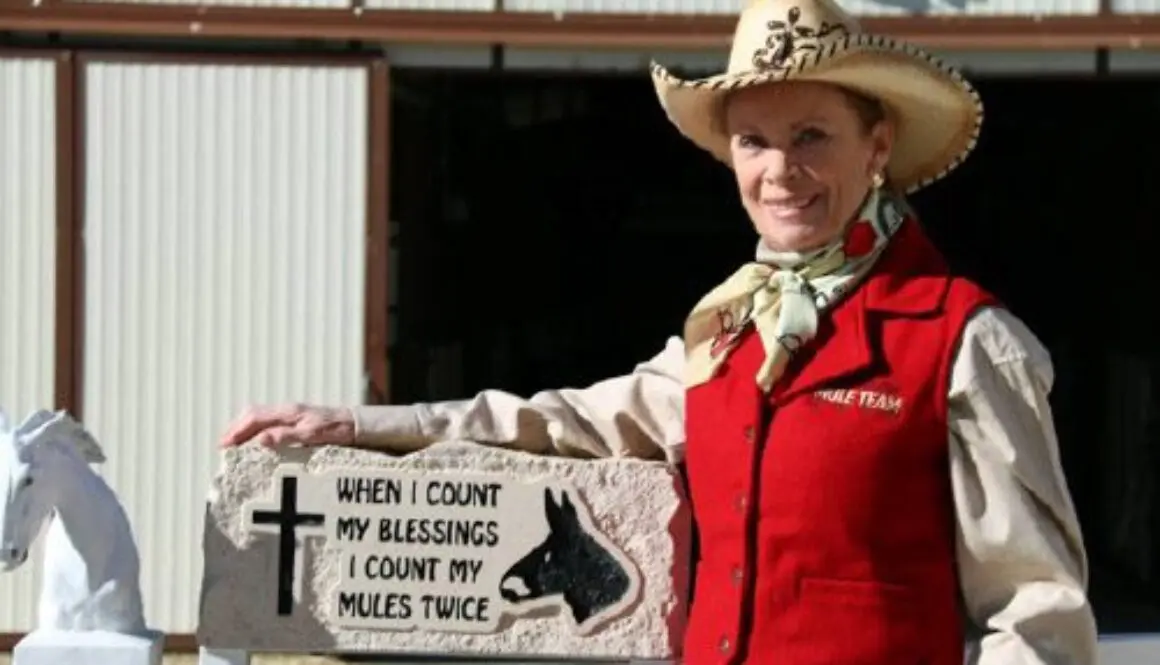
 By Meredith Hodges
 In 1979, I witnessed my first Bishop Mule Days Sierra Nevada packer’s rendezvous. That was where my career in training mules and donkeys in every recreational equine event began. I was “ass-tonished” at the impeccable way these knowledgeable men and women handled their mules, wagons, packs and equipment with such grace and dignity…and not without a proper measure of good humor! I caught a very bad case of “Mule Fever” and began my own pursuit with Longears in ALL forms of equine athletics. Bishop Mule Days grew from the weekend packer’s rendezvous into the weeklong show over Memorial Day weekend that it is today and they continue to add new classes each year to accommodate the accomplishments of a lot of Longears-lovers like myself along the way. Little did I know, the friendships I started then were to last a lifetime!
 In 1980, I founded the Lucky Three Ranch in Loveland, Colorado and embarked on a breeding and training program of my own with Lucky Three Sundowner, the last mule and Little Jack Horner, the last donkey jack born at Windy Valley Ranch in 1980. Sundowner was shipped to the ranch right away, but Little Jack Horner had to wait and be picked up a year later. Just outside of Sparks, Nevada in 1981, we were hailed to pull over by a jolly and quite charming man, Ernie Fanning who ran up to my truck and blurted through the driver’s side window, “I just KNOW you have a Windy Valley jack in the back of that trailer!” To this day, I don’t know how he could tell it was a Windy Valley jack only by the head and ears that showed above the stock trailer back door. All I can say is that man certainly knew his mules and donkeys, and I made yet another friend for life that day!
 Years passed, Bishop Mule Days grew as did my love for Longears and the people that came with them. I bred and showed Longears for many years, then judged and began a promotional career in support of Longears everywhere. Bishop Mule Days was where I met Bonnie Shields, the leading half-ass Tennessee Mule Artist and illustrator for my children’s series of books and DVDs, Jasper the Mule. Even though I no longer showed, I was still a welcome part of the Bishop Mule Days rendezvous family year after year as a respected dignitary and sponsor. One of our greatest thrills was when Bonnie, Jasper and I were invited by Bobby Tanner to ride in the old Borax Wagons pulled by the 20-Mule Team in the Bishop Mule Days parade three years in a row (2012-2014). What an incredible honor that was!
 On January 1, 2017, the new Borax Wagons and the 20-Mule Team made their debut in the Tournament of Roses parade in Pasadena, California. They held a practice in the desert near Bishop before they left for the parade and the mules all did great! On the parade route, they would be asked to make a tight turn onto Colorado Avenue in the midst of a lively crowd and would be asked to “jump the chain” to make that turn. What a spectacular feat to behold and they did it beautifully on parade day.