

MULE CROSSING: Good Basic Training Includes Common Sense, Part 3
By Meredith Hodges
In Part Two of this article, your equine was introduced to the ground rails, cavalletti and bridge obstacles. This helped develop his confidence and trust in you, his handler, while focusing on your animal just getting through each obstacle with true forward movement without hesitation. First, he learned the basics of negotiating these obstacles in Stage One. During Stage Two, when he went back through same the obstacles, he learned to do them in good posture and balance. Now, in order to continue your equine’s mental and physical conditioning, you are ready to proceed to more challenging obstacles.
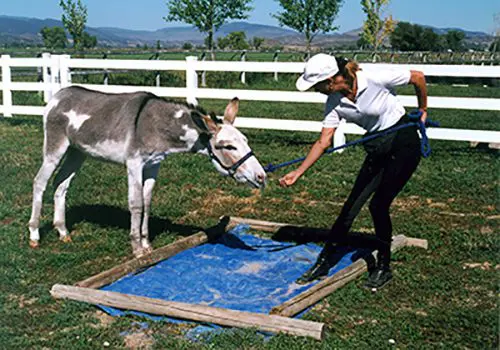
 The Tarp: The Tarp will dramatically affect your equine’s balance and coordination. Its uneven surface and the noise it makes when stepped on will typically put your equine off-balance and may cause him to veer from side to side as he crosses it. You can use the same “Stage One Obstacle” approach, as described in Part 2 of this article, to change his fear into curiosity. Again, as you did with the bridge, break this exercise down into small steps; stopping at the edge of the tarp, stopping with the front feet on the tarp, then all fours, then fronts off and hinds on, and then finally walking off the tarp to a complete halt and squaring up. Just learning to get through the obstacle will diminish your equine’s fear and replace it with curiosity and confidence. Then assume the showmanship position and do all obstacles again with Stage Two strength and balance, and with good posture in mind for both of you. You will know that your equine is ready to move on to the next stage of training in the round pen when you can toss the lead rope over his neck and he will negotiate all obstacles correctly, keeping his head at your shoulder and is showing no visible signs of a loss of balance, or any inability to obey your commands. He will then be placing his feet so that his balance is evenly distributed over all four feet and his foot placement is coordinated and deliberate. At this point, the obstacles in general should be an effortless task.
The Trailer: The Trailer should be considered just another obstacle, requiring the same basic approach as the bridge. Mules and donkeys are no-nonsense kinds of guys and become suspicious of intimidating techniques such as feeding them in the trailer. This would be bribing and it is quite different from rewarding for a task well done. The equine learns instead to distrust due to the sneaky approach that is used to get them in there. We would rather teach our equines to be trusting and willing by developing  their confidence in the handler. When we begin leading training, the equine is introduced to all kinds of obstacles. In Stage One of obstacle training, we first approach the obstacle and encourage them to investigate, changing their fear into curiosity and instilling confidence in them and in their handler. When they are compliant, they are rewarded with crimped oats and praised for being so brave. By the time they have learned to confidently negotiate other obstacles, the trailer is no longer a threat to them. They will most often just follow you right in, knowing (since they have never been trapped into complying) that there is a crimped oats reward waiting for them. For those animals that are still hesitant about the trailer and just won’t follow, we use a second method that restricts backward movement and this is explained in detail in DVD #1 of my series, Training Mules and Donkeys. When your equine willingly enters the trailer, you can employ Stage Two and ask your equine to step to the entrance of the trailer and square up, then enter with the front feet and leave the back feet on the ground and square up again, then all four feet in the trailer, square up, and, finally, when tied off inside the trailer, square up yet again. Backing out is also broken down into the same small steps to rebalance the same way on the way back out. This builds muscle correctly and enhances your equine’s proprioception (body awareness).
 Jumps: Jumps are a good exercise to do on the lead line, but you must be careful not to over-jump your animal in the beginning. Because they are large, they must have great strength in the hindquarters to boost their heavy bodies over a jump, and if they are not strong enough, they can easily pull a muscle or worse. Jumping should be done only after all other obstacles have been thoroughly mastered. In Stage One, approach the jump the same way you would any other obstacle, building confidence and trust. Then use Stage Two to finesse your equine’s movements. Mules have the ability to jump from a standstill, so you can still use the stop, square up, wait for the command to jump, jump, stop and square up again on the other side. This ability allows you to maintain control of your mule when on the ground with the lead line or in the drivelines. If you are training a horse or a donkey, use a longer lead rope, so after squaring up about four feet in front of the jump, he can get a trotting start to the jump. Whatever equine you are training, be sure to keep the jumps very low in the beginning.
If you want your equine to jump on the lead line, you must go over the jump yourself for the first few sessions, or he will not really understand what you want and may start dodging the jump. Ask him to stand still while you cross the jump to the other side, and then ask him to come. (Remember that a mule can stand closer to the jump, but a horse or a donkey will need some trotting space in order to make the jump). Once your equine takes the jump with no problem, you can teach him to go over the jump ahead of you on a longer lead line. Start off with very small jumps and understand that an equine will jump higher than he needs to jump the first few times. When he is finally tucking his knees under and just barely clearing the top, he is then ready for the jump to be slightly raised. Raise your jumps in three-inch increments and repeat the exercise until your equine is properly clearing each height and not over-jumping before you raise the height again. The lead line stop-and-jump procedure will help strengthen and develop your animal’s hindquarters and will begin to teach him to lengthen and compress his body as needed to control his stride.
 The Back Through “L”: The Back Through “L” will fine-tune your equine’s response to “Whoa,” and he will learn to allow you to adjust the different quarters of his body and move each of them independently. First, walk forward through the obstacle, then stop at the end and turn around to face backward. Then, slowly and steadily, back through the entire obstacle. Once he has gotten this down fairly well, you can then go back to the beginning, and back one step (but only one!). Then proceed forward to the middle of the first straightaway, stop, back up two steps and square up. Go forward again to the angled rails where they begin the turn, halt, and then move his front feet one or two steps sideways with gentle pulls on your lead line at the halter, into the middle of the second straightaway, and halt. Then ask for one or two steps forward into the second straightaway and halt. His back feet will be cutting the corner into the 90-degree turn, so after he halts, tap him lightly on the hip with the end of your lead rope to move the hindquarters over one or two steps to straighten him into the center of the second straightaway, halt and square up again. Finish the obstacle by walking to the end of the straightaway, halt and square up again. Now do the same series of steps in reverse. This exercise teaches him to maintain his focus and balance throughout the obstacle and to learn to wait for you to move his front and rear quarters into any position required, taking only as many steps as you request. This will improve his negotiation of forward and backward movement, as well as beginning to strengthen the hard-to-condition inside forearm, gaskin and stifle muscles.
Five or Six Tires on the Ground: Five or Six Tires on the Ground (3×2 or 3×3) is an obstacle which is used to help develop proprioception (deliberate and balanced foot placement) and coordination, as equines have so many different places to put their feet when walking through tires. Although they will want to waver and step out of the sides, you want them to maintain deliberate foot placement, so carefully plan each step. With each step, stop for a moment and then reward after the completed step. This will break the task down into doable stages and will help to keep your animal in a straight line while you both move through the tires. You can stagger the tires in a number of different ways, giving your equine multiple options for foot placement. He needn’t place his feet in the middle of each tire, but he must move straight forward in balance, correctly and in good posture. This exercise keeps him alert and careful about foot placement while it fine-tunes his proprioception and balancing capabilities.
The Tractor Tire: The Tractor Tire is a wonderful advanced exercise in coordination. The first task (Stage One) is to ask your equine to adjust his stride and simply walk through the middle of the tractor  tire. After he is comfortable walking through it, break it down into smaller steps in Stage Two: stop before the tire, then one foot in the tire, then two front feet in the tire, then allow the front feet out and the back feet in and then exit.
When he is calm with this, you can add to the exercise by stopping him when his front feet are in the middle of the tire and asking him to do a turn on the forehand. While watching his legs, make sure he is properly executing the turn by crossing his near hind in front of the far hind, as he turns without stepping his front feet out of the center of the tire. Allow him to adjust his front feet back to the center of the tire if they get too close to the edge. Just stop moving the hindquarters, halt, adjust the front legs, halt and begin moving the hindquarters again—only one step at a time. In the beginning, be sure to reward every step. As he understands and complies more easily, he can be rewarded less often within the task.
When he can easily do this exercise, you can then put his hind feet in the middle of the tire and do the turn on the haunches, crossing over in front of the hind pivot foot and the inside front foot as he makes the turn. Again, if the hind legs need to be adjusted back to the center of the tire, stop, correct the hind legs, stop again and then continue. In order to maintain his attentiveness and control, always teach general negotiation first for curiosity and confidence (Stage One), followed by breaking the obstacle down into small and doable steps to be rewarded in good posture and balance, and with coordination (Stage Two). The Tractor Tire is a great coordination exercise because it not only addresses forward motion, but simple lateral motion as well. These exercises will begin to strengthen the hard-to-condition inside forearm, gaskin and stifle muscles.
 Side Passing the “T”: Because Side Passing the “T” is a complicated and advanced obstacle, it is important that your equine execute the straight forward obstacles and lateral Tractor Tire obstacles before attempting to do the “T.” The “T” is a great way to fine-tune truly sideways lateral motion, where both front and back feet are crossing over diagonally and simultaneously in a balanced fashion, moving the equine laterally to the right and to the left as he negotiates the three different rails in the obstacle. In the same obstacle, you will be breaking the simultaneous motion into a turn on the forehand and a turn on the haunches in the middle of the obstacle, in order to make the turns into the next lateral motion down the next rail. This obstacle uses all the elements that have been taught in previous obstacles. It also lays the groundwork for perfect communication between you and your equine. In order to correctly execute this obstacle, he must pay attention to you at every step.
In the beginning, you will need to teach your equine to side pass by moving first the front quarters, then the hindquarters at each step to maintain straightness of the body throughout the obstacle. But as he gains more balance and coordination, he will be able to move the feet—both front and back—simultaneously along the side pass rails. This is where the inside forearm, gaskin and stifle muscles will begin to develop properly.
Again, you will know when you have spent adequate time on “Stage Two Obstacle Training” for your equine’s best conditioning when you can throw the lead rope over his neck and without you touching him and with his head at your shoulder, he will easily follow your hands and body language through all obstacles, displaying strength, coordination and balance in good posture and will stay focused throughout.
To learn more about Meredith Hodges and her comprehensive all-breed equine training program, visit LuckyThreeRanch.com, MEREDITH HODGES PUBLIC FIGURE Facebook page, or call 1-800-816-7566. Check out her children’s website at JasperTheMule.com. Also, find Meredith on Pinterest, Instagram, MeWe, YouTube and Twitter.
Covered in TRAINING MULES & DONKEY: A LOGICAL APPROACH TO TRAINING, TRAINING WITHOUT RESISTANCE, EQUUS REVISITED and A GUIDE TO RAISING & SHOWING MULES at www.luckythreeranchstore.com.
© 2015, 2016, 2020, 2024 Lucky Three Ranch, Inc. All Rights Reserved.

 lead line, keep in mind that you are not only teaching your equine to negotiate an obstacle, you are also conditioning the muscles (especially the ones that are closest to the bones) while, at the same time, teaching balance, coordination and self control. In showmanship training, you focused on strength and balance on the flat ground. While working with obstacles on the lead line, you will now begin to add coordination during this second phase of obstacle training. Remember: Do not put obstacles in your equine’s stable area and/or living quarters, in an attempt to make him “live” with the obstacle. This only serves to create insensitivity and in some cases, cause greater fear. The stable area should always be your animal’s resting place, just as our bedrooms are for us—a place of rest, relaxation and privacy.
 When your equine is more willing to come through the obstacle, you can regain your showmanship position, with your left hand carrying the lead line and your right arm extended in front of you, pointing toward the direction in which you will be going. When he is finally listening and will follow at your shoulder over or through the obstacle and stop or back up at any point during the negotiation of the obstacle, you can then turn your attention to whether he is actually traveling forward and backing up in a straight line, and whether or not he is stopping squarely. Do this the same way first on the lead line, then much later in the drivelines and, lastly, under saddle. How he negotiates the obstacles will have a direct bearing on how his muscles are being conditioned and how his balance and coordination are being affected so don’t be afraid to ask for more precision going forward.
 Ground Rails and Cavalletti: Four ground rails and four cavalletti are good tools for straight, forward exercises that will promote stretching of the body in true and correct forward motion. These exercises will also develop rhythm, balance, cadence and suspension within the gaits, first on the lead line, and then later during ground driving and under saddle. Ground rails and cavalletti are also great for enhancing your ability to stay in stride with your animal. You should first do the exercises over the ground rails. Then, for jumping training, you can graduate to the 6″ cavalletti setting, then the 12″ cavalletti setting and, finally, the 18″ cavalletti setting. Your equine will learn to suspend and place his feet in a balanced and deliberate fashion while you learn to do the same. Getting in rhythm with your animal’s stride will improve your equine training experience and make things a lot easier and safer.
 stop at the base, square up your equine and stand for a few seconds. Then ask him to put his two front feet on the bridge, square up and, again, stand for a few seconds. Next, ask him to put all four feet on the middle of the bridge, square up and stand still for a few seconds. Now ask him to take his two front feet off the bridge and leave the two back feet on it and square up again. Most equines can do the first few positions pretty easily, but when the front feet go off the bridge, the equine’s balance is often thrown forward and they find it very difficult to stop in this position. If he is able to sustain this position for several seconds before you give the command to continue forward, he has completed the bridge work.
 Work with ground rails and cavalletti helps to build muscle, particularly in the hind quarters. This will help him to carry your weight more easily through lateral movements, stops and lengthening of the gaits. Proper preparation minimizes resistance and frustration. This will be apparent in how your animal carries his tail. Is it hanging in a relaxed fashion, or is he switching his tail periodically, or regularly? You might notice that after the initial introduction of lateral moves, your equine’s forward motion has become a little “shaky” again. It is now time to clarify the connection between forward motion and lateral motion with his increased understanding of your seat and legs (Not so much the reins as your connection to the bit needs to remain quiet!). By employing a few simple exercises, this can be a very simple process.
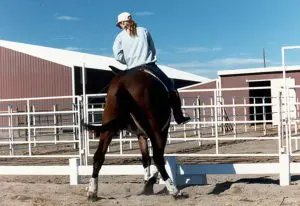 regular rhythm and cadence, proper flexion and bending through his rib cage. In rhythm, change your aids to a slight counter-bend and ask for a turn-on-the-forehand at the fence rail. Send his haunches around with pressure from your leg, well back on his barrel, until he is 180-degrees reversed. At the precise moment he is in the new position to go forward, in the opposite direction, release the pressure on your reins! Then send him forward again from your legs onto the new circle.
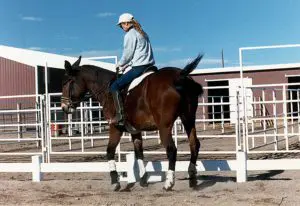 Complete the turn with a series of half-halts from your seat and a squeeze-release action with the reins. If you do this, your final release will come as a natural sequence to the turn and it will be executed in the rhythm and harmony of your equine’s movement. You can do this exercise at the walk, trot and canter, but be sure to slow down to a walk from the faster gaits in their natural sequence…canter, trot, walk and turn…trot, walk and turn. Do not be abrupt and skip the interim gaits.
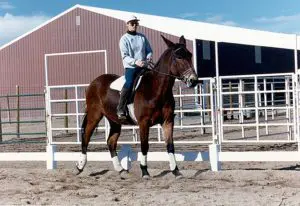 Be careful not to inhibit his forward motion. It is better that he does small circles to complete the turn at first than to fall back over his haunches and pivot on one hind foot. As in the turn-on-the-forehand, nudge his barrel on the opposite side, pushing his haunches into the turn with the squeeze-release action. Longears will tend to lean into a continuous pressure from your legs! Keep practicing this exercise, maintaining his body between your aids.
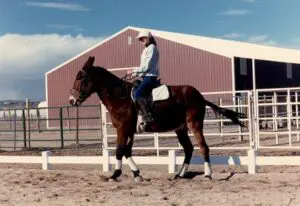 Once your equine gets his footwork figured out through these complicated movements, and has the opportunity to develop his body properly, you can begin to as for more speed and finesse on the turns, but this comes MUCH later! To attempt any more right now will most likely destroy his forward motion, cadence and rhythm. This will cause frustration and fatigue.
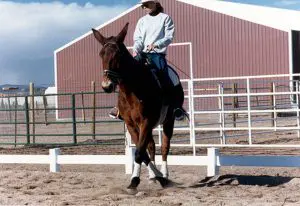 soon? Wouldn’t you rather have a long-lasting and pleasant relationship with a companion that is happy with his work?


