Dear Longears and Short Ears Equine Lover:
 Thank you for your email. It was good of you to take the time to contact me. Although we begin our DVD series with “Foal Training,” no matter how old, you should always begin training with imprinting and move forward from there with attention to feed as well. This will insure a positive introduction and will help to build a good relationship with your equine.
Our methods are meant to be done in a sequence and taking shortcuts or changing our method in some way will not yield the same results. After many years of training for other people, I have found that equines, especially mules and donkeys, bond to the person who trains them. When they go away to other people, they do not get the benefit of this bonding and can become resistant over time when they return home. After all, you wouldn’t ask someone else to go out and make a friend for you, would you? This is the primary reason I put my entire training program in books and videos, in a natural order like grade school is for children, for people to use as a resistance free correspondence training course instead of doing clinics and seminars. People are encouraged to use the series and to contact me via mail, email or telephone for answers to any questions.
No matter how old or how well trained the equine, they still need time doing the simplest of things to get to know you before they will learn to trust and have confidence in you. The exercises that you do should build the body slowly, sequentially and in good equine posture. No human or equine is born in good posture. It is something that needs to be taught and practiced repetitively if it is to become a natural way of moving the body. When the body is in good posture, all internal organs can function properly and the skeletal frame will be supported correctly. Just as our children need routine, ongoing learning and the right kind of exercise while they are growing up, so do equines. They need boundaries for their behavior clearly outlined to minimize anxious behaviors and inappropriate behavior, and the exercises that you do together need to build their strength and coordination in good equine posture. The time spent together during leading training and going forward builds a good solid relationship with your equine and fosters his confidence and trust in you because you actually help him to feel physically better. A carefully planned routine and an appropriate feeding program is critical to healthy development.
Most equines never experience core muscle strength and this becomes even more important as they age. We do leading training for a full year to not only get them to learn to lead and to develop a good relationship with them, but also to develop good posture and core muscle strength in preparation to carry a rider. Leading lessons for postural strength and balance need only be done for 15-20 minutes once a week to be certain that they aren’t fighting balance problems later when you mount and ride. Even an older equine with previous training would still need this for optimum performance and longevity. During the time you do the leading training strengthening exercises, you should NOT ride the animal as this will inhibit the success of the preliminary exercises.
If you ride while you do these exercises, it will not result in the same proper muscle conditioning, habitual behavior and new way of moving. The lessons need to be routine and done in good posture to acquire the correct results. Hold the lead rope in your LEFT hand, keep his head at your shoulder, match your steps with his front legs, point in the direction of travel with your right hand and look where you are going doing straight lines, gradual arcs and square him up with equal weight over all four feet EVERY TIME you stop. We are building NEW habits in their way of moving and the only way that can change is through routine, consistency in the routine and correctness in the execution of the exercises. Since this also requires that you be in good posture as well, you will also reap the benefits from this regimen. Along with feeding correctly (as described below), these exercises will help equines to drop fat rolls and to begin to take on a more correct shape and become strong in good posture.
Today’s general horse training techniques do not generally work well with mules and donkeys. Most horse training techniques used today speed up the training process so people can ride or drive sooner and it makes the trainers’ techniques more attractive, but most of these techniques do not adequately prepare the equine physically in good posture for the added stress of a rider on his back. Mules and donkeys have a very strong sense of self preservation and need work that builds their bodies properly so they will feel good in their new and correct posture, or you won’t get the kind of results you might expect. Forming a good relationship with your equine begins with a consistent maintenance routine and appropriate groundwork. Most equines don’t usually get the well-structured and extended groundwork training on the lead rope that paves the way to good balance, core muscle conditioning and a willing attitude. This is essential if he is truly expected to be physically and mentally prepared for future equine activities. With donkeys and mules, this is critically important.
The equine should be at least four years of age when the rider is finally introduced to insure that there is no undue stress on his body at the earlier stages of development. Equines generally run through the bit and exhibit other bad behaviors because they become anxious, lose their balance and don’t really have complete physical control of their bodies. They are unable to physically comply with your wishes without losing their balance, which makes them nervous and causes resistance. Changing bits or rushing through groundwork training so you can ride or drive sooner NEVER really works. Training is more than just teaching the equine to do “movements.” You should be creating an environment for success and conditioning his muscles to do movements easily and with minimal stress. This produces an equine with a happy and healthy working attitude. In order to get your mule to be soft and submissive in the snaffle bit, you need to be prepared to spend six months on flatwork leading training (also known as showmanship training for strength in good posture) and another six months leading through obstacles (turning fear into curiosity and then adding coordination to his strength and balance) before moving to the round pen work in DVD #2. Longears and horses do much better in a number of ways when you are patient enough to do this: a calmer attitude because they know what to expect, development of symmetrical muscle strength in good equine posture, a better response to verbal commands, better balance, better coordination and the ability to perform correctly.
Feeding & Weight Maintenance
What your animal is eating can have a direct impact on his response to training. Many feeds can cause hypertension in Longears (and horses, too!) and an inability to focus for any length of time. Mules and donkeys require a lot less feed than horses because they are half donkey and donkeys are desert animals. Too much feed or the wrong kind of feed and you run the risk of colic, or founder. The formula for our oats mix is very simple. Depending on the individual, feed the average sized equines (13 hands to 17 hands) 1-1/2 to 2 cups of oats mixed with 1 oz. of Sho Glo and 1 oz. of Mazola corn oil. Drafts (over 17 hands) get twice as much and the minis get 1/4 (small minis under 36 inches) to 1/2 (36 to 48 inches) as much. Of course, if they seem to need a little more oats, just increase it a half cup at a time and watch how they add weight or not. Most of their weight gain and loss we monitor by increasing and decreasing the hay intake because a maximum of 4 cups of oats (usually during the winter) is all they need, especially when you are also giving them oats as rewards during exercise lessons when they actually need the added energy. The oats must be broken open in some way (crimped, steamed, rolled, etc.) as equines cannot digest whole oats. We feed this once a day in the evenings, grass hay twice a day and we monitor weight gain with the hay and pasture intake. Young mules like human teenagers can eat a lot when growing and can have as much grass hay at each feeding as they will clean up. Do not alter or modify this with other products in any way for the best results. Also, make sure they have access to a trace mineral salt block for their salt and mineral needs. We worm our equines with Ivermectin paste wormer in January, March, May, July and September and then break the cycle with Strongid in November. We vaccinate in the spring and fall. Consult your veterinarian for the types of vaccines you will need for your area. You should never feed Longears (donkeys, or mules) any pre-mixed sweet feeds, or products high in alfalfa. Equines in general should never be turned out in a pasture with Fescue grass. Our pastures are seeded with brome and orchard grass and they seem to do best on that mix.
For those animals who are older and haven’t the teeth to chew their feed, we add grass hay cubes or Timothy hay pellets to their crimped oats mix. We mix the oats, vitamin concentrate and corn oil in a blender and add this to a bucket of grass hay cubes (amount will vary from animal to animal) that have been soaked in water. For minis, they would get roughly 3-4 cups of hay cubes in the mix. This produces a mix that is not too soupy nor too dry, so they have no problems eating it. They can have this mixture two, or three times a day in the morning, sometimes midday, and evening, depending on the needs of the individual animal.
Your equine should be kept in a smaller area for evening feedings, overnight and for morning feedings. This has several benefits: 1) Each animal can be checked every day for any injuries or anomalies, 2) He will not have to fight for his food, he can sleep uninterrupted and be more calm and fresh each day, 3) You will then be able to turn him out at specific times for grazing during the day and bring him back in each night. This way you can monitor his grazing intake so he will not be able to overgraze and colic, or founder, 4) the smaller area affords you a confined space for beginning training so there is no need to chase him, or be interrupted by other animals, and 5) having this definite routine lets your animal know what to expect and lessens adverse behaviors. You should always begin with DVD #1 and #8 (feeding, maintenance and advanced showmanship training) and take the training in sequence. When you feed the oats mix in the evenings, it makes it easier to call them back from shortened pasture time in the spring (they have to work into extended pasture time slowly and over several weeks) and they will be more apt to come to you easily after their morning feeding of grass hay for their lessons only when they know you have fanny pack full of oats for them. If you do things out of order, the results will not be the same.
The other thing we do for older equines with limited teeth is give them grass hay to chew on during the day to prevent nervous behaviors that can arise from a lack of grazing time as long as it does not negatively affect their weight gain, or loss. With compromised teeth, they will generally chew it into a cigar and spit it out. Also, pregnant mares and jennets can have the oats mix until they are six weeks out from foaling. Then they should only have grass hay until six weeks after foaling, after which you can then resume the oats mix.
Reason for our Feeding Program and Exercise
I know you must be VERY confused by now with all the “great advice” that people freely give out there to each other. Grazing alone does not provide all the daily nutritional requirements. The Sho Glo by Manna Pro is a One-A-Day Vitamin supplement that provides them with all their daily requirements when coupled with a trace mineral salt block to lick at will as they need it. The Mazola corn oil is the ONLY oil that really does promote a healthy hair coat, healthy hooves and digestive tract regularity. Equines should only be fed grass hays (orchard, brome, timothy, Bermuda, etc.) except for Fescue grass (it has been known to cause spontaneous abortions in pregnant mares among other things). Legume hays (leafy hays like alfalfa and clover) are fine for cows and animals that have multiple “stomachs,” but not for equines.
Rock and Roll Feeding
My rescue draft mules, Rock and Roll were on very expensive products and were in terrible shape when I first got them in December 2010. Their digestive tracts were compromised and they were supplemented with probiotics. I immediately dumped it all and put them on my feed program. I began to see a marked difference in FOUR days! You can read about their story in the article Rock and Roll: The Story of a Rescue in the “Mule Crossing” section on my website at www.luckythreeranch.com. I have not yet had a client who changed their feed program to this (no modifications) that did not have success almost immediately.
LTR Training Philosophy
Like human athletes, all equine athletes need to be prepared properly with feed and exercise over a long period of time for the activities they will be doing. Jumping and other FUN activities are often an advanced activity and should not be done until much later in the training program. In addition to the information given here, I would suggest that you read my series about miniature donkey training titled “Getting Down with Minis” found in the “Mule Crossing” section under “Training” on my website at www.luckythreeranch.com. Our training program is designed with healthy and appropriate exercise with safety in mind that is easily executed by anyone if you start at the beginning and work your way through slowly and sequentially. The end result is an equine that is truly bonded to you, confident in their job and able to do what you ask without unexpected bolting, bucking, running, off, etc. It is also healthy exercise for you that will also prepare you to be a better rider. The walking exercises for good posture, for example, begin to allow your hips to open up and move more freely, so when you finally do get on, you are better able to follow and not block the motion of the equine. Our methods will make it much safer and enjoyable for you and your equine whether horse, mule donkey, or any other hybrid cross.
I have spent over 50 years training all equines and the past 43 with a concentration on Longears. I have found that my training techniques can to date be used with ALL equines. After successfully showing from 1981 to 2000, I decided that it was important to document all I have learned in my books, videos, TV shows.
If I had continued to show, train, judge and give clinics, I would never have had the time to document and compile all this information for my fans. After being on RFD-TV for ten years, I opted to put all my TV shows on my website for people to see promptly upon request with Video on Demand. The in-person training I do now is with my students from my school and maintaining my own equines. I am still available to all those who use my products as a coach that they can contact at any time via email, mail, Facebook, phone calls, etc. I answer all questions personally which is also something I could not do if I were traveling a lot. There is a lot to consider when learning with your equine and that is why so many books and DVDs. They contain a wide variety of comprehensive information that is different in each product, but they complement each other so you get the WHOLE picture and not just bits and pieces.
I firmly believe that when you give both you and your equine ample time to learn together doing very simply things that you can actually do together over a longer period of time (like grade school is for children), and then let things progress at your own pace, you can begin to truly enjoy your time together. You learn to appreciate the “little” victories along the way that keep you happy in the learning process. As you “practice” these simple things, you will get better and will be able to move forward easily. It’s just like learning anything. It will be unfamiliar and awkward at first, but as you practice adequately with groundwork first, it gets easier and you will then be prepared to move on to the next steps. If the steps are hurried and too overwhelming, you find yourself defeated before you even get started and the fun is eliminated altogether. That’s when resistance begins. It is better to minimize any resistance by doing the preparatory work before riding. Then when you finally do ride, you and your equine will really be ready for that next stage of training. When you are both fighting imbalanced bodies, it is hard to find stable ground to work from in order to actually enjoy mutual cooperation.
Benefits of Training in a Logical Sequence
If you do the exercises as described in our products, they will prepare you for each stage of training that is to come and you will be more “in shape” to ride properly when you finally do get on. Any resistive behaviors will be minimized. The materials are done in a logical and sequential order that you can follow easily by starting at the beginning with imprinting and leading training…first on flat ground (for core strength and good postural balance) and later over obstacles (to add coordination to the strength and balance), then lunging for postural balance while in a faster motion (to teach the equine to stay erect and bend through his rib cage on the arc of the round pen), then ground driving to teach him rein cues and to teach you more coordination with both your legs and now the reins.
Once you are mounted, you will put all you have learned together and will be able to communicate effectively with your equine. He will then be calm and solid when you finally do mount and ride. There should be no problems with biting, kicking or bolting (kicking training covered in DVD #2). He will be more willing to stand still when you mount, carry you while staying attentive to your cues and will not run off or buck. And he will be less likely to become herd bound and always want to go back to the barn. You have made a good friend because you have made him feel good by not asking him to do anything that he is not physically prepared to do. After mounting training in the round pen in DVD #4, in DVD #5 you will have exercises that are designed specifically for the rider to improve rider balance and effectiveness with the cues. This program is done in a logical and sequential manner. To modify or change it would affect the end results.
The Reward
When we train, we use the same crimped oats as a reward since it gives them the extra energy they will need during training. Crimped oats are also a treat that they will never tire of and will continue to work for. Carrots and other treats do not work the same way and will not yield the same results. I began using this program more than 30 years ago and all of my equines have remained in remarkably good shape. We have had the broodmares on the same program and colic has ceased to be a problem.
We carry the crimped oats in a fanny pack and when the animal knows you have them, and that they will be rewarded for compliance, they don’t run off and are willing to follow you anywhere. Animals need to be rewarded for the good things they do with more than just a pat on the neck in order to insure that good behaviors will be repeated. People get pay and other rewards for their jobs and that is why they continue to do them. Food is the animal’s payment for doing a good job. You just need to learn what food is best to use and how to dispense it appropriately for the best results. For equines, it is crimped (rolled, cracked, or steamed) oats. Contrary to popular belief, the equine that is rewarded with crimped oats is less likely to bite than one that does not get the practice of taking them out of your hand.
Learning the Reward System
The most important thing when training your equine is to learn to dispense the crimped oats reward promptly and generously in the beginning, and only when your equine is complying. This will solidify the connection between you, insure that the positive behaviors will be repeated and will begin to facilitate a strong and mutually satisfying relationship. If your equine tries to pull away, just let go of the rope, call his name, reach in your fanny pack and offer the oats to coax him to return to you. Do not chase him! Do not try to progress through lessons too quickly as this is usually what causes disobedience.
Before you begin leading lessons, your equine should be rewarded frequently during the tying lessons when he is not pulling against the rope. This way, he will know that he will be rewarded when the rope is loose. It is the same for each new task. When he complies easily, he should be rewarded and you can move on to a new lesson, but be sure to take the process in small enough steps to assure his success at every step. Be generous with the rewards for new behaviors being learned! Then, reward less often on things already learned and reward new lessons lavishly. Again, the equine that learns to take the oats reward politely from your hand is less likely to bite you than the one that has never had the practice! If he does get aggressive, there is a definite way to react to your equine.
Correcting Aggressive Behavior
If your equine gets too close or pushy as an adult, you should slap him with an open hand on the side of the mouth, say “No” very loudly and put your hand up like a stop sign. He will then step back, or fling his head back quickly, at which point you should say, “Good, Boy (or Girl),” take a step toward him and give him a reward for giving you your space. In the future, you should only have to put your hand up like a stop sign and say, “No!” If you have done this correctly, the equine should then be conditioned to take a step backwards and wait for his reward when you put up your hand like a stop sign. Be very consistent about when and how the rewards are given, and assess carefully whether a negative correction is truly needed. “No” is the only negative verbal command and will be used as the only word that denotes your displeasure, so there is never any confusion for the equine (do not use any other words or noises!).
Foal Kicking and Biting
Equine foals need to be allowed to play: running, kicking and rolling. This is how they exercise so they will grow to be healthy adults. You should not expect a foal to have perfect manners. You will need to keep lessons short and use good judgment when you are with him to avoid being kicked or bitten. If he does kick or bite while you are doing things with him, use the flat of your hand and give him a quick thump on the rump for kicking or on the side of his mouth for biting…and be sure to say, “No!” loudly when you do. He will probably run off, but should be able to be coaxed back easily at which point you reward him with a nice pat on the neck and then leave him to play. You just want to let him know he should not kick at you, or bite, but it is okay to play. You can resume more serious lessons later. You cannot expect to teach a baby not to kick and bite all the time; it is just part of being an equine baby!
Important Reward System Guidelines
- Many horse feeds are much too rich for most longears and can actually cause detachment and hypertension. Feed only as I describe. This diet is fine for all equines if you have multiple equines.
- Keep the oats reward in a fanny pack around your waist at all times, reward promptly and concentrate only on the lessons at hand (leading straight lines, , backing straight lines, leading in gradual arcs…turns on the haunches come later during obstacle leading training… and no abrupt turns and square him up EVERY TIME you stop).
- Feed can be a huge part of a mule or donkey’s attention problem, but another important consideration is the need for you to be very consistent and calm through each step of the process. All the things outlined in my books and DVDs fit together like a jigsaw puzzle, so it really is important to have all the pieces for the big picture to turn out correctly. For instance, you will see how the feeding of oats and using them as the reward fits together like a glove…how feeding the oats at night makes it easier to bring them in off limited pasture time in the spring and how getting no oats for breakfast makes them more interested in you and your fanny pack during training sessions! I think you are going to find this training program has a lot of “Whoo Hoo!” moments to it to keep you both safe and happy at the same time!
- It isn’t so much how much TIME you spend in training as much as it is the QUALITY of the time spent! Fifteen minutes, once a week DOES build core muscle strength quite adequately! Bulk muscle comes later. If you do your part, he will do his and you BOTH will be great ambassadors for the breed! And, I am always here to help you through any snags along the way. Just FYI, the problems that arise will probably be your own fault and not that of your equine! I learned early on that equine’s always have an honest response to what we are doing. So, when things go awry, just ask yourself, how can I approach this differently for a positive result and the solution should come to you.
- In the beginning, always do your flatwork leading lessons in an enclosed arena, so that if he does get away, he has nowhere to go but back to you to get out.
- Only spend fifteen minutes a week on these leading lessons and only twice a week at the most. In the beginning, they will have a very short attention span and will bolt away when they are bored! If he does bolt, just let go, let him run off (he should be fenced in) and then just stay where you are and ask him, “Do you want more oats?” And shake the fanny pack, then stand and wait for him to come. If he just won’t come to you, just head for the gate and threaten to leave him by himself…just wait by the gate and call him once more. Keeping the lessons short ensures that he won’t get bored and bolt anyway. Leading lessons will take 3-6 months on the flat ground and then another 3-6 months over obstacles. You know when you are finished and can move to the next stage when you can throw the lead over his neck and he will do everything for you that he has learned with verbal and hand signals alone.
- Keep all lessons inside of a fenced in area (it can be very large to accommodate obstacles). Obstacles should first be done just to get through them and change his fear into curiosity…Stage One. Reward him with the oats for every attempt he makes even if he cannot complete an obstacle. If he comes forward towards it, that’s rewardable. Be sure to hold the lead in your LEFT hand, point where you are going with your right hand and match your steps with his front legs and be sure to stop with your feet together! When he balks at an obstacle, don’t just keep pulling on him. Keep a little tension on the line and walk to the end of the rope toward the obstacle and stop. Then shake the fanny pack and say, “Well, are you coming?” Then wait until he comes and reward. When you get to the obstacle, put some oats on it and encourage him to touch it and eat the oats reward on the obstacle. Keep this up to, over and through the obstacles rewarding at every interval of compliance. The approach can be remembered as OATS! Observe (the obstacle), Approach (the obstacle), Touch (the obstacle) and Sigh (a release of tension that he will do upon eating the oats). You stand absolutely still throughout this process only moving forward when needed.
- Study my “Mule Crossing” articles about employing this reward-system training called “Behavior Modification,” that can be found on my website under “Training.”
Halter Training Details
Never leave a halter on an unsupervised equine. Leaving a halter on an equine is very dangerous. He could get it snagged and injure himself severely, or even break his neck! Mules and donkeys learn like children do. During training, use a fanny pack filled with oats and do NOT offer a bucket. It does not produce the same results! You should not even have a halter and lead on your equine until he lets you touch him ALL OVER first! Then you can approach with the halter. If you want to have good results, you need to be working in a natural and logical order that makes sense to the equine to avoid confusion and resistance.
For instance, before you even halter him, ask him to come to you and then reward him with crimped oats when he does come. When he is consistently coming to you, the next step would be to carry the halter with you but not put it on. Reward his approach and acceptance of the halter being present. Once the presence of the halter doesn’t bother him, you can put on the halter. When doing so, be polite. Reward your equine for the approach and acceptance of the halter, then try to loop your arm over his neck while feeding the crown strap of the halter from your left hand to your right hand that is looped over his neck. This way, if he starts to move away slowly, you can pull him back towards you with the loop you’ve created around his neck. Finish by putting his nose through the noseband of the halter. If he jerks away quickly, just let go and encourage him to return and try again by showing him the oats, but do not give them to him until he comes back to your hand. Anytime he moves away, just ask him to return, but do not chase him! Make him come to you for the rewards.
Leading Training
If you have difficulty during leading training, you will simply need to break things down into smaller, doable steps. First make sure you are standing erect in good posture, hold the lead rope in your left hand and give the verbal command to “Walk on.” Walk a straight line for just a few steps, point where you are going with your right hand and keep the left hand securely at your left hip. Then stop with your feet together, face him and reward him for stopping. Make sure he is standing squarely with equal weight over all four feet and reward him for squaring up. Then just stand still for a few minutes. Reward your equine for standing quietly for a few minutes.
Next, turn and face the direction you will be going, point in the direction of travel with your right hand, give the command to “walk on,” and repeat the exercise with a few more steps forward than you did before and stop again. Keep your lines of travel straight with only gradual arcs through turns and with no abrupt movements. Performing the tasks in increments like this will keep him attentive and he will be less likely to forge ahead or drop behind you. This also gives you the opportunity to do things slowly enough to get it exactly right and through repetition, learned behaviors will become habitual behaviors. Don’t try to hold a move too long or do things too quickly or the equine can become confused and not have time to comply properly. When confused, he will begin to lose interest and will engage in avoidance behaviors. Keep lessons short (about 15-20 minutes every other day at the most) and in small enough steps so he can be rewarded. This is called setting up for success.
The task at the leading stage (with showmanship in mind) is not only to teach them to follow, but to have your equine follow with his head at your shoulder as you define straight lines and gradual arcs that will condition his body symmetrically on both sides. This planned course of action begins to develop a secure bond between you. Mirror the steps of his front legs as you go through the showmanship movements keeping your body erect and in good posture. Always look in the direction of travel and ask him to square up with equal weight over all four feet every time he stops. This kind of leading training develops strength and balance in the equine body at the deepest level so strengthened muscles will hold the bones, tendons and ligaments in correct alignment. Equines that are not in correct equine posture will have issues involving organs, joints, hooves and soft tissue trauma. This is why it is so important to spend plenty of time perfecting your showmanship techniques during leading every time you lead your equine. Showmanship is not just a class in a show! It has purpose for the health of your equine!
Importance of Gate Training
Going through a gate seems simple enough, but you can really get into trouble if it is not done correctly. Ask your mule to follow your shoulder to the gate and halt squarely and then reward him (crimped oats) for standing quietly while you unlatch the gate. When going through the gate, you should always push the gate away from you and your mule to walk through when possible. Transfer your lead line from your left hand (showmanship position) to your right hand and open the gate with your left hand if the gate is hinged on the left (switch positions if the gate is hinged on the right, but be sure to keep your body closest to the gate). Ask your mule to walk through at your shoulder, to turn and face you on the other side of the gate and to follow you as you close it. Then reward him again and latch the gate.
After latching the gate, turn back to your mule and reward him yet again for being patient and standing still while you latched the gate. This repetitive behavior through gates will teach him to stay with you and wait patiently instead of charging through, or pulling away from you. This is especially helpful when you are leading several animals at once. This way, you can get through a gate safely with as many as you choose to lead through together. Even if the gate is only two-mules wide, you could lead as many as four through by simply lengthening the lead lines of the back pair, asking the first pair to come through first and turn, then encouraging the second pair to come through. When trained this way, they will all line up like little soldiers on the other side of the gait and receive their rewards. They will stand quietly while you latch the gate and will only proceed from the gate when you ask.
When you return your mule to a pen with other animals, wave the others away from the gate and return to the pen the same way we described. Lead your mule or mules through the gate, reward them and then reward the others for staying back! If you have any problems with kicking, carry a whip with you to keep the problem children at bay while you reward the others first. Do not vary this routine. The repetition will build good habits! Once the others have learned that they cannot approach when you wave them away and each mule knows the routine of going through the gate properly, when you want to take one animal from the herd, you can call his name, wave the others away with your hand, open the gate and allow him to come through and turn (receiving his reward, of course!) to put on the halter. You never have to get in the middle of their sometimes dangerous playfulness again and your animals will all be easy to catch!
As you may have already discovered, the things that I suggest really do build slowly over time into fantastic behaviors and conditioning. This is very much like raising children (instead of just TRAINING them!). All of my training materials cover different aspects of the training process and should be used in their sequential order for the best results. For instance:
- Leading training when done correctly on flat ground teaches your equine to follow at your shoulder, match your steps with his front legs, stay attentive to your cues and stop correctly with equal weight over all four feet and stay that way until you give the verbal command to “Walk ON” (to proceed.” This transfers to standing quietly in every other situation going forward like mounting (or standing still in harness)! You learn to allow him to be responsible for his own balance by leading with the lead rope in your left hand so you do not interfere with his balance as he walks beside you. When you hold the lead in your right hand, you move his head and neck with every step and this throws him off balance and makes for asymmetrical, instead of symmetrical conditioning.
- Leading training over obstacles adds coordination for both of you and enhances the communication between you. Both flatwork leading and obstacle leading strengthens his core musculature, that which encircles the vital organs. When conditioned symmetrically, it allows these organs to work in a healthy way and not compromised by irregular pressure inside their bodies. He begins to discover that the exercises you do together make him feel good, so he will be more willing to leave his friends and go with you! This also cultivates his own proprioception (body awareness) so the incidence of stepping on your feet, or any other balancing problems become minimal in preparation to balance on the circle in the round pen.
- Lunging in the round pen begins to develop bulk muscle over the body in preparation to carry the rider. Doing this correctly makes sure his body is set up correctly for all athletic movements. You learn that it is important to have your equine turn AWAY from you and NOT toward you until he is fully conditioned and able to easily balance his body. When you turn them away from you in the round pen, you can see that they are automatically set up to take the correct lead at canter. When you pull them toward you, it creates an awkward switching of the feet to get into the correct position which puts undue pressure on the stifle muscles. Use of the “Elbow Pull” at this stage of training will help him to stay in good equine posture and balance on the circle at the faster gaits when you are in the middle and cannot influence his balance directly like you can on the lead rope and drive lines.
- Ground driving in the round pen first gives you both a chance to get in sync with rein cues. During leading training, you walked in sync with his front legs and with ground driving you learn to walk in sync with the back legs. When you finally get on board, you will be loosened up through your hips, already introduced to the alternate leg motions that will be necessary to move easily forward through your hips with your equine while on board. Then you are better able to give clear and concise leg cues.
- Then you build on these foundation exercises going forward. My DVD series #1 through #10 give you the exercises to do and covers 7-8 years of training, roughly one DVD per year depending on the animal. The Equus Revisited manual and DVD combo explains WHY you are doing these exercises so you understand the purpose of them all.
Training schedule:
If you do age-appropriate training, it should proceed as follows:
From birth to 6 months: (DVD #1 and #8) Imprinting, grooming, simple tying and leading lessons, introduction to food reward system (and feeding correctly), solid bonding for working relationship
From six months to 2 years: (DVD #1 and #8) advanced leading training (see below) first flatwork training (6-9 months), then over obstacles (6-9 months), learn to communicate effectively and to build core muscle strength and good posture
From 2 years to 3 years: (DVD #2)Lunging (6 months) and ground driving (6 months), further enhance body language communication and strengthen active hard muscle to prepare for a rider
From 3 to 4 years: (DVD #3) Preparation and training for Driving or if you don’t want to drive…(DVD #4) Mounting, walk, trot, back, reverse, halt in the round pen (6-9 months); simple hourglass pattern in open arena (6-9 months), strengthen equine with rider on board
From 4 to 5 years: More complicated patterns in open arena, simple trail riding, fine-tune connection between equine and rider and strengthen both rider and equine
Five years…now ready for specialized activities
Older animals beginning this kind of training will need a minimum of 15-20 minute lessons once a week and a maximum of 15-20 minute lessons every other day for the best results. The time it takes an older animal to get in shape will be less than it would be for a foal just starting out. The older equine will still need to spend:
– 3-6 months on flatwork leading training for strength and balance in good equine posture
– 3-6 months over obstacles to add coordination to their good posture
– 3-6 months on lunging for balancing on the circle and learning to bend through their rib cage while staying erect in their posture (using our self-correcting restraint called the elbow pull to help them hold their own balance until they can sustain it by themselves)
– 3-6 months on ground driving to learn how to communicate effectively through the lines (reins) such that the mule remains balanced and submissive before adding the rider (also done in the elbow pull).
-Doing all these steps before riding your equine gives you the opportunity to fine tune your own skills and for both of you to get in good enough shape to engage activities in a safer and more harmonious fashion.
Reason for a Disconnect
The reason for a disconnection between you and your equine is more than likely due to a lack of the right kind of ground work and time spent with that specific ground work to establish a good working relationship where the animal can learn to trust your judgement. I firmly believe that when you give both you and your equine ample time to learn together by doing very simply things that you CAN do over a longer period of time (like grade school is for children) and then let things progress at your own pace, you can begin to truly enjoy your time together. You learn to appreciate the “little” victories along the way that keep you happy in your learning process. It will be awkward at first, but as you “practice” these simple things, you will get better and will be able to move forward easily. It’s just like learning anything. If the steps are hurried and too overwhelming, you can find yourself defeated before you even get started and the fun is eliminated altogether. That’s where resistance begins. It is better to minimize any resistance by doing the right kind of preparatory work before riding.
When you make yourself as much fun to be with as their pasture mates, they actually love to be with you and they don’t mind leaving their pasture mates. The ground work that we describe in our Training Tips, books and DVDs is very specific during leading training for a reason. Our groundwork practices address the core muscle strength in the animal that supports the skeletal frame. In a few words, when you pay attention to developing their bodies properly from the inside out with these types of leading exercises, it makes them feel better and they recognize that you are the one that is giving them this pleasure. From that will come trust and their primary desire to spend their time with you.
Many equines have learned how to do a lot of “things,” but is probably not doing these “things” with a strong core. Thus, the animal is bound to become sore in muscle groups that are not regularly used and carrying a rider on his back is not pleasant, so he would rather stay with his pasture mates. If you take the time to do these types of leading exercises and quit riding for a while (and follow our reward system of training), you will see a 180 degree turnabout in the behavior of not only one animal, but in the others as well if you employ this routine and logical method of management and training with all of them. Core muscle strength and coordination only takes about fifteen minutes a week with these types of leading exercises.
Separating an animal from their pasture mates is actually punishment for no reason and can cause increased anxiety. You would not only be riding the equine when he is not in the best physical shape, but you would also be responsible for separating him from his friends. Thus, you now become the enemy instead of a “friend.”
I recommend that you keep ALL equines in a dry lot or stalls and runs overnight (during feeding times) and then monitor their collective time on pasture. Treat them all the exact same way. This way, if the oats mix is given in the evenings, they will come off the grass easily in the spring when they should only be on pasture for limited time because they know the oats are waiting. They will be more willing to come to you and your fanny pack of oats in the daytime because they don’t get the oats with breakfast and this is a way for them to get more of their favorite food.
The hardest task is to train oneself to be consistent, respectful of their needs and predictable so they don’t need to become anxious about anything that you do. I learned this the hard way! We all want to RIDE, but sometimes it is to our advantage to spend a little extra time with training on the ground before we actually do get on and ride. It makes all the difference in yours and your animal’s happiness and safety.
The information about equine management and training materials that we offer are listed below.
Training Mules and Donkeys: A Logical Approach to Longears is the first book to be published, has a more abbreviated view of the overall training process and general information about the psychology of mules and donkeys.
The book, Donkey Training is basically the same as DVD’s #9 and #10 without the benefit of the moving pictures (and has bonus information that the DVDs do not have) and illustrates the things that are different about training donkeys as opposed to horses and mules. Donkeys often do things in a different order and sometimes, they don’t need to learn to lunge at all until much later in their training…after they are already going well under saddle, or in harness. This DVD is designed to be used in conjunction with DVD #1 through DVD #8 when training donkeys.
Our book, A Guide to Raising & Showing Mules has a lot of valuable general information that complements the resistance free DVD training series with more about breeding, mare and foal care, and general mulemanship and maintenance issues. It is the perfect complement to the video series and a must-have for beginners and 4-H projects.
In DVD #1: Foal Training, you will not only be imprinting your animal and training for the simple tasks such as tying and leading, but you will also learn how to be prompt and appropriate with your rewards. The exercises will start your equine on a program that will begin to strengthen his muscles and promote coordination.
Imprinting is not just something you do with a foal and then it’s done. Imprinting is the way you touch and handle your animal every time you are with him throughout his entire life. As you learn how he likes to be touched, you can use this to help him to stay calm and accepting. How you touch him will determine whether, or not, he develops confidence and trust in you! When your equine is approached with patience and kindness, and is rewarded for standing quietly, it will be easier to handle him for such things as deworming and doctoring and he will be more willing to stand still to be mounted. The leading exercises in this DVD will start your equine on a program that will begin to strengthen his muscles and promote balance and coordination.
Leading Through Obstacles
Once you have established a good rapport with your equine on the flat ground during showmanship practice, the next step would be leading over obstacles to add coordination to his new strength and balance in good posture. You can tell when your equine is ready to move to the obstacle stage when you can throw your lead over his neck and he will remain at your shoulder and do everything you have practiced during flatwork leading training without you touching him. The first thing you would do over obstacles such as bridges, tires, tarps, etc. would be to teach confidence by encouraging your equine to negotiate these obstacles without fear. This means, you go ahead of them and reward them for their willingness to “attempt” and then eventually negotiate these obstacles. Again, when the equine will perform all these obstacles at your shoulder and do exactly as you ask with the lead over the neck, you can then go to the next stage of lunging in the round pen and learning to balance at the faster gaits on a circle.
Obstacle Groundwork Stages
The object of “Stage One” through obstacles is to turn fear into curiosity, instill trust and confidence and just get them through the obstacle. Never make them “live” with an obstacle as this will instill insensitivity and in some cases, a worse fear. Their stable area should always be their resting place just as our bedrooms function for us, a place of rest and relaxation.
If your mule is not approaching the obstacle easily, do not withhold the reward until they actually negotiate the obstacle such as a bridge, tarp, ground poles, or whatever. Lower your expectations and walk to the end of your lead line, hold it taut and wait for the mule to step towards you. When he steps forward, give him a reward of crimped oats and praise him. Let him settle, then walk to the end of the lead line again getting even closer to the obstacle and repeat the same way. When you reach the obstacle, step up onto the bridge, or over the first ground rail and ask again. Stop him if he tries to run through, or over the obstacle, and reward him for standing with the front feet into the obstacle. You might even want to back him up and reward for that before proceeding forward. Then go away from the obstacle and come back, putting all four feet into the obstacle. Repeat this procedure yet again and ask him to negotiate the entire obstacle slowly and in control. Breaking the obstacle down into small steps like this will facilitate control and keep your mule’s attention on you.
In “Stage Two” through the obstacles, when your equine is more willing to come through easily, you can regain your showmanship position with your left hand carrying the lead line and your right arm extended in front of you pointing to the direction you are going. When the equine is finally listening and will follow your shoulder over or through the obstacle, stop him frequently at critical intervals during the negotiation of each obstacle. Turn your attention to whether he is actually traveling forward and backing in straight lines and stopping squarely. How he negotiates the obstacle will have a direct bearing on how his muscles are being conditioned and how his balance and coordination are being developed, so don’t be afraid to ask for more perfection at this stage!
Stage Two Approach to Obstacles
4 Ground Rails/Cavaletti: 4 Ground rails and 4 cavaletti are good straight forward exercises to promote stretching of the body in true forward motion, developing rhythm, balance, cadence and suspension to the gaits on the lead line, ground driving and under saddle. They are great to enhance your ability to stay in stride with your animal on the lead line with transitions from the flat ground to a more active gait over the poles or cavaletti. You should first do the exercises over the ground rails and then graduate to the 6” cavaletti setting, then the 12” cavaletti setting and finally the 18” cavaletti setting (under saddle only). Your equine will learn to suspend and place his feet in a balanced and deliberate fashion while you learn to do the same. Getting in rhythm with your animal’s stride will enhance the riding and driving experience later and will make things a lot easier and safer for you and your equine. Alternate between stopping and trotting on after the obstacle to maintain your equine’s attention on you and to make sure he stays balanced and ready to do anything you might ask.
The Bridge: The Bridge will help develop the eye/hoof coordination. When he is confident about going over the bridge, he is ready for Stage Two leading for good balance and coordination. Those first steps onto a bridge will determine how the rest of the body will follow. Since balance is very sketchy in the beginning at best, you should break these obstacles down into small steps. Approach the bridge then stop at the base and stand for a few seconds. Then ask him to put his front feet on the bridge and again, stand for a few seconds (squarely, I might add), then all four feet and stand again on the middle of the bridge, then two front feet off the bridge with the back feet on (still square). Most equines can do the first few positions pretty easily, but when the front feet go off the bridge, their balance is often thrown forward and they find it very difficult to stop in this position. This will determine whether you are done with your bridge work or not! If your animal is having problems in the showmanship position, you can use the technique we use with donkeys (Video #9) and stand directly in front of him to stop him from falling forward in this last position over the bridge. If he has been properly trained to this point, he should not run over you, but will use your arms to help steady him in the correct position. Then walk off the bridge and ask him to square up again and reward.
The Tarp: The tarp will affect your equine’s balance and coordination dramatically. The uneven surface and noise that it makes will cause the equine to veer off balance from side to side as he crosses the tarp. Again, break this down into small steps as you did with the bridge, stopping at the edge of the tarp, stopping with the front feet on the tarp, then all fours, then fronts off and hinds on, and then finally walking of the tarp to a perfect halt. When he can negotiate the tarp with no visible signs of a loss of balance or disobedience to the halt, he is ready to negotiate this obstacle backwards. He will then be placing his feet such that the balance is evenly distributed over all four feet and his foot placement is coordinated and deliberate. The obstacle becomes an effortless task.
The Tractor Tire: The tractor tire is a wonderful exercise in coordination! The first task is to ask him to adjust his stride to walk through the middle of the tractor tire, but again, break it down into small steps: stop before the tire, one foot in the tire, then two front feet in the tire, then allow the front feet out and the back feet in, then exit. When he is calm with this, you can add to this exercise by stopping him with his front feet in the middle of the tire and ask him to do a turn on the forehand. Watch his legs carefully to make sure he is executing it properly by crossing the near hind in front of the far hind as he turns without stepping the front feet out of the center of the tire. Allow him to adjust the front feet back to center if they get too close to the edge of the tire. Just stop moving the hind, halt, adjust the front, halt and begin moving the hindquarters again. Only ask him for one step at a time to make sure he stays attentive and ready to stop and stand at any point in the exercise.
When he can do this easily, you can then put his hind feet in the middle of the tire and do the turn on the haunches, crossing over in front of the hind pivot foot and the inside front foot as he makes the turn. Again, if the hind feet need to be adjusted back to center, stop, correct the hind feet, stop again and then continue. The tractor tire is a great coordination exercise because it not only addresses forward motion, but simple lateral motion as well. These exercises will begin to strengthen those hard to condition inside forearm, gaskin and stifle muscles.
Back Through “L”: The back through “L” will fine tune your equine’s response to “Whoa” and he will learn to allow you to adjust the different quarters of his body and move them independently from one another. First walk forward through the obstacle, stop, and then back through slowly and steadily. Once he is doing this well, you can then go back and stop at the beginning, then back one step (ONLY ONE!). Then proceed forward to the middle of the first straightaway and stop, then back two steps. Go forward again to the outside rail at the turn, halt, then move his front feet one or two steps to the middle of the second straightaway and halt. Then ask for one or two steps forward into the straightaway and halt. His back feet will be cutting the corner into the 90 degree turn, so after he halts, move the hindquarters one or two steps to straighten him and halt, then walk to the end of the straightaway and halt. Do the same series of steps in reverse. This exercise teaches him to be balanced throughout the obstacle and to learn to wait for you to move his front and rear quarters into any position and only as many steps as you would like. These exercises will begin to strengthen those hard to condition inside forearm, gaskin and stifle muscles.
Six tires on the Ground (3×3): This is an interesting obstacle for coordination as they have so many different places to put their feet when walking through the tires. They will want to waiver and step out the sides, but you still want them to maintain deliberate foot placement, so stop and plan each step carefully such that it keeps your animal in a straight line over these tires. You can stagger the tires in a number of different ways: so they would need to step between tires to maintain straightness, so they must step in all tires to maintain straightness, or such that they have a mixture of stepping in the middle of the tires and between the tires to maintain straightness. This keeps them alert and careful about foot placement and fine tunes their balance capabilities. Only ask him for one step at a time to make sure he stays attentive and ready to stop and stand at any point in the exercise.
Side Passing the “T”: It is important that your equine has executed the straight forward obstacles and lateral tractor tire obstacles before attempting to do the “T.” The “T” is a great way to fine tune true sideways lateral motion where both front and back feet are crossing over simultaneously, in a balanced fashion, moving the equine laterally to the right and left within the same obstacle. In the beginning, break the simultaneous motion into a turn on the forehand and then a turn on the haunches to get him to side pass along the first rail. After side passing the first rail, ask him to do a turn on the haunches onto the base of the “:T” and then side pass to the end and back to the top of the “T” again. Then ask him for a turn on the forehand to move his haunches one quarter turn into position to side pass the last rail at the top of the “T.” This obstacle uses all the elements we have taught him in previous lessons and lays the groundwork toward perfect communication between you and your equine. He must listen at every step to execute this obstacle correctly.
In the beginning, you will need to teach him to side pass by moving first the front quarters, then the hind quarters at each step to maintain straightness in the body throughout the obstacle, but as he gains better balance and coordination, he will be able to move the feet, front and back, simultaneously along the side pass rails. This is when the inside forearm, gaskin and stifle muscles will really begin to develop properly. Only ask him for one step at a time to make sure he stays attentive and ready to stop and stand at any point in the exercise.
Jumps: Jumps are a good exercise on the lead line, but you must be careful not to over-jump your animal at the beginning. Though equines are large animals, they still need to have great strength in the hindquarters to boost their heavy body over a jump and if they are not strong, it is an easy way to pull a muscle! Jumping should only be done after the other obstacles are mastered. Mules are very good jumpers and have the ability to jump from a standstill, so still use the stop, jump, stop procedure to maintain control when on the ground with the lead line or drivelines. You can change the exercise to the hunter style under saddle quite easily later.
If you want your equine to jump on the lead line, you MUST go over the jump yourself for the first few sessions, or he will not really understand what you want and may start dodging the jump. You can teach him to go ahead of you once he takes the jumps with no problem. Keep the jumps very small to start with and understand that he will over jump any jump the first few times. When he is finally tucking his knees and just barely clearing the top, he is then ready for the jump to be raised. Only raise your jumps in 3-inch increments and repeat the exercise until he is clearing it properly and not over-jumping before raising it yet again. The lead line stop and jump procedure will help strengthen and develop his hindquarters and will begin to teach him to lengthen and compress his body as needed to control his stride. Alternate between stopping and trotting on after the obstacle to maintain your equine’s attention on you and to make sure he stays balanced and ready to do anything you might ask.
The Trailer is just another obstacle. Mules and donkeys are no-nonsense kind of guys and will become suspicious of techniques such as feeding them in the trailer. It isn’t really the trailer itself that they distrust, but rather the approach that is used to get them in. We teach our mules and donkeys to be trustful and willing by developing confidence in the handler. When we begin leading training, they are introduced to all kinds of obstacles. We approach the obstacle first and encourage them to investigate everything this way and they are rewarded with crimped oats when they comply. By the time they have learned about trail obstacles and many other things around the farm that could be scary, the trailer is not a threat to them. They will most often just follow you right in knowing there is a crimped oats reward waiting for them and that they have never been trapped into complying! After your equine has learned to get in and out of the trailer easily, ask him for one step at a time while loading to make sure he stays attentive and ready to stop and stand at any point in the exercise. We cover loading the difficult equine in our books and DVDs.
In DVD #2: Preparing for Performance: Groundwork, you will begin your lunging and ground driving lessons. The exercises will increase in their demand and begin to develop more bulk muscle in preparation for work in harness and riding. Equines will be introduced to the snaffle bit and other tack in this DVD. We use English bridles with a noseband and drop noseband over a mild snaffle bit right from the beginning, so they never even try to get their tongue over the bit. This teaches them to accept the bit easily and to form the good habit of taking contact with the bit instead of avoiding it and allowing bad habits to start. It is easier to prevent a bad habit than it is to try to break it later.
You will see how putting the animal in the correct frame (or posture) from the beginning in the round pen with what we call the “elbow pull” enables him to build his muscles correctly and symmetrically throughout his body You will learn how your body language affects his movement in the round pen and on the drivelines. Your equine may begin to be aggressive for his reward and you will learn how to set limits to these aggressive behaviors to set the stage for a polite and well-mannered equine. If biting, or kicking, has been a problem in DVD #1, you will learn how to correct these behaviors in DVD #2.
Round Pen Training
You should not do the work in the round pen until he has completed his lead line training, both on flat patterns and then through obstacles (each DVD is designed to take from 6 months to a year to complete depending on the individual animal, so take your time at each step). During the lead line training, you will be not only teaching him to follow your shoulder correctly, but you will be asking him to do this in the correct equine posture. When he is walking or trotting, he should do so in a straight line, stop squarely, make smooth turns with the correct pivot foot and not fall out of balance while doing all these moves. These simple exercises will help him build muscle correctly throughout his body so that when you do finally begin your work in the round pen, he has already begun to develop muscle strength in good balance with the coordination to hold this posture for longer periods of time. Then he is truly ready to begin work balancing on the circle in the round pen.
In DVD #2: Preparing for Performance: Groundwork, you will begin your lunging and ground driving lessons. The exercises will increase in their demand and begin to develop more bulk muscle in preparation for work in harness and riding. Equines will be introduced to the snaffle bit and other tack in this DVD. We use English bridles with a noseband and drop noseband over a mild snaffle bit right from the beginning, so they never even try to get their tongue over the bit. This teaches them to accept the bit easily and to form the good habit of taking contact with the bit instead of avoiding it and allowing bad habits to start. It is easier to prevent a bad habit than it is to try to break it later. You will see how putting the animal in the correct frame (or posture) from the beginning in the round pen with what we call the “elbow pull” enables him to build his muscles correctly and symmetrically throughout his body You will learn how your body language affects his movement in the round pen and on the drivelines. Your equine may begin to be aggressive for his reward and you will learn how to set limits to these aggressive behaviors to set the stage for a polite and well-mannered equine. If biting, or kicking, has been a problem in DVD #1, you will learn how to correct these behaviors in DVD #2.
During lunging, your equine will learn verbal commands and will gain strength and balance on the circle at all three gaits and through reverses. He will learn how to hold his body erect and in good posture and will not “lean” like a motorcycle around corners. Rather, he will remain upright and bend through his rib cage on the arc of a circles and turns. Reverses should always be done towards the fence of the round pen (and not toward you), so your equine will be set up correctly for diagonals at the trot and correct canter leads. If you let him reverse toward you, it will set him up incorrectly and he will have difficulty taking the correct leads in the open arena later under saddle.
Once he is responding promptly to commands and shows balance at all three gaits and the reverses and halts (halts should always be done with equal balance over all four feet, 4-square, as in showmanship), they are ready for ground driving that will further their balanced response coming from your hands. This is the beginning of your rein communication. This gives you both ample time to perfect your technique and your equine’s response to rein cues before riding. Again, it is very important that all tasks are done with straightness, balance and correct bending through the rib cage. These exercises will add still more strength, balance and coordination to your equine’s body and make it easier for him to respond to your wishes.
Lunging
When you want him to go forward, you need to focus your eyes on his haunches, give the verbal command and don’t look at his head at all. Let your whip following behind the haunches. If you want to stop him, say “whoa” and shift your eyes to his eyes. If you want him to do a reverse, give the command to reverse and move your body sideways such that you are now slightly in front of him and looking at his head again. It is the movement of your body that will make the difference between the halt and the turn. Notice how these subtle differences in your body affect what he does. It will just take practicing these things correctly and you will begin to do better. It doesn’t matter what anyone else does, or says; you go ahead and take the time you need to work this out with your mule!
Lunging is a lot more than just running them around in a circle. It is a tremendous opportunity to see how your body language affects the reactions your equine will have, and how you can fine tune the communication between you and develop balanced, cadenced and rhythmic gaits in your animal. So, start slow and don’t let things go beyond what you can control easily.
With the use of the elbow pull (How to make this is in the Equus Revisited DVD), your equine will begin building muscle over a correct frame. This is better than letting them develop out of frame and then have to go back later and breakdown established muscle that is out of frame and causing problems later. The elbow pull just “suggests” that they stay in frame and is not abusive at all. In fact, it is self-correcting for the equine. If they stay in frame, they feel nothing, but if they get out of frame, it can put pressure on the poll, bit, forearms and back. This is not unlike the grandmother who insists that you walk with a book on your head for good posture. It may sound silly at first, but you will be happy you did as you get older!
The equine also needs to build muscle so he can sustain his balance on the circle without the rider before he will be able to balance with a rider. This is also true when you want your animal to lunge on a lunge line. An equine that has not had time in the round pen to establish strength, coordination and balance on the circle will have difficulty on the line as he will be pulled off balance with even the slightest pressure on the line. Loss of balance will cause stress, and even panic that can result in him pulling the line right out of your hands and running off. This is not disobedience, just fear from a loss of balance and it should not be punished. The animal who has had strength built on the circle before lunging and riding will not exhibit these seemingly disobedient behaviors.
Lunging will begin to develop hard muscle over the base muscles and tendons you have spent so many months strengthening. It will further enhance their ability to perform and stay balanced in action, and play patterns will really begin to change dramatically as this becomes their true way of going. Be sure to be consistent with verbal commands during these beginning stages as they set the stage for better communication later.
Ground Driving
After he has learned these commands while lunging, then you should get him equally as responsive to verbal commands with the drivelines. This is done first in the round pen and then in an open arena to introduce him to a larger space where he will need to become even more responsive to your rein cues.
First, I have learned to realize the different general personality types associated with different equines. It does seem that the larger the animal, the more docile the personality may be as a general rule. Also, I learned that when a donkey or mule has a tendency to bolt and run, it’s because they don’t necessarily agree with what you are trying to do, nor how you are trying to do it. It is ALWAYS the handler’s fault!
If the equine wants to bolt when you ground drive from behind, walk beside him and gradually lengthen the distance one inch at a time until he has accepted the drivelines correctly…no matter how long it takes. I work them no more than 20-40 minutes every other day. I will make sure they get their treats for “Whoa” and “Back.” I do a lot of “Back” while still close in and repeat “Back” frequently at every increased or decreased distance behind. Keep things at a very slow walk until you feel relaxation through the drivelines (not a trace of pull). I am always calm and slow, willing to take all the time in the world if necessary. Constantly review the lessons in showmanship in DVD #1, DVD #8 and DVD #9, going to and from the work areas, and during any ground interaction to help her to really, truly bond to me on a very personal level. I treat every equine as my very favorite.
Certain personality types do take longer to come around, but with great patience, kindness, trust and respect, they eventually do come around. I just wouldn’t necessarily use them for driving, but they can be very good under saddle. In fact, once they do bond more strongly with you and look to you as their “Protector,” they are the ones who will have more “Go” and thus, more athletic tendencies and ability. Figuring out what kinds of things they like to do naturally does help a lot as well.
I have dealt with many animals that were high strung and I know it takes tremendous patience, but I also know they can come around. You might just need to back up and do things even more slowly and more meticulously than you ever thought you needed to, but you should get positive results if you do. Lower your expectations of for a while and try to have more fun with the basics.
If the equine does bolt, never hang on to the reins, lead, or drivelines. Just let go if you are on the ground and let the reins loose if under saddle. Just make sure you work in areas that are adequately and safely fenced, so you can easily catch the equine again. Whether on the lead line, in the drivelines or under saddle, once they realizes that you aren’t going to play “tug-o-war,” they will get a reward for staying and it is a waste of their energy to keep running, they will bolt less and less until the behavior is extinguished.
When ground driving, you should not worry about the whip while in the round pen as the walls will help guide the mule in the correct position. What you really need to do is keep even contact on both reins when going in a straight line (or on the circle in the round pen). To get them to begin stepping laterally, tighten the outside rein slightly and maintain contact on the inside rein, so they cannot complete the turn. Stay directly behind their haunches and urge them forward and they will begin to step sideways with their face to the wall. Only do a couple of steps, then straighten again quickly. You can build in more lateral steps as they begin to understand what you want.
When ground driving in the open, you can then begin to carry the whip in your right hand (always). Set the bend for the leg yield (opposite the way he will be tracking) by shortening the inside rein and holding it steady (Not too much of a bend! You just want to be able to see their eye on that side). Then squeeze and release the directing rein to indicate that you want them to move in the direction you are pulling. Be sure to give plenty of release between pulls so they don’t go too sideways at first. This should be a leg yield action and not a side-pass. The side-pass will come later as they understand what you want. If they don’t follow your leading rein, you can tap them gently on the opposite side to encourage them to move over. It can be very awkward at first, but with time and patience it will continue to improve!
Only after he is smooth, responsive to all commands in the round pen and ground drives well in the open arena, should you mount him and begin riding in the round pen. When he is light and responsive in the bridle in the round pen, then you can ride in the open and perfect his technique and responsiveness in the snaffle bit in the open arena.
DVD #3: Preparing for Performance: Driving, provides all the information you need to safely train your equine to drive. It covers carts and carriages, hitching training, Reinsmanship, Pleasure Driving, Obstacle Driving, working in harness, lateral exercises, obstacles, driven dressage and driving rules. You can begin this DVD after you have completed the foundation work in DVD’s #1 and #2.
DVD #4: Basic Foundation for Saddle. If you don’t wish to drive, you can go straight to DVD #4 and begin your equine’s riding training in a natural and non-stressful manner that eliminates adverse behaviors such as bucking or running off. We address both the needs of the rider and the equine as a team focusing on the right approach, good balance and coordination of both equine and rider. You can begin this DVD after you have completed DVD’s #1 and #2.
When you finally mount your equine and start riding, the only thing left for him to do is to get used to your shifting weight on his back and the new leg cues he will feel on his sides. Because he has learned to carry his own body in good, strong equine posture and has already learned what rein cues mean through ground driving, he will be better able to do all the different moves that you ask of him under saddle without being generally overwhelmed by too many things happening all at once. As you progress under saddle, you will be better able to perfect your own riding skills and your equine will become lighter in the bridle and more responsive to your cues. You both will not have to deal with the weakness, awkwardness, confusion and disobedience that originate from a lack of preparation for the tasks.
In DVD #5: In Intermediate Saddle Training, we help the rider fine tune his own skills and begin to cultivate a harmonious rapport between equine and owner with fun, safe and simple exercises that will enhance your riding experience whether it is for show, or pleasure. You can begin this DVD after you have completed DVD’s #1 and #2 and #4.
DVD #6: Advanced Saddle Training will begin to prepare the rider for specific disciplines and help them to make choices about what they might enjoy more. It demonstrates how the simple elements of dressage are the basis for all equine disciplines including gymkhana, reining, cutting, English and Western pleasure, trail, or even simply weekend trail riding. This kind of training is not just for show, but to keep both of you safe and happy during your time together. You can begin this DVD after you have completed DVD’s #1 and #2, #4 and #5.
DVD #7: Jumping gives the owner the opportunity to learn the fundamentals of jumping and condition their equine in a safe and methodical manner and… how to ride, build and evaluate jump courses. It covers exercises to prepare your equine to carry him safely over any obstacle, multi-level terrain or jumps. You can begin this DVD after you have completed DVD’s #1 and #2, #4, #5 and #6.
DVD #8: Management, Fitting & Grooming. Of course, your equine needs to be fed and maintained properly to get the best response from him during training and this is done in DVD #8. We also offer grooming tips and more advanced lessons in showmanship at the end of this video.
DVD’s #9 and #10 cover techniques that are specific to donkeys and these two DVDs are designed to be used in conjunction with the other video tapes.
DVD #9: Keys to Training the Donkey: Introduction and Basic Training covers groundwork technique that is specific to donkeys, how to train jacks to breed mares for mule production and how to measure your animal for athletic potential and should be used in conjunction with DVDs #1 and #2.
DVD #10: Keys to Training the Donkey: Saddle Training & Jumping covers saddle training and jumping and should be used in conjunction with DVD’s #4 through #7. You can also purchase our book, Donkey Training which is the same as DVD’s #9 and #10, but sometimes having the moving pictures can be more helpful than still shots. Also, if you want to teach your donkey to drive, you would also need DVD’s #1, #2, and #3.
Training Without Resistance (DVD’s #1 – #7) and Equine Management & Donkey Training (DVD’s #8 – #10) are exactly the same as the electronic workbooks that accompany the DVDs. These two manuals are also helpful to those who cannot afford the DVD series or for those who would like a professionally published workbook. They are both translated into French, German and Spanish, so our non-English speaking friends can read along with the DVD series in their own language.
Equus Revisited: A Complete Approach to Athletic Conditioning. This comprehensive 4-part DVD and companion manual explains WHY it is so important to spend plenty of time on groundwork and development of the core strength of your equine. It covers multiple aspects of your equine’s care in great detail with a team of experts. It has a lot of special features about various subjects and in-depth explanations about the anatomy and physiology of the equine.
Why So Many Different Books and Videos
I do offer “Packages” because each of the materials covers the elements of management and training from a different perspective with a different focus:
- Training Mules and Donkeys: A Logical Approach to Longears book is an overview or summary of the entire training program
- Donkey Training book is mostly about what things are done differently with donkeys than with horses and mules during the training process at each stage
- A Guide to Raising & Showing Mules book includes management (housing, fences, disease, teeth, hooves, etc.) , breeding and showing information with some regard to training
- 10-DVD Training Mules and Donkeys DVD series is a collection of the exercises that you DO in what order with each DVD representing roughly 1 year of training (except for 8, 9 and 10…see explanations in detail in what I sent before)
- Training Without Resistance manual is a collection of DVD’s #1 through #7 with extra detailed information in print and available in French, German and Spanish translations.
- Equine Management & Donkey Training manual is a collection of DVD’s #8 through #10 with extra detailed information in print and available in French, German and Spanish translations.
- Equus Revisited manual/DVD combo addresses WHY you are doing all the things that you do in the books and videos. If you had to pick just one book, I would suggest the “Equus Revisited” manual AND the companion DVD. However, buying the Horse/Mule Complete Package (at a discount rather than buying products individually) would give you all you need because basically the Donkey Training book (that is left out) is exactly the same as DVD #9 and #10 and the Equine Management and Donkey Training manual only the manual has extra information that the book does not have.
For more information and purchase of our products, you can call 1-800-816-7566 or visit our website at www.LuckyThreeRanch.com. Our website is also translated into French and Spanish for foreign convenience. Under Training, be sure to read archived articles posted in the Mule Crossing section, peruse commonly asked questions in Ask Meredith, get more details in our Training Tips and watch our new shows and past RFD-TV shows with Video on Demand. If you don’t have a computer, you can go to a library and use their computer, or ask a friend to help you out. Take time to peruse our Classified Ads section (this is a free service and an open forum, so we caution buyers to beware and check carefully). Under Resources, we post contact information for mule and donkey clubs and rescue organizations, keep you up to date about Equine Welfare in the news and heavily support Therapeutic Riding. Click our Homepage links for You Tube, Facebook and Twitter. And, don’t forget to check out our children’s website at www.JasperTheMule.com. Join the American Donkey & Mule Society (www.lovelongears.com, adms@lovelongears.com) to receive their bimonthly magazine with even more valuable information for a mere $27/yr. Learn together, enjoy the time with your equine and excel together!
Best Wishes and Happy Trails,
Meredith Hodges
2007


 By Meredith Hodges
 First, make sure that you have your animal tacked up with a stout nylon halter (one that will not break) and a 25-foot lead of the same strength. A heavy-gauge nylon lunge line works well for this. When attaching the lead to the halter, do not use the snap, as it can easily break. Tie the lead directly to the halter ring with a knot that will not slip or come loose. Note: Never use a chain, as this can cause pain and/or injury to your animal. It is always best to cover your animal’s legs with either shipping boots or leg wraps, to protect his legs from possible injury during loading or transporting. If your equine is a kicker, hock protectors should also be used. If he is the type to throw his head around, a poll guard is also advisable. Sheets or blankets, depending on weather conditions, will help to protect the rest of his body.
 Once he is tacked up for transporting, reassure him with a calm and soothing voice, offer him a small handful of oats and lead him quietly to the door of the trailer, leading him only as close as he is willing to go. Then give him one more small handful of oats, and while holding the excess lead, you go ahead of him into the trailer. Feed the lunge line out the side window and then walk back to your equine and give him some more oats for standing quietly. Fetch the end of your long line outside of the window and bring it down the side of the trailer, where you will find a place to take two wraps and snub the line.
 Note: It is advisable with horses not to keep the slack snubbed so his feet are too close to the edge of the trailer. Let out the slack in the line just enough to keep him clear of anything he could hit if he struggles. Hold him snubbed there instead of directly behind the trailer like you would with a Longears.
 your animal lined up straight behind the trailer. When you want him to load, making a clucking sound and give the command, “Get up.” If he takes a step forward, take up your slack and hold tight. Wait for him to settle before you ask him to move again. If he is resistant, encourage him to step forward by lightly tapping him behind his rear fetlocks, one leg at a time. If he still won’t go, tap a little harder each time you ask. More than likely, if he doesn’t go forward, he may try to back up. Do not allow this!
 that is allowed to go backwards for any distance will use this avoidance behavior whether he is actually fearful or not. The same goes for those animals that are always loaded into the trailer with the use of a reward. They sometimes will eventually take advantage of you and refuse to load easily, even with the reward. A good reward system is essential—however, you must be careful to reward your animal for a task well done and completed, and not use the reward as a bribe. Before you release the snub, make sure your animal has all four legs securely on the trailer floor and is standing quietly. Then attach the breech strap behind him, exit the trailer and close the doors before you release the snub and go to the front to tie him off. You can reach his head through the escape, or feed doors in almost any trailer. The open sides of a stock trailer afford easy access. In an enclosed slant-load, you can step in and easily tie him once the doors are closed behind you and he knows there is no escape. When he is loaded and secured, a reassuring word and a reward for a job well done are in order. In order to assure your animal a comfortable and non-threatening ride, try to make smooth stops and turns as you drive down the road. As he learns that he will not be harmed in any way, the loading will most likely become easier each time and, eventually, you should be able to entirely fade out your 25-foot lunge line and send him into the trailer from behind with his lead rope draped over his back.
 When unloading, simply reverse the process. At first, let him back out as quickly as he wants, but maintain your hold on the end of the line so you can stop him once he is out of the trailer. As he becomes more comfortable with the process, he will back out more slowly on his own. If you have an animal that wants to explode out the back of the trailer, be sure that he is untied in front before you open the doors to unload him. If he starts fighting the tie rope inside the trailer, he could be severely injured. If you keep your animal tied in the trailer and make a habit of removing his shipping boots inside of the trailer before unloading, it will help him to remain calm and will teach him to wait patiently before you release him. In addition, you never want to cause any claustrophobic tendencies in your equine because of a bad experience.
 In the early sixties, mules were among those animals quickly becoming extinct in this country. Thanks to the formation of clubs such as The American Donkey and Mule Society, founded in 1967, and the British Donkey Breed Society, founded in 1966, the trend was reversed and the animals began to get the recognition they justly deserved.
 For those of you who are unfamiliar with the breeding of a mule, he is the cross between a male donkey, called a jack, and a female horse, a mare. The reverse of that–a cross between a male horse, a stallion, and a female donkey, a jenny on jennet–is called a hinny, although many still refer to them as mules. Years ago people used low quality mares to breed to jacks to obtain mules, but today we are improving the breed by crossing better quality animals to obtain better and stronger mules.
 Many have asked about the training of mules. Training mules is much like training horses, but sophisticated trainers would probably agree that they are more like teaching young children. A mule is more likely to perform to the best of his ability if he is allowed to build trust in his trainer. This is where mules and horses differ. Horses have a forgiving nature and are able to forget a loss of temper by the trainer; mules do not forget. When a mule is nervous about a trainer, his ability to perform for the trainer is impaired. Pat Parelli, a California mule trainer, put it quite nicely: “Mules separate crude trainers from artistic trainers.” The mule handled by a crude trainer will generally epitomize the traditional belief that mules are stubborn and ornery. The mule handled by an artistic trainer will not. A technique widely used among mule trainers with great success is the psychological science of Behavior Modification, whereby the animal’s natural behaviors are modified to achieve the desired response through the use of positive reinforcement. Negative reinforcement is also used sparingly. When using negative reinforcement, one must remain calm, patient, and just to ensure the success of the temporary discipline. One must remember that negative reinforcement does not build desirable behavior. It is only used to stop a bad behavior long enough to substitute a desirable behavior. A mule trained in this manner will become a more trustworthy, willing, and predictable friend and companion. Let’s dispel the old saying that mules are “stubborn” and “ornery” and say that there are really no bad mules, only bad trainers.
 The Mule Days celebration in Bishop, California is the largest mule show in the world. Mule lovers, their friends and family enjoy four days of mule-related fun and entertainment. At this particular show there is a little something for everyone: Western cuisine, games, dancing, and conversation in addition to the mule show itself. In 1984, there were over 70 different classes and events for the competitors such as Pleasure classes, Reining classes, Trail, Musical Tires, Barrel Racing and Pole Bending. Also Jumping, Cattle Penning, Steer Stopping, Team Roping, and a Balloon Bust. For the packers: Pack Train classes, Packing contests, Box Hitch and Diamond Hitch packing contests (pro and non-pro), Team Packing and the Team Packing Scramble which you have to see to believe! There are Halter classes, Pulling, Driving classes, and for you race fans: Chariot races, Flat Track races, and yes, even a Backwards race! To highlight the events, there are featured performances by special people and mules. Almost every year, the 20-mule team makes an appearance and in 1981 Slim Pickens, Grand Marshall of the Mule Days Parade, drove his team to victory in a chariot race! In 1984, Colorado’s own Al Kaly Shrine Temple Mule Train World Champion Drill Team out of Colorado Springs gave a memorable performance on their beautifully matched, black army mules. This mule show brings together so many people with different backgrounds and interests for a perfectly glorious weekend. Each year leaves you looking forward to the next.
 The year before, John came down with a mild case of mule fever and decided to breed his red-road, half-Arabian mare, Missy, to Little Jack Horner here at the Lucky Three Ranch in Loveland. The breeding went smoothly and the mare was sent home. She returned 15 days later for her ultra-sound pregnancy check, at which time we discovered she had conceived twins. Since the twins posed a life-threatening situation, Kent Knebel, D.V.M., our attending veterinarian and I advised John of his options. We could abort the twins and start over or we could abort one and hope the other survived. The third and most risky choice would be to let nature run its course and hope for the best. John opted for the latter and took Missy home. She would be due to foal in August.
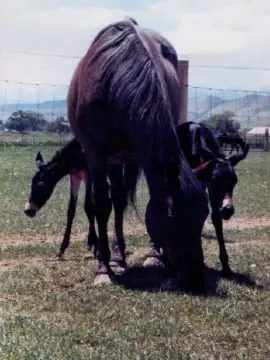 sustain two fetuses and the way the uterus contracts during the birth process. In a dog, cat, or animal given to litters, the uterus contracts in segments, giving each baby an opportunity to “line-up” for birth. In equines, the uterus contracts as a whole, often causing both babies to be pushed into the birth canal together. This usually ends in disaster. Before birth, a stronger twin may horde the larger part of the mother’s nutrients causing the second twin’s growth to be stunted. The degree of deprivation determines whether the smaller twin can survive, provided they both make it through the birth process. Either way, twins in equines are an extremely risky situation.
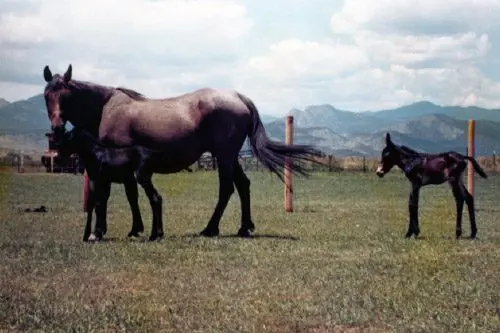 In two weeks, Missy dropped some of her weight and began to look more like a pregnant mare again. Apparently the unsupervised pasturing had allowed her to become somewhat obese. She began to wax after two weeks and we were ready for action, but she fooled us. The waxing stage came and went and she began streaming milk wherever she walked. On July 3, Dr. Knebel took another look at her while he was out at the ranch tending to another patient. “Looks like a firecracker birth to me…” he announced, “or maybe the day after.”
 By Meredith Hodges
 In 1979, I witnessed my first Bishop Mule Days Sierra Nevada packer’s rendezvous. That was where my career in training mules and donkeys in every recreational equine event began. I was “ass-tonished” at the impeccable way these knowledgeable men and women handled their mules, wagons, packs and equipment with such grace and dignity…and not without a proper measure of good humor! I caught a very bad case of “Mule Fever” and began my own pursuit with Longears in ALL forms of equine athletics. Bishop Mule Days grew from the weekend packer’s rendezvous into the weeklong show over Memorial Day weekend that it is today and they continue to add new classes each year to accommodate the accomplishments of a lot of Longears-lovers like myself along the way. Little did I know, the friendships I started then were to last a lifetime!
 In 1980, I founded the Lucky Three Ranch in Loveland, Colorado and embarked on a breeding and training program of my own with Lucky Three Sundowner, the last mule and Little Jack Horner, the last donkey jack born at Windy Valley Ranch in 1980. Sundowner was shipped to the ranch right away, but Little Jack Horner had to wait and be picked up a year later. Just outside of Sparks, Nevada in 1981, we were hailed to pull over by a jolly and quite charming man, Ernie Fanning who ran up to my truck and blurted through the driver’s side window, “I just KNOW you have a Windy Valley jack in the back of that trailer!” To this day, I don’t know how he could tell it was a Windy Valley jack only by the head and ears that showed above the stock trailer back door. All I can say is that man certainly knew his mules and donkeys, and I made yet another friend for life that day!
 Years passed, Bishop Mule Days grew as did my love for Longears and the people that came with them. I bred and showed Longears for many years, then judged and began a promotional career in support of Longears everywhere. Bishop Mule Days was where I met Bonnie Shields, the leading half-ass Tennessee Mule Artist and illustrator for my children’s series of books and DVDs, Jasper the Mule. Even though I no longer showed, I was still a welcome part of the Bishop Mule Days rendezvous family year after year as a respected dignitary and sponsor. One of our greatest thrills was when Bonnie, Jasper and I were invited by Bobby Tanner to ride in the old Borax Wagons pulled by the 20-Mule Team in the Bishop Mule Days parade three years in a row (2012-2014). What an incredible honor that was!
 On January 1, 2017, the new Borax Wagons and the 20-Mule Team made their debut in the Tournament of Roses parade in Pasadena, California. They held a practice in the desert near Bishop before they left for the parade and the mules all did great! On the parade route, they would be asked to make a tight turn onto Colorado Avenue in the midst of a lively crowd and would be asked to “jump the chain” to make that turn. What a spectacular feat to behold and they did it beautifully on parade day.
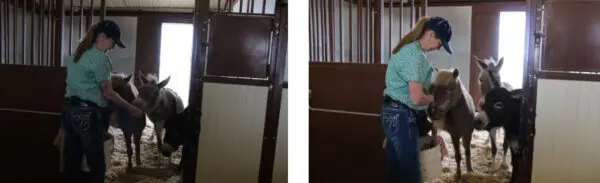
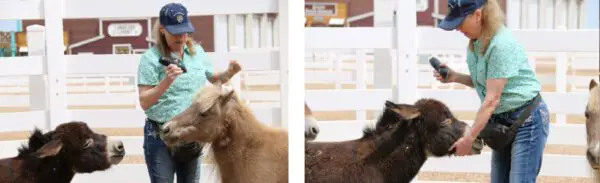
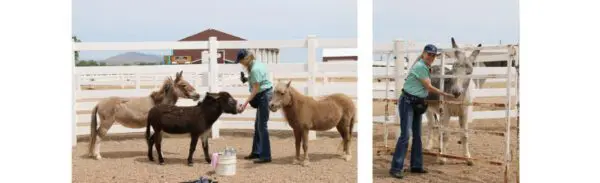
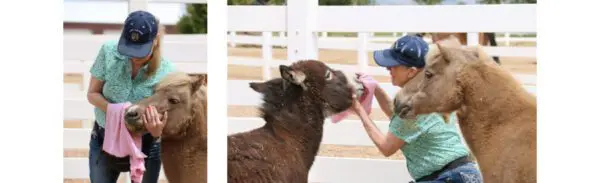
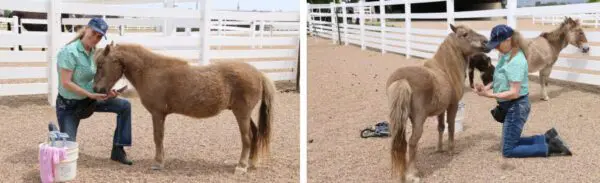
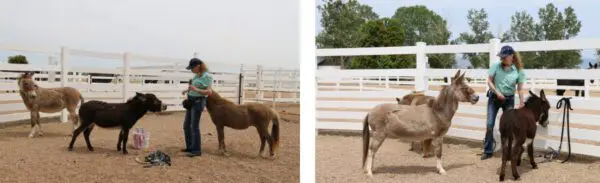
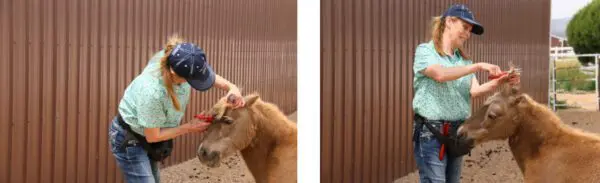
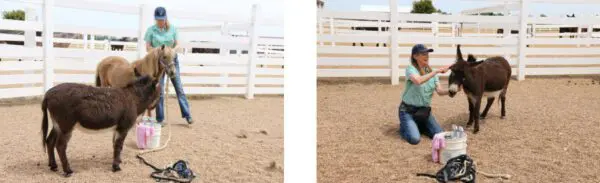
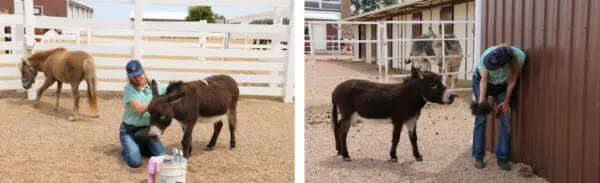
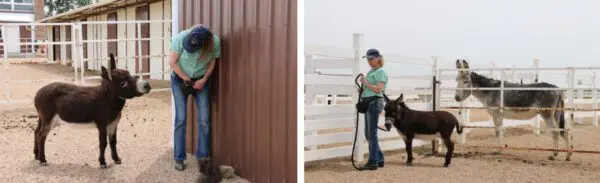
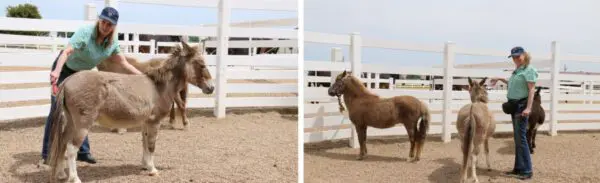
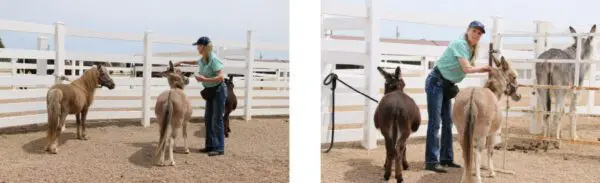
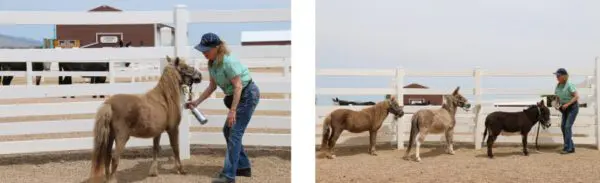
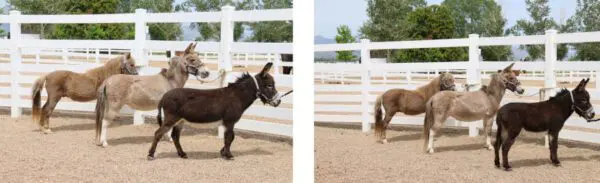

 September 30, 1989, marked another historical event for the mule industry; it was a mule and donkey promotional extravaganza held at the Lucky Three Ranch in Loveland, Colorado. Hosted by Gary and Meredith Hodges, 250 Colorado Donkey & Mule Society and Rocky Mountain Longears Association members, their families, friends, and business associates gathered for a fun-filled evening of good food, entertainment, dancing, and Longears displays. Even the mules and donkeys had a good time meeting and greeting their numerous guests, some of whom had never before had any personal contact with Longears. By the end of the evening, they were pleasantly hooked on Longears!
 Dressage is one of the oldest sports known to man. Its history dates back to times of war when the horse was trained and used to protect its rider from the hazards of war. During World War II, General Patton was responsible for aiding Colonel Alois Podhajsky in the protection of the famed Lipizzaner stallions of Vienna and the rescue of the mare herd. The stallions stand apart in the eyes of horsemen everywhere. Their riders are, perhaps, the best in the world. Since the time when the Art of Horsemanship was nearly lost at the end of W.W. II, it gained momentum and riders gained more respect for the art of Dressage. Dressage is a slow, humane and methodical approach to training equines. It is designed to condition and teach both rider and equine as a team, in a logical and appropriate sequence of gymnastic exercises. In Dressage, the respect and obedience is attained through no forceful or artificial means and the result is a picture of harmony in motion. The goal of Dressage is to cultivate a mount that is quiet, supple, obedient and appears to be doing of his own accord. This kind training is the most desirable foundation for all types of performance.
 The 14th Annual Meeting of the United States Dressage Federation was held November 18-23, 1986, in Houston, Texas. Recognizing the need for the mules’ acceptance in this realm of Horsemanship, Sally McClean and I attended this convention in support of mules and asked that they be eligible for registration in the U.S.D.F. This registration would entitle mules to the same opportunities in Dressage as the horses. There was some discussion as to the physical appearance and capabilities of the mule. With photos and videos, we were able to convince them of the outstanding appearance and abilities of today’s well-bred mules. We were fortunate that precedence had already been set by Ann Hathaway and her lovely 17.2 hand Dressage mule, Baby Huey, and by Maryster Farms Kit, a 15.3 hand Dressage, Combined Training, and Foxhunting mule owned by Edith Conyers of Kentucky. Most of the U.S.D.F. members agreed that there was indeed a certain beauty about the mules and none denied that the athletic abilities were present. Conduct and appearance of the exhibitors was also discussed and found to be of minimal concern. Those who had the opportunity to show with Kit remarked on the consideration of her owner and rider. Knowing how frightened some horses could be at the sight of a mule, Edith Conyers and Cathy Weischoff kept Kit a safe distance from those horses who were frightened until it was their turn to show. Edith exhibited not only her mule, but good judgment and consideration as well. It was duly appreciated. When all was said and done, the main question asked by the U.S.D.F. was: “Is the mule, in fact, an equid?” The answer was, “Yes!” And at that, no
  change in the by-laws was necessary, only a more educated interpretation. At the general meeting on Saturday, November 22, before the awards banquet took place, it was announced that mules would, hence, be allowed in the U.S.D.F. as of January of 1987!
 Welcome to Mule Xing; this is a column designed to take care of some of those unanswered questions about mules. Mules have made contributions to the building of this country since its beginning: they brought the pioneers across rough and rugged country to their new homes in the West, carried arms and equipment for the army, and worked long days in the fields. With industrialization came a gross decline in the mule population; there no longer seemed to be any use for the mule.
 animal capable of performing well in all forms of equine athletics. He can do cow work, work and pleasure driving, packing, jumping and is better suited for long trails, yet he still possesses all the traits that have made mules popular throughout the centuries: a willingness to work, an easy keeper, more resistance to parasites and disease, extremely surefooted and his indubitable intelligence that is often confused with stubbornness.
 What of the person who is curious about mules, but shies away because of the stigma attached to them? I can only say that there was a time when people would laugh, but in this new age a new breed of mule is causing mockers to choke on their laughter. He is better bred than his ancestors and his ability turns laughter to awe. The modern contemporary saddle mule has been banned from competing with horses in such events as Cutting and Jumping because he has proven to be consistently and considerably better than the horses in those events. In keeping with the evolution of the mule, more and more all-mule shows are springing up all over the country sponsored by concerned mule enthusiasts. The shows cover a wide spectrum of mule activities, from judged events to just plain fun and games. The growth of such shows has more than tripled since the late 1970s and is ever growing. The modern contemporary mule is now taking the credit he so richly deserves; he sees what the horse can do and thinks, “Anything he can do, I can do better!”
 By Meredith Hodges
 walking in sync with first his front legs and then with the back legs to teach your own body to follow his rhythm and cadence, prepping your body for his motion when you finally mount and ride him. Your equine must now become accustomed to direction coming from his bac (over his head), but first he must learn to adjust his balance to your additional weight.
 yourself aboard, dragging your right leg against his body gently, but firmly, up his hip, over his rump, and down the other side to the stirrup on the off side. If this does not disturb your equine, while verbally reassuring him, rock your weight from side to side and let him feel how the saddle over his back. Touch him gently and reassuringly all over the parts of his body that you can reach easily from your position. The more movement that he can tolerate while standing still, the better he will do later. Do only as much of this in any one lesson that he is able to calmly tolerate. Always try to end your lessons on a positive note! Do not get in too much of a hurry…that’s when the trouble starts!
 The first time or two ask only for the walk and back it up with soothing verbal commands to “Walk on.” When he is calm and quiet during the walk, you can then give him the command to “Trot” and gently squeeze/release with your legs to send him forward. You should always have a gentle, but firm, contact with his barrel so your leg cues to not “come out of nowhere” and startle him. Be sure to work evenly in both directions. Keep your assistant on hand throughout this stage of training until your equine works reliably at walk, trot, canter and back with no resistance or bolting. He WILL need to go faster at those gaits until he builds up his strength enough to support your additional weight, so don’t get too excited about…just ride it! he will slow down as he gains strength and confidence. If you begin to fight with him through the reins, he will only become more excited and anxious and resist. We want to set things up so he can SUCCEED in his tasks! This will prevent you both from becoming unnecessarily hurt, or seriously injured.
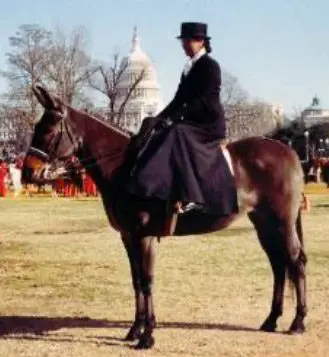 Mules and donkeys once again made their appearance in a prestigious fashion at the Inaugural Parade held in Washington, D. C., on January 20, 1993. Being invited to participate was indeed an honor, and the American Donkey & Mule Society was respectfully represented thanks to the long hours and hard work contributed by A.D.M.S. representative and parade coordinator Janet Luke, from Alta Loma, California. Prospective parade entrants had to be contacted and advised as to the strict requirements of such a parade. Arrangements had to be made for animal transport and stabling, signing of applications and release forms, and general organization of the group. Just trying to arrange for transport of my own mule and airline tickets for myself was complicated enough, not to mention
  expensive. Thank you, Janet Luke, for a superb job of organizing and coordinating our parade group entry!
 shipped via Nation-Wide Horse Transportation, Inc. to Hunter Mountain Farm in West Augusta, Virginia. My friends and fellow parade participants Barbara Hunter, Cindy Powell, Crystal Wilfong and Wynn DiGrassie graciously cared for “Bea” for two weeks before the parade. Then, on January 18, my friend – and newcomer to the mule industry – Jack Skendzel and I flew to Washington, D.C., to meet with the rest of the A.D.M.S. parade participants at the Prince George Equestrian Center in Alexandria, Virginia the following day.
 riding Western mule Lucky Three Stardust, and Wynn DiGrassie, riding Western Side Saddle mule Adkins Banjo, both from Hunter Mountain Farm in West Augusta, Virginia. Loyd Hawley rode Western mule My Darlin Clementine, from Hawleywoods Mule
  Farm in Prairie Grove, Arkansas; Christie McNerney from Prince George, Virginia rode her Appaloosa mule “Old John”Western, as did Skip Neese from Liberty, North Carolina. Garon Stutzman of Clifton, Virginia was our Hunt Master on a tall, sorrel mule that he had recently named Hillary, while Judy Young from Marrietta, South
  Carolina, represented the Dressage discipline on her tall, bay mule, Laser. Allan Valk, our rather outspoken mountain man from Cornelius, North Carolina, rode his donkey jack, Tricky Dick and was nearly captured by an all-girls’ trick riding unit!
 Bea C.T. and I represented the English Side Saddle entry from Loveland, Colorado. Our group was led by the official Democratic donkey, Irene and we were accompanied by another spotted donkey that had been designated the official “Donkey for a Change.” All together we had 17 donkeys and mules, and twenty-five people in our Inaugural Parade entry.
 attendance and by the history that surrounded us! It took awhile for our military escort to find us a place to park the trailers in preparation for the parade, but we did receive a wonderful tour of Washington, D.C.’s historical monuments, including the Capitol building, the White House, the Washington Memorial, the Lincoln Memorial, the Jefferson Memorial, the Vietnam Vet’s Wall Memorial and all of the buildings housing the Departments of “this and that!”
 drivers deserve a hearty thank you for their part in keeping us on time and well organized! After we unloaded the mules and donkeys, our drivers were escorted to parking at the end of the parade route where they patiently waited until the end of our part in the parade. After being lost in Arlington Cemetery and at the Pentagon the day before, Jack and I felt that being lost with the trailer in D.C. proper was simply the completion of an adventurous tour!
 Although we arrived at our makeup area at about 10:30 A.M., we were not fed into the parade until around 5:30 P.M.! Horses in the other equestrian units were becoming somewhat tired and anxious, but our donkeys and mules, patient and durable animals that they are, waited in anticipation with dignity and purpose while group members exchanged humorous stories and experiences.

 The modern donkey is descended from the Nubian Wild Ass of North Africa.
 important. Mules and donkeys can be obedient and extremely reliable when they feel you have their best interests at heart. But treat them harshly, and you’ll encounter resistance at every turn. Mules and donkeys will not do anything that they perceive is dangerous to their health.
 At the beginning of training, you should offer rewards often, although only when your animal complies with your direction. This will strengthen the bond between you and encourage good behavior. If your equine pulls away, don’t chase. Simply let go of the ropes, reins, drivelines, etc., and offer him oats until he returns. Your task is to correct and redirect. When your animal understands which behaviors result in a reward, he will want to repeat those behaviors. This is called “behavior modification.”
 Once your foal is comfortable being handled, you should be able to halter him with little trouble. Feeding time is a good time to start. Teach your foal about the halter and leading while he is still young. You’ll be using halters and lead ropes with him all his life, so the more experience he has with these, the better for both of you.
 When you can easily halter and tie your foal, untie him and ask him to follow. If he refuses, just tie him up again, wait 10 minutes, untie him and ask him again. When he follows for a few steps, praise him, so he knows he’s doing well. There’s no need to jerk or pull him or hit his rump. Keep your voice calm and use simple commands. Be patient, work with him and reward him when he does what you ask.
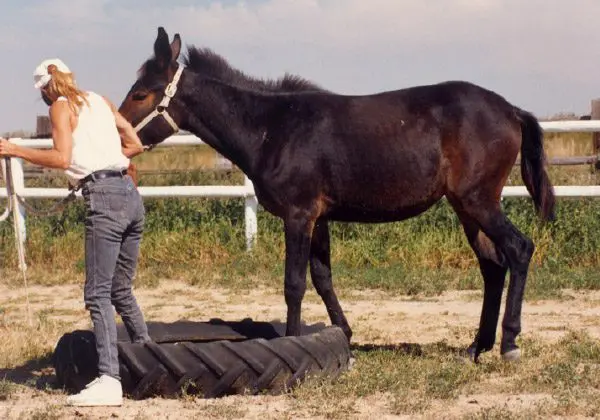 The work to develop muscles, tendons and ligaments over a good frame (proper equine posture) doesn’t start in the round pen—it begins on the lead line. Showmanship work on the lead line helps develop strength and balance on the flat ground, in a controlled situation. Leading over obstacles adds coordination to strength and balance. Take your time at this stage of training before moving your animal to the round pen to learn balance at all three gaits on the circle.
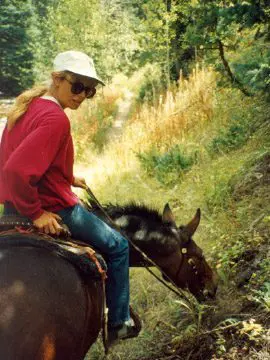 When you think of mules and donkeys, activities such as driving, packing and trail riding probably come to mind. But these days, mules, in particular, perform in an amazing variety of events including reining, roping, pleasure classes, endurance events, hunter classes, jumping and even dressage and combined training. In fact, in 2004, the United States Equestrian Federation voted to allow mules into sanctioned dressage competition.
 physically or mentally ready to carry a rider until he’s four years old. When your mule is physically prepared, comfortable with the saddle and bridle, and proficient in ground driving, then you’re ready to ride.
 Driving can be hazardous for you and your animal, not to mention whatever or whomever is in your path. Choose a good mule candidate—one who will stay fairly calm in the face of new situations. If you’re inexperienced, be sure to work with a trainer before setting off on your own.
 training program worth its salt will address not only the exercises required for performance, but also the physical, mental and emotional well-being of the animal.
 Our Training Mules and Donkeys DVD training series, was developed to help you to train your own animal with resistance-free techniques. This is important, especially in the case of mules and donkeys that actually bond to the person who trains them. In order for our program to work, it is important to use it correctly. Regardless of the age or experience of the animal, you need to begin with DVD #1 and take the training in sequence. Each DVD poses different tasks to help facilitate a good working relationship with the trainer and helps to strengthen the muscles at each stage to prepare the animal for things to come. We are preparing the animal physically, mentally, and emotionally. This is why it is important not to proceed too quickly and to do things in their natural order.
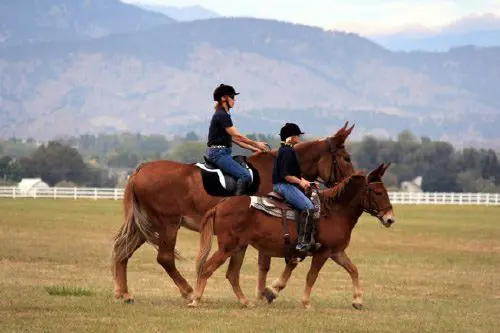 Our program is like grade school for equines, and lays a good solid foundation for versatility and optimum performance. We begin with simple tasks that build on each other. This not only teaches the animal to do what we ask, but it also teaches us to become more prompt and appropriate in rewarding positive behaviors to get the best results. We do not use the reward system (crimped oats) to bribe or coerce. The oats are given only after a positive task has been completed. When you do this correctly, there are little to no resistive behaviors. When we do this correctly, the animal learns to want to please, enjoys his time with you, and actually looks forward to each training session. The result is an obedient, submissive, dependable companion and athlete, capable of performing English, Western, Gymkhana, Driving, or any other equine activity that you would prefer.
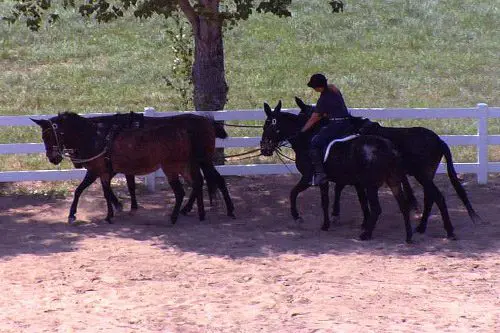 We developed this program to encourage people to form their own relationships with their animals, so they can get the best from their animals. The DVDs give you a lot of detail about what to do from day to day in your training sessions, which is virtually impossible to do with clinics or from sending your animal to a trainer. I am available by phone or mail should you have difficulties along the way, and I am prompt in getting back to you, so problems can be dealt with when they arise. Imagine! Your trainer is only a phone call or e-mail away! The cost is also considerably less than sending your animal to a trainer.
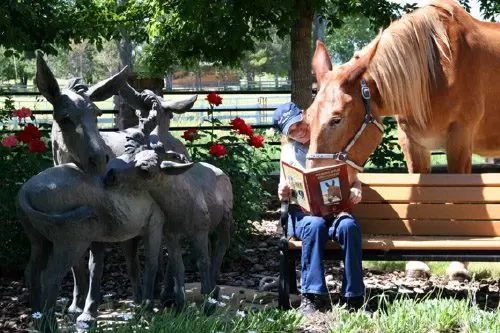 from any equine whether large or small, donkey, mule or horse. It is designed like grade school is for children. You and your equine will learn together in a natural and logical order.
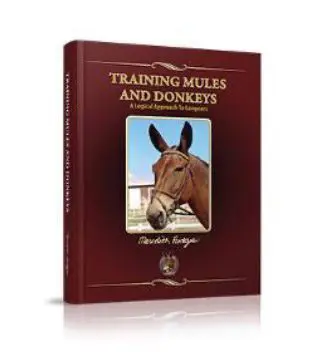
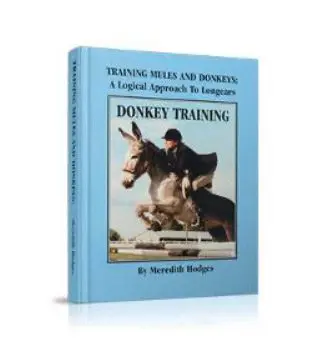 The book, Donkey Training is basically the same as DVD’s #9 and #10 without the benefit of the moving pictures (and has bonus information that the DVDs do not have) and illustrates the things that are different about training donkeys as opposed to horses and mules. Donkeys often do things in a different order and sometimes, they don’t need to learn to lunge at all until much later in their training…after they are already going well under saddle, or in harness. This DVD is designed to be used in conjunction with DVD #1 through DVD #8 when training donkeys.
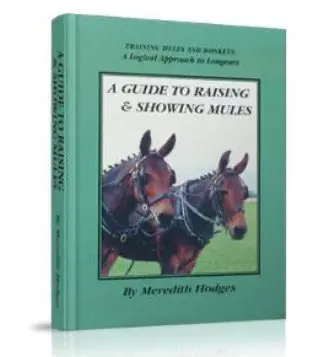 Our book, A Guide to Raising & Showing Mules has a lot of valuable general information that complements the resistance free DVD training series with more about breeding, mare and foal care, and general Mulemanship and maintenance issues. It is the perfect complement to the video series and a must-have for beginners and 4-H projects.
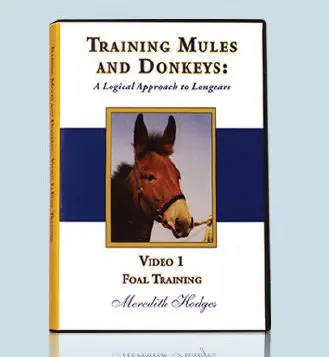 In DVD #1: Foal Training, you will not only be imprinting your animal and training for the simple tasks such as tying and leading, but you will also learn how to be prompt and appropriate with your rewards. The exercises will start your equine on a program that will begin to strengthen his muscles and promote coordination. Imprinting is not just something you do with a foal and then it’s done. Imprinting is the way you touch and handle your animal every time you are with him throughout his entire life. As you learn how he likes to be touched, you can use this to help him to stay calm and accepting. How you touch him will determine whether, or not, he develops confidence and trust in you! When your equine is approached with patience and kindness, and is rewarded for standing quietly, it will be easier to handle him for such things as deworming and doctoring and he will be more willing to stand still to be mounted. The leading exercises in this DVD will start your equine on a program that will begin to strengthen his muscles and promote balance and coordination.
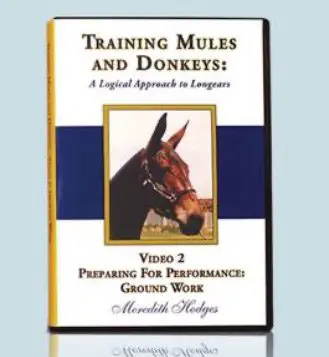 In DVD #2: Preparing for Performance: Groundwork, you will begin your lunging and ground driving lessons. The exercises will increase in their demand and begin to develop more bulk muscle in preparation for work in harness and riding. Equines will be introduced to the snaffle bit and other tack in this DVD. We use English bridles with a noseband and drop noseband over a mild snaffle bit right from the beginning, so they never even try to get their tongue over the bit. This teaches them to accept the bit easily and to form the good habit of taking contact with the bit instead of avoiding it and allowing bad habits to start. It is easier to prevent a bad habit than it is to try to break it later. You will see how putting the animal in the correct frame (or posture) from the beginning in the round pen with what we call the “elbow pull” enables him to build his muscles correctly and symmetrically throughout his body You will learn how your body language affects his movement in the round pen and on the drivelines. Your equine may begin to be aggressive for his reward and you will learn how to set limits to these aggressive behaviors to set the stage for a polite and well-mannered equine. If biting, or kicking, has been a problem in DVD #1, you will learn how to correct these behaviors in DVD #2.
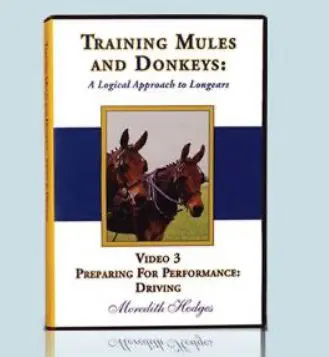 DVD #3: Preparing for Performance: Driving, provides all the information you need to safely train your equine to drive. It covers carts and carriages, hitching training, Reinsmanship, Pleasure Driving, Obstacle Driving, working in harness, lateral exercises, obstacles, driven dressage and driving rules. You can begin this DVD after you have completed the foundation work in DVD’s #1 and #2.
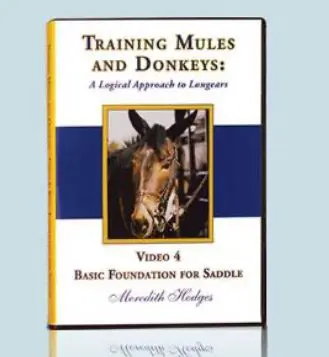 DVD #4: Basic Foundation for Saddle. If you don’t wish to drive, you can go straight to DVD #4 and begin your equine’s riding training in a natural and non-stressful manner that eliminates adverse behaviors such as bucking or running off. We address both the needs of the rider and the equine as a team focusing on the right approach, good balance and coordination of both equine and rider. You can begin this DVD after you have completed DVD’s #1 and #2.
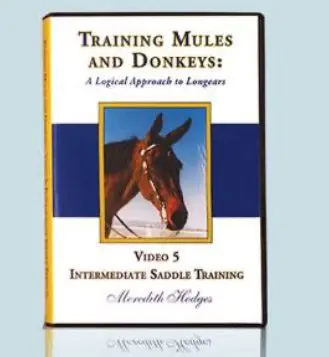 In DVD #5: Intermediate Saddle Training, we help the rider fine tune his own skills and begin to cultivate a harmonious rapport between equine and owner with fun, safe and simple exercises that will enhance your riding experience whether it is for show, or pleasure. You can begin this DVD after you have completed DVD’s #1 and #2 and #4.
 DVD #6: Advanced Saddle Training will begin to prepare the rider for specific disciplines and help them to make choices about what they might enjoy more. It demonstrates how the simple elements of dressage are the basis for all equine disciplines including gymkhana, reining, cutting, English and Western pleasure, trail, or even simply weekend trail riding. This kind of training is not just for show, but to keep both of you safe and happy during your time together. You can begin this DVD after you have completed DVD’s #1 and #2, #4 and #5.
 DVD #7: Jumping gives the owner the opportunity to learn the fundamentals of jumping and condition their equine in a safe and methodical manner and… how to ride, build and evaluate jump courses. It covers exercises to prepare your equine to carry him safely over any obstacle, multi-level terrain or jumps. You can begin this DVD after you have completed DVD’s #1 and #2, #4, #5 and #6.
 DVD #8: Management, Fitting & Grooming. Of course, your equine needs to be fed and maintained properly to get the best response from him during training and this is done in DVD #8. We also offer grooming tips and more advanced lessons in showmanship at the end of this video.
 DVD #9: Keys to Training the Donkey: Introduction and Basic Training covers groundwork technique that is specific to donkeys, how to train jacks to breed mares for mule production and how to measure your animal for athletic potential and should be used in conjunction with DVDs #1 and #2.
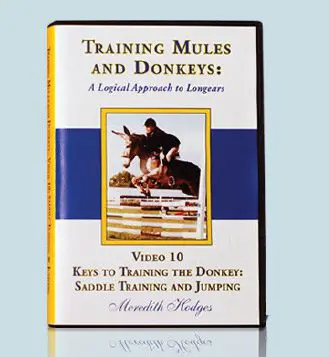 DVD #10: Keys to Training the Donkey: Saddle Training & Jumping covers saddle training and jumping and should be used in conjunction with DVD’s #4 through #7. You can also purchase our book, Donkey Training which is the same as DVD’s #9 and #10, but sometimes having the moving pictures can be more helpful than still shots. Also, if you want to teach your donkey to drive, you would also need DVD’s #1, #2, and #3.
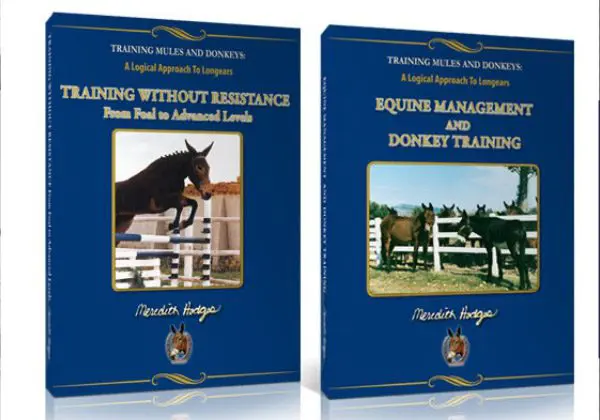 Training Without Resistance (DVD’s #1 – #7) and Equine Management & Donkey Training (DVD’s #8 – #10) are exactly the same as the electronic workbooks that accompany the DVDs. These two manuals are also helpful to those who cannot afford the DVD series or for those who would like a professionally published workbook. They are both translated into French, German and Spanish, so our non-English speaking friends can read along with the DVD series in their own language.
 Equus Revisited: A Complete Approach to Athletic Conditioning. This comprehensive 4-part DVD and companion manual explains WHY it is so important to spend plenty of time on groundwork and development of the core strength of your equine. It covers multiple aspects of your equine’s care in great detail with a team of experts. It has a lot of special features about various subjects and in-depth explanations about the anatomy and physiology of the equine.
 Our online school, TMD-Equine University offers the ultimate equine experience including a course in equine business. It was founded in order to provide extensive education in the care, maintenance and training for horses, ponies, donkeys, mules and other equine hybrids. We think it is important to understand and embrace the differences between the breeds. This course of study will teach the student in-depth management practices that assure that graduating students fully understand and can implement these practices in a healthy and safe manner for both the equine and the owner. Students who complete the program successfully will receive full Certification from the State of Colorado. Visit
  For more information and purchase of our products, you can call 1-800-816-7566 or visit our website at
 Thank you for your email. It was good of you to take the time to contact me. Although we begin our DVD series with “Foal Training,” no matter how old, you should always begin training with imprinting and move forward from there with attention to feed as well. This will insure a positive introduction and will help to build a good relationship with your equine.
 No matter how old or how well trained the equine, they still need time doing the simplest of things to get to know you before they will learn to trust and have confidence in you. The exercises that you do should build the body slowly, sequentially and in good equine posture. No human or equine is born in good posture. It is something that needs to be taught and practiced repetitively if it is to become a natural way of moving the body. When the body is in good posture, all internal organs can function properly and the skeletal frame will be supported correctly. Just as our children need routine, ongoing learning and the right kind of exercise while they are growing up, so do equines. They need boundaries for their behavior clearly outlined to minimize anxious behaviors and inappropriate behavior, and the exercises that you do together need to build their strength and coordination in good equine posture. The time spent together during leading training and going forward builds a good solid relationship with your equine and fosters his confidence and trust in you because you actually help him to feel physically better. A carefully planned routine and an appropriate feeding program is critical to healthy development.
 Most equines never experience core muscle strength and this becomes even more important as they age. We do leading training for a full year to not only get them to learn to lead and to develop a good relationship with them, but also to develop good posture and core muscle strength in preparation to carry a rider. Leading lessons for postural strength and balance need only be done for 15-20 minutes once a week to be certain that they aren’t fighting balance problems later when you mount and ride. Even an older equine with previous training would still need this for optimum performance and longevity. During the time you do the leading training strengthening exercises, you should NOT ride the animal as this will inhibit the success of the preliminary exercises.
 If you ride while you do these exercises, it will not result in the same proper muscle conditioning, habitual behavior and new way of moving. The lessons need to be routine and done in good posture to acquire the correct results. Hold the lead rope in your LEFT hand, keep his head at your shoulder, match your steps with his front legs, point in the direction of travel with your right hand and look where you are going doing straight lines, gradual arcs and square him up with equal weight over all four feet EVERY TIME you stop. We are building NEW habits in their way of moving and the only way that can change is through routine, consistency in the routine and correctness in the execution of the exercises. Since this also requires that you be in good posture as well, you will also reap the benefits from this regimen. Along with feeding correctly (as described below), these exercises will help equines to drop fat rolls and to begin to take on a more correct shape and become strong in good posture.
 What your animal is eating can have a direct impact on his response to training. Many feeds can cause hypertension in Longears (and horses, too!) and an inability to focus for any length of time. Mules and donkeys require a lot less feed than horses because they are half donkey and donkeys are desert animals. Too much feed or the wrong kind of feed and you run the risk of colic, or founder. The formula for our oats mix is very simple. Depending on the individual, feed the average sized equines (13 hands to 17 hands) 1-1/2 to 2 cups of oats mixed with 1 oz. of Sho Glo and 1 oz. of Mazola corn oil. Drafts (over 17 hands) get twice as much and the minis get 1/4 (small minis under 36 inches) to 1/2 (36 to 48 inches) as much. Of course, if they seem to need a little more oats, just increase it a half cup at a time and watch how they add weight or not. Most of their weight gain and loss we monitor by increasing and decreasing the hay intake because a maximum of 4 cups of oats (usually during the winter) is all they need, especially when you are also giving them oats as rewards during exercise lessons when they actually need the added energy. The oats must be broken open in some way (crimped, steamed, rolled, etc.) as equines cannot digest whole oats. We feed this once a day in the evenings, grass hay twice a day and we monitor weight gain with the hay and pasture intake. Young mules like human teenagers can eat a lot when growing and can have as much grass hay at each feeding as they will clean up. Do not alter or modify this with other products in any way for the best results. Also, make sure they have access to a trace mineral salt block for their salt and mineral needs. We worm our equines with Ivermectin paste wormer in January, March, May, July and September and then break the cycle with Strongid in November. We vaccinate in the spring and fall. Consult your veterinarian for the types of vaccines you will need for your area. You should never feed Longears (donkeys, or mules) any pre-mixed sweet feeds, or products high in alfalfa. Equines in general should never be turned out in a pasture with Fescue grass. Our pastures are seeded with brome and orchard grass and they seem to do best on that mix.
 Your equine should be kept in a smaller area for evening feedings, overnight and for morning feedings. This has several benefits: 1) Each animal can be checked every day for any injuries or anomalies, 2) He will not have to fight for his food, he can sleep uninterrupted and be more calm and fresh each day, 3) You will then be able to turn him out at specific times for grazing during the day and bring him back in each night. This way you can monitor his grazing intake so he will not be able to overgraze and colic, or founder, 4) the smaller area affords you a confined space for beginning training so there is no need to chase him, or be interrupted by other animals, and 5) having this definite routine lets your animal know what to expect and lessens adverse behaviors. You should always begin with DVD #1 and #8 (feeding, maintenance and advanced showmanship training) and take the training in sequence. When you feed the oats mix in the evenings, it makes it easier to call them back from shortened pasture time in the spring (they have to work into extended pasture time slowly and over several weeks) and they will be more apt to come to you easily after their morning feeding of grass hay for their lessons only when they know you have fanny pack full of oats for them. If you do things out of order, the results will not be the same.
 My rescue draft mules, Rock and Roll were on very expensive products and were in terrible shape when I first got them in December 2010. Their digestive tracts were compromised and they were supplemented with probiotics. I immediately dumped it all and put them on my feed program. I began to see a marked difference in FOUR days! You can read about their story in the article Rock and Roll: The Story of a Rescue in the “Mule Crossing” section on my website at
  I have spent over 50 years training all equines and the past 43 with a concentration on Longears. I have found that my training techniques can to date be used with ALL equines. After successfully showing from 1981 to 2000, I decided that it was important to document all I have learned in my books, videos, TV shows.
 Once you are mounted, you will put all you have learned together and will be able to communicate effectively with your equine. He will then be calm and solid when you finally do mount and ride. There should be no problems with biting, kicking or bolting (kicking training covered in DVD #2). He will be more willing to stand still when you mount, carry you while staying attentive to your cues and will not run off or buck. And he will be less likely to become herd bound and always want to go back to the barn. You have made a good friend because you have made him feel good by not asking him to do anything that he is not physically prepared to do. After mounting training in the round pen in DVD #4, in DVD #5 you will have exercises that are designed specifically for the rider to improve rider balance and effectiveness with the cues. This program is done in a logical and sequential manner. To modify or change it would affect the end results.
 The most important thing when training your equine is to learn to dispense the crimped oats reward promptly and generously in the beginning, and only when your equine is complying. This will solidify the connection between you, insure that the positive behaviors will be repeated and will begin to facilitate a strong and mutually satisfying relationship. If your equine tries to pull away, just let go of the rope, call his name, reach in your fanny pack and offer the oats to coax him to return to you. Do not chase him! Do not try to progress through lessons too quickly as this is usually what causes disobedience.
 Foal Kicking and Biting
 For instance, before you even halter him, ask him to come to you and then reward him with crimped oats when he does come. When he is consistently coming to you, the next step would be to carry the halter with you but not put it on. Reward his approach and acceptance of the halter being present. Once the presence of the halter doesn’t bother him, you can put on the halter. When doing so, be polite. Reward your equine for the approach and acceptance of the halter, then try to loop your arm over his neck while feeding the crown strap of the halter from your left hand to your right hand that is looped over his neck. This way, if he starts to move away slowly, you can pull him back towards you with the loop you’ve created around his neck. Finish by putting his nose through the noseband of the halter. If he jerks away quickly, just let go and encourage him to return and try again by showing him the oats, but do not give them to him until he comes back to your hand. Anytime he moves away, just ask him to return, but do not chase him! Make him come to you for the rewards.
 quickly or the equine can become confused and not have time to comply properly. When confused, he will begin to lose interest and will engage in avoidance behaviors. Keep lessons short (about 15-20 minutes every other day at the most) and in small enough steps so he can be rewarded. This is called setting up for success.
 Going through a gate seems simple enough, but you can really get into trouble if it is not done correctly. Ask your mule to follow your shoulder to the gate and halt squarely and then reward him (crimped oats) for standing quietly while you unlatch the gate. When going through the gate, you should always push the gate away from you and your mule to walk through when possible. Transfer your lead line from your left hand (showmanship position) to your right hand and open the gate with your left hand if the gate is hinged on the left (switch positions if the gate is hinged on the right, but be sure to keep your body closest to the gate). Ask your mule to walk through at your shoulder, to turn and face you on the other side of the gate and to follow you as you close it. Then reward him again and latch the gate.
 The reason for a disconnection between you and your equine is more than likely due to a lack of the right kind of ground work and time spent with that specific ground work to establish a good working relationship where the animal can learn to trust your judgement. I firmly believe that when you give both you and your equine ample time to learn together by doing very simply things that you CAN do over a longer period of time (like grade school is for children) and then let things progress at your own pace, you can begin to truly enjoy your time together. You learn to appreciate the “little” victories along the way that keep you happy in your learning process. It will be awkward at first, but as you “practice” these simple things, you will get better and will be able to move forward easily. It’s just like learning anything. If the steps are hurried and too overwhelming, you can find yourself defeated before you even get started and the fun is eliminated altogether. That’s where resistance begins. It is better to minimize any resistance by doing the right kind of preparatory work before riding.
 I recommend that you keep ALL equines in a dry lot or stalls and runs overnight (during feeding times) and then monitor their collective time on pasture. Treat them all the exact same way. This way, if the oats mix is given in the evenings, they will come off the grass easily in the spring when they should only be on pasture for limited time because they know the oats are waiting. They will be more willing to come to you and your fanny pack of oats in the daytime because they don’t get the oats with breakfast and this is a way for them to get more of their favorite food.
 Once you have established a good rapport with your equine on the flat ground during showmanship practice, the next step would be leading over obstacles to add coordination to his new strength and balance in good posture. You can tell when your equine is ready to move to the obstacle stage when you can throw your lead over his neck and he will remain at your shoulder and do everything you have practiced during flatwork leading training without you touching him. The first thing you would do over obstacles such as bridges, tires, tarps, etc. would be to teach confidence by encouraging your equine to negotiate these obstacles without fear. This means, you go ahead of them and reward them for their willingness to “attempt” and then eventually negotiate these obstacles. Again, when the equine will perform all these obstacles at your shoulder and do exactly as you ask with the lead over the neck, you can then go to the next stage of lunging in the round pen and learning to balance at the faster gaits on a circle.
 When you want him to go forward, you need to focus your eyes on his haunches, give the verbal command and don’t look at his head at all. Let your whip following behind the haunches. If you want to stop him, say “whoa” and shift your eyes to his eyes. If you want him to do a reverse, give the command to reverse and move your body sideways such that you are now slightly in front of him and looking at his head again. It is the movement of your body that will make the difference between the halt and the turn. Notice how these subtle differences in your body affect what he does. It will just take practicing these things correctly and you will begin to do better. It doesn’t matter what anyone else does, or says; you go ahead and take the time you need to work this out with your mule!
 the world if necessary. Constantly review the lessons in showmanship in DVD #1, DVD #8 and DVD #9, going to and from the work areas, and during any ground interaction to help her to really, truly bond to me on a very personal level. I treat every equine as my very favorite.
 By Meredith Hodges
 Dressage is practiced in an arena marked by a low fence with letters at strategic intervals. A manual outlining the different “tests” tells you what to do and where to go in your marked arena. Once an animal is started under saddle, he begins dressage training at what is called Training Level. There are four tests at each level that increase ever so slightly in difficulty from one to the next. In each level there are certain objectives to be met. At Training Level, for instance, your mule should learn to travel in straight lines and to bend his body to the arc of large circles and in corners, and to make upward and downward transitions through his gaits while maintaining good balance, a steady rhythm and cadence throughout the test in an elongated and elastic frame. At the same time, the rider is also learning and conditioning his own body to react appropriately to the body of his animal. The objective of dressage training is to develop a harmonious balance and understanding between equine and rider physically and mentally.
 When your equine is strong, steady, rhythmic, and responsive at Training Level, he can then proceed to the next level, or First Level. At First Level, he learns to initiate more engagement of the hindquarters (collection) and begins to condition the muscles needed for lateral work through lengthening of the gaits and yielding from the leg. As he is better conditioned in his body, he is better able to perform and hold the balance and collection that is needed for Second Level, then Third Level, Fourth Level, and beyond. In order to gain true collection, he needs to possess incredible strength, such that he can step underneath himself with power from his hindquarters, round his back, and bring lightness and suppleness to the front end. This kind of posture makes the fancy upper level movements one usually associates with Dressage fluid and effortless with no apparent movement by the rider.
 Each level builds on the exercises from the previous level from Training through Intermediate to Prix St. George and Grand Prix. Combined Training is the addition of gymnastic-type exercises (aerobic equivalent) to the regular dressage routine. The jumping, or gymnastic, exercises can start in conjunction with the dressage tests as early as Training Level and can greatly enhance and improve their Dressage performances. It gives the equine a mental break from the repetition and intensity of the dressage tests. It allows the animal to develop better coordination and stronger forward movement. Jumping also enhances hindquarter development and the variety in routine keeps your equine’s mind fresh, alert, and willing to perform.
 All the Lucky Three mules will attest to the success of Dressage and Combined Training, particularly Lucky Three Mae Bea C.T., who began to do exercises at the more advanced levels. Before we began dressage training, we were training for each event. With dressage training she developed an incredible responsiveness to seat, leg and rein cues and was able to perform anything easily and willingly. She did absolutely everything you would ask of her and did it all with above average quality and enthusiasm. It has made classes in which she already excelled even better! The other Lucky Three mules exhibited this same above-average attitude and performance across the board with Dressage and Combined Training. This kind of variety keeps life interesting and challenging as we find new uses and events in which we can compete our mules. They have even made their own unique contribution to the equine industry! Volunteers to help set up shows and events are often hard to find.
 The Mountain States Combined Training Association is grateful to the Lucky Three Ranch, but particularly to Mae Bea C.T. for her help in dragging logs to help build cross country jumps at Lory State Park in Fort Collins, Colorado. Mae Bea C.T., trained in Dressage and Combined Training, not only jumps those cross-country jumps, but helps to build them as well! She is a strong, healthy and willing mule thanks to the preservation of a 100-year-old or more equestrian art called Dressage!
 Vacation?!! Who, me?! Well, no one would say I didn’t try, but again, my passion for Longears won out! As a Christmas present, my husband bought tickets to visit St. Thomas and St. John in the Virgin Islands of the Caribbean in February for a week during my birthday, our first non-longears vacation in twelve years! We spent four restful
 Testing for immuno-contraception itself seemed a viable scientific experiment, but what I learned of their approach stunned me! First, it seemed that they didn’t have an efficient way of counting the donkeys that roamed freely about the island with its dense foliage. I was assured that there were probably less than the 300 donkeys that the park service had quoted. Second, if they were as prolific as the park service believed by their statistics and predictions, there should have been over 40,000 donkeys on the island by now provided the numbers were correct in 1671. Their means of identifying the donkeys was to draw pictures of them and to mark them with paint, which would eventually wash off during frequent tropical rains. The donkeys were baited in certain areas and then shot with the contraceptive. After baiting the donkeys, because of the natural affection that they have for humans (which makes them ideal for domestication), the donkeys began to frequent more populated areas and became a nuisance to residents and tourists. At one point, 10 donkeys were literally murdered on the beach in front of tourists for being a so-called nuisance!
 St. John is economically poor and it would seem that the donkeys could make a valuable contribution. If these donkeys were rounded up and managed properly, there is really no end to their usefulness to the people of St. John. The successful plight of the donkeys and burros in the United States has proven that most of the wild donkeys can be trained and become a useful member of society as a work, pet or pleasure animal. The donkeys on St. John could serve as a vehicle to teach children to ride. They could carry tourists on beach or trail rides. They could give variety to athletics with donkey baseball and basketball. They could guard herds of sheep, goats and other livestock. There could be the promotion and sales of donkey-related items, such as t-shirts, jewelry and island art. Donkeys are terrific animals to use in handicapped and disabled drive and ride programs. They have been proven to be very therapeutic because of their careful and affectionate nature. It seems that there would be more profit from making the donkeys an attraction rather than a distraction.
 By Meredith Hodges
 mule.” She showed him with 55 mules in the class and won the Western Pleasure class that year. Although he was nice in the Western Pleasure classes, she couldn’t see owning this mule for the long term due to his generally bad manners. Later, she picked up a mule in Northern Montana and brought him back and started training him…his name was Final Legacy. He was a good honest mule and she kept him for the long haul.
 In more recent years Crystal switched to raising and showing donkeys. She had a variety of donkeys, from miniatures to mammoths. She fully understood that you have to take a different approach when training a donkey and produced training videos with Napa, California, videographer, Video Mike. She truly appreciated a good donkey: “Donkeys are like potato chips—you can’t have just one.”
 Crystal enjoyed her interview for my documentary series, Those Magnificent Mules; she appeared in “The Bishop All Stars”episodes. (We have all of these episodes available to watch
 A wonderfully new and exciting addition to the Colorado Classic Heart Fund Benefit this year was opening night’s Symphony of Champions. Riders from all divisions were given spots to ride to the music of the Denver Symphony’s Young Artists Orchestra. American Show Horses, Saddlebreds, Arabians, Half-Arabians, Morgans, National Show Horses, Tennessee Walkers and mules danced to the music of Beethoven and Broadway hits, and then came together for the grand finale to the William Tell Overture. It was an evening of beauty, an evening of humor, an evening of suspense, an evening of the deepest emotions – and the audience loved it! What an exciting way to kick off a show!
 saddle mules in the country! Performance classes began with English Pleasure, and then went on to show some of the smoothest jumping mules ever in Hunter Hack and Hunter Under Saddle classes. There was a stunning touch of class by Tammy Dishong and Dena Hodges as they emerged in the Side Saddle class.
 Back to Tammy Dishong and Dena Hodges again for Youth Pleasure, where the girls exhibited their mules in a truly professional manner, explaining why each had claimed their World Champion placements at Bishop Mule Days in California just two years before! Until recently, California mule exhibitors seemed to claim most of the world titles, but two years ago they had to start working a little harder because our own Colorado mule exhibitors began doing better than ever, giving them a run for their money!
 Drive & Ride and Ranch Riding were cancelled as the show was running late and the judge needed to catch his flight home, but in the spirit of the Colorado Classic, the otherwise refunded money was donated to the Heart Fund. Our deepest thanks to all of the mule exhibitors who took time out of their busy schedules to help support this show with their avid participation: Bitterroot Mule Company of Bennett, Colorado; JD Diamond Ranch of Bennett, Colorado; Lucky Three Ranch of Loveland, Colorado; Mountain Shadow Mules of Longmont, Colorado; Kristin Pettinger of Littleton, Colorado; and Steven White of Westminster, Colorado! Everyone did a superb job and is to be highly commended for their excellent performances! Thank you all and let’s hope that we can have even more support and participation next year! Results are as follows:
 By Meredith Hodges
 Competitive riding requires constant discipline and dedication to lessons, clinics, shows, and practice sessions for the purpose of conditioning the bodies of mules and riders to perform what is learned. In turn, that which is put before the public is continually more impressive in the quest for perfection. As mules and riders meet new challenges, the appeal of the animal itself is broadened and becomes more positive.
 C.D.M.S meeting are held every two weeks at the Lucky Three Ranch in Loveland, Colorado. Members arrive at about noon and spend two to three hours in a video-taped group lesson and practice session after which is a supper meeting. During the meeting, our video-taped session is evaluated and critiqued and each rider is given his riding and training assignment. Club business is then discussed and the meeting adjourns.
 C.D.M.S. is not just for mules. We support and appreciate the donkey and his contribution to this industry. We recognize the importance of Donkey Power! We hope that as we grow as a society, we can establish an equally fun and interesting program for our donkeys. The World Champion Mule Show at Bishop, California, held in May recognized this need and a “Donkey Driving” class was added to their schedule. In Colorado, we have had limited donkey halter classes and driving classes. We hope to add to these. At the Queen City Donkey & Mule Show (July 30-Aug. 2), we added a Wild Burro Halter class. We hope this will help to promote the adoption and care of these beloved animals. The driving classes are split according to size and we hope to see more donkeys in the smaller sections. If enough donkeys show, we will be able to break off an exclusive Donkey Driving class and eventually add Donkey Trail, Pack Trail and Donkey Pleasure. Please help support our donkeys!
 Halter classes were dotted with mules of all sizes and colors. They ranged from black to white, from Paints to Appaloosas, all clipped and turned out with elegance. Grand Champion Model Mule went to Maggie, a 16.1 hand gray molly mule owned by Danny Langston of Denver, Colorado and shown by Dick Ayers of Blue Cloud Stables in Longmont. Reserve Grand Champion Model Mule was Lucky Three Mae Bea C. T., a 15 hand brown dun molly mule, owned and shown by Meredith Hodges of the Lucky Three Ranch in Loveland, Colorado.
 The Mule Side Saddle class took its place in the Coliseum arena amongst elegant saddle horses and Grand Prix jumping. Winner of this class was Rambling Rose, owned by Diane Walston of Longmont and shown by trainer, Joan Triolo. “‘Rose” was immaculately decked out in beautiful, handmade Mexican attire, impressive to all who were fortunate enough to be present. Second place was awarded to Nifty, owned and shown by Zella Brink of Fort Collins, Colorado.
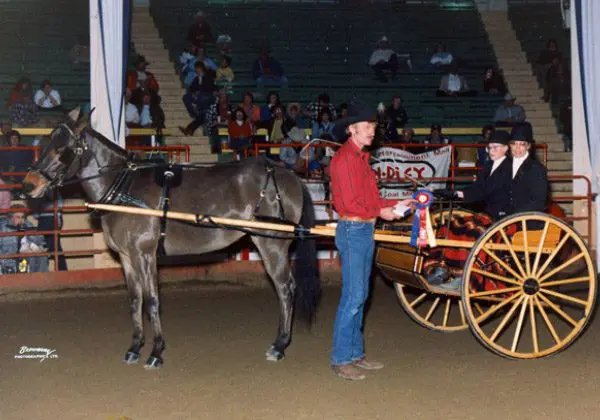 In the Single Hitch Driving, Lucky Three Mae Bea C.T. rose to the occasion, capturing first place, with Rambling Rose in second place. First in the Drive & Ride went to Princess, owned and shown by Tom Mowery of Brighton, Colorado. Tom is an active participant in the promotion of mules in Colorado – much of what has been done here could not have been done without him. Thanks, Tom! Second place went to sweet Rambling Rose, a formidable contender. In the Team Driving, Oscar and Yoyo were awarded first place, owned and driven by Bob Potestio of Parker, Colorado. Princess and Buster, owned and shown by Tom Mowery of Brighton placed second. Ranch Riding, a combined Reining and Trail class, was won by Nifty, owned and shown by Zella Brink of Fort Collins, with Lucky Three Mae Bea C.T. taking second place ridden by Meredith Hodges. First place in the Costume Class went to Rambling Rose and Joan Triolo in their impressive Side Saddle attire, while Tom Mowery took second place with his pack string Buster and Princess. Congratulations to Tom Mowery with High Point Mule, Princess, and to Reserve High Point Mule, Rambling Rose!
 In October of 1987, Leslie Busque will cross over into the ranks of adult riders, but she has had a youth career in mules of which any young rider would be proud. In 1983, she competed at the Texas State Fair, where she captured Reserve High Point Mule, a first from any age group in Colorado. In 1984, she again received Reserve High Point Mule at the Sandrifters All-Breed Show held in Colorado Springs and was elected Princess of the Prairie Ramblers Riding Club. In 1985, her uncle, Bob Anthony of Colorado Springs, bought a three-year-old molly mule from Judy Krol of Arizona, which he encouraged Leslie to train and show. At the Sandrifters All-Breed Show that year, Leslie rode Frijoles Dixie Belleagainst adults (there were no youth classes at this show), where she captured 1st place in English and Western Pleasure and Grand Champion High Point Mule. She went on to compete at the Colorado State Fair where she won 1st place in Green Western Pleasure (17 competitors), Open Western Pleasure, Youth Western Pleasure and Showmanship at Halter. Later that year, at the Desert Donkey and Mule Club Bicentennial Show held in Phoenix, Arizona, Leslie again competed against adults, taking 2nd in Mature Mules at Halter (3 yrs & over), 1st in Open English Pleasure, 2nd in Open Western Pleasure, and Reserve Grand Champion English Performance Mule.
 In preparation for college, Leslie moved from Colorado Springs to Loveland, where she rode as Assistant Trainer for the Lucky Three Mule Ranch. At the Denver Queen City Horse Show, she showed Lucky Three Mae Bea C.T., taking 1st place in Youth Showmanship and Youth Pleasure (14-17), then rode Lucky Three Ciji, a four year-old molly, to victory in the Adult English Pleasure.