
Featured This Month
MULE CROSSING: Surge of Mule Shows
All Articles
MULE CROSSING: Owning an Equine Is Serious Business, Part 3
By Meredith Hodges
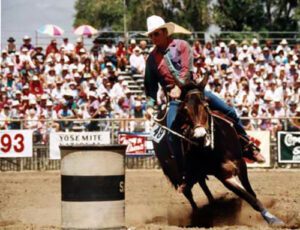
As discussed in Parts 1 and 2 of this article, there are many more things to think about before purchasing an equine than you could have ever imagined—from the actual purchase of the equine to the management considerations you need to be aware of on a daily basis. It is so important to always keep in mind that an equine is not an inanimate object like a car that you can tune up, drive (or, in this case, ride) at will, and then put back in 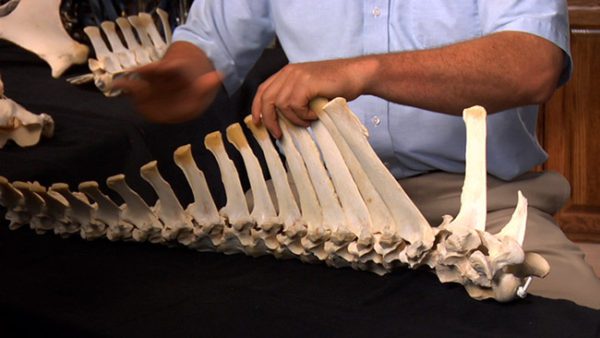 the garage until the next time. In fact, the equine was not anatomically designed to be ridden at all. The idea of riding was a completely human decision.
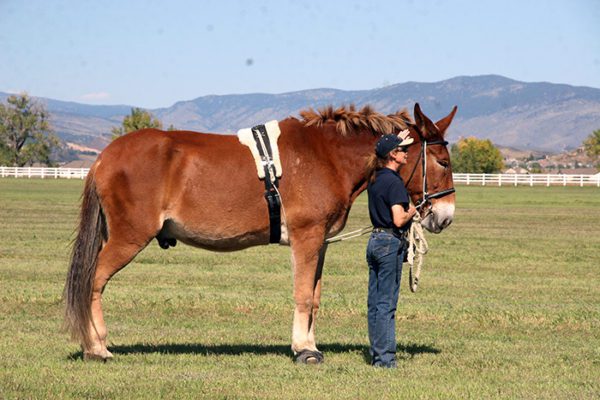
In order to more clearly understand this concept, let’s take a closer look at the equine anatomy. The equine is designed with interlocking vertebra in the spine that have long bony “fingers” called spinus processes,which protrude in varying lengths from the interlocking vertebra. The spinus processes“fingers” support the musculature that surrounds the super spinus ligament, which runs the full length of the back. The highest point of the spinus processes is at the withers, where the spinus processes bones are at their longest. They then taper down toward the croup, becoming shorter as they line up across the back. This is a body design that was intended 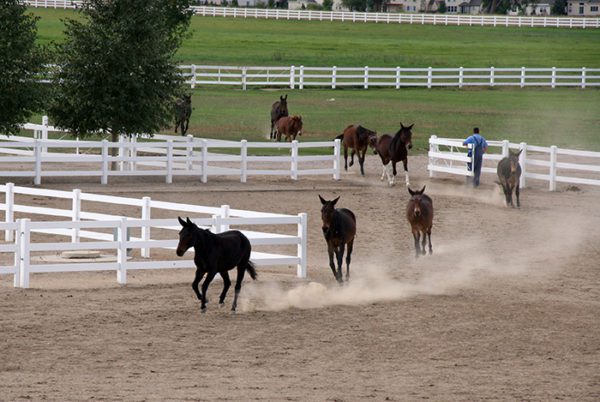 to carry the weight below the spine and not on top of it. Everything in the equine’s mind and body supports this position and, when we train, if we do not pay attention to re-programming the muscles, tendons and ligaments to support the additional weight above the spine in a way that is painless and clearly understood by the equine, they become uncomfortable and even sore, and bad behaviors are almost certain to arise.
If you keep the equine anatomical structure and his mental reactions to stimulus in mind, the way to build adequate musculature to carry a rider or pull a vehicle is really quite simple. Equines have a natural willingness to please and become resistant only when they are frightened, hurt or confused by the way they are being asked to do something. Training does not only take place 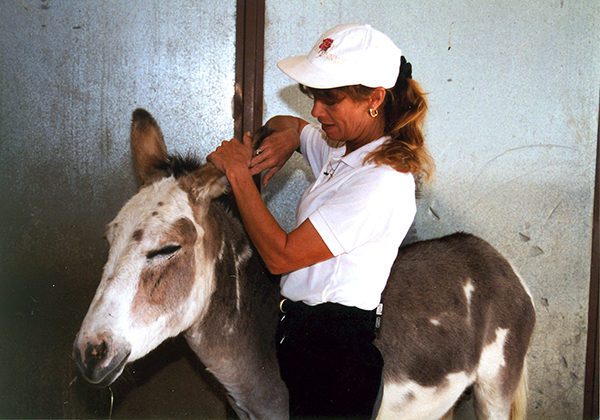 during lessons in your arena or round pen—lessons begin the moment you are within earshot of your animal, so when you go to get your equinefrom his pen or stall, approach with the attitude that you are visiting a friend. Don’t’ just barge into his living space and try to “catch” him—rather, call out his name and say hello in a cheerful voice. Stand at the gate or door and offer a handful of oats, and when your equine comes to see you, let him know you are happy to see him too. Stroke his neck before you put the halter on your equine, and then give him his oats and let him invite you into his space. It won’t be long before he anticipates your arrival and “talks” back to your “Hello.” If you want to make a friend, you first need to be a friend!
Here are some important techniques to remember each time you approach your equine:
- Be polite and considerate in your approach and your equine will be more willing to want to go with you. An equine that is “herd bound” and won’t leave his pasture buddies has simply decided that his equine counterparts are nicer to be around than the humans who “use” him, but if your animal feels good when he is with you, he won’t mind leaving his equine companions.
- When you want to pet your equine, let him see that your hand is moving toward him, but keep movements low, slow and non-threatening.
- Stroke his neck, going with the grain of the hair, and never against it.
- Touch his head and other sensitive areas only after you have gained his confidence. Note the way he responds to your touch and alter your touch accordingly. If he flinches, you might be touching him either too lightly and tickling him or you could be touching him too strongly and it hurts. Use the flat of your hand and don’t “poke” at him.
 Many people are familiar with imprinting their foals, but what they may not realize is that the purpose of imprinting is not just to get the foal used to human touch and smell. It is, in reality, the first steps in learning
about your equine’s entire body, and then adjusting the way you touch him so that you give him pleasure every time you touch him (except during brief disciplinary actions).
Most of us want to ride and do the more glamorous things that we see people do with equines right away, and we become impatient for the end result and don’t pay adequate attention to the smaller details that lead up to our fantasy. But it is imperative to always remember that equines are very much like young children and need to learn in a slow, logical and sequential way.
Ask yourself these questions:
- How are you leading your animal after you catch him? Are you maintaining good posture?
- How do you groom your animal, and how is the grooming received?
- Are you being polite and considerate in the way you use the grooming tools?
- How is the tack being put on?
Every movement sets the stage for how your equine’s body is being conditioned. So when you are leading your equine, make sure that you are holding the lead rope in your LEFT hand, are that you are moving in good posture yourself. Be sure that you are keeping your equine’s head at your shoulder, that you are pointing in the direction of travel with your right hand and that you are matching your equine’s steps while being clear in your intentions during movement transitions.
Remember: Square up your animal every time he stops to cultivate a new habit of good postural balance through repetition. Be cautious when leading your equine through narrow openings like gates and doorways. Make him allow you to pass through first every time. When you need to make a turn, always take one step forward first and then turn the animal on a gradual arc away from you—don’t make any abrupt movements.
Here are some important points to remember when learning to deal with tack and your new equine:
- When approaching with tack and equipment, allow the equine to smell and inspect it before you put it on him, and then reward him for staying calm.
- When putting on the bridle, be aware of how you take it over the animal’s ears so as not to hurt him.
- When saddling, make sure stirrups and girths are put up and not flopping. Be polite and let the girths and stirrups down easily on each side.
- Then ease the saddle onto your equine’s back, being sure not to tighten the girth all at once. Rather, come back several times and tighten just a little bit more each time until it is snug, but not tight.
- When needed, cruppers are used on riding equines in order to keep the saddle in the correct position on the equine’s back. Make sure you know how to properly place the saddle over his center of gravity (so the girth lies four inches behind the forearm) and then adjust this piece of equipment.
- Breeching is an assembly of straps across the rear quarters of the equine and is fine for packing and driving animals, but it can inhibit the hindquarter range of motion on a riding animal. A crupper is preferred for a riding animal to hold the saddle in place for extreme trail riding, etc.
- If you have a double rigging on your Western saddle, always make sure that the front girth is done first and pulled snug—NOT tight—and that the back girth lays against the body and is just snug enough to keep the back of the saddle from flipping up, but it is not too tight.
- Check your girth periodically when riding to make sure it stays snug enough so that the saddle does not roll toward you on the equine’s back when you try to mount.
- Never use bridle reins or drivelines to tie your equine. When tying your equine, always use a halter and lead rope, and tie to a stout post (NOT fence rails) with a safety release knot.
- Always untie your animal before removing the halter.
Coming up next, the fourth and final installment of Owning an Equine Is Serious Business features a discussion of beginning riding, with many valuable details, tips and safety rules and checklists that you can actually take with you while you are working with your new equine.
To learn more about Meredith Hodges and her comprehensive all-breed equine training program, visit LuckyThreeRanch.com or call 1-800-816-7566. Check out her children’s website at JasperTheMule.com. Also, find Meredith on Facebook, YouTube and Twitter.
© 2012, 2016, 2018, 2023, 2024 Lucky Three Ranch, Inc. All Rights Reserved.
MULE CROSSING: Owning an Equine Is Serious Business, Part 1
 By Meredith Hodges
While many of us were growing up, we were barraged with a deluge of ideas and attitudes about equines that were conveyed to us via multiple forms of media and educational sources. The role models of yesteryear were movies like, My Friend Flicka, books like The Black Stallion or Black Beauty, and TV shows like The Lone Ranger and Hopalong Cassidy. The most commonly known mules were “Francis,” who appeared in the Francis the Talking Mule series, and another mule known as “Ruth,” who appeared in the TV show, Gunsmoke. Those of us who tried to apply the management and training practices portrayed in the movies and books discovered that the things we saw on television and read in books covered only a fraction of what was really necessary, and the things that were shown and written about didn’t always work the same way in reality as they did in fiction.
Like many equine lovers, I was convinced that, when I got older, I would be able to have as many horses of my own as I wanted. I thought I would build a one hundred-stall barn and rescue all the abused horses in the country that I could. Surely, one hundred stalls could house almost all of them! Even into my early twenties, I believed this could happen. I honestly thought that all I needed was a patch of fenced grass and a shed out of the weather, and this simple solution would sufficiently provide for an equine. I was soon to discover the responsibility of health and finance that would burst my fantasy bubble and force me to deal with the hard realities of a life with equines. Once you confront these realities, you begin to really understand what is meant by “horse poor!” But more importantly, you discover how many important responsibilities there are when you own an equine.
Horses, mules and donkeys are living creatures with complex bodies that require not only proper nutrition and training but adequate space and the right kinds of fencing and housing. The standard rule of thumb is that you need two acres of land per equine, just for grazing. And, since equines cannot graze indefinitely without putting their bodies at risk for colic and founder, they also need space away from the lush green grass in the pastures. In addition, they cannot graze on just any kind of pasture. There are some grasses and plants that are toxic to equines and ingesting any of these potential hazards can result in sickness, paralysis or even death. It is important to familiarize yourself with the indigenous plants in your particular area that could be a potential hazard to your equine’s health and make sure they are removed from your property or, at the least, removed from the areas where your equine could gain access.
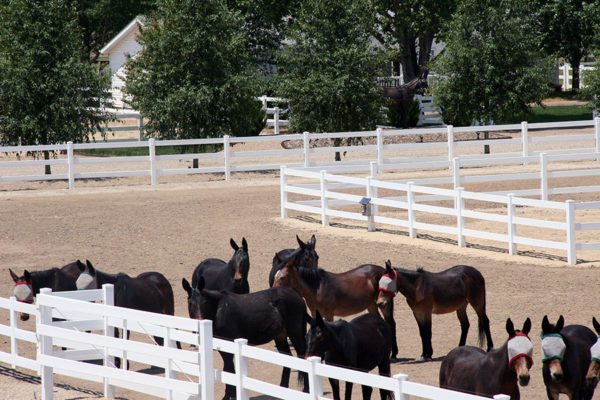 There is no substitute for proper management. Ideally, all equines should be kept overnight and fed in a dry paddock or stall where their feed can be monitored. They should be gradually exposed to pasture in the springtime. Begin by turning them out for only an hour per day to start, and then work into more time, adding one hour to turnout time per week until their bodies are accustommed to the pasture intake. They can remain on pasture during the day as their weight will tolerate, but I have found that a maximum of five hours of pasture time per day is ideal. Anything over five hours tends to start adding unhealthy weight. This routine is easy to do if they are kept up overnight and fed morning and evening in either a separate area that is nothing but dirt, or in a stall and run. Multiple animals can be kept together overnight in a dry lot, provided that they are compatible by size, gender and type, and there is enough space to put out buckets for their crimped oats mix and grass hay—the buckets should be spaced at least 16 feet apart. Contrary to popular belief, alfalfa and other hot feeds are not really good for equines.
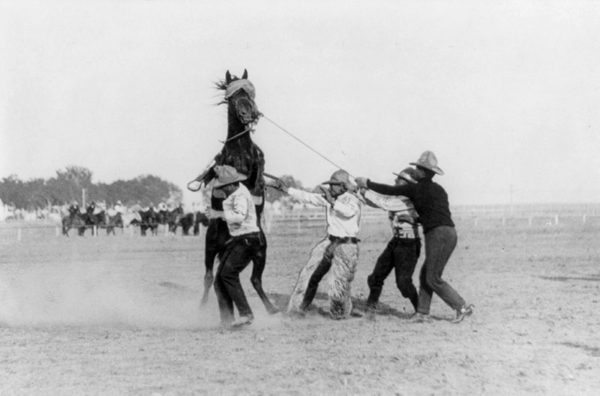
Before the industrial age and the onset of urban sprawl, equines were more independent, and many roamed free on the open range. Horses were kept in bands, or remudas, and rounded up when it was necessary to use them for ranch work and herding cattle. Most often, the abuse of horses in literature was portrayed, as in Black Beauty, on the busy streets of the cities, where they were overloaded or overworked in harness. Abusive training practices that were done in the more rural areas were deemed necessary and normal for the breaking of horses and mules. These equines were considered “wild” and hard to tame. Few people ever thought that perhaps the resistance they encountered from the equine was due to the approach and handling by the trainer. Because the donkey is a more placid animal, he was deemed stubborn and, thus, more harmless than his equine counterparts, so he subsequently became the mount of choice for ladies and young beginning riders. The harsh breaking of horses and mules was accepted in this country as a necessary evil when in reality, it was really only a contest of strength among men, and a peculiarity of the New World. The art of Classical Horsemanship and a more humane method of training equines had been present in Europe for nearly a hundred years prior to the time of the American cowboys.
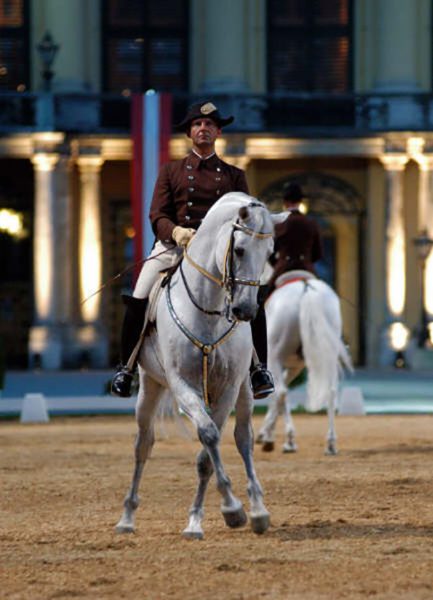
Throughout history, classically trained horsemen and women were aware of the value in the careful upbringing of the horse (or mule) as a useful and economically valuable animal that was beneficial to their civilization (particularly in the art of warfare). Horses were brought up in as close to the conditions of the wild as possible, but, with the encroachment of urbanization, the space to run free became less and less available. Classical Horsemanship is still practiced today and allows young horses to grow slowly, while formal training is kept to a healthy minimum. Young equines are ridden only after they have done plenty of body building groundwork and have reached the age of four. Today, equines must live in a completely different environment than they once knew, so we all need to understand that what we read about in books and see in movies and on television is no more than entertainment, and not an accurate portrayal of the reality of owning an equine.
Equines have unjustly become a commodity of our capitalistic system—they are treated more like a product to be bought and sold and less like the living and breathing creatures that they are. People buy and sell equines like cars, expecting them to be “tuned up” and stay that way for unskilled owners. Unsuspecting owners are often sold a “bill of goods” by practiced salespeople—animals and the responsibilities associated with them can easily be misrepresented to an unskilled buyer and, quite often, equines do not meet the unrealistic expectations of an inexperienced equine lover. Unless a buyer has family or a friend in the horse business, there is no reason they should know all the responsibilities that come with being an equine owner. But even if you do not have equine experience, if you plan to own an equine, you still have a responsibility to educate yourself as thoroughly as possible, so that you can give your equine partner the best care possible.
Remember: Be prepared to develop a lifestyle with your new equine that includes reliable routine, regular visits from your selected equine professionals and positive interaction with your equine on a daily basis.
The responsibility of maintaining an equine may seem overwhelming at first, when all you wanted to do was get a horse, pony, mule or donkey to ride or drive. But if you are a willing student and consistent in your own behavior, it soon becomes a pleasure to care for such a deserving partner in life. In Part 2 of this article, you will get a comprehensive list of best practices for the care and management of your new equine.
To learn more about Meredith Hodges and her comprehensive all-breed equine training program, visit LuckyThreeRanch.com or call 1-800-816-7566. Check out her children’s website at JasperTheMule.com. Also, find Meredith on Facebook, YouTube and Twitter.
© 2012, 2016, 2018, 2023 Lucky Three Ranch, Inc. All Rights Reserved.
MULE CROSSING: Donkey Training, Part 10
 By Meredith Hodges
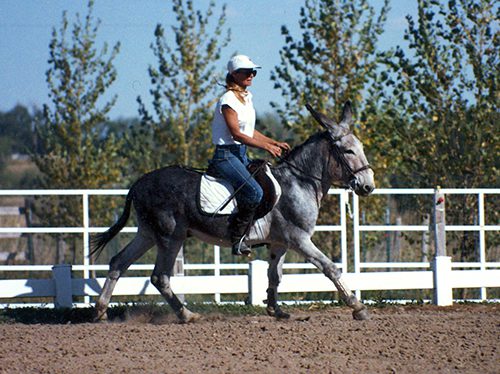
It is important that your donkey be in the best posture he can be in while he is performing at this stage of training. The way that he is moving with his body is the way his muscles and tendons will be strengthened and toned, and the way his bones will become permanently aligned. It is difficult for a rider to maintain this impeccable balance through every step and every stride. For this reason, you will use your “elbow pull” training aid to encourage your donkey’s good posture throughout training, once he has learned the right moves. Adjust your “elbow pull” so that, when tight, his poll can be raised about six inches above his withers. The “elbow pull” will help to maintain his proper frame and good balance without you having to fuss with anything. The “elbow pull” is most helpful during lateral movements, but it also helps him to maintain his balance through transitions and changes of direction. Get in the habit of using it all the time during intermediate training. When he is going well, staying in proper frame, light on the bit and responsive to your cues, and when the “elbow pull” is loose throughout all of his workouts—only then should you remove it. (Use of the “elbow pull” and instructions on how to make it are covered in my Equus Revisited DVD.)
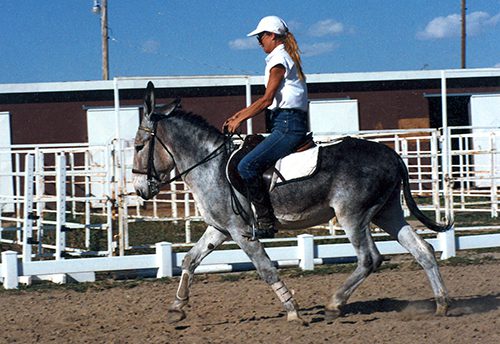 Now you need to teach your donkey to lengthen his trot. The elbow pull should have helped you to get a true trot out of your donkey. He will not be able to lengthen from a single-foot trot. Do not begin lengthening until the true trot is well established. When you wish to start schooling the lengthening, begin by asking him to lengthen on the long diagonal and corner-to-corner in your arena. Ask him to cover more ground going toward the center and as he approaches the corner, ask him to shorten his stride and collect the trot before the corner. Do not just ask for more speed. A lengthening is a more ground-covering walk, trot or canter, but maintains the same rhythm and cadence. In the beginning it will seem like there is very little difference between the working and lengthened gaits, but as he gets stronger and more agile, the difference will become more apparent.
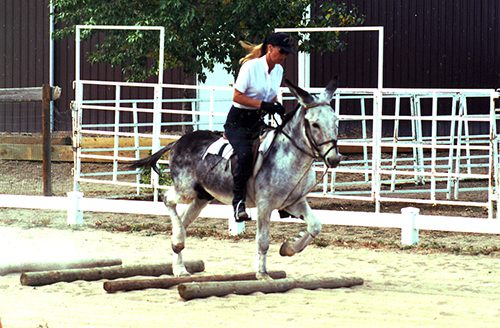
You can use ground poles to help lengthen the trot. Begin with four ground poles spaced about two and a half to three and a half feet apart, depending on the size of your donkey. He should trot easily through, with one foot landing between each two poles. This is also essential for preliminary jumping to help his stride become cadenced and regular. Trot your donkey around the arena and come up over the poles. If he is too sluggish, you might have to encourage him with the crop. If he is too enthusiastic and wants to run through the poles, tripping and jumping all the way, just stop him before the poles and back him. Do this a couple of times, and then come back and allow him to go over the poles. This does a couple of things. First, he will expect to stop, so he will stay slow and listen to your aids. Second, by the time he does realize that you are going over the poles, it is too late for him to bolt and run and he will negotiate the poles correctly. When he is trotting over the poles calmly and correctly, you can begin to school the lengthening over them by spacing them farther apart at each session. Don’t add more than an inch at each session. If you do, he will not do it correctly.
 Next you will begin to regulate the canter. Place a pole perpendicular to the long side of your arena. Canter around the perimeter of the arena, coming down the long side and over the pole. Each time you approach the pole, about three strides out, start counting to your donkey, “One, two, three, pole.” This will accomplish several things. First, you will learn to gauge your distances and measure your donkey’s strides. Second, your donkey will learn to adjust his strides and they will become more balanced, rhythmic and cadenced. Next, he will become more obedient to your aids. Don’t forget to count out loud to your donkey every time you do this exercise. Remember, donkeys respond best to verbal commands. Do the canter pole several times in each direction, during each session that you work in the arena to help improve his canter.
Whether you plan to jump or not, the next exercise is beneficial to your donkey’s body conditioning. It will help him to become agile and strong and he will be able to carry your weight a lot more efficiently. First set four cavalletti in 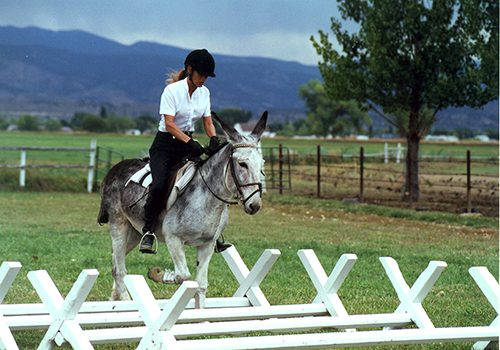 your arena and have your donkey trot through them during several lessons. Then, set a cavalletti or cross rail jump in your arena with a ground rail one stride before and after. Begin each session with review and warm up with stretching—turns on the forehand and haunches on the lead; feeding treats from his back, bending his head to your knee on both sides; walking and trotting through the hour-glass pattern on the long rein; walking, trotting and cantering the perimeter of the arena on the long rein. Then you should do a collecting exercise. Ask him to collect on the short sides, and lengthen on the long sides at the walk and then do this at the trot. After the warm-up, stop and rest for three minutes. After the collection exercise, stop and rest for three minutes. He will be working in approximately 15-minute intervals with three-minute breaks in between. This is standard for mules, donkeys and horses.
 For the final segment of his workout, take him along the rail at the trot and come up over the cavalletti or cross rail jump. Two strides out from the ground rail (three strides from the cavalletti), start counting out loud, “One, two, three, JUMP!” Allow your donkey to trot after the cavalletti the first two times through, and the third time over ask him to canter away to the rail and down the long side of the arena. Then stop and reward him for his effort. Give him a brief rest and then repeat the exercise the same way three times with a brief rest after each canter pass. When he has done this pattern three times going in one direction, do the same thing three times going the other direction. If he is lazy, he may need encouragement from the crop, or you may need to wear BLUNT spurs. If he wants to run at the cavalletti, you will need to school him a little differently. You will need to walk to the ground rail, stop and back. Then turn away from the cavalletti, do a circle and approach again at the walk, stop and back. Circle again—at the trot this time—stop, back. Do this twice. The third time, let him trot and jump the cavalletti. After he jumps the cavalletti, a few strides out, ask him to stop and back. This is to help him to let YOU maintain control. It will also help him to maintain his balance and jump correctly, thus avoiding a mishap or fall.
When he has done three sets over the cavalletti in one direction (two trot approaches and one canter), you should change directions and repeat the exercise. When he does this obediently, you may canter him to the cavalletti and away three times in each direction, but during each session, preface the canter with the trot work. If you were to go on to other kinds of jumps, you would approach them the same way. Your donkey needs to be strong to jump and should be schooled so he can jump from the trot or canter equally well. If he is built up slowly and becomes strong in a healthy way, there is no reason he shouldn’t be able to do this. Do not just trot around and jump or canter around and jump. This accomplishes nothing but risk to you and your donkey—it is both unsafe and unhealthy. End each workout by allowing your donkey to trot then walk on the long rein around the perimeter of the arena in both directions. If you school him properly, you and your donkey will have many enjoyable years together!
To learn more about Meredith Hodges and her comprehensive all-breed equine training program, visit LuckyThreeRanch.com, MEREDITH HODGES PUBLIC FIGURE Facebook page, or call 1-800-816-7566. Check out her children’s website at JasperTheMule.com. Also, find Meredith on Pinterest, Instagram, MeWe, YouTube and Twitter.
© 1999, 2016, 2024 Lucky Three Ranch, Inc. All rights reserved.